Articles
How To Wire A Leviton Dimmer Switch
Modified: February 23, 2024
Learn how to wire a Leviton dimmer switch with this comprehensive guide. Find step-by-step instructions and helpful tips in our informative articles.
(Many of the links in this article redirect to a specific reviewed product. Your purchase of these products through affiliate links helps to generate commission for Storables.com, at no extra cost. Learn more)
Introduction
Welcome to the ultimate guide on how to wire a Leviton dimmer switch! If you’re looking to upgrade your lighting control and create a cozy ambiance in your home, installing a dimmer switch is the way to go. With a dimmer switch, you can easily adjust the brightness of your lights, setting the perfect mood for any occasion.
Before diving into the installation process, it’s essential to have a basic understanding of how a dimmer switch works. In simple terms, a dimmer switch regulates the amount of electrical current flowing to the light fixture, allowing you to increase or decrease the brightness to your liking.
Remember, safety should always be your top priority when working with electrical installations. It’s crucial to turn off the power to the circuit you’ll be working on and take the necessary precautions to prevent any electrical accidents. If you’re unsure or uncomfortable performing any of the steps outlined in this guide, it’s always best to consult a licensed electrician.
In this comprehensive guide, we’ll walk you through the step-by-step process of how to wire a Leviton dimmer switch. We’ll cover the tools and materials you’ll need, as well as provide detailed instructions on each stage of the installation. So, let’s get started!
Key Takeaways:
- Upgrade your lighting control and create a cozy ambiance by installing a Leviton dimmer switch. Follow the comprehensive guide for a safe and successful installation, and enjoy the flexibility of adjustable lighting in your home.
- Prioritize safety, turn off the power, and follow the step-by-step process to wire and install your Leviton dimmer switch. Enjoy full control over your lighting and set the perfect mood for any occasion.
Read also: 12 Best Leviton Dimmer Switch for 2024
Tools and Materials Needed
Before you begin the installation, make sure you have the following tools and materials on hand:
- Screwdriver set: You’ll need a set of screwdrivers, including both flathead and Phillips head screwdrivers.
- Pliers: Pliers will come in handy for gripping and manipulating wires.
- Wire stripper: A wire stripper tool is essential for removing the insulation from the wires.
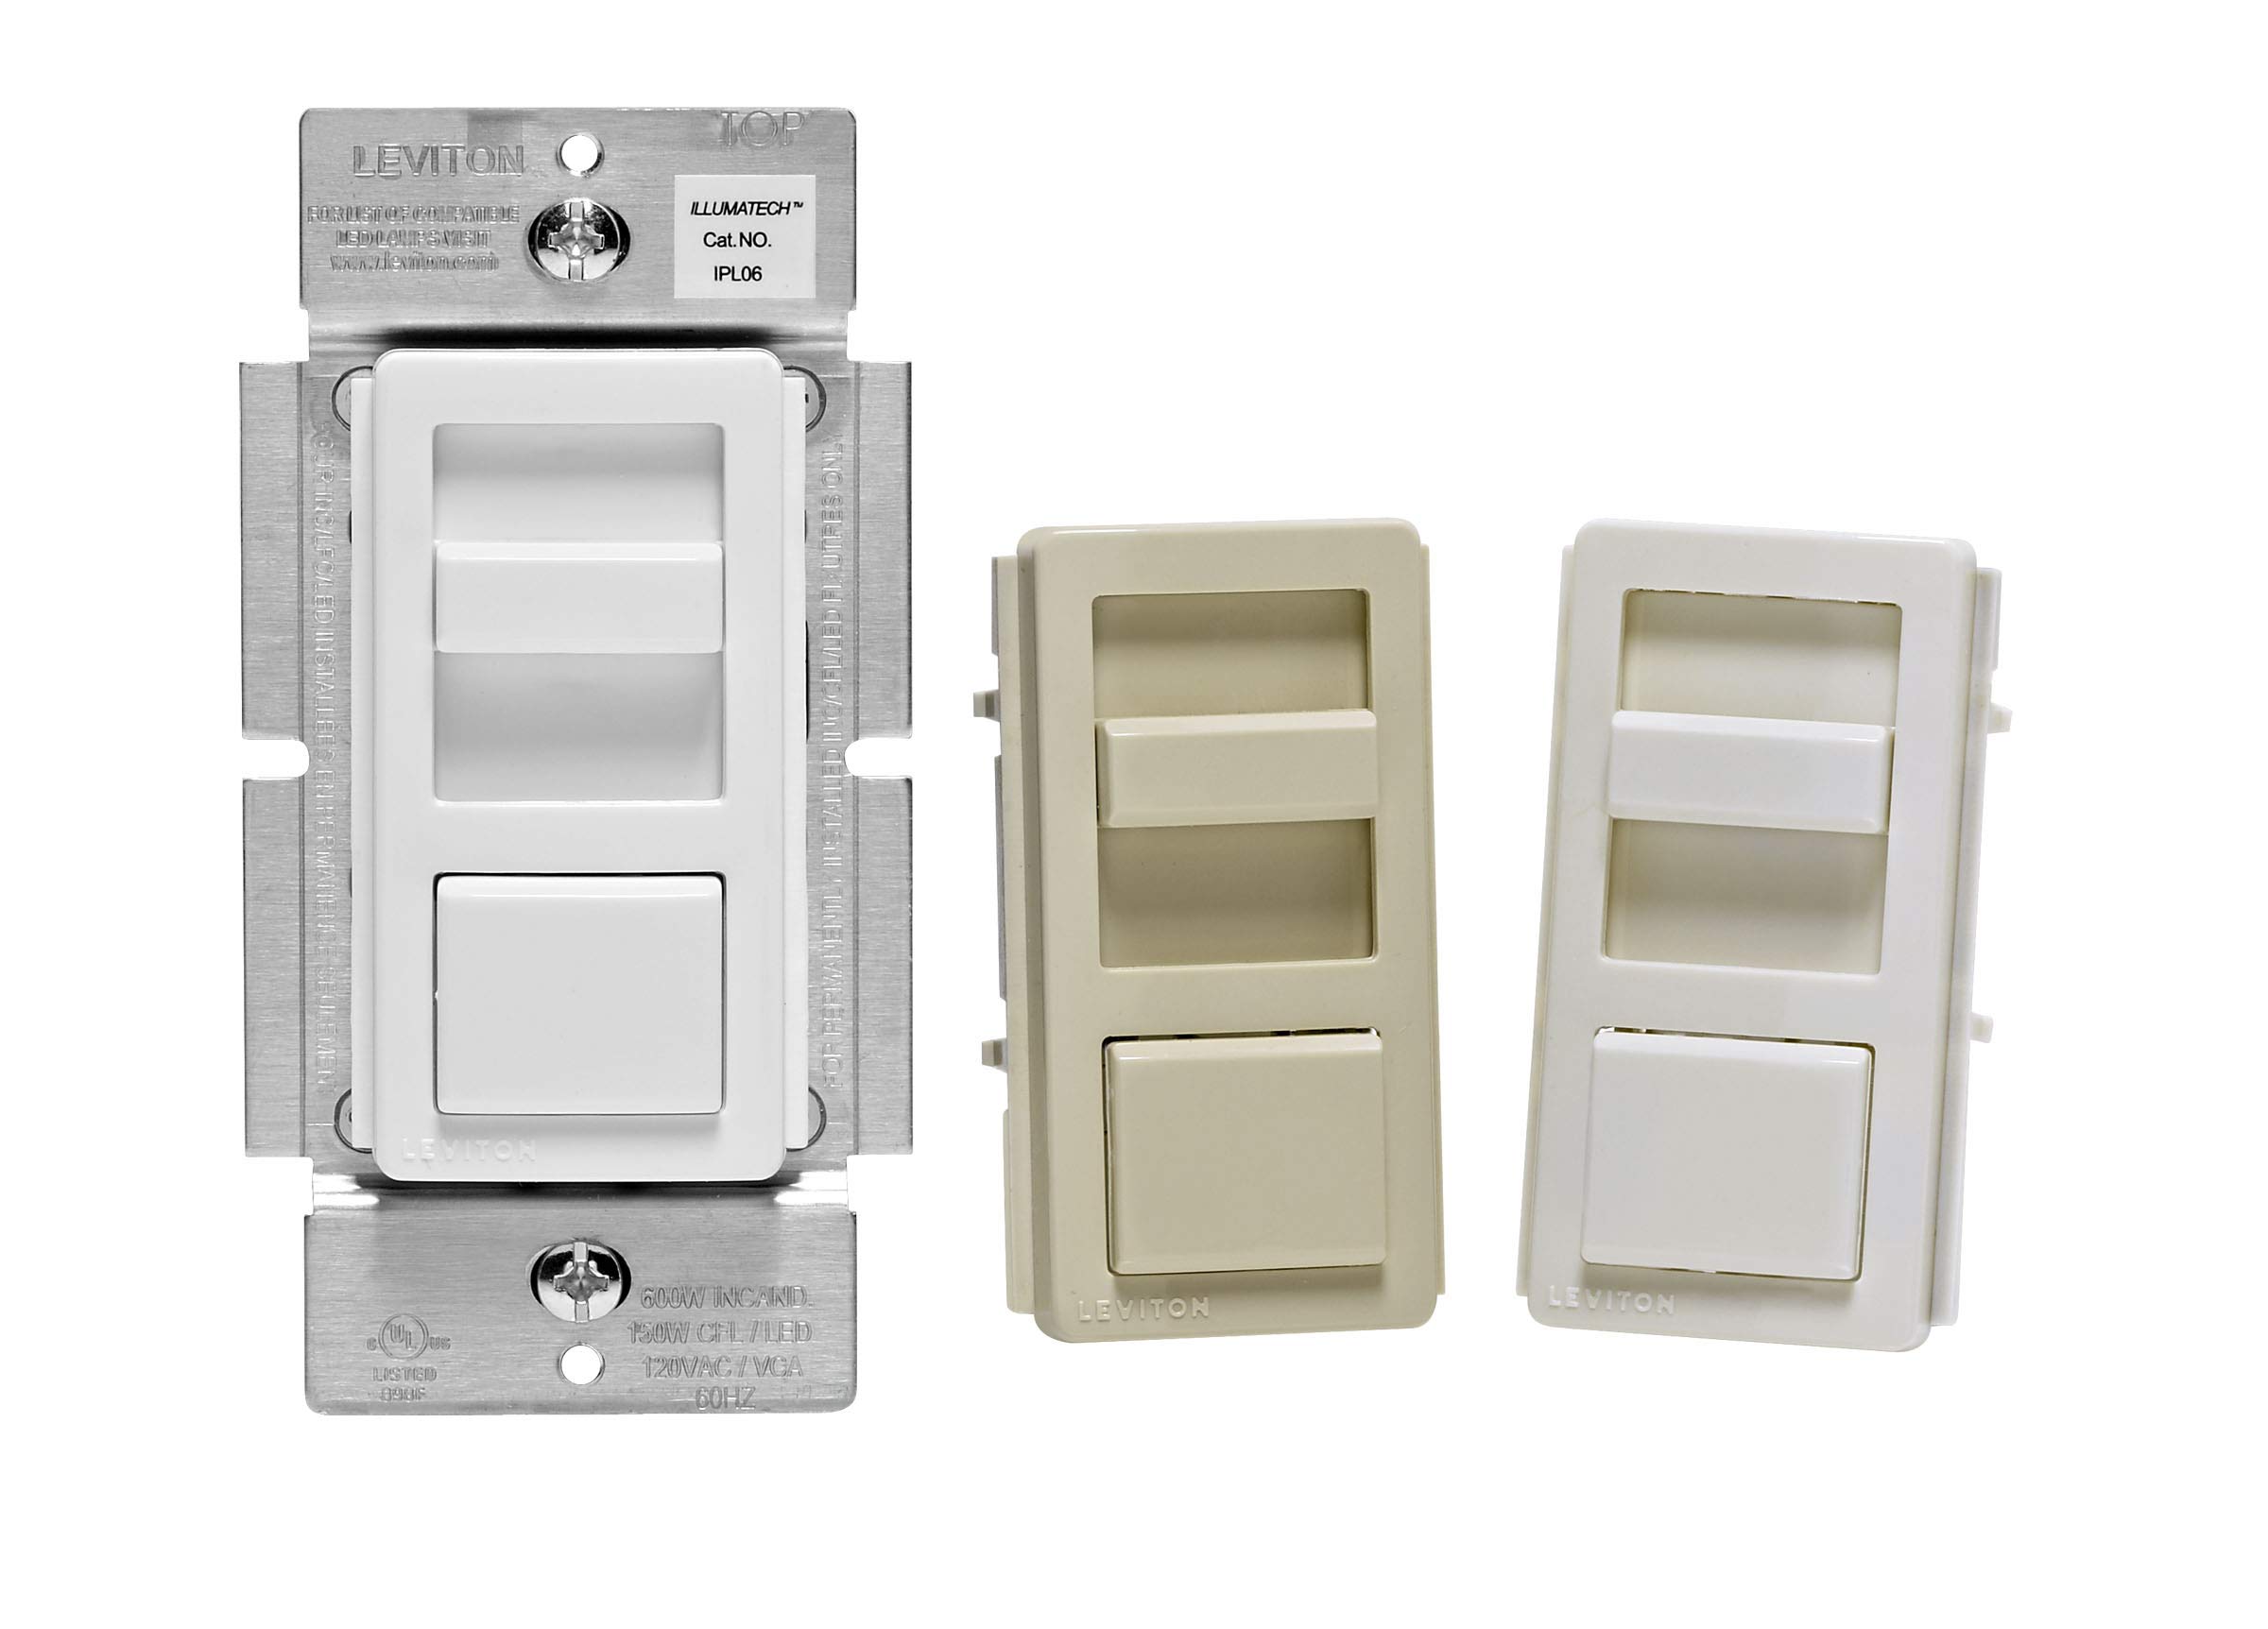
- Dimmer switch: Choose a Leviton dimmer switch that is compatible with your lighting fixtures.
- Electrical tape: Use electrical tape to secure and insulate wire connections.
- Wire connectors: Wire connectors or wire nuts are used to join and secure wires together.
- Voltage tester: A voltage tester helps ensure that the power is off before you begin working on the circuit.
- Wire cutter: Use a wire cutter to trim any excess wire.
- Circuit breaker panel key: You’ll need a circuit breaker panel key to access the electrical panel and turn off the power.
It’s important to gather all the necessary tools and materials before starting the installation process. This will make the process smoother and ensure that you have everything you need on hand. Additionally, always double-check that you have the correct type and size of dimmer switch for your specific lighting setup.
Step 1: Turn Off the Power
The first step in safely installing a Leviton dimmer switch is to turn off the power to the circuit you’ll be working on. This step is crucial to prevent any electrical shocks or accidents. Follow the instructions below to turn off the power:
- Locate your circuit breaker panel. This is usually located in a utility room, basement, or garage.
- Identify the breaker that controls the circuit you’ll be working on. It may be labeled as “lights” or “lighting.”
- Carefully switch the breaker to the “off” position. You can usually do this by pushing the switch towards the opposite side.
- Using a voltage tester, double-check that the power is off by touching the test leads to the wires connected to the switch. The tester should not detect any voltage.
It’s important to note that some homes may have multiple circuit breaker panels. If you’re unsure which panel controls the circuit, you may need to consult an electrician or refer to the electrical plans for your home.
Once you have confirmed that the power is off, it’s safe to proceed with the installation. However, always exercise caution and treat all wires as if they were live until you complete the installation process.
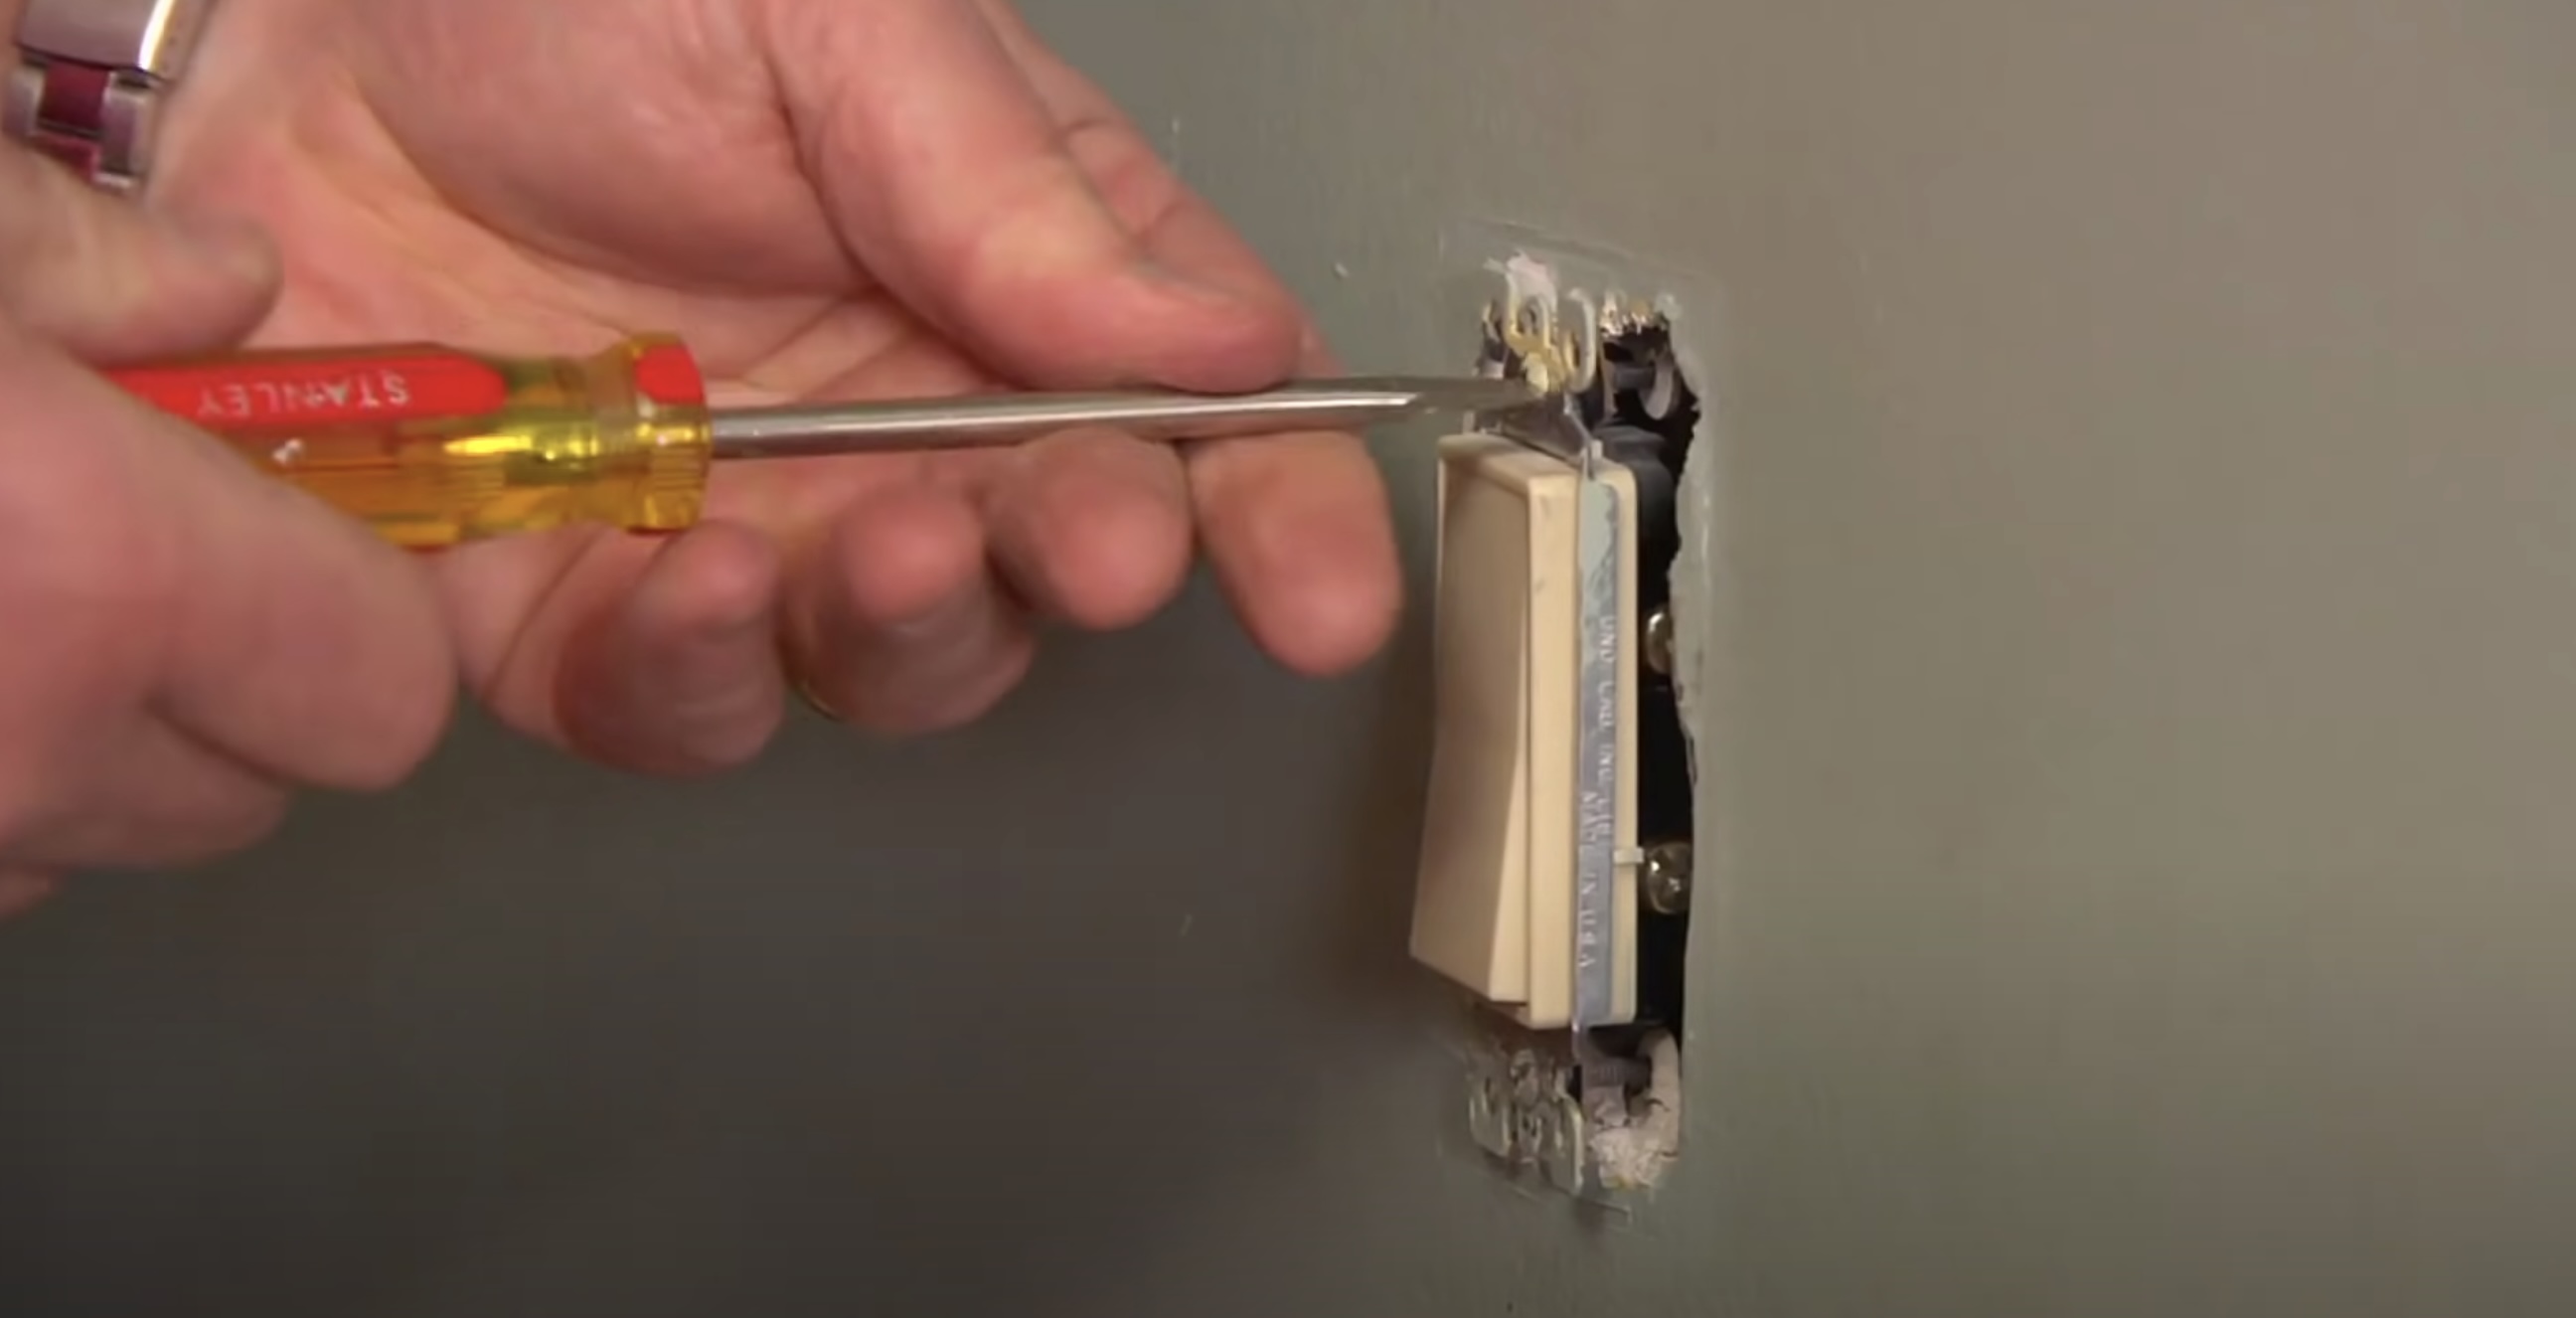
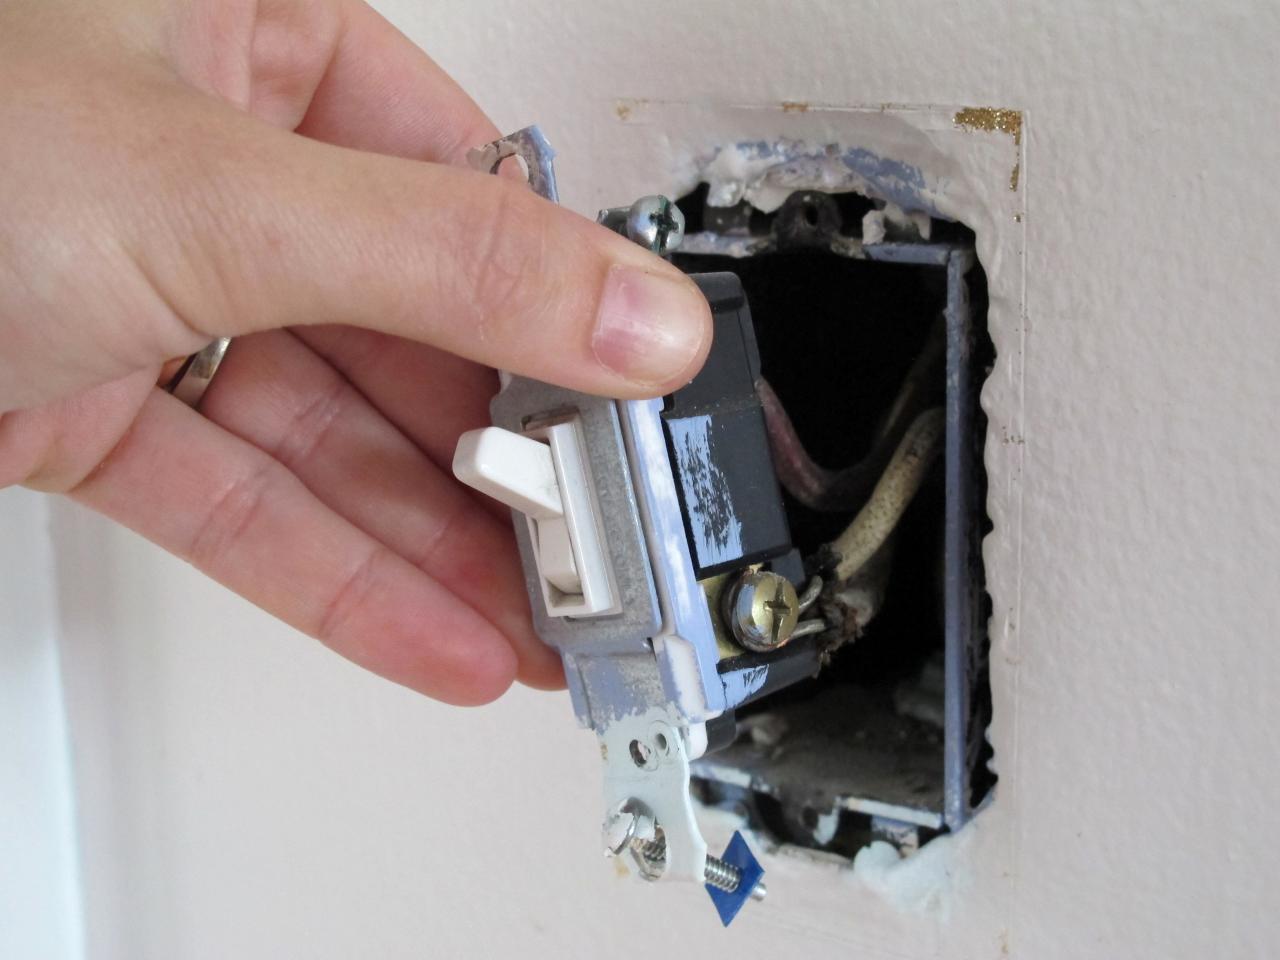
Step 2: Remove the Existing Switch
Now that the power is turned off, you can proceed to remove the existing switch. Follow the steps below:
- Use a screwdriver to remove the screws securing the switch plate to the wall. Set aside the plate and screws.
- Gently pull the switch away from the wall, exposing the wiring behind it.
- Take note of the wire connections on the switch. It’s a good idea to take a photo or make a diagram for reference during the installation process.
- Use a screwdriver to remove the screws securing the switch to the electrical box.
- Carefully pull the switch out of the electrical box, ensuring not to damage any wires in the process.
By removing the existing switch, you’re preparing the space for the installation of the Leviton dimmer switch. Take your time to remove the switch carefully to avoid any damage to the wires or the electrical box.
If you encounter any difficulties during this step, it’s recommended to consult a licensed electrician for assistance. They have the experience and knowledge to safely handle switch removal and wiring tasks.
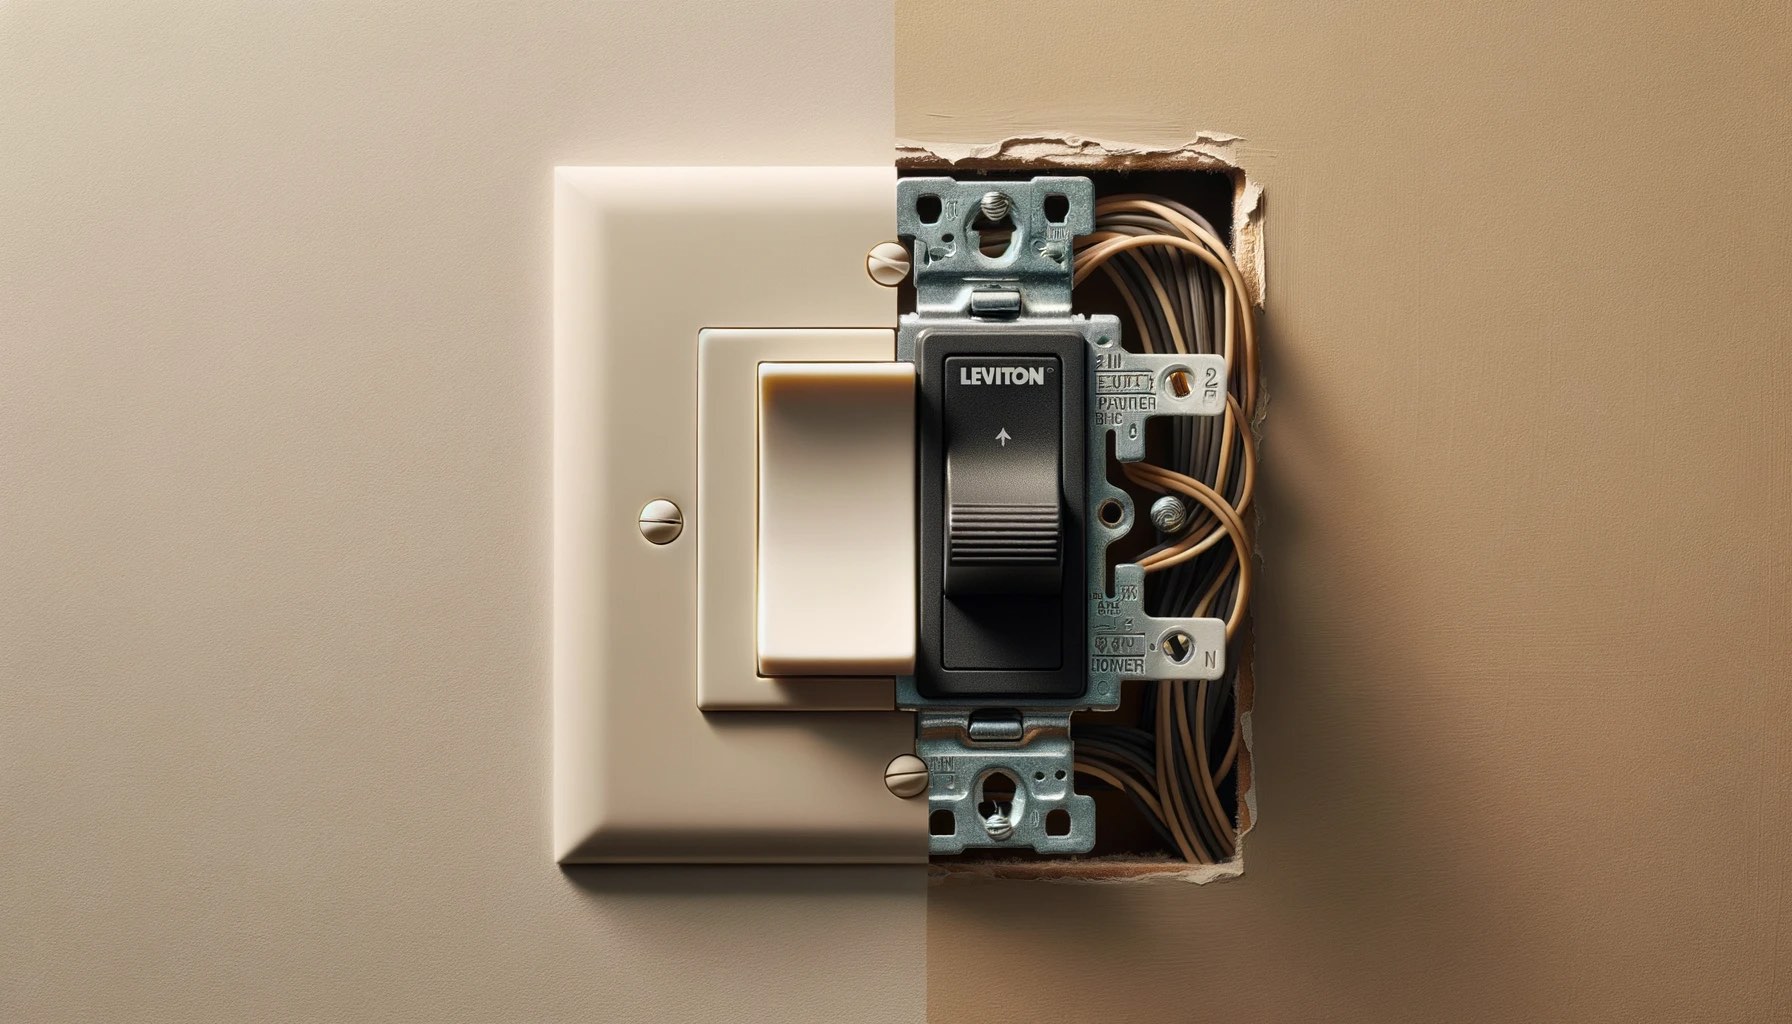
Step 3: Prepare the Dimmer Switch
With the existing switch removed, it’s time to prepare the Leviton dimmer switch for installation. Follow these steps:
- Read the instruction manual provided with the dimmer switch carefully. Familiarize yourself with the wiring diagram and any specific instructions for your model.
- Inspect the dimmer switch to ensure there are no visible defects or damage. If you notice any issues, contact the manufacturer for a replacement before proceeding.
- Identify the different terminals or wire leads on the dimmer switch. These may be labeled as “Load,” “Line,” and “Ground.”
- If necessary, trim the ends of the wires to ensure clean and straight ends. Remove about 1/2 inch of the insulation from the ends of the wires using a wire stripper tool.
- It’s a good practice to use wire connectors or wire nuts to secure the wires together. Twist the exposed ends of the wires together, matching the corresponding colors or labels.
- Wrap the twisted wire connections with electrical tape, ensuring that no bare wires are exposed.
Preparing the dimmer switch involves understanding the wiring diagram, inspecting the switch for any issues, and properly connecting the wires. By following these steps and taking care during the preparation process, you’ll ensure a smooth and safe installation of the dimmer switch.
If you’re unsure about any of the steps or if you’re working with complex wiring configurations, it’s always best to consult a licensed electrician for guidance.
When wiring a Leviton dimmer switch, make sure to turn off the power at the circuit breaker before starting. Follow the manufacturer’s instructions carefully to ensure proper installation and functionality.
Read more: How To Wire In A Dimmer Switch
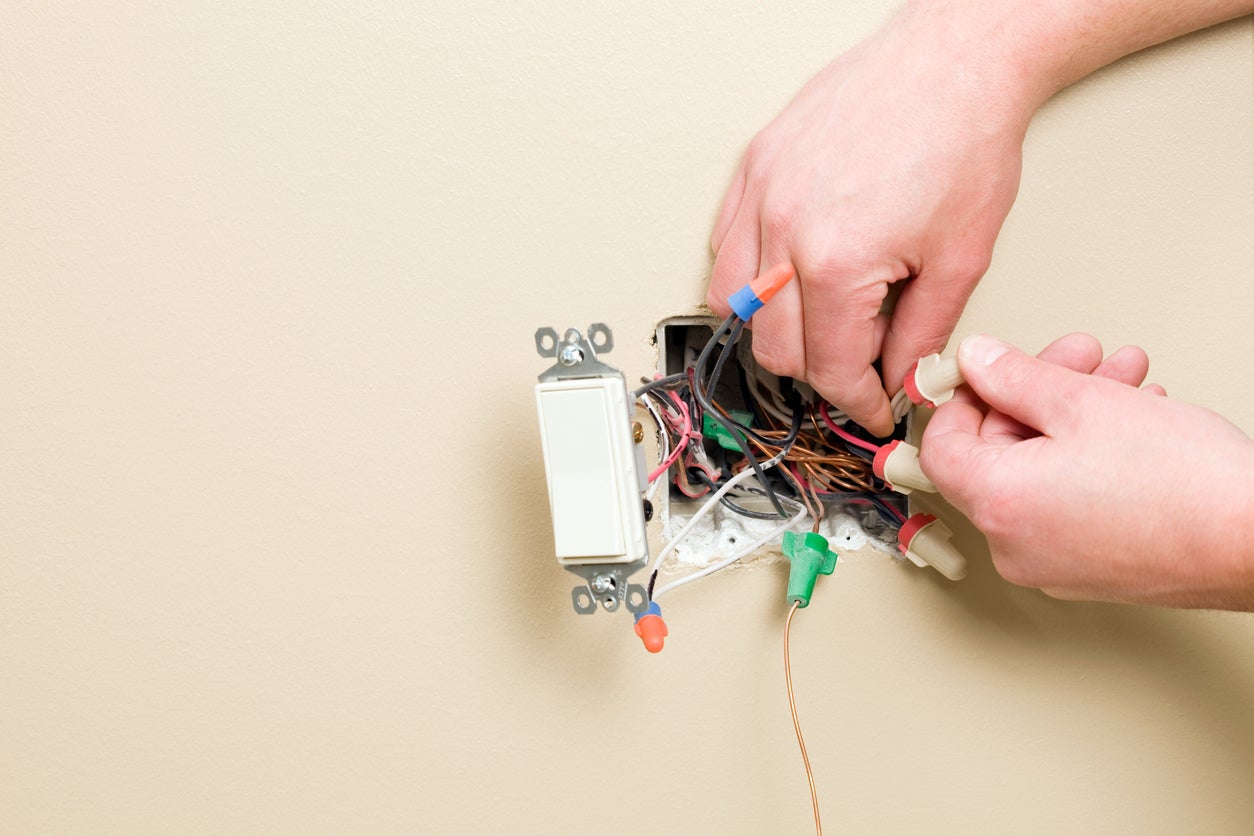
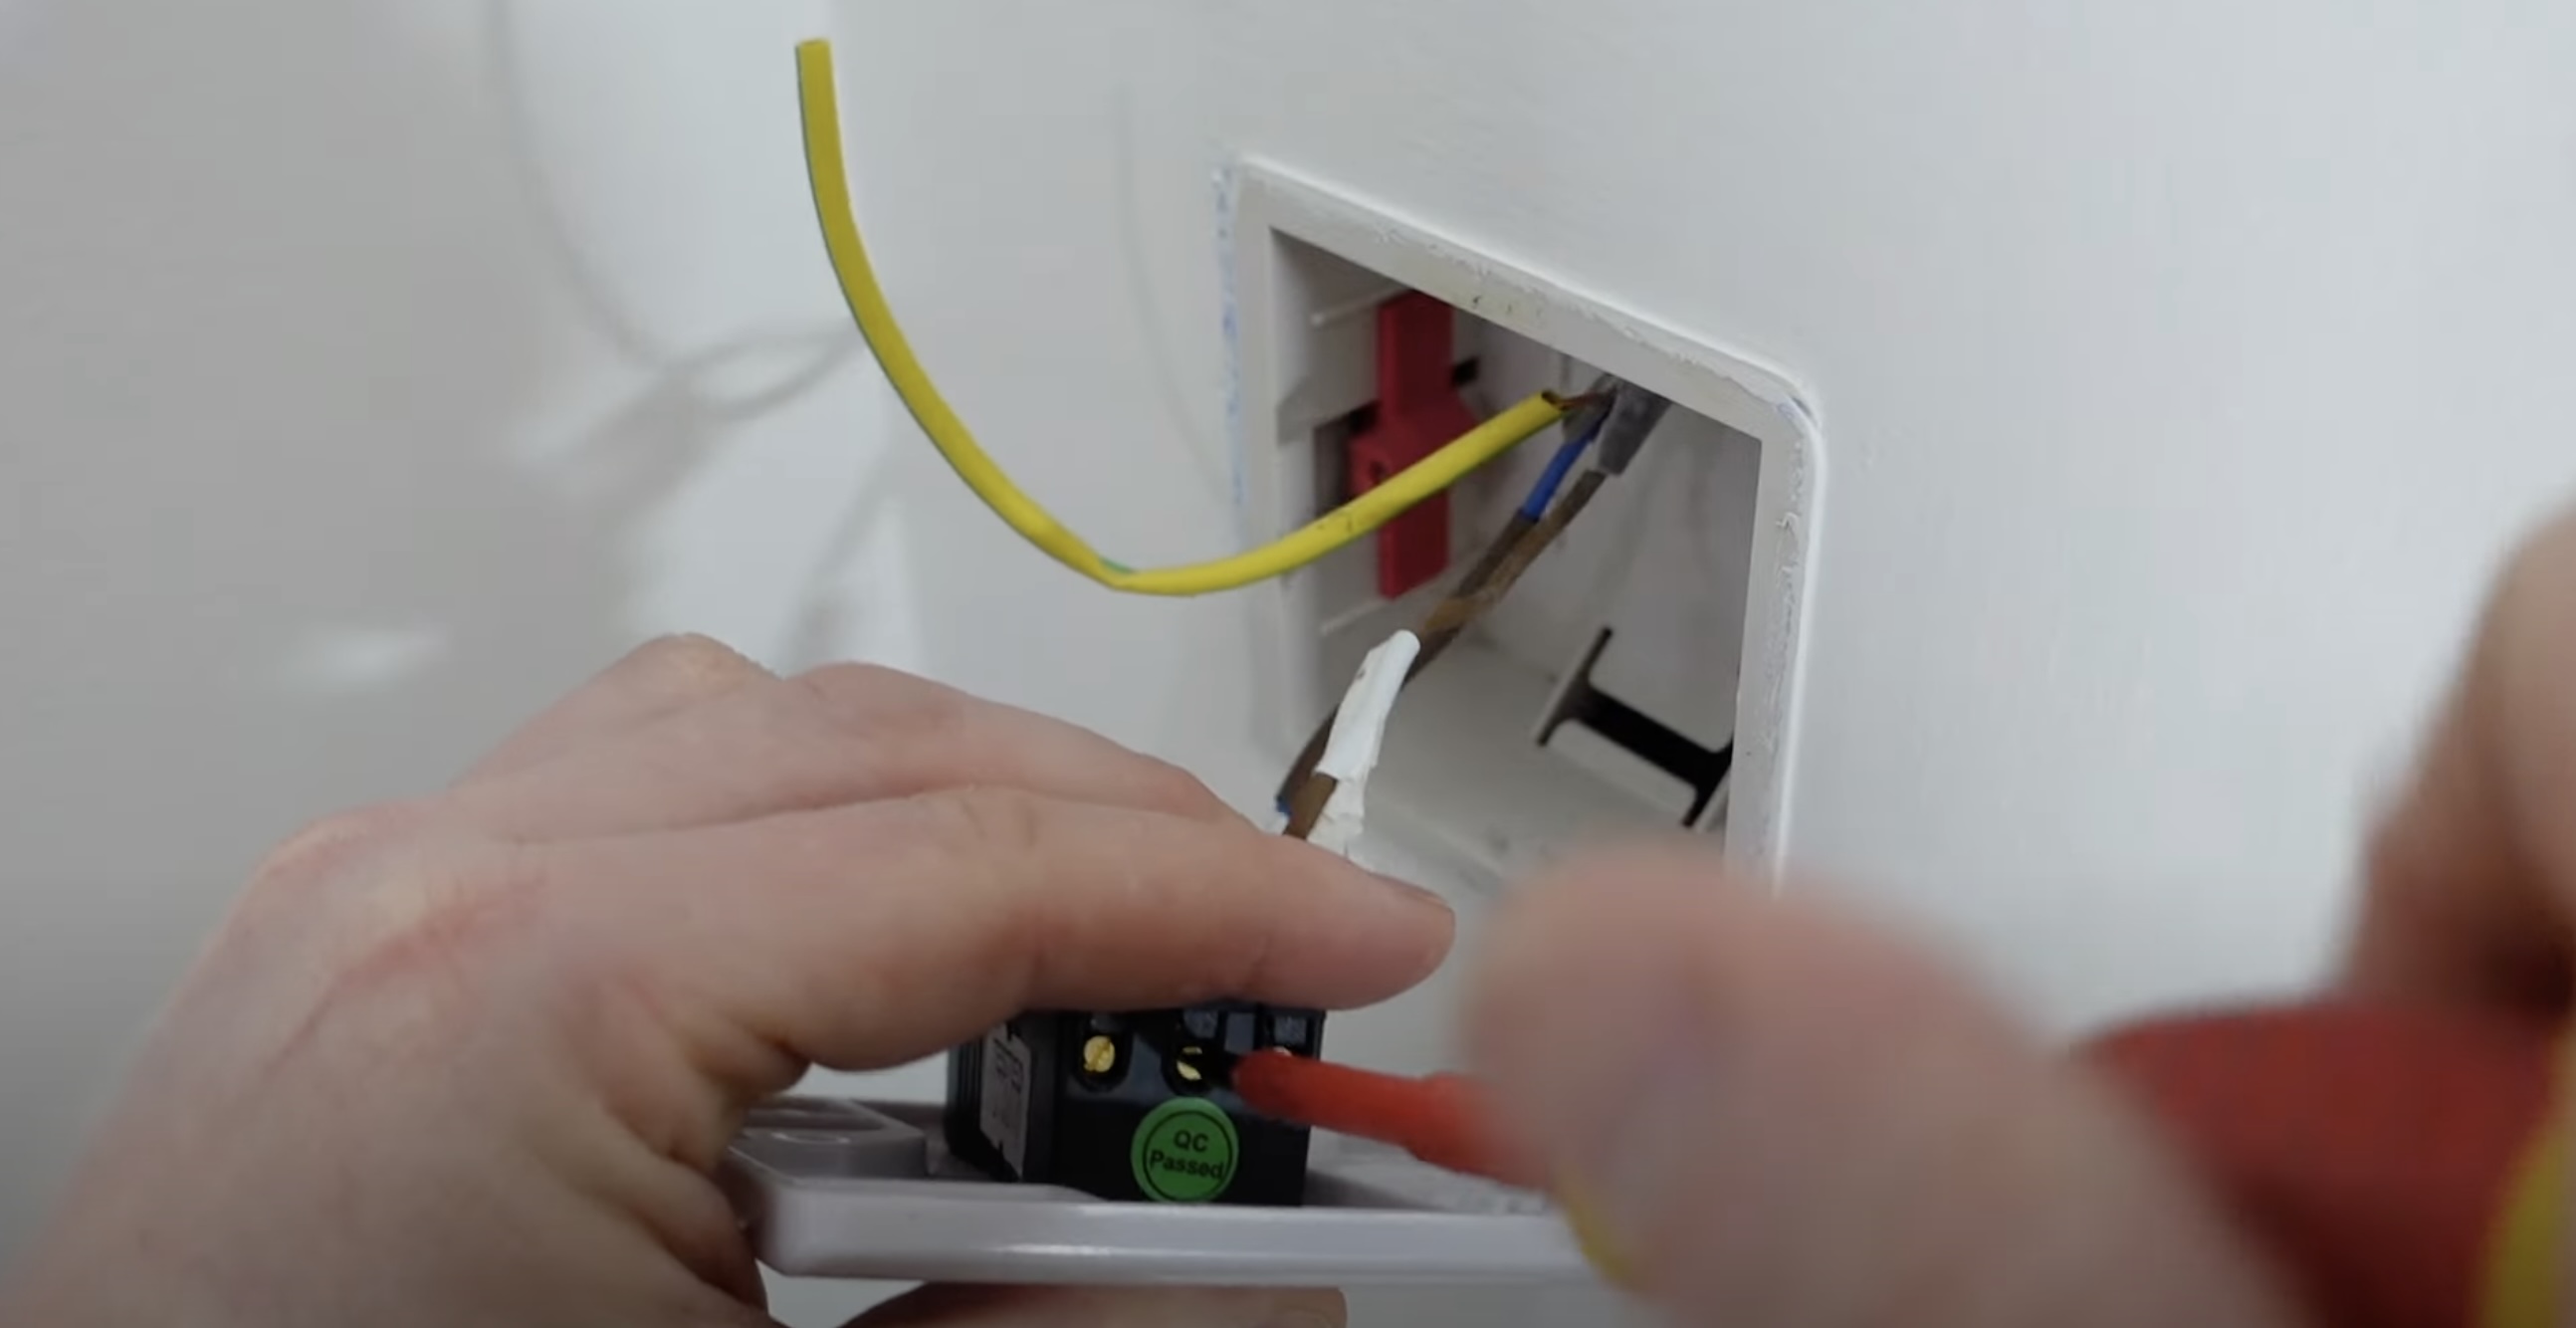
Step 4: Wire the Dimmer Switch
Now that the dimmer switch is prepared, it’s time to wire it. Follow these steps:
- Identify the wires in the electrical box. Typically, there will be three wires: a black or colored wire (known as the “Hot” wire), a white wire (known as the “Neutral” wire), and a bare copper or green wire (known as the “Ground” wire).
- First, connect the ground wire from the dimmer switch to the ground wire in the electrical box. Twist the exposed ends of the wires together and secure them with a wire connector or wire nut.
- Next, connect the black or colored wire from the dimmer switch to the hot wire in the electrical box. Use a wire connector or wire nut to secure the wires together.
- If your dimmer switch has a white wire, connect it to the neutral wire in the electrical box using a wire connector or wire nut. This step may not be necessary if your switch does not have a neutral wire.
- Double-check all the wire connections to ensure they are secure and properly insulated with electrical tape.
Properly wiring the dimmer switch is crucial for its safe and efficient operation. Make sure to follow the manufacturer’s instructions and any specific wiring diagrams provided with your dimmer switch.
It’s important to note that different wiring configurations may exist in your electrical box, especially in older homes. If you’re uncertain about the wiring or encounter complications during this step, it’s best to seek assistance from a licensed electrician.
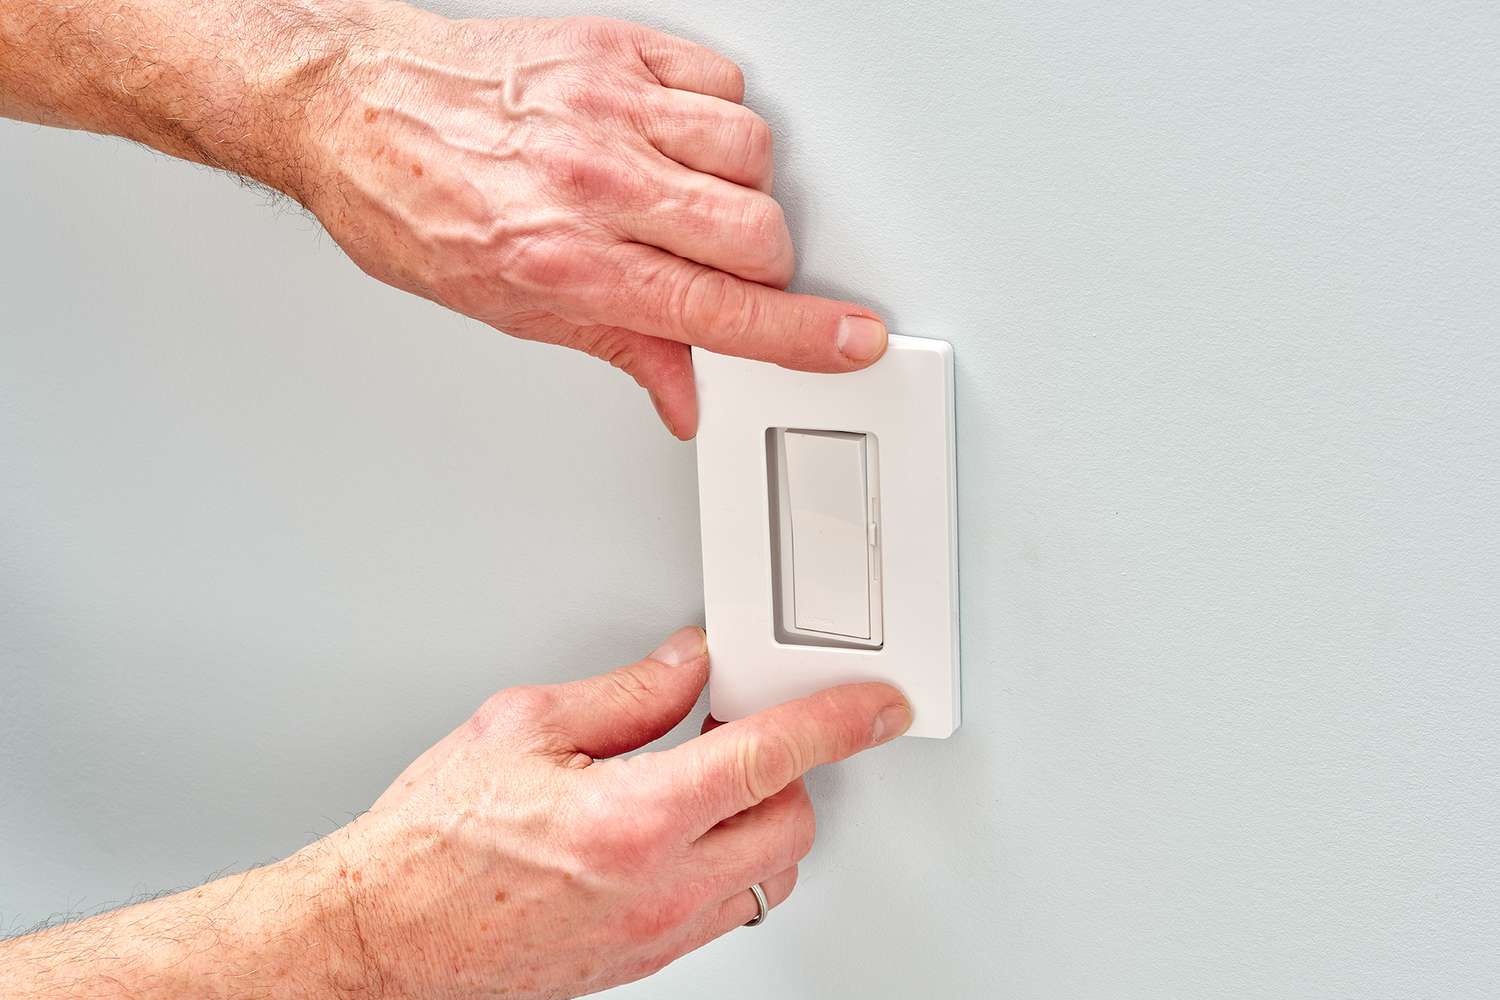
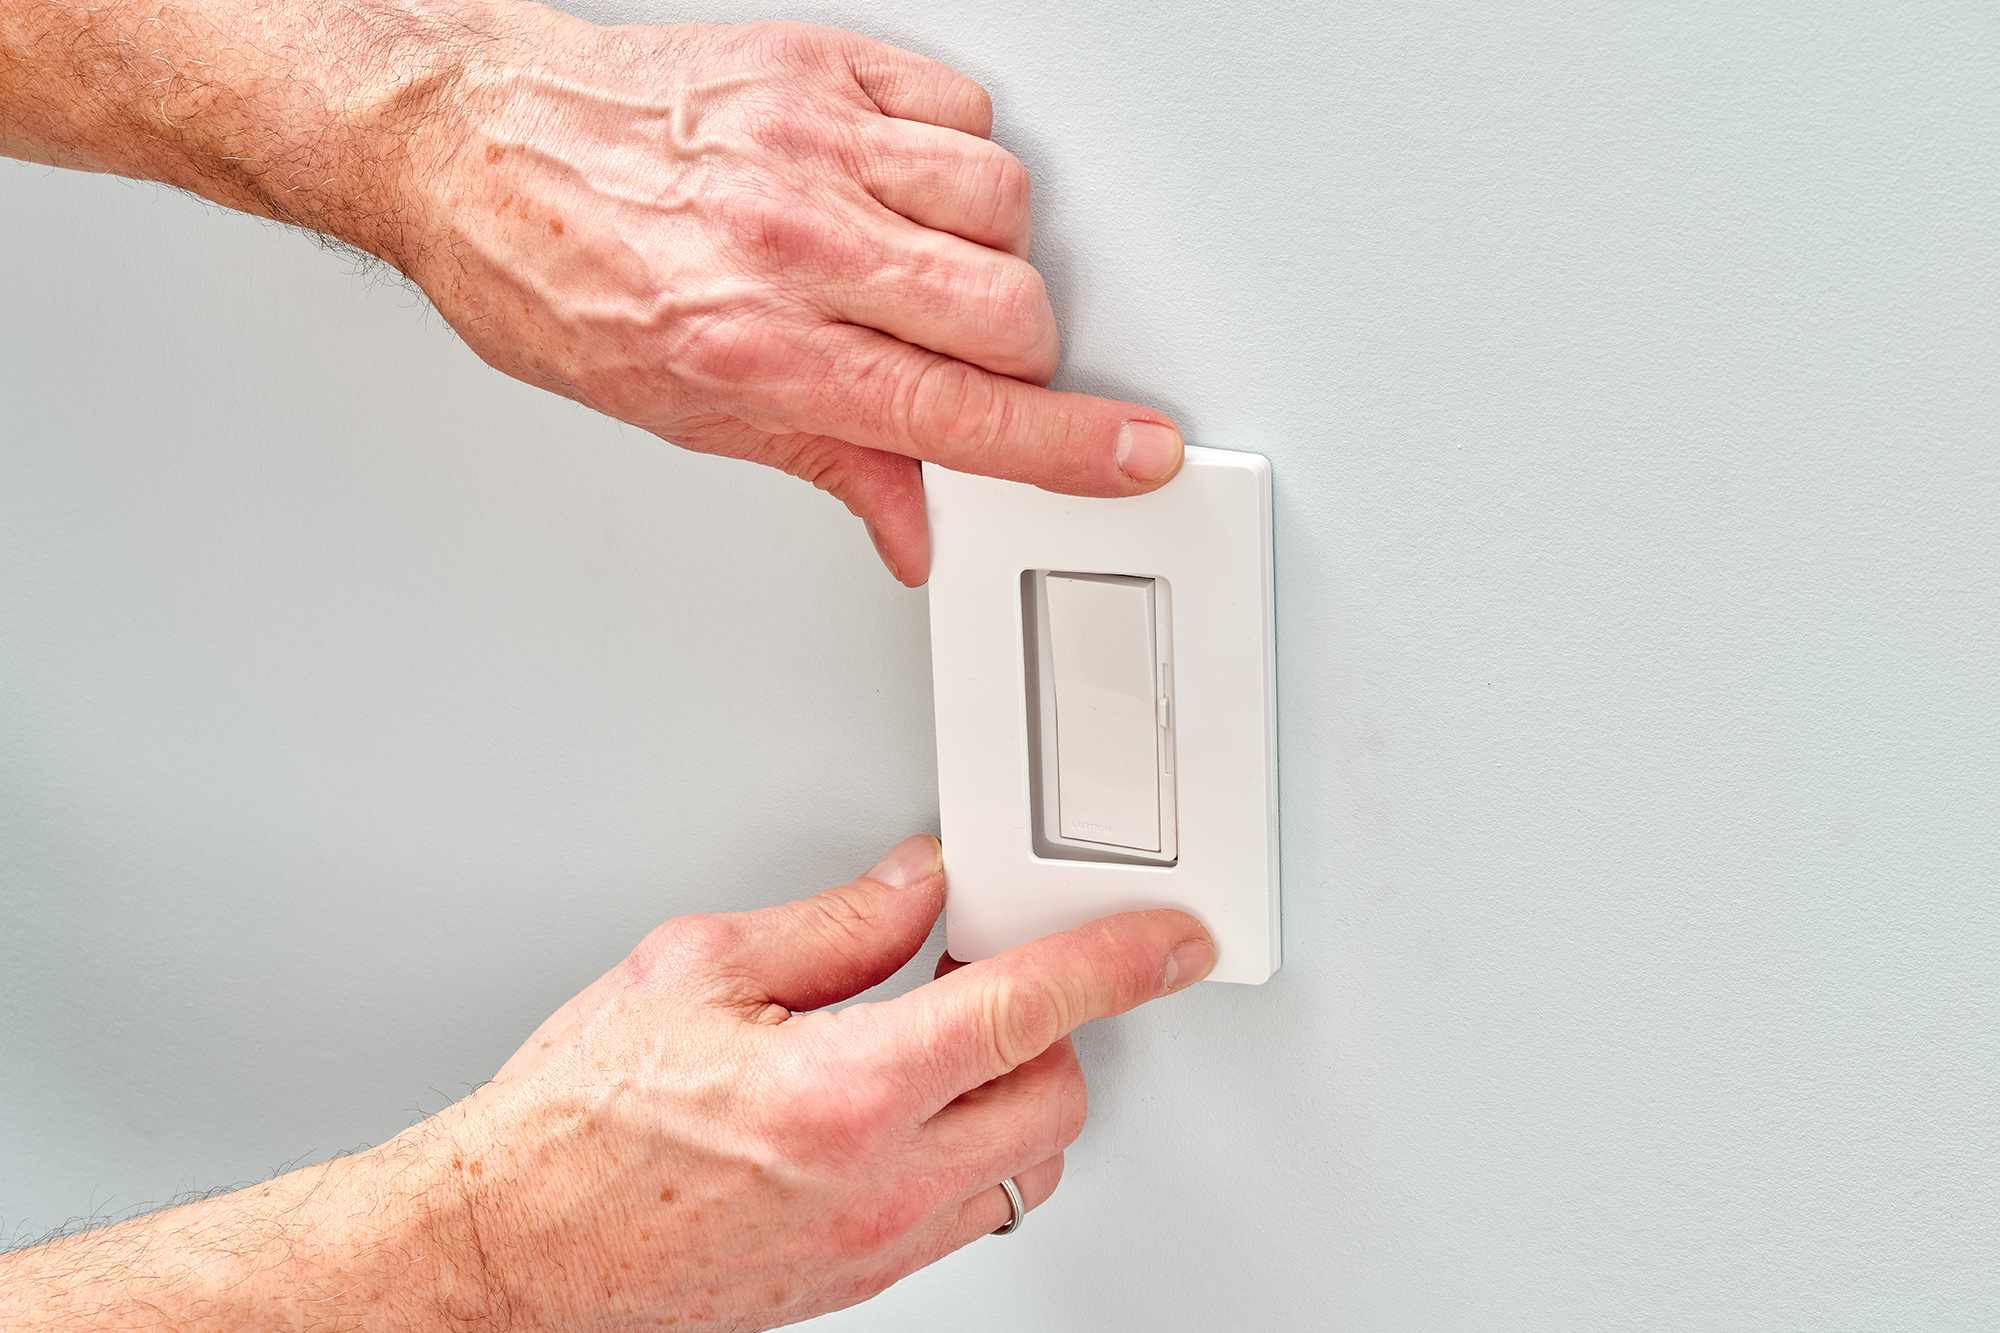
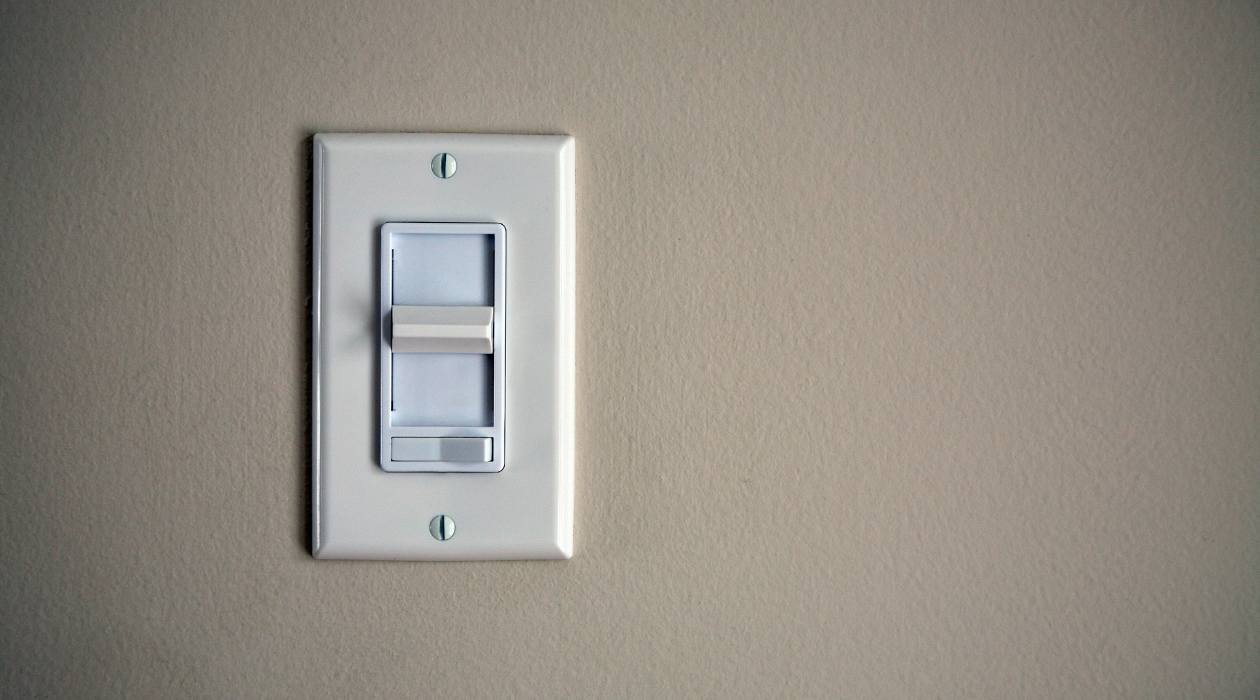
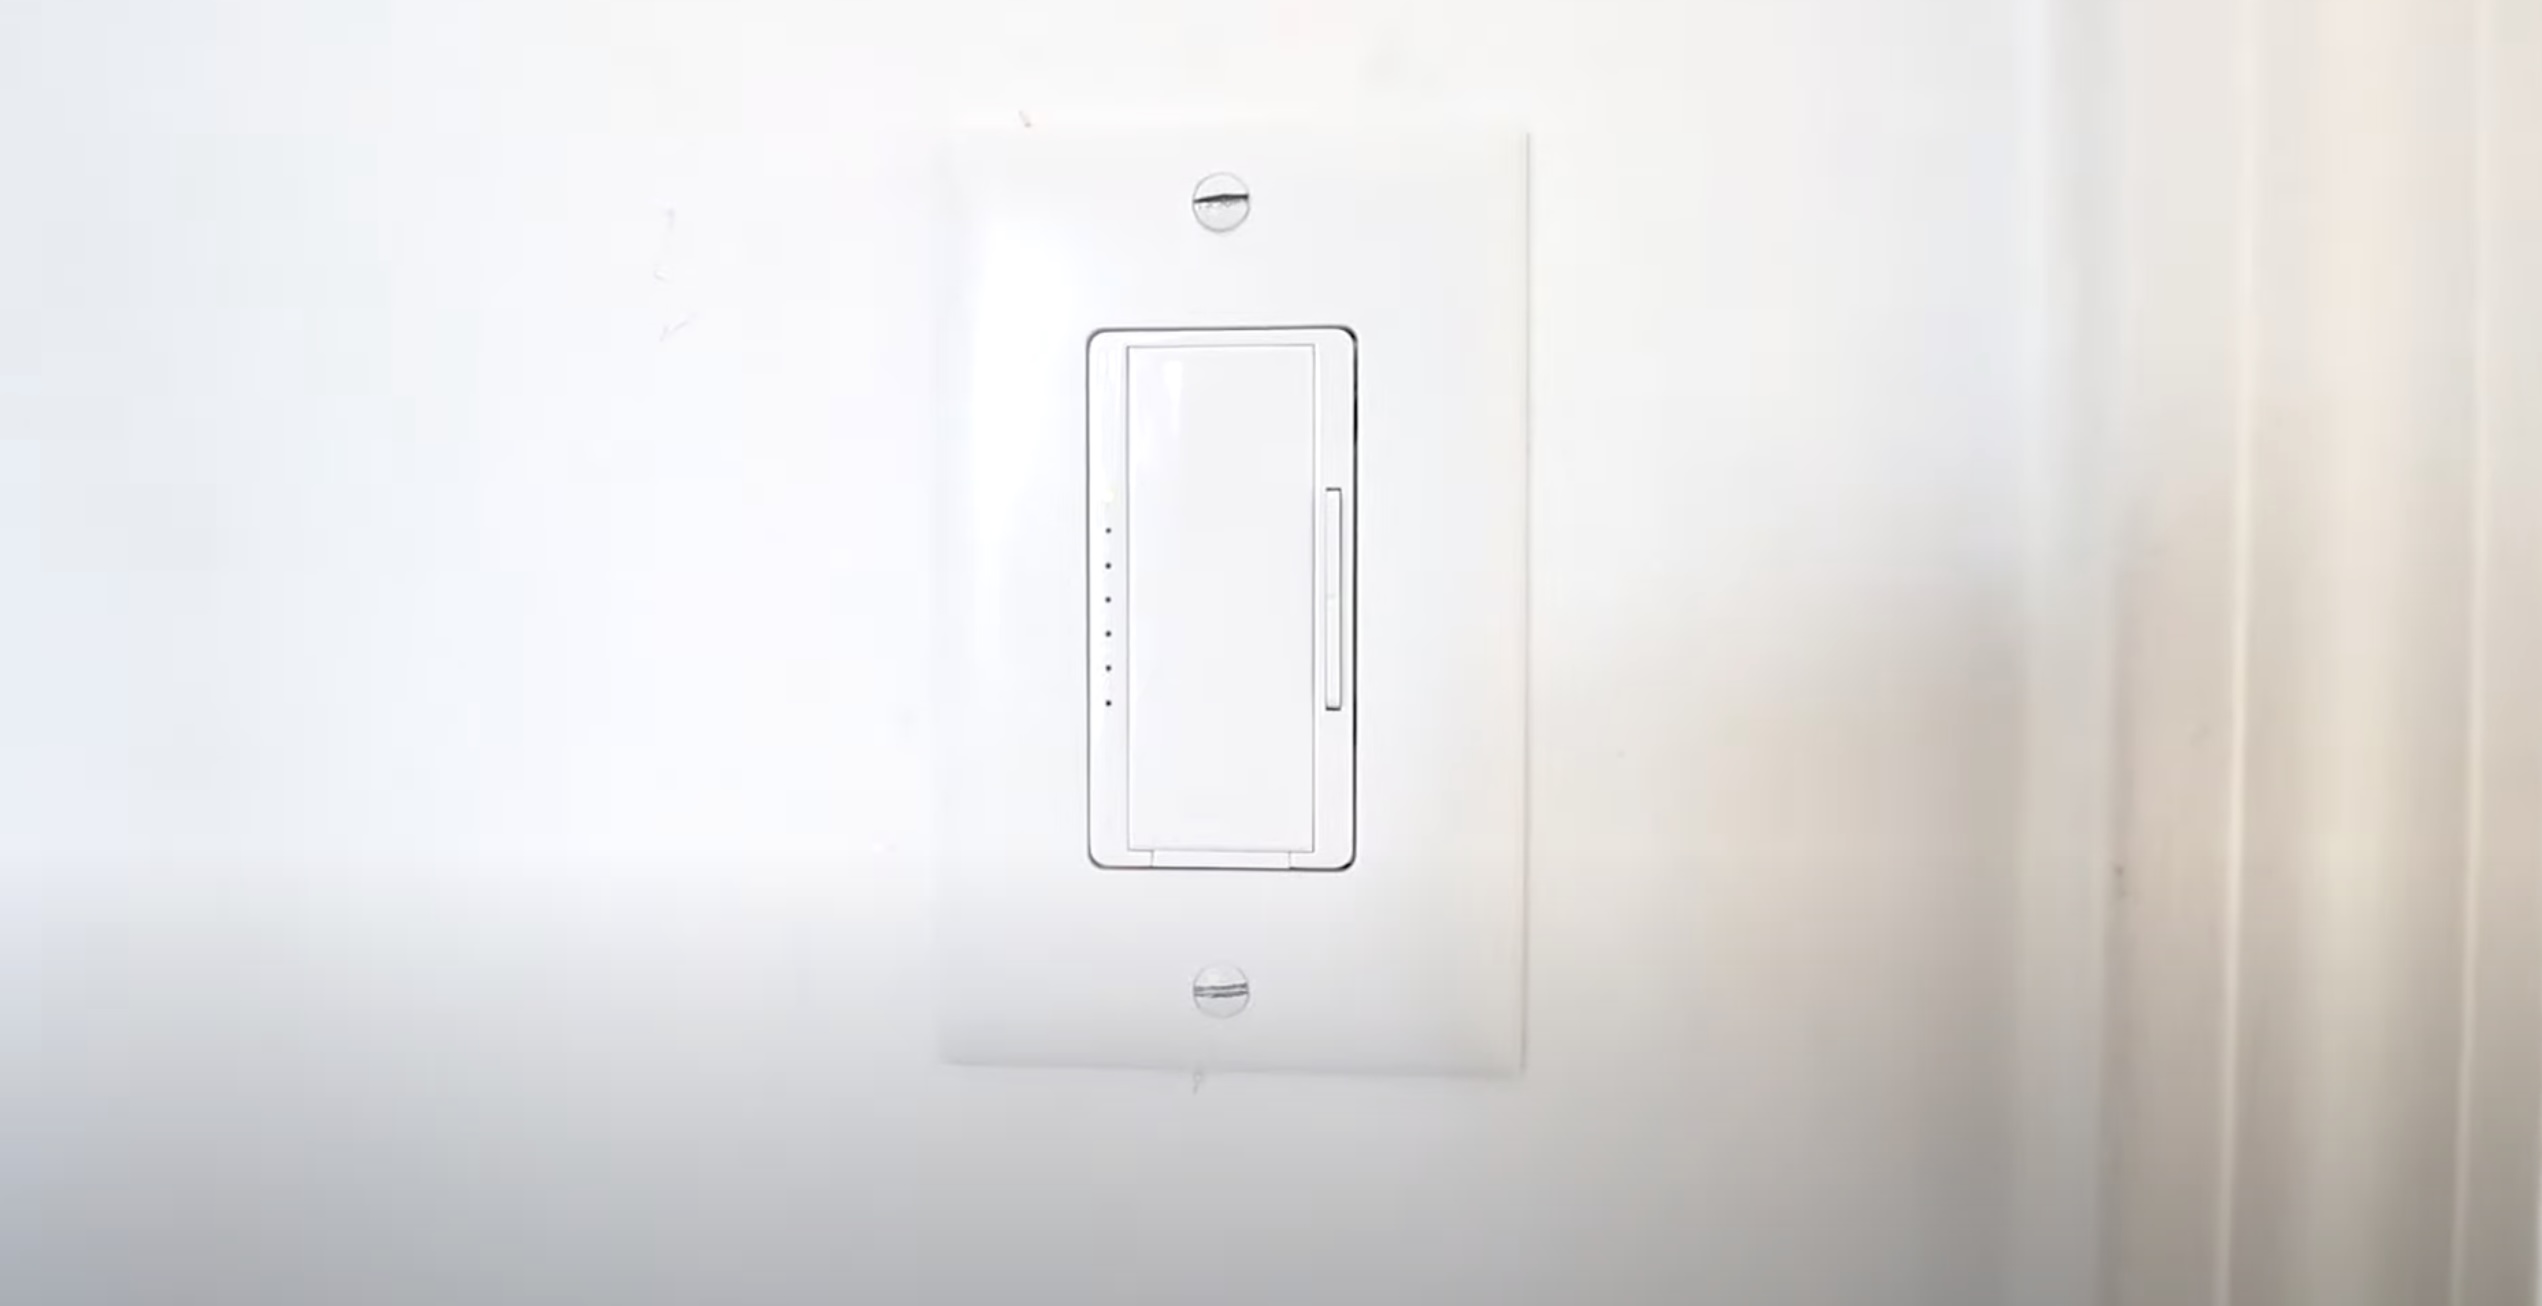
Step 5: Install the Dimmer Switch
With the dimmer switch properly wired, it’s time to install it into the electrical box. Follow these steps:
- Carefully tuck the connected wires into the electrical box, making sure they are not pinched or crushed.
- Align the dimmer switch with the screw holes in the electrical box.
- Secure the dimmer switch to the electrical box using the provided screws. Use a screwdriver to tighten the screws until the switch is firmly in place.
- Inspect the installation to ensure that the switch is level and properly aligned with the wall.
- Attach the switch plate onto the dimmer switch, aligning it with the screw holes.
- Secure the switch plate to the dimmer switch using the screws provided.
Installing the dimmer switch properly is important for both functionality and aesthetics. Securely fastening the switch in place will ensure that it remains in position and does not become loose over time.
Once the dimmer switch is installed, take a moment to admire your work and visualize the impact it will have on your lighting control. The next step is to test the dimmer switch to confirm that it is working correctly.
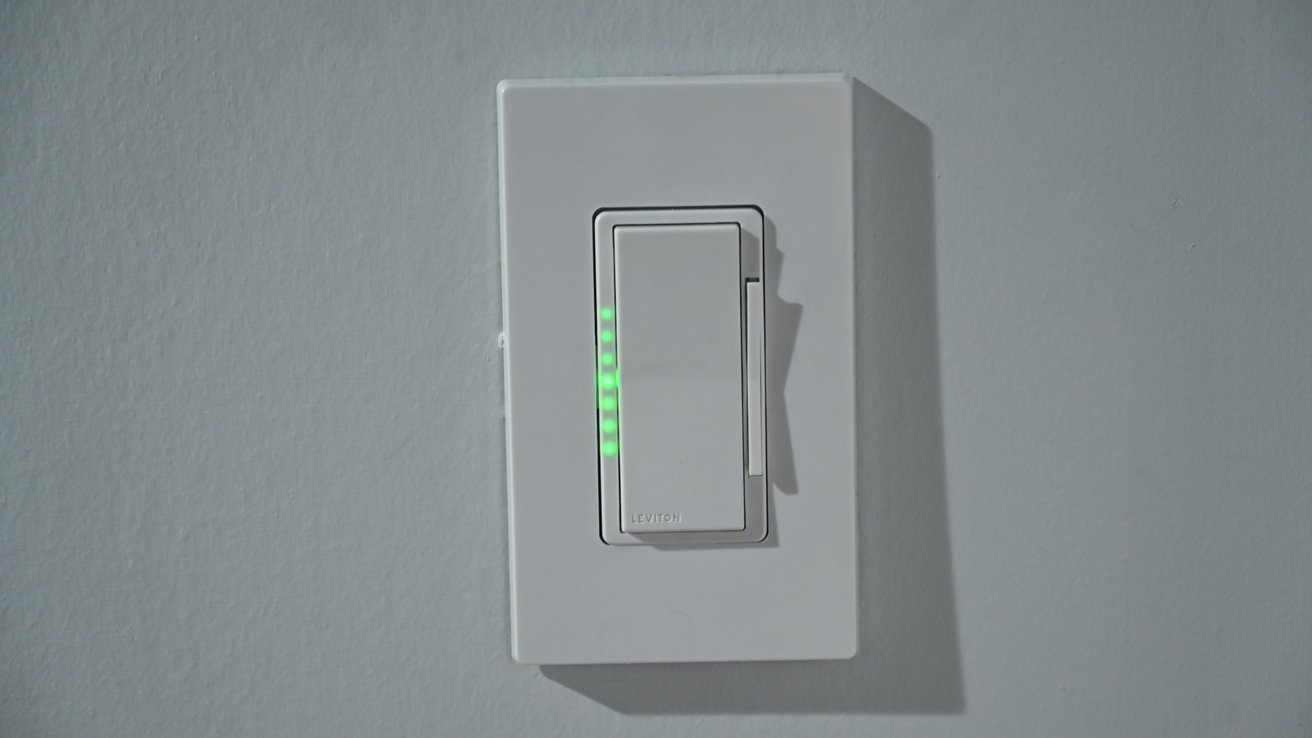
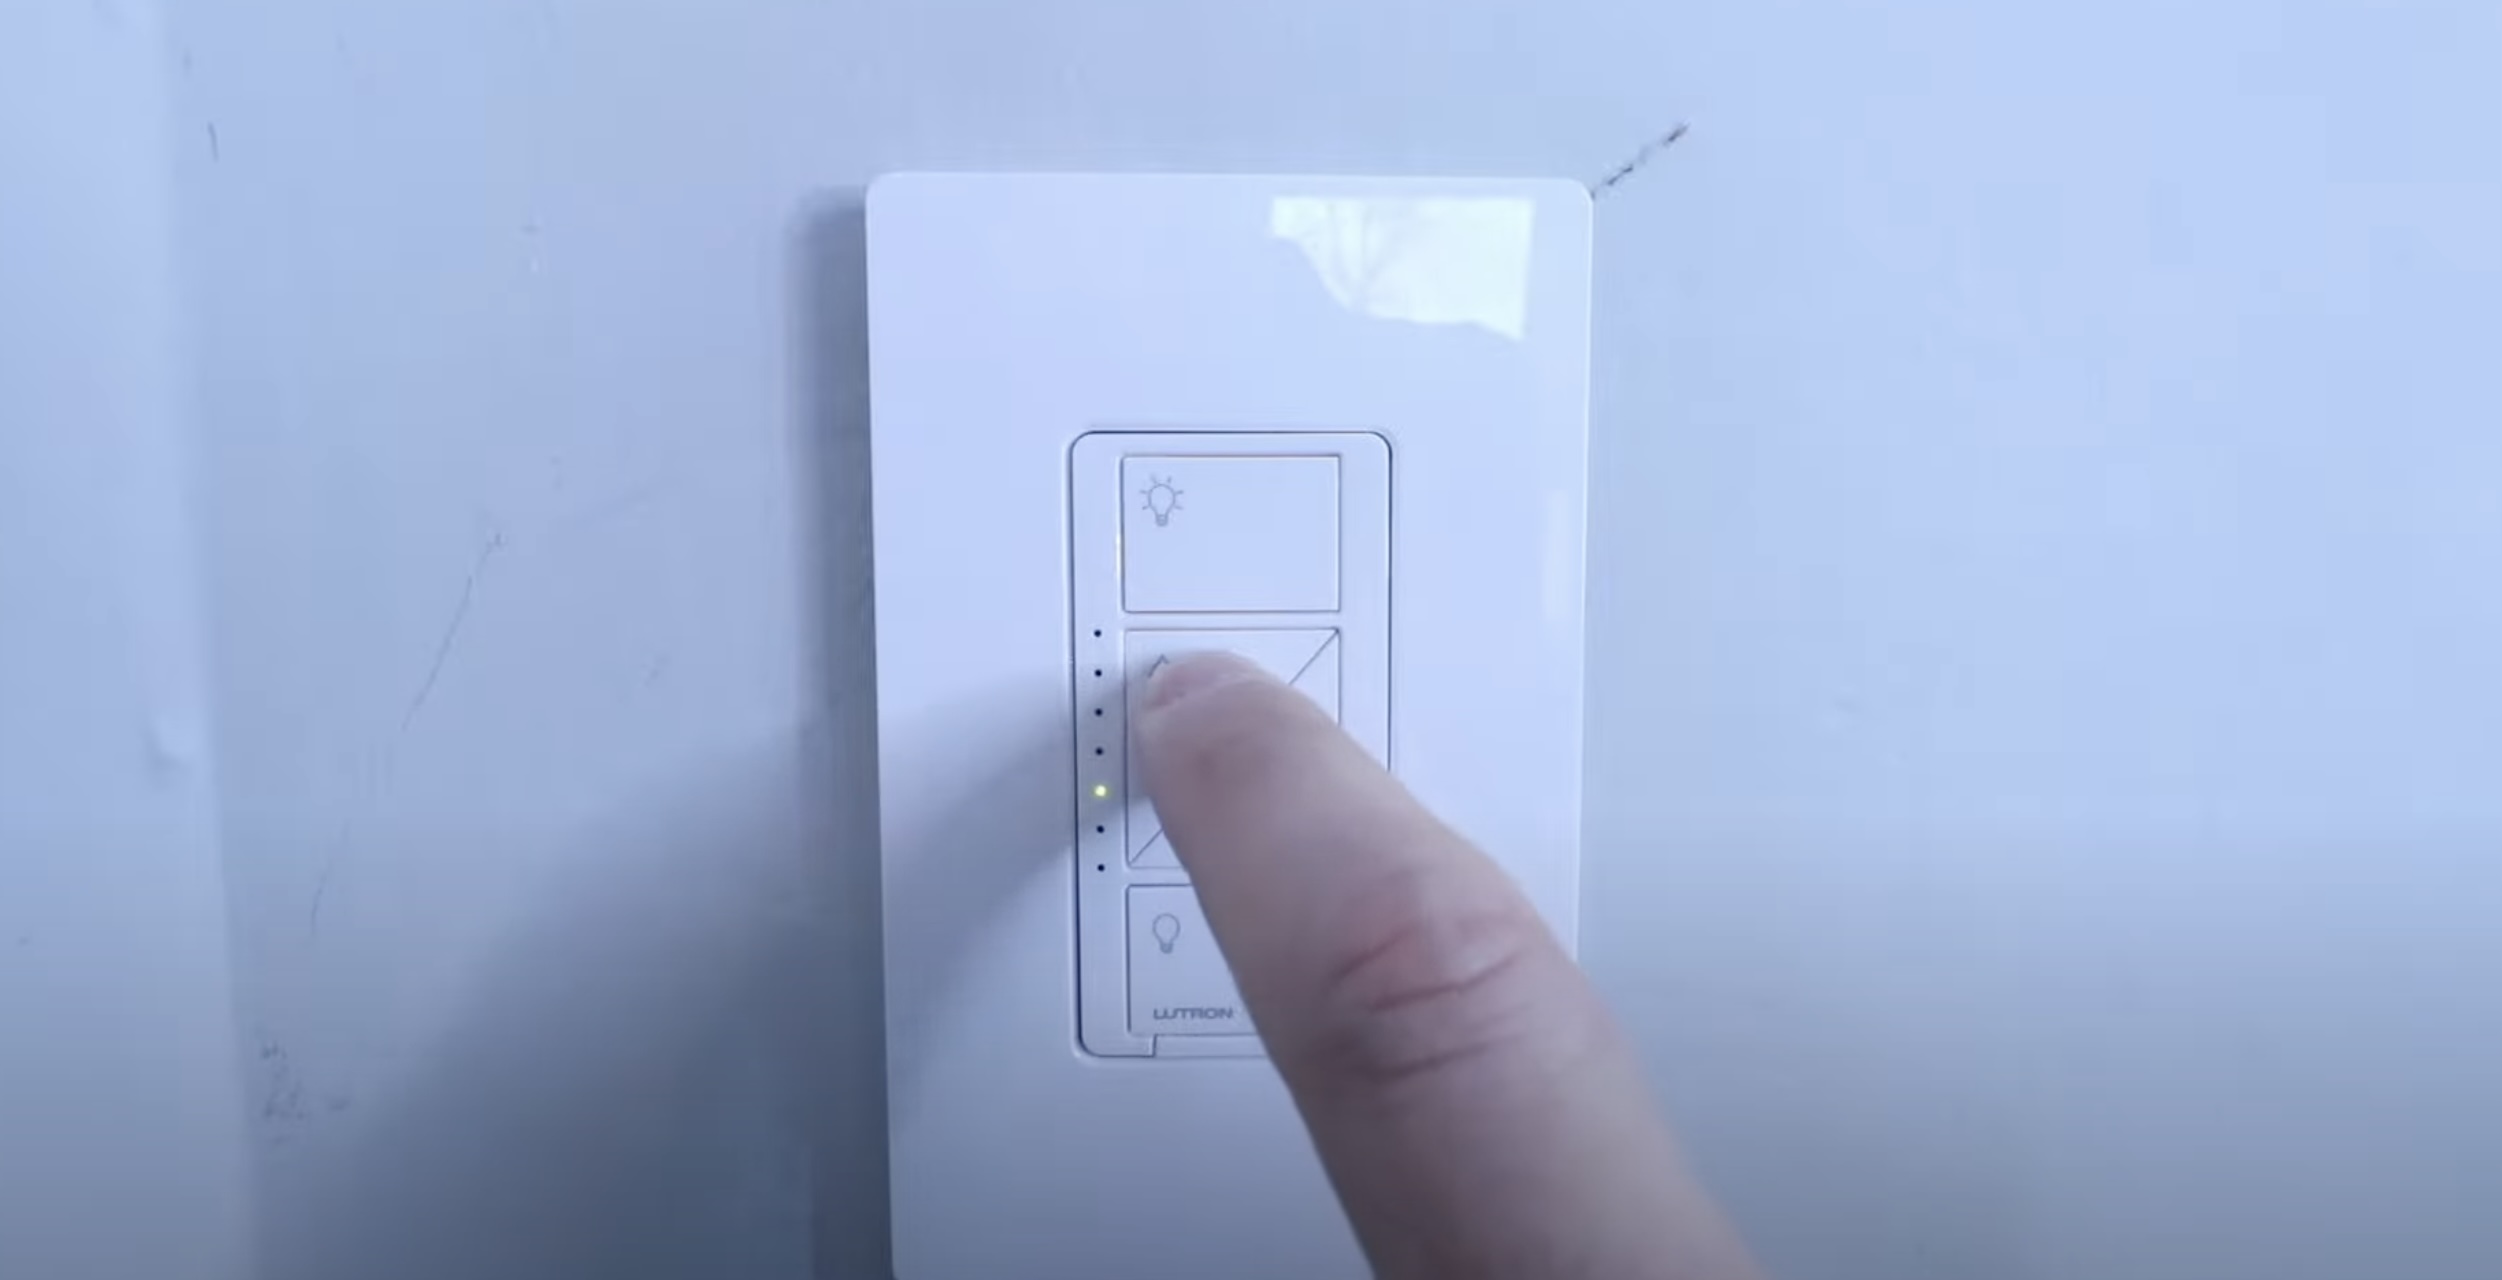
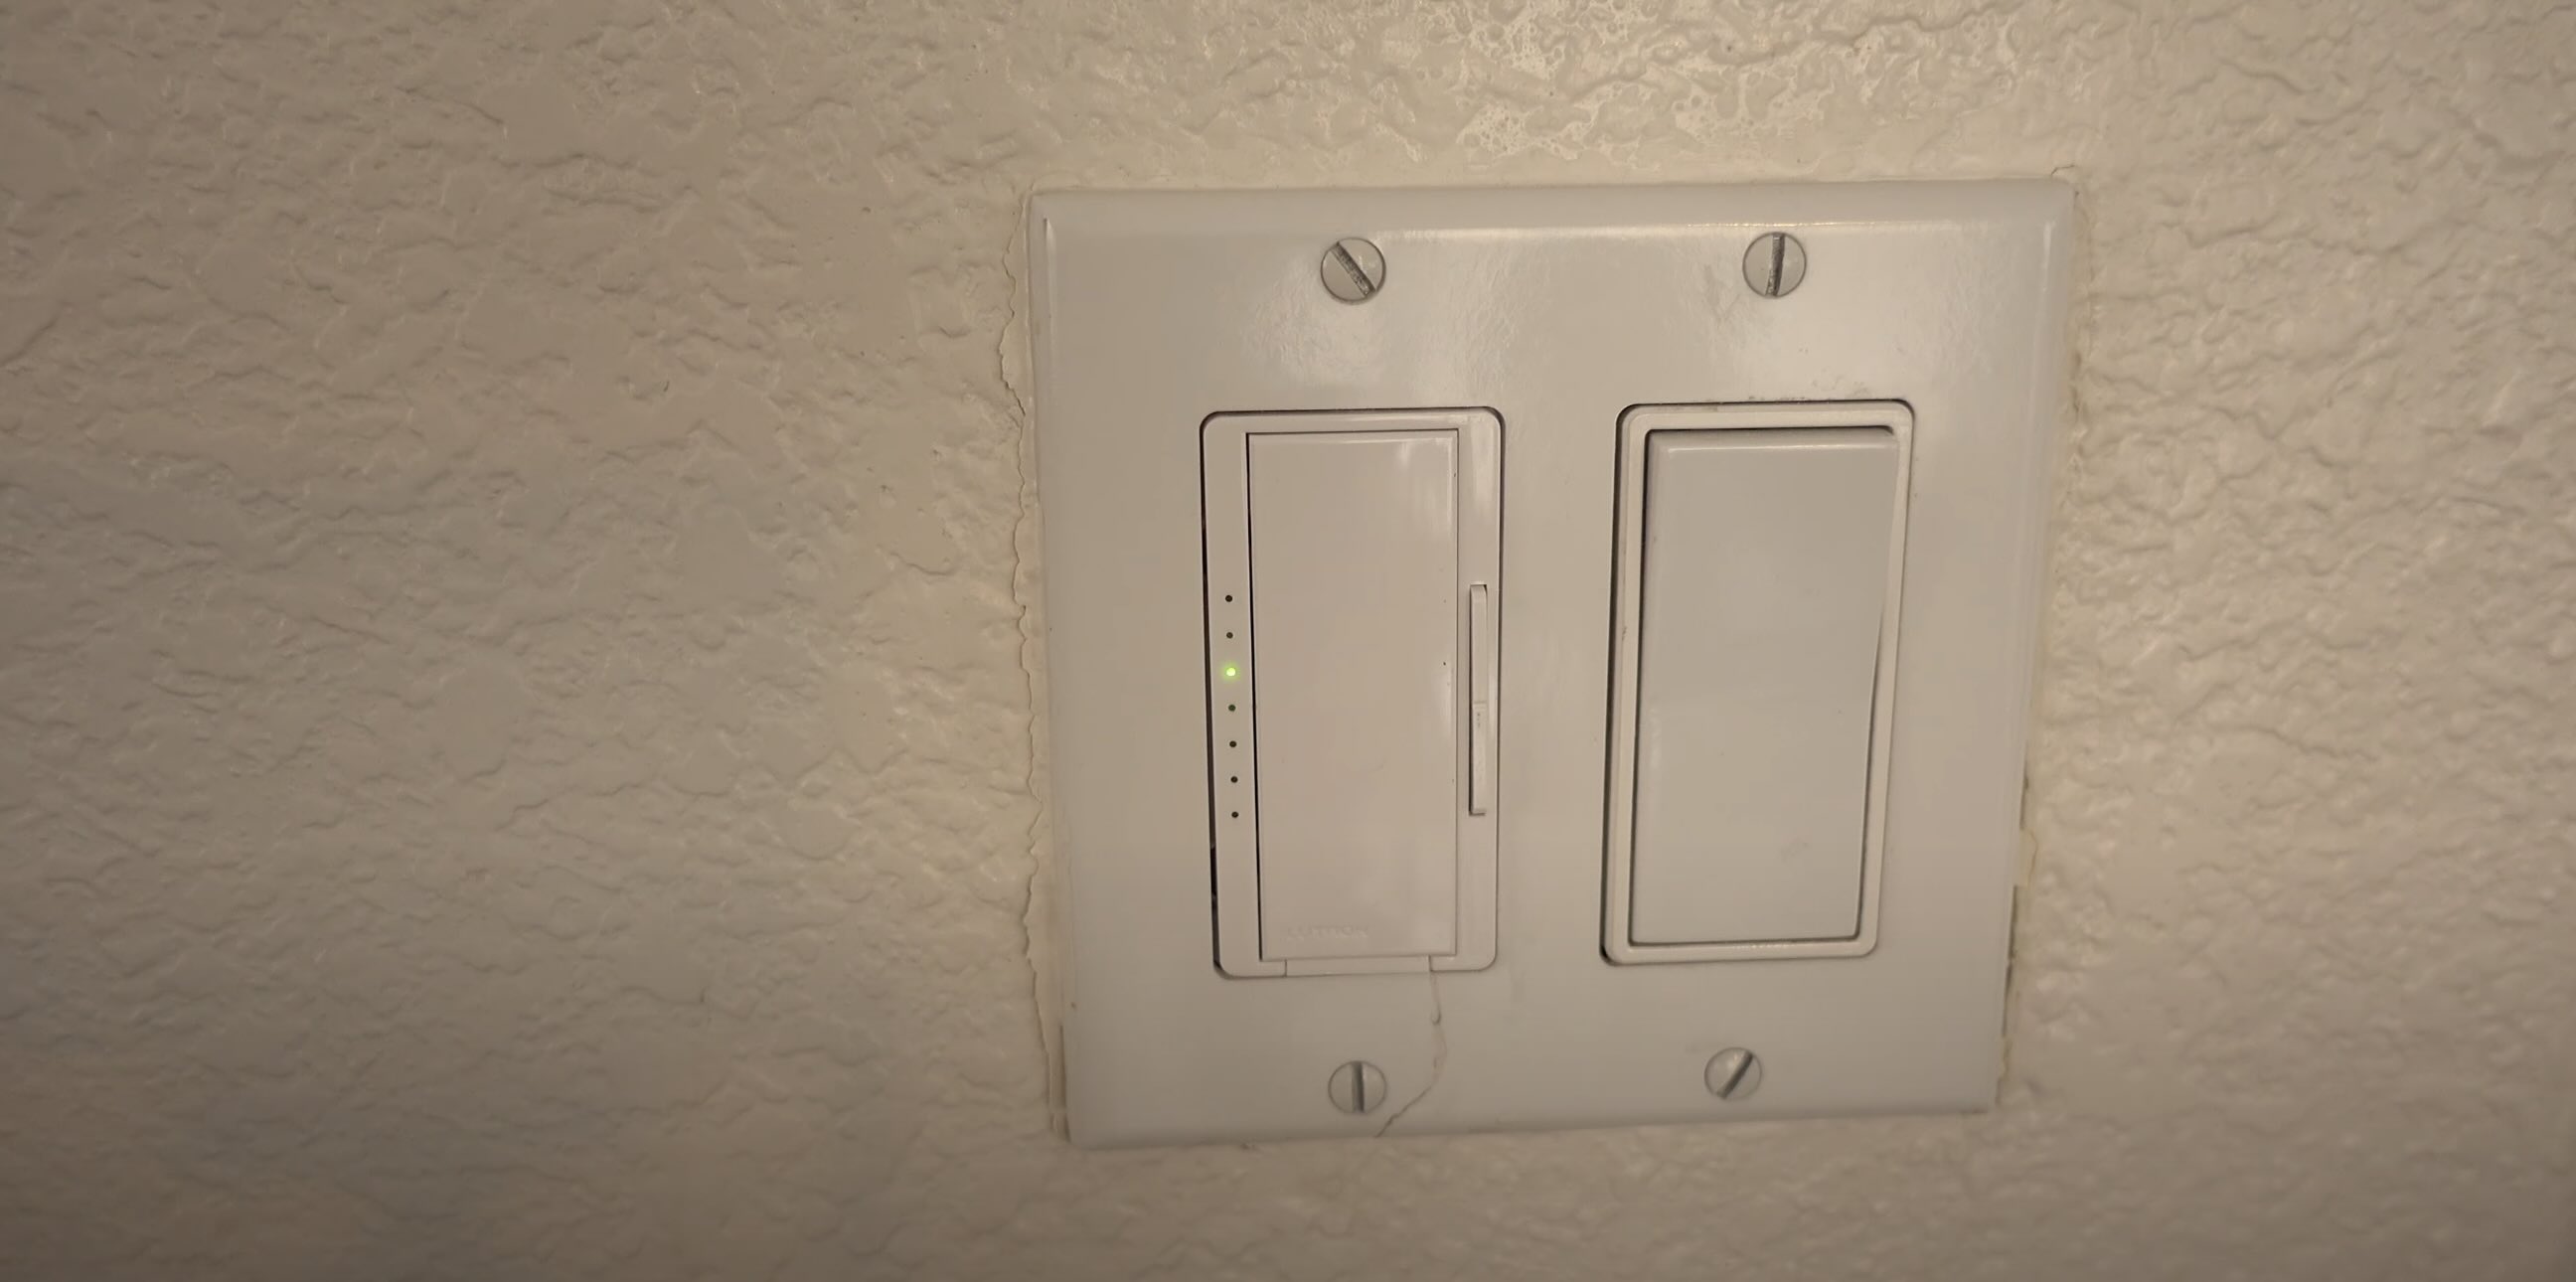
Step 6: Test the Dimmer Switch
After installing the dimmer switch, it’s crucial to test its functionality to ensure that it’s working properly. Follow these steps:
- Turn the power back on to the circuit by switching the breaker in the electrical panel to the “on” position.
- With the power restored, turn on the lights controlled by the dimmer switch.
- Gradually slide the dimmer switch up and down to adjust the brightness of the lights. Observe how the lights respond to the adjustments.
- Ensure that the dimmer switch smoothly and accurately controls the brightness levels of the lights.
- Check for any flickering, buzzing, or other unusual behavior during the dimming process.
If the dimmer switch is operating correctly without any issues, congratulations! You have successfully installed and tested your Leviton dimmer switch.
However, if you notice any problems during the testing phase, it’s important to troubleshoot the issue. Double-check the wiring connections, ensure that the dimmer switch is properly wired according to the manufacturer’s instructions, and review any troubleshooting suggestions provided in the user manual.
If you are unable to resolve the issue or are unsure about troubleshooting electrical problems, it’s best to seek assistance from a licensed electrician. They have the expertise to identify and resolve any wiring or electrical issues.
Once you’ve confirmed that the dimmer switch is functioning correctly, you can start enjoying the benefits of adjustable lighting in your home!
Conclusion
Congratulations on successfully installing your Leviton dimmer switch! You’ve taken the necessary steps to enhance your lighting control and create a more versatile and inviting atmosphere in your home. By following this comprehensive guide, you’ve learned how to turn off the power, remove the existing switch, prepare the dimmer switch, wire it correctly, install it securely, and test its functionality.
Remember, safety always comes first when working with electrical installations. It’s essential to turn off the power to the circuit you’ll be working on and take precautions to prevent any electrical accidents. If you’re unsure or uncomfortable performing any of the steps outlined in this guide, it’s always best to consult a licensed electrician.
With your new dimmer switch in place, you now have the flexibility to adjust the brightness of your lights and set the perfect mood for any occasion. Whether you want to create a cozy ambiance for movie nights or have a brighter space for tasks, the dimmer switch gives you full control over your lighting.
Remember to refer to the manufacturer’s instructions and any specific wiring diagrams provided with your dimmer switch to ensure a safe and proper installation. Take your time, double-check your wiring connections, and be patient as you adjust to using your new dimmer switch.
Thank you for choosing Leviton and following this guide on how to wire a Leviton dimmer switch. Enjoy the enhanced lighting control and the cozy ambiance it provides in your home!
Frequently Asked Questions about How To Wire A Leviton Dimmer Switch
Was this page helpful?
At Storables.com, we guarantee accurate and reliable information. Our content, validated by Expert Board Contributors, is crafted following stringent Editorial Policies. We're committed to providing you with well-researched, expert-backed insights for all your informational needs.

0 thoughts on “How To Wire A Leviton Dimmer Switch”