Home>Articles>How To Install A Dimmer Switch With No Ground Wire
Articles
How To Install A Dimmer Switch With No Ground Wire
Modified: August 17, 2024
Learn how to install a dimmer switch without a ground wire with our informative articles. Find step-by-step instructions and expert tips to easily complete your home improvement project.
(Many of the links in this article redirect to a specific reviewed product. Your purchase of these products through affiliate links helps to generate commission for Storables.com, at no extra cost. Learn more)
Introduction
Welcome to our guide on how to install a dimmer switch with no ground wire. Installing a dimmer switch is a great way to add flexibility and ambiance to your lighting setup. However, it can be a bit tricky when you don’t have a ground wire available. Don’t worry, though – we’ve got you covered. In this article, we will explain what a dimmer switch is, the importance of a ground wire, and provide step-by-step instructions for installing a dimmer switch without a ground wire.
Dimmer switches are electrical devices that allow you to adjust the brightness of a light fixture. They work by regulating the amount of electrical current flowing to the light, providing you with the ability to create different lighting levels to suit your needs and moods. Whether you want to create a cozy atmosphere in your living room or dim the lights for a romantic dinner, a dimmer switch can help you achieve the desired effect.
Now, let’s address the issue of the ground wire. The ground wire is an important safety feature in electrical wiring. It provides a path for electrical currents to flow safely to the ground in the event of a fault or malfunction. While it is always recommended to have a ground wire in your electrical setup, older homes may not have one installed. In such cases, it is still possible to install a dimmer switch, but it must be done correctly to ensure safety.
In this article, we will assume that you have already determined that your home does not have a ground wire. If you are unsure about the presence of a ground wire, it is important to consult with a professional electrician before proceeding with the installation.
Before we jump into the installation process, let’s quickly touch on some safety considerations. Working with electricity can be dangerous if proper precautions are not taken. Make sure to turn off the power at the circuit breaker before starting any electrical work. If you are uncomfortable or unsure about any aspect of the installation, it is best to seek the assistance of a licensed electrician.
Now that we have covered the basics, let’s move on to the steps involved in installing a dimmer switch without a ground wire. We will provide detailed instructions and helpful tips to ensure a successful installation. Let’s get started!
Key Takeaways:
- Installing a dimmer switch without a ground wire is possible, but safety is crucial. Carefully connect the hot and neutral wires, secure the switch, and test for proper functionality to ensure a successful and safe installation.
- Prioritize safety when working with electrical components. Turn off the power, use proper tools, and consult a professional if unsure. Enjoy the benefits of adjustable lighting with a properly installed dimmer switch.
Read more: How To Wire In A Dimmer Switch
Understanding Dimmer Switches
Before we dive deeper into the installation process, it’s important to have a solid understanding of how dimmer switches work. A dimmer switch is a device that allows you to control the intensity of the light emitted by a light fixture. Instead of simply turning the light on or off, a dimmer switch gives you the ability to adjust the brightness to your liking.
Dimmer switches use a process called “pulse width modulation” (PWM) to regulate the amount of electrical current flowing to the light fixture. By rapidly switching the current on and off, the dimmer switch effectively controls the amount of power being supplied to the light bulb. This modulation of power results in a dimming effect.
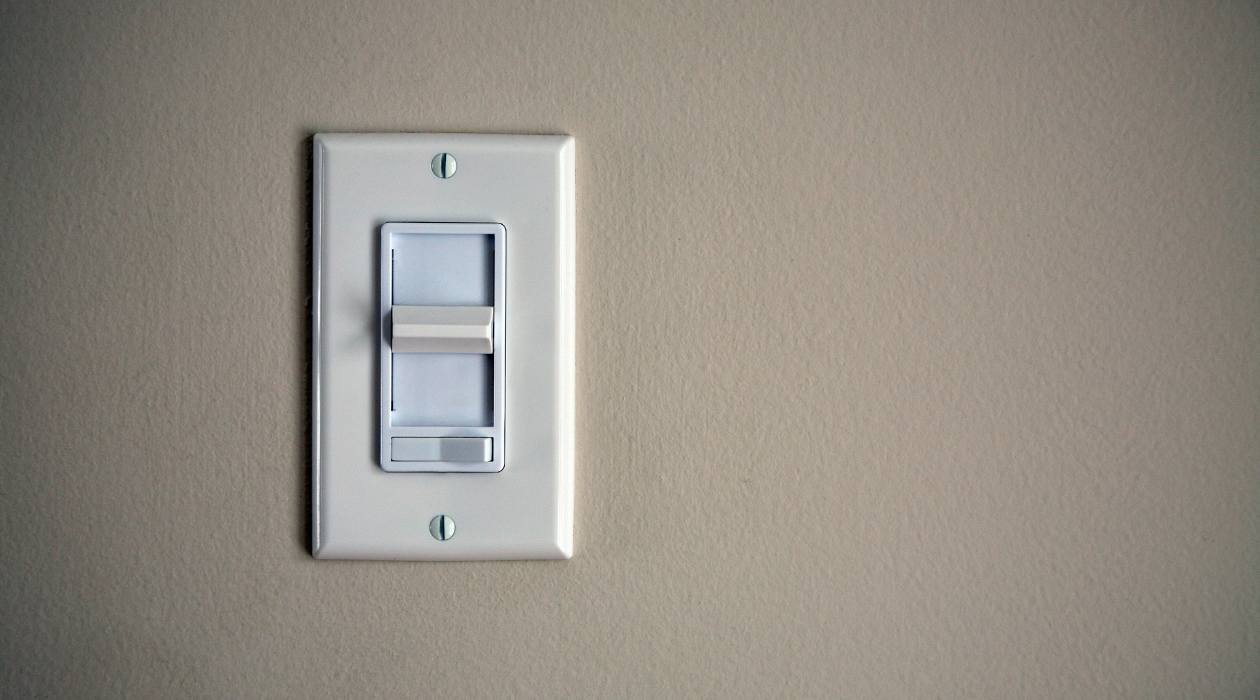
Dimmer switches come in various types, but the most common type is the “leading-edge” dimmer switch. This type of switch is compatible with traditional incandescent and halogen bulbs. Leading-edge dimmers work by cutting off a portion of the leading edge of the sine waveform, which reduces the power and dims the light.
Another type of dimmer switch is the “trailing-edge” dimmer switch. Trailing-edge dimmers are designed for use with LED and CFL bulbs. These dimmers work by cutting off a portion of the trailing edge of the sine waveform. By controlling the trailing edge of the waveform, the dimmer provides smooth dimming for LED and CFL lights, which are sensitive to sudden changes in power.
It’s important to note that not all dimmer switches are compatible with all types of light bulbs. Before purchasing a dimmer switch, make sure to check the compatibility with the specific type of bulb you plan to use.
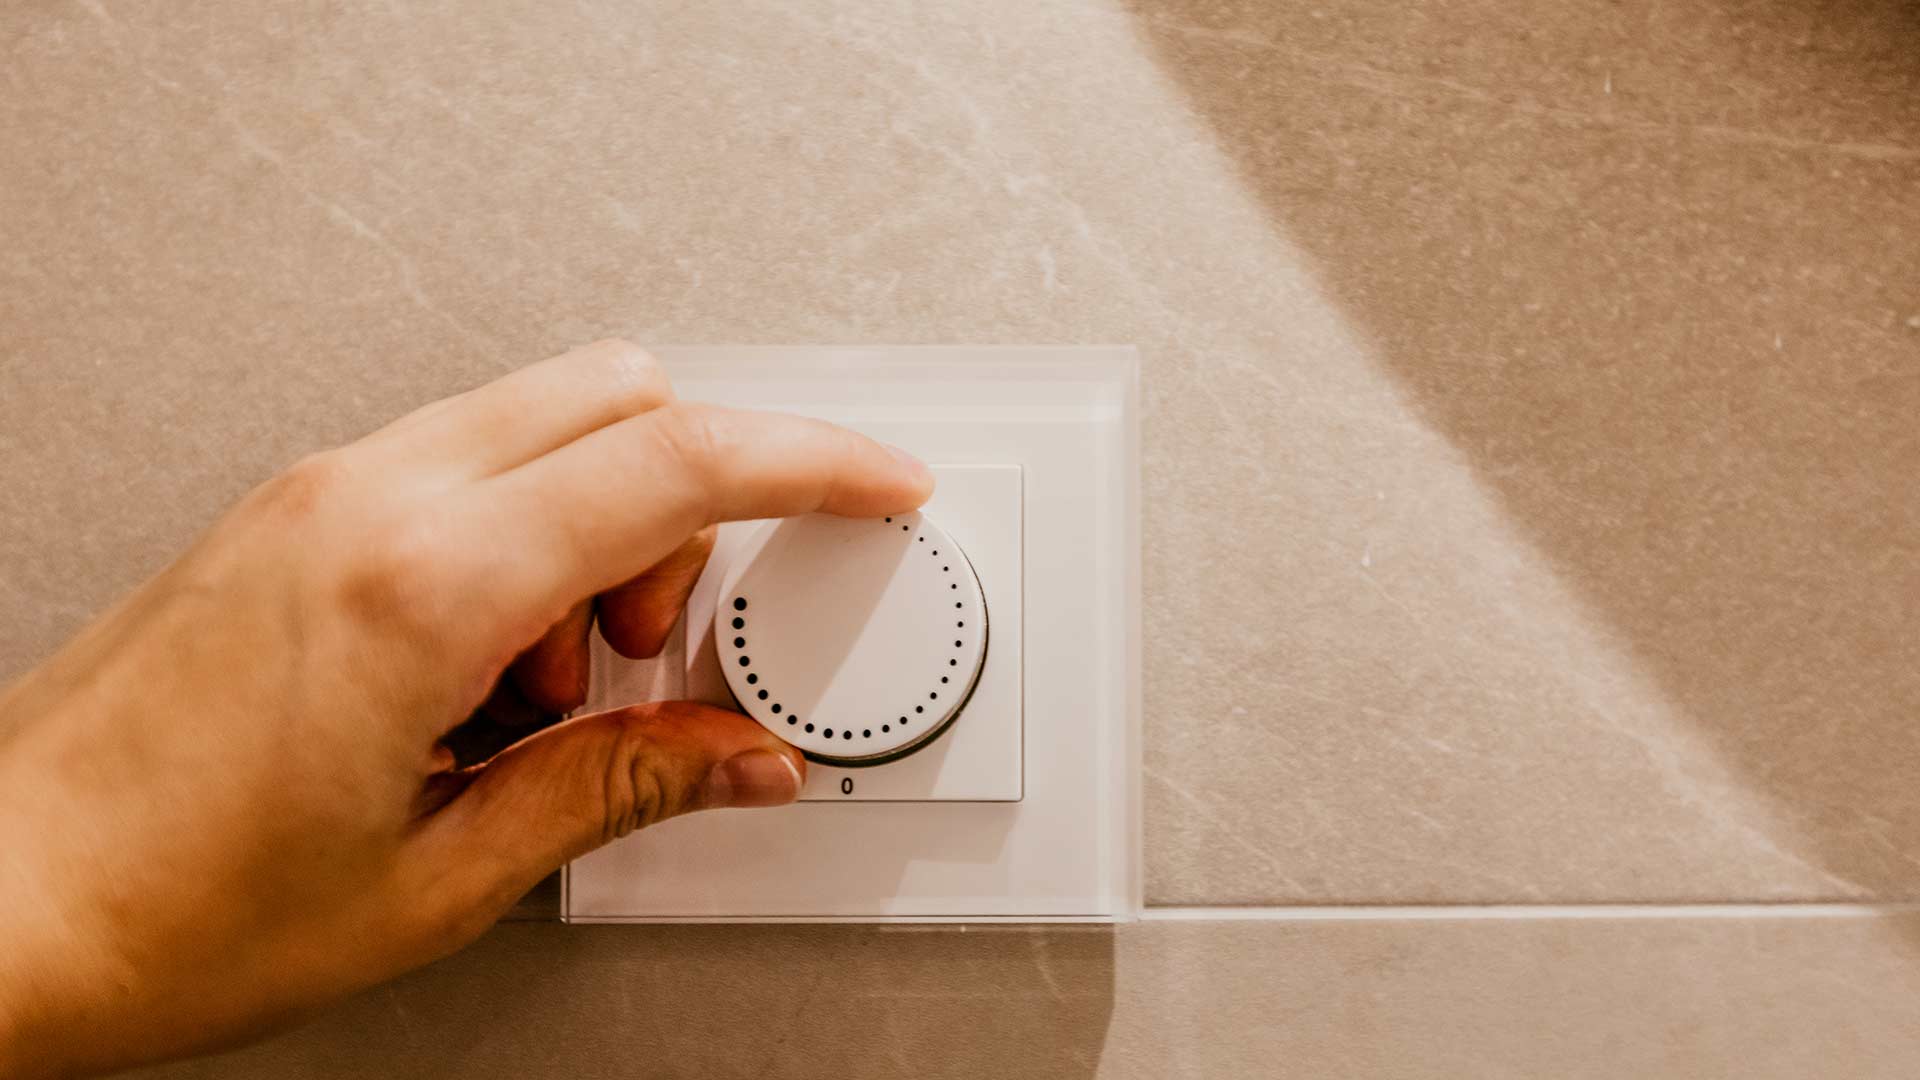
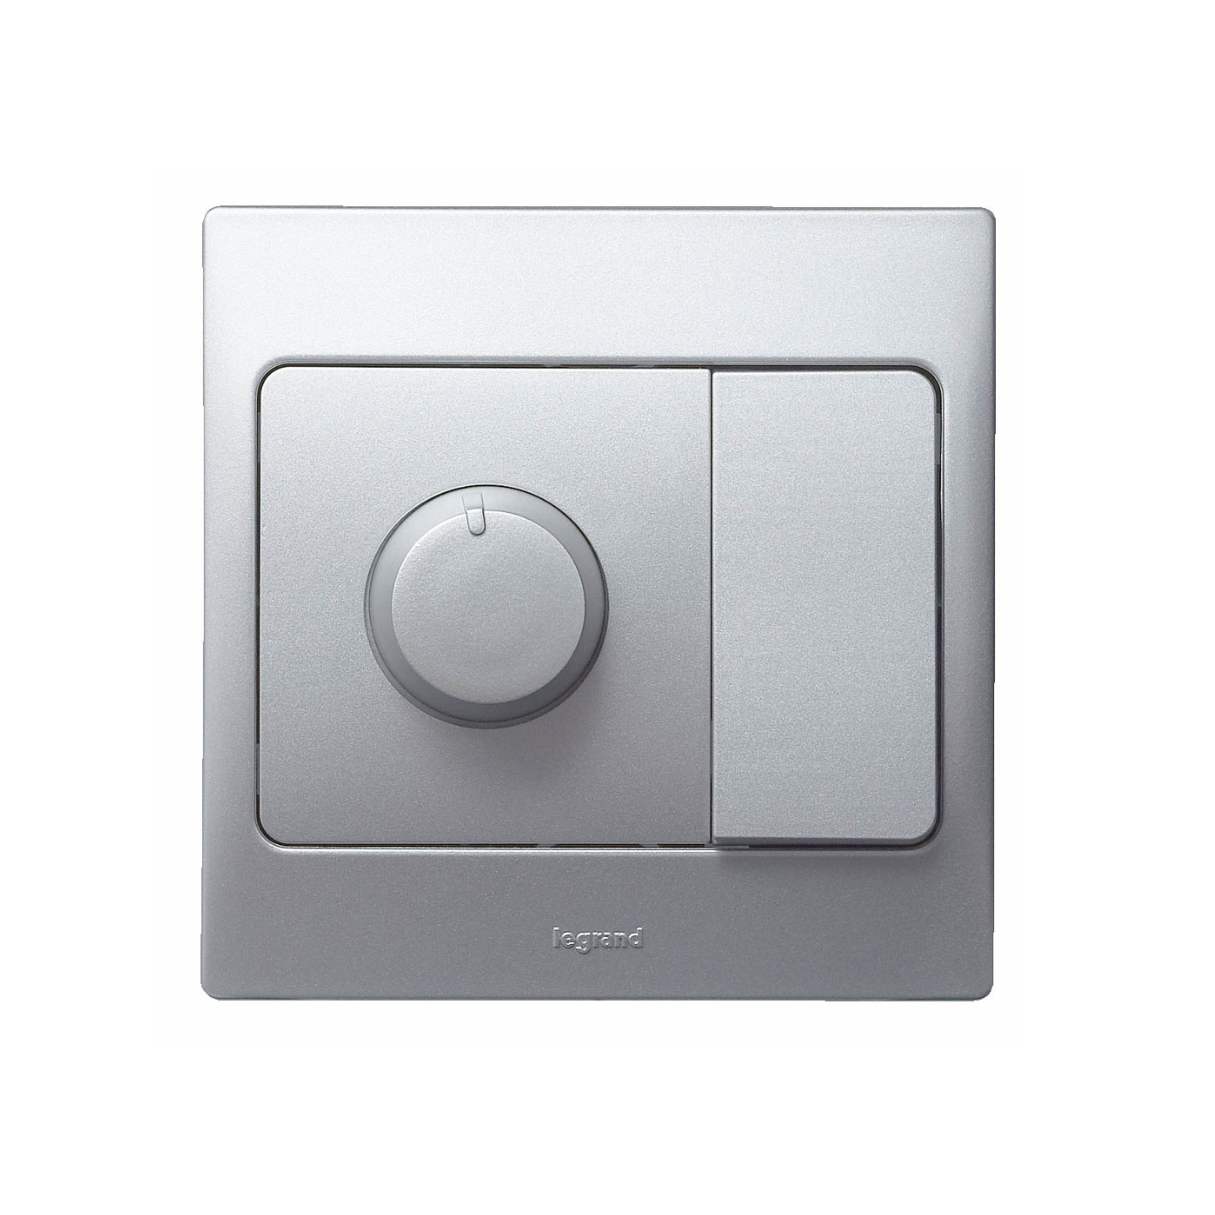
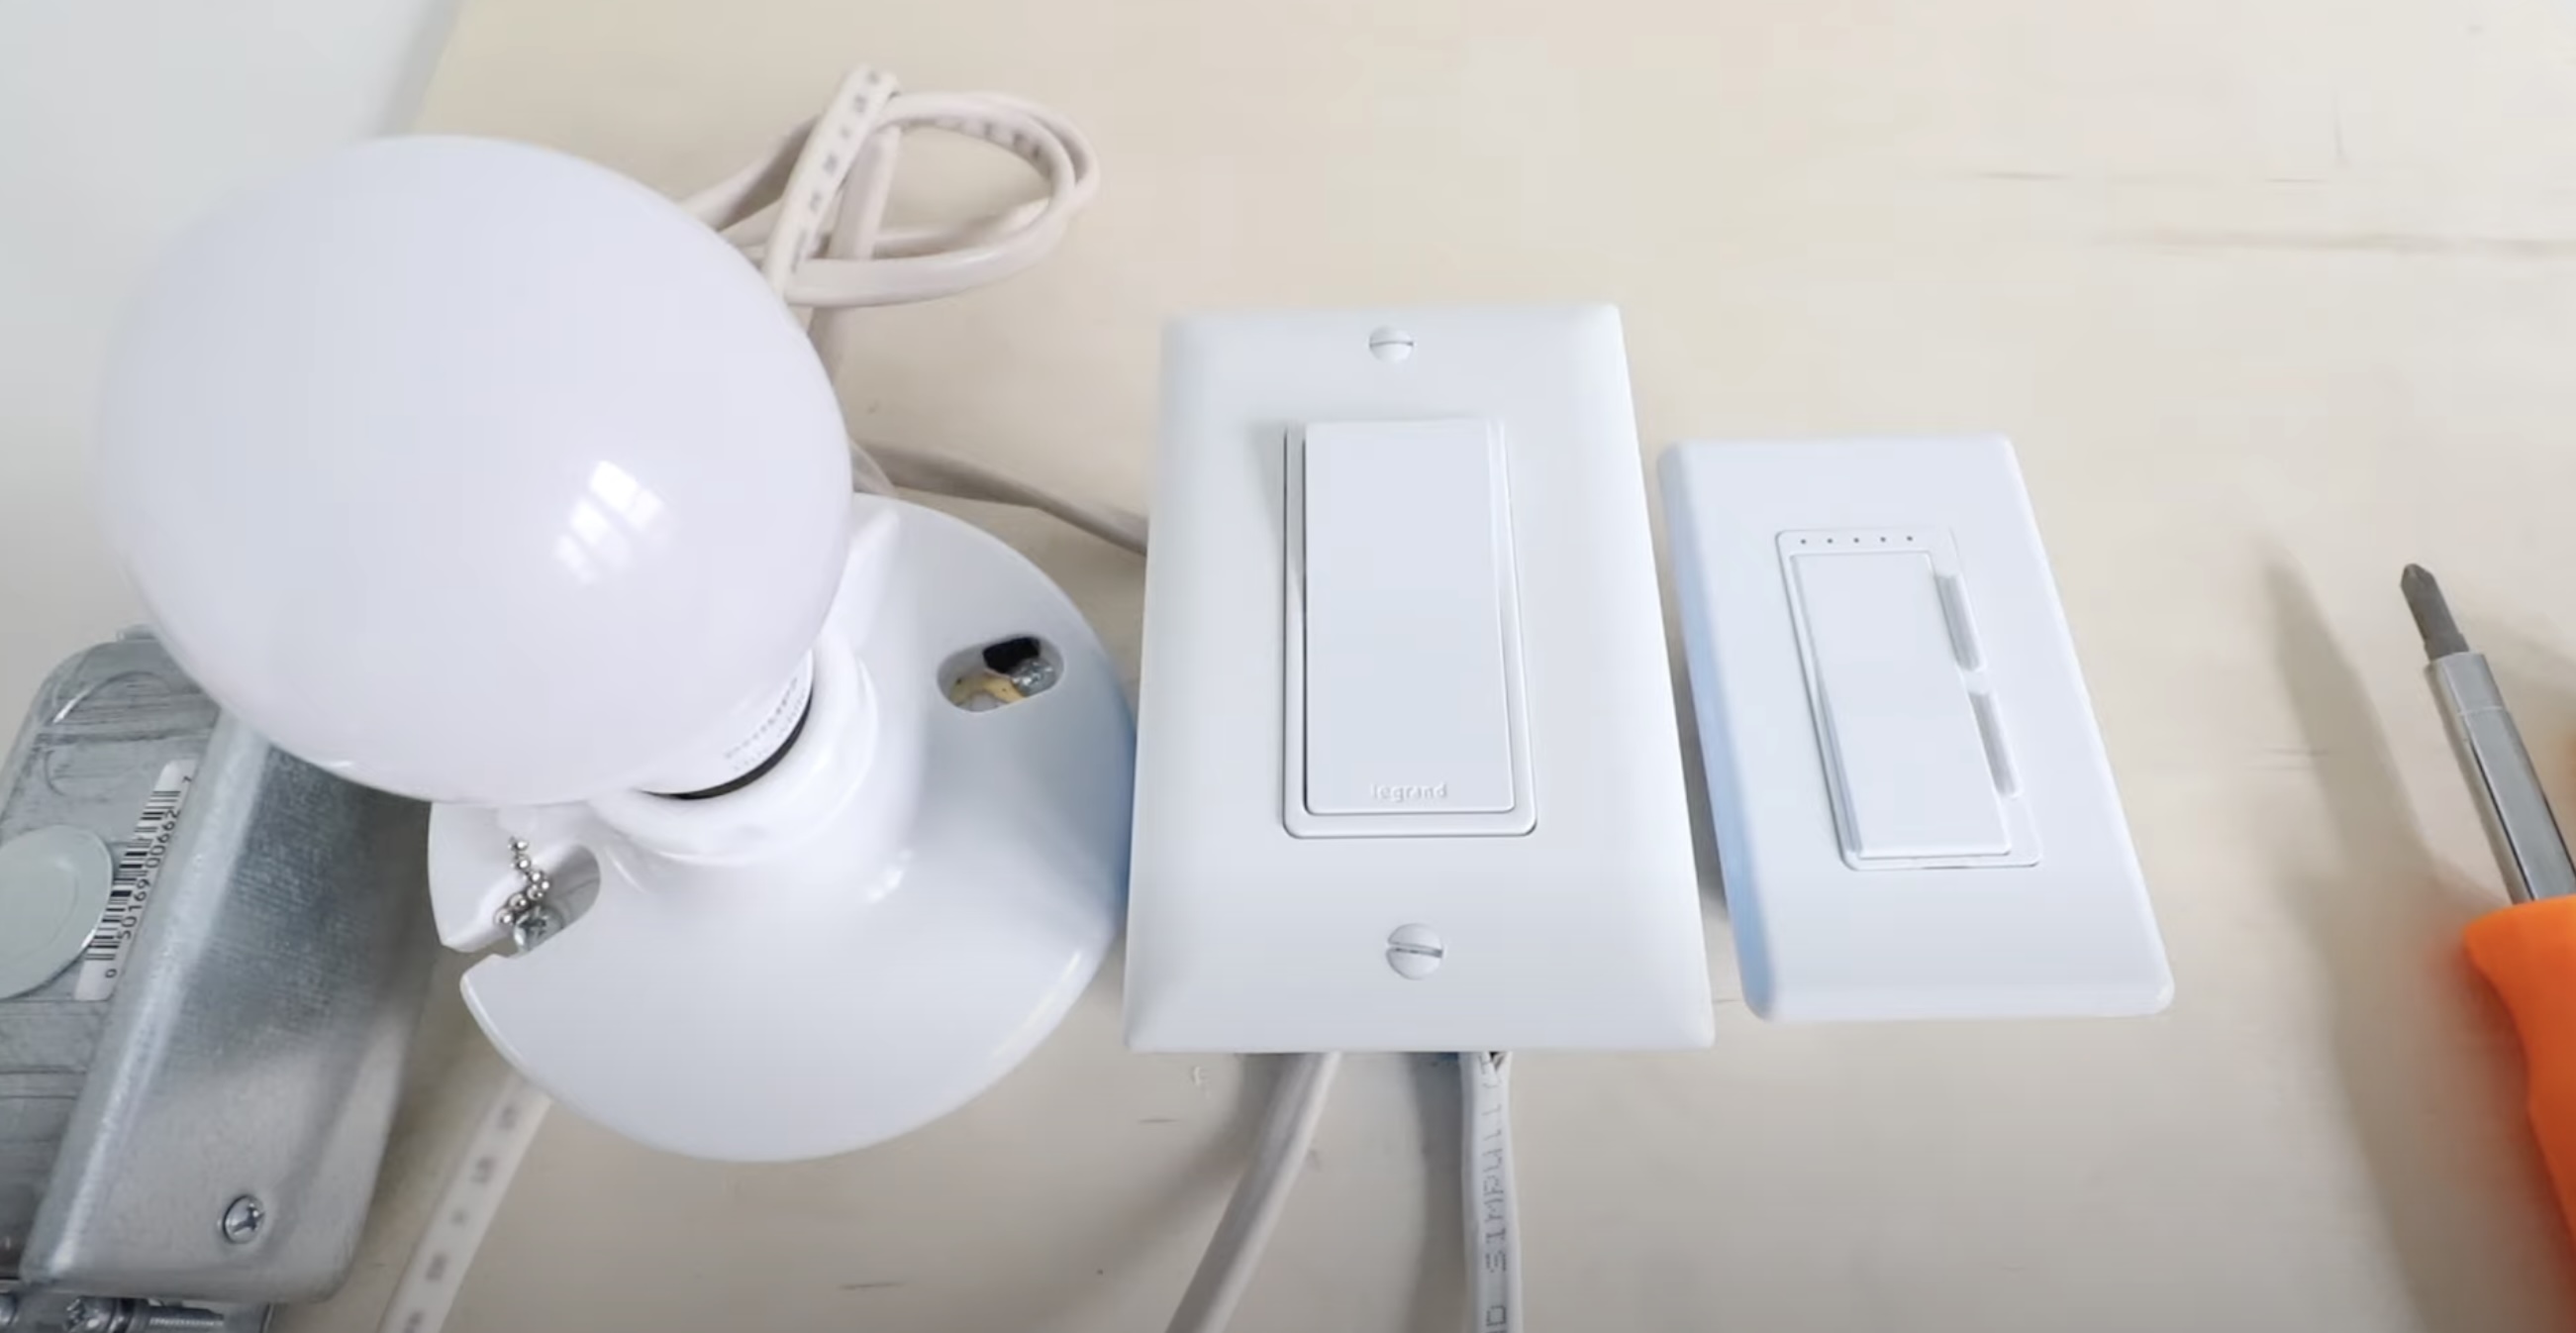
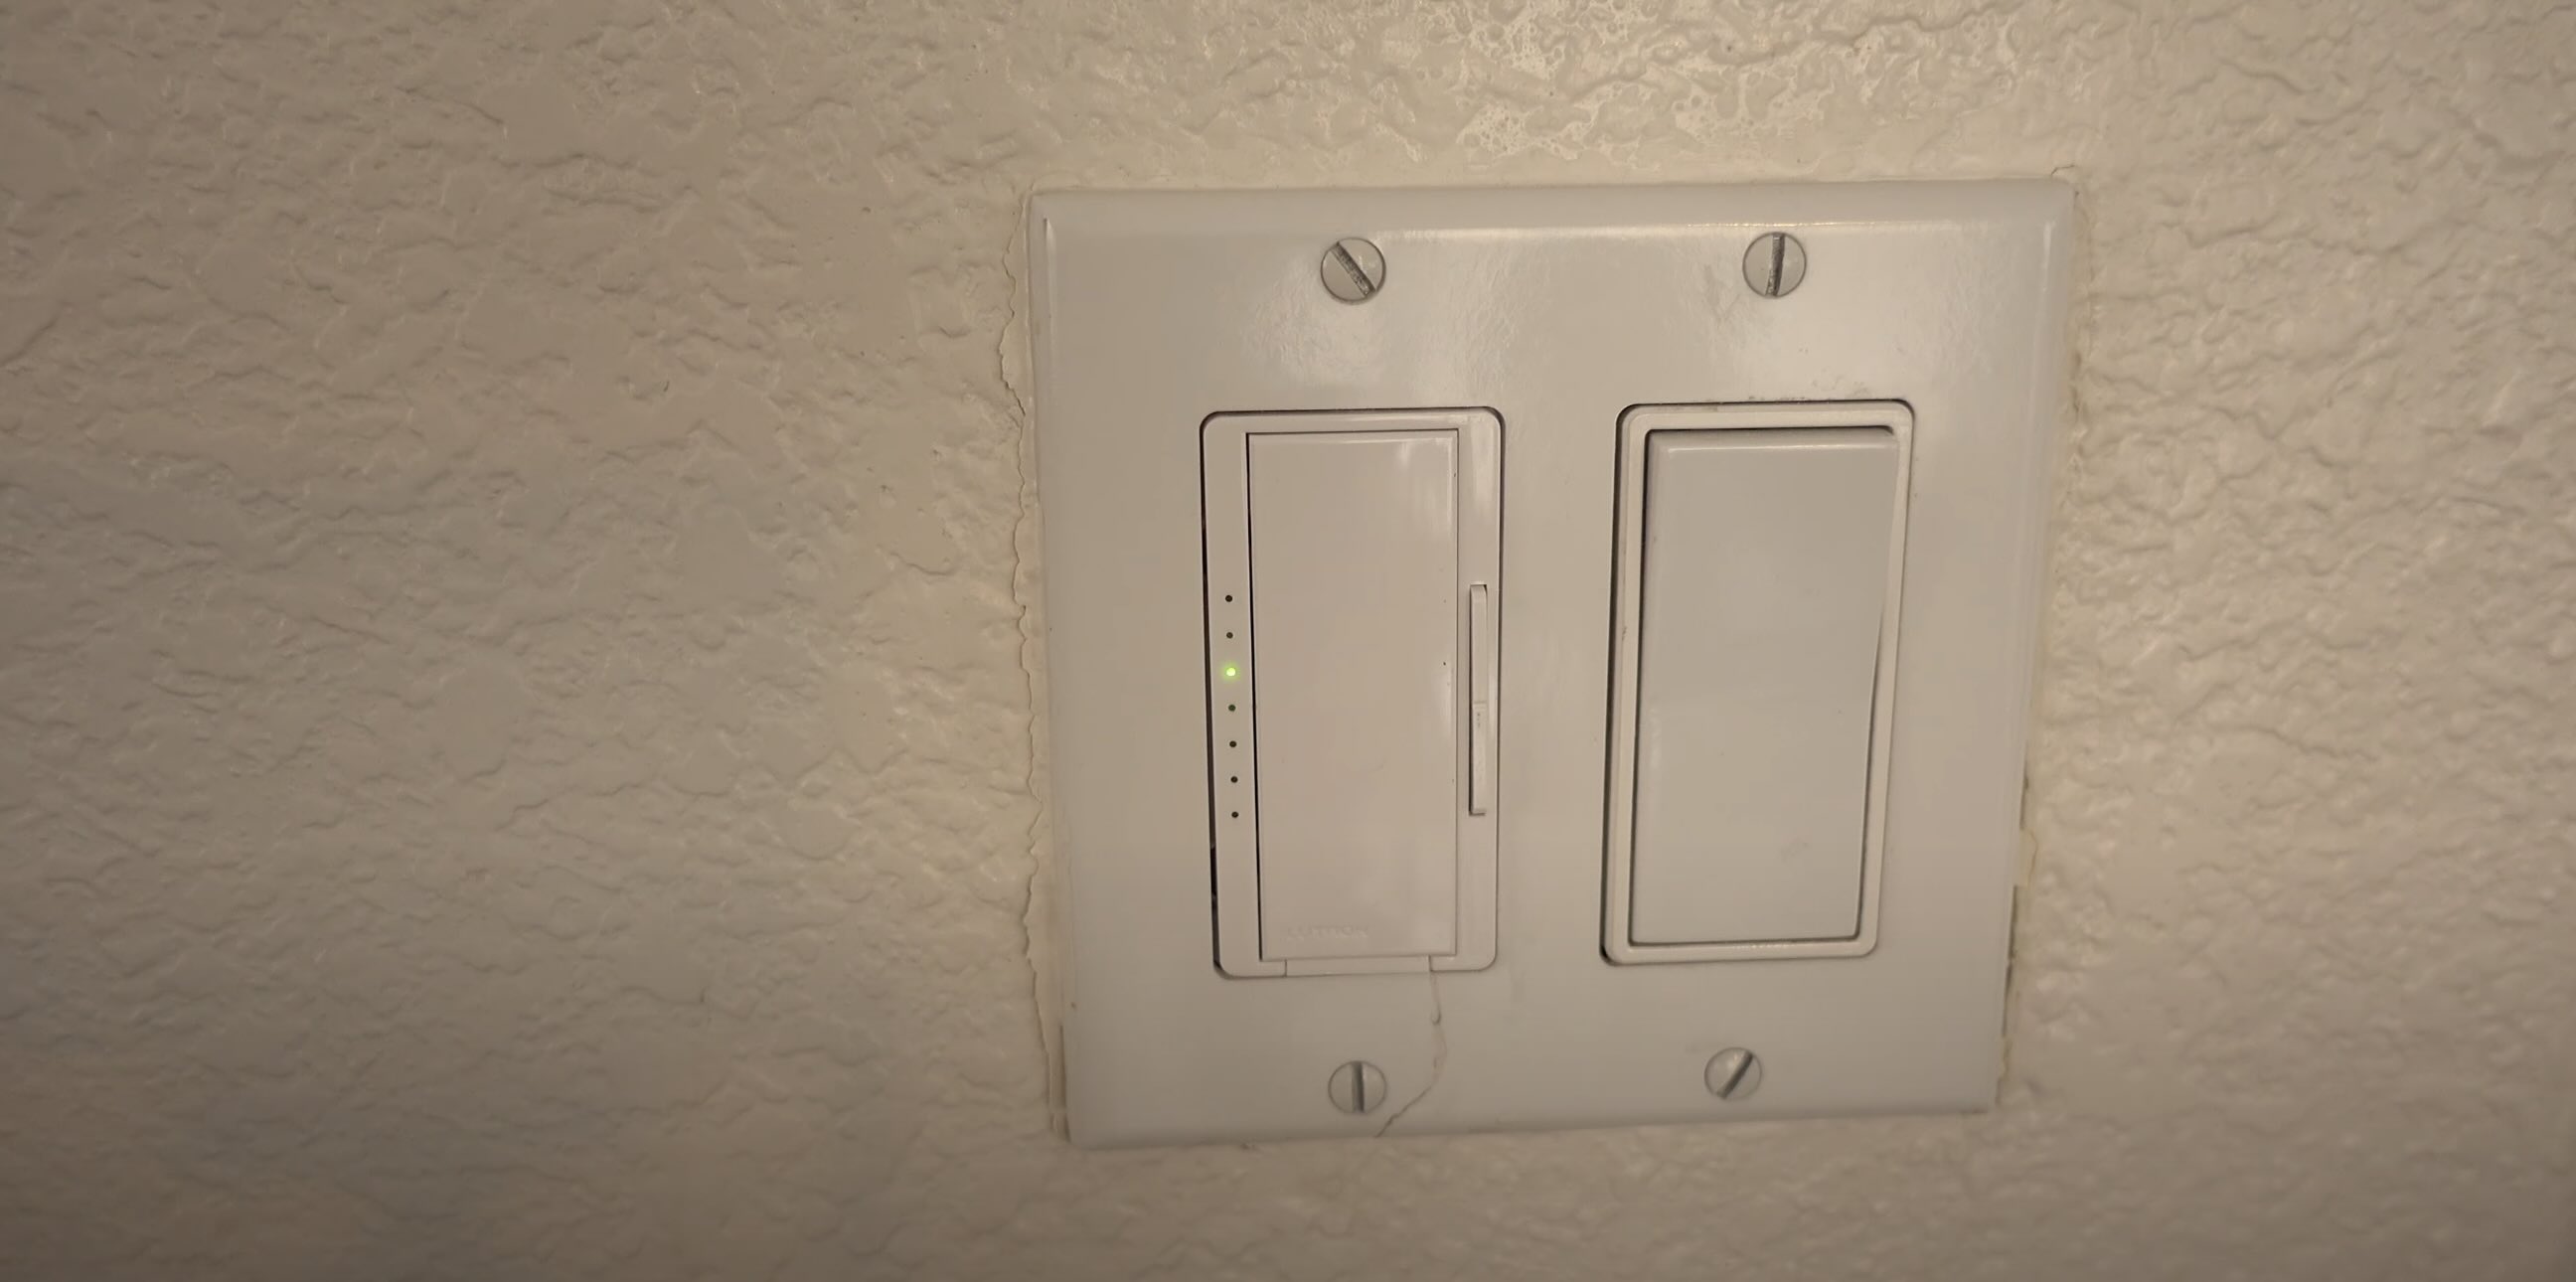
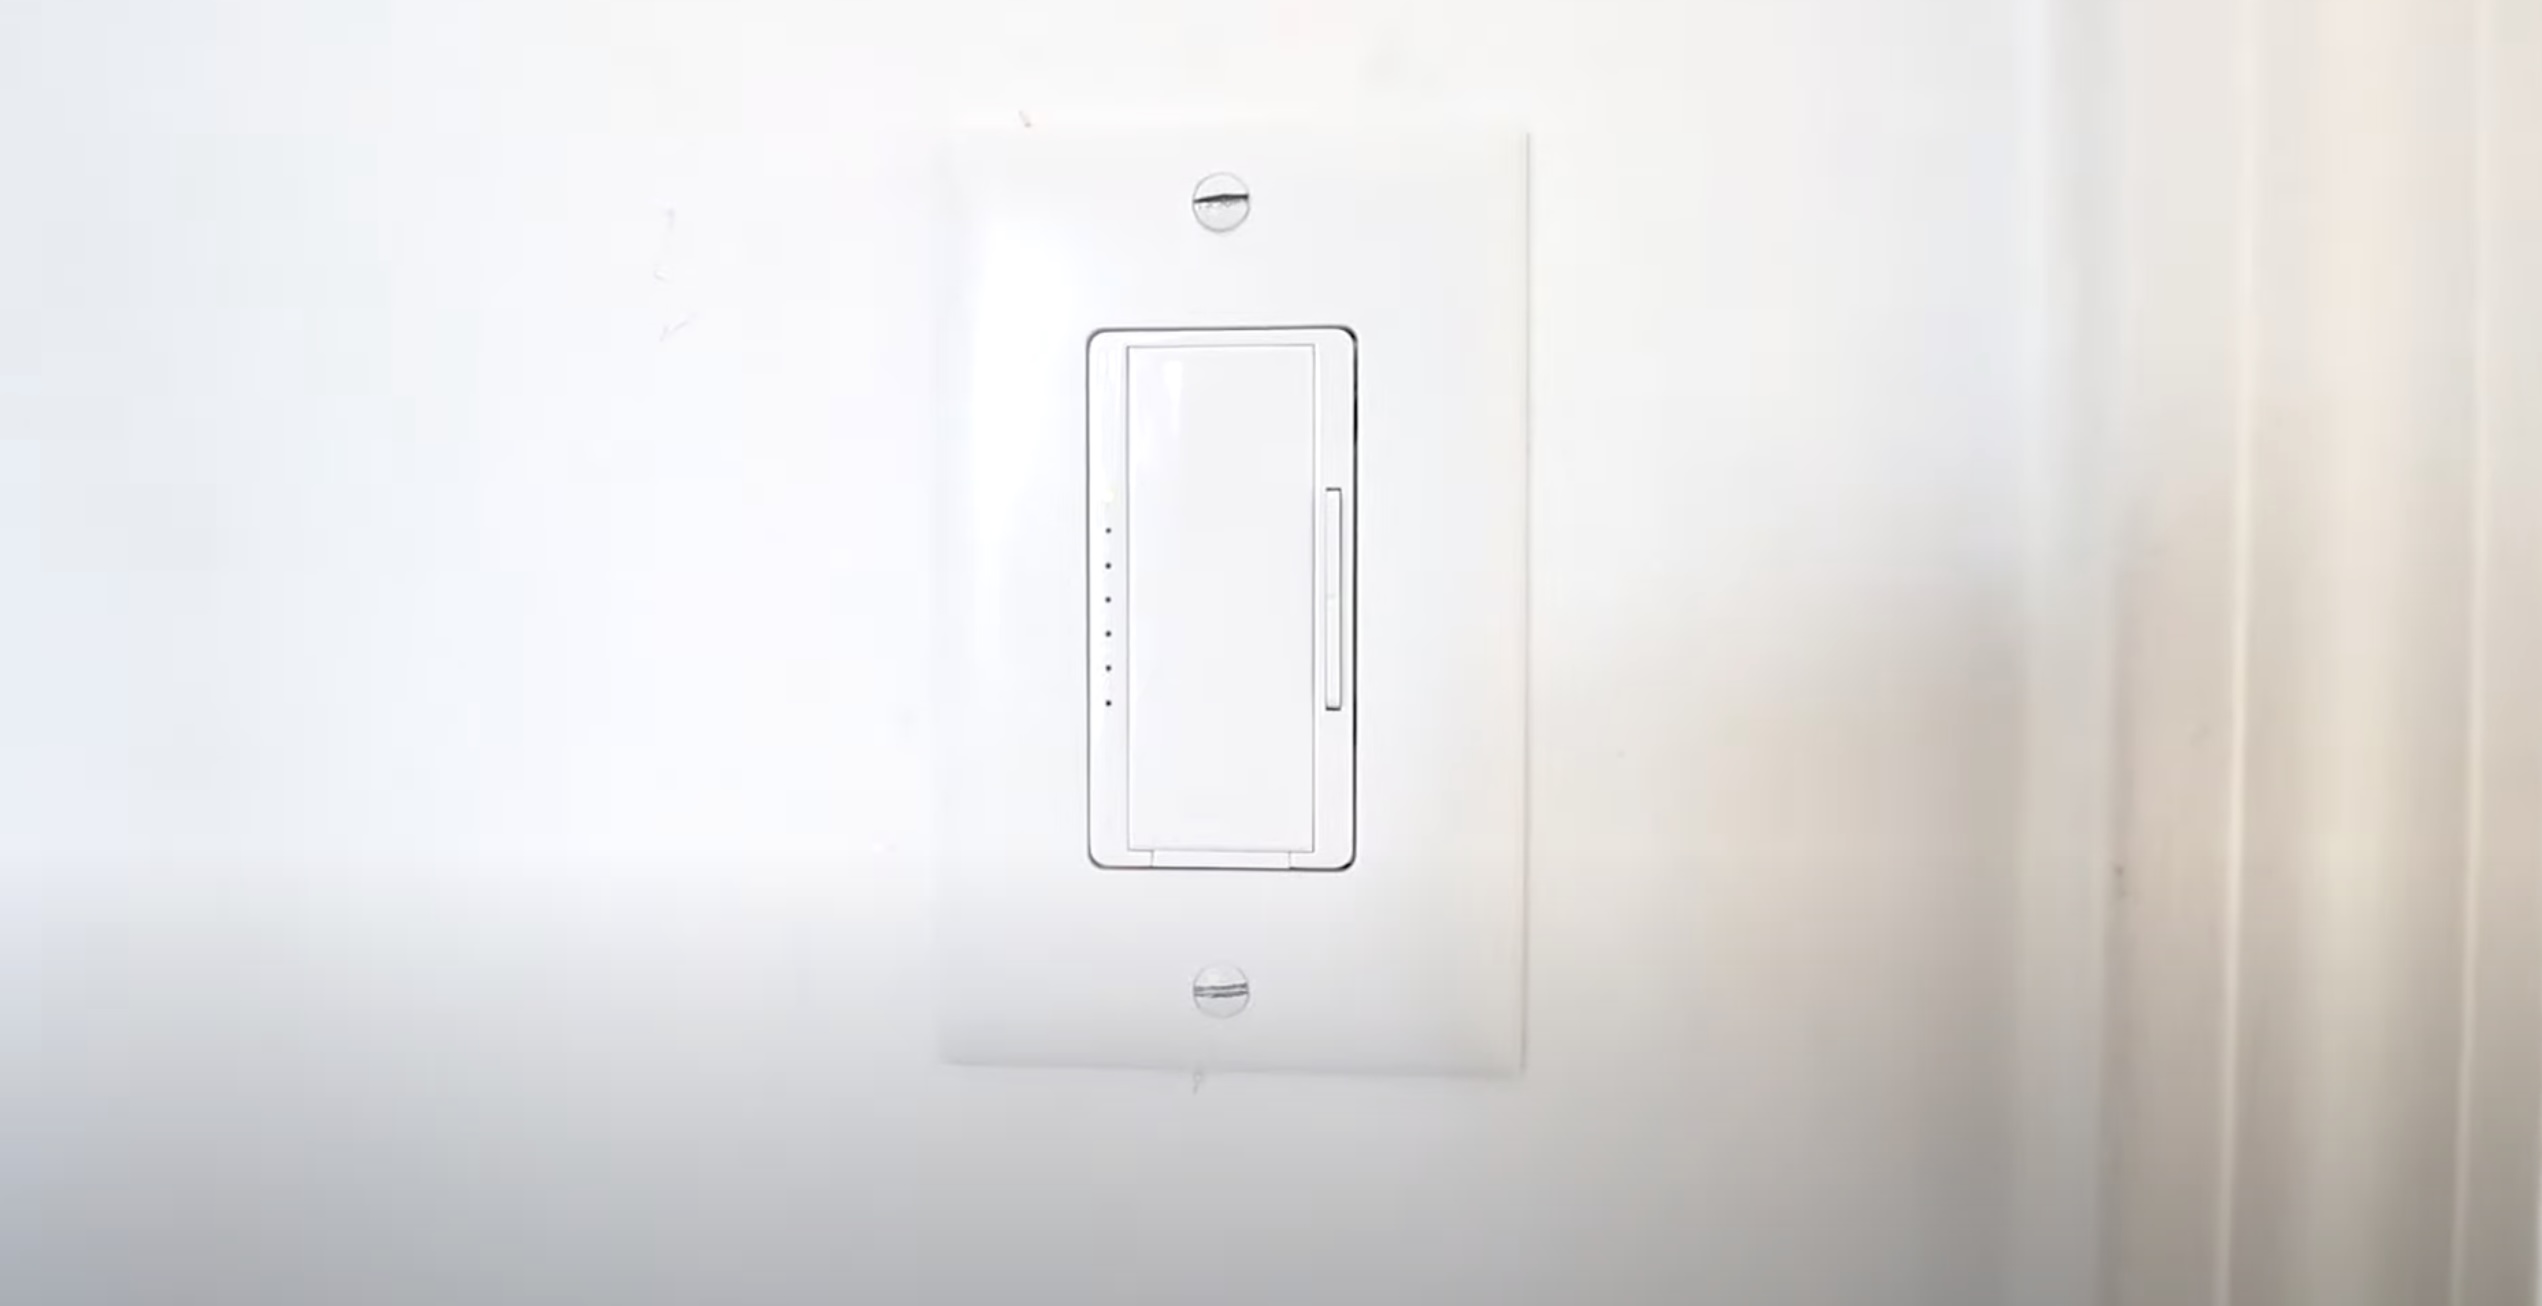
Dimmer switches are typically installed in place of a standard on/off switch. They usually consist of a cover plate, a switch module, and a control knob or button. The switch module contains the electronics that regulate the dimming function, while the control knob or button allows you to adjust the brightness level.
Now that we have a basic understanding of dimmer switches, let’s move on to the next step: determining if you have a ground wire available. This step is crucial for ensuring the safety and proper installation of your dimmer switch.
Determining If You Have a Ground Wire
Before proceeding with the installation of a dimmer switch without a ground wire, it’s important to determine if your electrical setup has a ground wire available. The ground wire serves as a safety measure, providing a path for electrical current to safely dissipate in case of a fault or malfunction.
To determine if you have a ground wire, you can follow these steps:
- Turn off the power: Before working with any electrical components, it is crucial to turn off the power at the circuit breaker. This will ensure your safety during the inspection process.
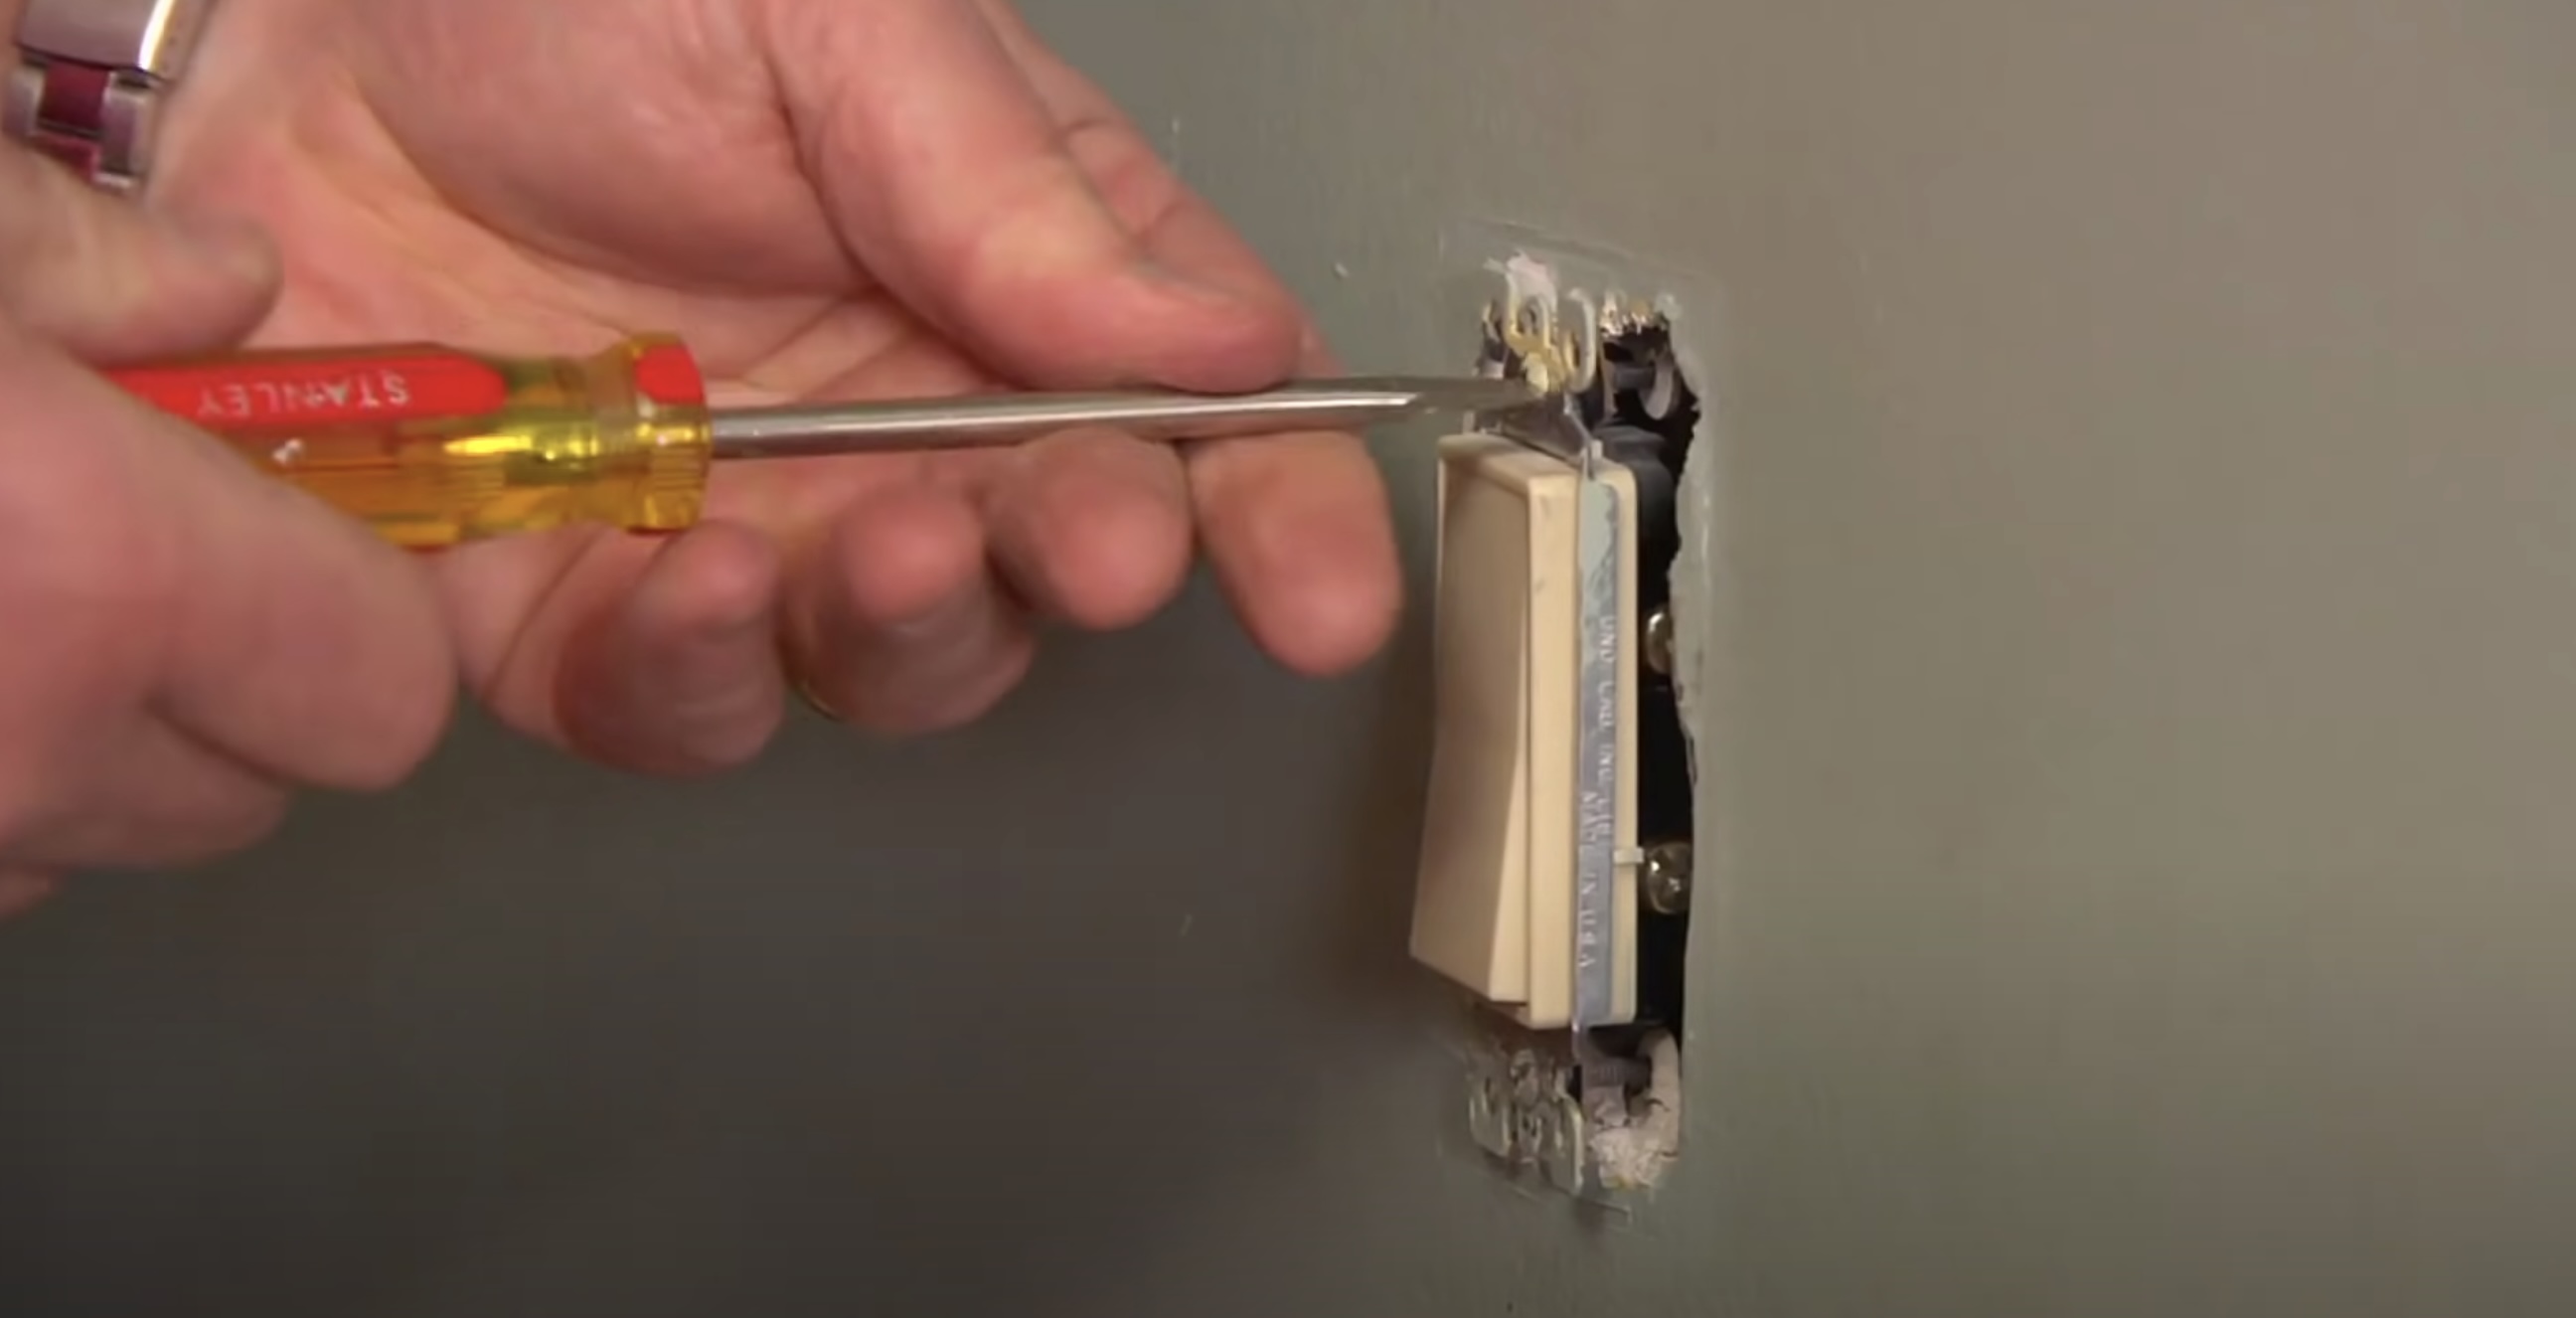
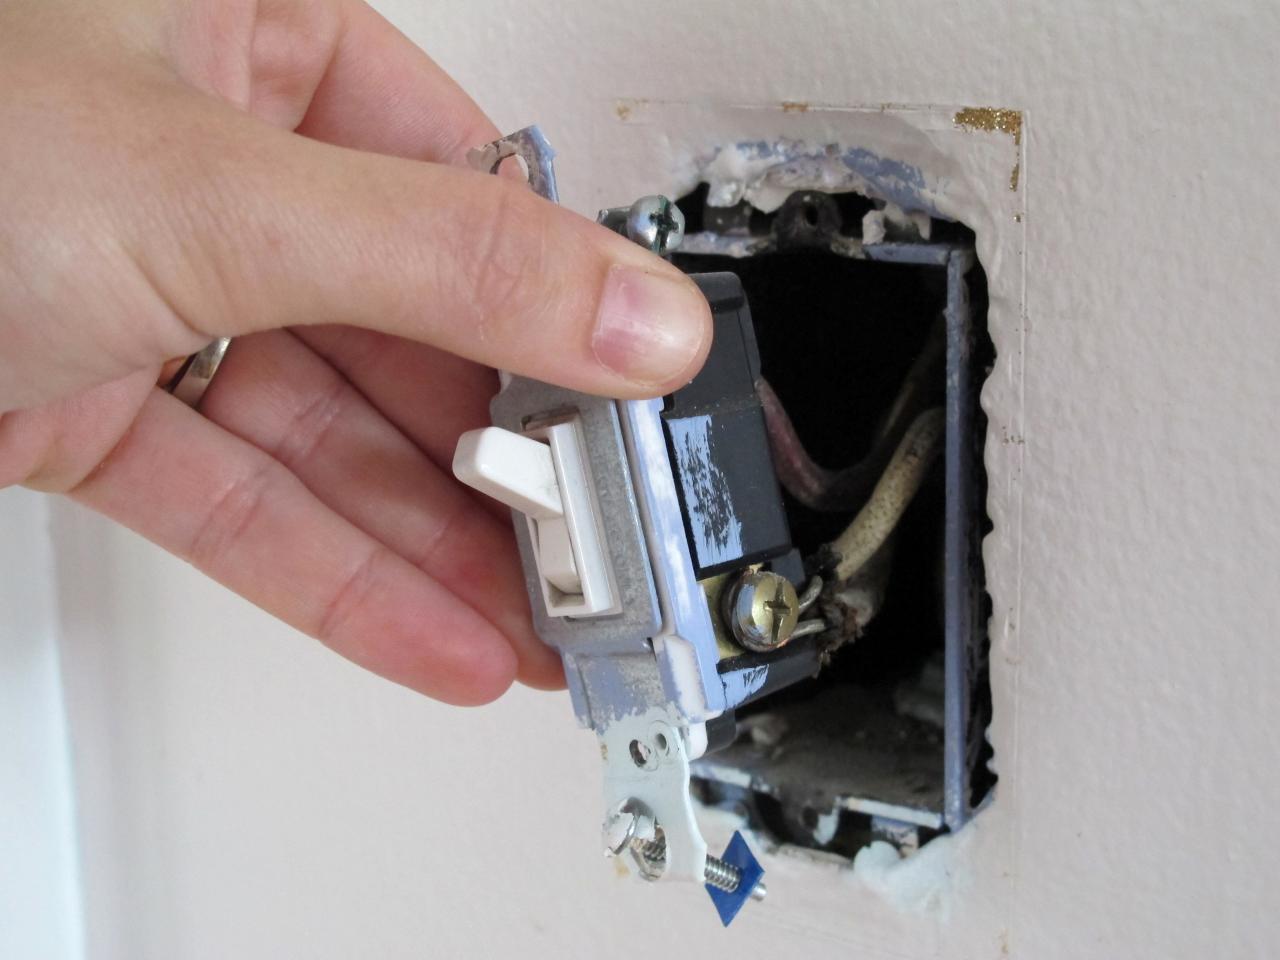
- Remove the existing switch plate: Using a screwdriver, remove the screws that secure the switch plate to the wall. Gently pull the switch plate away from the wall to expose the wiring behind it.
- Inspect the wiring: Take a close look at the wiring inside the electrical box. Look for a green or copper wire that is connected to the metal box or the electrical grounding system. This wire is typically the ground wire.
- If you see a green or copper wire that is securely connected, congratulations – you have a ground wire! You can proceed with the installation of the dimmer switch.
- If you don’t see a green or copper wire, it means that your electrical setup does not have a ground wire. In this case, you will need to install the dimmer switch without a ground wire, following the appropriate steps to ensure safety.
If you are unsure about whether your electrical setup has a ground wire or if you encounter any difficulties during the inspection process, it is strongly recommended to consult with a professional electrician. They will be able to accurately assess your wiring and provide guidance on the best course of action.
Now that you have determined whether you have a ground wire available, we can move on to the next step: installing a dimmer switch without a ground wire. Although it is not ideal to install a dimmer switch without a ground wire, it can be done safely by following the proper wiring procedures. We will guide you through the process step by step to ensure a successful installation. Let’s get started!
Installing a Dimmer Switch without a Ground Wire
Installing a dimmer switch without a ground wire requires careful attention to ensure the safety of the electrical setup. While it is always preferable to have a ground wire for added protection, it is possible to install a dimmer switch without one by following these steps:
- Turn off the power: Before starting any electrical work, turn off the power at the circuit breaker to ensure your safety.
- Remove the existing switch: Using a screwdriver, unscrew the screws that secure the existing switch to the electrical box. Carefully pull the switch out, exposing the wiring behind it.
- Inspect the wiring: Take a close look at the existing wiring. Identify the two wires connected to the existing switch – the hot wire (usually black or red) and the neutral wire (typically white). It is important to note the color coding of the wires, as they will guide you in the installation process.
- Prepare the dimmer switch: Follow the manufacturer’s instructions to prepare the dimmer switch for installation. This may involve attaching the wires provided with the dimmer switch or removing any excess insulation from the existing wires.
- Connect the wires: Connect the hot wire from the dimmer switch to the hot wire in the electrical box, using a wire connector. Make sure the connection is secure and tightly fastened.
- Connect the neutral wire: Connect the neutral wire from the dimmer switch to the neutral wire in the electrical box, using a wire connector. Again, ensure a secure and tight connection.
- Tuck the wires: Carefully tuck the connected wires into the electrical box, making sure they are not pinched or touching any metal components.
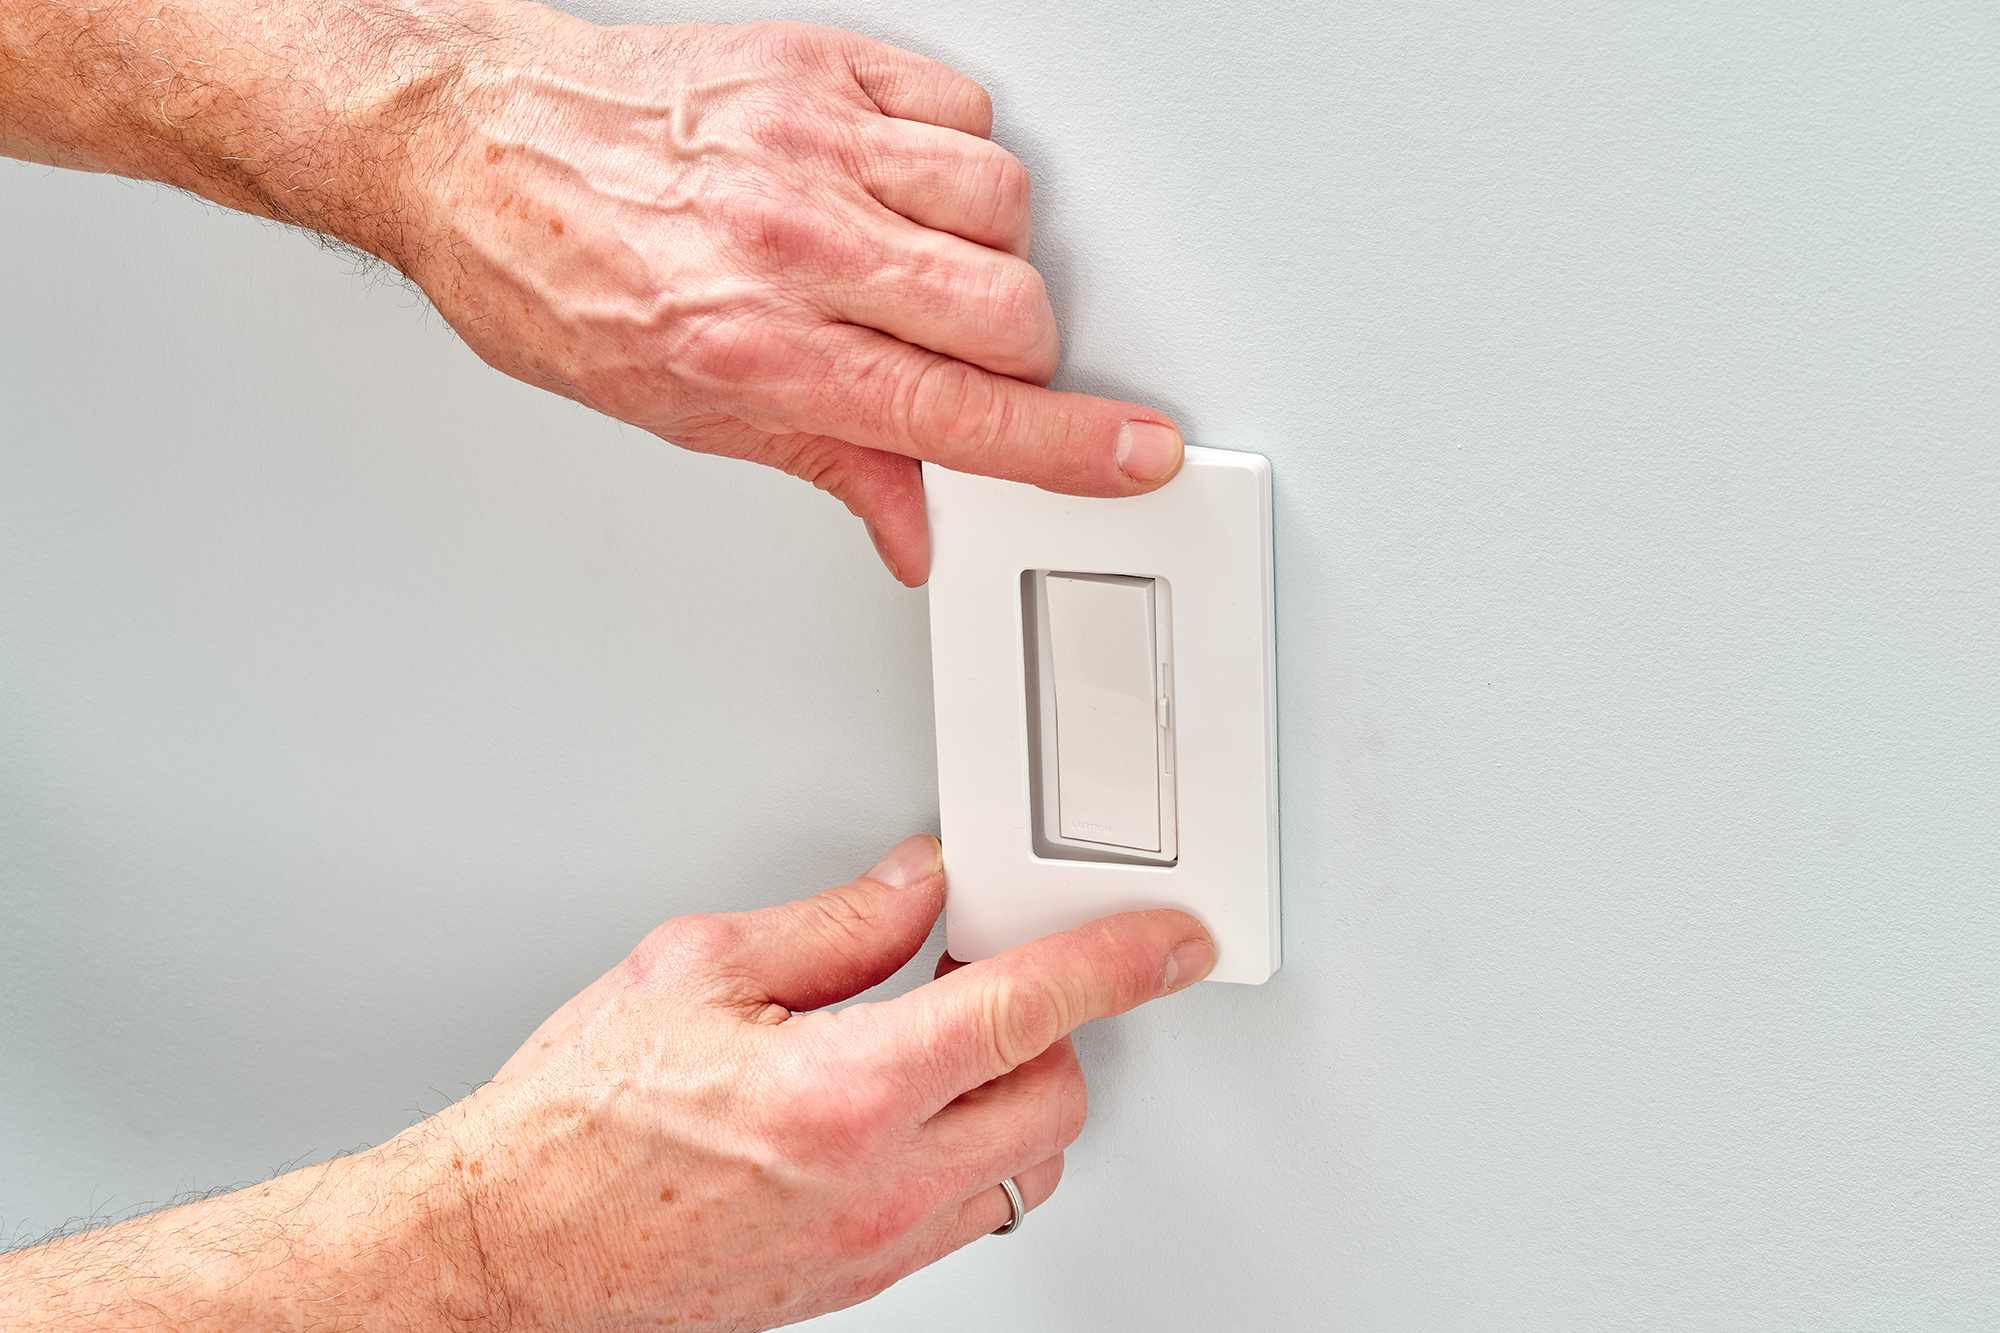
- Attach the dimmer switch: Align the dimmer switch with the screw holes in the electrical box. Secure it in place by screwing in the provided screws.
- Attach the switch plate: Place the switch plate over the dimmer switch and secure it to the electrical box using the screws provided.
It is important to note that the lack of a ground wire may affect the performance of the dimmer switch. In some cases, dimmer switches without a ground wire may produce a slight buzzing sound or exhibit minor performance issues. However, these issues are generally harmless and do not pose a safety risk.
After completing the installation, it is crucial to test the dimmer switch to ensure it is functioning properly. Turn on the power at the circuit breaker and test the dimming function by adjusting the brightness of the light. If you experience any issues or notice any abnormalities, it is recommended to consult with a licensed electrician to address the problem.
Remember, if at any point during the installation process you feel uncomfortable or unsure, it is best to seek the assistance of a professional electrician. They have the expertise and knowledge to ensure a safe and successful installation.
Now that you know how to install a dimmer switch without a ground wire, let’s move on to testing and troubleshooting to ensure everything is in working order.
If your dimmer switch has no ground wire, you can still install it by connecting the hot wire to the black wire on the switch, the neutral wire to the white wire, and capping off the ground wire with a wire nut. Always consult a professional if unsure.
Steps for Wiring a Dimmer Switch without a Ground Wire
Wiring a dimmer switch without a ground wire requires attention to detail and adherence to proper wiring procedures to ensure safety. Follow these steps closely to successfully wire your dimmer switch:
- Turn off the power: Before you begin any electrical work, ensure the power is turned off at the circuit breaker for the area you’ll be working in.
- Remove the existing switch plate: Unscrew the screws that secure the switch plate to the wall and carefully remove it, exposing the wiring behind it.
- Inspect the wiring: Take a close look at the available wiring. Identify the hot wire (usually black or red) and the neutral wire (typically white). These are the wires you’ll be working with to install the dimmer switch.
- Prepare the dimmer switch: Before connecting any wires, read the manufacturer’s instructions to familiarize yourself with the specific requirements for your dimmer switch model.
- Connect the hot wire: Using a wire connector or terminal screw, connect the hot wire from the dimmer switch to the hot wire in the electrical box. Ensure the connection is secure.
- Connect the neutral wire: Connect the neutral wire from the dimmer switch to the neutral wire in the electrical box. Use a wire connector or terminal screw and ensure a secure connection.
- Tuck the wires: Carefully tuck the connected wires into the electrical box, ensuring they are not pinched or touching any metal parts.
- Attach the dimmer switch: Align the dimmer switch with the screw holes in the electrical box and secure it in place using the provided screws.
- Attach the switch plate: Place the switch plate over the dimmer switch and secure it to the electrical box using the screws provided.
Throughout the wiring process, it’s essential to handle wires with care, ensuring no copper strands are exposed. Additionally, be mindful of any other wires or components in the electrical box to avoid interference or accidental contact.
Once the dimmer switch is securely installed, you can move on to the testing and troubleshooting phase to ensure it functions as expected. Turn on the power at the circuit breaker, and test the dimming functionality by adjusting the brightness of the light. If any issues arise or the dimmer switch does not work correctly, consult a licensed electrician to address the problem.
Remember to always prioritize safety when working with electricity. If you’re unsure or uncomfortable with any aspect of the wiring process, it’s best to seek the assistance of a professional electrician.
With the dimmer switch successfully wired, tested, and working, you can now enjoy the benefits of adjustable lighting in your space. Keep in mind that although it’s possible to install a dimmer switch without a ground wire, having a professional electrician assess and update the wiring in your home is always recommended for optimal safety and performance.
Read more: How To Wire A Dimmer Switch With 4 Wires
Testing and Troubleshooting
After successfully installing a dimmer switch without a ground wire, it is crucial to test the switch to ensure it is functioning properly and troubleshoot any issues that may arise. Follow these steps to test and troubleshoot your dimmer switch:
- Turn on the power: Make sure the power is turned on at the circuit breaker for the area you installed the dimmer switch in.
- Test the dimming function: Turn on the light connected to the dimmer switch and adjust the dimming knob or button to various levels. Observe if the light smoothly dims or if there are any issues such as flickering, buzzing, or erratic behavior.
- Check for proper light bulb compatibility: Verify that the light bulbs you are using are compatible with the dimmer switch. Different types of dimmers have specific compatibility requirements, and using incompatible bulbs may cause performance issues.
- Inspect the wiring connections: Carefully inspect the wiring connections inside the electrical box to ensure they are secure and properly connected. Loose or faulty connections can cause issues with the dimmer switch’s performance. If necessary, tighten any loose connections.
- Check for overheating: While the dimmer switch is in use, touch it lightly to see if it feels unusually warm or hot to the touch. Overheating can be an indication of an underlying problem and should be addressed immediately by a professional electrician.
- Listen for buzzing sounds: Pay attention to any buzzing or humming sounds coming from the dimmer switch or light fixture. Excessive noise can be an indication of compatibility issues or a faulty dimmer switch.
- Consider a dimmer switch replacement: If you encounter persistent issues with the dimming function, flickering, buzzing, or other abnormal behavior, it may be necessary to replace the dimmer switch. Consult the manufacturer’s instructions for troubleshooting steps specific to your dimmer switch model.
If you experience any issues with the dimmer switch or are unsure about any aspect of its functionality, it is strongly recommended to consult with a licensed electrician. They have the expertise to assess and address any underlying electrical issues that may be affecting the dimmer switch’s performance.
Safety should always be a priority when troubleshooting electrical components. If you are not comfortable or experienced in dealing with electrical systems, it is best to seek professional assistance to ensure a safe and effective solution to any dimmer switch issues.
By testing and troubleshooting the dimmer switch, you can ensure that it is operating properly and enjoy the benefits of adjustable lighting in your space. Remember, if any doubts or concerns arise during the process, it is always better to seek professional help to avoid any potential risks or hazards.
Safety Considerations
When working with electrical components, including installing a dimmer switch without a ground wire, it is crucial to prioritize safety. Here are some important safety considerations to keep in mind:
- Turn off the power: Always turn off the power at the circuit breaker before starting any electrical work. This step is necessary to protect yourself from electric shock and prevent damage to the electrical system.
- Use proper tools and equipment: Ensure that you have the necessary tools and equipment to safely complete the installation. This may include screwdrivers, wire connectors, and insulated gloves. Using the correct tools will not only make the installation process smoother but also minimize the risk of accidents.
- Inspect the wires: Before making any connections, carefully inspect the wires for any signs of damage or wear. Cracked insulation or exposed copper can cause short circuits or electrical malfunctions. Replace any damaged wires before proceeding.
- Avoid overloading the circuit: Before installing the dimmer switch, ensure that the circuit you are working on can handle the additional load. Check the circuit’s amp rating and make sure it is adequate for the combined load of the dimmer switch and the light fixture.
- Properly secure the wires: Ensure that all wires are securely connected and fastened with wire connectors or terminal screws. Loose connections can cause electrical arcing, leading to fires or other hazardous situations.
- Prevent wire damage: Take care to avoid damaging the wires during installation. Do not pinch or crimp them and ensure they are away from sharp edges or moving parts in the electrical box. Damaged wires can cause short circuits or electrical shocks.
- Follow manufacturer’s instructions: Every dimmer switch model may have specific installation requirements. Read and follow the manufacturer’s instructions carefully to ensure proper installation and functionality of the dimmer switch.
- Consider consulting a professional: If you are unsure about any aspect of the installation process or if you encounter difficulties, it’s best to seek the assistance of a licensed electrician. They have the expertise and knowledge to address any electrical issues and ensure the safety of your installation.
- Test the dimmer switch: After installation, test the dimmer switch to ensure it is functioning properly. Check for any abnormal behavior, such as flickering lights or buzzing noises. These could indicate compatibility issues or other wiring problems.
- Never work on live circuits: Always assume that any electrical circuit is live until you have turned off the power and verified it with a voltage tester. Working on live circuits can result in severe injuries or even death.
Remember, safety should be your top priority when working with electrical components. If you are uncomfortable or unsure about any step of the installation process, it is best to seek the assistance of a professional electrician to ensure a safe and successful installation.
By following these safety considerations, you can install a dimmer switch without a ground wire while minimizing the risk of electrical hazards and ensuring the safety of your electrical system.
Conclusion
Congratulations! You have reached the end of our guide on how to install a dimmer switch without a ground wire. We hope this article has provided you with the necessary information and guidance to successfully install a dimmer switch and enjoy adjustable lighting in your space.
We started by understanding the basics of dimmer switches and their role in controlling the intensity of light. We then explored the importance of a ground wire in electrical setups and how to determine if you have one available.
We discussed the steps involved in installing a dimmer switch without a ground wire, emphasizing the importance of safety throughout the process. Properly connecting the hot and neutral wires and securely attaching the dimmer switch are key to a safe installation.
We also highlighted the significance of testing and troubleshooting the dimmer switch. By carefully checking the functionality, compatibility, and wiring connections, you can ensure the switch is working as expected and troubleshoot any issues that may arise.
Lastly, we emphasized the importance of safety considerations when working with electrical components. Turning off the power, using proper tools, inspecting wires for damage, and seeking professional help when needed are crucial steps for a safe installation.
Remember, if you ever feel uncomfortable or unsure about any aspect of the installation process, it is best to consult with a licensed electrician. They have the expertise and knowledge to ensure a safe and effective installation.
By following the guidelines provided in this article, you can confidently install a dimmer switch without a ground wire and enjoy the benefits of adjustable lighting in your home or workspace. Enjoy the ambience and flexibility that a dimmer switch brings to your lighting setup!
Frequently Asked Questions about How To Install A Dimmer Switch With No Ground Wire
Was this page helpful?
At Storables.com, we guarantee accurate and reliable information. Our content, validated by Expert Board Contributors, is crafted following stringent Editorial Policies. We're committed to providing you with well-researched, expert-backed insights for all your informational needs.


0 thoughts on “How To Install A Dimmer Switch With No Ground Wire”