
Articles
How To Wire Electrical Cord
Modified: October 20, 2024
Learn how to wire electrical cords with our informative articles. Discover step-by-step guides and expert tips to ensure safe and efficient cord connections.
(Many of the links in this article redirect to a specific reviewed product. Your purchase of these products through affiliate links helps to generate commission for Storables.com, at no extra cost. Learn more)
Introduction
Wiring an electrical cord is an essential skill that can come in handy in various situations. Whether you’re replacing a damaged cord or creating a custom extension cord, knowing how to wire an electrical cord properly is crucial for safety and functionality.
In this article, we will guide you through the process of wiring an electrical cord step by step. We will cover the tools and materials needed, as well as provide detailed instructions on how to prepare the cord, strip the wires, connect them, and secure the connection. By the end of this article, you will have the knowledge and confidence to wire an electrical cord like a pro.
Key Takeaways:
- Properly wiring an electrical cord requires gathering the right tools, preparing the cord, stripping and connecting the wires, and securing the connection. Testing the cord is crucial to ensure safety and functionality.
- Prioritize safety throughout the wiring process, and always consult manufacturer’s instructions. With the knowledge gained from this article, you can confidently wire electrical cords for various applications, saving time and money.
Read more: How To Wire A Switch Into An Electrical Cord
Tools and Materials Needed
Before you start wiring an electrical cord, it’s important to gather all the necessary tools and materials. Here is a list of items you will need:
- Electrical cord
- Wire strippers
- Utility knife
- Electrical tape
- Wire connectors
- Wire cutter
- Wire crimping tool
- Marker or pen
- Safety glasses
The electrical cord is the main component of your project. Make sure you choose a cord that is suitable for your intended use, considering factors such as length, voltage rating, and ampacity.
Wire strippers are essential for removing the outer insulation of the cord and revealing the individual wire conductors. Look for a pair of wire strippers that can handle the gauge of wire you are working with.
A utility knife can be used as an alternative to wire strippers if you don’t have access to them. However, be extra cautious when using a utility knife, as it can be more challenging to strip the wires accurately.
Electrical tape is used to insulate and protect the exposed wires after they are connected. It also helps to secure the cord and prevent any strain on the connections.
Wire connectors, also known as wire nuts, are necessary to join the wires together securely. Choose wire connectors that are appropriate for the wire gauge you are using.
A wire cutter is handy for trimming the wires to the desired length, while a wire crimping tool is used to make additional connections or crimps if required.
Lastly, safety glasses are recommended to protect your eyes from any potential hazards during the wiring process.
By gathering all the necessary tools and materials beforehand, you can ensure a smooth and efficient wiring process.
Step 1: Gather the Necessary Equipment
Before diving into the process of wiring an electrical cord, it is essential to gather all the necessary equipment and materials. By doing so, you will have everything within reach, making the task easier and more efficient.
Here are the key items you will need:
- Electrical cord: Choose a cord that is suitable for your intended use, considering factors such as length, voltage rating, and ampacity. Ensure that the cord is in good condition, free from any fraying or damage.
- Wire strippers: This tool is used to remove the outer insulation of the cord to expose the individual wire conductors. Ensure that you have the appropriate wire strippers for the gauge of wire you are working with.
- Utility knife: If you don’t have access to wire strippers, a utility knife can be used as an alternative. However, exercise caution and precision when using a utility knife to avoid damaging the wires.
- Electrical tape: This tape is used to insulate and protect the exposed wire connections. It also provides additional security and prevents any strain on the wires.
- Wire connectors: Also known as wire nuts, these connectors are used to join the wires securely. Make sure you select wire connectors that are appropriate for the wire gauge you are using.
- Wire cutter: This tool is handy for trimming the wires to the desired length, ensuring a clean and neat installation.
- Wire crimping tool: If additional connections or crimps are required, a wire crimping tool will be necessary. This tool helps to secure the wires together firmly.
- Marker or pen: Having a marker or pen on hand can be useful for labeling the wires, especially if you are working with multiple wires.
- Safety glasses: It is crucial to prioritize safety when working with electrical connections. Wear safety glasses to protect your eyes from any potential hazards.
By ensuring you have all these necessary equipment and materials at the beginning of the project, you can streamline the wiring process and complete it efficiently.
Step 2: Prepare the Electrical Cord
Once you have gathered all the necessary equipment and materials, it is time to prepare the electrical cord for wiring. This step involves inspecting the cord, determining the length you need, and making any necessary adjustments.
Here are the steps to prepare the electrical cord:
- Inspect the cord: Start by examining the entire length of the electrical cord for any signs of damage, such as fraying insulation or exposed wires. If you notice any issues, it is crucial to replace the cord to ensure safety.
- Determine the desired length: Measure the required length of the cord for your specific application. Keep in mind any potential restrictions or limitations.
- Select an appropriate location: Choose a clean and well-lit workspace where you can comfortably work on the cord without any obstructions.
- Ensure proper ventilation: If working indoors, make sure the area is well-ventilated to prevent the accumulation of fumes from the wire stripping process.
- Secure the cord: Find a stable surface to secure the cord during the preparation process. This will prevent any unnecessary movement and facilitate easier handling.
By properly preparing the electrical cord, you are setting the stage for a successful wiring process. Take the time to inspect the cord, measure the desired length, and create a suitable workspace. This will contribute to a smooth and efficient installation.
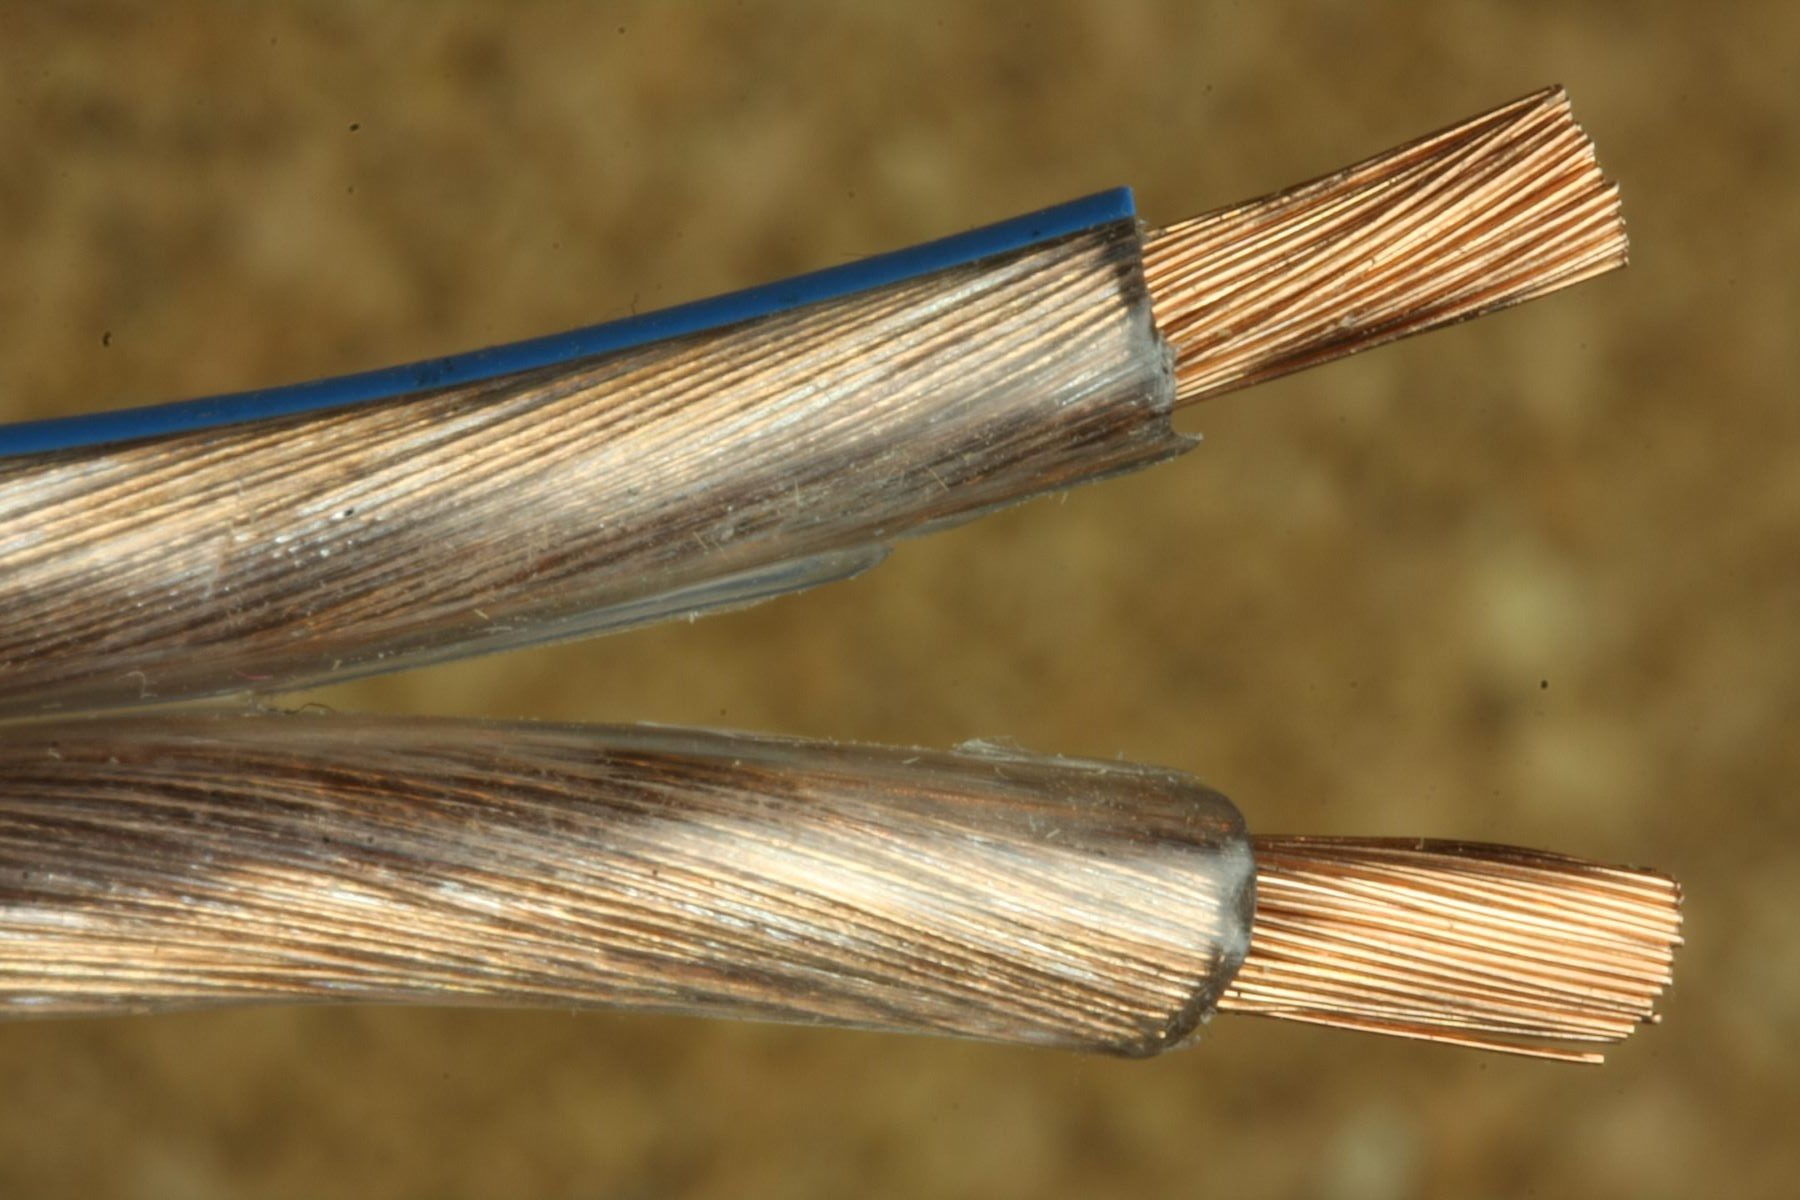
Step 3: Strip the Wires
Stripping the wires is a crucial step in wiring an electrical cord as it allows for a secure and proper connection. By removing the outer insulation of the wires, you create access to the individual wire conductors. This step requires precision and attention to detail.
Here is how to strip the wires:
- Put on safety glasses: Before starting the wire stripping process, ensure you are wearing safety glasses to protect your eyes from any potential hazards.
- Identify the end of the cord: Determine which end of the electrical cord you will be working with. Keep in mind that one end may already have a plug attached, while the other end may need to be wired.
- Measure the amount to strip: Use the wire strippers to measure and set the appropriate length of insulation to be removed. Refer to the instruction manual or consult an electrical wiring guide to determine the suitable length.
- Choose the correct wire gauge slot: Wire strippers typically have multiple slots labeled with various wire gauges. Select the correct slot that matches the gauge of your wire.
- Position the wire stripper: Position the wire stripper over the cord, aligning the marked length with the cutting edge of the wire stripper. Keep a firm grip on the cord and the wire stripper to maintain control.
- Strip the insulation: Squeeze the handles of the wire stripper firmly to cut through the outer insulation. Once the insulation is scored, carefully and smoothly pull the wire stripper away from the cord, sliding it along the length of the cord to remove the insulation.
- Inspect the exposed wires: After stripping the insulation, examine the exposed wire conductors. Ensure that each wire is free from any damage or fraying. Trim any excess strands if necessary.
- Repeat for the other end: If you intend to wire both ends of the cord, repeat the stripping process for the other end following the same steps.
By carefully and accurately stripping the wires, you create a clean and precise area for making connections. Remember to always follow safety precautions and handle the wire stripper with care to prevent any injuries.
When wiring an electrical cord, always make sure to match the wire gauge with the amperage rating of the appliance. Use proper insulation and secure connections to prevent electrical hazards.
Read more: Where To Buy Electrical Cord Wire
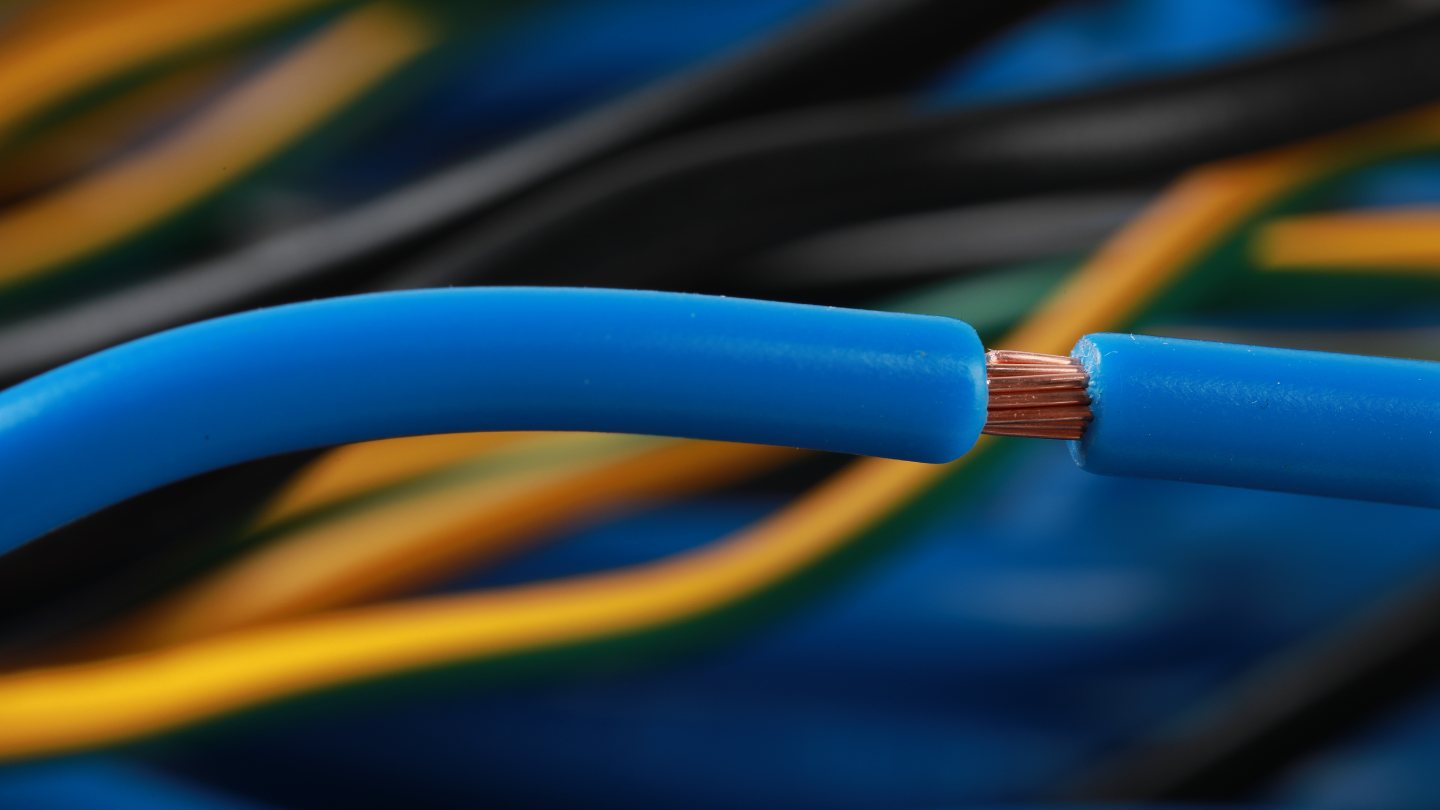
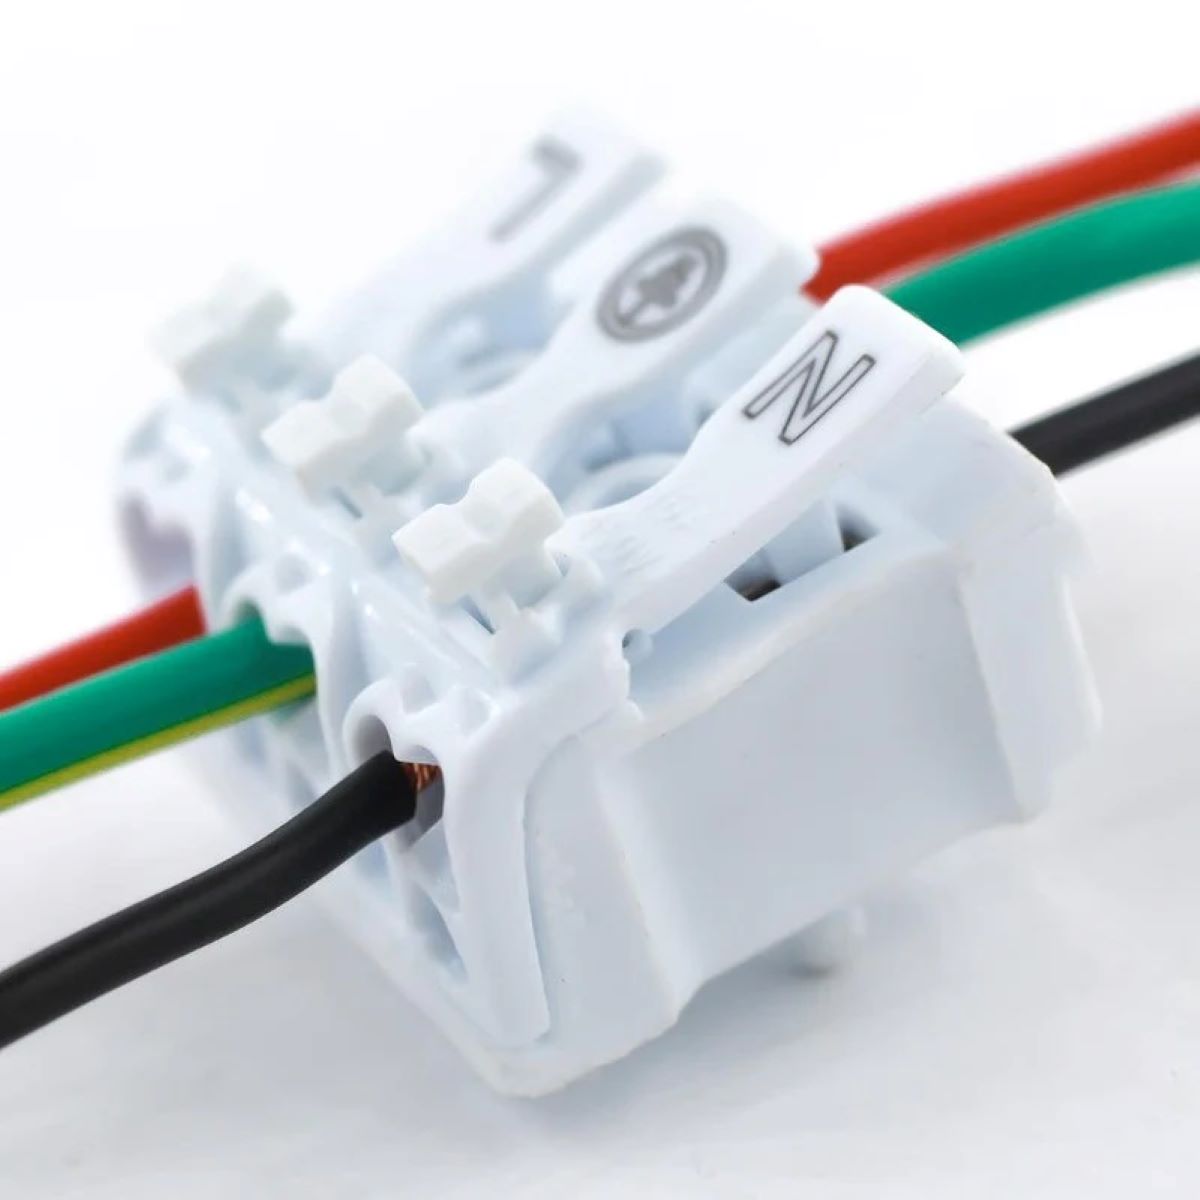
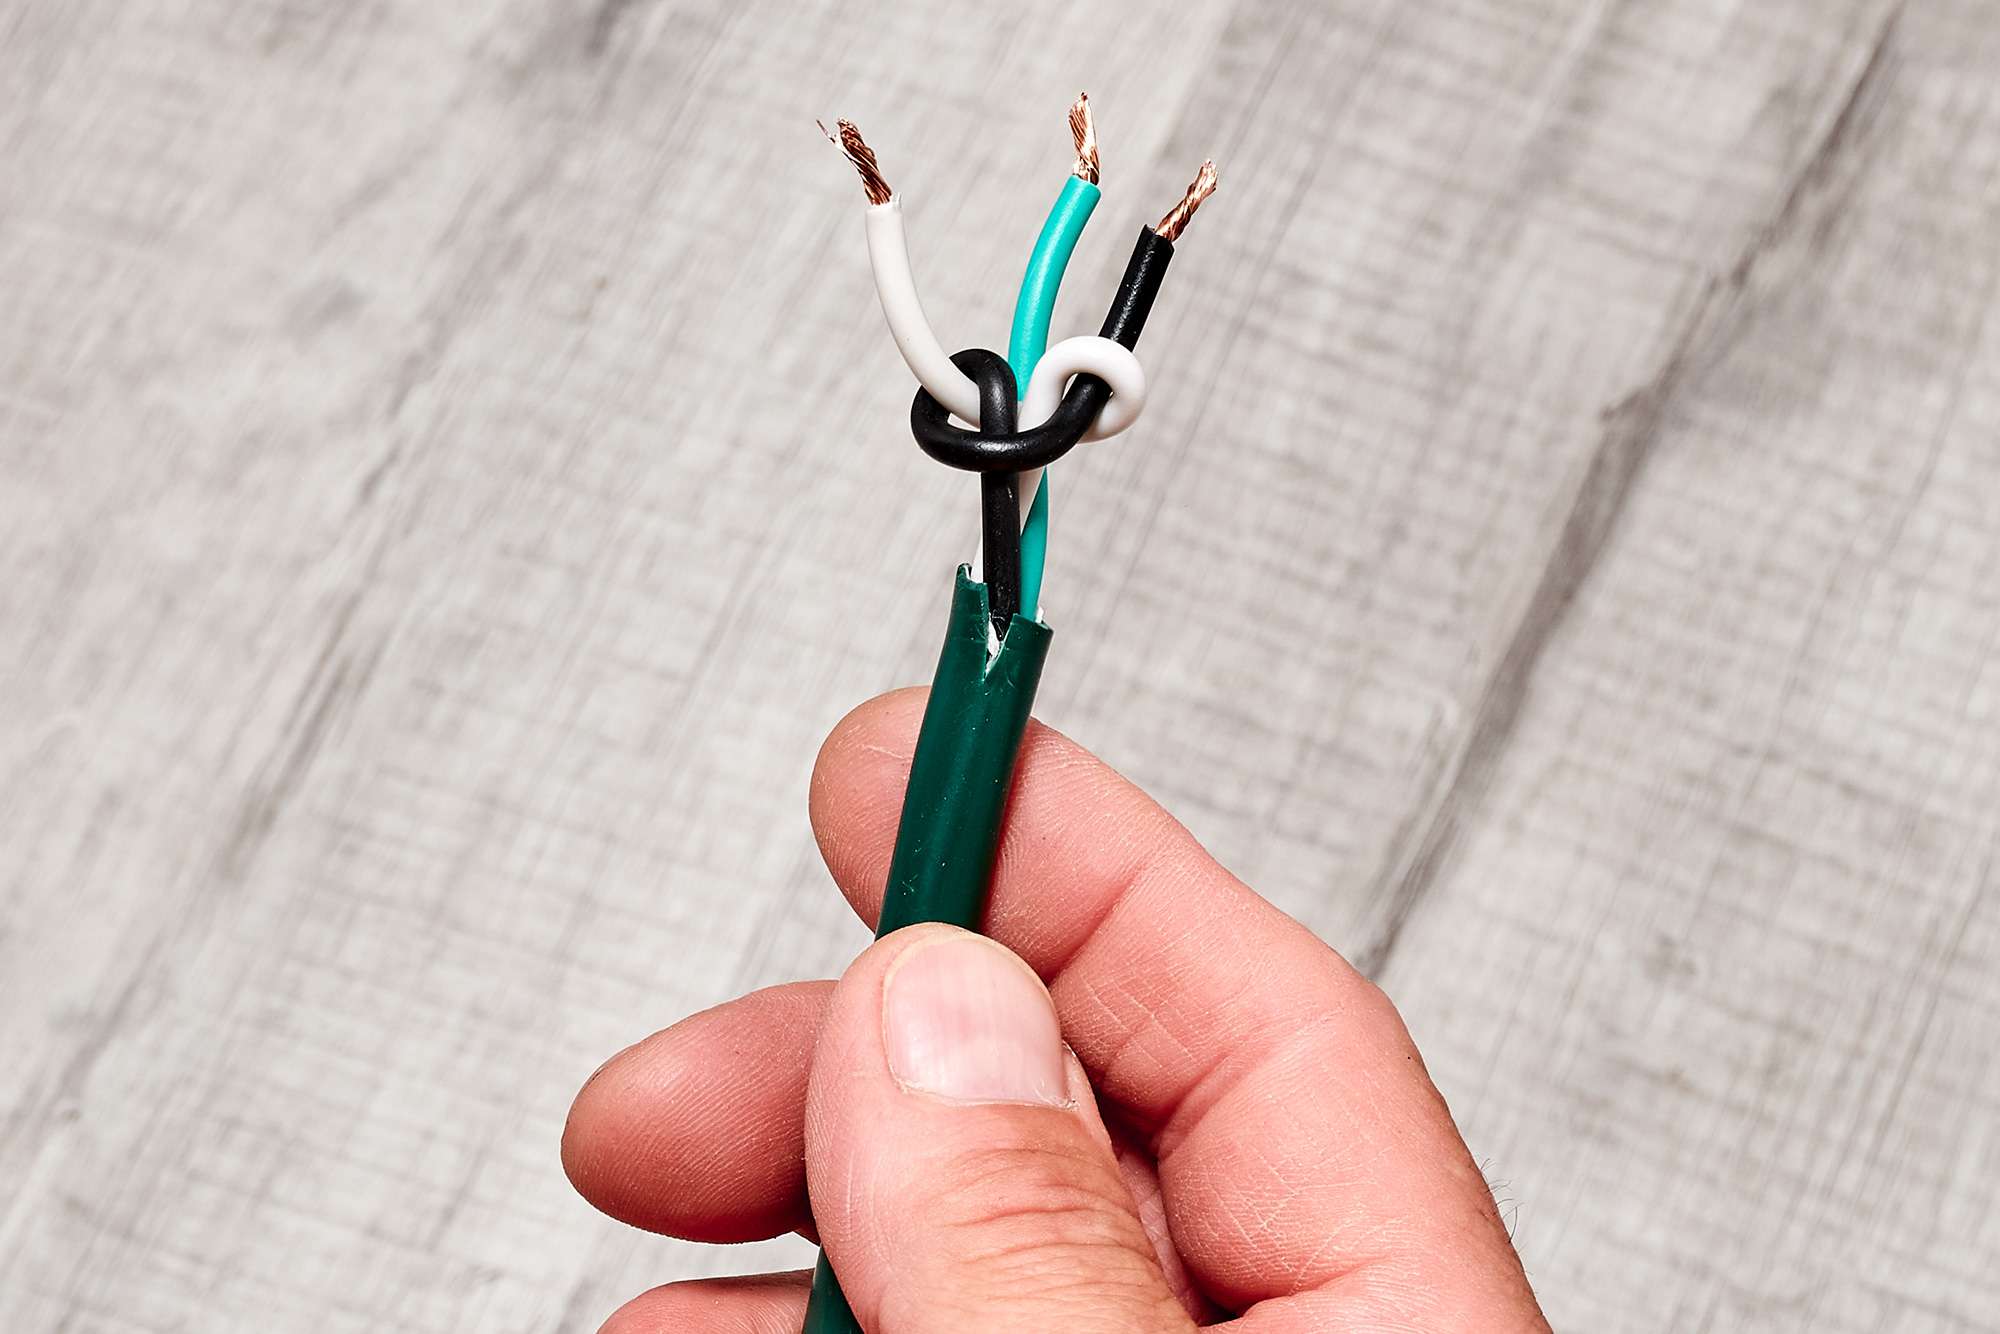
Step 4: Connect the Wires
Connecting the wires is a critical step in wiring an electrical cord. This step involves joining the stripped wires together to create a secure and reliable connection. Properly connecting the wires ensures the conductivity and functionality of the cord.
Follow these steps to connect the wires:
- Organize the wires: Arrange the stripped wires in an organized manner, taking care to identify the corresponding wires. This is particularly important if you are connecting multiple wires.
- Twist the wires together: Take the wires you want to connect and twist them together in a clockwise direction. Ensure that the twisted wires are tight and firmly secured.
- Insert the wire connectors: Place a wire connector over the twisted wires, ensuring that it covers the exposed portion of the wires. Push the wire connector down until it is snugly fitted over the twisted portion.
- Tighten the wire connector: Using a twisting motion, firmly tighten the wire connector onto the twisted wires. Make sure the connection is secure and the wires are not loose or easily pulled apart.
- Repeat for other connections: If you have multiple wires to connect, repeat the above steps for each connection. Take your time to ensure that each wire is securely connected using the proper wire connectors.
It is crucial to note that the type and size of the wire connectors may vary depending on the wire gauge and the specific application. Always refer to the manufacturer’s instructions or consult with an electrical professional if you are unsure about the appropriate wire connectors to use.
By connecting the wires properly, you ensure a solid and stable electrical connection. Take care to follow the steps accurately and confirm that each wire is securely twisted and fittingly connected before proceeding to the next step.
Step 5: Secure the Connection
Securing the connection is a crucial step to ensure the safety and reliability of the wired electrical cord. This step involves insulating the connection and providing additional support to prevent any strain or damage.
Here are the steps to secure the connection:
- Wrap the connection with electrical tape: Starting from the base of the wire connector, wrap the connection with electrical tape. Begin a few inches above the connection and continue wrapping until you reach a few inches below the connection. Make sure the tape is pulled tightly and securely adheres to the cord.
- Apply multiple layers of electrical tape: To enhance the insulation and durability of the connection, apply multiple layers of electrical tape. Each layer should overlap with the previous one, ensuring complete coverage of the connection.
- Tug the wires gently: After securing the connection with electrical tape, gently tug on the wires to ensure that the connection is solid and does not come apart easily. If the connection feels loose or unstable, recheck the twisting and tightening of the wires.
- Shorten any excess wires: If there is excessive wire length beyond the connection point, use a wire cutter to trim off the excess. Leaving excess wires can increase the risk of tangling or damaging the connection.
- Inspect the secured connection: Once the connection is secured and the excess wires are trimmed, inspect the entire wired section of the cord. Look for any exposed or bare wires, and ensure that all connections are properly insulated and protected.
By securing the connection with electrical tape and inspecting the overall wiring, you enhance the safety and longevity of the electrical cord. Take the time to wrap the connection neatly and ensure that it is well-insulated and protected from any potential damage.
Step 6: Test the Electrical Cord
After completing the wiring process, it is essential to test the electrical cord to ensure its functionality and safety. Testing the cord will verify that the connections are secure and that the cord is ready for use.
Follow these steps to test the electrical cord:
- Ensure that all connections are secure: Double-check that all the wire connections are properly twisted, secured with wire connectors, and insulated with electrical tape. Make sure there are no loose or exposed wires.
- Plug in the cord: Insert the plug end of the cord into a nearby electrical outlet. Ensure that the outlet is in good working condition and compatible with the voltage requirements of the cord.
- Check for power flow: Once the cord is plugged in, check for power flow by turning on the device or appliance that the cord is connected to. If the device operates as expected, it is an indication that the wiring and connections are successful.
- Inspect for any issues: While the device is running, closely inspect the cord and connections. Check for any signs of overheating, sparking, or unusual noises. If you notice any problems, immediately unplug the cord and address the issues before attempting to use it again.
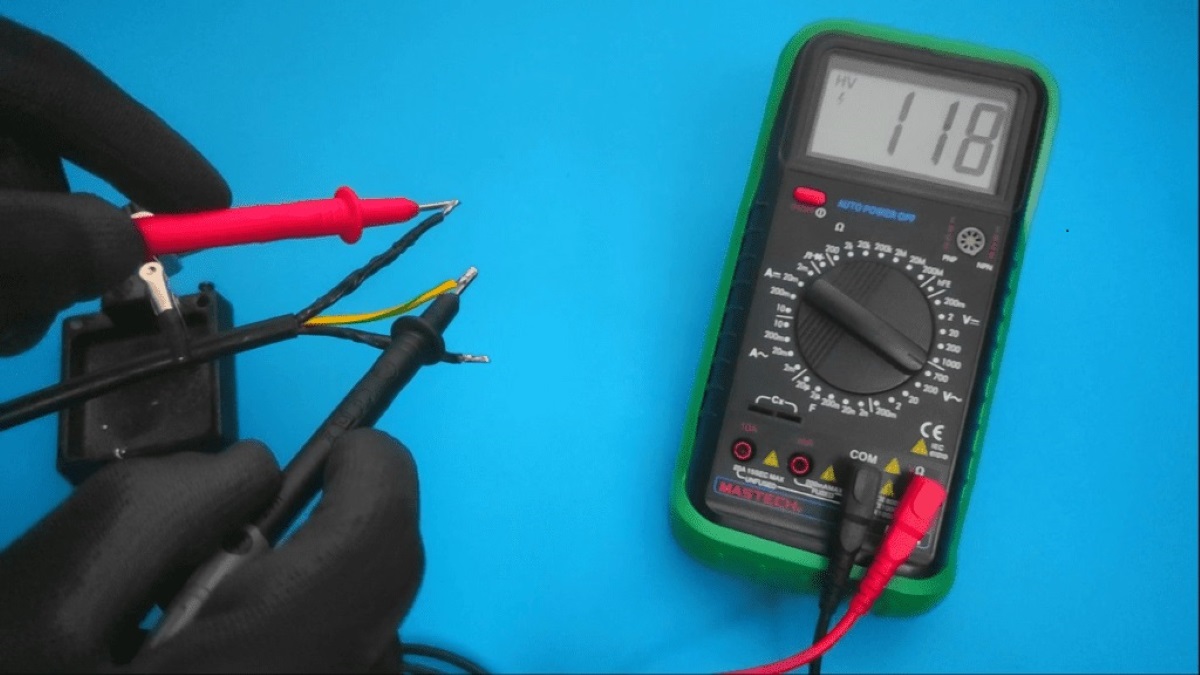
- Perform a continuity test (optional): If you have a continuity tester or a multimeter, you can perform a continuity test to verify the integrity of the wiring. Follow the instructions provided with the tester or consult an electrical professional for guidance.
- Unplug the cord: After testing the cord and ensuring proper functionality, safely unplug it from the electrical outlet. Make sure to grip the plug firmly and pull directly from the outlet.
By testing the electrical cord, you can identify any potential issues and address them before using the cord. It is essential to prioritize safety and follow all necessary precautions when testing electrical connections.
If you encounter any problems during the testing process or are unsure about the results, it is recommended to consult with an electrician or qualified professional for further assistance.
Conclusion
Wiring an electrical cord may seem like a daunting task, but by following the step-by-step instructions provided in this article, you can successfully wire a cord with confidence. Remember to prioritize safety throughout the process and take precautions to protect yourself and your electrical connections.
By gathering the necessary tools and materials, preparing the electrical cord, stripping the wires, connecting them securely, and properly securing the connection, you can ensure a well-wired and functional electrical cord. Additionally, testing the cord is crucial to verify its performance and safety before using it for your intended purpose.
Always consult the manufacturer’s instructions and guidelines for specific details regarding your electrical cord and the devices you are connecting to it. If you’re unsure about any aspect of the wiring process, it is recommended to seek assistance from a qualified electrician.
With the knowledge gained from this article, you are equipped to wire electrical cords for various applications. Whether you’re replacing a damaged cord or creating a custom extension cord, the ability to wire an electrical cord is a valuable skill that can save you time and money.
Remember, safety should always be the top priority. Exercise caution, follow the necessary safety measures, and never work on live electrical circuits. By taking the necessary precautions and carefully following the steps outlined in this article, you can successfully wire an electrical cord and ensure the safe and efficient functioning of your electrical devices.
Frequently Asked Questions about How To Wire Electrical Cord
Was this page helpful?
At Storables.com, we guarantee accurate and reliable information. Our content, validated by Expert Board Contributors, is crafted following stringent Editorial Policies. We're committed to providing you with well-researched, expert-backed insights for all your informational needs.


0 thoughts on “How To Wire Electrical Cord”