Articles
What Nap For Interior Walls
Modified: October 30, 2024
Discover the best articles on how to nap for interior walls, including step-by-step guides and expert tips, for a flawless finish. Enhance your DIY skills with our comprehensive resources.
(Many of the links in this article redirect to a specific reviewed product. Your purchase of these products through affiliate links helps to generate commission for Storables.com, at no extra cost. Learn more)
Introduction
When it comes to painting interior walls, achieving a smooth and flawless finish is crucial. One important step in this process is napping, which involves applying an even layer of paint to the wall surface using various techniques. Napping helps to hide imperfections, create texture, and ensure that the paint adheres properly to the walls.
In this article, we will explore the importance of napping for interior walls and discuss different techniques to achieve the best results. We will also dive into the factors to consider before napping, as well as provide some useful tips for a successful napping process.
Napping not only enhances the appearance of your interior walls but also ensures longevity and durability. By following the right techniques and considering various factors, you can achieve professional-looking results that will leave your walls looking refreshed and attractive.
So, let’s dive deeper into the world of napping and discover how you can transform your interior walls with this essential painting technique.
Key Takeaways:
- Proper napping of interior walls is essential for achieving a flawless and professional finish. Factors such as wall material, paint type, and desired texture play a crucial role in determining the right napping techniques and tools.
- Attention to detail, patience, and adherence to drying and curing times are vital for successful napping projects. Prepping the walls, choosing the right nap material, and using proper techniques contribute to stunning and long-lasting results.
Read more: What Are Interior Walls Made Of
Why Napping is Important for Interior Walls
Napping plays a crucial role in achieving a high-quality finish on interior walls. It offers several benefits that contribute to the overall aesthetics and durability of the painted surface.
First and foremost, napping helps to hide imperfections on the wall surface. No matter how well you prepare the walls, there may still be small dents, scratches, or uneven spots. Napping effectively camouflages these flaws, giving your walls a smoother and more uniform appearance.
Furthermore, napping allows for the creation of various textures and finishes. Depending on the technique used, you can achieve a range of effects, such as a stippled texture, a subtle grainy finish, or a smooth and sleek look. This versatility allows you to customize the appearance of your walls and complement your interior design style.
Another benefit of napping is that it helps the paint adhere properly to the walls. By creating a rougher surface, the paint has more grip and is less likely to peel or chip over time. This is particularly important in high-traffic areas or rooms prone to moisture, where walls are more susceptible to wear and tear.
In addition to improving the visual appeal and durability, napping also contributes to the overall efficiency of the painting process. When the paint is applied evenly and smoothly, it requires fewer coats to achieve the desired coverage. This not only saves time but also reduces the amount of paint needed, making it a cost-effective choice.
Overall, napping is an essential step in painting interior walls. It ensures a flawless finish, hides imperfections, creates texture, improves paint adhesion, and enhances the efficiency of the painting process. By incorporating napping techniques into your painting routine, you can elevate the aesthetics of your interior spaces and enjoy long-lasting results.
Types of Napping Techniques for Interior Walls
When it comes to napping interior walls, there are several different techniques to choose from. Each technique offers unique advantages and is suitable for different wall surfaces and desired finishes.
-
Sanding
Sanding is a popular napping technique that involves using sandpaper to create a smooth and even surface. This technique is particularly useful for walls with rough or uneven textures, as it helps to level them out. Start by sanding the walls with coarse-grit sandpaper, gradually moving to finer-grit sandpaper for a smoother finish. Remember to clean the walls thoroughly after sanding to remove any dust or debris.
-
Brushing
Brushing is a simple and effective napping technique that involves using a paintbrush to create texture on the walls. This technique is commonly used to achieve a stippled or grainy finish. To brush the walls, dip the brush in paint and then lightly press or flick the bristles against the wall. Experiment with different brush sizes and pressures to achieve the desired texture.
-
Read more: What Size Sheetrock For Interior Walls
Rollers and Pads
Rollers and pads are versatile napping tools that can be used to achieve a range of finishes, from smooth to textured. Rollers with a longer nap length are great for creating texture, while shorter naps deliver a smoother finish. Similarly, pads can be used for both texturing and smoothing walls. Roll the paint onto the walls in even and overlapping strokes to ensure a consistent coat.
-
Spray Application
Spray application is a popular napping technique for large and open wall surfaces. It involves using a paint sprayer to evenly distribute paint across the wall. This technique allows for quick and efficient coverage, particularly on walls with complicated textures or surfaces. It’s important to use appropriate safety measures and follow the manufacturer’s instructions when using a paint sprayer.
Choosing the right napping technique depends on various factors, such as the wall material, condition, desired finish, and personal preference. Experimenting with different techniques can help you achieve the desired texture and enhance the overall aesthetics of your interior walls.
Sanding
Sanding is a fundamental napping technique used to create a smooth and even surface on interior walls. It is especially beneficial for walls with rough or uneven textures, as it helps level them out, resulting in a flawless finish.
Before you begin sanding, it’s important to prepare the walls properly. Remove any loose paint, dirt, or debris using a scraper or sandpaper. Fill any holes or cracks with spackle or putty, and allow it to dry completely. Once the surface is clean and dry, you’re ready to start sanding.
Start by selecting the appropriate sandpaper grit. For initial sanding, use a coarse-grit sandpaper (around 80-120 grit) to remove any high spots or imperfections. As you progress, switch to finer-grit sandpaper (around 180-220 grit) for a smoother finish.
Using a sanding block or sanding pole, apply light to moderate pressure and move the sandpaper in a circular or back-and-forth motion. Be sure to sand in a consistent manner to avoid creating uneven spots. Take breaks and check your progress periodically to ensure that you’re achieving the desired level of smoothness.
After sanding, it’s essential to remove all the dust and debris. Wipe down the walls with a damp cloth or use a vacuum with a brush attachment to clean the surface thoroughly. Failing to remove the dust can result in a less-than-ideal paint finish.
Sanding is a time-consuming process, but it is essential for achieving a flawless and even surface. It not only helps to level out any imperfections but also provides a better base for the paint to adhere to. Remember to wear protective gear, such as a dust mask and goggles, to protect yourself from the dust generated during the sanding process.
Overall, sanding is a crucial technique for achieving a smooth and professional-looking finish on interior walls. It helps create a uniform surface, hides imperfections, and ensures that the subsequent layers of paint adhere properly. With patience and attention to detail, sanding can transform your walls and provide an excellent foundation for an impeccable paint job.
Brushing
Brushing is a versatile and straightforward napping technique that can be used to create various textures and finishes on interior walls. It involves using a paintbrush to achieve a stippled or grainy effect, adding visual interest and depth to the painted surface.
Before you start brushing the walls, make sure they are clean and free from any loose paint or debris. If necessary, lightly sand the walls to create a smoother surface.
Choose a high-quality brush with bristles that are appropriate for the texture and effect you want to achieve. A natural bristle brush is typically used for oil-based paints, while synthetic brushes are suitable for water-based paints. Select a brush size that allows you to have good control over the strokes and fits comfortably in your hand.
To create the desired texture, dip the brush into the paint, making sure not to overload it with too much paint. Lightly press the bristles against the wall and then flick your wrist in a quick and controlled motion. The motion will vary depending on the texture you want to achieve. For a stippled texture, short and rapid flicks will work best. For a grainy effect, longer and more deliberate strokes can be used.
As you brush the walls, work in small sections at a time to ensure that the paint remains wet and blendable. Blend each section with the adjacent one to create a seamless look. If you make a mistake or want to modify the texture, blot or gently wipe the painted surface with a cloth or sponge before the paint dries.
It’s important to note that brushing can create a more pronounced texture compared to other napping techniques. Therefore, consider the overall theme and style of your room when deciding whether to use brushing as a napping technique.
After brushing, clean your brush thoroughly with appropriate cleaning agents to maintain its quality and prevent any buildup of dried paint. Store the brush in a clean and dry place for future use.
Brushing is a versatile and enjoyable napping technique that allows you to add depth and texture to your interior walls. The technique provides flexibility and creativity, allowing you to customize the look and feel of your space. By experimenting with brush size, pressure, and motion, you can create unique textures that enhance the overall aesthetics of your walls.
Read more: What Is The Best Color For Interior Walls
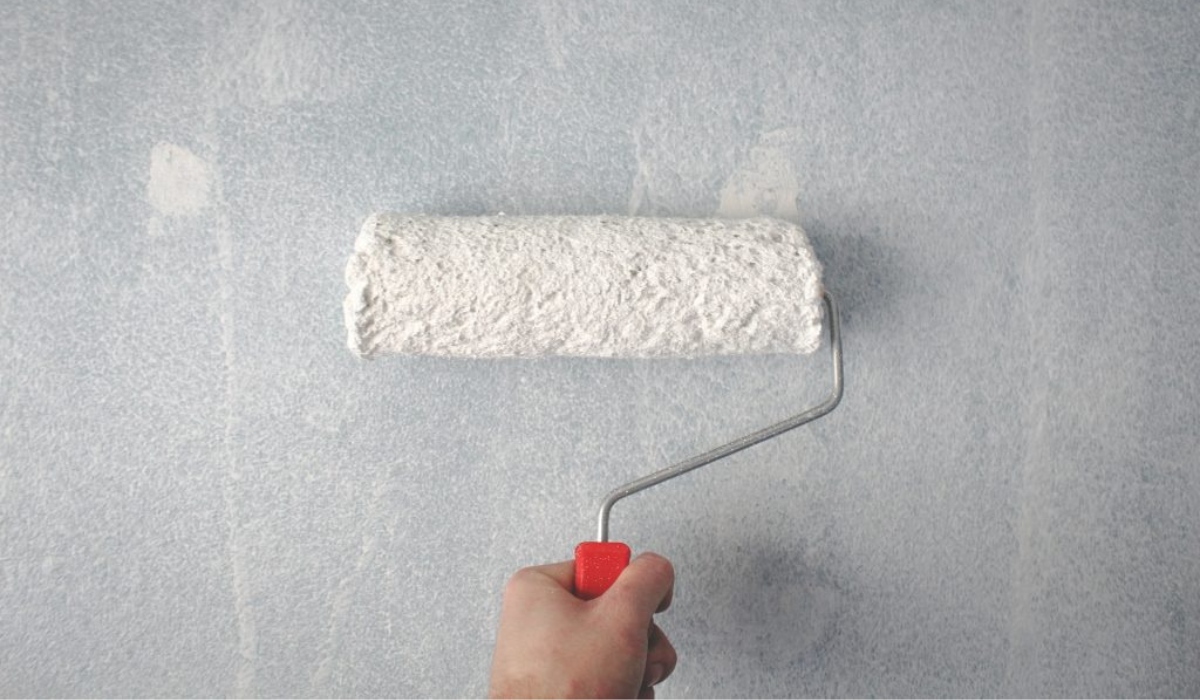
Rollers and Pads
Rollers and pads are versatile napping tools commonly used for painting interior walls. They allow for quick and efficient coverage while providing a range of finishes, from smooth to textured. Rollers are available in various sizes and nap lengths, allowing you to customize the appearance of your walls.
Before using rollers or pads, prepare your walls by cleaning them and removing any loose paint or debris. Fill in any holes or cracks with spackle or putty, and sand the surface if necessary.
When choosing a roller, consider the nap length, which refers to the thickness of the fabric cover. Longer nap lengths, such as ¾-inch or 1-inch, are great for creating texture, while shorter naps, around ⅜-inch, deliver a smoother finish. Select a roller cover made of a material suitable for your paint type, such as synthetic or natural fibers.
To use a roller, pour your paint into a paint tray and evenly distribute the paint on the roller cover. Roll the roller back and forth in the tray to ensure even coverage on the nap. Start by applying the paint in a “W” or “M” shape on the wall, and then fill in the remaining area using vertical or horizontal strokes. Apply light pressure and maintain a consistent speed to achieve an even and uniform coat of paint.
If you want to create texture, consider using technique called “stippling” or “rolling and pressing.” After applying the paint with the roller, lightly press or pat the surface with the roller to create subtle raised areas. This technique can add dimension and visual interest to your walls.
When using a pad, similar principles apply. Dip the pad into the paint and distribute the paint evenly by pressing it onto the pad tray. Apply the paint to the wall using a combination of rolling and patting motions. Pads are particularly useful for creating unique textures and patterns on walls.
Remember to keep your roller or pad properly cleaned and maintained. After each use, remove excess paint by rinsing the roller cover or pad under water or using a paint roller cleaner. Once clean, allow it to air dry before storing it for future use.
Rollers and pads offer efficiency and versatility when napping interior walls. Their ability to cover large areas quickly makes them ideal for larger rooms or projects. Choose the appropriate nap length and technique to achieve the desired texture or finish and enjoy the satisfaction of transforming your walls with ease.
Spray Application
Spray application is a popular and efficient napping technique for painting interior walls. It involves using a paint sprayer to evenly distribute paint across large and open wall surfaces, providing quick and consistent coverage.
Before using a paint sprayer, it’s crucial to prepare the room properly. Cover furniture, remove or tape off fixtures and electrical outlets, and protect the floor with drop cloths or plastic sheets. Ensure good ventilation by opening windows or using fans to dissipate fumes.
Choose a paint sprayer suitable for your project. There are different types of sprayers available, such as airless sprayers and HVLP (High Volume Low Pressure) sprayers. Airless sprayers deliver paint under high pressure, providing fast and efficient coverage. HVLP sprayers are known for their precision and low overspray. Consider the size of the project, the type of paint you are using, and your personal preferences when selecting a sprayer.
Before starting, read the manufacturer’s instructions and familiarize yourself with the sprayer’s settings and operation. Test the sprayer on a piece of cardboard or scrap material to ensure it’s functioning properly and the paint is spraying evenly.
When ready, hold the sprayer approximately 8 to 12 inches away from the wall surface. Begin spraying in a smooth and controlled motion, moving your arm and the sprayer horizontally or vertically to achieve even coverage. Overlap each pass slightly to avoid any gaps or lines. Keep the sprayer at a consistent distance from the wall to maintain an even paint flow.
When using a paint sprayer, it’s important to work in sections and avoid oversaturation. Apply a thin coat of paint, allowing it to dry before applying additional layers. This ensures that the paint adheres properly and prevents drips or runs from forming.
After spraying, clean the sprayer according to the manufacturer’s instructions. Proper maintenance and cleaning are essential to keep the sprayer in good working condition for future use.
By using a paint sprayer, you can achieve a smooth and professional-looking finish on your interior walls. The spray application technique offers efficient and consistent coverage, making it particularly suitable for large and open spaces. Ensure you follow safety guidelines and take the necessary precautions to protect yourself and the surrounding area when using a paint sprayer.
Consider consulting professionals or practicing on a small area before tackling larger projects to become comfortable with using a paint sprayer effectively. With practice and attention to detail, you can achieve impressive results and transform your interior walls with ease.
Factors to Consider Before Napping Interior Walls
Before diving into the napping process for your interior walls, it’s important to consider several factors that can greatly affect the final outcome. These factors influence the choice of technique, tools, and materials you use, as well as the overall success of your paint job.
-
Wall Material and Condition
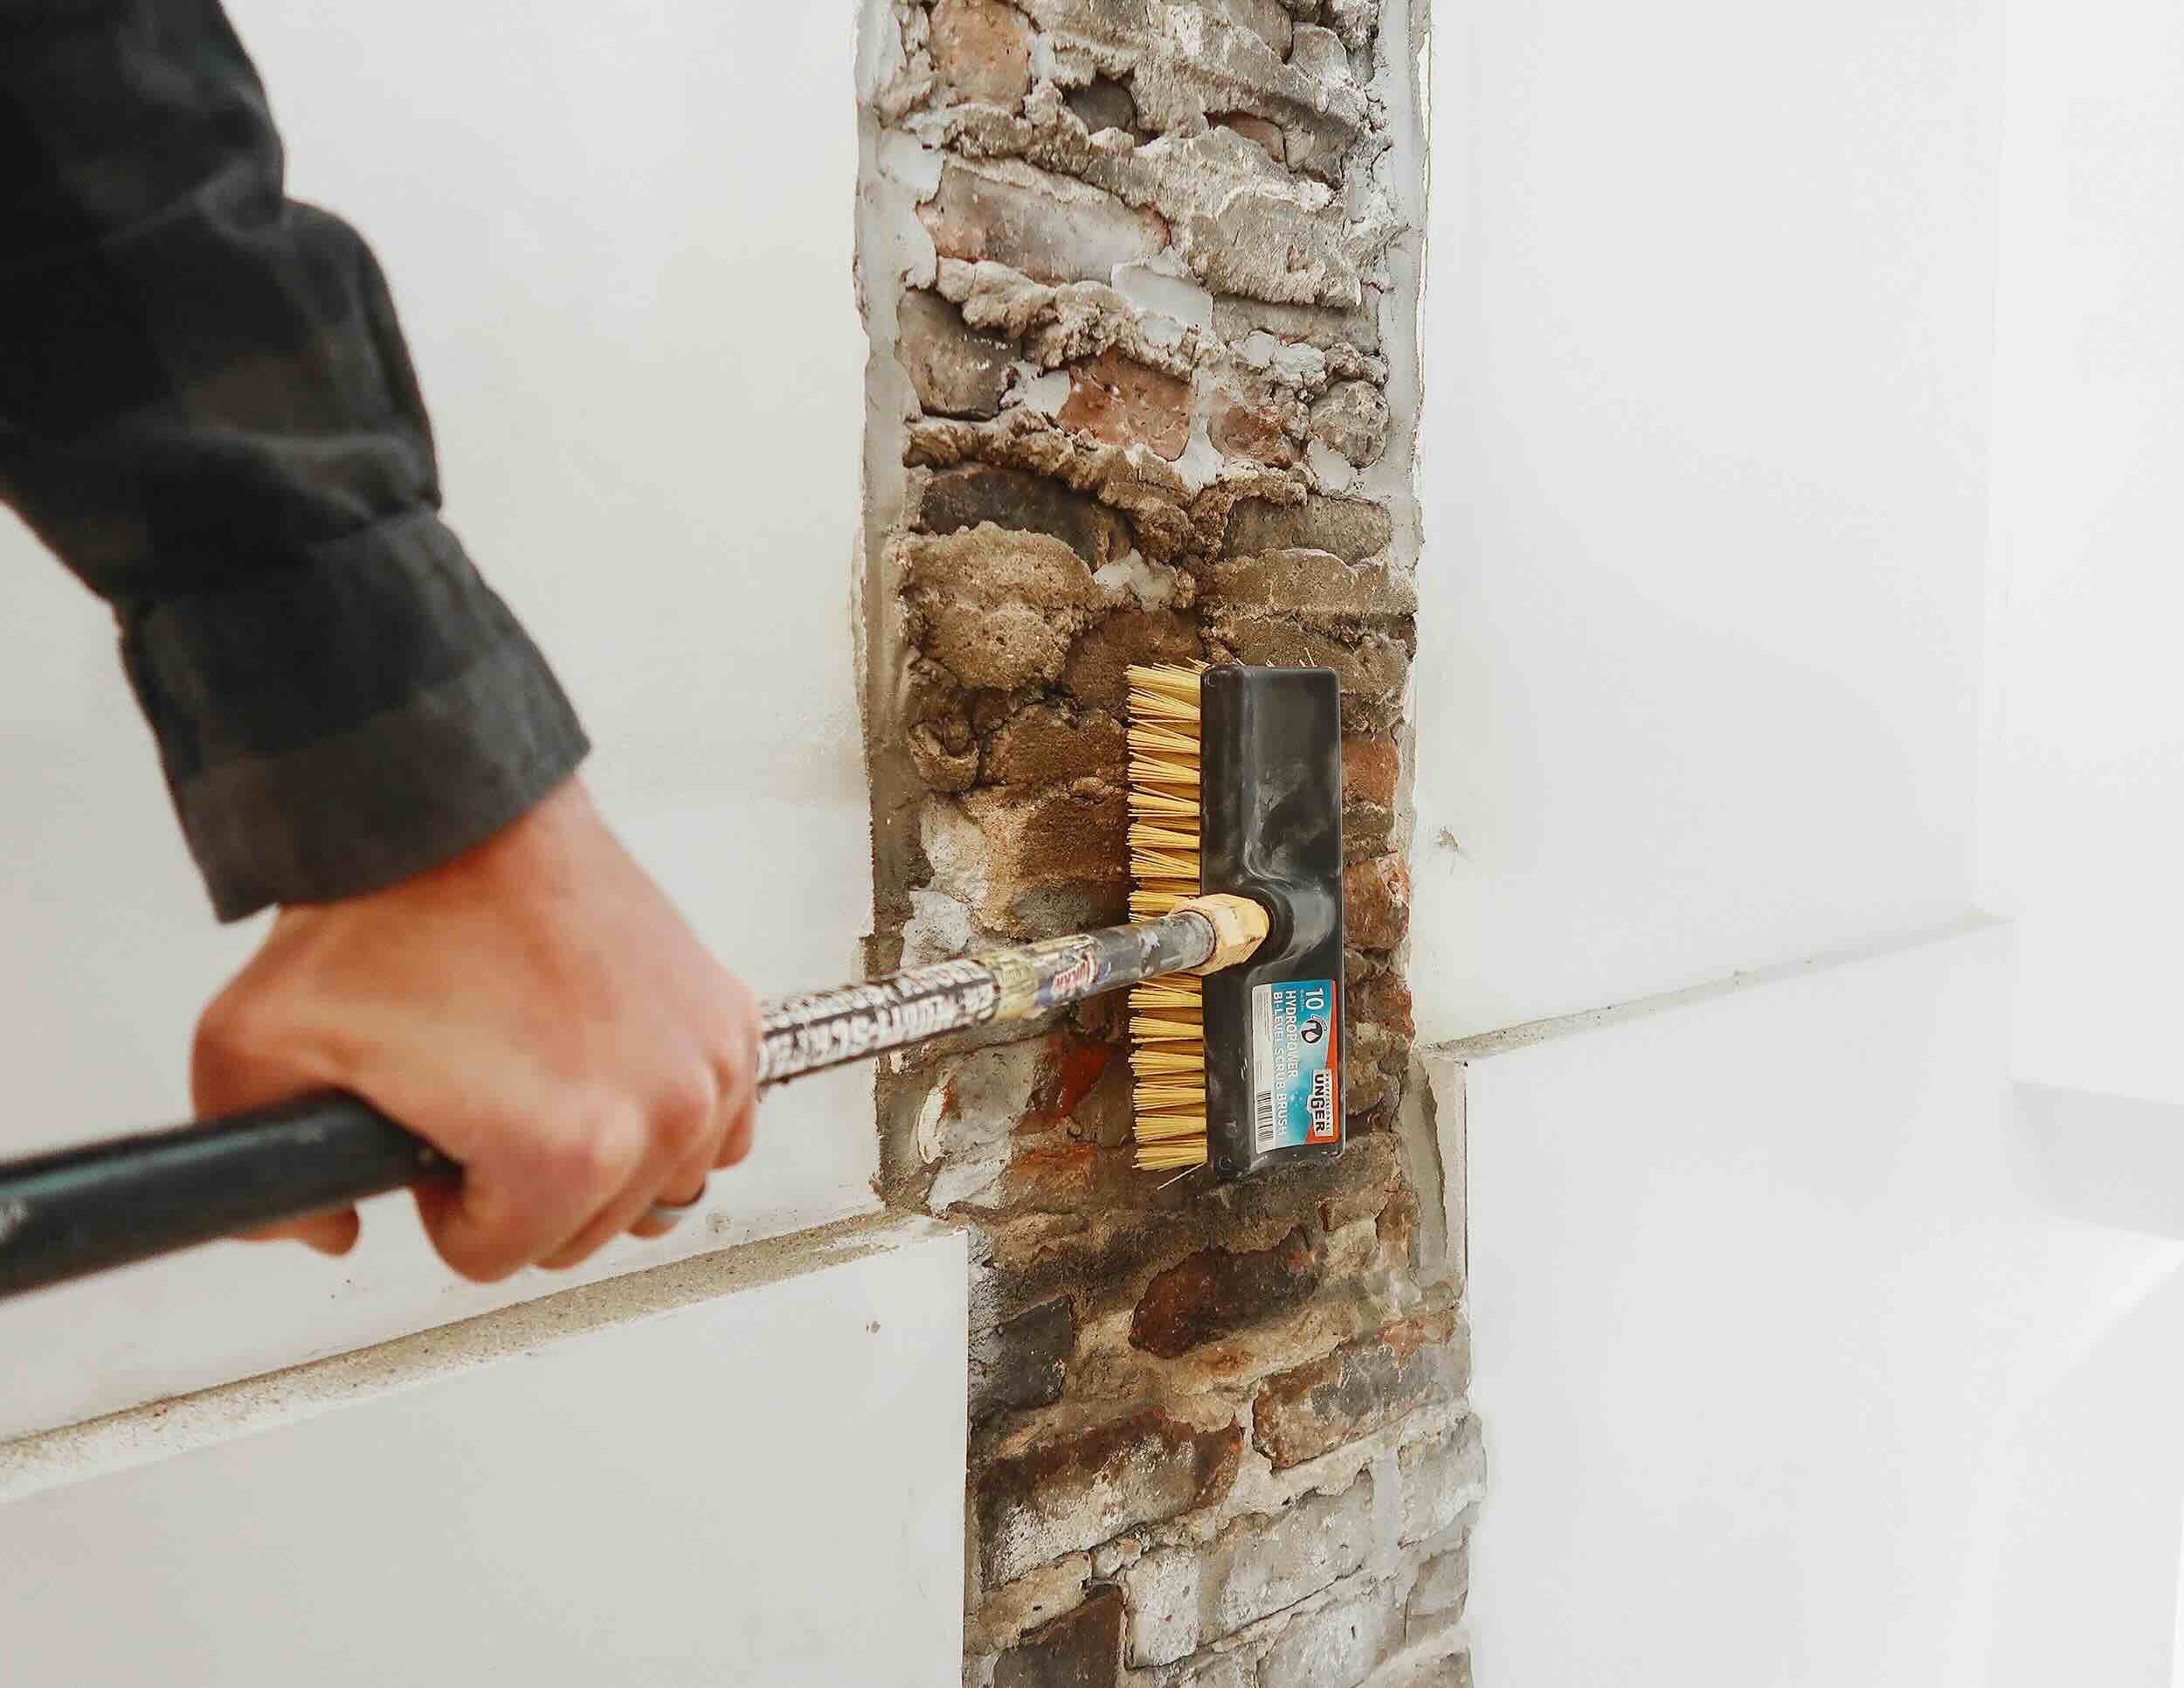
The type of material your walls are made of, such as drywall, plaster, or wood, can impact the napping technique you choose. Some materials may require additional preparation, such as sanding or priming, to ensure proper adhesion. Additionally, consider the condition of the walls. If there are significant cracks, holes, or damage, they may need to be repaired prior to napping.
-
Read more: What Thickness Of Plywood For Interior Walls
Paint Type and Texture
The type of paint you choose can influence the napping technique and tools you use. Different paint formulations, such as latex or oil-based, may require specific techniques for optimal results. Additionally, consider the desired texture of the finished walls. Certain techniques, such as brushing or using textured rollers, are more suitable for creating texture, while others, like sanding, can help achieve a smooth surface.
-
Desired Finish and Effect
Consider the overall aesthetic you wish to achieve in the space. Are you aiming for a smooth and sleek finish or a textured and rustic look? Understanding your desired outcome will help you select the appropriate napping techniques and tools. Experiment with different samples, techniques, and finishes on a test area to determine the best approach for achieving your desired effect.
While these factors are essential to consider, it’s also important to take your own skill level and comfort into account. Certain napping techniques may require more practice and expertise to achieve the desired results. If you’re unsure or inexperienced, don’t hesitate to seek guidance from professionals or research tutorials and guides.
Remember that every room and project is unique, so adapt and adjust your approach accordingly. Taking the time to assess these factors before napping your interior walls will not only save you time and effort but also ensure that you achieve a beautiful and professional-looking finish that enhances your space.
Wall Material and Condition
Before napping your interior walls, it’s important to consider the material and condition of the walls. Understanding these factors will help you determine the appropriate napping techniques and ensure a successful paint job.
The type of material your walls are made of can greatly influence the napping process. Common wall materials include drywall, plaster, and wood. Each material has its own characteristics and may require different preparation and techniques for optimal results.
Drywall is a popular wall material due to its affordability and ease of installation. It is generally smooth and even, making it suitable for a variety of napping techniques. Before napping drywall, ensure that it is properly installed and any joints and seams are properly sealed and sanded for a seamless look.
Plaster walls, on the other hand, are more traditional and can have a textured surface. When napping plaster walls, it’s essential to identify any cracks, holes, or imperfections and repair them before applying paint. Consider using a sanding technique to smooth out any rough patches and ensure an even base for painting.
If you have wood walls, such as paneling or shiplap, napping can enhance the natural beauty and texture of the wood. However, ensure that the wood is properly cleaned, sanded, and sealed before painting. Some wood surfaces may require special primers or sealants to prevent bleed-through and ensure proper paint adhesion.
Aside from wall material, it’s essential to evaluate the condition of the walls before napping. Inspect for any cracks, holes, or damage that may need to be repaired. Fill in any imperfections with spackle or putty, and allow sufficient drying time before proceeding with napping. A smooth and well-prepared surface will result in a more professional-looking finish.
It’s worth noting that napping may not be suitable for all wall materials or conditions. For instance, heavily textured walls or walls with severe damage might require alternative techniques like skim coating or wallpapering. If you’re unsure about the best approach for your specific walls, it’s recommended to consult a professional or seek advice from a home improvement specialist.
By taking into account the material and condition of your walls, you can choose the ideal napping techniques and prepare the surface properly. This will ensure that the paint adheres well and the final result is a beautifully finished interior that adds style and charm to your space.
Paint Type and Texture
When it comes to napping interior walls, considering the type of paint and desired texture is crucial for achieving the desired finish. Different paint types and textures require specific techniques and tools to ensure optimal results.
The type of paint you choose can impact the napping process and determine the appropriate techniques to use. The two most common paint types for interior walls are latex (water-based) and oil-based paints.
Latex paint is widely used due to its ease of application, fast drying time, and low odor. It is suitable for most interior surfaces and offers a wide range of colors. Latex paints can be napped using various techniques such as sanding, brushing, or rollers. Before napping with latex paint, make sure to select high-quality brushes or rollers specifically designed for water-based paints.
Oil-based paints, on the other hand, provide a durable and long-lasting finish. They are ideal for areas with high moisture levels or heavy wear and tear. However, napping oil-based paints can be more challenging due to their slower drying time and strong odor. Brushing and rolling are the common techniques used for napping oil-based paints. Be aware that oil-based paints require proper ventilation and longer drying/curing time compared to latex paints.
Aside from paint type, the desired texture of your walls should also be considered. Napping techniques can be used to create varying textures, from smooth to heavily textured finishes.
If a smooth finish is desired, sanding the walls before painting can help create an even and flawless surface. Sanding removes any imperfections and creates a smooth base for the paint to adhere to. This technique is especially beneficial for walls with visible dents, scratches, or uneven spots.
To achieve textured finishes, techniques like brushing, rolling, or stippling can be employed. Brushing involves using a paintbrush to create a stippled or grainy effect, adding depth and visual interest to the walls. Rolling with textured roller covers or using pads can also create various textures, such as stucco or sponge-like patterns.
It’s important to experiment with different techniques on a small test area to determine the desired texture and effect before applying it to the entire wall. This will allow you to gauge how the chosen napping technique interacts with the paint type and texture, ensuring a cohesive and satisfactory result.
By considering the type of paint and desired texture, you can select the appropriate napping techniques and tools to achieve your desired finish. Whether you prefer a smooth and sleek surface or a textured and visually interesting wall, understanding these factors will lead to a successful and aesthetically pleasing paint job.
Read more: What Size Studs For Interior Walls
Desired Finish and Effect
When napping interior walls, one important factor to consider is the desired finish and effect you want to achieve. Your desired outcome will guide the choice of napping techniques and help you create the desired atmosphere and ambiance in your space.
There are various finishes and effects that you can achieve through napping, ranging from smooth and seamless to textured and visually interesting surfaces. Understanding your preferences and the overall style you want to create will guide your decision-making process.
If you desire a smooth and flawless finish, techniques like sanding and using rollers with shorter nap lengths are best suited. Sanding helps level out imperfections on the wall surface, creating a seamless and even base for paint application. Using rollers with shorter nap lengths ensures a smooth and uniform coat of paint on the walls. This type of finish is commonly preferred for modern and contemporary spaces where a clean and polished look is desired.
For those who appreciate texture and visual depth, techniques like brushing, rolling with textured roller covers, or stippling can create stunning effects on the walls. Brushing creates a stippled or grainy effect, adding dimension and interest to the surface. Rolling with textured roller covers or using special pads can produce a variety of textured finishes, including stucco or sponge-like patterns. These techniques are often used in rustic, bohemian, or traditional interior styles, as they add character and warmth to the space.
Consider the overall theme and atmosphere you want to create in the room. If you’re aiming for a contemporary and minimalist look, a smooth finish might be more appropriate. On the other hand, if you want to create a cozy and inviting space, textured finishes can add visual interest and contribute to the overall ambiance.
It’s important to experiment and test different napping techniques on a small area or sample boards before committing to a larger project. This allows you to see how different techniques and finishes interact with your chosen paint color and lighting conditions.
Consulting with design professionals or seeking inspiration from interior design resources can also provide valuable insights into the range of finishes and effects you can achieve through napping. By considering your desired finish and effect, you can make informed decisions about the napping techniques and tools that will help you achieve the desired outcome, ensuring that your walls perfectly complement the overall look and feel of your space.
Tips for Successful Napping of Interior Walls
Napping interior walls can be a transformative process that enhances the aesthetics and durability of your space. To ensure a successful paint job and achieve professional-looking results, consider the following tips:
-
Prep the Walls Properly
Before napping, ensure that the walls are clean, dry, and free from any loose paint, dirt, or debris. Repair any cracks, holes, or imperfections with spackle or putty, and allow sufficient drying time.
-
Choose the Right Nap Material and Size
When selecting nap materials for rollers or pads, consider the texture you want to achieve and the type of paint you are using. Longer nap lengths are suited for textured finishes, while shorter naps are ideal for smooth surfaces. Choose brushes or rollers designed for your specific paint type.
-
Read more: What Paint Finish For Interior Walls
Use Proper Techniques and Tools
Be familiar with the napping techniques that are suitable for your chosen paint type and desired finish. Whether it’s sanding, brushing, rolling, or spraying, practice the technique in a small area before applying it to the entire wall. Use high-quality brushes, rollers, or sprayers for smooth and even application.
-
Pay Attention to Drying and Curing Time
Allow sufficient drying time between coats and before moving furniture or touching the painted surface. Follow the manufacturer’s instructions for recommended drying and curing times. Rushing the process can lead to an uneven finish and compromise the durability of the paint.
Additionally, here are a few extra tips to help you achieve the best results:
- Protect surrounding areas, such as floors and furniture, with drop cloths or plastic sheets to prevent paint splatters or spills.
- Apply paint in thin and even coats to avoid drips or runs. Multiple thin coats yield better results than a single heavy coat.
- Consider using a primer before painting, especially if you are working on bare or heavily repaired surfaces. Priming helps with paint adhesion and can improve overall finish quality.
- Work in natural or well-lit areas to ensure that you can see any missed spots or inconsistencies in the paint application.
- Clean your tools and brushes properly after each use to maintain their quality and prolong their lifespan.
- Follow safety guidelines, such as wearing protective gear like gloves and goggles, especially when working with chemicals or using spray application techniques.
Remember that napping interior walls requires patience, attention to detail, and a systematic approach. Don’t rush the process and take the time to ensure each step is executed properly. By following these tips, you can achieve a successful paint job and transform your interior walls into beautiful and inviting spaces.
Prep the Walls Properly
Properly preparing your walls before napping is essential for a successful paint job. This crucial step ensures that the surface is clean, uniform, and ready to accept the paint. Here are some tips to help you prep your walls properly:
-
Clean the Walls
Begin by removing any dirt, grease, or grime from the walls. Use a mild detergent and warm water to scrub the surface gently. Pay close attention to areas near the floor, kitchen countertops, or any other areas prone to splashes or stains. Rinse the walls thoroughly and allow them to dry completely before moving on to the next step. Ensure that the walls are free from any residues or cleaning solutions.
-
Read more: What Kind Of Insulation For Interior Walls
Repair Any Imperfections
Inspect the walls for any cracks, holes, or dents. Fill in these imperfections with a suitable spackle or putty. Use a putty knife to apply the filler, ensuring that it is level with the surrounding wall surface. Allow the filler to dry completely and then sand it gently until it is smooth and flush with the wall. Wipe away any dust created during the sanding process.
-
Sand the Walls
Sanding the walls helps create a smooth and even surface for paint application. It removes any rough spots, imperfections, or old paint that may hinder the final finish. Use a sanding block or sandpaper with a medium grit (around 120-150) to gently sand the walls. Be sure to sand in a circular or back-and-forth motion, covering the entire surface area. Sanding also helps promote better paint adhesion and ensures a more professional-looking outcome.
-
Protect and Mask Off Areas
Take the time to protect areas that you do not want to paint, such as baseboards, trim, windows, and electrical outlets. Use painter’s tape to create clean, crisp edges and prevent the paint from bleeding onto these surfaces. Lay down drop cloths or plastic sheets to protect the floors and furniture from accidental drips or splatters.
-
Prime the Walls (If Needed)
In some cases, applying a primer may be necessary, especially if you are changing wall colors, working on porous surfaces, or covering stains and discolorations. Priming provides a smooth and uniform base for the paint to adhere to, enhancing the overall durability and finish of the final coat. Follow the manufacturer’s instructions when selecting and applying the appropriate primer for your specific needs.
By following these steps and properly prepping your walls, you set the stage for a successful napping job. Taking the time to clean, repair, sand, and protect the walls will ensure a smoother finish, better paint adhesion, and ultimately, a more professional-looking result. Remember, proper wall preparation is the foundation of any painting project and is key to achieving long-lasting, beautiful results.
Read more: What R-Value Insulation For Interior Walls
Choose the Right Nap Material and Size
Choosing the right nap material and size for your napping project is crucial for achieving the desired texture and finish on your interior walls. The nap refers to the surface texture of rollers or pads that come in contact with the wall during the painting process. Here are some tips to help you choose the right nap material and size:
-
Determine the Texture You Want
Consider the texture you want to achieve on your walls. Do you prefer a smooth and seamless finish, or are you looking for more texture and depth? Understanding the desired end result will guide you in selecting the appropriate nap material and size.
-
Consider the Type of Paint
The type of paint you are using also plays a role in determining the right nap material. For latex (water-based) paints, synthetic fibers like nylon or polyester are suitable. These materials are highly durable and can withstand the water-based paint without matting or shedding. For oil-based paints, natural fibers like lambswool or mohair are commonly used. These materials hold more paint and provide smoother application but are less resistant to water-based products.
-
Choose the Nap Length
The nap length refers to the thickness of the fibers on the roller or pad. Longer nap lengths create more texture, while shorter nap lengths deliver smoother finishes. Consider the condition of your walls when choosing the nap length. If your walls have imperfections such as dents or scratches, a longer nap can help hide them. For smooth surfaces, a shorter nap is recommended to minimize the texture left by the roller or pad.
-
Read more: What Size Spray Tip For Interior Walls
Experiment with Samples
If you’re unsure about the right nap material and size, it’s always a good idea to try out different options on a small test area or sample board. This allows you to see how different naps interact with your selected paint and wall texture. It also helps you determine the right amount of pressure and the right technique needed to achieve the desired effect.
Remember, the nap material and size you choose can greatly influence the outcome of your napping project. Taking the time to consider the texture you desire, the type of paint you’re using, and experimenting with different options will help you achieve the best results. By choosing the right nap material and size, you can effectively apply paint and create the desired look on your interior walls.
Use Proper Techniques and Tools
Using proper techniques and tools is essential when napping your interior walls. By following the right methods and using the appropriate tools, you can achieve a smooth and professional finish. Here are some tips to help you use proper techniques and tools:
-
Brushing Technique
If you’re using a brush for napping, hold it at a slight angle and apply light to moderate pressure. Start by dipping the brush into the paint, about one-third of the bristle length. Tap off any excess paint and use smooth and even strokes. Avoid overloading the brush with too much paint, as it can lead to drips or uneven application.
-
Rolling Technique
When using a roller, start by prepping the roller cover by evenly distributing paint on it using a tray. Roll the cover back and forth in the tray to ensure even coverage on the nap. Begin by applying the paint to the wall in a “W” or “M” shape, and then fill in the remaining area using vertical or horizontal strokes. Apply light pressure and maintain a consistent speed to achieve an even and uniform coat of paint.
-
Read more: How To Cover Stucco Interior Walls
Sanding Technique
If sanding the walls before napping, use a sanding block or sandpaper with a medium grit. Sand in a circular or back-and-forth motion, covering the entire surface area. Apply light to moderate pressure and take breaks to check your progress. Be careful not to oversand or damage the wall surface, especially if you’re working with delicate materials like plaster or wood.
-
Spray Application
If using a paint sprayer, follow the manufacturer’s instructions for proper setup and spraying technique. Maintain a consistent distance between the sprayer and the wall surface. Move the sprayer smoothly and evenly, covering the entire area without oversaturating or leaving gaps. Practice proper safety precautions, such as wearing protective goggles and a mask, and ensure good ventilation in the area.
-
Choose High-Quality Tools
Invest in high-quality brushes, rollers, and sanding tools. Good-quality tools ensure better paint application, smoother finishes, and durability. Cheap or worn-out tools can lead to streaks, shedding, or uneven application, resulting in an unprofessional finish. Take care of your tools, clean them properly after each use, and store them in a clean and dry place.
Practice is key when using proper techniques. If you’re new to napping, consider practicing on a small test area or sample board to become familiar with the process. Allow yourself time to experiment and adjust your technique until you achieve the desired result.
Using the proper techniques and tools will not only enhance the final finish but also make the napping process more efficient and enjoyable. By taking the time to learn and practice these techniques, you can achieve professional-looking results and transform your interior walls with confidence.
Pay Attention to Drying and Curing Time
Understanding and adhering to the appropriate drying and curing time is crucial for a successful napping project. Rushing the process or not allowing sufficient time for the paint to dry and cure can result in a compromised finish. Here are some tips to help you pay attention to drying and curing time:
-
Read more: How To Build Interior Walls
Follow Manufacturer’s Guidelines
Always refer to the manufacturer’s instructions on the paint can for specific drying and curing times. Different paint formulations and brands may have varying recommendations, so it’s important to follow their guidelines for the best results.
-
Drying Time
Drying time refers to the period it takes for the paint to become touch-dry. Lightly touching the painted surface can give you an indication of its dryness. It’s important to wait for the paint to dry completely before applying additional coats or touching it to avoid smudging or ruining the finish. Keep in mind that drying times can vary depending on factors like humidity, temperature, and ventilation.
-
Curing Time
Curing time is the period it takes for the paint to fully harden and reach its maximum durability. Even if the paint feels dry to the touch, it may still be in the process of curing. It’s important to allow sufficient time for the paint to cure before subjecting it to heavy use or cleaning. This helps ensure that the paint fully bonds to the surface and provides long-lasting protection.
-
Consider Environmental Factors
Environmental factors, such as temperature and humidity, can affect drying and curing times. Higher temperatures and lower humidity generally promote faster drying, while cooler temperatures and higher humidity can prolong drying and curing times. Aim to paint in a well-ventilated area with moderate temperature and humidity levels to facilitate proper paint drying and curing.
-
Read more: How To Repaint Interior Walls
Be Patient
Exercise patience and resist the temptation to rush the drying and curing process. Applying additional coats or handling the painted surface before it has fully dried or cured can disrupt the finish and lead to imperfections or damage. It’s better to be patient and allow the paint to fully dry and cure according to the manufacturer’s recommendations.
By paying attention to drying and curing time, you ensure that the paint achieves its maximum durability, adhesion, and longevity. Properly dried and cured paint creates a more durable and resistant surface, allowing your napped walls to withstand everyday wear and tear.
Always follow the manufacturer’s guidelines and take into account environmental factors when estimating drying and curing times. By being patient and allowing sufficient time for the paint to dry and cure, you can achieve a beautiful and long-lasting finish on your interior walls.
Conclusion
Napping your interior walls is a vital step in achieving a flawless and professional-looking paint job. By understanding the importance of napping, considering factors such as wall material and condition, paint type and texture, and desired finish and effect, you can make informed decisions and create stunning results.
Properly prepping the walls, choosing the right nap material and size, using proper techniques and tools, and paying attention to drying and curing time are all critical factors for a successful napping project. Taking the time to prepare the walls properly ensures a smooth and even surface, primed for paint application. Selecting the right nap material and size allows you to achieve the desired texture and finish on your walls.
Using proper techniques and tools, whether it’s brushing, rolling, sanding, or using spray application, guarantees a professional appearance and enhances the durability of the paint. Paying attention to drying and curing time allows the paint to set and harden properly, ensuring a long-lasting and beautiful finish.
Remember to take your time throughout the napping process. Practice on small areas or test boards, experiment with different techniques, and be patient with drying and curing times. It’s better to invest more time and effort to achieve the desired results than rush through the process and end up with a subpar finish.
Ultimately, napping your interior walls is an opportunity to transform your space and create a visually stunning and appealing atmosphere. Whether you’re aiming for a smooth and sleek finish or a textured and cozy look, proper napping techniques and attention to detail will yield exceptional results.
By following the tips and guidelines outlined in this article, you can confidently tackle your napping project and be rewarded with walls that reflect your personal style and enhance the overall aesthetics of your home.
Frequently Asked Questions about What Nap For Interior Walls
Was this page helpful?
At Storables.com, we guarantee accurate and reliable information. Our content, validated by Expert Board Contributors, is crafted following stringent Editorial Policies. We're committed to providing you with well-researched, expert-backed insights for all your informational needs.

0 thoughts on “What Nap For Interior Walls”