Articles
Why Insulate Interior Walls
Modified: October 31, 2024
Discover the benefits of insulating your interior walls with informative articles. Improve energy efficiency and enhance comfort in your home.
(Many of the links in this article redirect to a specific reviewed product. Your purchase of these products through affiliate links helps to generate commission for Storables.com, at no extra cost. Learn more)
Introduction
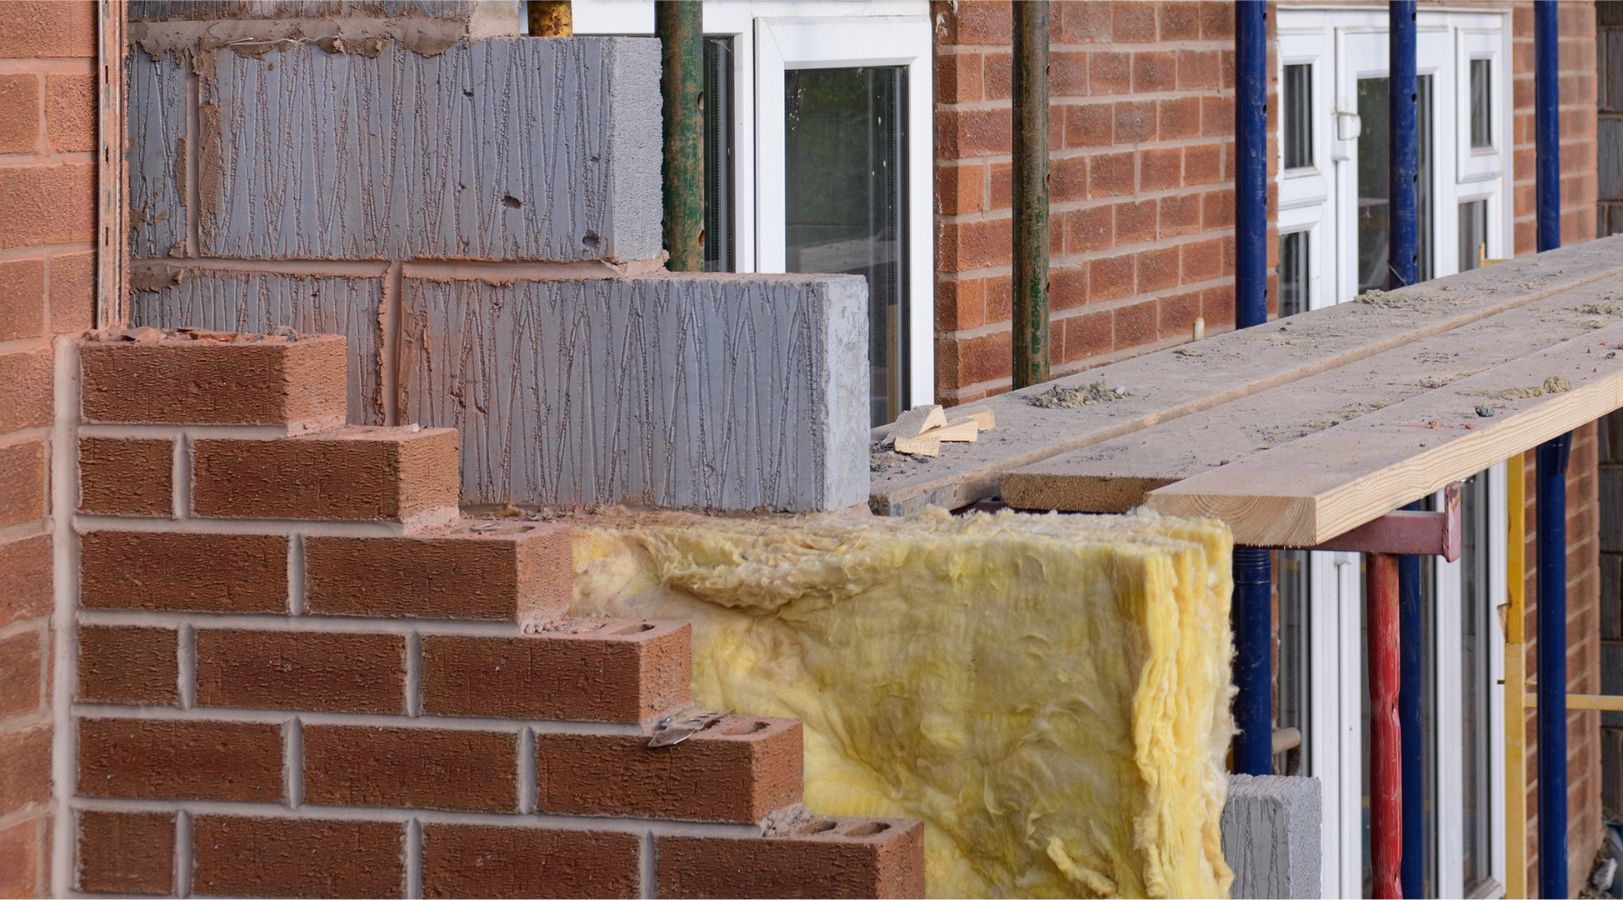
Insulating the interior walls of your home may not be a top priority when it comes to home improvement projects, but it can offer numerous benefits that are worth considering. Insulation not only helps to regulate the temperature inside your home, but it also contributes to soundproofing, moisture prevention, and energy efficiency. In this article, we will delve into the various reasons why insulating interior walls is a wise investment, the different types of insulation available, and how to go about the process.
When we think about insulation, we often think about the exterior walls and attic, but insulating interior walls can be equally important. Interior insulation can help create a more comfortable living environment by regulating temperatures and reducing noise transmission between rooms. It can also help keep your energy bills in check by minimizing heat loss and reducing the workload on your HVAC system.
There are several key benefits to insulating interior walls, including:
Key Takeaways:
- Insulating interior walls offers energy efficiency, soundproofing, and comfort. Choose the right material, address potential challenges, and ensure proper installation for a cozy and peaceful living space.
- Consider moisture issues, obstructions, and ventilation when insulating interior walls. Select the most suitable material and follow installation guidelines for optimal energy efficiency and comfort.
Read more: What Kind Of Insulation For Interior Walls
Benefits of Insulating Interior Walls
- Increased Energy Efficiency: Insulating interior walls helps to create a thermal barrier, preventing heat transfer and reducing the need for excessive heating or cooling. This can result in significant energy savings over time, as your HVAC system won’t have to work as hard to maintain a comfortable indoor temperature.
- Improved Soundproofing: Insulating interior walls can also help to minimize sound transmission between rooms. This is particularly beneficial if you have a home office, a playroom, or bedrooms that require a quieter environment. Insulation can effectively dampen sound vibrations, reducing noise levels and making your home a more peaceful place.
- Enhanced Comfort and Climate Control: By insulating interior walls, you can create a more stable and consistent indoor climate. Insulation helps to regulate temperature fluctuations and prevents cold spots, making your living spaces more comfortable throughout the year.
- Preventing Moisture and Mold Problems: Insulating interior walls can act as a barrier against moisture intrusion, which can lead to mold and mildew growth. Proper insulation can help to minimize condensation and prevent moisture-related issues that could damage your walls and compromise indoor air quality.
- Cost Savings: Investing in interior wall insulation can yield long-term cost savings by reducing your energy consumption and lowering your heating and cooling bills. While the upfront cost may vary depending on the type of insulation and the size of the project, the return on investment can be substantial.
Now that we understand the benefits of insulating interior walls, let’s explore the different types of insulation materials that are commonly used for this purpose.
Key Takeaways:
- Insulating interior walls offers energy efficiency, soundproofing, and comfort. Choose the right material, address potential challenges, and ensure proper installation for a cozy and peaceful living space.
- Consider moisture issues, obstructions, and ventilation when insulating interior walls. Select the most suitable material and follow installation guidelines for optimal energy efficiency and comfort.
Read more: What Kind Of Insulation For Interior Walls
Benefits of Insulating Interior Walls
Insulating the interior walls of your home offers a range of benefits that can greatly improve your living environment. From increased energy efficiency to enhanced comfort, here are the key advantages of insulating interior walls:
- Increased Energy Efficiency: Insulating interior walls helps to create a thermal barrier that prevents heat transfer between rooms. This means that the heat produced by your heating system stays where it’s needed, reducing the amount of energy required to maintain a comfortable temperature. As a result, you can enjoy lower energy bills and a reduced carbon footprint.
- Improved Soundproofing: If you’re tired of hearing every conversation or noise from neighboring rooms, insulating interior walls can greatly reduce sound transmission. Insulation material absorbs sound waves, preventing them from traveling through the walls. This makes your home quieter and more peaceful, creating a better living environment for everyone.
- Enhanced Comfort and Climate Control: Insulating interior walls helps to regulate the temperature in your home, creating a more consistent and comfortable living environment. By preventing heat loss in the winter and heat gain in the summer, insulation helps to maintain a stable indoor climate, eliminating hot or cold spots in different areas of your home. This means no more uncomfortable drafts or temperature fluctuations.
- Preventing Moisture and Mold Problems: Moisture can be a common issue in homes, leading to mold growth, structural damage, and health concerns. Insulating interior walls with moisture-resistant insulation material helps to create a barrier that prevents moisture infiltration. This reduces the risk of mold and mildew development, improving the indoor air quality and protecting your home from potential damage.
- Cost Savings: Insulating the interior walls of your home may require an initial investment, but it can lead to significant long-term cost savings. By reducing the amount of energy needed for heating and cooling, insulation helps to lower your utility bills. Additionally, insulation can increase the lifespan of your HVAC system by reducing its workload, saving you money on potential repairs and replacements in the future.
By insulating interior walls, you not only create a more energy-efficient and comfortable living space, but you also contribute to a healthier environment and potential savings in your pocket. Now that we understand the benefits, let’s explore the different types of insulation materials commonly used for interior wall insulation.
Increased Energy Efficiency
One of the significant benefits of insulating interior walls is the increased energy efficiency it provides for your home. When you properly insulate interior walls, you create a thermal barrier that helps to prevent heat transfer between rooms. This means that the heat produced by your heating system stays where it’s needed, reducing the amount of energy required to maintain a comfortable indoor temperature.
During the colder months, insulated interior walls act as a buffer, preventing heat from escaping through the walls. This reduces the need for continuous heating, as the warmth generated inside stays trapped within the living spaces. As a result, your heating system won’t have to work as hard, leading to significant energy savings and lower utility bills.
Similarly, during the hotter months, insulation helps to prevent heat from entering your home through the walls. It acts as a barrier against the outdoor heat, allowing your air conditioning system to work more efficiently. With properly insulated interior walls, your space stays cooler for longer periods with less reliance on cooling systems, resulting in lower energy consumption and reduced energy costs.
Insulating interior walls also helps to minimize temperature variations in different areas of your home. By creating a more uniform temperature distribution, insulation eliminates cold spots and drafts, ensuring consistent comfort throughout your living spaces. This not only increases energy efficiency but also enhances the overall comfort of your home.
Another aspect of energy efficiency brought by insulating interior walls is the reduction of your carbon footprint. By decreasing your energy consumption, you lower the demand for fossil fuels, which are the primary source of greenhouse gas emissions. With the growing concern for environmental sustainability, the energy efficiency provided by insulation makes it an excellent choice for homeowners looking to make their homes more eco-friendly.
In summary, insulating interior walls significantly improves energy efficiency by reducing heat transfer and preventing thermal loss. This results in reduced energy consumption, lower utility bills, more consistent indoor temperatures, and a reduced carbon footprint. By making your home more energy-efficient, you not only save money but also contribute to a greener and more sustainable future.
Improved Soundproofing
If you’re looking to create a quieter and more peaceful living environment, insulating interior walls is an effective solution for improved soundproofing. Sound transmission between rooms can be a common issue, especially in houses with thin walls or when multiple activities are happening simultaneously. Insulating interior walls can help to minimize the transfer of sound vibrations, providing a more acoustically comfortable space.
When you insulate interior walls, the insulation material absorbs and dampens sound waves, preventing them from traveling through the walls. This means that conversations, music, or other noises from one room are less likely to be heard in adjacent rooms. Whether you have a home office, a playroom, or bedrooms that require a quieter environment, insulating interior walls can greatly contribute to reducing noise disturbances.
Insulation materials with soundproofing properties, such as mineral wool or acoustic foam, are commonly used for interior wall insulation. These materials have high density and provide excellent sound absorption capabilities. By filling the wall cavities with such insulation material, you create a barrier that absorbs and blocks sound, making your home a more peaceful place.
In addition to reducing the transmission of sound within your home, insulating interior walls can also help to minimize the impact of external noises. If you live in a busy neighborhood or near a noisy street, insulation can act as a buffer against external sound, creating a more serene living environment. This can be particularly beneficial for improving sleep quality and concentration, as well as enhancing the overall comfort of your home.
Improved soundproofing through insulation is particularly valuable in multi-story homes or apartments, where sound can easily travel between floors. Insulating the interior walls not only helps to reduce sound transfer within the same level but also minimizes the vertical transmission of sound. This results in a more private and peaceful living experience for everyone in the household.
In summary, insulating interior walls provides significant improvements in soundproofing by absorbing and dampening sound vibrations. Whether you’re seeking a quieter home office, a more peaceful living space, or a shield against external noise, insulating interior walls can greatly enhance the acoustics and overall comfort of your home.
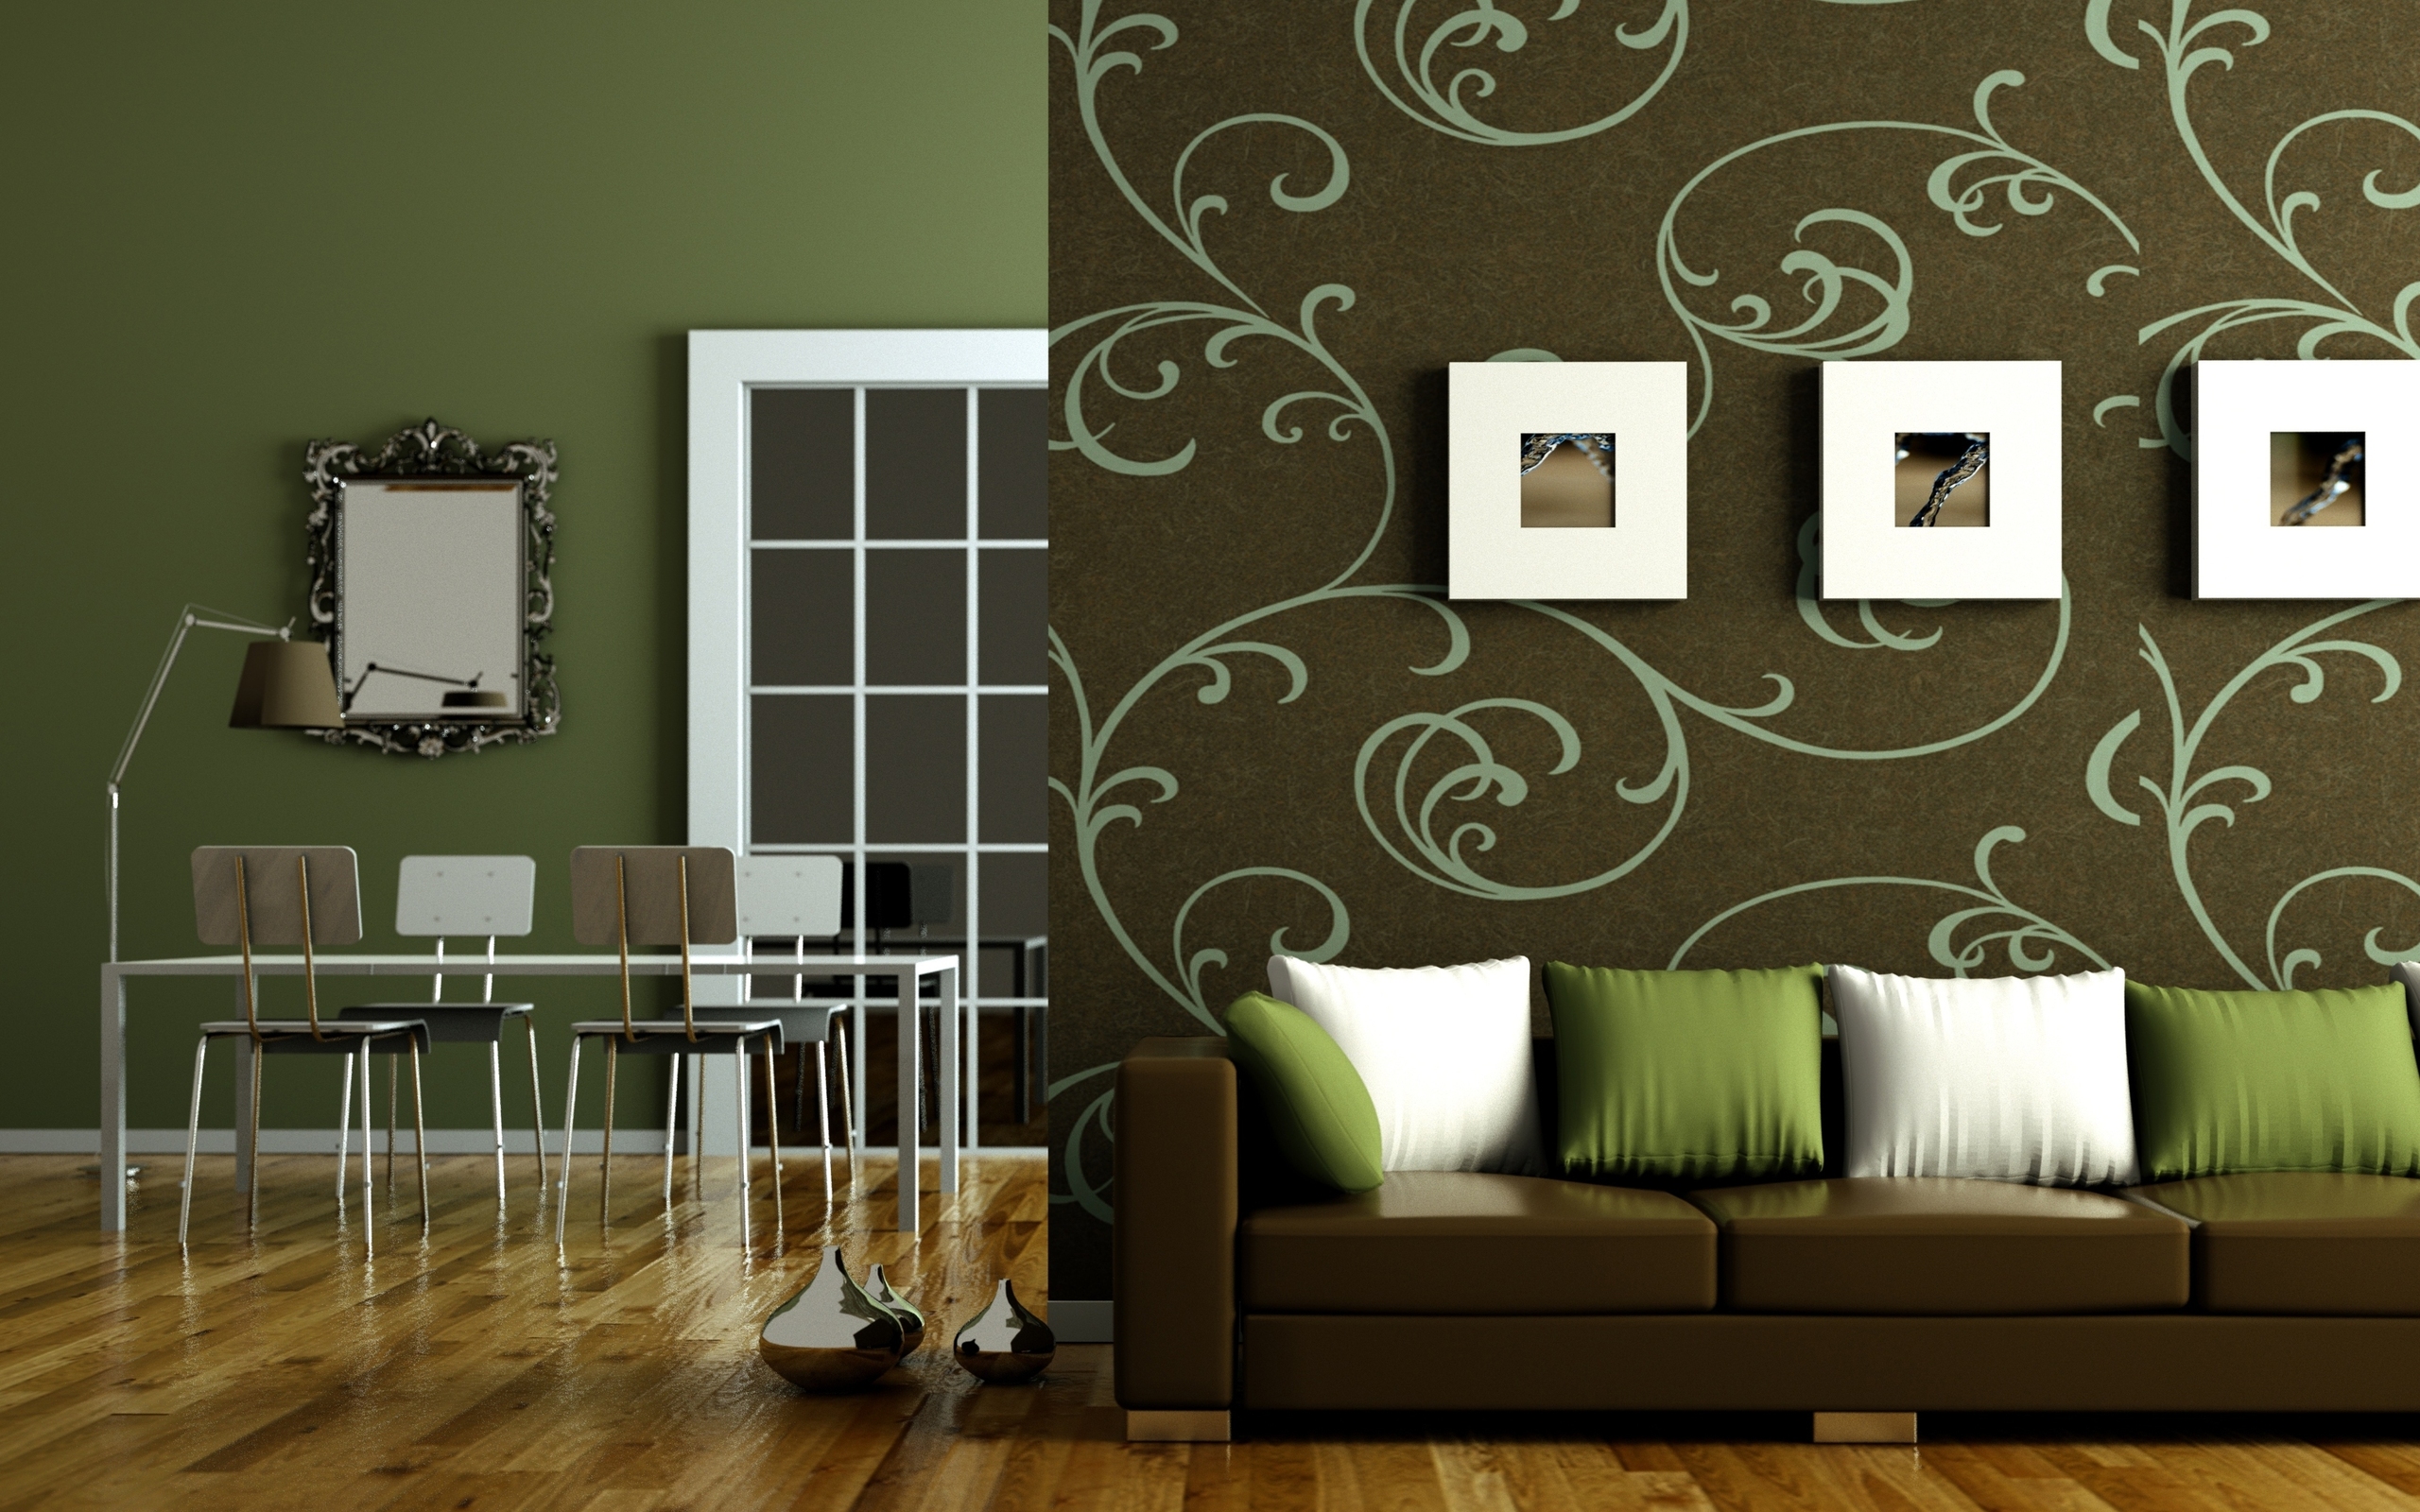
Enhanced Comfort and Climate Control
Insulating the interior walls of your home not only improves energy efficiency and soundproofing but also enhances overall comfort and climate control. By creating a more stable and consistent indoor climate, insulation helps to ensure that your living spaces remain comfortable throughout the year.
One of the primary factors that contribute to enhanced comfort is the regulation of temperature fluctuations. Insulating interior walls acts as a barrier that helps to prevent heat loss during the colder months and heat gain during the hotter months. This means that the temperature inside your home remains more consistent, eliminating uncomfortable drafts or sudden temperature changes that can lead to discomfort.
Insulation also helps to eliminate cold spots in your home. Without insulation, the areas closest to exterior walls or uninsulated spaces can become noticeably colder than the rest of the rooms. By insulating interior walls, you ensure that heat is distributed evenly, preventing these cold spots and creating a more comfortable living environment.
In addition to temperature regulation, insulation also helps to improve climate control in your home. Insulated interior walls prevent air leakage, which can occur when there are gaps or cracks in the walls. This not only helps to maintain the desired temperature but also reduces the infiltration of outside pollutants, allergens, and dust. By creating a sealed envelope within your home, insulation contributes to better indoor air quality and a healthier living environment.
Enhanced comfort and climate control through insulation also extend to humidity regulation. Insulating interior walls can help to prevent condensation, which can occur when warm and moist air comes into contact with cooler surfaces. By minimizing condensation, insulation helps to reduce the risk of mold and mildew growth, maintaining a dry and healthy living space.
Insulating interior walls can also have psychological benefits related to comfort and well-being. When your home maintains a comfortable and stable temperature, it can contribute to a sense of coziness and relaxation. This can enhance your overall enjoyment of your living spaces and create a more inviting atmosphere for both you and your guests.
In summary, insulating interior walls enhances comfort and climate control by regulating temperature fluctuations, eliminating cold spots, improving indoor air quality, and preventing condensation. By creating a more consistent and comfortable living environment, insulation contributes to improved well-being and enjoyment of your home.
Preventing Moisture and Mold Problems
Moisture and mold can be major concerns for homeowners, but insulating interior walls can help to prevent these problems from occurring. Moisture infiltration can lead to mold and mildew growth, which can pose health risks and cause damage to your home. By insulating interior walls, you create a barrier that helps to prevent moisture from entering your walls and creating a conducive environment for mold.
One of the primary ways insulation prevents moisture and mold problems is by reducing condensation. Condensation can occur when warm indoor air comes into contact with cooler surfaces, such as uninsulated walls. The moisture from the air condenses on these surfaces, creating a damp environment that is ideal for mold growth. However, by insulating interior walls, you help to maintain a more consistent temperature throughout your home, minimizing the risk of condensation and moisture buildup.
In addition to reducing condensation, insulation acts as a barrier against moisture infiltration. Moisture can enter your home through various sources, such as leaks, humidity, and outdoor weather conditions. Insulating interior walls helps to prevent moisture from seeping into the walls, thereby reducing the likelihood of mold and mildew growth.
Mold and mildew can thrive in damp environments and can have negative effects on both your health and the integrity of your home. Exposure to mold can cause respiratory issues, allergic reactions, and other health problems. Additionally, mold can damage the structure of your walls, leading to costly repairs. By insulating interior walls, you create a dry and well-insulated space that is less prone to moisture-related issues and mold growth. This promotes a healthier living environment and protects the longevity of your home.
It’s worth noting that when insulating interior walls, it’s essential to choose insulation materials that are moisture-resistant or have moisture-retardant properties. This ensures that the insulation itself does not become a problem area for moisture buildup, which could potentially lead to mold growth. It’s recommended to consult with a professional insulation contractor or manufacturer to select the appropriate insulation material for your specific needs.
In summary, insulating interior walls plays a crucial role in preventing moisture and mold problems. By reducing condensation, preventing moisture infiltration, and creating a dry environment, insulation helps to minimize the risk of mold and mildew growth, protecting both your health and the structural integrity of your home.
Cost Savings
Investing in insulating the interior walls of your home can lead to significant cost savings in the long run. While there may be an initial cost associated with the insulation project, the benefits and savings outweigh the upfront investment.
One of the primary ways that insulating interior walls can save you money is through reduced energy consumption. When your walls are properly insulated, they act as a barrier against heat transfer, preventing the loss of warmth during the colder months and the gain of heat during the hotter months. This means that your heating and cooling systems don’t have to work as hard to maintain a comfortable temperature, resulting in lower energy usage and reduced utility bills.
By minimizing energy consumption, insulating interior walls helps to decrease your carbon footprint. As the demand for energy reduces, there is less reliance on non-renewable energy sources, leading to a more sustainable and environmentally friendly lifestyle. Contributing to a greener world is not only beneficial for the planet but also aligns with the growing focus on eco-conscious living.
Insulating interior walls can also extend the lifespan of your HVAC (heating, ventilation, and air conditioning) system. When your home is properly insulated, your HVAC system doesn’t have to work as hard to regulate the temperature, reducing wear and tear on the system. This can result in fewer repairs and a longer operational lifespan for your HVAC unit, saving you money on maintenance and replacement costs in the future.
In addition, insulating interior walls helps to create a more comfortable living environment, which can lead to cost savings in other areas. When your home is properly insulated, you can experience less temperature fluctuations and drafts, resulting in improved comfort and reduced reliance on additional heating or cooling devices. This means you may not need to invest in space heaters, fans, or other supplemental comfort equipment, saving both energy and money.
Furthermore, insulation can increase the value of your home. Energy efficiency is a sought-after feature for potential homebuyers, and a well-insulated home can be seen as a desirable and valuable asset. Should you decide to sell your home in the future, the presence of quality interior wall insulation can attract buyers and potentially lead to a higher resale value.
While the cost of insulating interior walls will vary depending on factors such as the size of your home and the type of insulation material used, the long-term cost savings and benefits make it a wise investment. By reducing energy consumption, extending the lifespan of your HVAC system, improving comfort, and increasing your home’s value, insulating interior walls can lead to substantial cost savings over time.
Types of Insulation for Interior Walls
When it comes to insulating the interior walls of your home, there are various types of insulation materials to choose from. Each type has its own unique qualities and benefits. Here are some of the most common types of insulation used for interior walls:
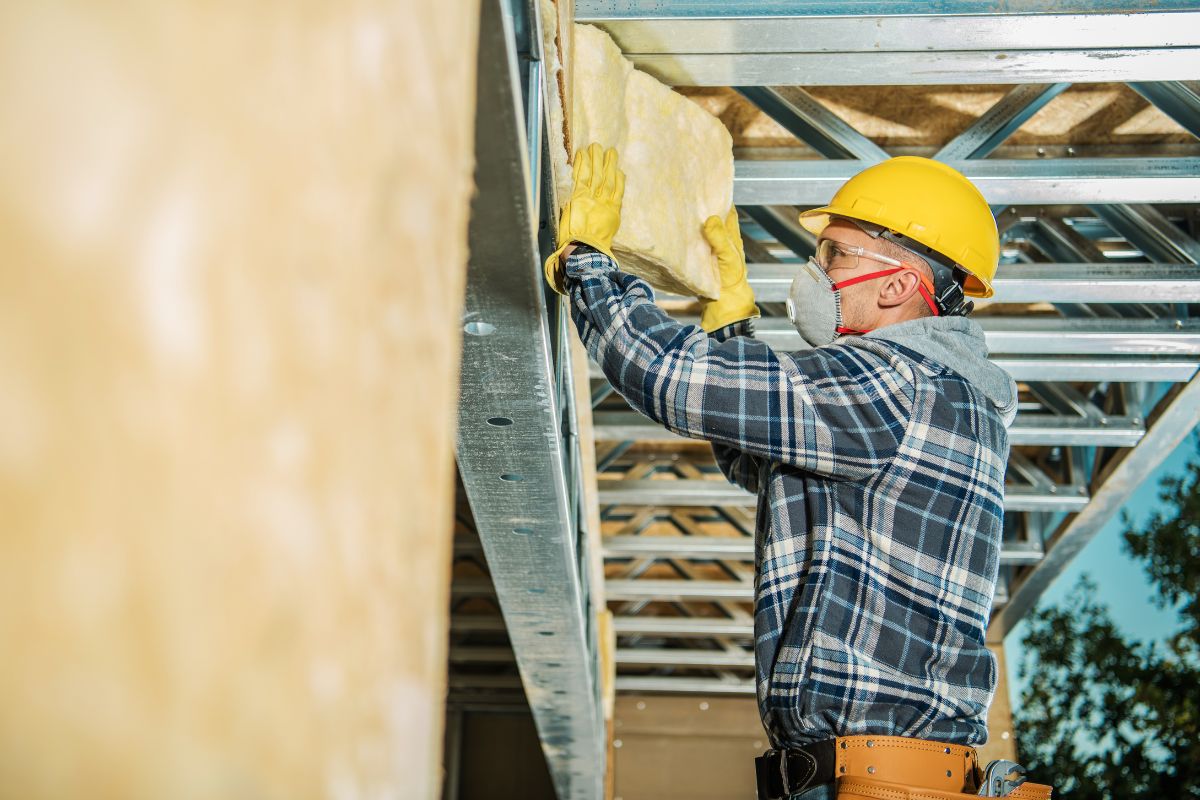
- Fiberglass Insulation: Fiberglass insulation is one of the most popular options for interior wall insulation. It is made up of fine glass fibers that are spun together to create a fluffy material. Fiberglass insulation provides excellent thermal insulation, sound absorption, and fire resistance properties. It is often installed in batts or rolls, which can be easily cut to fit between wall studs.
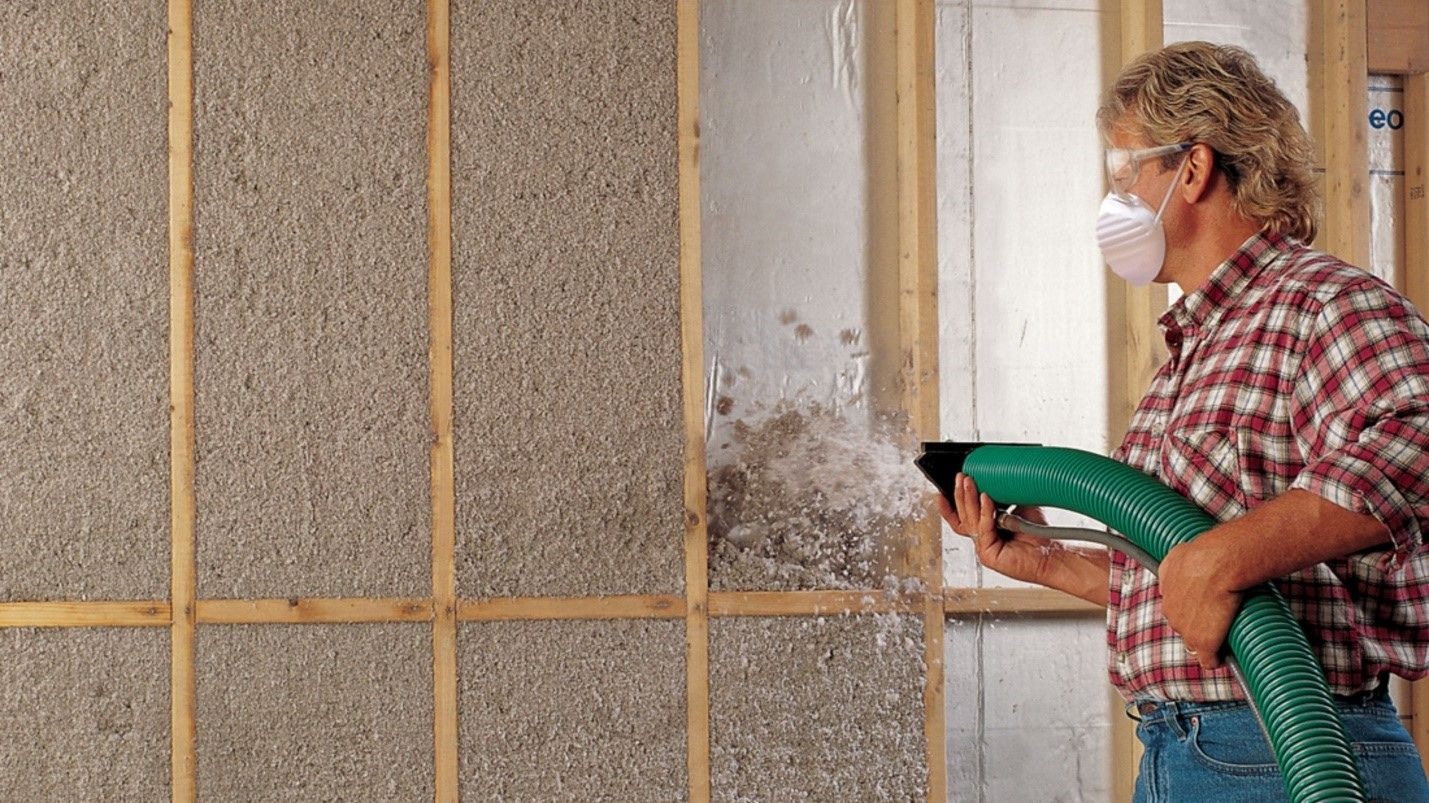
- Cellulose Insulation: Cellulose insulation is made from recycled paper products, typically treated with fire-retardant chemicals. It is a loose-fill insulation material that can be blown into wall cavities using specialized equipment. Cellulose insulation has good thermal and soundproofing properties and is considered an eco-friendly option due to its recycled content.
- Spray Foam Insulation: Spray foam insulation is a popular choice for interior walls due to its excellent insulating properties. It is applied as a liquid foam that expands and hardens upon contact with the wall surfaces. Spray foam insulation creates a seamless and airtight barrier, providing high levels of thermal insulation and soundproofing. It can be more costly than other insulation types but offers superior insulation performance.
- Reflective Insulation: Reflective insulation consists of layers of foil or other reflective materials. It works by reflecting radiant heat, helping to keep your home cooler in the summer and warmer in the winter. Reflective insulation is often used in combination with other insulation materials for enhanced thermal performance.
- Rigid Foam Insulation: Rigid foam insulation is a type of insulation board made from foam plastic materials, such as expanded polystyrene (EPS), extruded polystyrene (XPS), or polyisocyanurate (polyiso). It provides excellent thermal resistance and can be easily cut to fit between wall studs. Rigid foam insulation is commonly used for areas that require higher insulation values or where space is limited.
When selecting the right insulation for your interior walls, it’s important to consider factors such as your budget, the desired R-value (a measure of thermal resistance), soundproofing requirements, and any specific health or environmental concerns. It’s recommended to consult with insulation professionals or contractors to determine the most suitable insulation material and installation method for your specific needs.
Proper installation is key to optimizing the performance of your insulation, so it’s crucial to follow manufacturer guidelines and ensure a thorough and complete application. With the right insulation material in place, you can enjoy improved energy efficiency, enhanced comfort, and sound reduction within your home.
Read more: What R-Value Insulation For Interior Walls
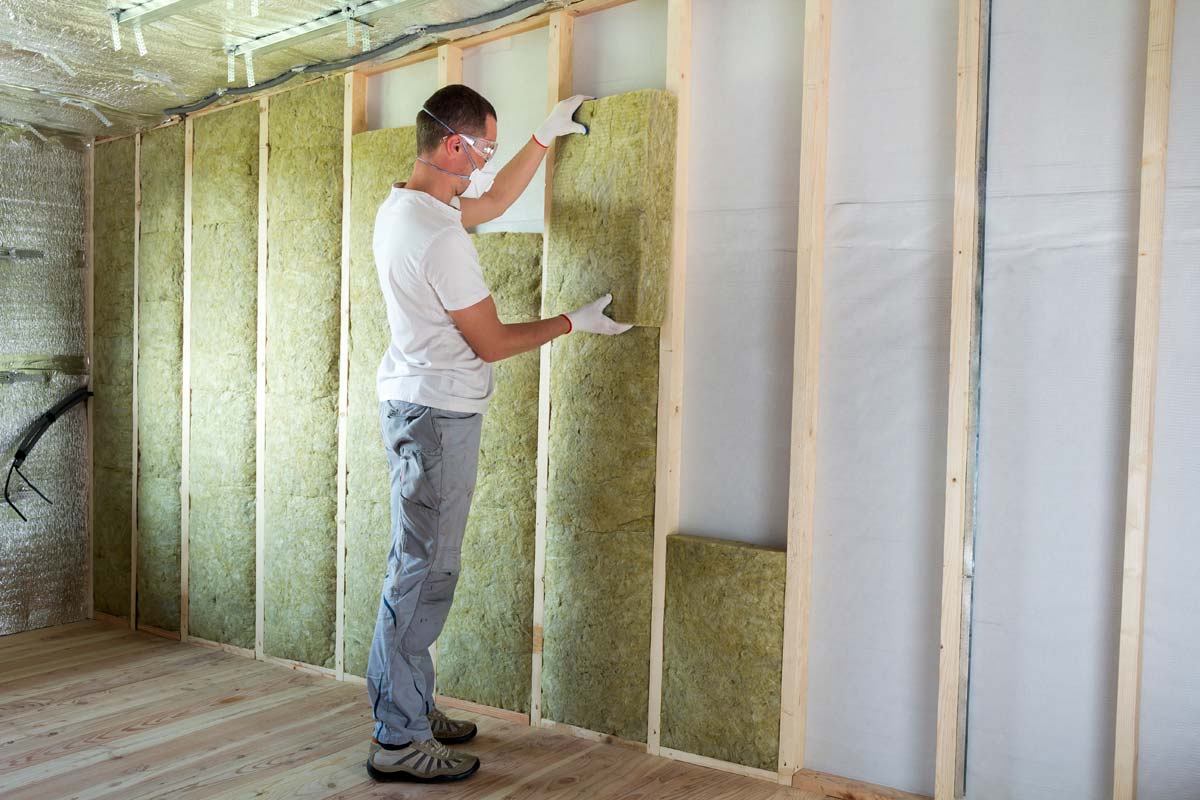
Fiberglass Insulation
Fiberglass insulation is one of the most commonly used types of insulation for interior walls. It is made up of extremely fine glass fibers that are spun together to create a fluffy material. Fiberglass insulation is known for its excellent thermal insulation properties, sound absorption capabilities, and fire resistance.
One of the main advantages of fiberglass insulation is its effectiveness in reducing heat transfer. The tiny air pockets trapped within the fiberglass material help to slow down the movement of heat, providing insulation against both hot and cold temperatures. This means that fiberglass insulation helps to keep your home comfortable year-round by minimizing heat loss in the winter and heat gain in the summer.
Fiberglass insulation is available in batts or rolls, making it easy to install between wall studs. It can be cut to fit the specific dimensions of your wall cavities, ensuring a snug and effective barrier against thermal transfer. The flexibility of fiberglass insulation also allows for easy installation around obstacles such as electrical wiring, plumbing, and other structural elements within the walls.
Another benefit of fiberglass insulation is its soundproofing properties. The dense nature of the material helps to absorb and dampen sound vibrations, reducing the transmission of noise between rooms. This is particularly beneficial if you have a home office, playroom, or bedrooms that require a quieter environment.
In terms of fire resistance, fiberglass insulation is inherently non-combustible. It does not contribute fuel to a fire and can help to slow down the spread of flames. This can contribute to the overall fire safety of your home by providing a protective barrier within the walls.
Fiberglass insulation is also generally considered to be safe for both installation and long-term use. It does not emit any harmful chemicals or volatile organic compounds (VOCs) into the air, making it a preferred choice for those with sensitivities or allergies. However, it’s important to handle fiberglass insulation with care, as the tiny glass fibers can irritate the skin, throat, and lungs if they become airborne. Wearing proper protective gear, such as gloves and a mask, during installation is recommended.
In summary, fiberglass insulation is a versatile and cost-effective option for insulating interior walls. Its thermal insulation properties, soundproofing capabilities, and fire resistance make it a popular choice among homeowners. With proper installation and precautions, fiberglass insulation can contribute to improved energy efficiency, enhanced comfort, and a quieter living environment within your home.
Cellulose Insulation
Cellulose insulation is a popular choice for insulating interior walls, known for its eco-friendly nature and excellent insulation properties. It is made from recycled paper products, typically treated with fire-retardant chemicals to enhance its fire resistance.
One of the notable benefits of cellulose insulation is its high thermal resistance, which helps to prevent heat transfer through the walls. The shredded paper fibers that make up cellulose insulation create a dense and efficient barrier that significantly reduces thermal conductivity. This means that in the winter, cellulose insulation helps to retain warmth inside your home, while in the summer, it keeps the heat from infiltrating your living spaces.
Cellulose insulation is commonly installed as a loose-fill material, which can be blown into wall cavities using specialized equipment. This makes it suitable for both retrofitting existing walls and filling new construction. The loose-fill nature of cellulose insulation allows it to conform and adhere to various wall cavities, creating a seamless and effective insulation layer.
In addition to its thermal insulation properties, cellulose insulation is also an excellent sound absorber. The dense composition of the cellulose fibers helps to dampen sound vibrations, reducing noise transmission between rooms or floors. This can greatly improve the acoustics within your home and create a more peaceful living environment.
One of the significant advantages of cellulose insulation is its eco-friendly nature. It is made from recycled paper products, such as newspapers and cardboard, which allows for the reuse of materials that would otherwise contribute to landfill waste. Cellulose insulation also has a low embodied energy and a low carbon footprint, making it a sustainable choice for environmentally conscious homeowners.
Cellulose insulation is often treated with fire-retardant chemicals to enhance its fire resistance. These chemicals help to reduce the flammability of cellulose insulation, making it a safe choice for interior wall applications. However, it’s important to note that proper installation techniques must be followed to maintain the effectiveness of the fire-resistance treatment.
It’s worth mentioning that cellulose insulation, like other loose-fill insulation materials, can settle over time. Regular inspection and maintenance may be required to ensure that the insulation remains evenly distributed within the wall cavities and maintains its optimal insulating properties.
In summary, cellulose insulation is a versatile and environmentally friendly option for insulating interior walls. Its high thermal resistance, sound absorption capabilities, and eco-conscious composition make it a popular choice among homeowners. With proper installation and regular maintenance, cellulose insulation can contribute to improved energy efficiency, soundproofing, and a more sustainable home environment.
Spray Foam Insulation
Spray foam insulation is a highly effective and versatile option for insulating interior walls. It is applied as a liquid foam that expands and hardens upon contact with the wall surfaces, creating a seamless and airtight barrier.
One of the standout features of spray foam insulation is its exceptional insulating properties. The expanding foam fills every nook and cranny within the wall cavities, creating a continuous layer of insulation that eliminates air leakage and thermal bridging. This means that spray foam insulation provides superior insulation performance, significantly reducing heat transfer and improving energy efficiency within your home.
Due to its ability to expand and conform to the shape of the wall cavities, spray foam insulation also provides excellent air sealing capabilities. By filling gaps, cracks, and other hard-to-reach areas, it creates a seamless thermal envelope that prevents air infiltration and exfiltration. This not only improves energy efficiency but also enhances indoor air quality by reducing the infiltration of dust, allergens, and pollutants from the outside.
Another advantage of spray foam insulation is its exceptional soundproofing capabilities. The dense and rigid nature of the foam absorbs and dampens sound vibrations, reducing noise transmission between rooms and floors. This can greatly enhance the acoustics within your home, providing a quieter and more comfortable living environment.
One of the notable benefits of spray foam insulation is its versatility in application. It can be applied to various types of surfaces, including wood, concrete, and metal, making it suitable for different wall materials. Spray foam insulation can also be used in both new construction and retrofitting projects, allowing for flexible installation options.
It’s important to note that while the initial cost of spray foam insulation may be higher compared to other insulation materials, the long-term benefits offset the investment. Spray foam insulation’s superior insulation performance, air sealing capabilities, and soundproofing properties contribute to energy savings and increased comfort, potentially leading to lower energy bills over time.
When considering spray foam insulation, it’s recommended to hire a professional contractor experienced in spray foam installation. Proper installation techniques and equipment are crucial to ensure uniform coverage and optimal performance of the insulation. Additionally, it’s important to allow sufficient curing time for the foam before occupying the space.
In summary, spray foam insulation is a highly effective and versatile option for insulating interior walls. Its superior insulation, air sealing, and soundproofing properties make it an attractive choice for homeowners. With its ability to create a seamless and airtight barrier, spray foam insulation can significantly improve energy efficiency, enhance indoor comfort, and contribute to a quieter living environment.
Reflective Insulation
Reflective insulation is a unique type of insulation that utilizes the power of reflection to improve the thermal performance of interior walls. It consists of layers of foil or other reflective materials that help to reflect radiant heat, providing additional insulation benefits.
One of the primary features of reflective insulation is its ability to reduce heat gain during the summer months and heat loss during the winter months. The reflective surface of the material reflects a significant portion of the radiant heat back to its source, preventing it from penetrating into your home. This means that with reflective insulation, your interior spaces stay cooler in the summer and warmer in the winter, improving overall energy efficiency.
Reflective insulation works by creating what is known as a radiant barrier. This barrier effectively resists the transfer of radiant heat, which is the heat that travels in the form of electromagnetic waves. By reflecting this radiant heat, the insulation helps to maintain a more comfortable temperature inside your home, reducing the workload on your heating and cooling systems.
One of the significant advantages of reflective insulation is its ease of installation. It typically comes in rolls or sheets and can be easily cut and fitted to cover the interior walls. Reflective insulation is often used in combination with other types of insulation to enhance overall thermal performance. It can be installed along with fiberglass or cellulose insulation for added effectiveness.
In addition to its thermal benefits, reflective insulation can also contribute to soundproofing. While it may not provide the same level of sound absorption as materials specifically designed for soundproofing, the additional layer of material can help to dampen sound vibrations and reduce noise transmission between rooms.
It’s important to install reflective insulation properly to ensure its maximum effectiveness. The reflective surface should face the air gap or open space, allowing it to reflect radiant heat away from your home. Proper installation techniques, such as sealing seams and overlaps, are also important to minimize air leakage and maintain the integrity of the insulation.
Reflective insulation is particularly beneficial in areas with hot climates or homes that experience significant temperature variations. However, it can also have a positive impact in colder climates by preventing heat loss through walls and maintaining a more consistent indoor temperature.
In summary, reflective insulation is a unique option for insulating interior walls that harnesses the power of reflection to improve thermal performance. By reflecting radiant heat, it helps to keep your home cooler in the summer and warmer in the winter, reducing the workload on your HVAC system. While not a standalone solution, when used in combination with other insulation materials, reflective insulation can contribute to energy efficiency, soundproofing, and overall comfort within your home.
How to Insulate Interior Walls
Insulating the interior walls of your home is a worthwhile investment that can improve energy efficiency, soundproofing, and overall comfort. Here is a general guide on how to insulate your interior walls:
1. Assessing the Wall Cavities
Before you begin the insulation process, it’s important to assess the wall cavities to determine their size, accessibility, and any potential obstructions such as wiring or plumbing. You may need to remove existing wall coverings, such as drywall, to access the cavities.
2. Selecting the Right Insulation Material
Choose the most suitable insulation material for your interior walls based on factors such as budget, required R-value, soundproofing needs, and any specific health or environmental considerations. Common options include fiberglass insulation, cellulose insulation, spray foam insulation, reflective insulation, and rigid foam insulation.
3. Installing the Insulation
Exact installation methods may differ depending on the chosen insulation material, so it’s crucial to follow manufacturer guidelines and consult with insulation professionals if needed. However, here are general steps for installing insulation:
- Fiberglass Insulation: Cut the insulation material to fit the wall cavities, leaving a slight gap for expansion. Install the insulation between the studs, ensuring a snug fit. Use a utility knife to trim excess material if necessary.
- Cellulose Insulation: If using loose-fill cellulose insulation, use a blower machine to fill the wall cavities through small holes drilled into the walls. Distribute the insulation evenly to achieve the desired density. Patch and seal the holes once the cavities are filled.
- Spray Foam Insulation: Apply spray foam insulation in a continuous and even layer to cover the interior wall surfaces. Use caution to avoid over-application, as excessive foam can expand and cause damage.
- Reflective Insulation: Install reflective insulation sheets or rolls by stapling or attaching them to the interior wall surfaces with adhesive. Ensure that the reflective side faces the air gap.
Read more: What Is Wall Insulation
4. Addressing Potential Challenges and Considerations
During the insulation process, consider any potential challenges such as obstructions, electrical wiring, or moisture issues. Take proper precautions to ensure safety, such as turning off electricity to the area you’re working on if needed. If you encounter any moisture problems, address them before proceeding with insulation to prevent future issues.
5. Reinstalling Wall Coverings
Once the insulation is properly installed, you can reinstall wall coverings such as drywall or paneling. Ensure that all seams and joints are properly sealed to maintain the integrity of the insulation and minimize air leakage.
It’s important to note that insulation projects can vary in complexity, and it’s recommended to consult with insulation professionals or contractors for personalized advice and assistance. They can provide guidance specific to your home’s needs and ensure that the insulation is installed correctly and effectively.
By following these general steps and considering the specific requirements of your home, you can effectively insulate the interior walls, leading to improved energy efficiency, enhanced soundproofing, and greater overall comfort within your living spaces.
Assessing the Wall Cavities
Assessing the wall cavities is an essential first step before insulating the interior walls of your home. This process involves evaluating the size, accessibility, and potential obstructions within the wall cavities to ensure a smooth and effective insulation installation. Here are some key considerations when assessing the wall cavities:
1. Size of the Wall Cavities
Start by measuring the dimensions of the wall cavities where insulation will be installed. This includes the height, width, and depth of the cavities. Accurate measurements are essential for selecting the appropriate insulation material and determining the quantity needed for the project.
Read more: How To Cover Stucco Interior Walls
2. Accessibility of the Wall Cavities
Determine the accessibility of the wall cavities, as this will affect the installation process. If the cavities are easily accessible and there are no barriers, such as built-in cabinets or fixed furniture, insulating the walls will be more straightforward. However, if the cavities are difficult to access due to structural elements or limited openings, additional planning may be required.
3. Potential Obstructions
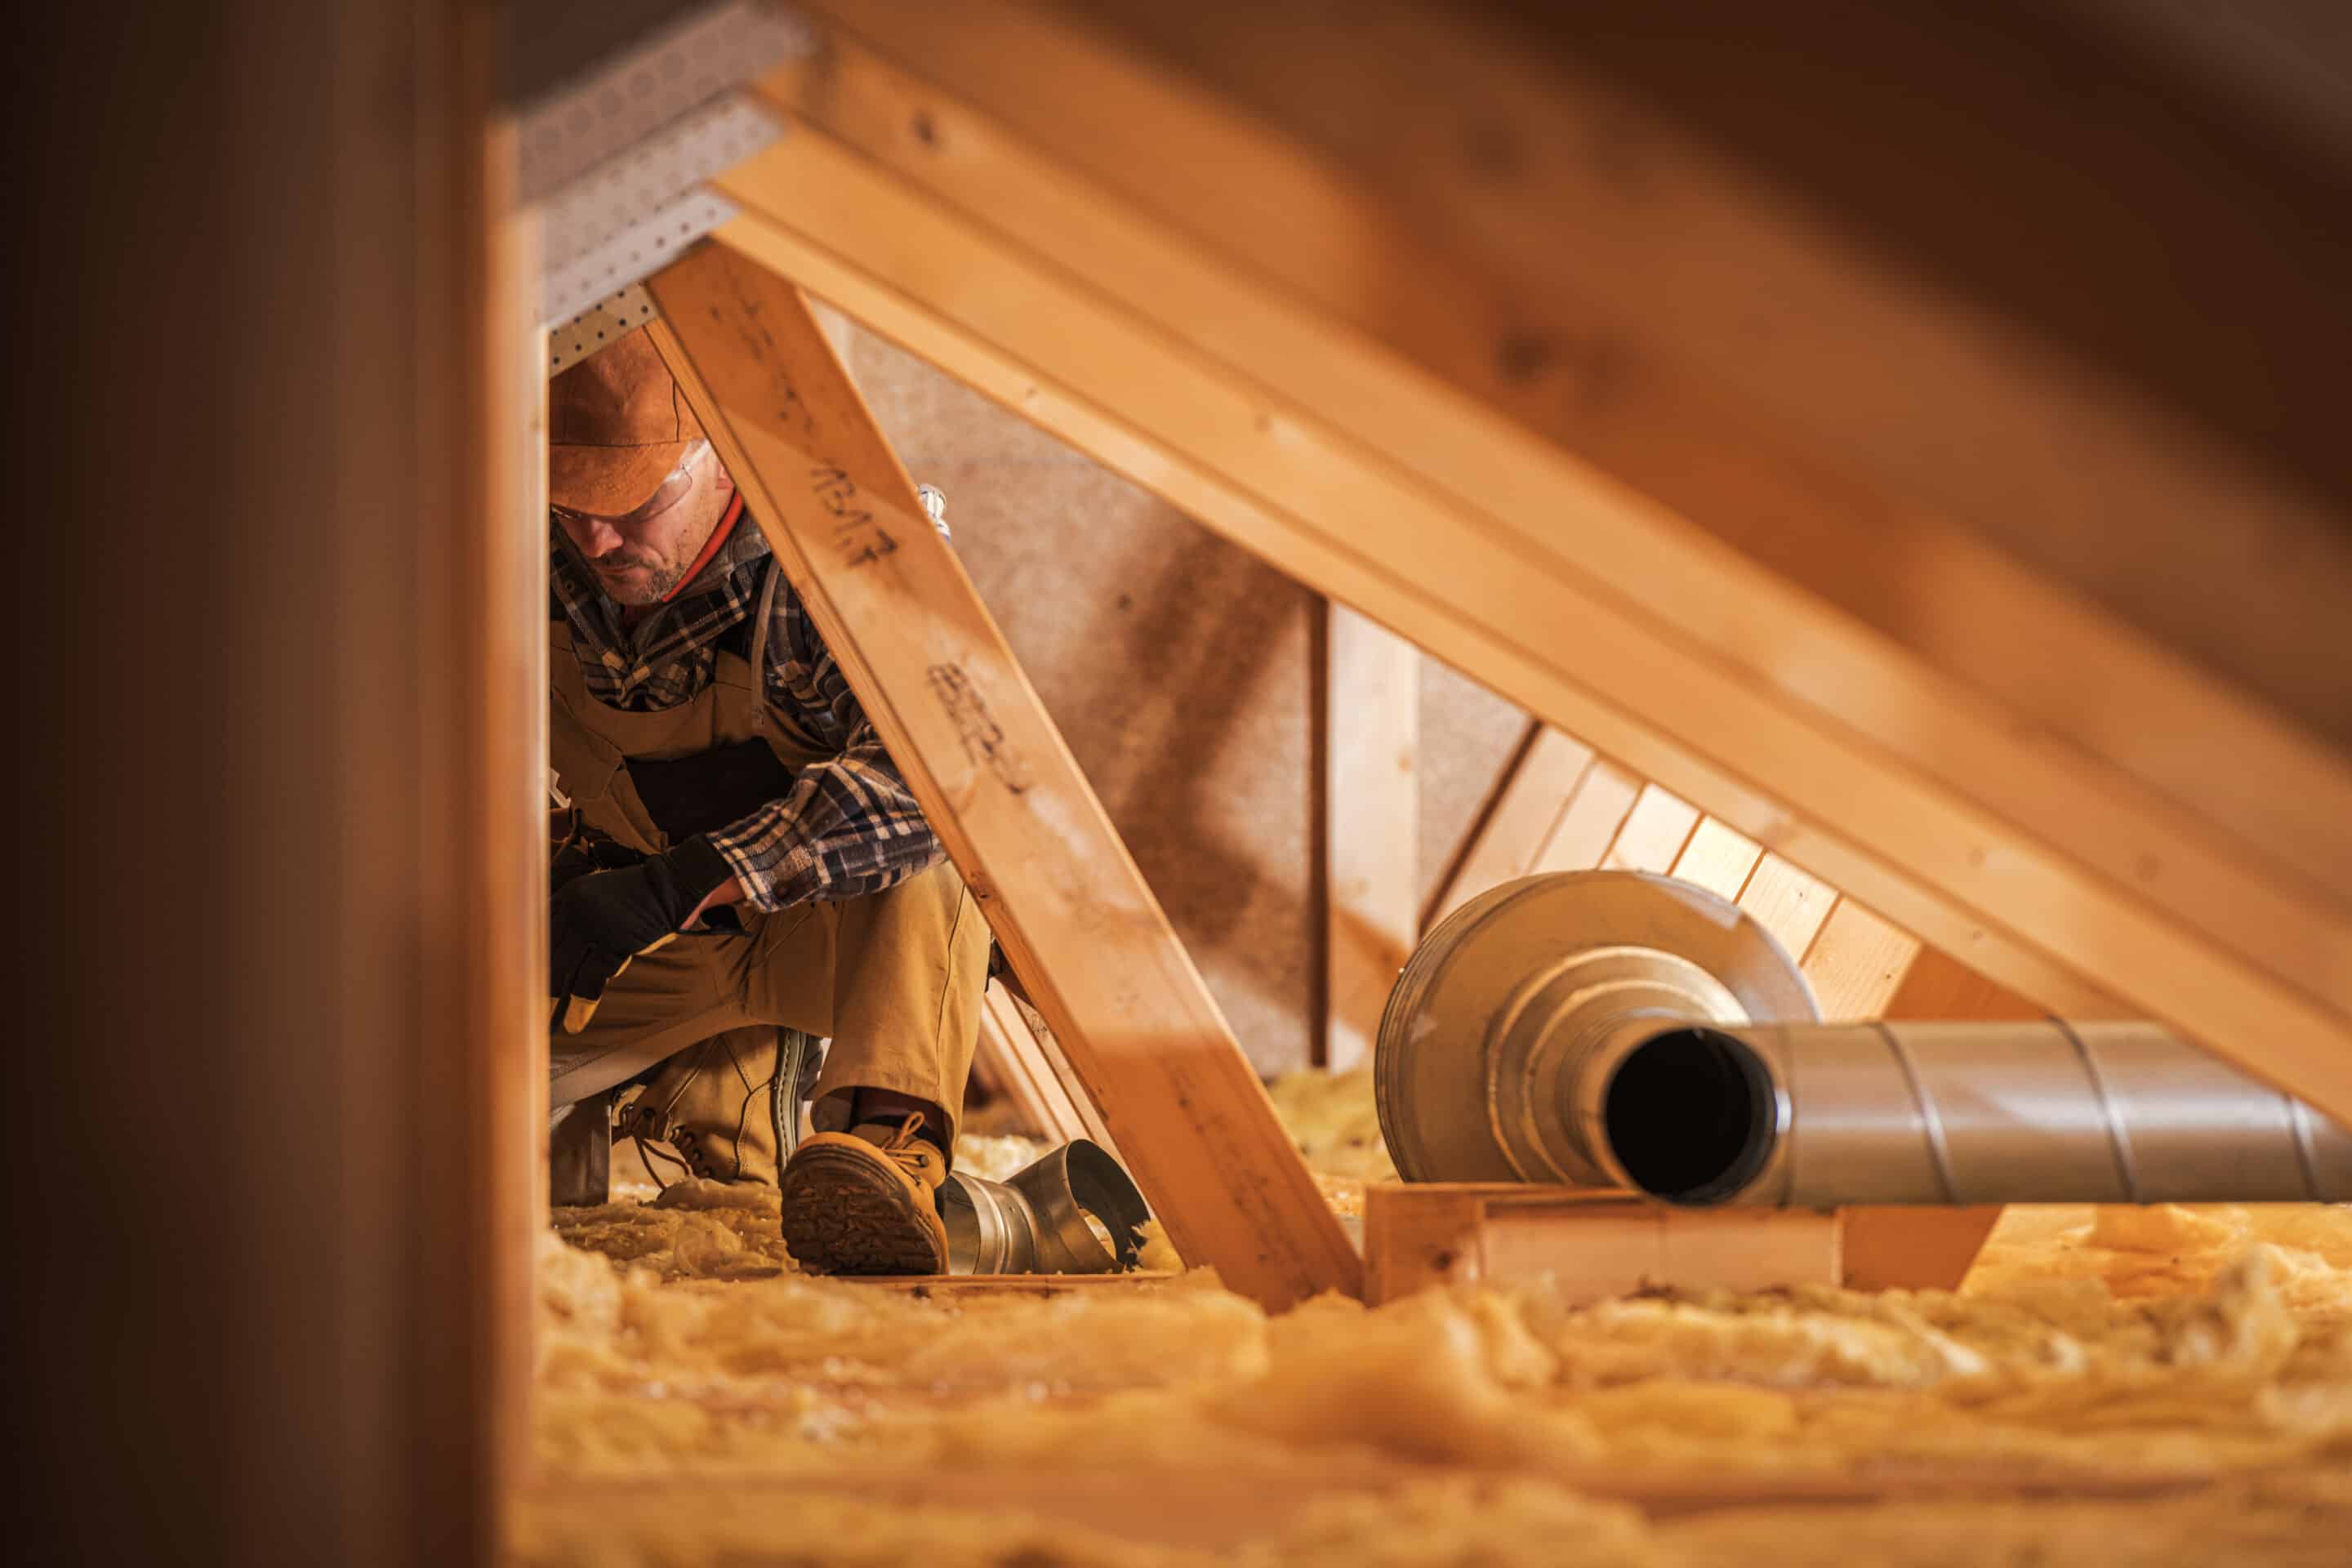
Identify any potential obstructions within the wall cavities that may impede the insulation process. These obstructions may include electrical wiring, plumbing, ductwork, or other utilities. It’s crucial to take note of their locations and ensure that insulation installation will not obstruct or damage these components. Consider consulting with professionals if you’re uncertain about how to work around these obstructions.
4. Removing Wall Coverings
In some cases, you may need to remove existing wall coverings, such as drywall or paneling, to access the wall cavities. This step may be necessary to assess the condition of the walls, identify potential issues like moisture damage or mold growth, and create enough space for insulation installation. Take care when removing wall coverings to minimize damage and ensure safety.
5. Assessing Moisture Issues
Moisture issues can compromise the effectiveness of insulation and lead to mold or other damage. Before insulating, inspect the wall cavities for signs of moisture such as water stains, dampness, or mold growth. If moisture issues are present, it’s crucial to address and resolve them to prevent further damage and ensure a dry environment before proceeding with insulation installation.
By thoroughly assessing the wall cavities, you can gather important information and determine the necessary steps for insulating your interior walls effectively. This assessment will help you select the appropriate insulation material, plan for any obstructions, and address any moisture issues that may impact the insulation process. Consider consulting with insulation professionals or contractors for expert advice and guidance tailored to your specific needs.
Read more: What Nap For Interior Walls
Selecting the Right Insulation Material
Choosing the right insulation material is crucial for effectively insulating the interior walls of your home. The selection process involves considering factors such as budget, desired R-value, soundproofing needs, and any specific health or environmental considerations. Here are some popular insulation materials to consider:
Fiberglass Insulation
Fiberglass insulation is a widely used and affordable option. It consists of fine glass fibers held together in batts or rolls. Fiberglass insulation provides excellent thermal insulation, sound absorption, and fire resistance. It is easy to handle and install, making it a popular choice for DIY projects.
Cellulose Insulation
Cellulose insulation is made from recycled paper products, typically treated with fire-retardant chemicals. This eco-friendly option is blown into the wall cavities as loose fill, conforming to irregular shapes and providing effective thermal insulation. Cellulose insulation also offers good soundproofing qualities.
Spray Foam Insulation
Spray foam insulation is a versatile and high-performance option. It is applied as a liquid foam that expands and hardens upon contact with surfaces, creating an airtight barrier. Spray foam provides superior insulation, air sealing, and soundproofing properties. Professional installation is recommended for proper application.
Read more: How To Build Interior Walls
Reflective Insulation
Reflective insulation utilizes reflective materials such as foil to resist radiant heat transfer. It consists of layers of reflective material sandwiched between other insulating materials. Reflective insulation is particularly effective in hot climates, as it reflects radiant heat, keeping your home cooler. It works well in combination with other insulation materials for enhanced thermal performance.
Rigid Foam Insulation
Rigid foam insulation is composed of foam plastic materials, such as expanded polystyrene (EPS), extruded polystyrene (XPS), or polyisocyanurate (polyiso). It offers high levels of thermal resistance in a relatively thin profile. Rigid foam insulation is commonly used in areas where space is limited or greater insulation values are required.
When selecting the right insulation material, consider factors such as your budget, insulation performance requirements, moisture resistance, fire resistance, and any specific health or environmental concerns. It is also essential to check local building codes and regulations to ensure compliance with the recommended insulation materials for your area.
Consulting with insulation professionals or contractors can provide valuable insights and recommendations based on your specific needs. They can guide you in selecting the most suitable insulation material and ensure proper installation for optimal energy efficiency, soundproofing, and comfort within your home.
Installing the Insulation
Proper installation of insulation is crucial for maximizing its effectiveness in insulating the interior walls of your home. The specific installation method may vary depending on the insulation material chosen, so it’s important to follow manufacturer guidelines and consult with insulation professionals if needed. Here are some general steps to consider when installing insulation:
1. Preparation
Before installing insulation, ensure that the wall cavities are clean and free of debris. Remove any obstacles that may impede the installation process, such as electrical wiring or plumbing, and take necessary precautions, such as turning off power when working around electrical components.
Read more: Why Is Insulation Dangerous
2. Cutting and Fitting
If you are using insulation materials like fiberglass or rigid foam, measure and cut the insulation to fit the dimensions of the wall cavities. Leave a slight gap for expansion as necessary. Properly fitted insulation ensures a snug and effective barrier against thermal transfer.
3. Installation Methods
The installation methods will vary depending on the insulation material:
- Fiberglass Insulation: Install the fiberglass insulation between the wall studs, pushing it gently into place and ensuring a tight fit. Avoid compressing the insulation excessively, as this can reduce its thermal performance.
- Cellulose Insulation: If using loose-fill cellulose insulation, use a blower machine to fill the wall cavities through small holes drilled into the walls. Distribute the insulation evenly to achieve the desired density. Patch and seal the holes once the cavities are filled.
- Spray Foam Insulation: Apply the spray foam insulation in a continuous and even layer across the interior wall surfaces. Use caution and follow manufacturer guidelines to avoid over-application, as excessive foam can expand and cause damage. Professional installation is recommended for optimal results.
- Reflective Insulation: Install reflective insulation sheets or rolls by stapling or attaching them to the interior wall surfaces with adhesive. Ensure that the reflective side faces the air gap to maximize its effectiveness in reducing radiant heat.
4. Sealing and Inspecting
Ensure that all seams, joints, and penetrations are properly sealed to create a tight thermal envelope. This can be achieved using insulation tape, caulk, or other appropriate sealing methods. Carefully inspect the installed insulation to identify and address any gaps or areas that require additional insulation.
5. Reinstalling Wall Coverings
Once the insulation is properly installed, you can reinstall the wall coverings such as drywall, paneling, or other finishes. Take care to seal any gaps or holes created during the installation process to maintain the integrity of the insulation and prevent air leakage.
It’s important to note that insulation projects can vary in complexity, and it’s recommended to consult with insulation professionals or contractors for personalized advice and guidance. They can provide recommendations specific to your home’s needs and ensure that the insulation is installed correctly and effectively, maximizing energy efficiency, soundproofing, and overall comfort within your living spaces.
Read more: How To Repaint Interior Walls
Potential Challenges and Considerations
When insulating the interior walls of your home, it’s important to be aware of potential challenges and considerations that may arise during the process. By anticipating and addressing these factors, you can ensure a smoother and more successful insulation project. Here are some key points to keep in mind:
1. Obstructions:
Assess the wall cavities for any potential obstructions such as electrical wiring, plumbing, or other utilities. These obstacles may require special attention and careful planning to ensure that insulation can be installed effectively without damaging or obstructing these components. Consult with insulation professionals or contractors if you’re unsure about how to work around these obstructions.
2. Moisture Issues:
Prior to insulating, inspect the wall cavities for signs of moisture, such as water stains, dampness, or mold growth. Moisture issues can compromise the effectiveness of insulation and lead to further damage. If moisture problems are present, address and resolve them before proceeding with insulation installation to prevent potential ongoing issues.
3. Air Sealing:
Proper air sealing is crucial to maximize the efficiency of insulation. Take care to seal all gaps, cracks, and penetrations in the walls to prevent air leakage. This can be achieved using insulation tape, caulk, or other appropriate sealing methods. A well-sealed thermal envelope ensures that the insulation performs optimally and reduces energy loss through air infiltration.
Read more: What Are Interior Walls Made Of
4. Ventilation:
Consider the impact of insulation on ventilation within your home. While insulation helps to improve energy efficiency, it also reduces the natural airflow through the walls. Proper ventilation is important to maintain indoor air quality and prevent moisture buildup. Ensure that your home’s ventilation system is adequate and functioning properly to provide fresh air circulation.
5. Building Codes and Regulations:
Check local building codes and regulations to ensure compliance with the recommended insulation materials and installation methods for your area. Building codes may dictate specific requirements for fire resistance, thermal performance, and safety measures. Familiarize yourself with these regulations or consult with professionals to ensure that you adhere to the appropriate guidelines.
By considering these potential challenges and taking them into account during the insulation project, you can address them effectively and ensure a successful outcome. Insulation professionals or contractors can provide valuable guidance and expertise throughout the process, helping you navigate any challenges and ensuring that your interior walls are properly insulated for optimal energy efficiency, soundproofing, and comfort within your home.
Conclusion
Insulating the interior walls of your home offers numerous benefits that contribute to energy efficiency, soundproofing, and overall comfort. By creating a thermal barrier within your walls, insulation helps to regulate temperature fluctuations, reduce heat loss or gain, and enhance climate control. Additionally, insulation provides sound absorption properties, creating a quieter and more peaceful living environment. The prevention of moisture and mold problems is another advantage of insulating interior walls, ensuring a healthy and sustainable home.
When considering insulation options, select the most suitable material for your specific needs. Fiberglass insulation is a cost-effective and commonly used option, while cellulose insulation offers eco-friendly characteristics. Spray foam insulation provides unmatched performance, and reflective insulation helps manage radiant heat. Rigid foam insulation is ideal for limited spaces or higher insulation requirements.
Proper installation is crucial to maximize the benefits of insulation. Adequately assess the wall cavities, considering their size, accessibility, and potential obstructions. Handle moisture issues beforehand and ensure effective air sealing and ventilation. Confirm compliance with local building codes and regulations, and consult with professionals for personalized advice.
By insulating your interior walls, you can experience cost savings through improved energy efficiency and decreased reliance on supplemental heating or cooling devices. The enhanced comfort and climate control in your home create a more enjoyable living environment for you and your family. Additionally, reduced sound transmission and prevention of moisture-related problems contribute to a healthier and quieter living space.
In conclusion, insulating interior walls is a wise investment that pays off in long-term benefits. It not only improves energy efficiency and soundproofing but also enhances comfort, prevents moisture issues, and reduces costs. Consider the specific needs of your home, select the appropriate insulation material, and ensure proper installation to transform your living spaces into a cozy, energy-efficient, and peaceful haven.
Eager to learn more about keeping your house snug and energy bills low? Dive into our latest feature on wall insulation, a must-read for anyone planning to upgrade their home for the coming year. This detailed guide covers new trends, materials, and techniques that promise to transform your space into a fortress against both noise and weather, making every room more comfortable year-round. Don’t miss out on learning how to tackle this key aspect of home improvement.
Frequently Asked Questions about Why Insulate Interior Walls
Was this page helpful?
At Storables.com, we guarantee accurate and reliable information. Our content, validated by Expert Board Contributors, is crafted following stringent Editorial Policies. We're committed to providing you with well-researched, expert-backed insights for all your informational needs.
0 thoughts on “Why Insulate Interior Walls”