
Articles
Why Does The Dryer Squeak
Modified: August 24, 2024
Discover helpful articles on why your dryer squeaks and how to fix it, providing solutions to eliminate the annoying noise and ensure smooth laundry sessions.
(Many of the links in this article redirect to a specific reviewed product. Your purchase of these products through affiliate links helps to generate commission for Storables.com, at no extra cost. Learn more)
Introduction
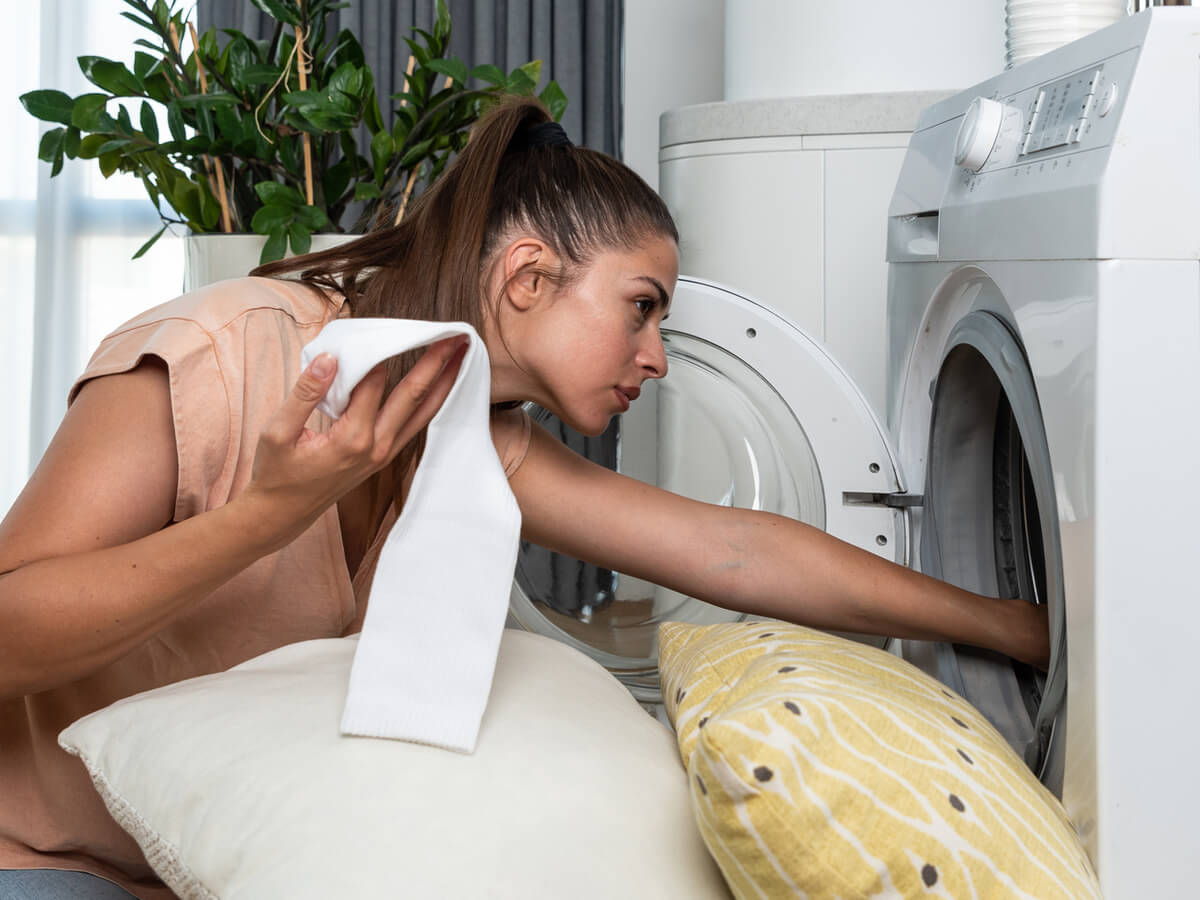
A dryer is an essential appliance in most households, providing convenience and efficiency in drying clothes. However, one common issue that can arise with dryers is a squeaking noise. If you’ve ever experienced a dryer squeaking, you know how annoying and disruptive it can be. Not only is it bothersome, but it can also be a sign of a potential problem with your dryer that needs attention.
In this article, we will explore the common causes of dryer squeaking and provide DIY troubleshooting and solutions to help you resolve the issue. We’ll also discuss when it’s necessary to call a professional for assistance. So, let’s dive in and find out why your dryer is squeaking and how to fix it.
Key Takeaways:
- DIY Troubleshooting
Regular maintenance and DIY troubleshooting can often resolve dryer squeaking issues, such as lubricating drum support rollers and replacing drive belts, ensuring a quiet and efficient laundry experience. - When to Call a Professional
Knowing when to seek professional assistance for persistent or complex dryer issues, as well as prioritizing safety and proper maintenance, can ensure effective and safe resolution of squeaking problems.
Read more: Why Does My Washer Squeak
Common Causes of Dryer Squeaking
There are several potential reasons why your dryer may be squeaking. Identifying the root cause is crucial in determining the appropriate solution. Here are a few common culprits behind that irritating noise:
- Worn Out Drum Support Rollers: Over time, the drum support rollers can wear down or become damaged, resulting in a squeaking sound. These rollers support the drum as it rotates, and when they become worn, they can produce a metal-on-metal squeak.
- Damaged Drive Belt: The drive belt is responsible for turning the drum in the dryer. If the belt gets frayed, worn, or damaged, it can cause a squeaking noise as it tries to grip the drum and rotate it.
- Malfunctioning Idler Pulley: The idler pulley helps to maintain tension on the drive belt. When the pulley becomes worn or faulty, it can result in the belt slipping and causing a squeaking noise.
- Faulty Blower Wheel: The blower wheel is responsible for circulating air through the dryer. If the wheel becomes loose, damaged, or clogged with debris, it can produce a squeaking sound as it spins.
- Loose or Worn Out Motor Mounts: The motor mounts secure the motor in place. If they come loose or wear out, it can cause the motor to vibrate and produce a squeaking noise.
These are just a few of the potential causes behind a squeaky dryer. The exact source of the noise may vary based on the make and model of your appliance. It’s essential to inspect and troubleshoot these components to determine the exact cause of the squeaking noise.
Worn Out Drum Support Rollers
One of the most common causes of dryer squeaking is worn out drum support rollers. These rollers are located at the back of the dryer and support the drum as it rotates. Over time, the rollers can become worn or damaged, resulting in a squeaking or squealing noise.
To troubleshoot this issue, you’ll need to access the drum support rollers. Start by unplugging the dryer and locating the access panel at the back. Remove the panel to expose the rollers. Inspect them for signs of wear, such as flat spots, cracks, or a rough surface.
If the drum support rollers appear worn, it’s best to replace them. You can find replacement rollers at an appliance parts store or online. Follow the manufacturer’s instructions for your specific dryer model to replace the rollers. It typically involves removing the old rollers, cleaning the shafts, and installing the new rollers. Make sure to lubricate the shafts with a small amount of high-temperature grease to ensure smooth rotation.
Once you have replaced the drum support rollers, plug in the dryer and run it to see if the squeaking noise has been resolved. If the noise persists, you may need to investigate other potential causes of the squeak, such as the drive belt or idler pulley.
Regular maintenance can help prevent the drum support rollers from wearing out quickly. It’s a good practice to clean the rollers periodically to remove any lint or debris that may cause friction. This will help prolong their lifespan and reduce the likelihood of squeaking. Additionally, avoiding overloading the dryer can alleviate stress on the rollers, reducing the risk of wear and tear.
By addressing the issue of worn out drum support rollers promptly, you can eliminate the squeaking noise and ensure smooth and efficient operation of your dryer.
Damaged Drive Belt
The drive belt in your dryer is responsible for turning the drum as the motor runs. Over time, the drive belt can become worn, frayed, or damaged, resulting in a squeaking noise when the dryer is in operation.
To determine if a damaged drive belt is the cause of the squeaking, you’ll need to access the belt. Start by disconnecting the power to the dryer and locating the access panel on the back or front of the appliance, depending on the model. Once the panel is removed, you should be able to see the drive belt around the drum.
Inspect the belt for any signs of wear or damage, such as fraying, cracks, or stretching. If the belt appears worn or damaged, it will need to be replaced. You can purchase a replacement belt from an appliance parts store or online. Ensure that you choose the correct belt for your specific dryer model.
Replacing the drive belt involves removing the old belt from the drum and motor pulley and installing the new belt following the manufacturer’s instructions. It’s a good idea to refer to your dryer’s manual or search for a step-by-step guide specific to your model for detailed instructions.
After replacing the drive belt, plug in the dryer and run it to check if the squeaking noise has been resolved. If the noise persists, it may indicate an issue with another component, such as the drum support rollers or the idler pulley.
To prevent future drive belt damage and prolong its lifespan, avoid overloading the dryer. Overloading puts extra strain on the belt, leading to premature wear. Additionally, regular maintenance, such as cleaning the drum and vents, can prevent lint buildup, which can cause the belt to slip or become damaged.
Fixing a damaged drive belt can eliminate the squeaking noise and ensure smooth and efficient rotation of the dryer drum. By addressing this issue promptly, you can extend the lifespan of your dryer and enjoy hassle-free drying of your clothes.
Malfunctioning Idler Pulley
The idler pulley in your dryer plays a crucial role in maintaining tension on the drive belt. The pulley keeps the belt taut as it moves the drum, allowing for smooth rotation. However, over time, the idler pulley can become worn or faulty, leading to a squeaking noise.
To determine if a malfunctioning idler pulley is the cause of the squeak, you’ll need to locate it. The idler pulley is typically located near the motor and has a small wheel or pulley attached to it.
Start by disconnecting the power to the dryer and removing the access panel on the back or front, depending on the model. Once you have access to the idler pulley, inspect it for any signs of wear, damage, or misalignment. Look for cracks, excessive play, or uneven wear on the wheel.
If you notice any issues with the idler pulley, it’s best to replace it. You can purchase a replacement pulley from an appliance parts store or online. Make sure to choose the correct pulley for your specific dryer model.
Replacing the idler pulley involves removing the old pulley and installing the new one according to the manufacturer’s instructions. Typically, this includes releasing the tension on the belt, removing the old pulley, attaching the new pulley, and then reapplying tension to the belt.
After replacing the idler pulley, plug in the dryer and run it to check if the squeaking noise has been resolved. If the noise persists, it may indicate a different component issue that requires further investigation.
To prevent future idler pulley problems, it’s important to keep the area clean and free from debris. Regularly inspect and clean the pulley and surrounding areas to prevent lint or other particles from interfering with its function. Additionally, avoid overloading the dryer to reduce stress on the pulley and other components.
By addressing a malfunctioning idler pulley, you can eliminate the squeaking noise and ensure proper tension on the drive belt, leading to smooth and efficient operation of your dryer.
Read more: Why Does My Opal Ice Maker Squeak
Faulty Blower Wheel
The blower wheel in your dryer is responsible for circulating air through the appliance, ensuring efficient drying. However, if the blower wheel becomes loose, damaged, or clogged with debris, it can lead to a squeaking or rattling noise.
To determine if a faulty blower wheel is the cause of the squeak, you’ll need to locate it. The blower wheel is usually located at the front or back of the dryer behind the drum.
To access the blower wheel, first, disconnect the power to the dryer and remove the front or back panel, depending on the model. Once you have access to the blower wheel, inspect it for any signs of damage. Look for cracks, excessive play, or debris buildup that may be interfering with its rotation.
If you find any issues with the blower wheel, it’s best to address them promptly. Start by cleaning the wheel and removing any debris that may be causing the noise. Use a soft brush or vacuum to carefully remove lint, dust, or other particles that may have accumulated.
If cleaning doesn’t resolve the issue, you may need to replace the blower wheel. You can find a replacement blower wheel at an appliance parts store or online. Ensure that you choose the correct wheel for your specific dryer model.
Replacing the blower wheel typically involves removing the old wheel and installing the new one according to the manufacturer’s instructions. Be sure to follow the proper steps to ensure a secure and proper fit.
After replacing or cleaning the blower wheel, plug in the dryer and run it to check if the squeaking noise has been resolved. If the noise persists, it may be necessary to investigate other potential causes.
To prevent future blower wheel problems, it’s important to keep the area around the blower wheel clean and free from debris. Regularly inspect and clean the wheel and surrounding areas to ensure optimal airflow and prevent any buildup that may contribute to noise.
By addressing a faulty blower wheel, you can eliminate the squeaking noise and restore smooth airflow, allowing for efficient drying in your dryer.
Loose or Worn Out Motor Mounts
The motor mounts in your dryer serve an important function: they secure the motor in place, ensuring stability during operation. However, over time, the motor mounts can become loose or worn out, leading to vibrations and a squeaking noise.
To determine if loose or worn out motor mounts are the cause of the squeak, you’ll need to locate them. The motor mounts are typically located near the motor and can be accessed by removing the front or back access panel of the dryer.
Once you have access to the motor mounts, inspect them for any signs of wear, damage, or looseness. Check for cracks, misalignments, or excessive play in the mounts.
If you notice any issues with the motor mounts, it’s crucial to address them promptly. Start by tightening any loose mounting screws or bolts, ensuring that the motor is securely in place. If the mounts appear worn or damaged, it may be necessary to replace them. You can find replacement motor mounts at an appliance parts store or online. Be sure to choose the correct mounts for your specific dryer model.
Replacing motor mounts typically involves removing the old mounts and installing the new ones according to the manufacturer’s instructions. It’s essential to follow the proper steps and ensure a secure fit to prevent further issues.
After addressing loose or worn out motor mounts, plug in the dryer and run it to check if the squeaking noise has been resolved. If the noise persists, it may indicate another underlying issue that requires further investigation.
To prevent future motor mount problems, it’s important to keep the dryer clean and free from excess lint or debris. Regularly inspect the motor mounts and surrounding areas, and clean out any accumulated lint or debris that may interfere with their function. Additionally, avoid overloading the dryer, as excessive weight can cause additional strain on the motor mounts.
By addressing loose or worn out motor mounts, you can eliminate the squeaking noise and ensure stable motor operation, allowing for a quiet and efficient drying experience.
DIY Troubleshooting and Solutions
If your dryer is squeaking, there are several DIY troubleshooting steps you can take to identify and resolve the issue. Here are some common solutions to help eliminate the squeaking noise:
- Lubricating the Drum Support Rollers: If the drum support rollers are causing the squeaking noise, try lubricating them with a small amount of high-temperature grease. This can help reduce friction and eliminate the squeak. However, if the rollers are worn or damaged, they may need to be replaced for a long-term solution.
- Replacing the Drive Belt: If a damaged drive belt is the source of the squeak, it’s best to replace it. Follow the manufacturer’s instructions for your specific dryer model to remove the old belt and install a new one. Make sure to choose a high-quality replacement belt to ensure proper operation and reduce the risk of future squeaking.
- Fixing or Replacing the Idler Pulley: If the idler pulley is squeaking, you can try cleaning it and removing any debris that may be causing the noise. If cleaning doesn’t resolve the issue, consider replacing the idler pulley with a new one. Be sure to follow the proper steps for replacement to ensure a secure and properly functioning pulley.
- Repairing or Replacing the Blower Wheel: If the blower wheel is loose, damaged, or clogged, it can result in a squeaking noise. Start by cleaning the wheel and removing any debris that may be causing the issue. If cleaning doesn’t help, consider repairing or replacing the blower wheel for a more permanent solution.
- Tightening or Replacing Motor Mounts: Loose or worn out motor mounts can cause vibrations and a squeaking noise. Start by tightening any loose mounting screws or bolts. If the mounts are damaged or severely worn, they may need to be replaced. Look for replacement motor mounts that are compatible with your specific dryer model.
Remember, before attempting any DIY repairs, always disconnect the power to the dryer for safety purposes. Take caution and refer to your specific dryer’s manual or consult a professional if you’re unsure about any repair steps.
If you’ve tried the troubleshooting solutions above and the squeaking persists, it may be time to consider calling a professional for further assistance.
It’s important to note that regular maintenance can help prevent future squeaking issues. Clean the lint screen after each use, inspect and clean the drum and vents periodically, and avoid overloading the dryer. These practices can help prolong the life of your dryer and minimize the chances of squeaking or other mechanical problems.
By following these DIY troubleshooting steps and solutions, you can often resolve the squeaking noise in your dryer and ensure smooth and quiet operation.
Regular maintenance and cleaning of the dryer’s drum and belt can help prevent squeaking. Use a vacuum to remove lint and debris, and apply a small amount of lubricant to the belt and pulleys to reduce friction.
Lubricating the Drum Support Rollers
One of the DIY solutions for addressing a squeaking dryer is to lubricate the drum support rollers. Over time, these rollers can become worn or dry, resulting in friction and a squeaking noise. Lubricating them with high-temperature grease or oil can help reduce friction and eliminate the squeak.
To lubricate the drum support rollers, start by disconnecting the power to the dryer for safety. Then, locate the drum support rollers, which are usually found at the back of the dryer, behind the drum. You may need to remove the front or back panel to access them, depending on the dryer model.
Once you have access to the drum support rollers, inspect them for any signs of wear, such as flat spots or rough surfaces. If they appear worn, it may be necessary to replace them. However, if they are still in good condition, lubrication may help resolve the squeaking issue.
Apply a small amount of high-temperature grease or oil to the shaft of each roller. Rotate the roller by hand to ensure the lubricant is evenly distributed. Be careful not to apply too much grease, as it can attract lint and cause other problems. Use a lint-free cloth to wipe away any excess grease.
After lubricating the drum support rollers, plug in the dryer and run it to check if the squeaking noise has been eliminated. If the noise persists, it may indicate another issue that requires further troubleshooting.
Regular maintenance can prevent future issues with the drum support rollers. Clean the rollers periodically to remove lint or debris that may interfere with their function. Additionally, avoid overloading the dryer, as excessive weight can put additional strain on the rollers and contribute to premature wear.
It’s worth noting that if the drum support rollers are severely worn or damaged, lubrication may only provide temporary relief. In such cases, it’s best to replace the rollers to ensure smooth and efficient operation of your dryer.
By lubricating the drum support rollers, you can often eliminate the squeaking noise, prolong the life of the rollers, and enjoy quiet drying cycles once again.
Read more: Why Is My Standing Fan Squeaking
Replacing the Drive Belt
If your dryer is producing a squeaking noise and the culprit is a damaged drive belt, replacing it can help resolve the issue. The drive belt is responsible for rotating the drum as the motor runs. Over time, the belt can become worn, frayed, or damaged, leading to squeaking or squealing sounds.
To replace the drive belt, start by disconnecting the power to the dryer for safety. Then, locate the access panel at the back or front of the dryer, depending on the model. Remove the panel to gain access to the drive belt.
Inspect the drive belt for any signs of wear, such as fraying, cracks, or stretching. If it appears damaged, it’s best to replace it with a new belt. You can find a compatible replacement belt at an appliance parts store or online. It’s important to get the correct size and type of belt for your specific dryer model.
Before removing the old belt, take note of the belt’s positioning and how it wraps around the drum and motor pulley. This will help guide you when installing the new belt.
To remove the old belt, release the tension by either releasing the tension roller or detaching the motor from the mounting bracket. Carefully remove the belt from the drum and motor pulleys.
Next, install the new drive belt by sliding it over the drum and fitting it onto the motor pulley according to the previous positioning. Ensure the belt is properly aligned and seated on both pulleys.
Once the new belt is securely in place, reestablish the tension by either reattaching the motor to the mounting bracket or adjusting the position of the tension roller. Make sure the belt is tight but not overly stretched.
After replacing the drive belt, reattach the access panel and plug in the dryer. Run a test cycle to check if the squeaking noise has been resolved. If the noise persists, further troubleshooting may be necessary.
To prevent future drive belt issues, avoid overloading the dryer and ensure that the drum turns smoothly during operation. Regularly inspect the belt for any signs of wear and replace it as needed.
By replacing a damaged drive belt, you can eliminate the squeaking noise and restore proper functionality to your dryer, allowing for quiet and efficient drying of your clothes.
Fixing or Replacing the Idler Pulley
If your dryer is squeaking and the source of the noise is a malfunctioning idler pulley, fixing or replacing it can help resolve the issue. The idler pulley is responsible for maintaining tension on the drive belt, ensuring smooth rotation of the drum. When the pulley becomes worn or faulty, it can result in belt slippage and a squeaking noise.
To address a squeaking idler pulley, start by disconnecting the power to the dryer for safety. Then, locate the access panel on the back or front of the dryer, depending on the model. Remove the panel to gain access to the idler pulley.
Inspect the idler pulley for any signs of wear, such as cracks, excessive play, or uneven wear on the wheel. If the pulley appears damaged or worn, it’s best to replace it with a new one. You can find a compatible replacement pulley at an appliance parts store or online.
If the idler pulley is in good condition but squeaking due to debris or lack of lubrication, you may be able to fix it without replacing it. First, clean the pulley thoroughly by removing any built-up lint, dust, or debris. Use a soft brush or a lint-free cloth to wipe away any residue.
After cleaning the idler pulley, apply a small amount of lubricant to the wheel or the shaft. Use a high-temperature lubricant specifically designed for use in dryers. Be careful not to over-lubricate, as excess lubrication can attract dust and lint, which may lead to future problems.
Once the idler pulley is cleaned and lubricated, reassemble the dryer by reattaching the access panel and plugging in the power. Run a test cycle to check if the squeaking noise has been resolved. If the noise persists, further troubleshooting or replacement may be necessary.
To prevent future idler pulley issues, regularly clean the area around the pulley to remove lint and debris. Additionally, ensure that the drive belt is properly aligned and seated on the pulleys to prevent unnecessary strain on the pulley and belt.
By fixing or replacing a squeaking idler pulley, you can eliminate the noise and ensure that the drive belt maintains proper tension, allowing for smooth and quiet operation of your dryer.
Repairing or Replacing the Blower Wheel
If your dryer is emitting a squeaking noise and the culprit is a faulty blower wheel, repairing or replacing it can help resolve the issue. The blower wheel is responsible for circulating air through the dryer to facilitate efficient drying. When the wheel becomes loose, damaged, or clogged, it can produce a squeak or rattle.
To address a squeaking blower wheel, start by disconnecting the power to the dryer for safety. Then, locate the access panel on the back or front of the dryer and remove it to gain access to the blower wheel.
Inspect the blower wheel for any signs of looseness, cracks, or damage. Additionally, check for debris or lint buildup that could be causing the noise. If the blower wheel is loose or clogged, you may be able to repair it. Start by removing any debris by hand or using a soft brush or vacuum cleaner.
If the blower wheel is loose, inspect the wheel hub and the motor shaft for any damage or wear. If they appear worn or damaged, the blower wheel may need to be replaced.
If the blower wheel can be repaired, secure it back into place by tightening any loose screws or bolts. Make sure the wheel is aligned properly and balanced. However, if the blower wheel is severely damaged or cannot be repaired, it’s best to replace it.
To replace a faulty blower wheel, purchase a compatible replacement from an appliance parts store or online. Follow the manufacturer’s instructions or refer to your dryer’s manual for guidance on the installation process. Remove the old blower wheel and install the new one, ensuring that it is secured tightly in place.
After repairing or replacing the blower wheel, reattach the access panel and plug in the power. Run a test cycle to check if the squeaking noise has been resolved. If the noise persists, further troubleshooting or inspection may be necessary.
To prevent future blower wheel problems, regular maintenance is essential. Clean the blower wheel periodically to remove lint or debris that can accumulate and cause friction. Additionally, regularly clean the lint screen and dryer vent to promote proper airflow and prevent clogs.
By repairing or replacing a faulty blower wheel, you can eliminate the squeaking noise and ensure efficient air circulation in your dryer, leading to smooth and quiet operation.
Tightening or Replacing Motor Mounts
If your dryer is producing a squeaking noise and the source is loose or worn out motor mounts, tightening or replacing them can help eliminate the issue. Motor mounts play a vital role in securing the motor in place and reducing vibrations. When the mounts become loose or worn, they can cause the motor to vibrate and generate a squeaking sound.
To address loose or worn motor mounts, start by disconnecting the power to the dryer for safety. Then, locate the access panel on the back or front of the dryer and remove it to gain access to the motor and mounts.
Inspect the motor mounts for any signs of looseness, wear, or damage. Check if there are any visible cracks, misalignments, or excessive play in the mounts. Additionally, ensure that the mounting screws or bolts are securely tightened.
If the motor mounts are loose, use a wrench or screwdriver to tighten the mounting screws or bolts. Make sure to check and tighten all the mounts to ensure proper stability. If the mounts are worn or severely damaged, they may require replacement.
To replace motor mounts, remove the old mounts by unscrewing the mounting hardware and disconnecting the motor. Install the new mounts according to the manufacturer’s instructions or refer to your dryer’s manual for guidance. Take care to align the new mounts correctly and use the appropriate screws or bolts to secure them tightly.
After tightening or replacing the motor mounts, reattach the access panel and plug in the power. Run a test cycle to check if the squeaking noise has been resolved. If the noise persists, you may need to investigate other potential causes.
To prevent future motor mount issues, perform regular maintenance on your dryer. Clean around the motor and mounts to remove any dust, lint, or debris that can interfere with their functionality. Additionally, avoid overloading the dryer, as excessive weight can strain the motor mounts and contribute to premature wear.
By tightening or replacing loose or worn out motor mounts, you can eliminate the squeaking noise and ensure stable motor operation in your dryer, resulting in a quieter and more efficient drying process.
Read more: Why Is My New Mattress Squeaking
When to Call a Professional
While there are many DIY troubleshooting steps and solutions for addressing a squeaking dryer, there may be instances where it’s best to call a professional. A professional technician has the expertise and experience to diagnose and repair complex dryer issues effectively and safely.
Here are some situations where it’s advisable to seek professional assistance:
- Unfamiliarity with Dryer Repairs: If you’re not experienced or comfortable with appliance repairs, it’s best to leave the job to a professional. Trying to fix complex issues without the necessary knowledge and tools can lead to further damage or personal injury.
- Complex Component Replacement: Certain dryer components, such as the heating element or electronic control board, may require specialized knowledge and tools for replacement. A professional technician can ensure proper installation and prevent potential damage to the dryer.
- Electrical Safety Concerns: Dealing with electrical components in a dryer can be dangerous, especially if you’re not familiar with electrical work. A professional technician understands the necessary safety precautions and can handle electrical repairs safely.
- Warranty Considerations: If your dryer is still under warranty, DIY repairs might void the warranty. To avoid any issues with warranty coverage, it’s best to consult the manufacturer or a professional technician authorized by the manufacturer.
- Persistent or Intermittent Squeaking: If you’ve tried DIY troubleshooting steps, but the squeaking noise persists or occurs intermittently, it’s a sign that there might be an underlying issue that requires professional diagnosis and repair.
- Noise in Unreachable Areas: If the squeaking noise seems to originate from inside the dryer’s drum or other inaccessible areas, it’s best to call a professional. They have the tools and expertise to disassemble the dryer and access the necessary components for repair.
Remember, safety should always be a top priority when it comes to appliance repairs. If you’re unsure about any aspect of repairing your dryer or if the issue is beyond your level of expertise, it’s wise to consult a professional technician.
A professional dryer repair service can accurately diagnose the problem, provide the necessary repairs or replacements, and ensure the safe and efficient operation of your dryer. They can also offer valuable maintenance tips to prevent future issues and maximize the lifespan of your appliance.
By knowing when to call a professional, you can avoid potential risks and have the assurance that your squeaking dryer will be repaired properly and efficiently.
Conclusion
A squeaking dryer can be a frustrating and irritating problem. However, by understanding the common causes and implementing DIY troubleshooting solutions, you can often resolve the issue and restore quiet and efficient operation to your appliance.
In this article, we explored the common causes of dryer squeaking, such as worn out drum support rollers, damaged drive belts, malfunctioning idler pulleys, faulty blower wheels, and loose or worn out motor mounts. We discussed the DIY troubleshooting steps and solutions for each of these issues, emphasizing the importance of safety and proper maintenance.
While DIY repairs can be effective, there are situations where professional assistance is warranted. Complex repairs, unfamiliarity with dryer repairs, electrical safety concerns, warranty considerations, persistent or intermittent squeaking, and noise in unreachable areas are all indications that it’s time to call a professional technician.
Proper maintenance is essential to prevent future squeaking and keep your dryer in optimal condition. This includes regular cleaning of the drum, vents, and lint screen, as well as avoiding overloading the dryer.
Remember, safety should always be a priority when attempting any repairs. If you’re unsure about any aspect of the process or if the problem persists despite your efforts, it’s best to consult a professional technician.
By addressing the squeaking noise in your dryer, you can ensure a more pleasant laundry experience and extend the lifespan of your appliance. Whether you’re able to fix the issue yourself or require professional assistance, a quiet and efficient dryer will make your laundry routine much more enjoyable.
So take action today, troubleshoot the problem, and enjoy the quiet and efficient operation of your dryer once again!
Frequently Asked Questions about Why Does The Dryer Squeak
Was this page helpful?
At Storables.com, we guarantee accurate and reliable information. Our content, validated by Expert Board Contributors, is crafted following stringent Editorial Policies. We're committed to providing you with well-researched, expert-backed insights for all your informational needs.


0 thoughts on “Why Does The Dryer Squeak”