Articles
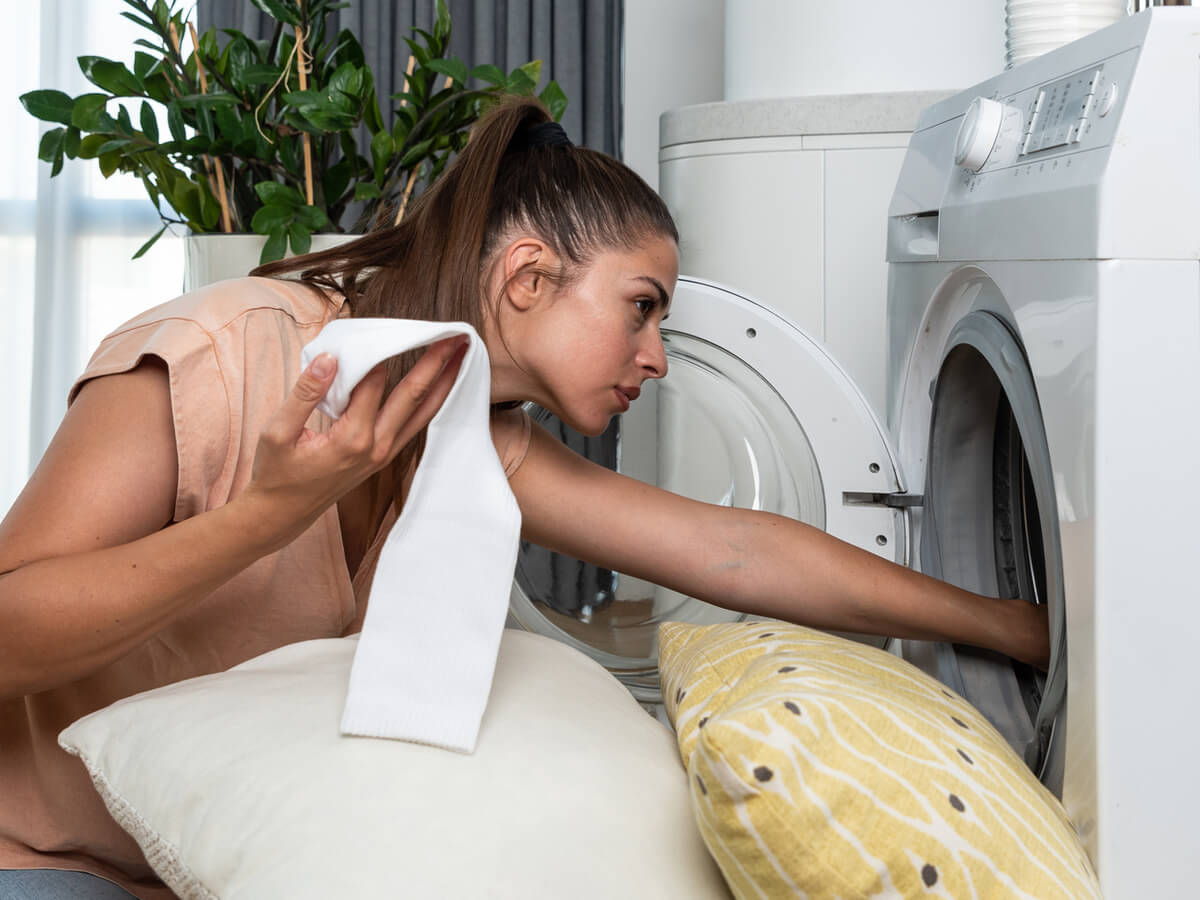
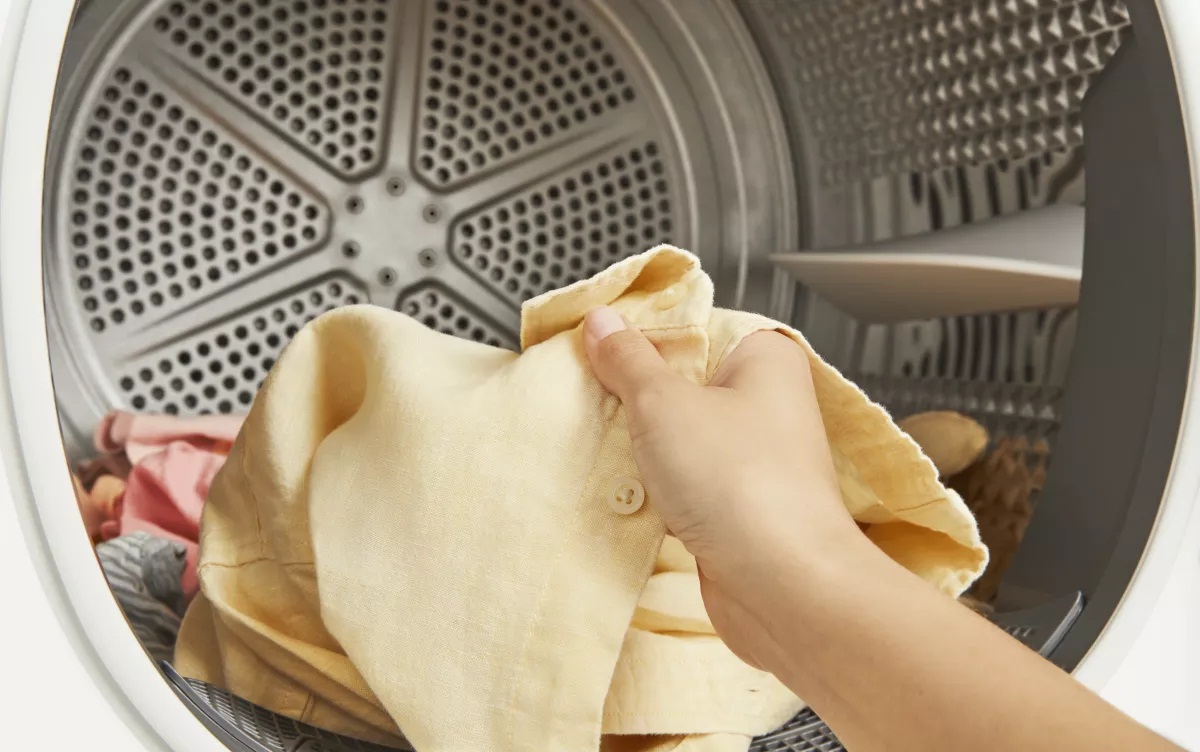
Why Is The Inside Of My Dryer Wet
Modified: October 20, 2024
Learn why the inside of your dryer is wet and how to fix it with our expert articles.
(Many of the links in this article redirect to a specific reviewed product. Your purchase of these products through affiliate links helps to generate commission for Storables.com, at no extra cost. Learn more)
Introduction
A wet dryer can be a frustrating and perplexing problem. After going through the entire drying cycle, you expect your clothes to come out dry, only to find them damp or even soaking wet. This can not only be inconvenient, but it can also lead to mildew, mold, and musty odors if left unresolved. Understanding the causes of a wet dryer is essential in order to effectively address the issue and prevent further damage.
There can be various reasons why the inside of your dryer is wet. In this article, we will explore the common causes and provide solutions to help you get your dryer back in optimal working condition.
Key Takeaways:
- Addressing common causes such as condensation, ventilation problems, and clogged vent hoses can help prevent a wet dryer and ensure efficient drying of clothes.
- Following proper dryer usage tips, such as sorting laundry, pre-treating stains, and regular maintenance, can maximize drying efficiency and minimize the risk of a wet dryer.
Read more: Why Is My Mattress Wet Underneath
Common Causes of a Wet Dryer
When your dryer fails to properly dry your clothes, it could be attributed to several common causes. Identifying and addressing these issues will help ensure that your dryer functions efficiently and effectively. Here are some of the most common culprits:
- Condensation Issues: One of the most common causes of a wet dryer is condensation. When the warm air inside the dryer comes into contact with the cooler air outside, condensation can form. This can cause moisture to build up inside the dryer, leading to damp clothes. To mitigate this issue, make sure that your dryer is properly vented and that the exhaust vent is clear and functioning correctly.
- Ventilation Problems: Insufficient ventilation can also contribute to a wet dryer. If the air circulation is limited, the moisture from the wet clothes will have a harder time evaporating, resulting in dampness. Ensure that the area around the dryer is well-ventilated and free from obstructions to allow proper airflow.
- Clogged or Restricted Vent Hose: A clogged or restricted vent hose can hinder airflow and lead to a wet dryer. Over time, lint and debris can accumulate in the vent hose, reducing the efficiency of the dryer. Regularly inspect and clean the vent hose to prevent blockages.
- Damaged or Malfunctioning Dryer Seal: The door seal, also known as the gasket, is responsible for creating an airtight seal between the dryer drum and the door. If the seal is damaged or worn out, it can allow moisture to escape from the dryer, resulting in damp clothes. Inspect the seal for any signs of damage and replace it if necessary.
- Load Imbalance: Loading the dryer unevenly can also contribute to wet clothes. If the load is not distributed evenly, the clothes may pack together and prevent proper airflow and drying. Make sure to evenly distribute the garments inside the dryer to ensure efficient drying.
By addressing these common causes, you can effectively troubleshoot and solve the issue of a wet dryer. However, there are a few more factors that can lead to dampness in the dryer. Let’s explore them in more detail.
Condensation Issues
Condensation is a common problem that can lead to a wet dryer. It occurs when the warm air inside the dryer comes into contact with the cooler air outside, causing moisture to accumulate inside the machine. This can result in damp or wet clothes even after completing a full drying cycle.
There are several factors that can contribute to condensation issues in your dryer:
- Poor Ventilation: If your dryer is not properly ventilated, the moist air inside the machine cannot escape effectively. This trapped moisture can lead to condensation forming on the walls of the dryer, as well as on your clothes. Ensure that your dryer is properly vented to the outside and that the vent hose is not blocked or restricted.
- Cold Environment: Using a dryer in a cold environment can exacerbate condensation problems. The colder air outside can cause the warm air inside the dryer to cool rapidly, leading to moisture accumulation. If your laundry area is particularly cold, consider using a space heater or ensuring proper insulation to maintain a more consistent temperature.
- High Humidity: High humidity levels in the surrounding environment can increase the chances of condensation occurring within your dryer. Moisture from the air can infiltrate the dryer and contribute to dampness. It is advisable to run the dryer in a well-ventilated area or use a dehumidifier to reduce humidity.
- Improperly Installed Vent Hose: If the vent hose is not installed correctly, it can contribute to condensation problems. A vent hose that is too long or has excessive bends can trap moisture and hinder proper airflow. Ensure that the vent hose is properly installed, as per the manufacturer’s instructions, to facilitate efficient air circulation.
To address condensation issues in your dryer, there are several steps you can take:
- Verify that your dryer is properly vented and that the vent hose is free from obstructions.
- Check the condition of the seals around the dryer door and replace them if necessary.
- Ensure proper airflow by keeping the dryer area well-ventilated and free from blockages.
- If using the dryer in a cold environment, consider using a space heater or insulating the area to maintain a more stable temperature.
- If humidity is a persistent issue, use a dehumidifier in the laundry area to reduce moisture levels.
By addressing these condensation issues, you can minimize the risk of a wet dryer and promote efficient drying of your clothes. However, if the problem persists, it may be advisable to seek professional assistance to diagnose and repair any underlying mechanical issues with your dryer.
Ventilation Problems
Ventilation problems can contribute to a wet dryer, as they hinder the proper airflow needed for efficient drying. When the warm, moist air generated by the dryer cannot escape, it can lead to damp or wet clothes even after a complete drying cycle. Here are some common ventilation issues that you might encounter:
- Blocked or Restricted Vent Hose: A blocked or restricted vent hose is one of the most common causes of ventilation problems. Over time, lint, debris, and even small animals can accumulate in the vent hose, obstructing the airflow. This restricted airflow prevents the moist air from being expelled, leading to moisture buildup inside the dryer. Regularly check and clean the vent hose to ensure proper airflow.
- Poorly Positioned Dryer: Improper positioning of the dryer can also hinder ventilation. If the dryer is pushed too close to the wall, it can restrict the airflow, causing moisture to accumulate. Leave adequate space behind and around the dryer to allow for proper ventilation.
- Improper Ventilation System: In some cases, the ventilation system itself may be inadequate. If the vent hose is too long, has too many bends, or is made of a material that does not facilitate proper airflow, it can lead to ventilation problems. Consult a professional to ensure that your ventilation system is properly designed and installed.
- Exterior Vent Blockage: The exterior vent opening is where the moist air from your dryer is expelled to the outside. If this opening becomes blocked by debris or other obstructions, it can impede the airflow and cause moisture to back up inside the dryer. Regularly inspect and clean the exterior vent to maintain unrestricted airflow.
To resolve ventilation problems and prevent a wet dryer, consider the following steps:
- Regularly clean the vent hose to remove any accumulated lint or debris.
- Ensure that the vent hose is properly installed and is not kinked or bent excessively.
- Position the dryer with sufficient space around it to allow for proper airflow.
- Inspect and clean the exterior vent regularly to prevent blockage.
- If you suspect an issue with the ventilation system, consult a professional for proper evaluation and assistance.
By addressing ventilation problems and ensuring proper airflow, you can minimize the risk of a wet dryer and improve the drying efficiency of your clothes. However, if the issue persists, it may be necessary to consult a professional technician to diagnose and resolve any underlying mechanical issues with your dryer.
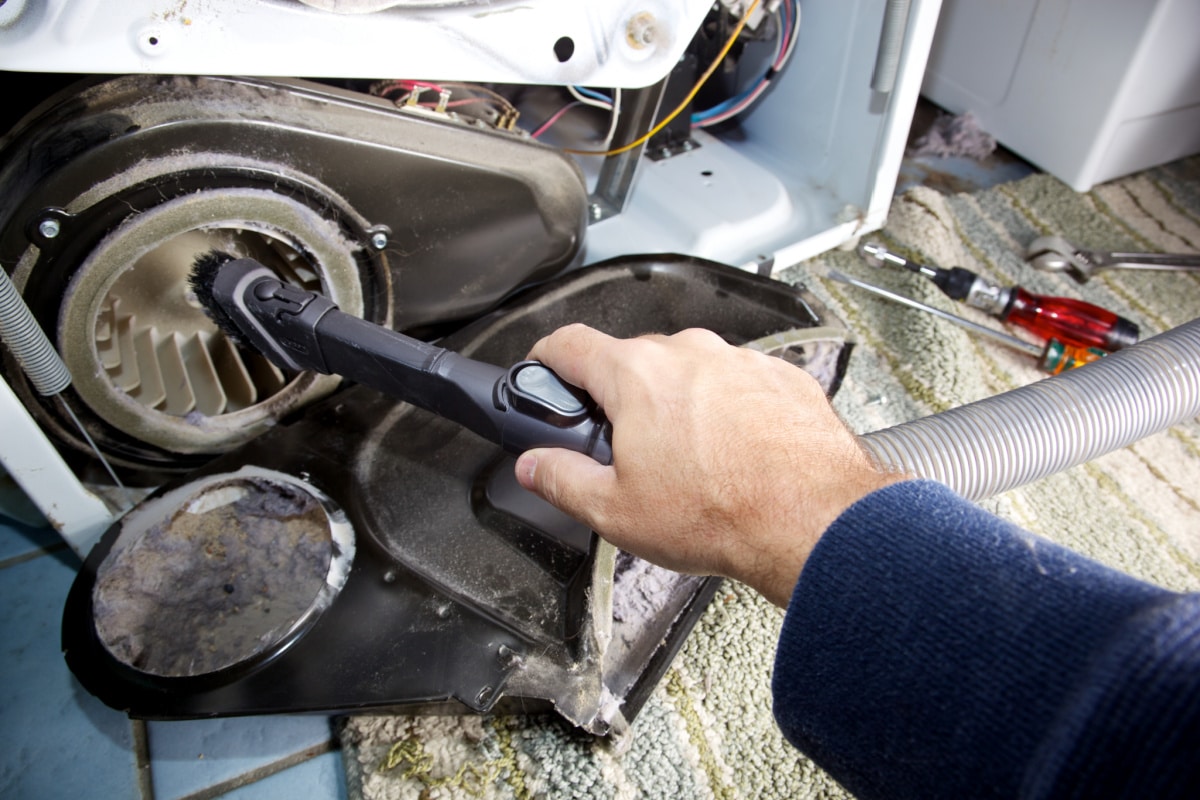
Clogged or Restricted Vent Hose
A clogged or restricted vent hose is a common reason for a wet dryer. Over time, lint, dust, and other debris can build up in the vent hose, obstructing the airflow and impairing the drying process. When the moist air cannot escape properly, it can lead to damp or wet clothes after a drying cycle.
Here are some of the main reasons why a vent hose can become clogged or restricted:
- Lint Buildup: Lint is produced from the clothes during the drying process and is typically caught in the lint trap. However, some lint particles may escape and accumulate in the vent hose. Over time, this buildup can restrict airflow and hinder proper drying.
- Debris and Blockages: Apart from lint, other debris such as dust, hair, and small objects can find their way into the vent hose, leading to blockages. Additionally, bird nests or small animals may also obstruct the vent hose if there are open ends or insufficient protection.
- Bends and Kinks: If the vent hose has excessive bends, twists, or kinks, it can restrict the airflow and increase the likelihood of clogs. These bends can create pockets where lint and debris can accumulate, obstructing the passage of air.
- Inadequate Vent Hose Length: The length of the vent hose is also important for effective airflow. If the hose is too long, it can create additional resistance to the airflow, giving more opportunities for lint and debris to accumulate and restrict the passage of air.
To address a clogged or restricted vent hose, you can take the following steps:
- Regularly clean the lint trap after each drying cycle to minimize lint buildup.
- Inspect the vent hose for any visible blockages or obstructions. If you notice any, carefully remove them using a brush or vacuum cleaner attachment.
- Detach the vent hose from both the dryer and the exterior vent and clean it thoroughly. You can use a long brush or a vent cleaning kit specifically designed for this purpose.
- Ensure that the vent hose is properly installed and does not have excessive bends, kinks, or sags that can impede airflow. If necessary, replace the vent hose with a shorter, more efficient one.
Regular maintenance and cleaning of the vent hose will help prevent clogs and ensure optimal drying performance. By maintaining a clear and unrestricted vent hose, you can minimize the risk of a wet dryer and ensure that your clothes are efficiently dried.
Read more: Why Is My Car Floor Wet
Damaged or Malfunctioning Dryer Seal
A damaged or malfunctioning dryer seal can contribute to a wet dryer. The seal, also known as the gasket, is responsible for creating an airtight seal between the dryer drum and the door. If the seal is compromised, it can allow moisture to escape from the dryer, resulting in damp or wet clothes at the end of the drying cycle.
Here are some common reasons why a dryer seal may become damaged or malfunction:
- Aging and Wear: Over time, the rubber or felt material used in the dryer seal can deteriorate and lose its effectiveness. Continuous use and exposure to heat can cause the seal to become brittle, crack, or fray, compromising its ability to create a tight seal.
- Physical Damage: Accidental impacts or rough handling of the dryer door can cause damage to the seal. Sharp objects or rough edges can tear or cut the seal, allowing moisture to escape.
- Misalignment: If the dryer drum is not properly aligned with the door, it can cause the seal to be compressed unevenly or not make full contact. This can lead to gaps or leaks that allow moisture to escape during the drying process.
- Excessive Heat or Moisture: Extended exposure to high heat or excessive moisture levels can cause the seal to warp, distort, or degrade prematurely. This can compromise its effectiveness in creating an airtight seal.
To address a damaged or malfunctioning dryer seal, consider the following steps:
- Inspect the seal for any visible signs of damage, such as cracks, tears, or fraying. Make sure to thoroughly examine the entire circumference of the seal.
- If you identify any damage, replace the seal with a new one that is compatible with your dryer make and model. Consult the dryer’s user manual or contact the manufacturer for guidance.
- Ensure that the new seal is properly aligned and securely attached. Follow the manufacturer’s instructions for installation.
- Regularly clean and maintain the seal by wiping it down with a damp cloth to remove any lint or debris that may affect its performance.
By addressing a damaged or malfunctioning dryer seal, you can restore the airtight seal between the drum and the door, preventing moisture from escaping and resulting in damp clothes. Regular maintenance and inspection of the seal will help ensure optimal drying performance and reduce the risk of a wet dryer.
Load Imbalance
A load imbalance in the dryer occurs when the clothes are not distributed evenly inside the drum. This can result in a wet dryer as certain areas of the load may not receive sufficient airflow, causing them to remain damp or wet even after the drying cycle is complete.
Here are some common causes of load imbalance in the dryer:
- Uneven Distribution: If you load your dryer in a haphazard manner, with some areas densely packed and others sparsely filled, it can lead to an imbalance. The densely packed areas prevent proper airflow, while the sparsely filled areas dry faster, resulting in an unevenly dried load.
- Large and Heavy Items: Bulky or heavy items, such as blankets or jeans, tend to gather in one area of the drum. They can create an imbalance and cause insufficient airflow, leading to wet spots on the clothes.
- Incorrect Loading: Placing too many clothes in the dryer at once can overwhelm its drying capacity. Overloading prevents proper airflow and can result in damp or wet clothes. It is important to adhere to the dryer’s recommended load capacity for optimal drying performance.
- Separating Fabric Types: Different types of fabrics have varying drying times. If you mix lightweight and heavy fabrics in the same load, the lightweight items may dry quickly, while the heavier ones remain damp or wet.
To address load imbalance issues in your dryer, consider the following steps:
- Ensure even distribution of clothes inside the drum. Arrange them loosely and avoid overcrowding.
- If you have bulky or heavy items, try to spread them out within the load to distribute the weight more evenly.
- Avoid overloading the dryer. Follow the manufacturer’s recommendations for load capacity to ensure proper drying performance.
- Consider separating different fabric types to prevent uneven drying times. This will allow each type of fabric to dry more evenly.
- If necessary, stop the dryer mid-cycle and redistribute the load to achieve a more balanced distribution.
By addressing load imbalance issues, you can encourage better airflow and ensure that all clothes in the dryer are evenly dried. This will help prevent wet spots and promote more effective drying results.
Check the vent hose for any blockages or kinks that may be preventing proper airflow. Also, make sure the dryer is not overloaded, as this can lead to poor drying performance.
Overloading the Dryer
Overloading the dryer is a common mistake that can result in a wet dryer. When you cram too many clothes into the drum, the dryer becomes unable to effectively circulate hot air and remove moisture, leading to damp or wet clothes, even after a full drying cycle.
Here are some reasons why overloading the dryer can cause wet clothes:
- Insufficient Airflow: When the dryer drum is overloaded, the clothes are tightly packed, impeding the airflow. The hot air may not be able to circulate evenly through the load, resulting in uneven drying and damp spots.
- Extended Drying Time: Overloading the dryer means that there are more clothes that need to be dried. This increases the overall drying time as the heat and airflow must reach each article of clothing. Running the dryer for longer periods increases the risk of moisture buildup and can result in wet clothes.
- Overworking the Heating Element: Overloading the dryer puts excessive strain on the heating element, which may affect its ability to generate and maintain the necessary heat. As a result, the clothes may not dry completely, leaving them damp or wet.
- Uneven Weight Distribution: An overloaded dryer may cause the load to become unbalanced. This can lead to the drum spinning unevenly, preventing proper airflow and resulting in damp or wet clothes in certain areas.
To avoid overloading the dryer and ensure effective drying, consider the following tips:
- Follow the manufacturer’s recommendations for load capacity. Avoid exceeding the recommended weight or volume of clothes for optimal drying performance.
- Leave enough space for the clothes to move freely inside the drum. Overcrowding prevents proper airflow and can result in wet spots.
- Separate heavier items from lighter ones. This will help distribute the weight more evenly and promote better drying.
- Divide larger loads into smaller, manageable batches to prevent overloading the dryer.
- Regularly check the lint trap and clean it to ensure proper airflow.
By avoiding the temptation to overload the dryer, you can ensure that your clothes are adequately dried. This will help prevent damp or wet garments and promote efficient drying performance.
Excessive Moisture in the Clothes
Excessive moisture in the clothes is another factor that can contribute to a wet dryer. When the clothes being loaded into the dryer are excessively damp, the machine may struggle to adequately remove the moisture during the drying cycle, resulting in damp or wet clothes.
Here are some reasons why excessive moisture in the clothes can cause a wet dryer:
- Inadequate Spinning: If your washing machine does not spin the clothes properly during the wash cycle, they may retain more moisture than necessary. When placed in the dryer, the excess moisture can be difficult to remove completely, leading to dampness.
- Absorbent Fabrics: Certain types of fabrics, such as towels or thick cotton materials, can absorb and retain more moisture compared to others. When these fabrics are placed in the dryer, they may release moisture back into the air, making it harder for the dryer to dry them effectively.
- Improperly Loaded Washing Machine: Filling the washing machine beyond its recommended capacity can result in inadequate agitation and spinning. This can leave the clothes overly wet before they even enter the dryer.
- High Humidity or Damp Environment: If the laundry area or storage space is prone to high humidity or dampness, the clothes may absorb moisture from the environment. This additional moisture can hamper the drying process, causing the clothes to remain damp or wet.
To address excessive moisture in the clothes and prevent a wet dryer, consider the following steps:
- Ensure that your washing machine is operating properly and effectively spinning the clothes during the wash cycle.
- Avoid overloading the washing machine to facilitate better spinning and reduce excessive moisture retention in the clothes.
- If you notice certain fabrics retaining more moisture, consider separating them from other clothes or using a higher spin cycle setting specifically for those items.
- Before transferring the clothes to the dryer, give them a gentle shake or fluff to remove any excess moisture that may have pooled.
- Ensure that the laundry area is well-ventilated and not excessively humid. Use a dehumidifier if necessary to reduce moisture levels.
By addressing excessive moisture in the clothes and optimizing the washing process, you can help prevent a wet dryer. Ensuring that the clothes are properly spun and not overly soaked will contribute to more effective and efficient drying results.
Read more: Why Is My AC So Loud Inside My House
Faulty Thermostat or Temperature Sensor
A faulty thermostat or temperature sensor can contribute to a wet dryer. These components are responsible for regulating the heat within the dryer during the drying cycle. If they are not functioning correctly, the dryer may fail to reach and maintain the appropriate temperature, leading to inadequate drying and leaving the clothes damp or wet.
Here are some reasons why a faulty thermostat or temperature sensor can cause a wet dryer:
- Inaccurate Temperature Readings: If the thermostat or temperature sensor is malfunctioning, it may provide incorrect readings to the dryer’s control system. This can cause the machine to inaccurately gauge and adjust the temperature, potentially resulting in insufficient heat to dry the clothes properly.
- Inconsistent Temperature Regulation: A faulty thermostat or temperature sensor may lead to inconsistent heating cycles within the dryer. This can cause fluctuations in temperature, with periods of insufficient heat that do not effectively remove moisture from the clothes.
- Failure to Shut Off at the Appropriate Time: If the thermostat or temperature sensor fails to accurately detect when the desired level of dryness has been achieved, the dryer may continue running for longer than necessary. This can lead to over-drying of some clothes, while others remain damp or wet.
- Worn or Damaged Components: Over time, the thermostat or temperature sensor can wear out or become damaged, impacting their performance. This can result in erratic temperature regulation or complete failure to function, compromising the dryer’s ability to dry the clothes effectively.
If you suspect that a faulty thermostat or temperature sensor is causing your wet dryer, consider the following steps:
- Consult the dryer’s user manual or contact the manufacturer for troubleshooting guidance specific to your model.
- Consider hiring a professional technician to inspect and diagnose any potential issues with the thermostat or temperature sensor.
- If necessary, have the faulty component replaced or repaired by a qualified professional to restore proper functionality.
- Regularly maintain and clean the dryer to prevent damage to components and promote optimal performance.
By addressing any faults with the thermostat or temperature sensor, you can ensure that the dryer maintains the appropriate temperature for effective drying. This will help prevent damp or wet clothes and promote more efficient drying results.
Lack of Maintenance
A lack of maintenance can contribute to a wet dryer. Over time, the accumulation of lint, dust, and debris can hinder the dryer’s performance and prevent it from effectively drying clothes. Neglecting regular maintenance tasks can lead to reduced airflow, inefficient heat distribution, and increased moisture retention, resulting in damp or wet clothes.
Here are some reasons why a lack of maintenance can cause a wet dryer:
- Lint buildup: Failure to clean the lint trap after each drying cycle allows lint to accumulate, obstructing airflow and preventing proper drying. This buildup can also increase the risk of lint igniting, posing a fire hazard.
- Clogged dryer vents: Over time, lint and debris can accumulate in the vent hose and exterior vent, impeding airflow. A clogged vent restricts the release of moist air from the dryer, leading to damp or wet clothes.
- Dirty drum: Dust, lint, and fabric softener residues can accumulate on the walls of the dryer drum, forming a layer that inhibits efficient drying. This layer can trap moisture and prevent proper heat transfer to the clothes.
- Worn or damaged seals: Failure to inspect and replace worn or damaged seals can lead to air leaks and moisture escape. This compromises the dryer’s ability to create an airtight environment and results in wet clothes.
- Improper vent installation: If the vent hose is improperly installed or disconnected, it can allow moist air to escape into the laundry area rather than being directed outside. This can increase humidity levels and contribute to dampness in the dryer.
To prevent a wet dryer due to a lack of maintenance, consider the following steps:
- Regularly clean the lint trap after each drying cycle to remove lint and debris.
- Inspect and clean the vent hose and exterior vent regularly to ensure proper airflow.
- Periodically clean the dryer drum to remove dust, lint, and residue that can hinder drying efficiency.
- Check and replace worn or damaged seals to maintain an airtight environment.
- Ensure proper vent installation to direct moist air outside the home.
By scheduling regular maintenance tasks, you can prevent a wet dryer and maximize its drying performance. Keeping the dryer clean and ensuring unrestricted airflow will help avoid damp or wet clothes and promote efficient drying results.
Proper Dryer Usage Tips
To prevent a wet dryer and ensure optimal drying results, it is important to follow proper usage guidelines. Here are some essential tips to consider:
- Sort the Laundry: Separate the laundry into similar fabric types and drying requirements. This allows for more efficient and consistent drying. Heavy fabrics, such as towels and blankets, require longer drying times compared to lightweight items like shirts or socks.
- Pre-Treat Stains: Treat any stains on the clothes prior to putting them in the dryer. Dried-in stains are harder to remove and can impact the drying process.
- Empty Pockets: Check and empty all pockets before placing clothes in the dryer. Items like tissues, coins, or keys can cause damage to the dryer drum or get stuck in the filter, disrupting airflow.
- Avoid Overloading: Follow the manufacturer’s guidelines for load capacity. Overloading the dryer can lead to insufficient airflow, resulting in damp or wet clothes. It is essential to leave enough space for the clothes to freely tumble and dry.
- Clean the Lint Trap: After every drying cycle, clean the lint trap to remove excess lint and debris. A clogged lint trap restricts airflow, making it harder for the dryer to effectively dry clothes.
- Inspect the Vent Hose: Regularly check the vent hose for blockages or damage. Ensure that it is properly connected and free from restrictions to promote proper airflow.
- Optimal Dryer Settings: Select the appropriate drying cycle and temperature settings for the fabric being dried. Higher heat settings are suitable for sturdy fabrics, while delicate items should be dried using lower heat or designated “delicate” settings.
- Properly Fold or Hang Clothes: Remove the clothes from the dryer as soon as the cycle is complete to minimize wrinkles. Fold or hang them immediately to maintain their shape and prevent unnecessary moisture accumulation.
- Regular Maintenance: Perform routine maintenance tasks such as cleaning the dryer drum, inspecting and cleaning the vent hose, and checking for any signs of wear or damage. This helps ensure optimal performance and reduces the risk of a wet dryer.
By following these proper dryer usage tips, you can maximize drying efficiency, minimize the risk of a wet dryer, and extend the lifespan of your machine. Consistent maintenance and adherence to usage guidelines will help you achieve better drying results and keep your clothes looking their best.
Conclusion
A wet dryer can be a frustrating and inconvenient problem, leaving you with damp or wet clothes even after a full drying cycle. However, understanding the common causes and implementing the appropriate solutions can help you prevent this issue and maintain an efficiently functioning dryer.
We explored various factors that can contribute to a wet dryer, including condensation issues, ventilation problems, clogged vent hoses, damaged dryer seals, load imbalances, excessive moisture in the clothes, faulty thermostats or temperature sensors, and a lack of maintenance. By identifying and addressing these issues, you can restore proper drying performance and ensure that your clothes come out dry every time.
Proper usage of the dryer, such as sorting the laundry, pre-treating stains, and avoiding overloading, is crucial for effective drying. Regular maintenance tasks, including cleaning the lint trap, inspecting the vent hose, and checking for worn seals, help prevent blockages and maintain optimal airflow. By following these usage tips and performing routine maintenance, you can promote efficient drying and minimize the risk of a wet dryer.
Remember to address any condensation issues, ensure sufficient ventilation, clean or replace clogged vent hoses, inspect and replace damaged seals, distribute the load evenly, and be mindful of excessive moisture in the clothes. In case of faulty thermostats or temperature sensors, it is advisable to consult a professional for diagnosis and repair.
Maintaining a properly functioning dryer not only saves time and frustration but also helps prevent the growth of mildew, mold, and musty odors. By implementing these tips and solutions, you can enjoy the convenience of a reliable and efficient dryer that consistently delivers dry and fresh-smelling clothes.
So take the necessary steps to address any issues you may be facing with your wet dryer. With proper maintenance and usage, you can ensure that your dryer performs at its best, allowing you to enjoy perfectly dried clothes with each load.
Frequently Asked Questions about Why Is The Inside Of My Dryer Wet
Was this page helpful?
At Storables.com, we guarantee accurate and reliable information. Our content, validated by Expert Board Contributors, is crafted following stringent Editorial Policies. We're committed to providing you with well-researched, expert-backed insights for all your informational needs.


0 thoughts on “Why Is The Inside Of My Dryer Wet”