Articles
Why Is My Water Pump Not Building Pressure
Modified: August 27, 2024
Learn about common reasons why your water pump may not be building pressure in this informative article. Find troubleshooting tips and solutions to get your pump working again.
(Many of the links in this article redirect to a specific reviewed product. Your purchase of these products through affiliate links helps to generate commission for Storables.com, at no extra cost. Learn more)
Introduction
Having a water pump that is not building pressure can be a frustrating experience. Whether you rely on a water pump for your household needs or for agricultural or industrial purposes, low pressure can disrupt your daily activities and hinder the efficiency of your operations.
Understanding the reasons behind the lack of pressure in your water pump is crucial in order to identify and address the issue effectively. This article will delve into the common causes of low water pump pressure and provide troubleshooting steps to help you resolve the problem.
Water pump pressure is an integral aspect of its functionality. It determines the force at which water is delivered through the system, ensuring a steady flow and sufficient pressure for various applications. When the pressure is compromised, it can lead to a wide range of problems, including weak water flow, reduced efficiency, and even complete failure of the pump.
There are several potential reasons why your water pump may not be building pressure. These can range from simple issues like air leaks to more complex problems related to worn-out parts or malfunctioning components. By familiarizing yourself with these common causes, you can quickly identify the root cause of the issue and take the necessary steps to restore proper pressure.
In the following sections, we will explore the possible reasons for low water pump pressure and provide practical troubleshooting steps to resolve each issue. From air leaks in the suction line to clogged impellers and faulty pressure switches, we will cover a range of potential culprits that may be causing your water pump’s pressure woes.
It is important to note that troubleshooting a water pump can be challenging and, at times, requires technical expertise. If you are not comfortable performing the troubleshooting steps yourself, it is advisable to seek professional assistance. Proper diagnosis and prompt repair will not only restore the pressure but also prevent further damage to your water pump.
Now, let’s dive into the various causes of low water pump pressure and explore the steps that can be taken to rectify each issue. By understanding the inner workings of your water pump and addressing the underlying problems, you can ensure consistent pressure and reliable performance.
Key Takeaways:
- Addressing common issues such as air leaks, low water levels, clogged impellers or filters, faulty pressure switches, and worn-out pump parts is crucial for restoring proper water pump pressure. Regular maintenance and timely repairs are essential for efficient operation.
- Troubleshooting steps, including checking power and electrical connections, inspecting for air leaks, verifying water source, cleaning or replacing impeller and pump filter, testing the pressure switch, evaluating pump parts, priming the pump, and seeking professional assistance, are vital for identifying and resolving low water pump pressure issues.
Read more: Why Is My Water Pump Leaking
Understanding Water Pump Pressure
Before delving into the reasons behind low water pump pressure, let’s take a moment to understand how water pump pressure works.
Water pump pressure is the force exerted by the pump to move water through the system. It is typically measured in pounds per square inch (psi) and determines the strength and efficiency of water flow.
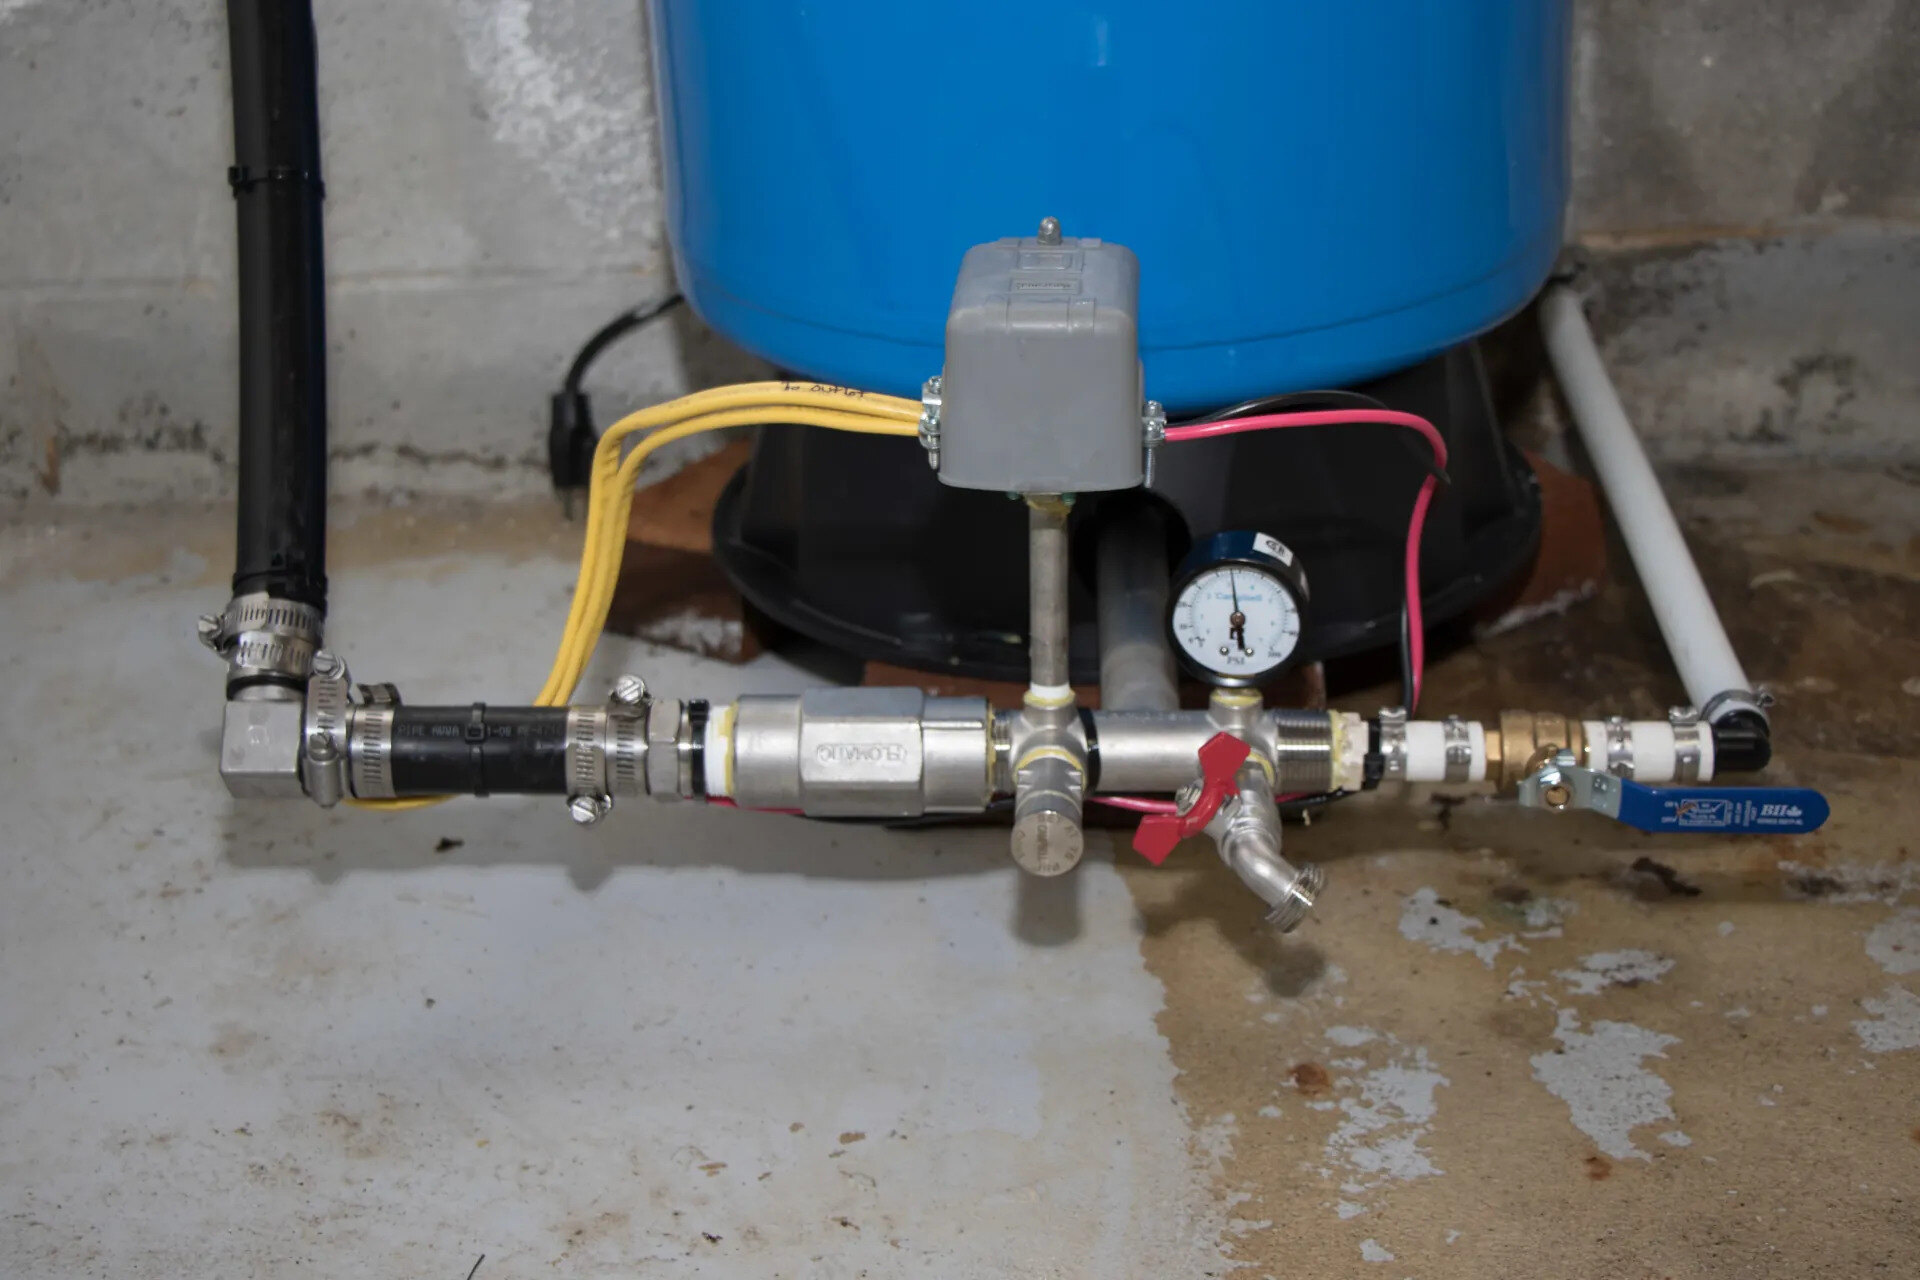
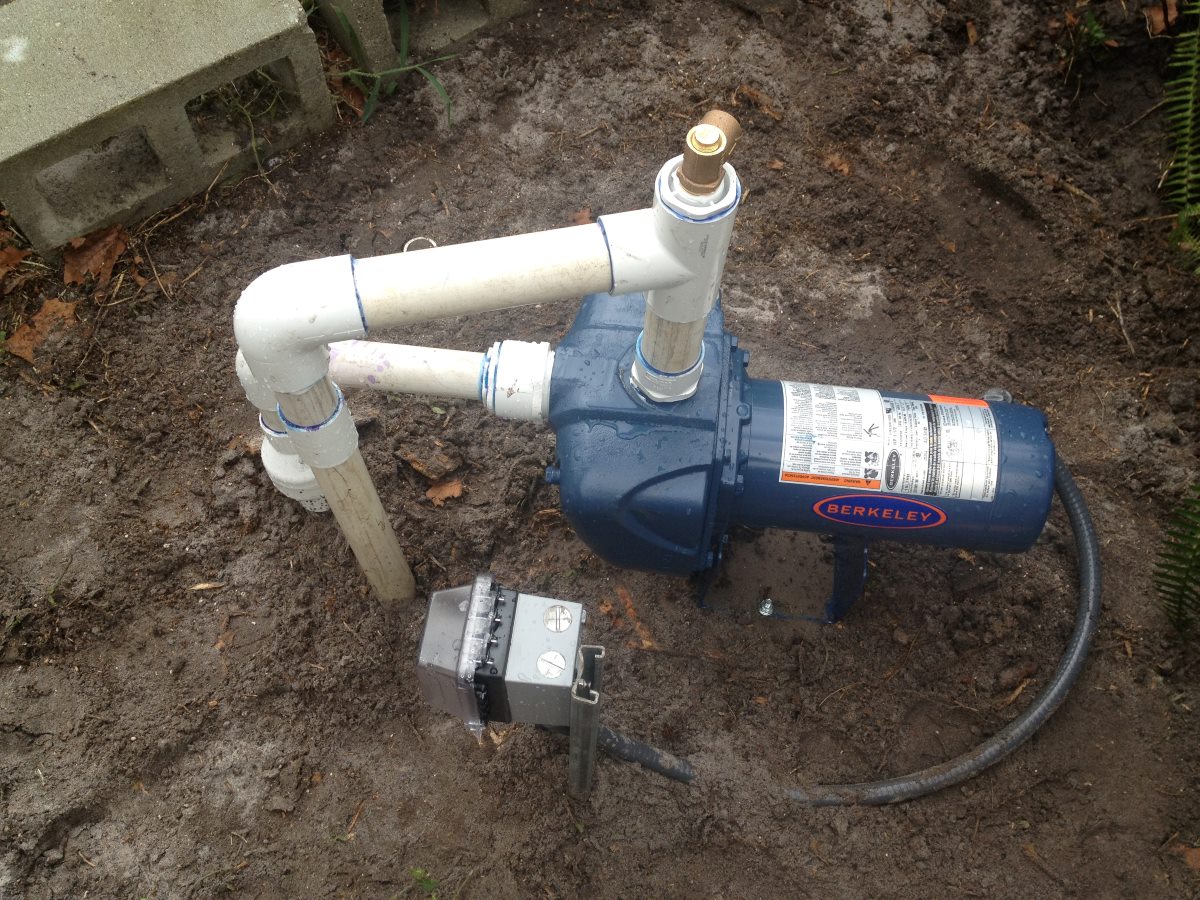
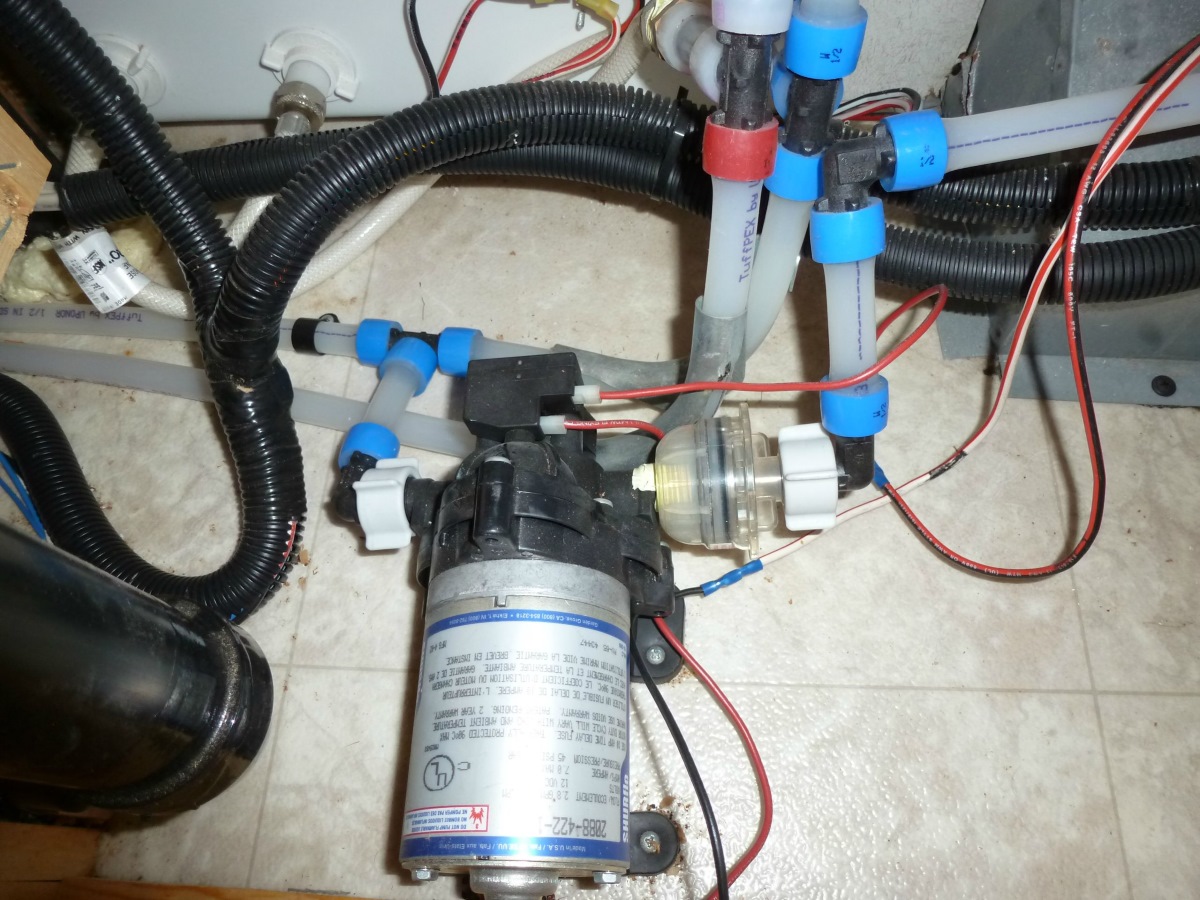
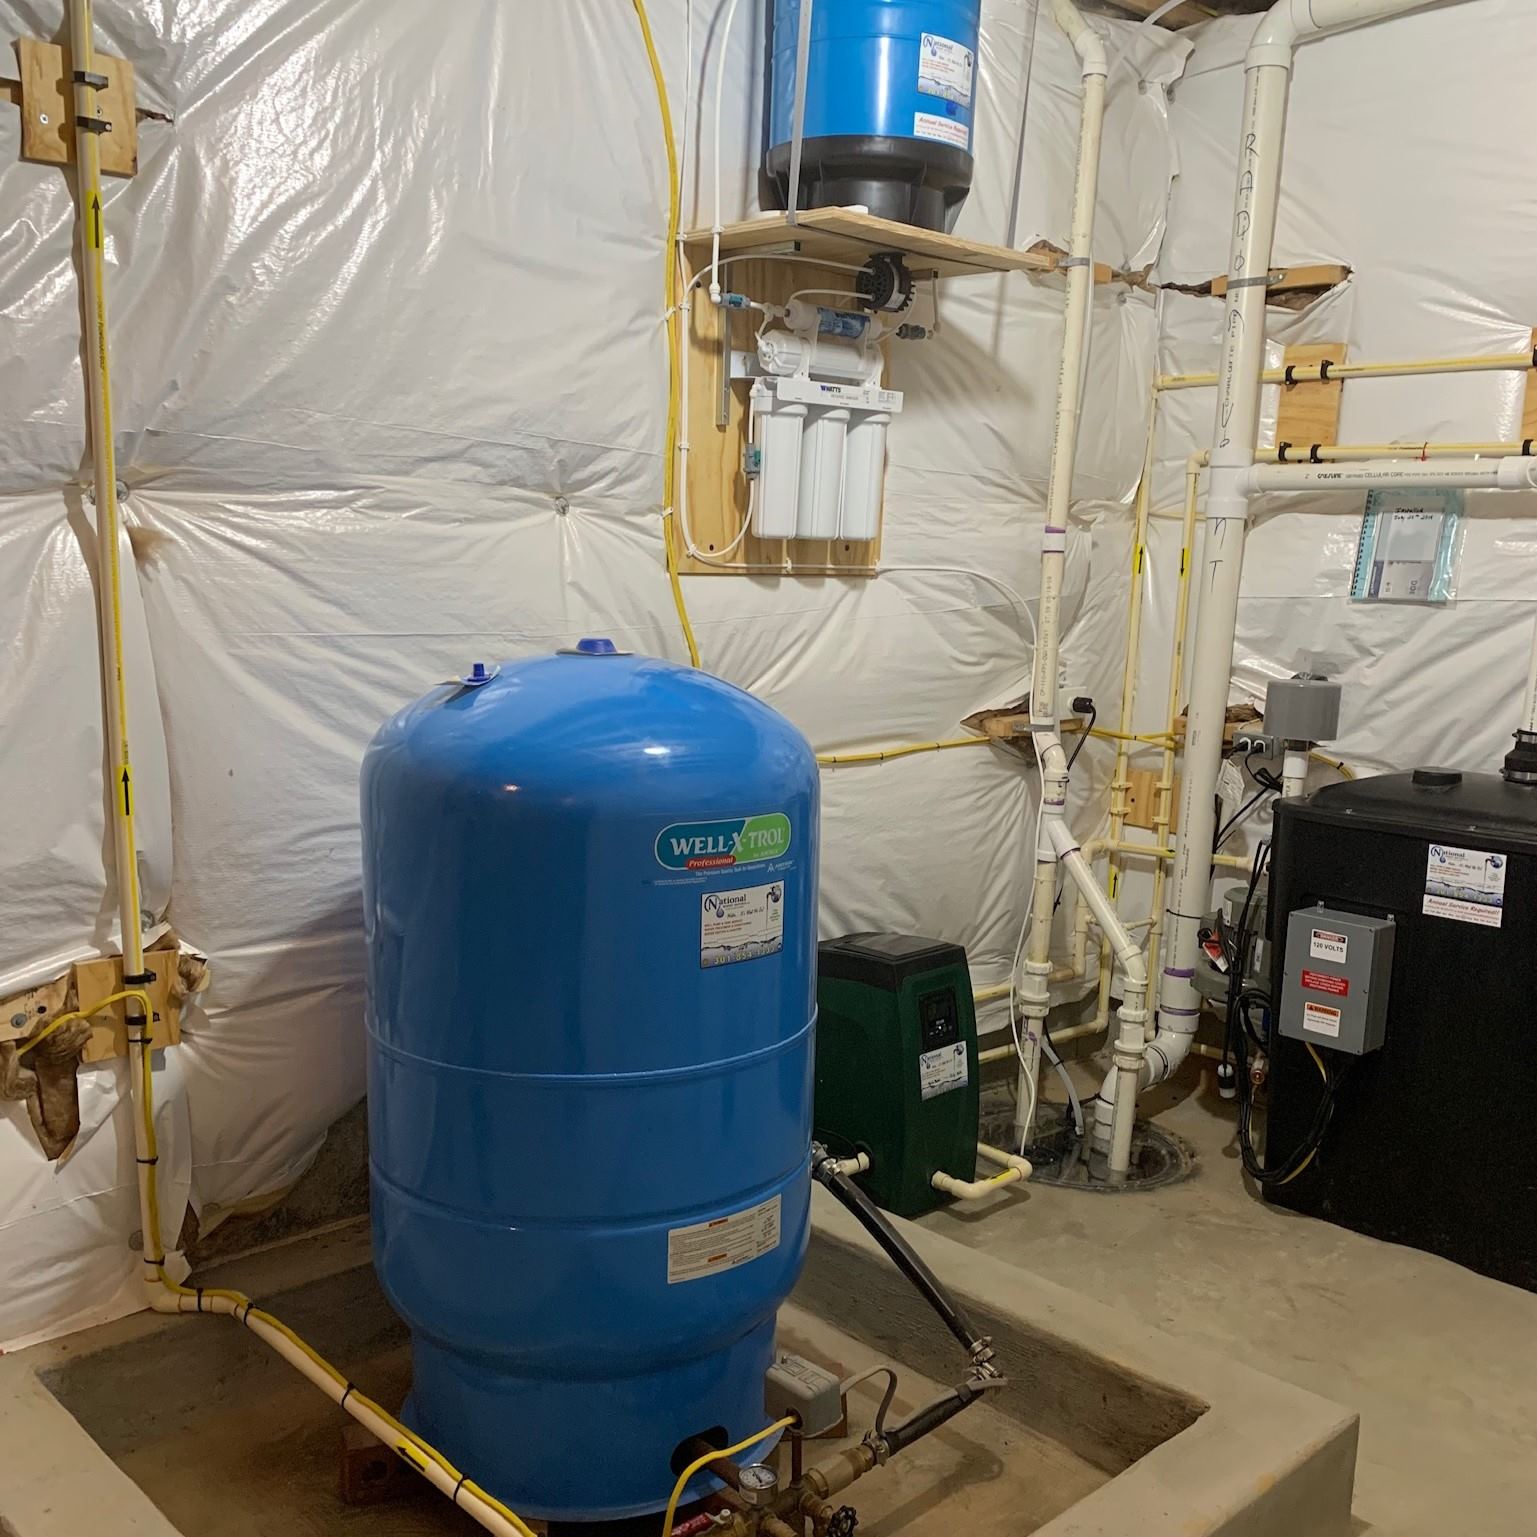
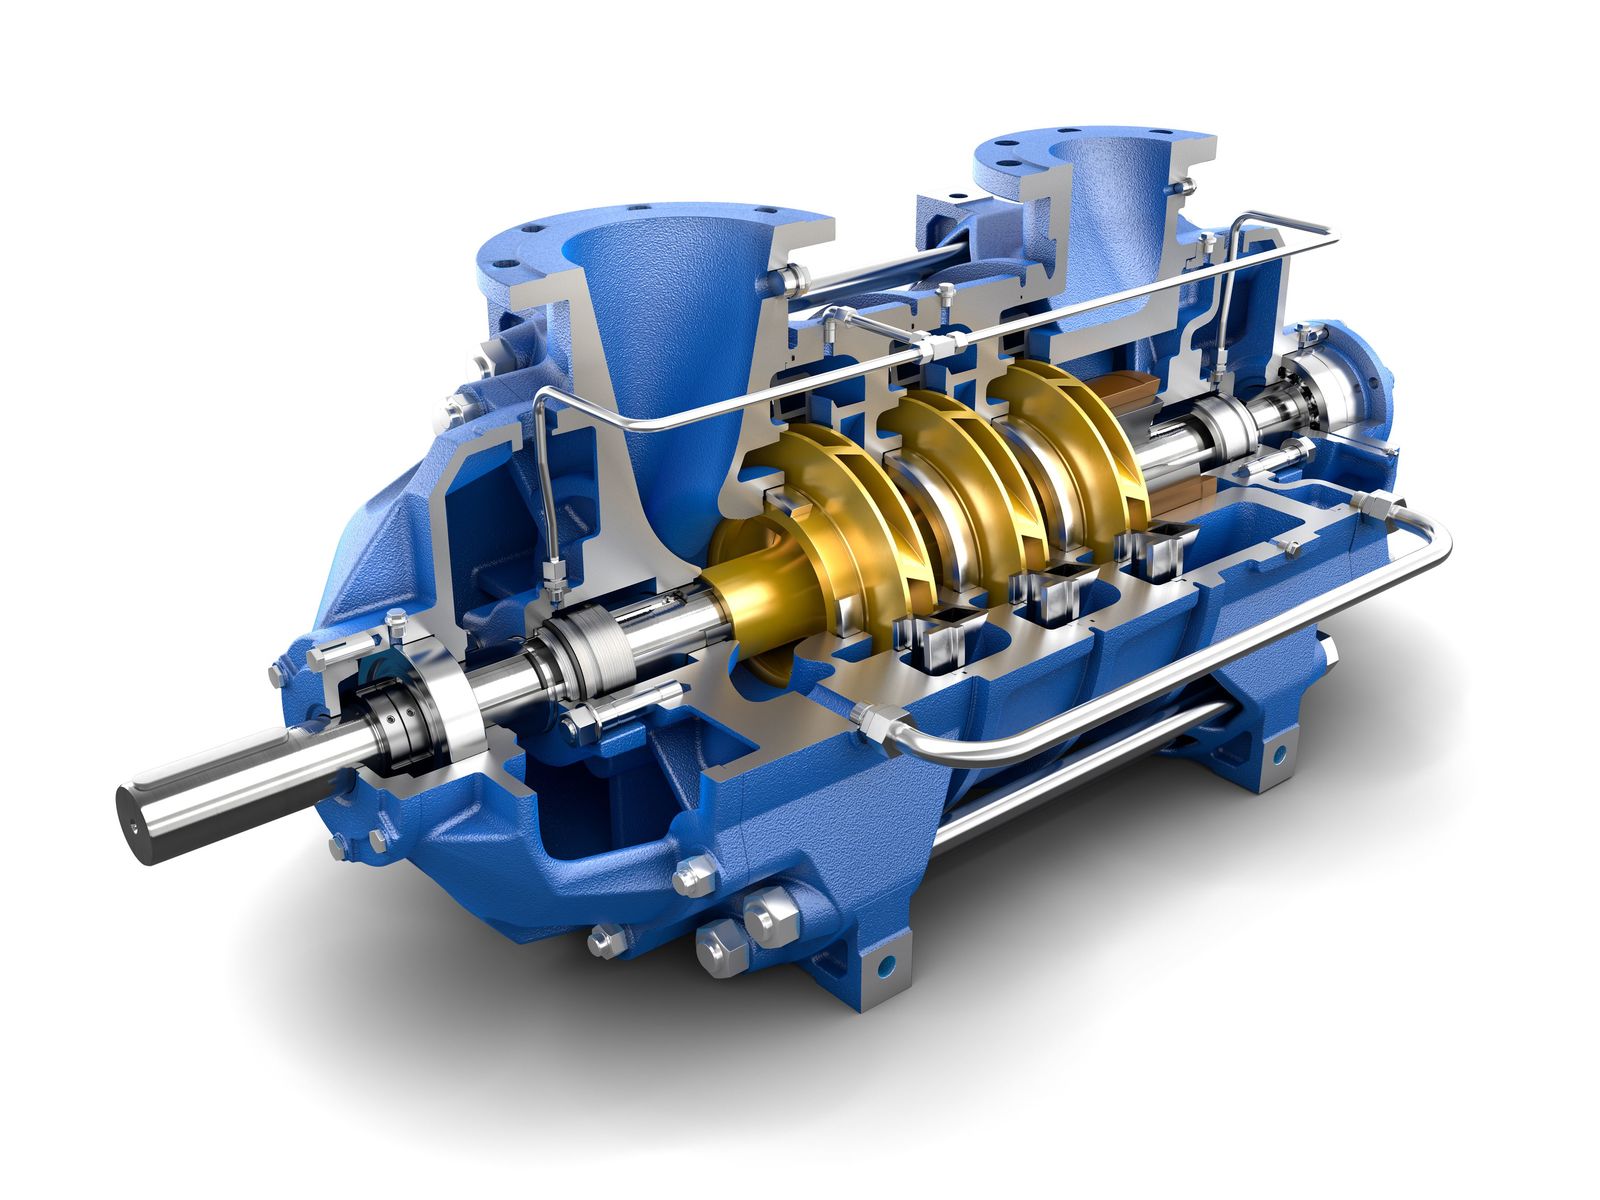
A water pump consists of various components, including an impeller, motor, suction line, discharge line, and pressure switch. When the pump is turned on, the impeller spins to create a suction force, pulling water from a source, such as a well or reservoir, through the suction line. The water is then propelled through the pump and delivered to the desired location via the discharge line.
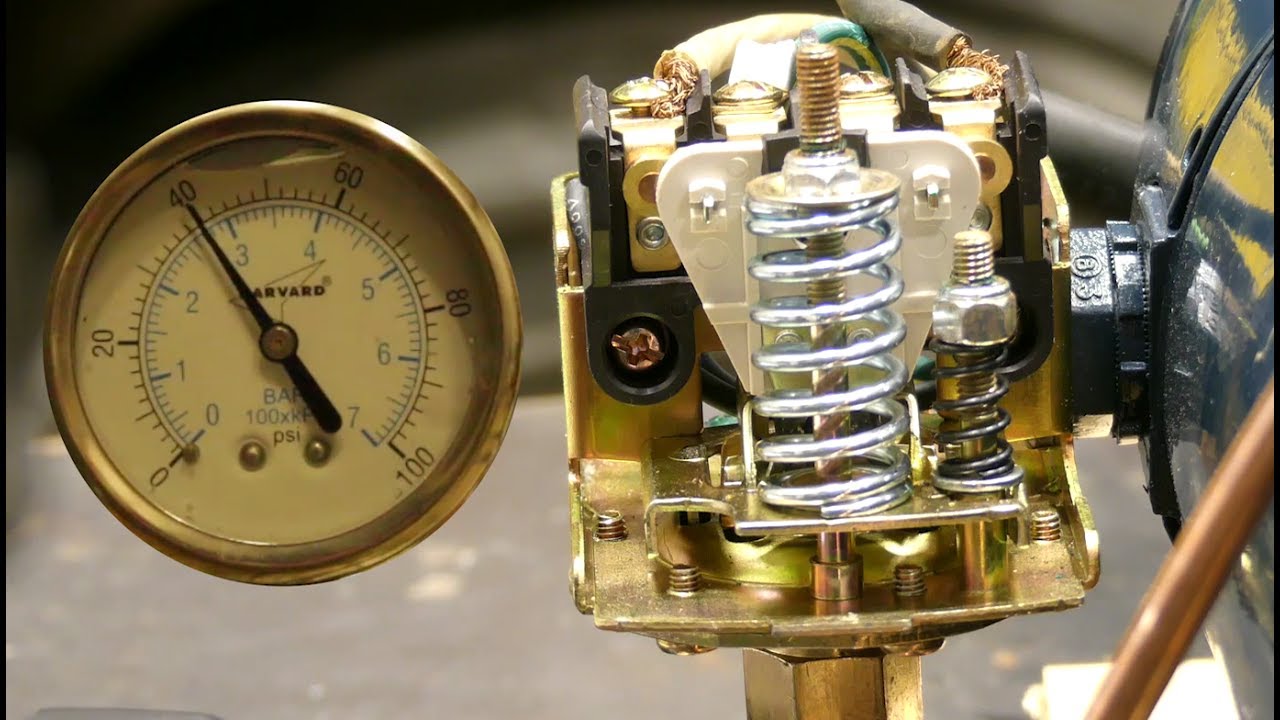
The pressure switch plays a crucial role in controlling the pump’s pressure. It automatically turns the pump on when the pressure drops below a set point and shuts it off when the desired pressure is reached. This ensures that the pump operates within the optimal pressure range.
Maintaining the correct pressure is vital for the efficient operation of the water pump. Insufficient pressure can lead to weak water flow and inadequate supply, while excessive pressure can strain the pump and potentially cause damage to the system.
There are two types of water pump systems: positive displacement and centrifugal. In positive displacement pumps, such as piston pumps, the pressure is generated through the mechanical movement of the piston or diaphragm. In centrifugal pumps, commonly used in residential and commercial applications, pressure is created by the centrifugal force generated by the spinning impeller.
Understanding the different components and mechanics of a water pump is essential in identifying the reasons behind low pressure. While troubleshooting, it is important to consider various factors, including the condition of the impeller, the presence of air leaks, the water level in the source, and the functionality of the pressure switch. By systematically evaluating these elements, you can pinpoint the cause of the low pressure and take the appropriate steps to rectify the issue.
In the next sections, we will explore the common reasons for low water pump pressure and provide troubleshooting steps to help you resolve each problem. Whether it’s an air leak in the suction line, a clogged impeller, or a faulty pressure switch, we will guide you through the necessary actions to restore proper pressure and ensure the smooth operation of your water pump system.
Possible Reasons for Low Pressure
When your water pump is not building pressure, there can be several factors contributing to the issue. Here are some of the possible reasons:
1. Air Leak in the Suction Line: One of the most common causes of low water pump pressure is an air leak in the suction line. Air infiltrating the system can disrupt the flow of water and reduce the overall pressure. This can occur due to damaged or loose fittings, cracked pipes, or worn-out seals. Inspecting the suction line for any signs of leaks and addressing them promptly can help restore pressure.
2. Low Water Level in the Source: If the water level in the source, such as a well or reservoir, is too low, the pump may struggle to draw an adequate amount of water. This can result in reduced pressure. Monitoring the water level and ensuring it remains above the minimum level required for the pump to function optimally is essential.
3. Clogged Impeller or Pump Filter: Over time, the impeller or pump filter can accumulate debris, sediment, or foreign objects, leading to clogs. These obstructions hinder the smooth flow of water and reduce pressure. Regular maintenance, including cleaning or replacing the impeller and filter, can help prevent clogs and maintain adequate pressure.
4. Faulty Pressure Switch: The pressure switch is responsible for monitoring and regulating the pump’s pressure. If the switch is defective, it may not activate the pump at the appropriate pressure level, resulting in low pressure. Testing and, if necessary, replacing the pressure switch can resolve this issue.
5. Worn-out Pump Parts: As a water pump ages, its various components may wear out or become damaged, affecting its performance. This can include worn bearings, seals, or valves, which can contribute to low pressure. Regular inspection and maintenance of the pump’s parts can help identify and address any wear or damage before it impacts the pressure.
These are just a few possible reasons for low water pump pressure. It is essential to systematically evaluate each potential cause to narrow down the issue accurately. In the following sections, we will provide troubleshooting steps for each of these problems to help you identify and resolve the root cause of the low pressure. Remember, if you are unsure or uncomfortable performing the troubleshooting steps yourself, it is recommended to seek professional assistance to avoid further damage to the water pump system.
By addressing these common causes of low pressure, you can restore the proper functioning of your water pump and maintain consistent and reliable pressure for all your operational needs.
Air Leak in the Suction Line
An air leak in the suction line is a common culprit for low water pump pressure. When air infiltrates the system, it disrupts the flow of water, leading to reduced pressure. Here are some steps to address this issue:
1. Check for Visible Leaks: Start by visually inspecting the suction line for any signs of leaks. Look for loose fittings, cracked pipes, or worn-out seals. If you notice any visible leaks, make sure to tighten the fittings or replace the damaged components.
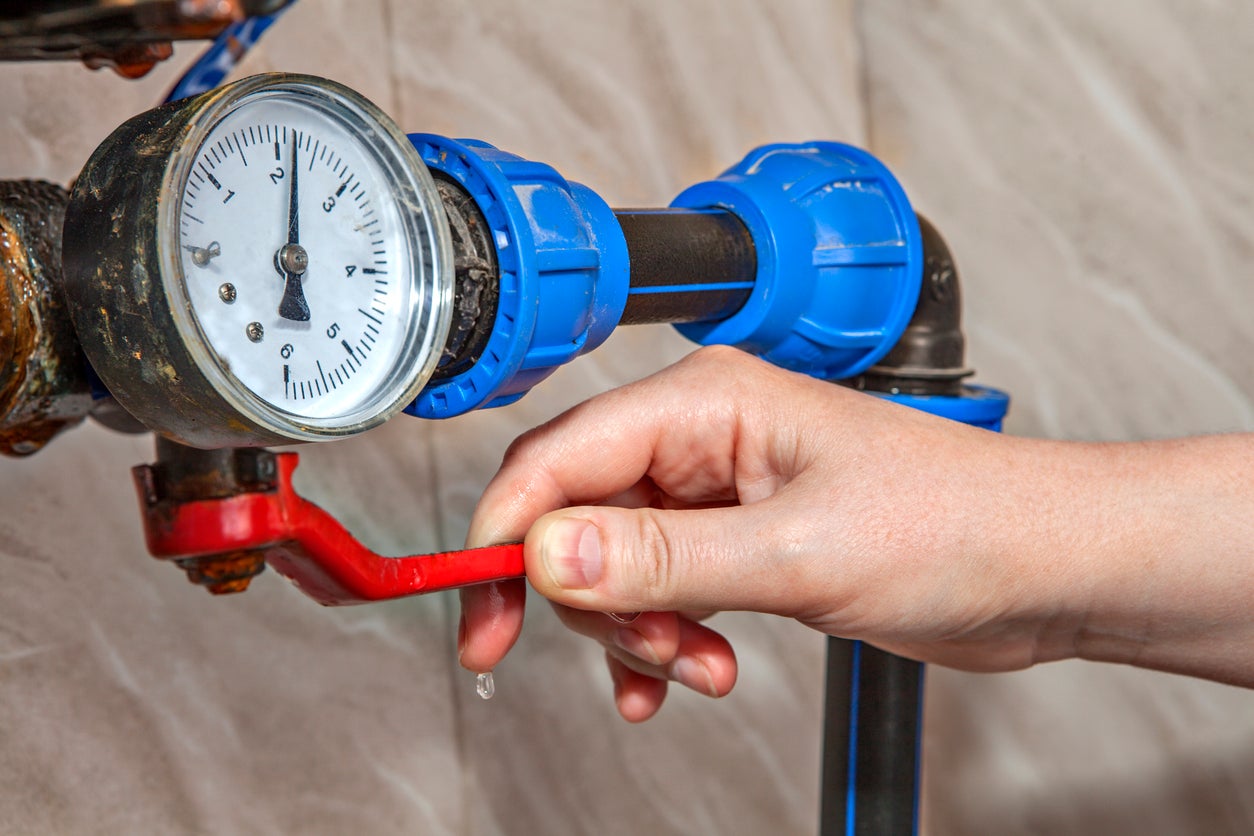
2. Conduct a Pressure Test: Use a pressure gauge to check the pressure in the suction line. If the pressure reading drops when the pump is running, it indicates an air leak. This test helps pinpoint the location of the leak and aids in determining the severity of the issue.
3. Seal the Leaks: Once you have identified the air leaks, seal them to prevent further infiltration. Depending on the severity of the leaks, you may need to use sealing compounds, add Teflon tape to the fittings, or replace damaged pipes or seals. Ensure that the suction line is airtight to maintain proper pressure.
4. Check the Water Level: It is also important to verify that the water level in the source, such as a well or reservoir, is sufficient. If the water level is too low, the pump may draw more air than water, leading to reduced pressure. Keep the water level above the minimum required for the pump to operate efficiently.
5. Prime the Pump: After sealing the air leaks and confirming an adequate water supply, it may be necessary to prime the pump. Priming involves filling the pump with water to eliminate any air pockets and allow for proper suction. Follow the manufacturer’s instructions to prime the pump correctly.
6. Regular Maintenance: To prevent future air leaks, have a regular maintenance schedule in place. Inspect the suction line periodically for potential leaks and address any issues promptly. It is also recommended to clean or replace the pump’s intake strainer regularly to prevent debris from entering the system.
By addressing air leaks in the suction line, you can restore proper pressure to your water pump system. It is important to remember that troubleshooting a water pump can be complex, and if you are unsure or uncomfortable performing the steps yourself, it is advisable to seek professional assistance. A trained technician can help identify and resolve air leaks and ensure the efficient operation of your water pump.
Low Water Level in the Source
A low water level in the source, such as a well or reservoir, can contribute to low pressure in your water pump system. When the water level is insufficient, the pump may struggle to draw an adequate amount of water, resulting in reduced pressure. Here are some steps to address this issue:
1. Check the Water Level: Start by assessing the water level in the source. If it is significantly below the intake pipe or the pump’s minimum operating level, it can impact the pump’s ability to deliver sufficient water and pressure. Ensure that the water level is maintained at an appropriate level to support the pump’s efficiency.
2. Adjust the Intake Pipe: If the water level in the source is low, consider adjusting the intake pipe to a deeper position. This allows the pump to draw water from a lower point, increasing the available water supply and potentially improving the pressure.
3. Increase the Source’s Water Supply: If possible, you can explore options to increase the water supply to the source. This can include redirecting runoff, capturing rainwater, or utilizing other sources to replenish the reservoir or well. By increasing the water volume, you can enhance the pump’s ability to maintain optimal pressure.
4. Consider a Storage Tank: Installing a storage tank or a larger reservoir can provide a buffer for water supply. This can help compensate for low water levels during periods of high demand or limited sources. The additional volume can ensure a consistent water supply and improve the overall pressure delivered by the pump.
5. Address Water Source Issues: If the low water level in the source is due to external factors such as drought or seasonal variations, it may be necessary to address these underlying issues. Implementing water conservation measures, exploring alternative water sources, or consulting with local authorities can help mitigate low water levels and ensure a reliable supply for your pump.
6. Seek Professional Help: If you have tried the above steps and are still experiencing low water levels in your source, it is recommended to seek assistance from a professional. A qualified technician can assess your specific situation, offer expert advice, and propose appropriate solutions tailored to your water pump system.
Remember, maintaining an adequate water level in the source is crucial for optimal pump performance and pressure. By addressing low water levels and ensuring a consistent water supply, you can improve the pressure delivered by your water pump and ensure reliable operation for your household or operational needs.
Check for air leaks in the intake line, ensure the pump is primed, and check for clogs or blockages in the pump or intake line. If the issue persists, consider checking the pressure switch or the pump itself.
Read more: Why Is My Rv Water Pump Not Working
Clogged Impeller or Pump Filter
A clogged impeller or pump filter can significantly impact the pressure generated by your water pump. When debris, sediment, or foreign objects accumulate, they can obstruct the smooth flow of water, leading to reduced pressure. Here’s how you can address this issue:
1. Inspect the Impeller: Start by examining the impeller, which is responsible for creating the centrifugal force that propels water through the pump. Look for any signs of clogs, such as built-up debris or objects trapped in the impeller blades. If the impeller is visibly clogged, it will need to be cleaned or replaced.
2. Clean or Replace the Pump Filter: Next, check the pump filter, which is designed to trap larger debris and prevent it from entering the pump. If the filter is dirty or clogged, it can impede water flow and reduce pressure. Clean the filter thoroughly or replace it if necessary. Follow the manufacturer’s instructions for proper cleaning or replacement procedures.
3. Flushing the System: In some cases, simply cleaning the impeller and filter may not be sufficient. Flushing the system can help dislodge any stubborn debris or sediment that is obstructing the flow. Disconnect the discharge line, flush water through the system in the opposite direction, and then reconnect the line.
4. Regular Maintenance: To avoid future clogs, establish a regular maintenance routine for your water pump system. Clean or replace the pump filter as recommended by the manufacturer. Consider installing additional filters or strainers to prevent large debris from entering the system. Regularly inspect the impeller for any signs of obstruction.
5. Consider Pre-Filtration: If your water source contains significant amounts of debris or sediment, installing pre-filtration systems may help reduce the chances of clogs. This can include installing a sediment filter or a settling tank to remove larger particles and protect the pump from potential damage.
6. Seek Professional Assistance: If you are unsure about cleaning the impeller or replacing the filter, or if the clog persists despite your efforts, it is advisable to seek help from a professional. They can assess the situation and perform the necessary maintenance or repairs to restore proper pressure to your water pump system.
By addressing clogged impellers and pump filters, you can improve water flow and restore pressure in your water pump system. Regular maintenance and precautions will help prevent future clogs and maintain the efficiency of your pump. Remember to follow the manufacturer’s guidelines and seek professional assistance when needed to ensure the longevity and optimal performance of your water pump.
Faulty Pressure Switch
A faulty pressure switch is another potential cause of low water pump pressure. The pressure switch is responsible for monitoring and regulating the pressure in the system. If the switch is malfunctioning or out of calibration, it can lead to inaccurate pressure readings and improper pump operation. Here are some steps to address this issue:
1. Test the Pressure Switch: Start by testing the pressure switch to determine if it is functioning correctly. Use a pressure gauge to measure the pressure in the system. Compare the gauge reading with the pressure switch’s set points. If there is a significant discrepancy, it indicates a faulty pressure switch.
2. Adjust the Pressure Switch: Sometimes, a simple adjustment to the pressure switch can rectify the issue. Refer to the manufacturer’s instructions to locate the adjustment screws or controls on the pressure switch. Make careful adjustments to align the switch with the desired pressure levels. Test the system to ensure the pressure is within the correct range.
3. Clean or Replace the Pressure Switch: If adjusting the pressure switch does not resolve the problem, it may be necessary to clean or replace the switch. Over time, the contacts or diaphragm inside the switch can become dirty or worn, affecting its functionality. Carefully clean the switch with a soft brush or replace it with a new one to ensure accurate pressure sensing.
4. Check the Wiring and Connections: Faulty wiring or loose connections can also contribute to pressure switch issues. Inspect the wiring and terminals connected to the pressure switch. Ensure they are secure, free from damage, and properly connected. Tighten any loose connections and replace any damaged wiring.
5. Replace the Pressure Accumulator Tank: In some cases, low pressure can be caused by a faulty pressure accumulator tank. The pressure tank helps to regulate and stabilize pressure in the system. If the tank is damaged or not functioning properly, it can affect the pressure switch’s operation. Consider replacing the pressure accumulator tank if necessary.
6. Consult a Professional: If troubleshooting and adjusting the pressure switch do not resolve the problem, it is recommended to seek assistance from a professional. They have the expertise and specialized tools to diagnose and repair or replace the pressure switch correctly.
By addressing a faulty pressure switch, you can restore accurate pressure monitoring and regulate the water pump’s operation effectively. Regular maintenance, including testing and cleaning the pressure switch, can help prevent future issues. Remember, if you are unsure about performing these steps or do not have the necessary skills, it is best to consult a professional to ensure the proper functioning of your water pump system.
Worn-out Pump Parts
Worn-out pump parts can contribute to low water pump pressure. Over time, various components of the pump can degrade or become damaged, affecting its performance and reducing pressure. Here are some steps to address this issue:
1. Inspect the Pump Components: Start by inspecting the various parts of the water pump, including the impeller, seals, valves, and bearings. Look for signs of wear, damage, or corrosion. Pay close attention to the impeller, as worn or bent blades can significantly impact water flow and pressure.
2. Replace Worn-out Parts: If you notice any worn-out or damaged components during the inspection, it is crucial to replace them promptly. Follow the manufacturer’s instructions or consult a professional to ensure that the replacement parts are compatible and installed correctly.
3. Grease or Lubricate Moving Parts: Proper lubrication is important for the smooth operation of the pump. Lubricate any moving parts, such as bearings or gears, with the recommended lubricant as specified by the manufacturer. This helps reduce friction and wear, ensuring the longevity and optimal performance of the pump.
4. Check the Pump Alignment: Misalignment of the pump can also contribute to decreased pressure. Verify that the pump is correctly aligned with the motor shaft. If misalignment is detected, adjust the pump’s position to ensure proper alignment. Misalignment can cause excessive vibration and premature wear on the pump components, negatively impacting pressure.
5. Perform Regular Maintenance: Regular maintenance is essential to prevent premature wear and prolong the lifespan of your water pump. Clean the pump regularly to remove any debris or sediment that can cause damage. Inspect and replace any worn-out parts on a scheduled basis to maintain optimal functioning and pressure.
6. Seek Professional Assistance: If you are unsure about inspecting or replacing pump parts, or if the wear appears to be extensive, it is advisable to seek help from a professional. A qualified technician can accurately assess the condition of your pump, identify worn-out parts, and perform the necessary repairs or replacements.
Effective maintenance and timely replacement of worn-out pump parts are crucial to ensure the proper functioning and pressure of your water pump system. By addressing and resolving any worn components, you can improve water flow and restore optimal pressure. Remember, when working with pump parts, always prioritize safety and consult professionals when needed to ensure the longevity and efficiency of your water pump system.
Troubleshooting Steps
When your water pump is not building pressure, troubleshooting the issue can help identify the underlying cause and guide you toward a resolution. Here are some general troubleshooting steps to follow:
1. Check Power and Electrical Connections: Ensure that the pump is receiving power and that all electrical connections are secure. Check the circuit breaker and reset it if necessary. Verify that the pump’s motor is running properly.
2. Inspect for Air Leaks: Check the suction line and connections for any air leaks. Look for loose fittings, cracked pipes, or damaged seals. Seal any visible leaks to prevent air infiltration into the system.
3. Verify Water Source: Ensure that the water level in the source, such as a well or reservoir, is sufficient. If the water level is too low, the pump may struggle to draw water, resulting in low pressure. Maintain an adequate water level for optimal pump operation.
4. Clean or Replace Impeller and Pump Filter: Inspect the impeller and pump filter for clogs or debris. Clean or replace these components as necessary to improve water flow and restore pressure.
5. Test the Pressure Switch: Use a pressure gauge to check the pressure in the system and compare it to the pressure switch’s set points. Adjust or replace the pressure switch if it is malfunctioning or out of calibration.
6. Evaluate Pump Parts: Inspect the various components of the pump, such as seals, valves, and bearings, for wear or damage. Replace any worn-out parts to ensure proper pump performance and pressure.
7. Prime the Pump: If air has entered the system, it may be necessary to prime the pump. Follow the manufacturer’s instructions to properly prime the pump and eliminate any air pockets.
8. Check for Obstructions: Clear any potential obstructions in the discharge line that may restrict water flow and hinder pressure development.
9. Consult the Manufacturer’s Manual: Review the manufacturer’s manual for specific troubleshooting steps and recommendations for your water pump model.
10. Seek Professional Assistance: If you have attempted the above steps and are still unable to resolve the issue, it is recommended to seek help from a professional. A qualified technician can diagnose and address complex or technical problems and provide expert guidance.
Remember, troubleshooting a water pump can involve multiple factors, and the specific steps may vary depending on the pump model and system configuration. It is important to exercise caution and seek professional assistance if you are unsure or uncomfortable performing the troubleshooting steps yourself. A professional can ensure accurate diagnosis and effective resolution of the low pressure issue in your water pump system.
Read more: Why Is My Rv Water Pump So Loud
Conclusion
Ensuring proper water pump pressure is essential for the efficient operation of your water pump system. When faced with low pressure, it is crucial to identify the underlying causes and take appropriate steps to address them. By understanding common issues such as air leaks, low water levels, clogged impellers or filters, faulty pressure switches, and worn-out pump parts, you can troubleshoot and resolve the problem effectively.
Regular maintenance and inspection of your water pump system are paramount to prevent issues and prolong its lifespan. This includes checking for air leaks, maintaining adequate water levels, cleaning or replacing impellers and filters, testing and adjusting pressure switches, and addressing any worn-out components.
Remember to consult the manufacturer’s manual for specific instructions related to your water pump model. If you are uncertain or uncomfortable with the troubleshooting steps, it is advisable to seek professional assistance. Trained technicians can provide expert guidance, accurate diagnosis, and appropriate repairs or replacements to ensure the optimal performance and pressure of your water pump system.
Maintaining proper pressure in your water pump system is not only crucial for household water needs but also for various agricultural, industrial, and commercial applications. Having consistent and reliable pressure ensures smooth operations, efficient water flow, and adequate supply for all your needs.
By following the troubleshooting steps outlined in this article, you can identify and address the root causes of low water pump pressure, restoring proper functioning and efficiency to your system. Regular maintenance and timely repairs or replacements will help prevent future issues and extend the lifespan of your water pump.
Remember, safety should always be a priority when working with water pumps and electrical components. Take necessary precautions, follow recommended procedures, and seek professional assistance when needed.
In conclusion, understanding the potential causes of low water pump pressure and implementing appropriate solutions will help you maintain optimal pressure, ensuring a reliable water supply for your daily needs. With the right troubleshooting steps and proper maintenance, you can enjoy consistent water flow and efficient performance from your water pump system.
Frequently Asked Questions about Why Is My Water Pump Not Building Pressure
Was this page helpful?
At Storables.com, we guarantee accurate and reliable information. Our content, validated by Expert Board Contributors, is crafted following stringent Editorial Policies. We're committed to providing you with well-researched, expert-backed insights for all your informational needs.

0 thoughts on “Why Is My Water Pump Not Building Pressure”