
Articles
How To Winterize Rv Water Pump
Modified: August 16, 2024
Learn how to winterize your RV water pump with helpful articles. Stay prepared for the colder months and protect your RV's plumbing system.
(Many of the links in this article redirect to a specific reviewed product. Your purchase of these products through affiliate links helps to generate commission for Storables.com, at no extra cost. Learn more)
Introduction
Winterizing your RV’s water pump is an essential task for any RV owner who resides in colder climates or plans to store their vehicle during the winter months. By properly winterizing the water pump, you can prevent freezing and potential damage to your RV’s plumbing system.
In this article, we will guide you through the process of winterizing your RV’s water pump, step by step. From gathering the necessary materials to testing the winterized system, we’ll cover everything you need to know to ensure your RV is protected during the colder months.
Understanding the inner workings of your RV’s water pump and the importance of winterization is crucial before you begin the process. RV water pumps are responsible for drawing water from the freshwater tank and delivering it to the various faucets, showers, and toilets in your RV. Without proper winterization, residual water in the pump and plumbing lines can freeze, causing burst pipes and significant damage.
Now, let’s dive into the step-by-step process of winterizing your RV’s water pump.
Key Takeaways:
- Protect your RV’s water pump by understanding the winterization process, gathering necessary materials, and following step-by-step instructions to ensure your plumbing system is safeguarded against freezing temperatures.
- Insulate and test your winterized RV water system to provide additional protection and peace of mind, ensuring your RV is ready for the colder months and future adventures.
Read more: How To Prime A Rv Water Pump
Understanding RV Water Pump and Winterization
Before diving into the winterization process, it’s important to have a basic understanding of how an RV water pump works and why winterization is necessary. An RV water pump is a vital component of your RV’s plumbing system, as it pressurizes and distributes water throughout the vehicle.
During normal operation, the water pump draws water from the freshwater tank and pumps it through the plumbing lines to the faucets, toilets, and showers. However, during the winter months, freezing temperatures pose a risk to the plumbing system, including the water pump itself.
Water expands when it freezes, which can cause pipes and fittings to rupture. In an RV, this can lead to costly repairs and extensive damage. Winterizing the water pump involves taking proactive steps to prevent freezing and protect your investment.
The primary goal of winterization is to remove all water from the plumbing system and replace it with antifreeze. Antifreeze is designed to withstand freezing temperatures, keeping the pipes and water pump protected during the winter.
It’s important to note that different RV models may have slightly different plumbing systems and water pump configurations. However, the general winterization principles apply to most RVs. Always consult your RV owner’s manual for specific instructions and guidelines for your particular model.
Now that we have a basic understanding of the water pump and the importance of winterization, let’s move on to the step-by-step process of winterizing your RV’s water pump.
Step 1: Gathering Materials
Before you begin the process of winterizing your RV’s water pump, it’s important to gather all the necessary materials. Having everything on hand before you start will make the process smoother and more efficient. Here are the essential materials you’ll need:
- RV Antifreeze: Purchase an adequate amount of RV antifreeze. Be sure to choose antifreeze specifically designed for RV use, as it is non-toxic and safe for your plumbing system.
- Water Heater Bypass Kit: If your RV doesn’t already have a built-in water heater bypass, you’ll need to purchase a bypass kit. This allows you to bypass the water heater during the winterization process, saving you from wasting a considerable amount of antifreeze.
- Hand Pump or Compressor: You’ll need a means to pump the antifreeze into the plumbing system. You can use a hand pump or an air compressor with the appropriate adapter.
- Wrench: Keep a wrench handy to remove and reinstall any necessary plumbing connections.
- Hose: A short length of hose will be needed to connect the hand pump or compressor to the RV’s plumbing system.
- Bucket or Container: Have a bucket or container nearby to catch any water that may drain from the plumbing system during the winterization process.
- Protective Gloves and Eyewear: It’s always a good idea to protect your hands and eyes while handling antifreeze or working on the plumbing system.
By gathering all the necessary materials before you start, you’ll save time and avoid the frustration of having to pause the process to search for missing items.
In the next step, we’ll discuss draining the water system to prepare for winterization.
Step 2: Draining the Water System
Once you have gathered all the necessary materials for winterizing your RV’s water pump, it’s time to start draining the water system. Draining the system removes any residual water and prepares it for the antifreeze. Follow these steps to ensure a thorough drain:
- Turn off the water supply: Begin by shutting off the water supply to your RV. This can usually be done at the main water valve or by disconnecting your RV from the water source.
- Open all faucets and drains: Open all the faucets, both hot and cold, in your RV. This includes the sinks, showers, and outside faucets if applicable. Don’t forget to also open any low point drains and the fresh water drain valve to fully empty the water system.
- Drain the water heater: If your RV has a water heater, consult the owner’s manual for specific instructions on how to drain it properly. This step is crucial to prevent any remaining water from freezing and causing damage to the water heater.
- Flush the toilets: Flush the toilets in your RV to drain any water from the toilet tanks and lines.
- Keep the faucets open: After draining the water system, leave all faucets and drains open throughout the winterization process. This allows for proper circulation of antifreeze and ensures that all water is flushed out.
It’s important to note that while draining the water system removes the majority of water, there may still be pockets of water hidden in the plumbing lines. These pockets can freeze and cause damage, which is why it’s crucial to follow the next steps of winterizing your RV’s water pump.
In the next step, we’ll discuss bypassing the water heater to protect it during the winterization process.
Step 3: Bypassing the Water Heater
As part of the winterization process for your RV’s water pump, it’s important to bypass the water heater. This step helps conserve antifreeze and prevents it from flowing into the water heater, saving you both time and money. Follow these steps to bypass the water heater:
- Locate the water heater bypass valves: The location of the valves may vary depending on your RV’s make and model. Typically, you’ll find the bypass valves near the water heater or in a nearby cabinet. Consult your RV owner’s manual if you’re unsure about the exact location.
- Turn off the water heater: Before bypassing the water heater, make sure the water heater is turned off. This prevents any potential damage to the heating elements during the winterization process.
- Close the inlet and outlet valves: Locate the inlet and outlet valves on the water heater bypass system. Turn both valves to the “closed” position. This will redirect the water flow and prevent it from entering the water heater.
- Open the bypass valve: Locate the bypass valve in the water heater bypass system. Turn this valve to the “open” position. This allows the antifreeze to flow through the bypass system and prevent it from entering the water heater.
- Check for proper valve positions: Double-check that the appropriate valves are in the correct positions for bypassing the water heater. This ensures that antifreeze won’t enter the water heater and will only flow through the plumbing lines.
Bypassing the water heater during the winterization process helps protect the internal components and prevents unnecessary use of antifreeze. By following these steps, you can ensure that your water heater remains unaffected during the winter months.
In the next step, we’ll discuss adding antifreeze to the water lines to fully protect your RV’s plumbing system.
Before winterizing your RV water pump, make sure to drain all water from the system and use RV antifreeze to protect the pump from freezing temperatures.
Read more: How To Winterize Well Water Pump
Step 4: Adding Antifreeze to the Water Lines
Now that you have drained the water system and bypassed the water heater, it’s time to add antifreeze to the water lines of your RV. This step ensures that all the plumbing lines are protected from freezing temperatures. Follow these steps to properly add antifreeze to the water lines:
- Prepare the antifreeze: Before adding the antifreeze, make sure it is properly mixed and ready to use. Follow the instructions on the antifreeze container for dilution if necessary.
- Connect the hand pump or compressor: If you’re using a hand pump, connect it to the short length of hose. If you’re using a compressor, attach the appropriate adapter to the hose. Ensure a secure connection to prevent any leaks during the process.
- Locate the RV’s freshwater tank fill port: Locate the freshwater tank fill port on your RV. This is where you will introduce the antifreeze into the water system.
- Add antifreeze to the water system: Insert the end of the hose or pump into the freshwater tank fill port and begin pumping the antifreeze into the system. Start with the furthest faucet or fixture from the water pump and work your way towards it.
- Turn on the faucets: As you pump the antifreeze, turn on the faucets one by one until you see the antifreeze flowing out. Make sure both hot and cold faucets are turned on to flush out all water from the plumbing lines.
- Flush the toilet and other fixtures: After flushing out the faucets, flush the toilet and run the shower and any other fixtures until you see the antifreeze flowing through them.
Continue pumping the antifreeze until you see a consistent flow of antifreeze coming out of each faucet. This ensures that all plumbing lines are filled with antifreeze and protected from freezing temperatures.
In the next step, we’ll discuss priming the water pump to ensure it is ready for winterization.
Step 5: Priming the Water Pump
After adding antifreeze to the water lines, it’s important to prime the water pump to ensure it is ready for winterization. Priming the pump helps remove any residual water and ensures that the antifreeze is properly circulated throughout the system. Follow these steps to prime the water pump:
- Disconnect the hose or compressor: If you were using a hand pump or compressor to add antifreeze, disconnect it from the freshwater tank fill port.
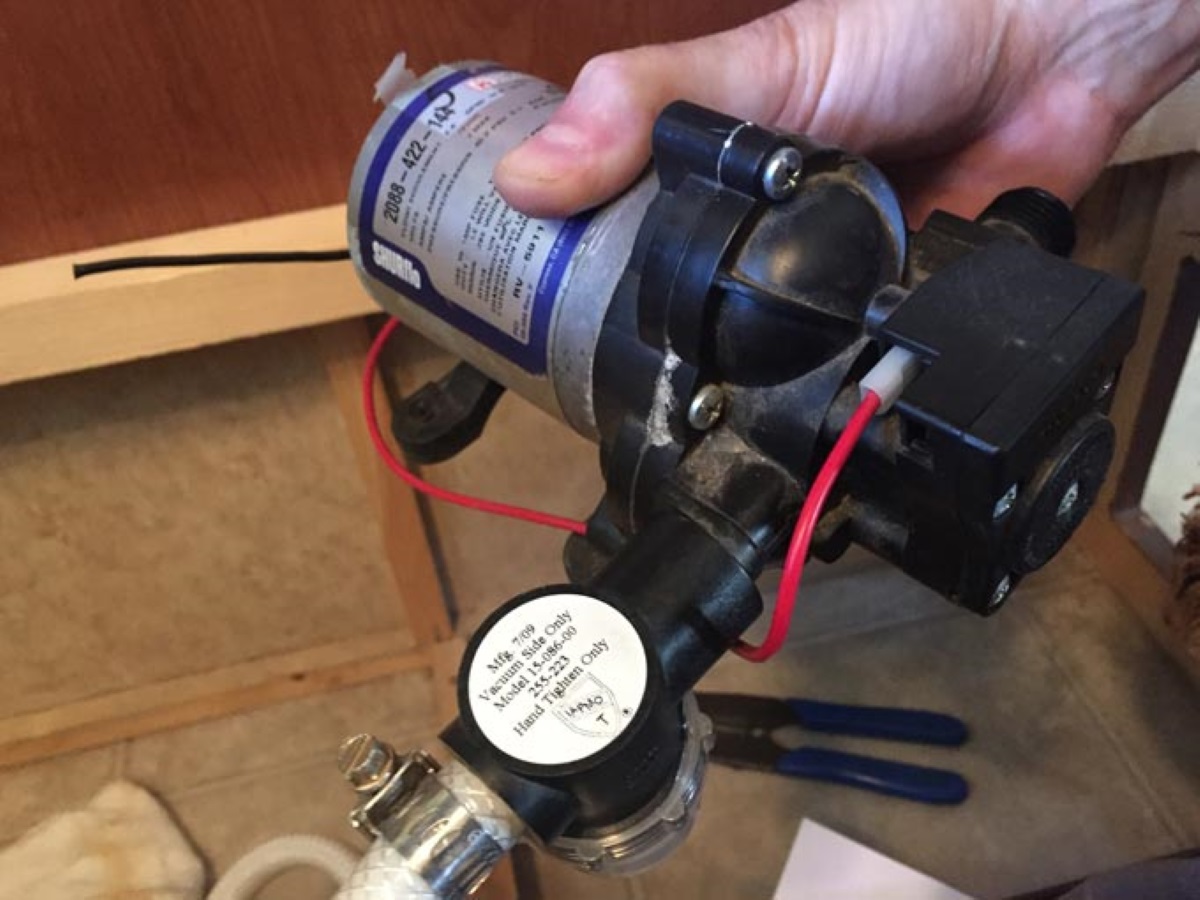
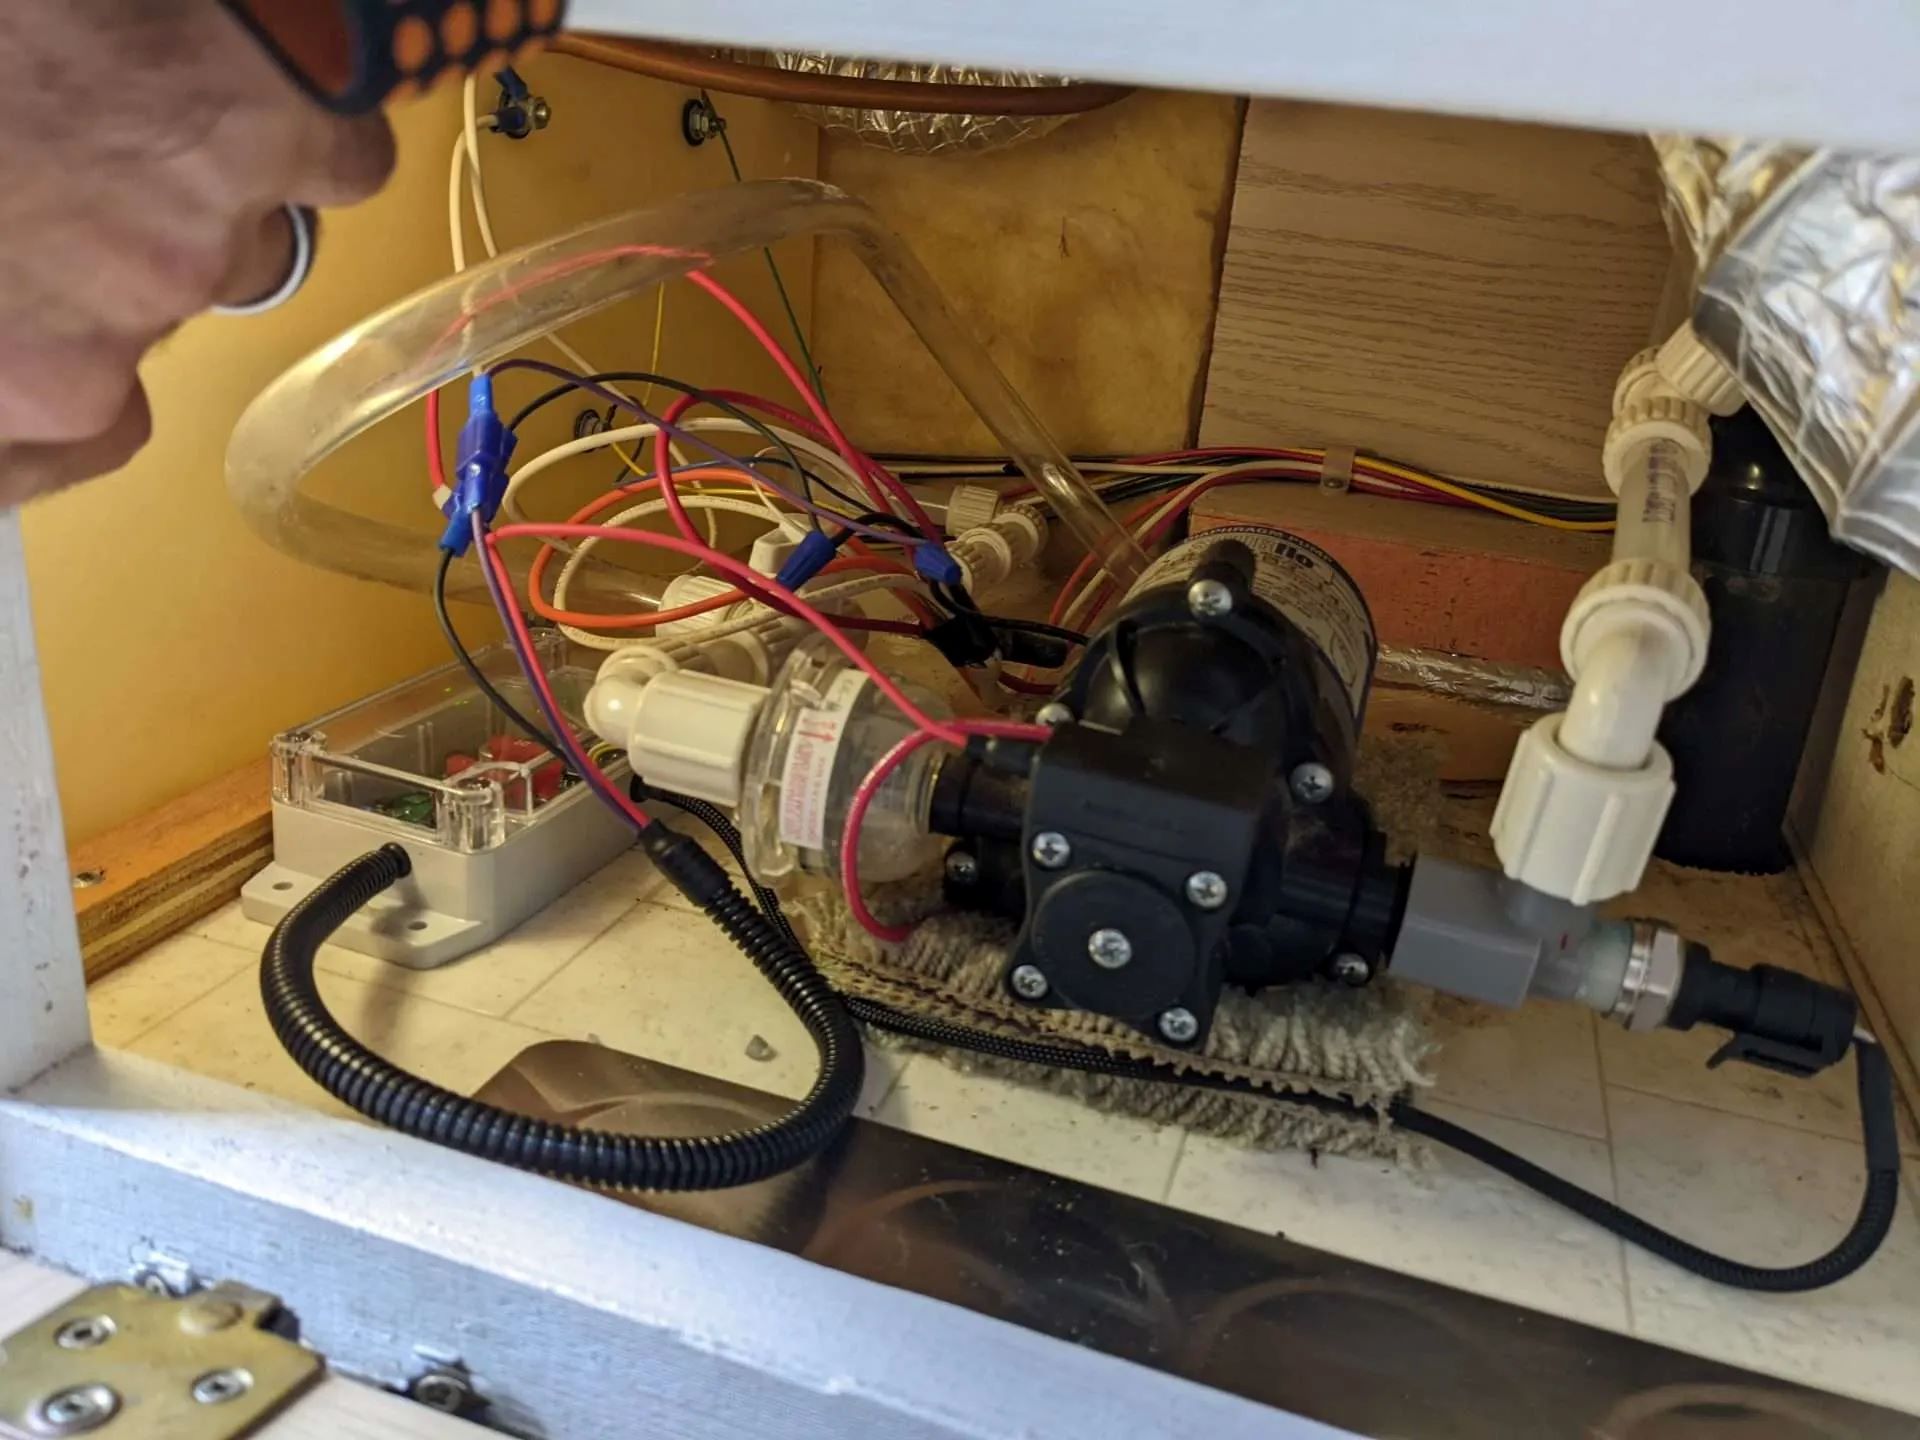
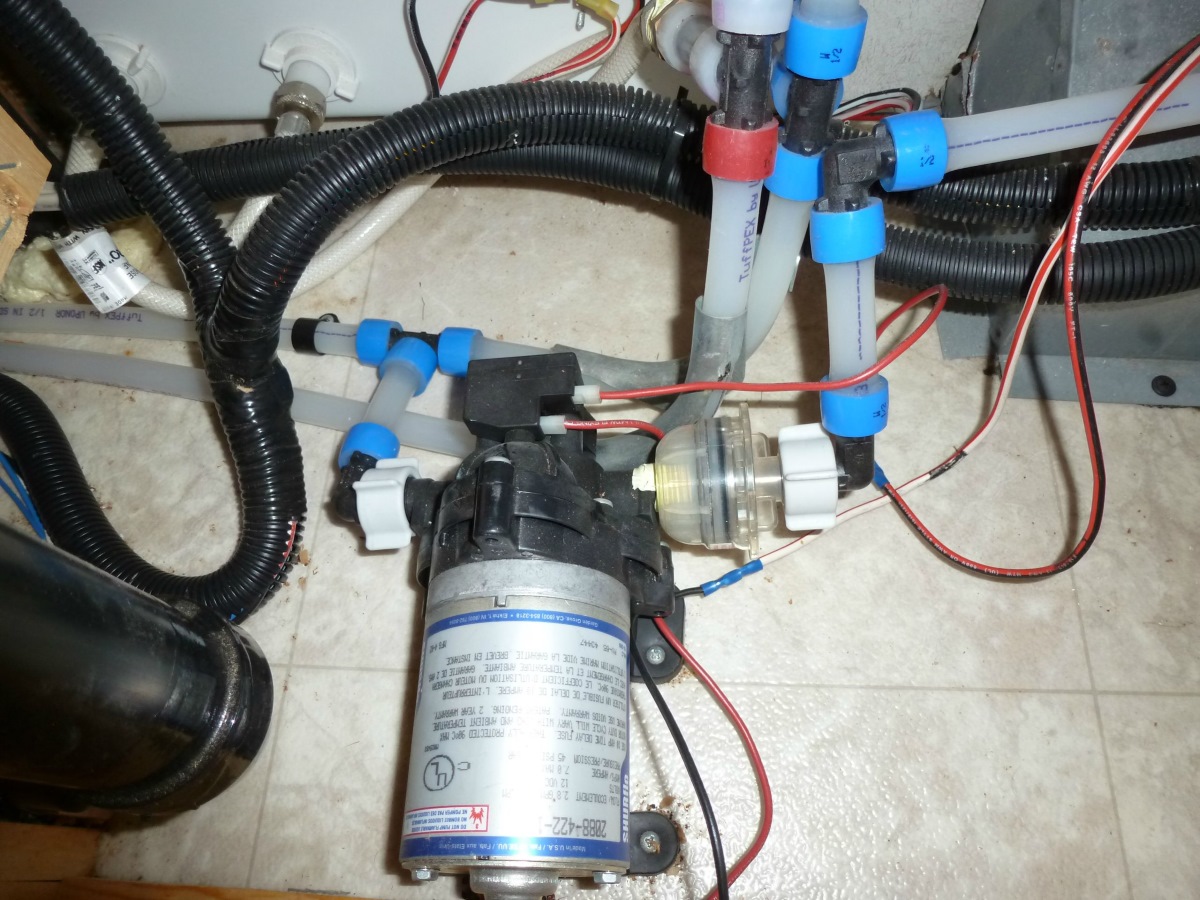
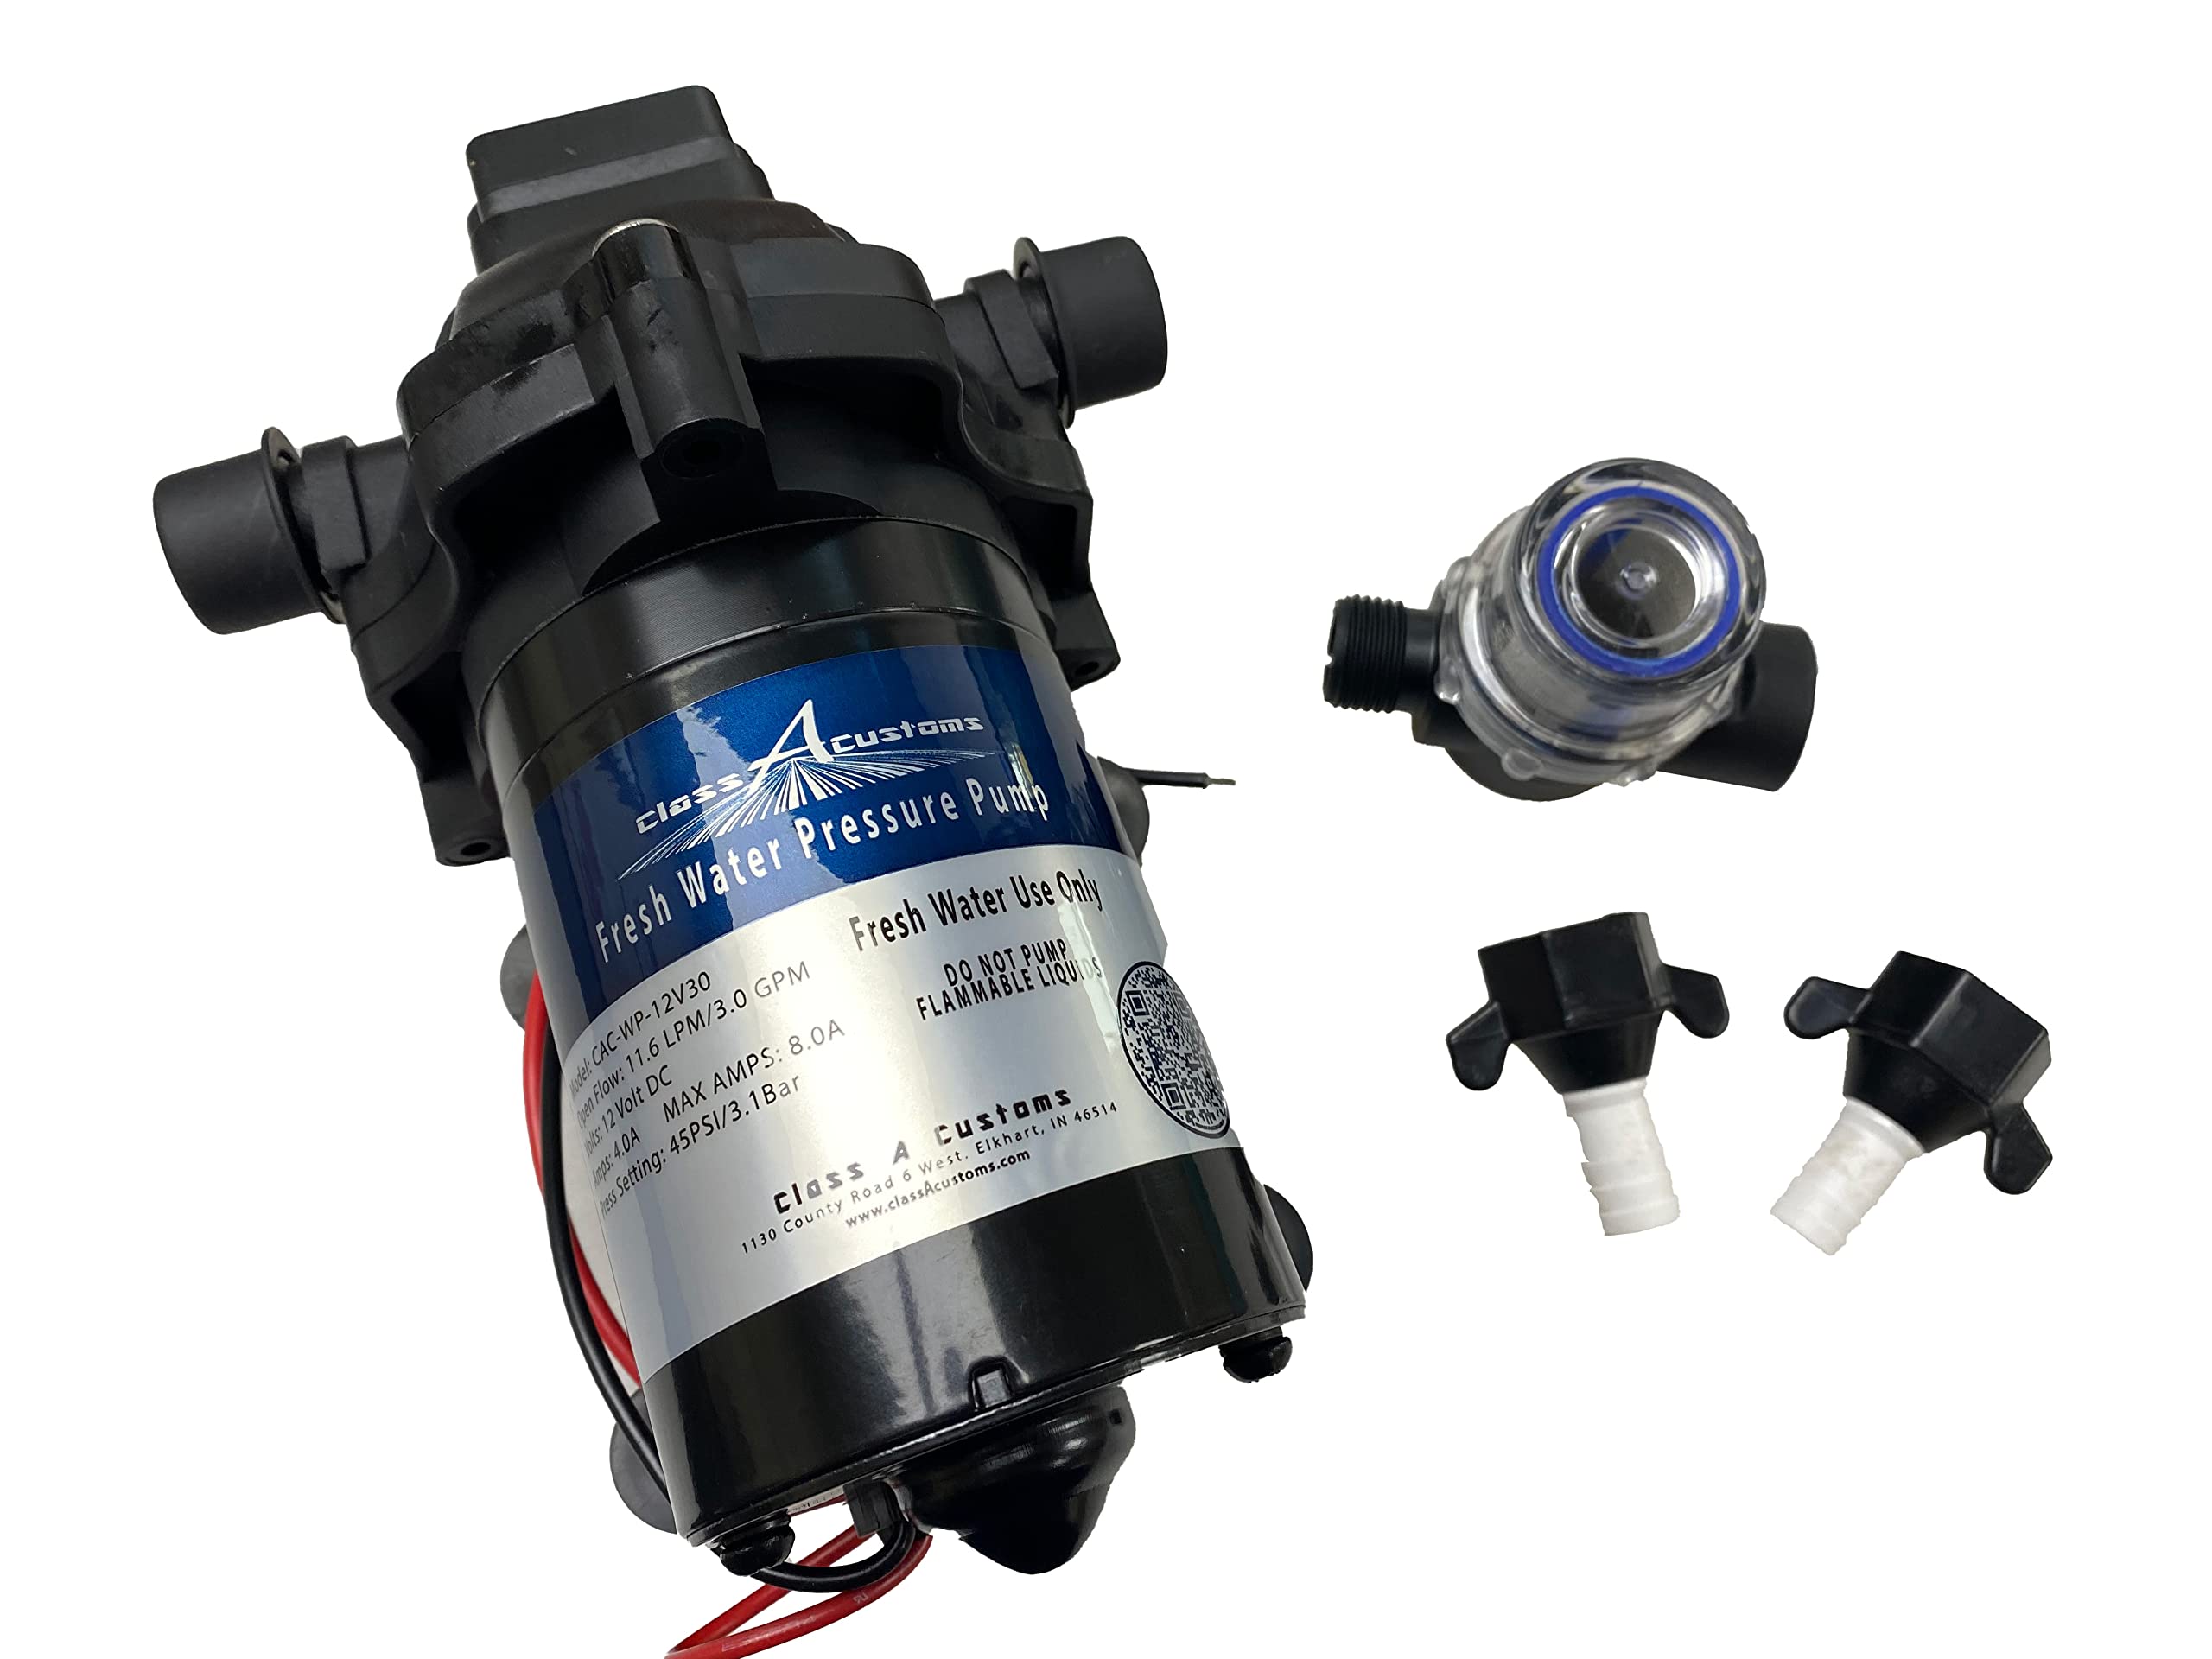
- Locate the water pump: The water pump is typically located near the freshwater tank or in a compartment where the plumbing lines are accessible. Consult your RV owner’s manual if you’re unsure about the exact location.
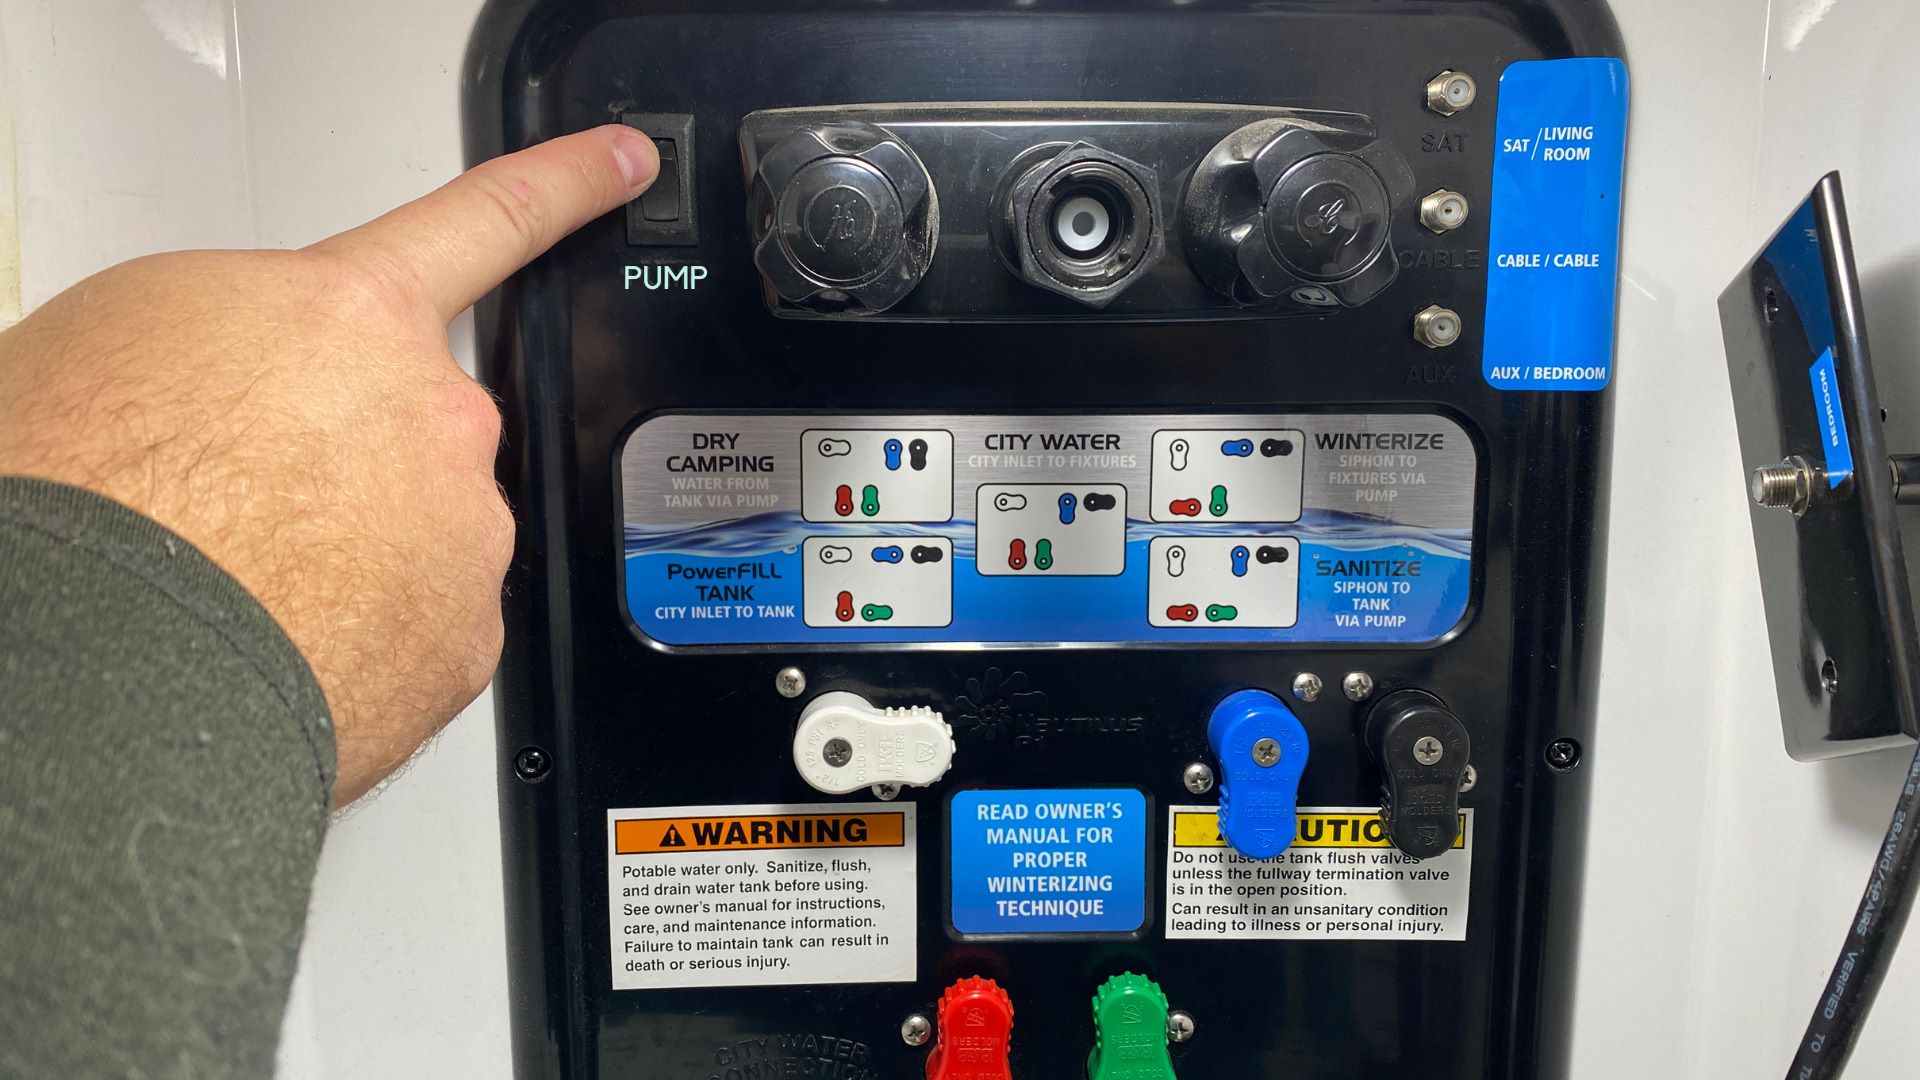
- Turn on the water pump: Turn on the water pump switch to activate it. Allow the pump to run for a few minutes to ensure that any remaining water is fully flushed out.
- Monitor the pump: While the pump is running, listen for any unusual noises or vibrations. This can indicate potential issues with the pump, which should be addressed before storing your RV for the winter.
- Turn off the water pump: After running the pump for a few minutes, turn off the pump switch to stop the flow of antifreeze.
By priming the water pump, you ensure that any water left in the pump is flushed out and replaced with antifreeze. This further protects the pump and prevents freezing during the winter months.
In the next step, we’ll discuss insulating the water pump to provide additional protection against freezing temperatures.
Step 6: Insulating the Water Pump
Insulating the water pump is an important step in winterizing your RV’s plumbing system. By providing additional protection against freezing temperatures, insulation helps safeguard the water pump from potential damage. Follow these steps to properly insulate the water pump:
- Locate the water pump: Identify the location of the water pump in your RV. It is usually found near the freshwater tank or in a compartment accessible from the outside of the RV.
- Wrap the water pump with insulation: Use foam pipe insulation or specialized water pump insulation sleeves to wrap the water pump. Make sure to cover all exposed parts of the pump, including the fittings and electrical connections.
- Secure the insulation: To keep the insulation in place, use zip ties, duct tape, or other suitable fastening methods. Ensure that the insulation is properly secured and tightly wrapped around the water pump.
- Protect the water pump from the elements: If the water pump is exposed to the elements, consider using a waterproof cover or housing to shield it from rain, snow, and other weather conditions. This provides an extra layer of protection against freezing temperatures.
Insulating the water pump helps maintain a stable temperature and prevents freezing. It is an effective measure to prolong the life of the pump and avoid costly repairs in the future.
In the next step, we’ll discuss how to test the winterized RV water system to ensure it is properly prepared for the colder months.
Step 7: Testing the Winterized RV Water System
After completing the winterization process for your RV’s water pump, it’s essential to test the system to ensure that it has been properly prepared for the colder months. This step helps identify any potential issues or leaks before storing your RV. Follow these steps to test the winterized RV water system:
- Reconnect the RV to a water source: If you disconnected your RV from the water source during the winterization process, reconnect it now to test the water system.
- Turn on the water supply: Turn on the water supply to your RV and check for any water leaks or unusual sounds. Pay close attention to the plumbing connections and faucets.
- Check the water pump operation: Turn on the water pump and listen for any unusual noises or vibrations. Ensure that the pump is running smoothly and providing adequate water pressure.
- Inspect all faucets and fixtures: Go through each faucet and fixture in your RV, including sinks, showers, and toilets. Run the water and check for any signs of leaks or issues with water flow.
- Verify the antifreeze is flushed out: During the testing process, make sure there is no trace of antifreeze in the water. The water should appear clear and free from any discoloration.
- Check the water heater: If you bypassed the water heater during the winterization process, double-check that it is operating correctly. Turn on the hot water faucet and ensure that water flows freely.
By testing the winterized RV water system, you can address any potential problems and ensure that your plumbing system is in good working condition. If you notice any leaks or issues, it’s important to resolve them before storing your RV to avoid further damage.
Congratulations! You have successfully winterized your RV’s water pump and prepared your plumbing system for the colder months. By following these steps and taking the necessary precautions, you can protect your RV and enjoy peace of mind during the winter season.
Read more: What Does The Water Pump Do In An Rv
Conclusion
Winterizing your RV’s water pump is a vital step in protecting your investment and ensuring that your plumbing system remains intact during the colder months. By following the step-by-step process outlined in this article, you can effectively winterize your RV’s water pump and safeguard against freezing temperatures.
Understanding the inner workings of your RV’s water pump and the importance of winterization is crucial before embarking on the process. By gathering all the necessary materials and properly draining the water system, you can prepare the plumbing lines for antifreeze.
Bypassing the water heater allows you to conserve antifreeze and protect the water heater from potential damage. Adding antifreeze to the water lines ensures that all plumbing lines are protected, while priming the water pump helps remove any residual water and ensures proper circulation of antifreeze.
Insulating the water pump provides an extra layer of protection against freezing temperatures, and testing the winterized RV water system helps identify any issues or leaks before storage.
By taking these necessary steps, you can have peace of mind knowing that your RV’s water pump and plumbing system are prepared for the winter months. The proper winterization of your RV’s water pump helps prevent costly repairs and ensures that your RV is ready to hit the road again when warmer weather returns.
Remember to consult your RV owner’s manual for specific instructions and guidelines, as different RV models may have slightly different plumbing systems and water pump configurations.
Stay proactive in winterizing your RV’s water pump and enjoy worry-free adventures throughout the year!
Frequently Asked Questions about How To Winterize Rv Water Pump
Was this page helpful?
At Storables.com, we guarantee accurate and reliable information. Our content, validated by Expert Board Contributors, is crafted following stringent Editorial Policies. We're committed to providing you with well-researched, expert-backed insights for all your informational needs.


0 thoughts on “How To Winterize Rv Water Pump”