Articles
Why Is Water Dispenser On Fridge Not Working
Modified: August 19, 2024
Discover common reasons why your water dispenser on the fridge is not working and find helpful articles to troubleshoot the issue.
(Many of the links in this article redirect to a specific reviewed product. Your purchase of these products through affiliate links helps to generate commission for Storables.com, at no extra cost. Learn more)
Introduction
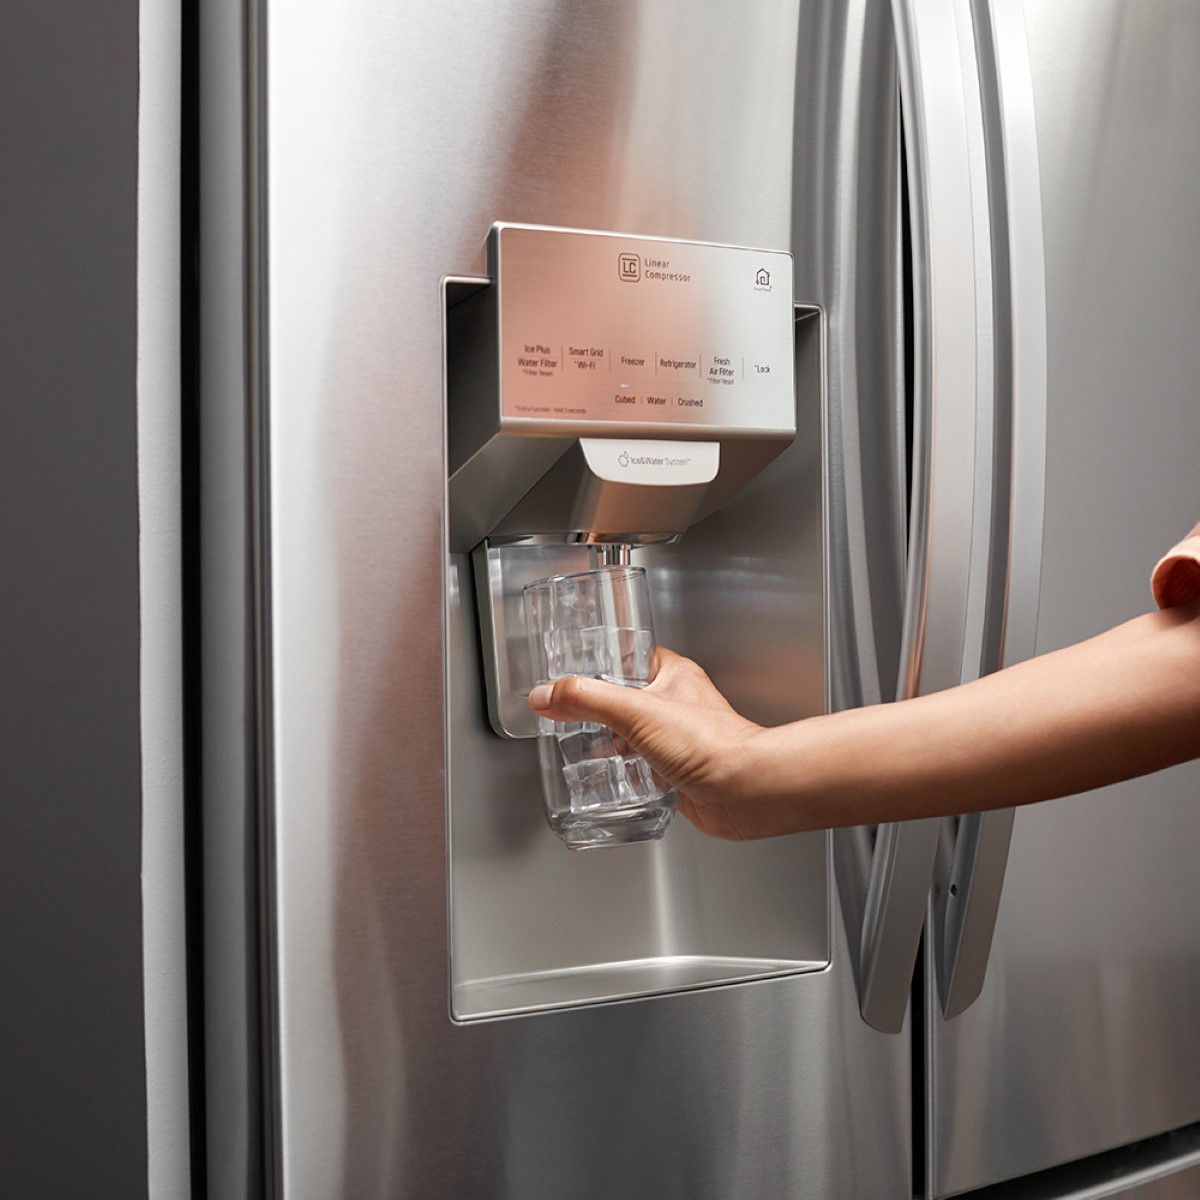
Having a water dispenser on your refrigerator is a convenient and refreshing feature. It allows you to have chilled water at your fingertips without the need for bulky water coolers or constantly refilling water bottles. However, what happens when your water dispenser stops working? It can be frustrating and inconvenient, especially if you rely on it for your daily hydration needs. In this article, we will explore the common causes of a non-functioning water dispenser and provide troubleshooting tips to get it back up and running.
There are several reasons why your water dispenser on the fridge may not be working properly. It could be due to a problem with the water supply, a clogged or faulty water filter, a malfunctioning water inlet valve, issues with the dispenser control board, a faulty dispenser switch or paddle, a malfunctioning solenoid, a problem with the dispenser actuator arm, or an issue with the water line tubing. By examining these potential causes and performing some simple troubleshooting steps, you can often resolve the issue and have your water dispenser functioning again.
Before we dive into the troubleshooting tips, it’s important to note that safety should always be a priority. If you’re not comfortable or familiar with handling the inner workings of your refrigerator, it’s best to consult a professional technician to avoid any potential damage or harm. Now, let’s proceed with the troubleshooting steps to get your water dispenser on the fridge working again.
Key Takeaways:
- Troubleshooting your non-working water dispenser on the fridge involves checking the water supply, filter, inlet valve, control board, switch, solenoid, actuator arm, and tubing. Regular maintenance and replacement of faulty parts can restore functionality.
- Safety is crucial when troubleshooting a non-working water dispenser. If uncomfortable, seek professional assistance. Regular maintenance and timely replacement of parts can keep your water dispenser on the fridge working efficiently.
Read more: Why Is My Hot Water Dispenser Not Working
Common Causes of Water Dispenser Malfunction
There are several common causes of a water dispenser on a fridge malfunctioning. Understanding these causes can help you identify and resolve the issue more effectively. Here are some of the most common culprits:
- Water Supply Issues: One of the first things to check is the water supply. Make sure that the refrigerator is properly connected to a water source and that the water supply valve is fully open. Sometimes, a partially closed valve can restrict water flow, resulting in a non-functioning water dispenser.
- Water Filter Problems: A clogged or faulty water filter can also cause issues with the water dispenser. Over time, the filter can become blocked with sediment and impurities, limiting water flow. If it has been more than six months since you last replaced the filter, it’s a good idea to do so. This simple step can often solve the problem.
- Water Inlet Valve Malfunction: The water inlet valve controls the flow of water into the refrigerator’s dispenser. If this valve is faulty or malfunctioning, it can result in a non-working water dispenser. Inspect the valve for any signs of damage or wear and consider replacing it if necessary.
- Dispenser Control Board Issues: The dispenser control board is responsible for regulating the functions of the water dispenser. If it becomes damaged or fails, it can lead to a malfunctioning dispenser. Look for any visible signs of damage or loose connections on the control board and consider replacing it if needed.
- Dispenser Switch or Paddle Fault: The dispenser switch or paddle is what you press or push to activate the water dispenser. If these components are damaged or not functioning properly, it can prevent the dispenser from working. Check for any visible signs of damage or wear on these parts and replace them if necessary.
- Solenoid Malfunction: The solenoid is responsible for controlling the flow of water through the dispenser. If it becomes stuck or malfunctions, it can result in a non-functioning water dispenser. Inspect the solenoid for any signs of damage and consider replacing it if needed.
- Dispenser Actuator Arm Issue: The dispenser actuator arm is what senses when you push a glass against it and activates the water dispenser. If it is broken or misaligned, it may not properly engage with the switch or paddle, leading to a non-working dispenser. Inspect the actuator arm for any visible damage and realign or replace it if necessary.
- Water Line Tubing Problems: The water line tubing carries water from the supply to the dispenser. If the tubing becomes kinked, blocked, or damaged, it can restrict water flow and cause the dispenser to malfunction. Inspect the tubing for any signs of damage or obstruction and replace it if needed.
By understanding these common causes of a non-working water dispenser, you can effectively troubleshoot the issue and get your fridge dispenser back to functioning again. In the following sections, we will provide troubleshooting tips specific to each of these common causes to help you pinpoint and resolve the problem.
Troubleshooting Tips for a Non-Working Water Dispenser
When your water dispenser on the fridge is not working, there are several troubleshooting steps you can take to identify and resolve the issue. By following these tips, you can often find a solution without the need for professional assistance. Let’s explore each troubleshooting tip in detail:
Check the Water Supply
Start by checking the water supply to the refrigerator. Ensure that the water supply valve is fully open and that water is properly reaching the fridge. If the water supply is restricted or not reaching the refrigerator, it can result in a non-functioning water dispenser. Consider checking the water line for any kinks or obstructions that may be impeding water flow.
Inspect the Water Filter
If your refrigerator has a water filter, inspect it for any signs of clogging or damage. A blocked or faulty water filter can restrict the flow of water and cause the dispenser to malfunction. In such cases, it’s recommended to replace the water filter. Refer to the manufacturer’s instructions for the specific steps to remove and replace the filter.
Read more: Why Is My Primo Water Dispenser Not Working
Examine the Water Inlet Valve
The water inlet valve controls the flow of water into the refrigerator’s dispenser. If it is malfunctioning or damaged, it can result in a non-working water dispenser. Inspect the valve for any visible signs of damage or wear. If necessary, replace the water inlet valve with a new one that is compatible with your refrigerator model.
Check the Dispenser Control Board
The dispenser control board regulates the functions of the water dispenser. If it becomes damaged or fails, it can lead to a malfunctioning dispenser. Take a close look at the control board for any visible signs of damage or loose connections. If you suspect an issue with the control board, consider replacing it with a new one.
Inspect the Water Dispenser Switch or Paddle
The water dispenser switch or paddle is what you press or push to activate the water dispenser. If these components are damaged, worn out, or not functioning properly, it can prevent the dispenser from working. Carefully examine the switch or paddle for any visible signs of damage or malfunction. If needed, replace the switch or paddle with a compatible replacement part.
Examine the Dispenser Solenoid
The dispenser solenoid controls the flow of water through the dispenser. If it becomes stuck or malfunctions, it can result in a non-functioning water dispenser. Inspect the solenoid for any signs of damage or obstruction. If necessary, replace the solenoid with a new one that is compatible with your refrigerator model.
Check the Dispenser Actuator Arm
The dispenser actuator arm is what senses when you push a glass against it and activates the water dispenser. If it is broken or misaligned, it may not properly engage with the switch or paddle, leading to a non-working dispenser. Examine the actuator arm for any visible damage or misalignment. If necessary, realign or replace the actuator arm with a compatible replacement part.
Inspect the Water Line Tubing
The water line tubing carries water from the supply to the dispenser. If the tubing becomes kinked, blocked, or damaged, it can restrict water flow and cause the dispenser to malfunction. Carefully inspect the tubing for any signs of damage or obstruction. If needed, replace the tubing with a new one that matches the specifications of your refrigerator.
By following these troubleshooting tips, you can identify and resolve the most common issues that cause a non-working water dispenser on the fridge. However, if the problem persists or if you’re not comfortable performing these troubleshooting steps, it’s always best to consult a professional technician to ensure proper diagnosis and repair.
Check the Water Supply
One of the first troubleshooting steps to take when your water dispenser on the fridge is not working is to check the water supply. If the water supply is restricted, it can lead to a non-functioning water dispenser. Here are some steps to check the water supply:
1. Verify the Water Supply Valve
Ensure that the water supply valve connected to your refrigerator is fully open. The valve is usually located behind the fridge or under the sink. Turn the valve counterclockwise to ensure it is fully open. If the valve is partially closed, it can restrict water flow and result in a non-working water dispenser.
2. Check for Water Flow
Once you have confirmed that the water supply valve is fully open, check for water flow to the refrigerator. Disconnect the water line connected to the refrigerator and place the end in a bucket or sink. Turn on the water supply valve and observe if water is flowing freely into the container. If there is no or limited water flow, there may be an issue with the water supply line or the valve itself. Consider contacting a plumber or a professional technician to further diagnose and resolve the problem.
3. Inspect the Water Line
Inspect the water line that connects the water supply to your refrigerator. Ensure that the line is not kinked, twisted, or pinched. Any obstruction in the line can restrict water flow to the dispenser, causing it to malfunction. If you notice any damage or blockage in the line, replace it with a new one that matches the specifications of your refrigerator.
4. Check for Frozen Water Line
In some cases, the water line leading to the refrigerator’s dispenser may freeze, preventing water from reaching the dispenser. If you suspect a frozen water line, try defrosting it by turning off the refrigerator and leaving the freezer door open for a few hours. Alternatively, you can use a hairdryer to gently warm the water line. Once the line is defrosted, restore power to the refrigerator and check if the water dispenser is working again.
5. Test for Water Pressure
Inadequate water pressure can also affect the functionality of the water dispenser. To assess the water pressure, turn on a nearby faucet and observe the flow. If the water pressure is low, you may need to contact a plumber to address the issue. Insufficient water pressure can impact the performance of the refrigerator’s water dispenser.
Checking the water supply is an important step in troubleshooting a non-working water dispenser on the fridge. By ensuring a proper water supply, you eliminate one of the potential causes of the malfunction. If the issue persists after checking the water supply, proceed to the next troubleshooting step to address other possible causes.
Inspect the Water Filter
When your water dispenser on the fridge is not working, a common culprit can be a clogged or faulty water filter. The water filter plays a crucial role in removing impurities and contaminants from the water before it reaches the dispenser. Over time, the filter can become clogged with sediment and debris, which can restrict water flow and lead to a non-functioning water dispenser. Here are a few steps to inspect the water filter:
1. Locate the Water Filter
The location of the water filter may vary depending on the make and model of your refrigerator. Most often, it is located inside the fridge compartment, either in the upper right corner or behind a removable panel. Consult your refrigerator’s manual or manufacturer’s website to determine the exact location of the water filter for your specific model.
2. Remove the Water Filter
Before inspecting the water filter, make sure to turn off the water supply to the refrigerator. This can typically be done by turning the water supply valve clockwise until it is fully closed. Then, carefully remove the water filter from its housing. Refer to the manufacturer’s instructions for your specific model on how to properly remove the water filter.
3. Examine the Filter for Clogs or Damage
Once the filter is removed, visually inspect it for any signs of clogs or damage. Look for dirt, debris, or sediment that may have accumulated on the filter. If the filter is dirty or clogged, it can significantly impede water flow and cause the water dispenser to malfunction. In such cases, it’s recommended to replace the water filter with a new one.
Read also: 9 Best Fridge Water Dispenser for 2025
4. Check the Filter’s Lifespan
Most water filters have a recommended lifespan, after which they should be replaced. Check the date or the usage indicator on the filter to determine if it has exceeded its recommended usage period. If it has been more than six months since you last replaced the filter, it’s a good idea to install a new one. Replacing the filter regularly ensures optimal water filtration and helps to keep your water dispenser functioning properly.
5. Install a New Water Filter
If you find that the water filter is clogged, dirty, or past its recommended usage period, it’s time to install a new filter. Follow the manufacturer’s instructions to properly install the replacement filter. Make sure to securely fasten the filter in its housing and ensure a tight seal to prevent any leaks.
Inspecting the water filter is an important step in troubleshooting a non-working water dispenser on the fridge. By checking for clogs or damage and replacing the filter if necessary, you can restore proper water flow and functionality to the dispenser. If the issue persists after inspecting the water filter, proceed to the next troubleshooting step to address other potential causes of the problem.
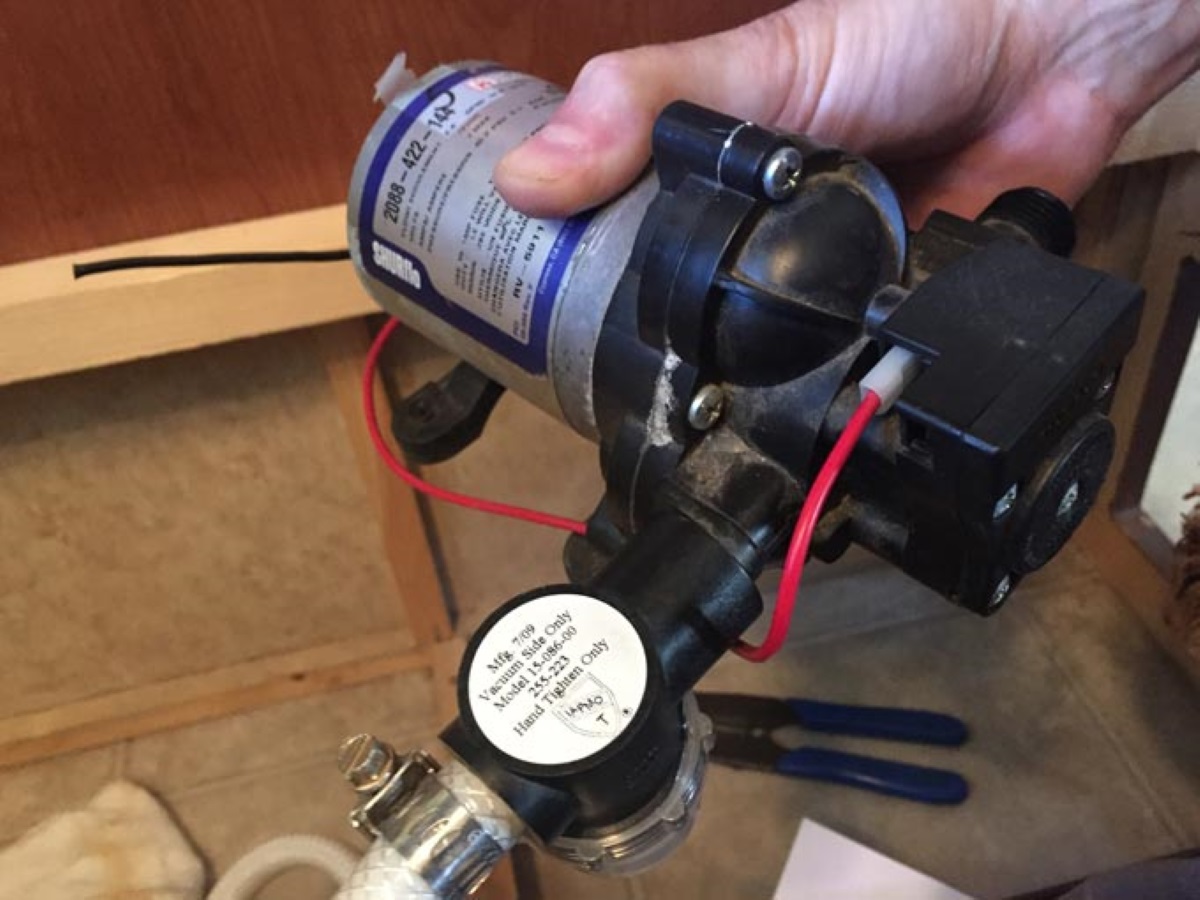
Examine the Water Inlet Valve
When your water dispenser on the fridge is not working, another possible cause could be a malfunctioning or faulty water inlet valve. The water inlet valve controls the flow of water into the refrigerator’s dispenser. If it is not functioning properly, it can restrict or block water flow, resulting in a non-working water dispenser. Here are some steps to examine the water inlet valve:
1. Locate the Water Inlet Valve
The water inlet valve is usually located at the back of the refrigerator, near the bottom. It is connected to the water supply line that runs from the wall to the refrigerator. Refer to your refrigerator’s manual or consult the manufacturer’s website to determine the exact location of the water inlet valve for your specific model.
Read more: How Does Water Dispenser Work
2. Turn off the Water Supply
Before examining the water inlet valve, make sure to turn off the water supply to the refrigerator. This can typically be done by turning the water supply valve clockwise until it is fully closed. This precaution is necessary to ensure your safety and prevent any water leaks during the inspection process.
3. Inspect the Valve for Damage
Carefully examine the water inlet valve for any visible signs of damage or wear. Look for cracks, leaks, or corrosion on the valve body or the connectors. These issues can indicate a problem with the valve and may be the cause of the water dispenser malfunction. If you notice any signs of damage, it’s recommended to replace the water inlet valve with a new one that is compatible with your refrigerator model.
4. Check the Valve’s Solenoids
The water inlet valve contains solenoids, which are responsible for opening and closing the valve to control water flow. If the solenoids are faulty or sticking, it can cause a disruption in the water flow and result in a non-functioning water dispenser. Test the solenoids by using a multimeter to measure the resistance across the solenoid terminals. Refer to your refrigerator’s manual for the specific resistance levels to look for or consult a professional technician for assistance.
5. Replace the Water Inlet Valve
If you determine that the water inlet valve is the cause of the water dispenser malfunction, it’s recommended to replace the valve with a new one. Make sure to purchase a valve that is compatible with your specific refrigerator model. Follow the manufacturer’s instructions or consult a professional technician for guidance on how to properly replace the water inlet valve.
Examining the water inlet valve is an essential step in troubleshooting a non-working water dispenser on the fridge. By checking for damage and ensuring proper functioning of the valve, you can restore water flow and resolve the dispenser issue. If the problem persists after examining the water inlet valve, proceed to the next troubleshooting step to address other possible causes.
Read more: How Does Water Dispenser In Fridge Work
Check the Dispenser Control Board
When your water dispenser on the fridge is not working, one possible cause could be a malfunctioning dispenser control board. The dispenser control board is responsible for regulating the functions of the water dispenser. If it becomes damaged or fails, it can lead to a non-functioning dispenser. Here are some steps to check the dispenser control board:
1. Locate the Dispenser Control Board
The dispenser control board is usually located on the back of the refrigerator, behind a panel or cover. Refer to your refrigerator’s manual or consult the manufacturer’s website to determine the exact location of the dispenser control board for your specific model.
2. Power Off the Refrigerator
Before checking the dispenser control board, ensure that the refrigerator is powered off and unplugged. This will help to prevent any electrical accidents and ensure your safety during the inspection process.
3. Remove the Control Board Cover
Carefully remove the cover or panel that is protecting the dispenser control board. It may be secured with screws or clips. Use the appropriate tools to remove the cover without damaging any components.
4. Examine the Control Board for Damage
Visually inspect the dispenser control board for any signs of damage, such as burnt spots, loose connections, or bulging capacitors. These issues can indicate a problem with the control board and may be the cause of the water dispenser malfunction. If you notice any signs of damage, it’s recommended to replace the dispenser control board with a new one that is compatible with your refrigerator model.
5. Check for Loose Connections
Ensure that all connections on the dispenser control board are secure and tight. Check for any loose or disconnected wires or cables. If you identify any loose connections, carefully reconnect them to the appropriate terminals or sockets on the control board.
6. Replace the Dispenser Control Board
If you determine that the dispenser control board is the cause of the water dispenser malfunction, it’s recommended to replace the control board with a new one. Make sure to purchase a control board that is compatible with your specific refrigerator model. Follow the manufacturer’s instructions or consult a professional technician for guidance on how to properly install the new dispenser control board.
Checking the dispenser control board is an important step in troubleshooting a non-working water dispenser on the fridge. By examining the control board for damage and ensuring proper connections, you can identify and resolve any issues related to the control board. If the problem persists after checking the dispenser control board, proceed to the next troubleshooting step to address other potential causes.
Inspect the Water Dispenser Switch or Paddle
If your water dispenser on the fridge is not working, a possible cause could be a malfunctioning or faulty water dispenser switch or paddle. The switch or paddle is what you press or push to activate the water dispenser. If these components are damaged, worn out, or not functioning properly, it can prevent the dispenser from working. Here are some steps to inspect the water dispenser switch or paddle:
Read more: Why My Water Heater Is Not Working
1. Locate the Water Dispenser Switch or Paddle
The water dispenser switch or paddle is typically located on the front panel of the refrigerator, near the dispenser area. It may be a push button or a lever-style paddle. Refer to your refrigerator’s manual or consult the manufacturer’s website to determine the exact location and design of the water dispenser switch or paddle for your specific model.
2. Examine for Visible Damage
Carefully inspect the water dispenser switch or paddle for any visible signs of damage or wear. Look for cracks, chips, or any other physical damage that may affect its functionality. Additionally, check if the switch or paddle is loose or misaligned, as this can also prevent the water dispenser from working properly.
3. Test the Switch or Paddle
Press or push the water dispenser switch or paddle to see if it activates the water flow. Pay attention to any resistance or unusual behavior. If the switch or paddle feels loose, unresponsive, or if it doesn’t engage with the dispenser mechanism, it may be defective and in need of replacement.
4. Clean the Switch or Paddle
If the water dispenser switch or paddle appears dirty or sticky, it may be affecting its functionality. Use a mild detergent or a mixture of water and vinegar to clean the switch or paddle gently. Make sure to dry it thoroughly before testing it again. Cleaning can sometimes resolve minor issues and restore the proper functioning of the water dispenser.
5. Replace the Water Dispenser Switch or Paddle
If you find that the water dispenser switch or paddle is damaged, worn, or not functioning despite cleaning, it’s recommended to replace it with a new one. Contact the refrigerator manufacturer or a reputable parts supplier to purchase a compatible replacement part. Follow the manufacturer’s instructions or consult a professional technician for guidance on how to properly install the new switch or paddle.
Inspecting the water dispenser switch or paddle is an essential step in troubleshooting a non-working water dispenser on the fridge. By examining these components for damage or malfunctioning, you can identify whether they are causing the issue. If the problem persists after inspecting the water dispenser switch or paddle, proceed to the next troubleshooting step to address other potential causes.
Examine the Dispenser Solenoid
If your water dispenser on the fridge is not working, a potential cause could be a malfunctioning or faulty dispenser solenoid. The dispenser solenoid controls the flow of water through the dispenser. If it becomes stuck, doesn’t engage properly, or malfunctions, it can result in a non-functioning water dispenser. Here are some steps to examine the dispenser solenoid:
1. Locate the Dispenser Solenoid
The dispenser solenoid is usually located behind the front panel of the refrigerator, near the water dispenser area. It is connected to the water supply line and is responsible for controlling the water flow when activated. Refer to your refrigerator’s manual or consult the manufacturer’s website to determine the exact location and design of the dispenser solenoid for your specific model.
2. Power Off the Refrigerator
Before examining the dispenser solenoid, ensure that the refrigerator is powered off and unplugged. This precaution is necessary to prevent any electrical accidents and to ensure your safety during the inspection process.
Read more: Why Is My Water Flosser Not Working
3. Inspect the Solenoid for Damage or Obstructions
Carefully examine the dispenser solenoid for any visible signs of damage, such as cracks, leaks, or loose connections. Additionally, check for any obstructions or blockages that may be preventing the solenoid from functioning properly. Debris or sediment buildup can interfere with its movement and result in a non-working water dispenser.
4. Test the Solenoid with a Multimeter
If you have access to a multimeter, you can test the dispenser solenoid to determine its functionality. Set the multimeter to measure resistance and carefully detach the solenoid from the water supply line. Place the multimeter probes on the terminal contacts of the solenoid and check for a reading within the expected range. Consult your refrigerator’s manual or a professional technician to determine the specific resistance values for your model.
5. Replace the Dispenser Solenoid
If you determine that the dispenser solenoid is damaged, not functioning properly, or if it shows no resistance reading when tested, it’s recommended to replace the solenoid with a new one. Contact the refrigerator manufacturer or a reputable parts supplier to purchase a compatible replacement part. Follow the manufacturer’s instructions or consult a professional technician for guidance on how to properly install the new dispenser solenoid.
Examining the dispenser solenoid is an important step in troubleshooting a non-working water dispenser on the fridge. By checking for damage or obstructions and testing its functionality, you can determine if the solenoid is causing the issue. If the problem persists after examining the dispenser solenoid, proceed to the next troubleshooting step to address other potential causes.
Check the Dispenser Actuator Arm
If your water dispenser on the fridge is not working, one possible cause could be a broken or misaligned dispenser actuator arm. The dispenser actuator arm is responsible for sensing when you push a glass against it and activating the water dispenser. If the actuator arm is damaged or not properly engaging with the switch or paddle, it can lead to a non-functioning water dispenser. Here are some steps to check the dispenser actuator arm:
Read more: What Is A Water Dispenser
1. Locate the Dispenser Actuator Arm
The dispenser actuator arm is usually located behind the panel or cover on the front of the refrigerator, near the water dispenser area. It is a small plastic or metal arm that is typically attached to the switch or paddle mechanism. Refer to your refrigerator’s manual or consult the manufacturer’s website to determine the exact location and design of the dispenser actuator arm for your specific model.
2. Observe the Position and Movement of the Actuator Arm
Carefully observe the position and movement of the dispenser actuator arm. Check if it is properly aligned with the switch or paddle and if it moves freely when pushed or released. If the actuator arm is misaligned or appears broken, it may not be able to properly engage with the switch or paddle mechanism, resulting in a non-working water dispenser.
3. Inspect for Visible Damage
Examine the dispenser actuator arm for any visible signs of damage or wear. Look for cracks, breaks, or any other physical damage that may affect its functionality. If you notice any signs of damage, it’s recommended to replace the actuator arm with a new one that is compatible with your refrigerator model.
4. Realign or Replace the Actuator Arm
If the dispenser actuator arm is misaligned, carefully realign it with the switch or paddle mechanism. Ensure that it engages properly when pushed. If the actuator arm is significantly damaged or broken, it’s recommended to replace it with a new one. Contact the refrigerator manufacturer or a reputable parts supplier to purchase a compatible replacement part. Follow the manufacturer’s instructions or consult a professional technician for guidance on how to properly install the new dispenser actuator arm.
Checking the dispenser actuator arm is an important step in troubleshooting a non-working water dispenser on the fridge. By examining its position, movement, and overall condition, you can determine if the actuator arm is causing the issue. If the problem persists after checking the actuator arm, proceed to the next troubleshooting step to address other possible causes.
Inspect the Water Line Tubing
If your water dispenser on the fridge is not working, it’s important to check the water line tubing. The water line tubing carries water from the supply to the dispenser. If the tubing becomes kinked, blocked, or damaged, it can restrict water flow and cause the dispenser to malfunction. Here are some steps to inspect the water line tubing:
1. Locate the Water Line Tubing
The water line tubing is typically located at the back of the refrigerator, behind a panel or cover. It runs from the water supply connection to the dispenser area. Refer to your refrigerator’s manual or consult the manufacturer’s website to determine the exact location and design of the water line tubing for your specific model.
2. Check for Kinks or Bends
Visually inspect the water line tubing for any kinks, bends, or restrictions. A kinked or bent tubing can significantly impede water flow to the dispenser. Gently straighten out any kinks or bends in the tubing to restore proper water flow. Be careful not to apply too much force, as it may cause the tubing to crack or break.
3. Look for Obstructions or Blockages
Check for any obstructions or blockages in the water line tubing. Sediment, mineral deposits, or debris can accumulate over time and restrict the water flow. If there are any visible blockages, carefully remove them using a clean cloth or a pipe cleaner. If the blockage is severe or difficult to remove, it’s recommended to replace the water line tubing.
Read more: Why Is My Catit Water Fountain Not Working
4. Inspect for Damage
Examine the water line tubing for any signs of damage, such as cracks, leaks, or punctures. Even a small crack can cause water leakage and affect the functionality of the dispenser. If you notice any damage, it’s recommended to replace the water line tubing with a new one that matches the specifications of your refrigerator model.
5. Check the Connections
Ensure that the water line tubing is securely connected to both the water supply and the dispenser. Loose or improper connections can lead to leaks or decreased water flow. Verify that the connections are tight and properly sealed to prevent any water leakage.
Inspecting the water line tubing is an essential step in troubleshooting a non-working water dispenser on the fridge. By checking for kinks, bends, obstructions, or damage in the tubing and ensuring proper connections, you can identify and resolve any issues related to the water line. If the problem persists after inspecting the water line tubing, it’s recommended to consult a professional technician for further assistance.
Conclusion
A non-working water dispenser on your fridge can be frustrating, but with some troubleshooting, you can often identify and resolve the issue. By following the steps outlined in this article, you can address common causes of water dispenser malfunctions and potentially get your water dispenser back up and running.
First, check the water supply by ensuring that the water supply valve is fully open and that water is reaching the refrigerator. Next, inspect the water filter for any clogs or damage. Replace the filter if necessary, especially if it has been more than six months since the last replacement.
Examine the water inlet valve for any damage or wear, and replace it if needed. Similarly, inspect the dispenser control board for any visible signs of damage or loose connections. Replace the control board if necessary.
Check the water dispenser switch or paddle for any damage or misalignment. Clean the switch or paddle to remove any dirt or stickiness. Replace the switch or paddle if it still doesn’t work properly.
Inspect the dispenser solenoid and make sure it moves freely and isn’t obstructed. Replace the solenoid if it’s damaged or doesn’t function correctly. Also, check the dispenser actuator arm for any damage or misalignment. Realign or replace the arm as needed.
Finally, examine the water line tubing for kinks, blockages, or damage. Straighten out any kinks, remove blockages, and replace the tubing if necessary.
Remember, safety is paramount. If you’re unsure or uncomfortable with troubleshooting the water dispenser yourself, it’s always best to seek professional assistance from a technician with experience in refrigerator repairs.
By following these troubleshooting tips, you can often diagnose and resolve common issues that cause a non-working water dispenser on the fridge. Restoring functionality to your water dispenser will ensure you have easy access to refreshing, chilled water whenever you need it.
Now that you are armed with these troubleshooting techniques, put them to use and enjoy the convenience of a working water dispenser on your fridge once again!
Frequently Asked Questions about Why Is Water Dispenser On Fridge Not Working
Was this page helpful?
At Storables.com, we guarantee accurate and reliable information. Our content, validated by Expert Board Contributors, is crafted following stringent Editorial Policies. We're committed to providing you with well-researched, expert-backed insights for all your informational needs.
0 thoughts on “Why Is Water Dispenser On Fridge Not Working”