Home>Dining>Table Decor>How To Make Tissue Paper Pom Pom Centerpieces
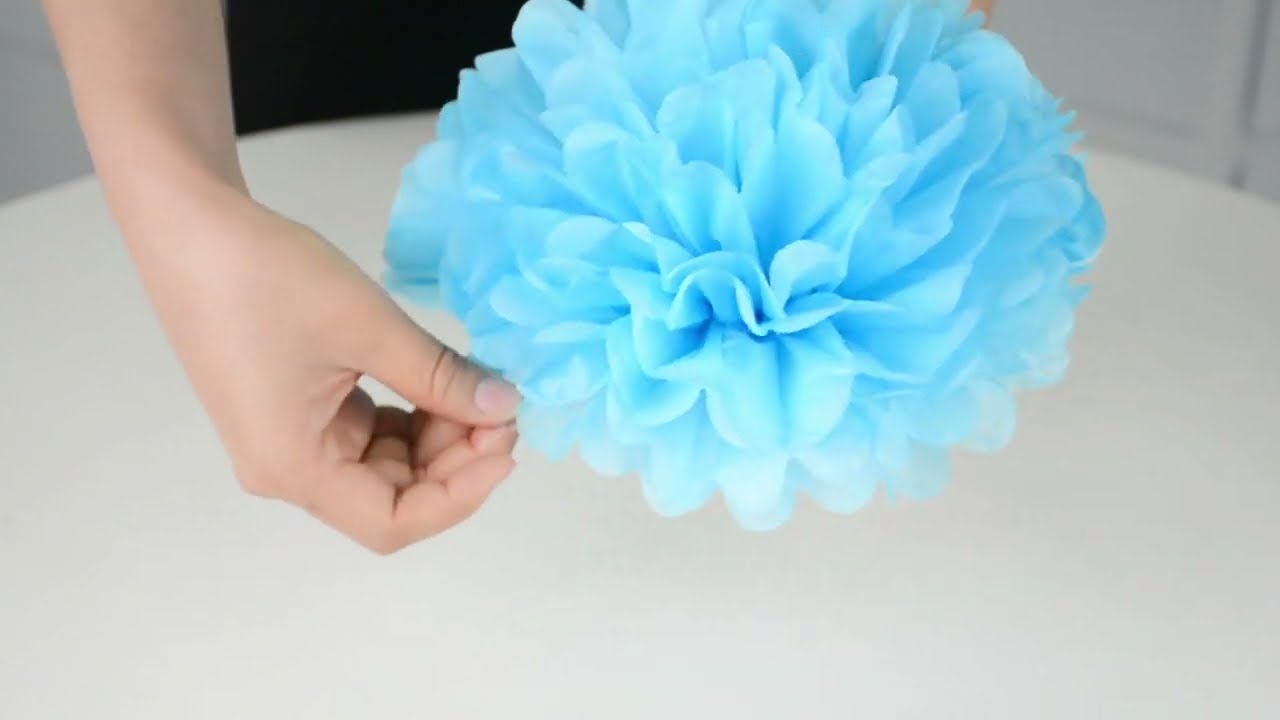
Table Decor
How To Make Tissue Paper Pom Pom Centerpieces
Modified: January 21, 2024
Learn how to create stunning table decorations with tissue paper pom pom centerpieces. Perfect for adding a pop of color to any event or celebration.
(Many of the links in this article redirect to a specific reviewed product. Your purchase of these products through affiliate links helps to generate commission for Storables.com, at no extra cost. Learn more)
Introduction
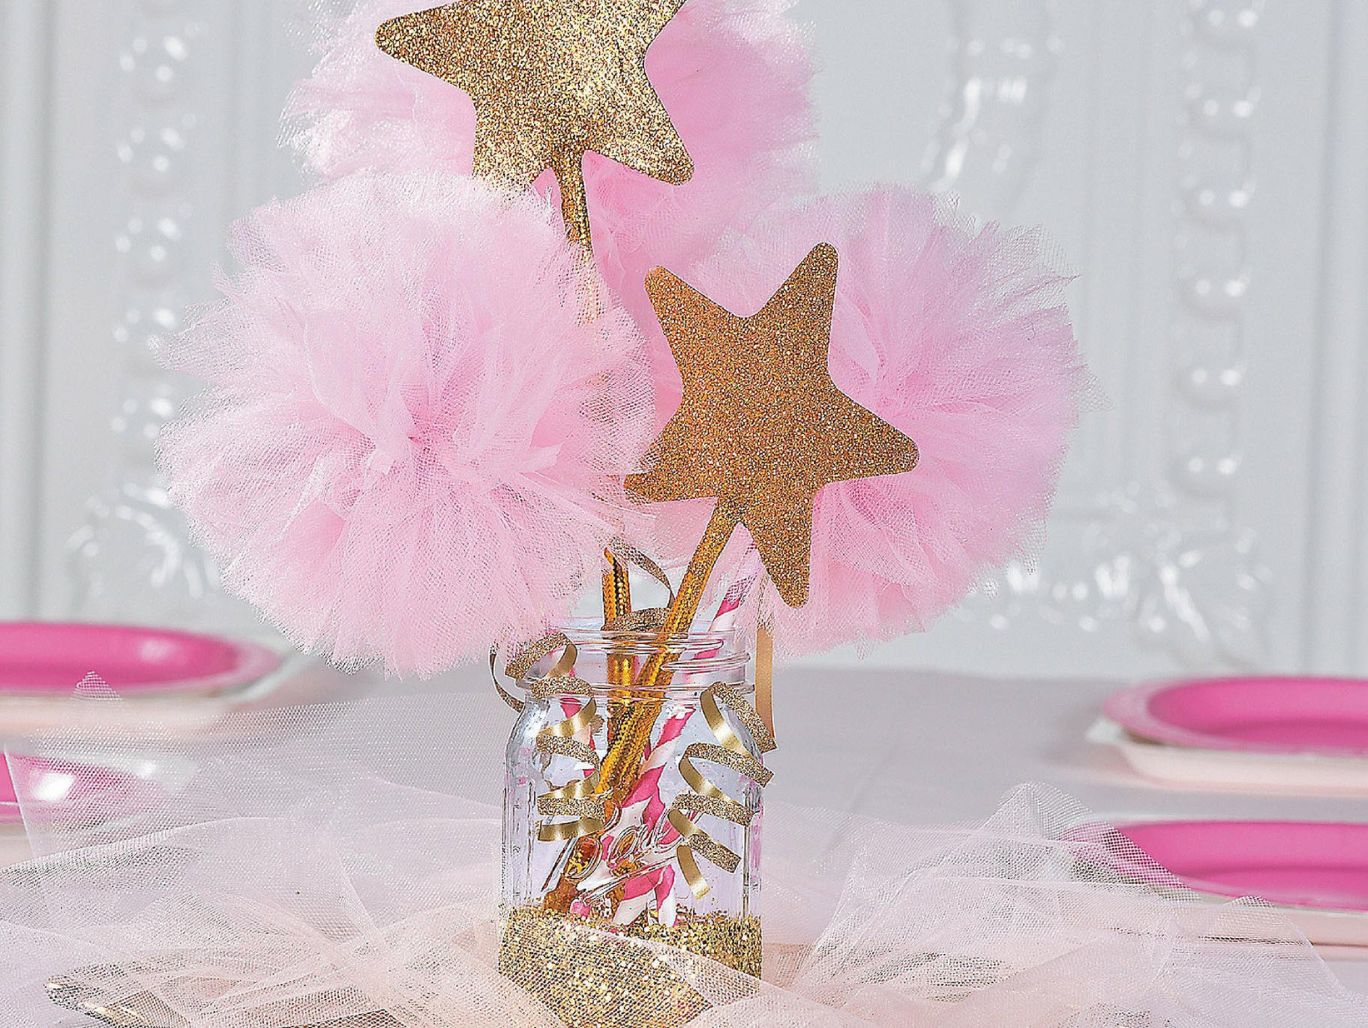
Welcome to the world of table decor, where even the smallest details can make a big impact. When it comes to creating stunning centerpieces for your special occasions, tissue paper pom poms are a fantastic option. Not only are they easy and affordable to make, but they also add a touch of whimsy and elegance to any event.
In this tutorial, we will guide you through the process of creating beautiful tissue paper pom pom centerpieces. These centerpieces are perfect for weddings, birthdays, baby showers, or any other celebration where you want to add a pop of color and style to your tables.
Whether you are a seasoned crafter or a DIY enthusiast, you’ll find this tutorial easy to follow and enjoyable. So, let’s gather our materials and embark on this creative journey!
Key Takeaways:
- Create vibrant and elegant tissue paper pom pom centerpieces for any occasion with easy-to-follow steps and personalized color choices. Elevate your table decor and impress your guests with whimsical charm.
- Unleash your creativity and craft stunning tissue paper pom pom centerpieces to add a touch of elegance and joy to your special events. Enjoy the process, experiment with colors, and create unique, eye-catching table decor.
Read more: How To Store Tissue Paper
Materials Needed
Before we dive into the tutorial, let’s make sure we have all the necessary materials at hand. Here are the items you’ll need to create your tissue paper pom pom centerpieces:
- Tissue paper in various colors
- Scissors
- String or fishing line
- Clear adhesive tape
- Centerpiece base (such as a vase, candle holder, or floral foam)
- Ribbon or decorative accents (optional)
The tissue paper is the star of the show in this project. You can choose a single color for a classic and elegant look, or you can opt for a combination of colors to create a vibrant and eye-catching centerpiece.
Scissors are essential for cutting the tissue paper into the required shapes and sizes. Make sure to use sharp scissors to make clean cuts and avoid fraying.
String or fishing line will be used to tie the center of the tissue paper pom poms. Fishing line is a great option if you want it to be virtually invisible, while colorful string can add a fun twist to the design.
Clear adhesive tape will come in handy when attaching the pom poms to the centerpiece base. It provides a secure hold without being noticeable.
Lastly, you’ll need a centerpiece base to display your pom poms. This can be a vase, a candle holder, or even a floral foam block. Get creative and choose a base that complements your overall theme or the style of your event. Adding ribbons or other decorative accents is optional but can enhance the final look of your centerpieces.
Now that we have all the materials ready, let’s move on to the next step: choosing the tissue paper colors for our pom poms.
Step 1: Gather Supplies
Before we begin the tissue paper pom pom making process, it’s important to gather all the supplies in one place. This will make the entire crafting experience more efficient and enjoyable. Here’s what you’ll need:
- Tissue paper sheets
- Scissors
- String or fishing line
- Clear adhesive tape
- Centerpiece base
- Ribbon or decorative accents (optional)
Make sure you have enough tissue paper sheets to create several pom poms. The number of sheets required depends on the size and fullness you desire for your centerpieces. As a general guideline, aim for around 8-10 sheets per pom pom.
Prepare a comfortable working space with ample room to unfold the tissue paper sheets and move around. Having a clean and clutter-free area will help prevent any missteps or accidental damage to the materials.
Ensure that your scissors are sharp and ready to make clean cuts. Dull scissors may result in jagged edges and fraying tissue paper, compromising the overall appearance of the pom poms.
Having a spool of string or fishing line nearby is essential to secure the middle of the pom poms. Opt for a color that matches your tissue paper or choose a contrasting shade for a playful touch.
Keep a roll of clear adhesive tape within reach to attach the pom poms to your desired centerpiece base. The transparent nature of the tape ensures that it remains discreet while providing a strong hold.
Choose a centerpiece base that complements the overall theme and style of your event. Vases, candle holders, and floral foam blocks are popular options. If desired, have any additional decorative accents or ribbons ready to further enhance the centerpieces.
By gathering all these supplies before starting the crafting process, you’ll have everything you need within arm’s reach, allowing for a smooth and uninterrupted experience. Now that our supplies are organized, we can move on to the exciting step of choosing the perfect tissue paper colors for our pom poms.
Step 2: Choose Tissue Paper Colors
Now that we have all our supplies ready, it’s time to unleash our creativity and choose the perfect tissue paper colors for our pom poms. The color selection plays a vital role in creating visually stunning centerpieces. Here are some tips to help you make the right choices:
- Consider the occasion: Think about the theme or the purpose of the event. If it’s a wedding, you may want to go for elegant and sophisticated colors like ivory, champagne, or blush. For a birthday party, you can opt for fun and vibrant colors that match the overall theme.
- Coordinate with the surroundings: Take into account the colors of the venue, tablecloth, and other decorations. Choose tissue paper colors that complement the existing color palette to create a cohesive and visually appealing look. Harmonizing with the surroundings will make the centerpieces stand out without clashing.
- Play with different shades: Experiment with different shades of a single color or consider a combination of complementary or contrasting colors for a more eclectic and eye-catching effect. Mixing pastels with bold hues or combining shades of the same color family can add depth and visual interest to your centerpieces.
- Consider the season: If your event is during a particular season, you may want to incorporate colors that reflect the time of year. For example, warm tones like oranges and yellows for autumn or cool blues and silvers for winter. This will help create a cohesive atmosphere and highlight the seasonal vibe.
- Personal preference: Trust your instincts and go with colors that resonate with your personal taste. After all, you are the one crafting these centerpieces, and it’s essential to create something that you love and feel proud of.
Take your time in choosing the perfect colors for your tissue paper pom poms. Play around with different combinations and trust your artistic inclinations. Remember, there are no hard and fast rules when it comes to selecting colors – it’s all about personal expression and creating a captivating visual experience. Once you have chosen your tissue paper colors, we can move on to the next step: cutting the tissue paper sheets.
Step 3: Cut Tissue Paper Sheets
With our chosen tissue paper colors in hand, it’s time to start cutting the sheets to prepare for our pom poms. Follow these steps to ensure clean and precise cuts:
- Lay out a few sheets of tissue paper on a flat surface. The number of sheets you’ll need depends on the fullness and size you desire for your pom poms. As a general guideline, start with 8-10 sheets per pom pom.
- If the tissue paper is folded, unfold it gently, making sure not to crease or stretch the sheets.
- Smooth out any wrinkles or folds in the tissue paper to ensure an even and clean cut.
- Using a sharp pair of scissors, carefully cut the tissue paper into rectangular or square sheets. The size of the sheets will determine the final size of your pom poms. If you prefer smaller pom poms, opt for smaller-sized sheets.
- Keep in mind that the dimensions of each sheet will get multiplied by the number of layers, so consider the thickness and overall visual impact of the pom pom.
- Continue cutting sheets of tissue paper in the chosen colors until you have enough for all your pom poms. It’s always better to cut a few extra sheets in case you need them later.
As you cut the tissue paper sheets, handle them with care to prevent tearing or ripping. Smooth, clean edges will contribute to a polished and professional-looking final result.
After completing this step, you should have a stack of tissue paper sheets ready to be transformed into beautiful pom poms. Now, let’s move on to the next step: folding the tissue paper accordion-style.
Read more: How To Store Gift Bags And Tissue Paper
Step 4: Fold Tissue Paper Accordion Style
With our cut tissue paper sheets in hand, it’s time to start folding them accordion-style to create the intricate layers of our pom poms. Follow these steps to fold the tissue paper with precision:
- Take one sheet of tissue paper and lay it flat on your work surface. Make sure the edges are aligned and the sheet is free of any wrinkles or creases.
- Starting from one of the shorter ends, fold the tissue paper over itself widthwise, creating a fold about 1 inch wide. Make sure the edges line up neatly.
- Flip the folded tissue paper over to the other side and fold it over once again, maintaining the 1-inch width. This creates a back-and-forth accordion fold.
- Continue folding the tissue paper in the same manner, back and forth, until the entire sheet is folded into a long, narrow strip. Take your time to keep the folds as even and straight as possible.
- If you encounter any large creases or wrinkles during the folding process, you can gently unfold and refold the affected section to achieve a smoother accordion fold.
- Repeat this process with the remaining sheets of tissue paper in your chosen colors until you have a stack of folded strips ready for the next step.
By folding the tissue paper accordion-style, we create the foundation for the beautiful layers of our pom poms. The even and precise folding ensures that each layer unfolds elegantly, resulting in a visually appealing centerpiece.
Once you have finished folding all the tissue paper sheets, it’s time to move on to the next step: tying the center of the tissue paper folds.
When making tissue paper pom pom centerpieces, be sure to fluff each layer of tissue paper carefully and evenly to create a full and round pom pom.
Step 5: Tie the Center of the Tissue Paper
Now that we have our tissue paper folded accordion-style, it’s time to secure the center and create the distinct shape of our pom poms. Follow these steps to tie the center of the tissue paper folds:
- Pick up the stack of folded tissue paper strips and hold it firmly in the middle.
- Take a piece of string or fishing line and wrap it tightly around the center of the tissue paper folds. Make sure to wrap it around a couple of times to create a secure hold.
- Tie a double knot to secure the string in place. Keep in mind that the length of the string will determine the hanging length of the pom pom.
- If you prefer the string or fishing line to be discreet, you can trim any excess length and tuck it inside the folds of the tissue paper.
- Double-check that the string or fishing line is securely tied, as this will be the anchor that holds the pom pom together.
By tying the center of the tissue paper folds, we create the distinctive clustered shape of the pom poms. This step ensures that the layers stay in place and gives the pom poms their fluffiness and volume.
Once you have tied the centers of all the tissue paper stacks, we can move on to the exciting step of shaping the pom poms in the next section.
Step 6: Shape the Pom Pom
With the centers of our tissue paper stacks securely tied, we are ready to shape our pom poms and bring them to life. Follow these steps to give your pom poms their final form:
- Hold the tied center of the tissue paper stack with one hand, while using your other hand to gently separate the layers on one side.
- Start pulling apart the layers of tissue paper towards the center, one by one, carefully fluffing them up. Be gentle to avoid tearing the tissue paper.
- Continue separating and fluffing the layers on one side until you have achieved a rounded and fluffy shape.
- Repeat the process on the other side, fluffing the remaining layers to ensure a well-balanced and full pom pom.
- Take a step back and assess the shape and fullness of the pom pom. Adjust and fluff the layers as needed until you are satisfied with the final result.
Shaping the pom poms is where the magic happens. As you separate and fluff the layers of tissue paper, you’ll see the intricate design and volume come to life. Take your time and give attention to detail, ensuring that each layer is well-dispersed for a visually appealing arrangement.
Remember, every pom pom may require different fluffing techniques and adjustments. Play around with the layers, experiment with the positioning of the tissue paper, and personalize each pom pom to your preferences.
Once you have shaped all your pom poms, it’s time to move on to the next step: fluffing them up for a more vibrant and eye-catching look.
Step 7: Fluff the Pom Pom
With our pom poms shaped, it’s time to take them to the next level by giving them a fluffy and voluminous appearance. Follow these steps to fluff your pom poms:
- Gently hold the tied center of the pom pom in one hand, allowing the layers of tissue paper to hang down.
- Starting from the outermost layer, carefully separate and fluff each individual sheet of tissue paper. Use your fingers to gently lift and separate the layers, allowing them to spread out naturally.
- Continue working your way through each layer, taking your time to ensure that every sheet of tissue paper is separated and fluffed up fully.
- Once you have fluffed all the layers, step back and assess the pom pom’s fullness and shape. Make any final adjustments by gently arranging the tissue paper to create a balanced and aesthetically pleasing appearance.
Fluffing the pom poms enhances their overall appearance, making them look fuller and more vibrant. By separating and lifting the layers of tissue paper, you create a sense of depth and texture.
During the fluffing process, be gentle to avoid tearing or damaging the tissue paper. Take your time and give attention to each layer, ensuring that they are well-separated and beautifully arranged.
Once you have fluffed all your pom poms, we can move on to the next step: attaching them to the centerpiece base to create stunning table decor.
Read more: How To Store Pom Poms
Step 8: Attach Pom Poms to Centerpiece Base
Now that our pom poms are beautifully fluffed, it’s time to attach them to the centerpiece base to create stunning table decor. Follow these steps to securely attach your pom poms:
- Take your chosen centerpiece base, whether it’s a vase, candle holder, or floral foam block, and position it in the desired location on your table.
- Using clear adhesive tape, apply a small strip to the bottom of the tied center of a pom pom.
- Press the tape firmly onto the centerpiece base, ensuring that it is securely attached.
- Repeat this process with the remaining pom poms, spacing them out evenly on the base to create a balanced and visually appealing arrangement.
- If you have different-sized pom poms, consider placing larger ones at the base and gradually arranging smaller ones towards the top to create a cascade effect.
- If desired, add additional embellishments such as ribbons, bows, or decorative accents to the centerpiece base to further enhance the overall look.
Attaching the pom poms to the centerpiece base not only adds a decorative element but also provides stability and ensures that they stay in place throughout your event.
When applying the adhesive tape, make sure to press it firmly onto the base for a secure hold. If you’re using a delicate or fragile centerpiece base, consider using a removable adhesive or tying the pom poms with a ribbon instead of using tape.
Take a step back and admire your work once all the pom poms are attached to the centerpiece base. You’ll see how they come together to create a vibrant and visually striking centerpiece for your table.
With the pom poms securely attached to the base, we can move on to the final step: arranging the pom pom centerpieces to complete your table decor.
Step 9: Arrange Pom Pom Centerpieces
Now that all of our pom poms are attached to the centerpiece base, it’s time to bring everything together and create a stunning display on your table. Follow these steps to arrange your pom pom centerpieces:
- Place your centerpiece or set of centerpieces in the center of your table, ensuring that it is positioned where you want the focal point to be.
- If you have multiple pom pom centerpieces, consider staggering their heights by using different-sized centerpiece bases or adding risers underneath some of them. This will create visual interest and dimension.
- Take a step back and evaluate the arrangement. Make any necessary adjustments to ensure balance and symmetry.
- Consider adding additional elements around the pom pom centerpieces to complement the overall theme or style of the event. This could include candles, greenery, or other decorative accents.
- If you have several tables that require centerpieces, repeat the same process to create a cohesive and coordinated look throughout the venue.
- Stand back and admire your beautifully arranged pom pom centerpieces. Take photos and share your creations with others to inspire their own table decor ideas.
Arranging the pom pom centerpieces is where your creativity can truly shine. Play around with different placements, heights, and combinations to create a visually appealing and captivating display.
Consider the overall theme and style of your event when arranging the centerpieces. If it’s a formal affair, keep the arrangement elegant and symmetrical. For a more relaxed and whimsical event, feel free to experiment with asymmetrical placements and mix-and-match pom pom sizes and colors.
Remember to step back and view the arrangement from various angles to ensure that it looks visually balanced from all sides. Don’t be afraid to make adjustments and rearrange the pom poms until you are satisfied with the final result.
Once you have perfected the arrangement of your pom pom centerpieces, you have successfully completed the last step of this tutorial. Your table decor is now complete and ready to impress your guests!
Congratulations! You have successfully learned how to create beautiful tissue paper pom pom centerpieces. Enjoy the fruits of your creativity and let your centerpieces be the centerpiece of conversations and admiration at your special event.
Remember to have fun and enjoy the process of creating these stunning centerpieces. Get creative, experiment with different colors and styles, and make them truly uniquely yours. Happy crafting!
Conclusion
Congratulations! You have completed the journey of creating stunning tissue paper pom pom centerpieces. Through this tutorial, you have learned the step-by-step process of transforming simple materials into vibrant and eye-catching table decor that will elevate any special occasion.
By carefully choosing tissue paper colors, cutting and folding the sheets, and shaping and fluffing the pom poms, you have created unique and visually captivating centerpieces. With each pom pom securely attached to the centerpiece base and carefully arranged, you have achieved a cohesive and beautiful table display.
These tissue paper pom pom centerpieces are not only affordable and easy to make, but they also allow you to unleash your creativity. By exploring different color combinations, sizes, and arrangements, you can personalize your centerpieces to suit any event or theme.
Whether it’s a wedding, birthday party, baby shower, or any other celebration, these pom poms are sure to impress your guests and create a memorable ambiance. The delicate and whimsical appearance of the pom poms adds a touch of elegance and charm to any table setting.
Remember, crafting is not just about the end result but also about the joy and satisfaction that comes from creating something beautiful with your own hands. So, embrace your artistic side, enjoy the process, and have fun experimenting with different colors, shapes, and sizes.
Now that you have mastered the art of making tissue paper pom pom centerpieces, you can use this newfound skill to create stunning decor for your future events or even share your knowledge with others who are looking to add a personal touch to their table settings.
Thank you for joining us on this creative journey. We hope that this tutorial has inspired you to explore your creativity and enhance the ambiance of your special occasions with these lovely tissue paper pom pom centerpieces. Happy crafting!
Frequently Asked Questions about How To Make Tissue Paper Pom Pom Centerpieces
Was this page helpful?
At Storables.com, we guarantee accurate and reliable information. Our content, validated by Expert Board Contributors, is crafted following stringent Editorial Policies. We're committed to providing you with well-researched, expert-backed insights for all your informational needs.


0 thoughts on “How To Make Tissue Paper Pom Pom Centerpieces”