Articles
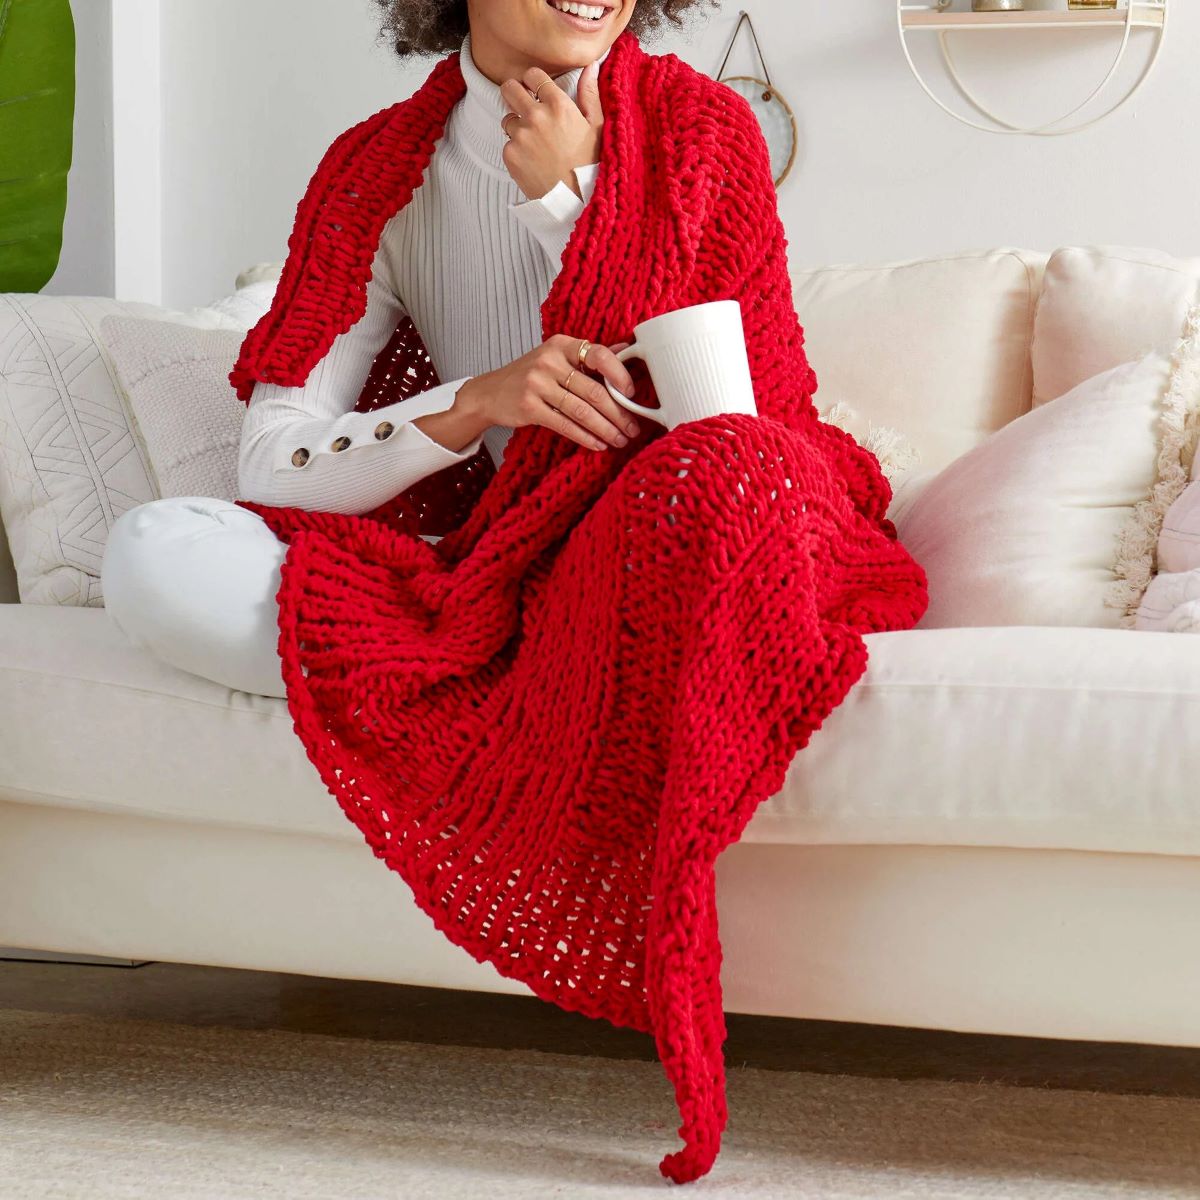
How To Make A Finger Knit Blanket
Modified: February 25, 2024
Learn how to make a cozy finger knit blanket with our step-by-step articles. Perfect for a creative and relaxing DIY project.
(Many of the links in this article redirect to a specific reviewed product. Your purchase of these products through affiliate links helps to generate commission for Storables.com, at no extra cost. Learn more)
Introduction
Welcome to the world of finger knitting! Finger knitting is a fascinating craft that allows you to create beautiful and cozy projects using just your fingers and yarn. In this tutorial, we will focus on one of the most popular finger knitting projects – a finger knit blanket.
Finger knitting is not only a fun and relaxing activity but also a great way to create unique and personalized gifts for yourself or your loved ones. Whether you’re a novice or an experienced knitter, finger knitting is an accessible and enjoyable craft that anyone can master.
In this article, we will guide you through the process of making a finger knit blanket step by step. We will cover everything from the materials you’ll need to the techniques required to create a beautiful and cozy blanket. So, grab your favorite yarn and get ready to embark on a creative and cozy adventure!
Key Takeaways:
- Finger knitting a blanket is a fun and accessible craft suitable for beginners and experienced knitters alike. With just yarn and your fingers, you can create a cozy masterpiece to cherish or gift to loved ones.
- The finger knitting process, from casting on to binding off, offers opportunities for personalization through color changes and fringe additions. Embrace the meditative nature of finger knitting and enjoy the creative journey.
Read more: How To Wash A Knitted Blanket
Materials Needed
Before we dive into the finger knitting process, let’s gather all the materials you’ll need to create your finger knit blanket:
- Yarn: Choose a soft and chunky yarn in your desired color. The amount of yarn you’ll need will depend on the size of the blanket you want to make. Consider getting around 5-6 skeins of yarn to ensure you have enough.
- Scissors: You’ll need a pair of scissors to cut the yarn during the project.
- Measuring Tape: This will come in handy when you want to keep track of the size of your blanket.
- Optional: Pom-pom Maker or Fork: If you wish to add some whimsical pom-pom embellishments to your blanket, having a pom-pom maker or a fork will help you create them easily.
Once you have gathered all the materials, make sure you have a comfortable and well-lit space to work in. Finger knitting requires some space to move your fingers freely, so choose a cozy corner where you can relax and enjoy the process.
Step 1: Casting On
Now that you have all your materials ready, it’s time to get started on your finger knit blanket! The first step is to cast on, which is the process of creating the foundation row of stitches.
To cast on, follow these steps:
- Hold the end of the yarn between your thumb and index finger of your non-dominant hand, leaving a short tail.
- Create a loop by crossing the working yarn over the tail of the yarn in your hand.
- Bring your working hand (dominant hand) through the loop from below and grab the working yarn.
- Pull the working yarn through the loop, creating a new loop on your hand.
- Repeat steps 2-4 until you have the desired number of stitches for your blanket. Remember, the number of stitches will determine the width of your blanket.
Once you have cast on all your stitches, you’ll have a row of loops on your hand. Make sure the loops are not too tight so that you can easily work with them in the following steps.
You’re now ready to move on to the next step, where you’ll start knitting the first row of your finger knit blanket. Get ready to see your blanket take shape!
Step 2: Knitting the First Row
With your stitches cast on and loops on your hand, it’s time to start knitting the first row of your finger knit blanket. This step will create the foundation for the rest of the knitting process.
Follow these steps to knit the first row:
- Insert your non-dominant hand’s fingers into the first loop from below, making sure to go through the loop towards your palm.
- Take the working yarn in your dominant hand and bring it behind your non-dominant hand’s fingers.
- Guide the working yarn through the loop on your non-dominant hand’s fingers from the back to the front.
- Release the loop from your non-dominant hand’s fingers, pulling it slightly to tighten the stitch.
- Repeat steps 1-4 for each loop in your hand until you reach the end of the row.
As you knit the first row, you’ll start to see the fabric of the blanket forming and the stitches coming together. Take your time and ensure that each stitch is secure but not too tight.
Remember to maintain steady tension on the yarn while knitting, to create an even and smooth surface on your finger knit blanket.
Once you’ve completed the first row, you’re ready to move on to the next step and continue knitting the subsequent rows. Keep going, and soon you’ll have a beautiful finger knit blanket to cozy up with!
Step 3: Continuing the Knitting Pattern
Now that you’ve completed the first row of your finger knit blanket, it’s time to continue knitting and create the pattern for your blanket. This step involves repeating a sequence of knitting the rows to build the length and width of your blanket.
Follow these steps to continue the knitting pattern:
- Insert your non-dominant hand’s fingers into the loops of the previous row from below, just like you did in Step 2.
- Take the working yarn in your dominant hand and bring it behind your non-dominant hand’s fingers.
- Guide the working yarn through the loops on your non-dominant hand’s fingers from the back to the front, just like in Step 2.
- Release the loops from your non-dominant hand’s fingers, pulling them slightly to tighten the stitches.
- Repeat steps 1-4 for each row, knitting from left to right, until your blanket reaches the desired length.
As you continue knitting, you’ll notice the rows stacking on top of each other, creating a beautiful and textured pattern on your blanket. Take the time to enjoy the process and rhythm of finger knitting, allowing yourself to relax and unwind.
Remember to maintain consistent tension on the yarn to ensure an even and balanced fabric. If you find that your tension is too tight or too loose, adjust your finger placement or yarn tension accordingly.
Continue knitting, row after row, until your finger knit blanket reaches the desired length. Enjoy the meditative nature of finger knitting and watch as your blanket grows before your eyes!
When finger knitting a blanket, use chunky or bulky yarn for a quicker and cozier result. Keep your tension consistent to ensure an even and professional-looking finish.
Read more: How To Finish Knitting A Blanket
Step 4: Changing Colors (Optional)
If you want to add some visual interest to your finger knit blanket, you can choose to change colors throughout the knitting process. Changing colors allows you to create unique patterns, stripes, or even a gradient effect on your blanket.
Follow these steps to change colors in your finger knit blanket:
- Knit until you reach the point where you want to change colors.
- Take the new colored yarn and make a slipknot, leaving a short tail.
- Insert your non-dominant hand’s fingers into the next loop from below, just like in the previous steps.
- Place the slipknot of the new colored yarn onto your non-dominant hand’s fingers, along with the loop.
- Continue knitting as usual, but with the new colored yarn.
- If desired, cut the previous colored yarn, leaving a short tail, and secure the loose end.
- Repeat these steps whenever you want to change colors throughout your finger knit blanket.
Changing colors can bring a whole new dimension to your blanket, allowing you to express your creativity and style. Experiment with different color combinations and patterns to make your finger knit blanket truly unique.
Remember to weave in the loose ends of the yarn to secure them and maintain a neat appearance. You can do this by threading the tail of the yarn onto a yarn needle and weaving it through the stitches on the backside of the blanket.
Adding color changes can elevate the visual appeal of your finger knit blanket and make it a true work of art!
Step 5: Adding Fringe (Optional)
If you want to add an extra touch of flair to your finger knit blanket, you can choose to add fringe. Fringe adds texture and movement to your blanket, giving it a cozy and bohemian look.
Follow these steps to add fringe to your finger knit blanket:
- Cut yarn strands: Decide on the desired length of your fringe, and cut multiple strands of yarn at that length. You’ll need twice the length to create the fringe, as each strand will be folded in half.
- Fold yarn strands: Take one yarn strand and fold it in half, creating a loop at one end.
- Insert folded end: Insert the folded end of the yarn strand through the last stitch on the edge of your blanket from the front to the back.
- Pull yarn through loop: Pull the loose ends of the yarn strand through the loop, securing it to the edge of your blanket.
- Repeat: Repeat steps 2-4 along the edge of your blanket, spacing the fringe strands evenly.
- Trim and style: Once you have added fringe to the entire edge, trim any uneven ends to create a neat and uniform look. You can also separate the strands of the fringe to give it a fuller appearance.
Adding fringe to your finger knit blanket can give it a playful and decorative touch. Consider using contrasting colors or different textures of yarn to make the fringe stand out.
Be creative and experiment with different lengths and densities of fringe to achieve the desired look for your blanket. Remember to consider the overall aesthetic of your blanket and how the fringe complements it.
With the addition of fringe, your finger knit blanket will become even more visually appealing and delightful to cuddle up with!
Step 6: Binding Off
The final step in completing your finger knit blanket is binding off, which is the process of securing the stitches to prevent them from unraveling. Binding off gives your blanket a clean and finished edge.
Follow these steps to bind off your finger knit blanket:
- Knit the first two stitches of your row as usual.
- Insert your non-dominant hand’s fingers into the first loop on your dominant hand, from below.
- Take the first loop on your dominant hand’s fingers and pass it over the second loop and off your fingers.
- Knit the next stitch, then pass the previous loop over the newly formed stitch and off your fingers.
- Continue this process of knitting a stitch and passing the previous loop over until you have one loop remaining on your dominant hand’s fingers.
- Cut the working yarn, leaving a long tail. Thread the tail through the loop and pull it tight to secure the last stitch.
Once you’ve bound off all the stitches, you can weave in any loose ends of yarn using a yarn needle. Thread the tail of the yarn through the needle and weave it through the stitches on the backside of the blanket. This will ensure that all the loose ends are secure and hidden.
Take a moment to admire your finished finger knit blanket! You’ve completed all the steps and transformed a simple ball of yarn into a cozy and beautiful blanket.
Remember to give your blanket a gentle shake or pat to help the stitches settle and create an even and cohesive texture. Your finger knit blanket is now ready to be enjoyed and cherished for years to come!
Conclusion
Congratulations on completing your finger knit blanket! You’ve mastered the art of finger knitting and have created a cozy and beautiful masterpiece. The process of turning yarn into a blanket using just your fingers is a truly rewarding and enjoyable experience.
Throughout this tutorial, we’ve covered the step-by-step process of creating a finger knit blanket, from casting on to binding off. We’ve explored optional techniques such as changing colors and adding fringe, allowing you to customize your blanket to reflect your personal style.
Finger knitting is a versatile craft that opens up endless possibilities for creativity. You can experiment with different yarn weights, colors, and patterns to create unique and personalized blankets that make wonderful gifts or additions to your home decor.
Remember, finger knitting is not limited to blankets alone. You can apply the same techniques to create scarves, cowls, rugs, and even larger projects like shawls or ponchos. The more you practice and explore, the more you’ll discover the vast potential of finger knitting.
Now that you have completed your finger knit blanket, it’s time to snuggle up and enjoy its warmth and cozy charm. Wrap yourself in the softness of your creation and relish the satisfaction of having made something with your own hands.
Don’t hesitate to share your finger knit blanket and newfound skills with others. Spread the joy of finger knitting by teaching your friends and family how to create their own finger knit projects. The more people who engage in this craft, the more we can celebrate the beauty of handmade creations.
So, grab your yarn and get started on your next finger knitting adventure. Let your imagination and creativity guide you as you embark on new projects and bring your ideas to life.
Thank you for joining us on this finger knitting journey. Happy knitting!
Frequently Asked Questions about How To Make A Finger Knit Blanket
Was this page helpful?
At Storables.com, we guarantee accurate and reliable information. Our content, validated by Expert Board Contributors, is crafted following stringent Editorial Policies. We're committed to providing you with well-researched, expert-backed insights for all your informational needs.