Home>Dining>Tableware>How To Craft A Large Circular Dining Room Table
Tableware
How To Craft A Large Circular Dining Room Table
Modified: January 8, 2024
Discover the art of crafting a large circular dining room table with this comprehensive guide. Learn about tableware options and create a stunning centerpiece for your dining space.
(Many of the links in this article redirect to a specific reviewed product. Your purchase of these products through affiliate links helps to generate commission for Storables.com, at no extra cost. Learn more)
Introduction
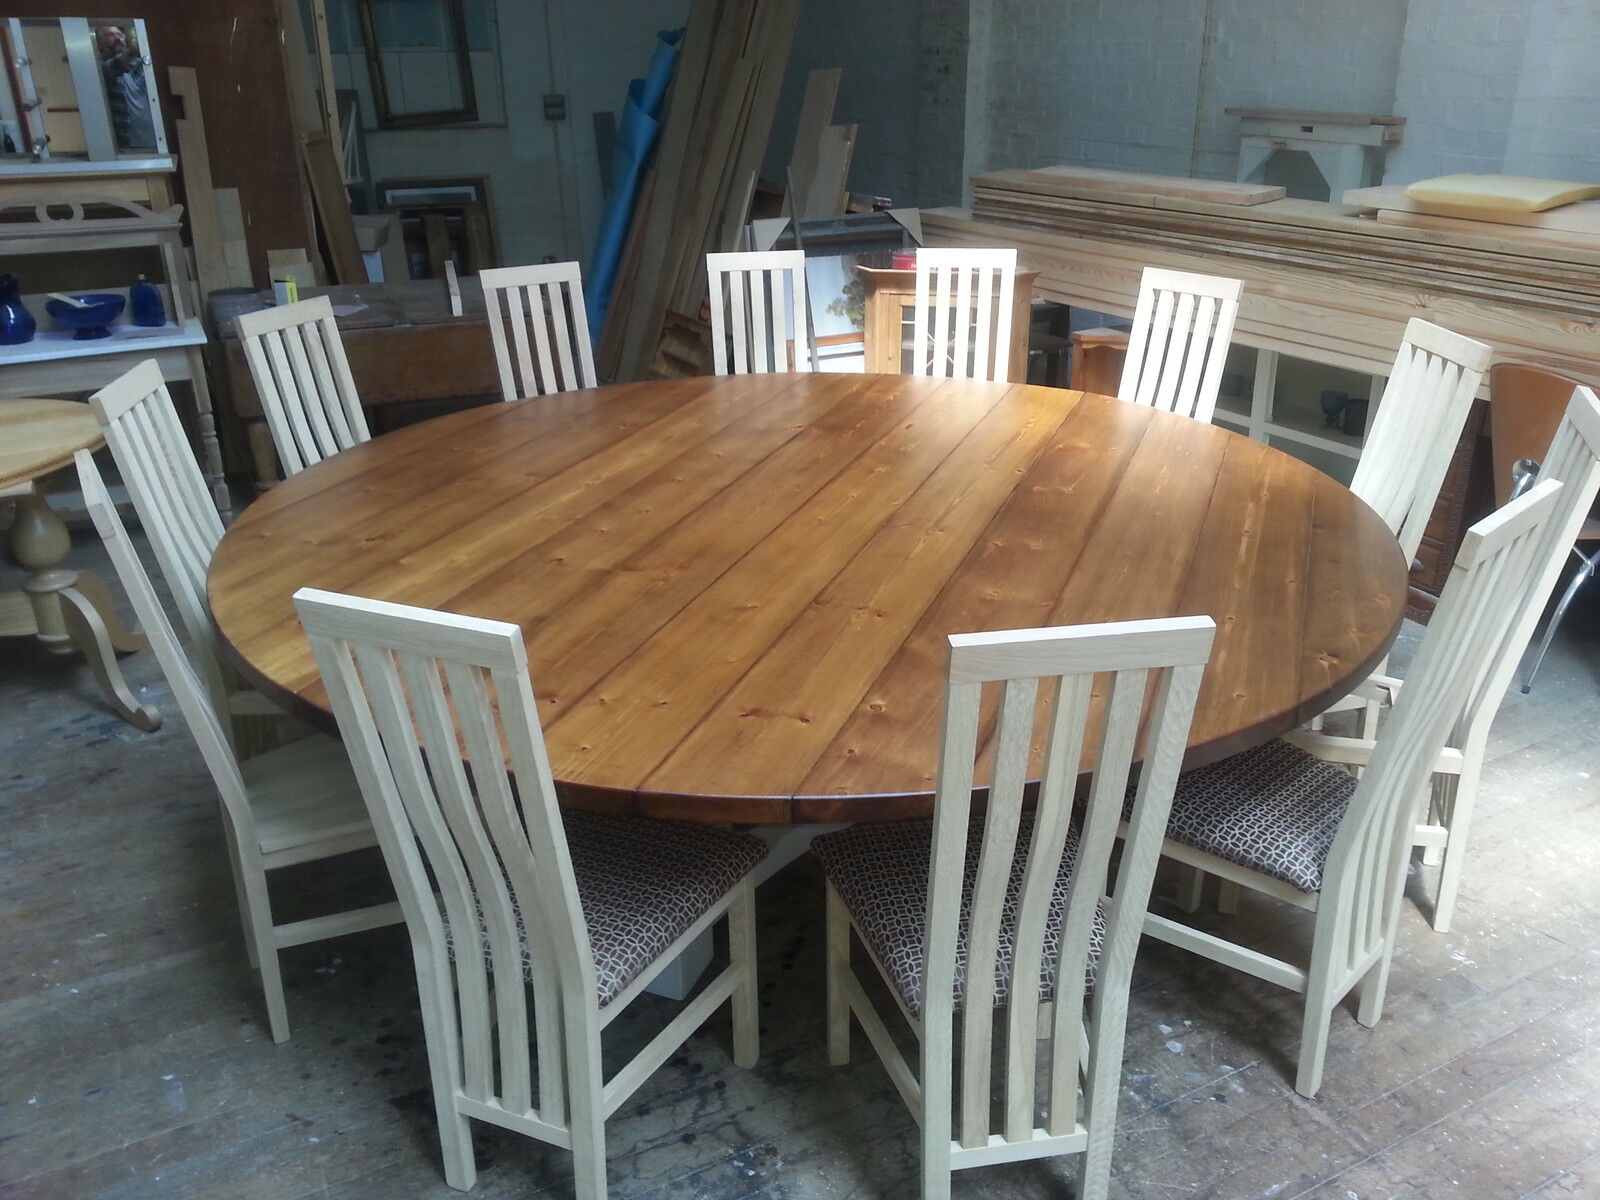
Welcome to the world of tableware, where quality craftsmanship meets functional beauty. In this guide, we will delve into the art of crafting a large circular dining room table, a centerpiece that is sure to captivate the attention of any gathering.
A dining table is more than just a piece of furniture; it’s a gathering place for family and friends, a symbol of togetherness and shared meals. Crafting a large circular dining room table allows you to create a unique and personal space that combines both elegance and functionality.
Before we dive into the step-by-step process of building a table, let’s briefly discuss the materials and tools you’ll need to bring this project to life.
Key Takeaways:
- Crafting a large circular dining room table involves meticulous planning, precise construction, and thoughtful finishing. From selecting materials to assembling the table, each step contributes to creating a stunning and functional centerpiece for memorable gatherings.
- Proper care and maintenance are essential for preserving the beauty and longevity of a large circular dining room table. By adding final touches and following care instructions, you can ensure that your masterpiece remains a cherished focal point in your home for years to come.
Read more: How To Adorn A Circular Dining Table
Materials and Tools Required
Before embarking on your journey to craft a large circular dining room table, gather the following materials and tools:
Materials:
- Wood: Choose a high-quality hardwood such as oak, maple, or walnut for durability and visual appeal.
- Plywood: Opt for thick plywood to serve as the tabletop base.
- Wood glue: A strong adhesive to ensure the stability of the joints.
- Screws: Use screws to reinforce the construction of the table.
- Sandpaper: Varying grits, from coarse to fine, for smoothing and polishing the wood surfaces.
- Wood stain: Select a stain color that matches your desired aesthetic.
- Clear coat: Apply a clear protective finish to enhance the longevity of the table.
Tools:
- Table saw: Use a table saw for cutting the wood to the desired dimensions.
- Miter saw: A miter saw will come in handy for making angled cuts in the wood.
- Jigsaw: Use a jigsaw to cut the circular shape of the table tabletop.
- Drill: A drill is essential for creating holes for the screws.
- Sander: A handheld sander or sanding block for smoothing the surfaces.
- Clamps: Clamps will help hold the pieces together securely during assembly.
- Measuring tape and ruler: Accurate measurements are crucial for a well-built table.
- Paintbrushes: Use brushes for applying the wood stain and clear coat.
- Safety equipment: Don’t forget protective gear such as safety glasses and gloves.
Now that you have your materials and tools ready, let’s move on to the planning and designing stage of crafting your large circular dining room table.
Planning and Designing
The planning and designing stage is where you bring your vision to life and ensure that your large circular dining room table fits perfectly into your space and meets your needs. Here are the key steps to follow:
Read more: How To Make A Large Round Dining Room Table
1. Determine the Size:
Measure the available space in your dining room to determine the appropriate size for your table. Consider how many people you want the table to accommodate comfortably. A diameter of 60-72 inches is typically suitable for a large circular dining table.
2. Sketch the Design:
Use graph paper or design software to create a scaled drawing of your table. Consider the shape, proportions, and any additional design elements you want to incorporate, such as a pedestal base or decorative inlays.
3. Choose the Wood:
Select the type of wood that best complements your style and decor. Hardwoods like oak or walnut provide durability and a timeless aesthetic. Consider the natural color and grain pattern of the wood as well.
4. Select the Tabletop Thickness:
The thickness of the tabletop will impact the overall look and feel of your table. Thicker tops provide a more substantial appearance, while thinner tops offer a sleek and modern design. Consider the weight and stability of the table when choosing the thickness.
Read more: What Is In A Dining Room?
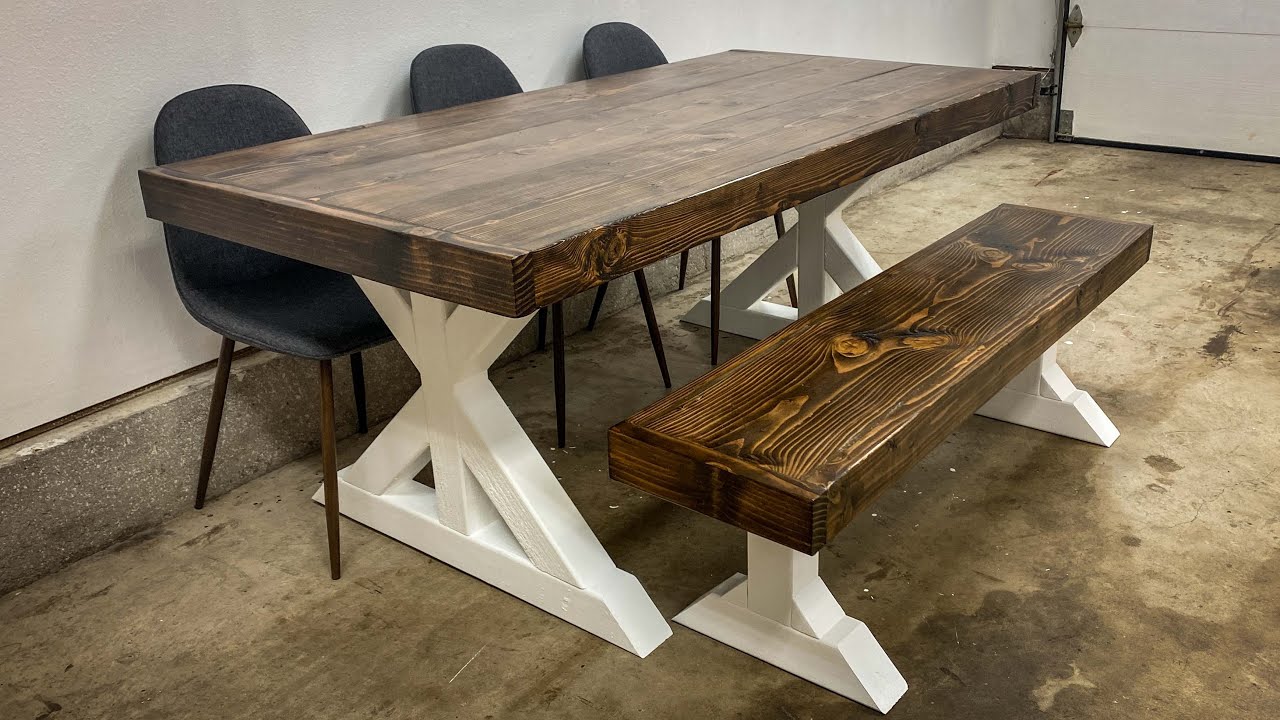
5. Consider the Base Design:
The base of your table plays a crucial role in both aesthetics and stability. Decide whether you want a pedestal base or a leg design. Remember to choose a design that complements the overall style of your table.
6. Research and Gather Inspiration:
Browse through magazines, online platforms, and furniture stores to gather inspiration for your table design. Take note of any unique features or details that appeal to you and incorporate them into your own design.
By thoroughly planning and designing your large circular dining room table, you’ll ensure that the end result aligns with your vision and creates a stunning focal point in your dining space. Now, let’s move on to the next step: constructing the tabletop.
Constructing the Tabletop
The tabletop is the centerpiece of your large circular dining room table. Building a sturdy and visually appealing tabletop involves several key steps. Let’s dive in:
1. Prepare the Materials:
Start by cutting the plywood to the desired diameter for the tabletop. Use a jigsaw to create a smooth, circular shape. Sand the edges to remove any roughness.
Read more: How To Style A Dining Room Table
2. Create the Subtop:
To add strength and stability to the tabletop, cut several strips of wood to serve as the subtop. Arrange them in a circular pattern on top of the plywood, leaving space between each strip for expansion. Secure them using wood glue and clamps. Allow the glue to dry completely.
3. Glue and Clamp the Tabletop:
Apply wood glue to the underside of the subtop strips and carefully place them onto the plywood. Ensure they are aligned properly and clamp them tightly. Leave the clamps in place until the glue has fully dried.
4. Reinforce with Screws:
For added strength, use a drill to pre-drill holes through the subtop strips and into the plywood. Insert screws into the holes to secure the strips firmly to the plywood. Countersink the screws slightly and fill the holes with wood filler for a seamless finish.
5. Sand and Smooth:
Use sandpaper or a sander to smooth the entire tabletop surface. Begin with a coarse grit sandpaper and gradually work your way up to a finer grit. Sand in the direction of the wood grain to achieve a smooth and even finish.
Read more: How To Light A Dining Room
6. Apply Stain and Finish:
Choose a wood stain that complements your desired aesthetic and apply it to the tabletop following the manufacturer’s instructions. Once the stain has dried, apply multiple coats of clear coat finish to protect and enhance the beauty of the wood.
With the tabletop complete, it’s time to move on to the next step: building the table base.
Building the Table Base
The table base is not only responsible for providing stability and support to your large circular dining room table but also contributes to its overall design and aesthetic appeal. Here’s how you can build a sturdy and stylish table base:
1. Determine the Base Design:
Based on your chosen table design, decide whether you want a pedestal base or a leg design. Consider the style and dimensions that will best complement the tabletop.
2. Gather the Required Materials:
Depending on your chosen design, gather the necessary materials, such as solid wood or metal, to construct the table base. Ensure it is of high quality and capable of supporting the weight of the tabletop.
Read more: How To Organize Dining Room
3. Measure and Cut the Base Components:
Measure and mark the appropriate lengths for the base components according to your design. Use a saw or other cutting tools to accurately cut the wood or metal pieces.
4. Assemble the Base Components:
Following your design specifications, assemble the base components using screws, bolts, or other appropriate fasteners. Ensure that the joints are secure and the base is stable.
5. Add Decorative Elements:
If desired, incorporate decorative elements such as carvings, molding, or metal accents to enhance the visual appeal of the table base. These details can be added during the assembly process or after the base is constructed.
6. Sand and Finish:
After the base is fully assembled, sand any rough edges or imperfections. Apply a finish, such as paint or stain, to protect the wood or metal and to achieve the desired look. Allow the finish to dry completely.
Building a solid and visually appealing table base is a crucial step in creating a functional and beautiful large circular dining room table. With the base complete, let’s move on to assembling the table.
Read more: How To Clean A Dining Room
Assembling the Table
With the tabletop and base components constructed, it’s time to bring everything together and assemble your large circular dining room table. Follow these steps to ensure a successful assembly:
1. Position the Base:
Place the table base in the desired location, ensuring it is centered and aligned correctly in relation to the tabletop. Use a level to confirm that the base is sitting evenly on the floor.
2. Attach the Tabletop to the Base:
Depending on your chosen base design, there are a few methods for attaching the tabletop. For a pedestal base, use screws or brackets to secure the tabletop to the pedestal. If using a leg design, attach the legs securely to the tabletop using screws or other appropriate fasteners.
3. Check Stability:
Once the tabletop is attached to the base, check the stability of the table by gently pushing and rocking it. Ensure that all connections are secure and that the table does not wobble or sway.
Read more: How To Measure For A Dining Room Table
4. Make Any Necessary Adjustments:
If you notice any instability or unevenness, make the necessary adjustments. Tighten screws, add additional support brackets, or adjust the leveling feet if needed.
5. Test the Table:
Give the table a thorough test by placing some weight on it and gently applying pressure. Check for any signs of weakness or movement. It’s better to identify and address any issues now rather than after the table is in use.
6. Secure Loose Components:
Inspect the table for any loose components such as screws or bolts. Tighten them to ensure that everything is secure and stable.
With the table fully assembled, you’re now ready to move on to the next step: finishing and staining the table for a polished look.
Finishing and Staining
Finishing and staining your large circular dining room table is the final step in bringing out its beauty and protecting it for years to come. Follow these steps to achieve a professional and polished finish:
Read more: How To Redo A Dining Room Table
1. Prepare the Surface:
Before applying any finish or stain, ensure that the table is clean and free of any dust or debris. Use a clean cloth or tack cloth to wipe down the entire surface.
2. Choose the Stain:
Select a wood stain that matches your desired aesthetic. Test the stain on a small, inconspicuous area of the table to ensure you achieve the desired shade before applying it to the entire surface.
3. Apply the Stain:
Using a clean cloth or brush, apply the stain evenly on the table surface following the direction of the wood grain. Make sure to cover all areas of the table, including edges and corners.
4. Wipe off Excess Stain:
After applying the stain, use a clean, dry cloth to wipe off any excess stain. This will prevent the stain from drying unevenly or leaving unsightly blotches.
Read more: How To Design Your Dining Room
5. Allow the Stain to Dry:
Follow the instructions on the stain can to determine the appropriate drying time. Ensure that the stain is completely dry before moving on to the next step.
6. Apply a Clear Coat:
To further protect the table and add a beautiful sheen, apply a clear coat finish. Use a paintbrush or roller to evenly apply the clear coat, following the manufacturer’s instructions. Allow the clear coat to dry according to the recommended drying time.
7. Sand and Repeat:
Once the first coat of clear coat is dry, lightly sand the surface with a fine-grit sandpaper. Wipe away any dust and apply additional coats of clear coat as needed to achieve your desired level of protection and sheen. Allow each coat to dry thoroughly before sanding and applying another coat.
With the finishing and staining complete, your large circular dining room table is almost ready for use. But before you gather around and enjoy your creation, let’s add some final touches and discuss the care instructions.
Final Touches and Care Instructions
With your large circular dining room table complete, it’s time to add some final touches to enhance its beauty and longevity. Additionally, understanding how to properly care for your table will ensure it remains a cherished piece of furniture for years to come. Let’s explore these final touches and care instructions:
Read more: How To Plan The Design Of A Dining Room
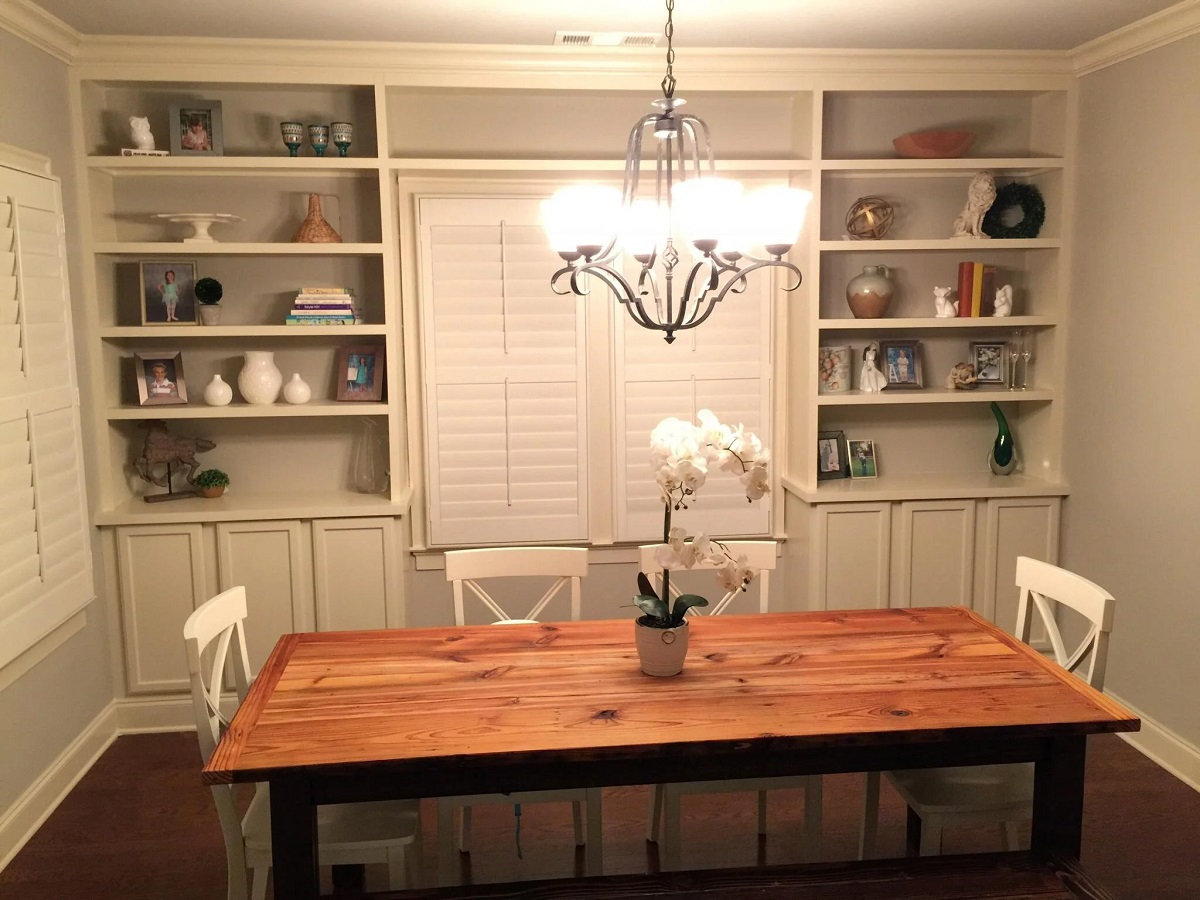
1. Add Table Accessories:
To make your table more inviting, consider adding accessories such as a table runner, centerpiece, or decorative tableware. These elements can enhance the overall aesthetic and create a warm and inviting atmosphere for your dining area.
2. Protect the Tabletop:
Place coasters or placemats under glasses, plates, and hot dishes to prevent scratches and heat damage to the tabletop. By using these protective measures, you’ll preserve the beauty of the wood for a longer time.
3. Clean Regularly:
Regularly clean your table with a soft, damp cloth to remove any dust or spills. Avoid using abrasive cleaners or harsh chemicals as they can damage the finish. For stubborn stains, use a mild soap mixed with water, and gently clean the affected area.
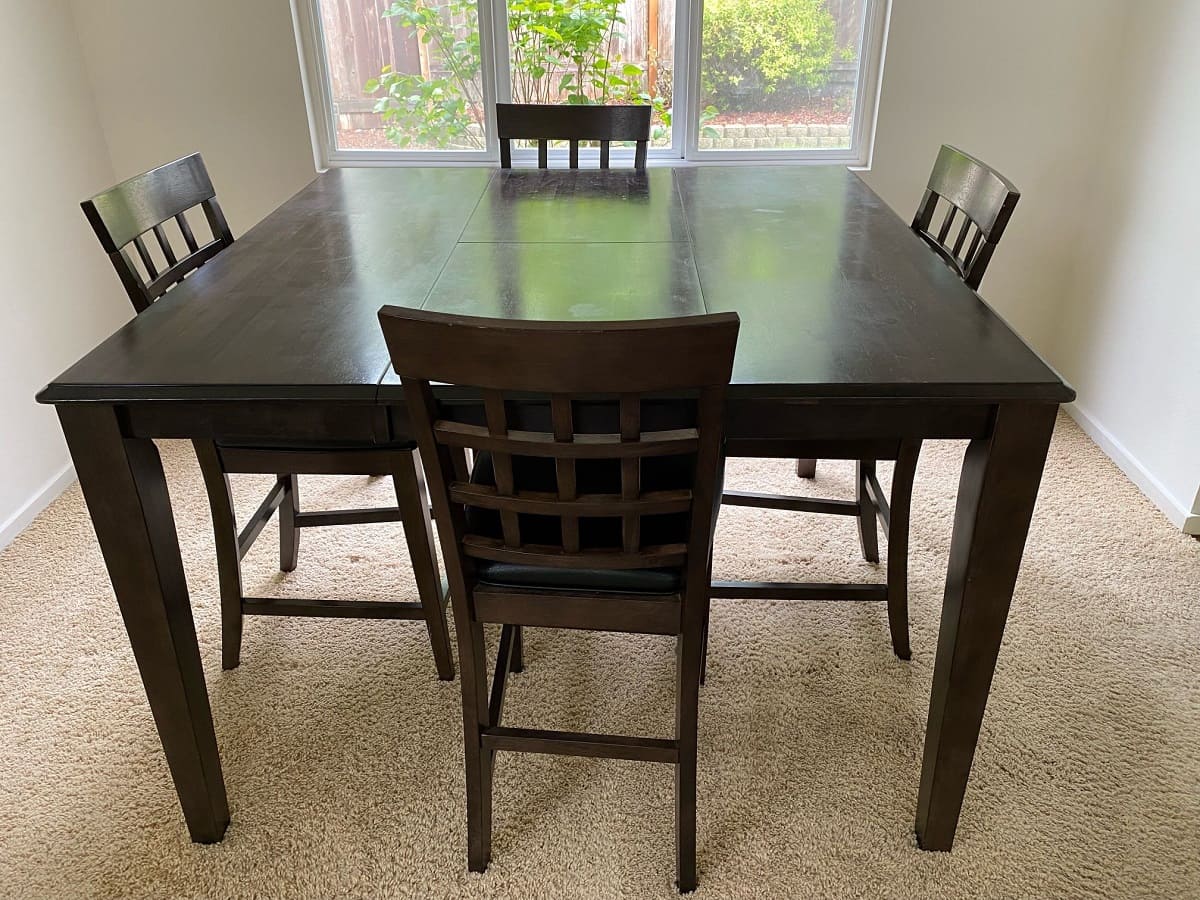
4. Avoid Direct Sunlight:
Keep your table away from direct sunlight as prolonged exposure can fade the wood and cause discoloration. Consider using curtains or blinds to protect the wood from harsh sunlight.
Read more: How To Extend A Dining Room Table
5. Reapply Finish as Needed:
Over time, the finish on your table may wear off. If you notice any signs of wear or damage, lightly sand the surface and reapply a fresh coat of clear coat finish to protect the wood and restore its shine.
6. Prevent Moisture Damage:
Avoid placing wet or damp items directly on the tabletop as it can lead to water damage and warping. Wipe up any spills immediately to prevent moisture from seeping into the wood.
7. Maintain Temperature and Humidity:
Wood furniture performs best in a stable temperature and humidity environment. Avoid placing your table near sources of extreme heat or cold, such as radiators or air conditioning vents, to prevent warping or cracking.
By implementing these final touches and following the care instructions, you’ll ensure that your large circular dining room table remains a stunning centerpiece in your home for years to come. Enjoy the beauty and functionality of your masterpiece as you gather around for memorable meals and cherished moments with your loved ones!
With the final touches and care instructions complete, it’s time to enjoy the beauty and functionality of your large circular dining room table.
Conclusion
Crafting a large circular dining room table is a rewarding and fulfilling endeavor that allows you to create a stunning centerpiece for your home. Throughout this guide, we’ve explored the materials, tools, and steps involved in the construction process. By following these steps and infusing your own creativity, you can bring your vision to life and enjoy a beautiful and functional table that will be the heart of many cherished gatherings.
From planning and designing to constructing the tabletop and building the base, every step plays a crucial role in ensuring the stability and visual appeal of your table. Applying the finishing touches and understanding how to care for your table properly will help preserve its beauty for years to come.
Remember, a large circular dining room table is not just a piece of furniture; it’s a gathering place where memories are made and shared. So, gather your loved ones around the table, delight in delicious meals, engaging conversations, and moments of togetherness.
Now that you have the knowledge and understanding to craft a large circular dining room table, it’s time to embark on your own woodworking journey. Enjoy the process, embrace your creativity, and create a masterpiece that will be admired and cherished for generations to come.
Happy crafting and bon appétit!
Frequently Asked Questions about How To Craft A Large Circular Dining Room Table
Was this page helpful?
At Storables.com, we guarantee accurate and reliable information. Our content, validated by Expert Board Contributors, is crafted following stringent Editorial Policies. We're committed to providing you with well-researched, expert-backed insights for all your informational needs.
0 thoughts on “How To Craft A Large Circular Dining Room Table”