Tableware
How To Restore A Veneer Dining Table
Modified: January 23, 2024
Learn how to restore your veneer dining table to its former glory with our expert tips and techniques. Transform your tableware and bring back its beauty today!
(Many of the links in this article redirect to a specific reviewed product. Your purchase of these products through affiliate links helps to generate commission for Storables.com, at no extra cost. Learn more)
Introduction
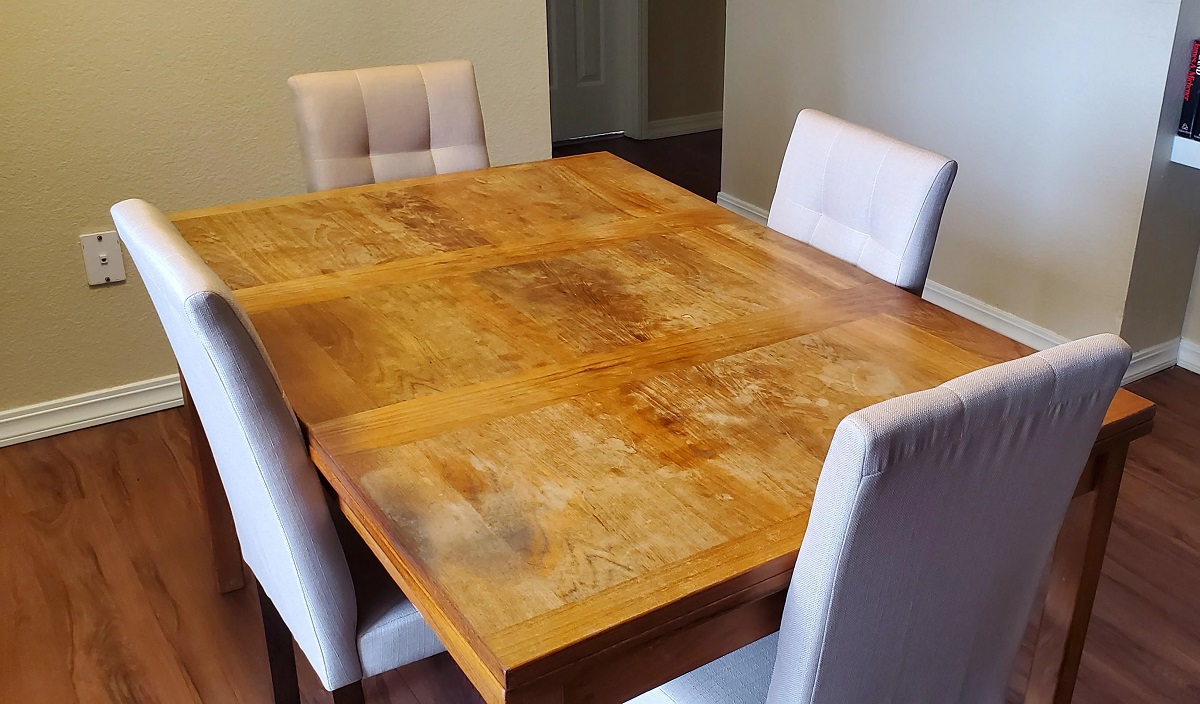
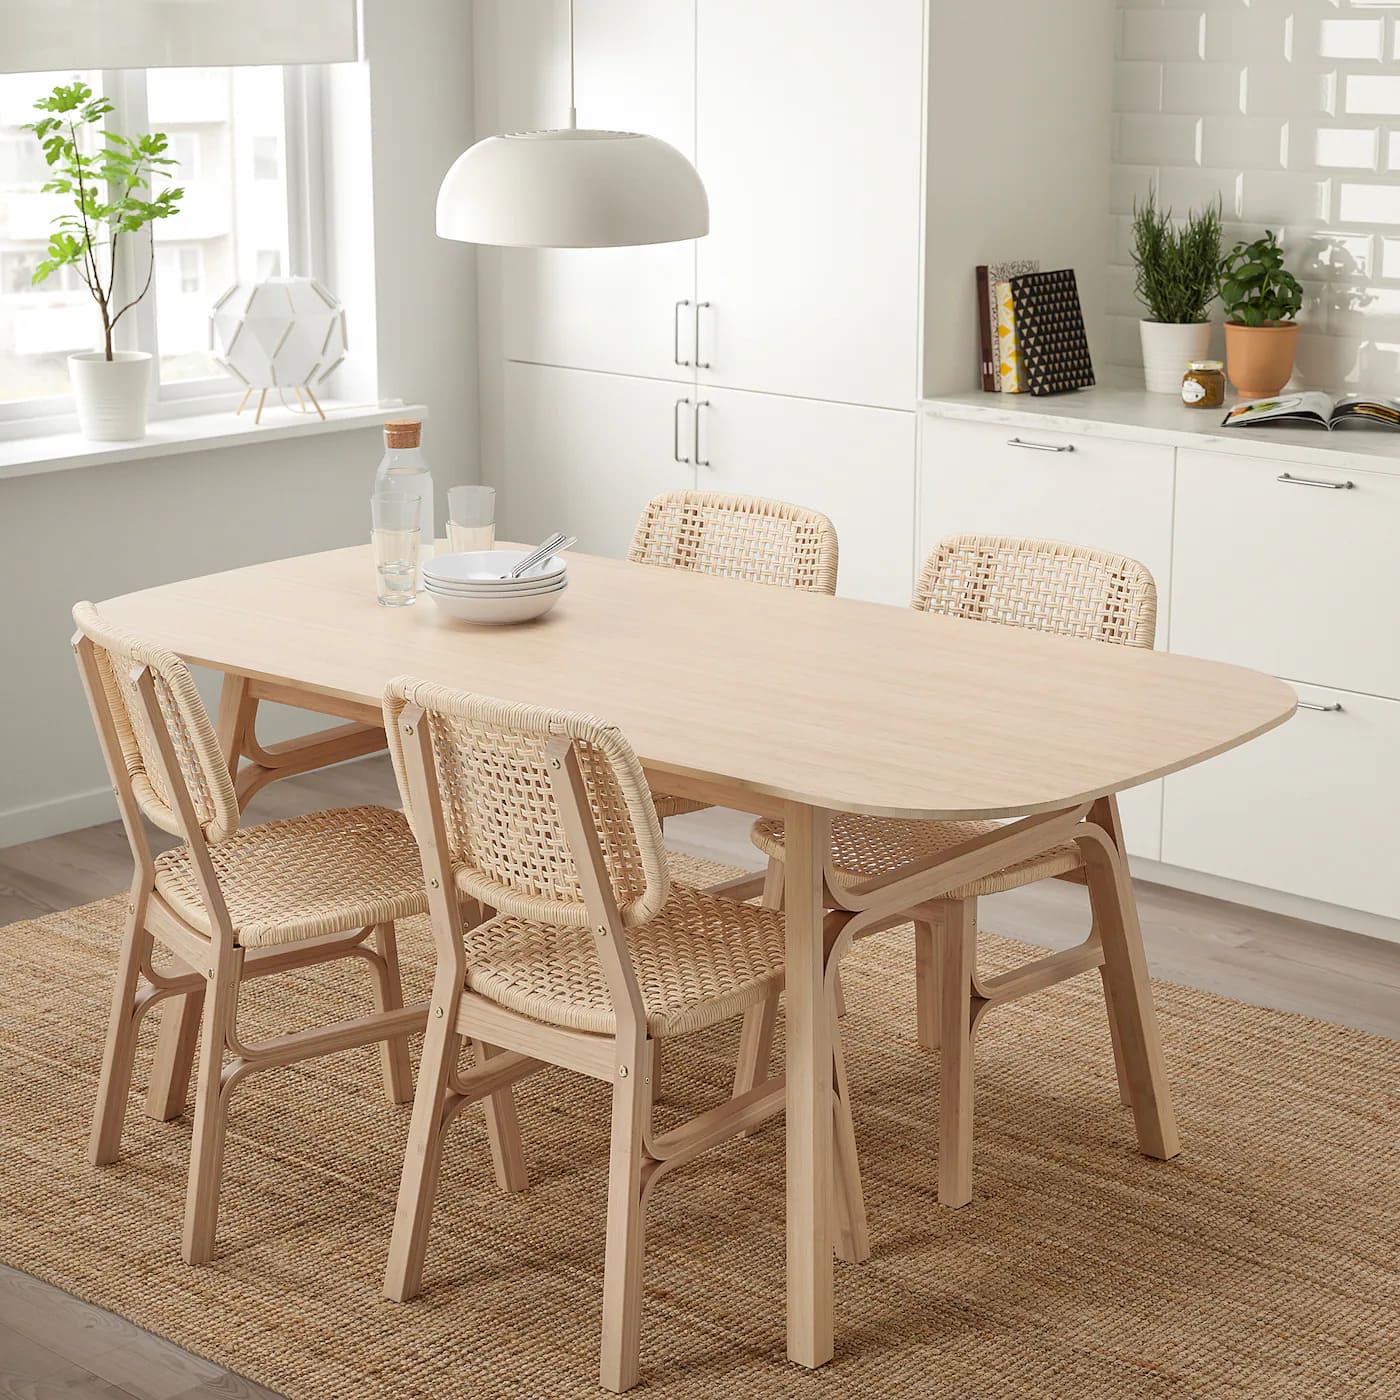
When it comes to tableware, a dining table is a centerpiece that not only serves as a functional piece of furniture but also adds style and elegance to your home. One popular choice for dining tables is veneer, which is a thin layer of wood that is applied to a base material to create a beautiful and durable surface. However, over time, veneer can become worn, scratched, or damaged, diminishing the overall appearance of the table.
If you have a veneer dining table that has seen better days, don’t fret! Restoring a veneer dining table is a rewarding project that can bring new life to your beloved piece of furniture. Whether you want to showcase its natural beauty or give it a fresh new look, restoring a veneer dining table can be a fun and creative endeavor.
In this article, we will guide you through the step-by-step process of restoring a veneer dining table, from assessing the damage to applying a protective finish. So, roll up your sleeves, grab your tools, and let’s get started on transforming your dining table into a masterpiece!
Key Takeaways:
- Transform your worn veneer dining table into a stunning centerpiece by following a step-by-step restoration process, from assessing damage to applying a protective finish. Embrace the satisfaction of reviving your beloved furniture!
- Restoring a veneer dining table is a gratifying and creative endeavor that allows you to showcase its natural beauty or give it a fresh new look. With patience and attention to detail, you can breathe new life into your beloved piece of furniture.
Read more: How To Refinish A Veneer Dining Table
Step 1: Assess the Damage
Before diving into the restoration process, it’s crucial to assess the extent of the damage on your veneer dining table. Carefully examine the table for any scratches, chips, peeling veneer, or water damage. This step will help you determine the level of repairs needed and guide you in selecting the appropriate materials.
If you notice minor scratches or superficial damage, you may be able to fix them with simple repairs. However, if the damage is extensive or the veneer is severely peeling or lifting, you may need to consider reapplying new veneer to restore the table’s integrity.
Once you’ve assessed the damage, take note of any issues and create a plan for how you will tackle each one. This could involve repairing minor scratches, gluing down loose veneer, or completely removing and replacing damaged sections. By having a clear understanding of the repairs needed, you can proceed with confidence to the next steps.
If you find that the damage is beyond your repair skills or if you prefer professional assistance, it’s recommended to reach out to a furniture restoration expert who can evaluate the table and provide guidance on the best approach.
Remember, the key to a successful restoration is to be realistic about what can be repaired and what needs to be replaced. Taking the time to properly assess the damage ensures that you are well-prepared and equipped to restore your veneer dining table to its former glory.
Step 2: Remove the Old Veneer
Now that you have assessed the damage on your veneer dining table, it’s time to remove the old veneer. This step is essential if the veneer is peeling, cracked, or damaged beyond repair. Removing the old veneer will provide a clean and stable surface for the new veneer to be applied.
To begin, gather the necessary tools and materials, including a utility knife, a putty knife, and a heat gun or a clothes iron. The heat gun or iron will help loosen the adhesive that is holding the veneer in place.
Start by using the utility knife to score the edges of the old veneer. This will help prevent any potential damage to the underlying wood. Then, using the putty knife, gently pry up the edges of the veneer, working your way across the table.
Once you have loosened the edges, apply heat using the heat gun or iron to further soften the adhesive. Be careful not to hold the heat source in one spot for too long, as excessive heat can cause damage to the wood. Use the putty knife to continue lifting and peeling away the old veneer as you apply heat.
As you remove the old veneer, make sure to take your time and work methodically. Be patient and gentle to avoid causing any additional damage. You may encounter stubborn or stubbornly adhered areas, in which case, additional heat and a bit more force with the putty knife may be necessary.
Once you have successfully removed the old veneer from the entire table, use sandpaper or a scraper to remove any adhesive residue or remaining bits of veneer. This will ensure a smooth and clean surface for the new veneer.
Remember to wear protective gloves and eye protection during this step to ensure your safety. Also, dispose of the old veneer and any adhesive debris properly.
With the old veneer removed, you are now ready to move on to the next step of the restoration process: preparing the surface for the new veneer.
Step 3: Prepare the Surface
With the old veneer successfully removed from your dining table, it’s time to prepare the surface for the new veneer. Proper surface preparation is essential to ensure a strong and long-lasting bond between the new veneer and the table.
Start by thoroughly cleaning the surface of the table. Use a mild soap and water solution to remove any dirt, grease, or residue left from the adhesive or previous finishes. Dry the table completely before proceeding.
Next, inspect the underlying wood for any imperfections or damage that need to be addressed. Fill in any cracks, gouges, or holes with a wood filler or epoxy putty, following the manufacturer’s instructions. Allow the filler to dry and then sand it smooth with fine-grit sandpaper.
After repairing any imperfections, sand the entire surface of the table to create a roughened texture for better adhesive bonding. Start with a medium-grit sandpaper and then progress to a finer-grit sandpaper for a smooth finish. Sand in the direction of the wood grain to avoid damaging the surface.
Once the sanding is complete, remove any dust or debris from the surface using a tack cloth or a slightly damp cloth. It’s crucial to have a clean and dust-free surface before applying the new veneer.
Additionally, if you plan to change the color of the table or apply a stain, now is the time to do so. Use a wood stain or paint of your choice to achieve the desired look. Apply the stain or paint in thin, even coats, allowing each coat to dry before applying the next one. Follow the manufacturer’s instructions for proper application and drying times.
Finally, ensure that the surface is completely dry and free from any moisture or residue before moving on to the next step. This will ensure optimal adhesion and a flawless finish for the new veneer.
Now that the surface is properly prepared, it’s time to move on to the exciting part of the restoration process: applying the new veneer!
Step 4: Apply the New Veneer
Now that you have prepared the surface of your dining table, it’s time to apply the new veneer. This step is crucial, as it will determine the overall appearance and durability of your restored table.
Start by measuring and cutting the new veneer to fit the dimensions of your table. It’s important to ensure that the veneer is slightly larger than the surface area to allow for trimming and adjustment during the installation process.
Apply adhesive to both the underside of the veneer and the surface of the table according to the manufacturer’s instructions. Be sure to choose a high-quality adhesive specifically designed for veneer applications for optimal results.
Once the adhesive is applied, carefully align the veneer with the edges of the table and slowly lower it onto the surface. Use a roller or a clean cloth to press the veneer firmly and evenly onto the table, eliminating any air bubbles or wrinkles. Start from the center and work your way out to ensure a smooth and uniform bond.
Pay close attention to the corners and edges, applying extra pressure to ensure that the veneer adheres securely. Trim any excess veneer using a utility knife or a veneer trimmer, following the shape and contours of the table.
If you encounter any stubborn areas or loose sections during the installation, simply lift the veneer slightly and apply more adhesive before pressing it back down. It’s important to address these issues promptly to ensure a seamless and long-lasting bond.
Once the veneer is applied, use a clean cloth to remove any excess adhesive from the surface before it dries. Allow the adhesive to cure according to the manufacturer’s instructions, ensuring that the veneer is securely bonded to the table.
With the new veneer in place, your dining table is starting to look brand new! The next step is to trim and sand the edges for a finished and refined appearance.
When restoring a veneer dining table, start by cleaning the surface with a gentle wood cleaner and a soft cloth. Then, use a fine-grit sandpaper to smooth out any imperfections before applying a new coat of wood finish or stain.
Read more: How To Restore A Dining Room Table
Step 5: Trim and Sand the Edges
Now that the new veneer is securely applied to your dining table, it’s time to trim and sand the edges for a clean and polished finish. This step will ensure that the edges blend seamlessly with the rest of the table, creating a professional and cohesive look.
Start by carefully inspecting the edges of the table where the veneer meets the wood. If there are any rough or uneven edges, use a rasp or a file to gently smooth them out. Take your time and work slowly to avoid damaging the veneer.
Next, use a veneer trimmer or a utility knife with a sharp blade to trim the excess veneer along the edges. Take care to follow the contours of the table and maintain a straight and clean line. Make light, controlled cuts to avoid any accidental slips or mistakes.
After trimming the edges, it’s time to sand them for a smooth and refined finish. Start with a coarse-grit sandpaper to remove any rough edges or unevenness. Then, progress to finer-grit sandpaper, gradually smoothing the edges until they are flush with the surface of the table.
Sand the edges in a gentle and continuous motion, following the direction of the wood grain. This will prevent any noticeable sanding marks or scratches and create a seamless transition between the veneer and the wood.
Be sure to clean away any sanding dust with a tack cloth or a clean, damp cloth. It’s crucial to have a clean surface before proceeding to the next step.
By this point, your veneer dining table is taking shape and starting to regain its former beauty. The next step is to enhance and protect the surface with an appropriate stain or paint.
Step 6: Stain or Paint the Table
With the edges of your dining table now trimmed and sanded, it’s time to add the finishing touch by staining or painting the surface. This step will not only enhance the appearance of the table but also provide protection against damage and wear.
Before applying any stain or paint, ensure that the surface is clean and free from dust or debris. Use a tack cloth or a slightly damp cloth to remove any remaining particles.
If you prefer to showcase the natural beauty of the wood, staining is a great option. Choose a wood stain that complements the style and color of your dining table. Apply the stain using a brush, cloth, or foam applicator, following the manufacturer’s instructions.
Start with a small, inconspicuous area to test the stain color and absorption. If you’re satisfied with the result, proceed to stain the entire surface of the table, working in small sections and following the direction of the wood grain.
For a painted finish, select a high-quality wood paint in the color of your choice. Use a brush or a roller to apply the paint evenly, working in thin, smooth coats. Allow each coat to dry completely before applying the next, and lightly sand between coats for a smooth finish.
Whether you choose to stain or paint your dining table, be sure to follow the recommended drying times and ventilation requirements. Allow the stain or paint to cure according to the manufacturer’s instructions to achieve the best results.
Once your chosen finish has dried and cured, your restored veneer dining table is almost complete! The final step is to apply a protective finish to safeguard the surface against daily use and maintain its beauty for years to come.
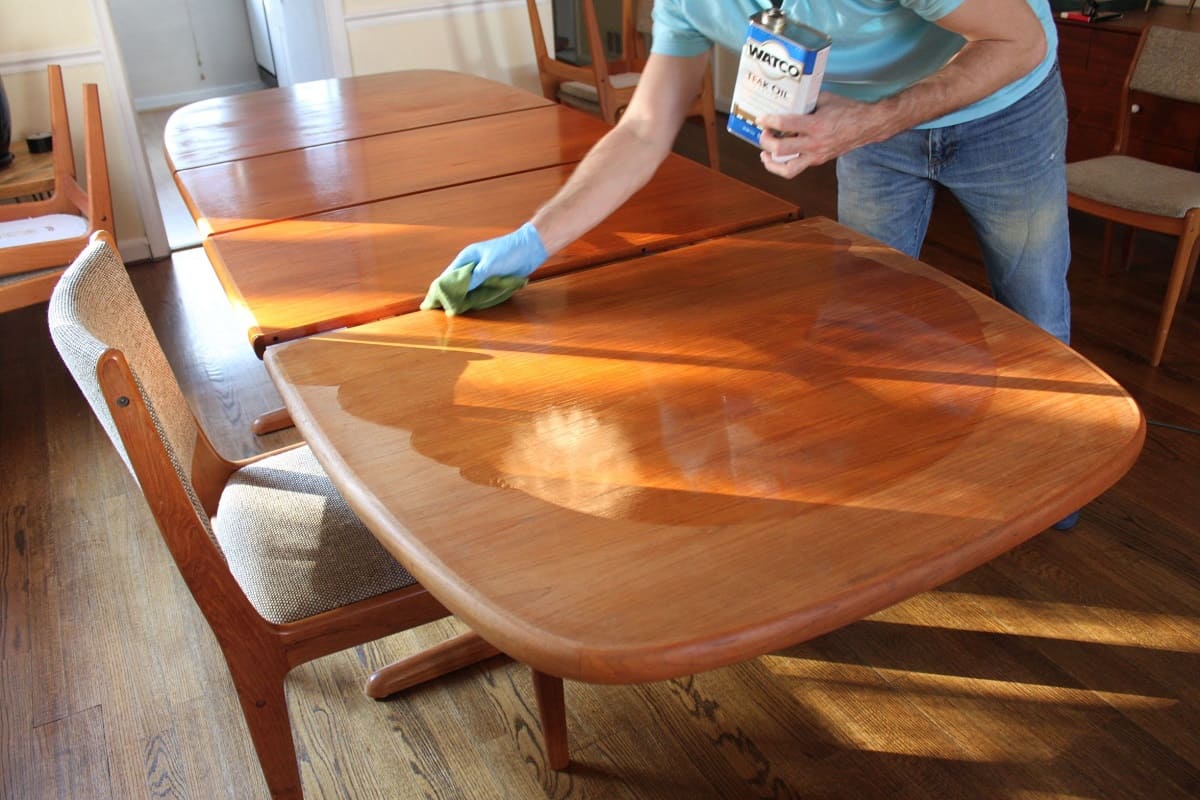
Step 7: Apply a Protective Finish
In the final step of restoring your veneer dining table, it’s important to apply a protective finish to seal and safeguard the surface. This protective layer will enhance the durability of the table and protect it from spills, scratches, and everyday wear and tear.
Before applying the protective finish, ensure that the surface is clean and free from any dust or debris. Wipe it down with a tack cloth or a slightly damp cloth to remove any remaining particles.
There are various options for a protective finish, including polyurethane, lacquer, or varnish. Choose a finish that suits your desired level of shine and durability.
Using a brush or a clean cloth, apply the protective finish in thin, even coats, following the manufacturer’s instructions. Make sure to cover the entire surface of the table, including the edges and corners.
Allow the first coat to dry completely before applying subsequent coats. Sand lightly between coats to create a smooth surface and remove any imperfections.
Continue applying multiple coats of the protective finish until you achieve the desired level of protection and sheen. Be patient and allow each coat to dry thoroughly before moving on to the next.
Once the final coat has dried and cured, your veneer dining table is fully restored and ready to be enjoyed! The protective finish will not only provide durability but also enhance the natural beauty of the wood or the chosen color.
Remember to follow the manufacturer’s guidelines for maintenance and cleaning of the protective finish to preserve its longevity. Avoid placing hot items directly on the table and use coasters or placemats to protect the surface from spills and scratches.
Now, step back and admire your beautifully restored veneer dining table. It’s a testament to your hard work and dedication, and it will continue to be a centerpiece of elegance and functionality in your home for years to come.
Conclusion
Restoring a veneer dining table is a gratifying project that allows you to breathe new life into a beloved piece of furniture. By following the step-by-step process outlined in this guide, you can restore your table to its former glory, showcasing its natural beauty or giving it a fresh new look.
Starting with a thorough assessment of the damage, you can determine the necessary repairs and create a plan for the restoration. Removing the old veneer, preparing the surface, and applying the new veneer are crucial steps that require patience and attention to detail.
Trimming and sanding the edges of the table ensures a seamless transition between the veneer and the wood, while staining or painting the surface allows you to personalize the table to your taste and style. Finally, applying a protective finish seals and preserves your hard work, ensuring the lasting beauty and durability of the restored table.
Remember to approach each step with care and precision, following the manufacturer’s instructions for the materials and tools you use. Take your time, as rushing through the process could result in mistakes or subpar results.
Throughout the restoration journey, embrace the satisfaction of transforming a worn or damaged veneer dining table into a stunning centerpiece that will adorn your home for years to come. It’s a testament to your craftsmanship and love for tableware.
So, gather your tools, unleash your creativity, and embark on the adventure of restoring your veneer dining table. Enjoy the process and take pride in the final result that will bring beauty and functionality to your dining space.
Frequently Asked Questions about How To Restore A Veneer Dining Table
Was this page helpful?
At Storables.com, we guarantee accurate and reliable information. Our content, validated by Expert Board Contributors, is crafted following stringent Editorial Policies. We're committed to providing you with well-researched, expert-backed insights for all your informational needs.


0 thoughts on “How To Restore A Veneer Dining Table”