Home>Furniture & Design>Living Room Furniture>How To Refinish A Veneer Dining Table
Living Room Furniture
How To Refinish A Veneer Dining Table
Published: January 6, 2024
Learn how to refinish a veneer dining table to give your living room furniture a fresh new look. Follow our step-by-step guide for furniture and design inspiration.
(Many of the links in this article redirect to a specific reviewed product. Your purchase of these products through affiliate links helps to generate commission for Storables.com, at no extra cost. Learn more)
**
Introduction
**
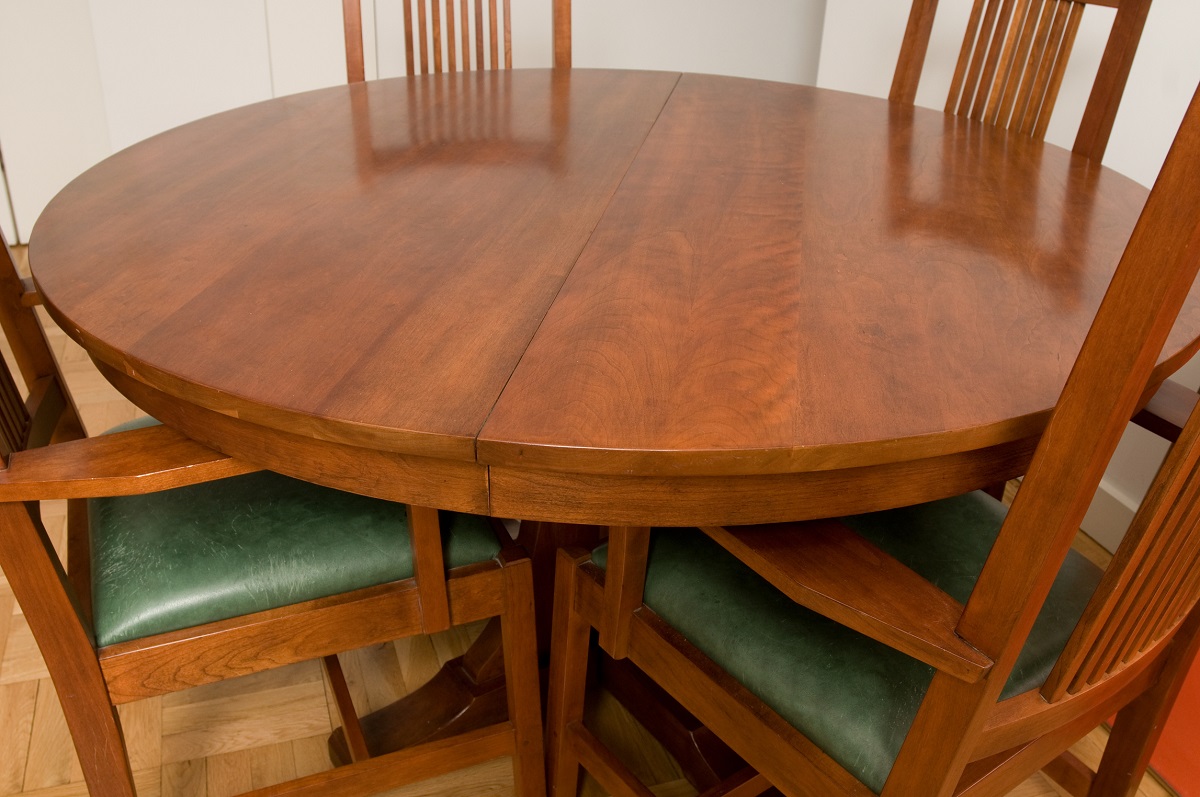
So, you've got a beautiful veneer dining table that's seen better days. Maybe it's been through a few too many family dinners, or perhaps it's been hiding under layers of neglect in a corner of your dining room. Whatever the case, it's time to breathe new life into this centerpiece of your home. Refinishing a veneer dining table may seem like a daunting task, but with the right materials, tools, and a bit of elbow grease, you can restore it to its former glory.
In this comprehensive guide, we'll walk you through the step-by-step process of refinishing a veneer dining table. From preparing the workspace to applying the final finish, we'll cover everything you need to know to achieve professional-looking results. Whether you're a seasoned DIY enthusiast or a first-time furniture refinisher, this guide will equip you with the knowledge and confidence to tackle this rewarding project.
So, roll up your sleeves, gather your supplies, and let's embark on a journey to transform your worn-out veneer dining table into a stunning focal point that will grace your home for years to come.
Key Takeaways:
- Refinishing a veneer dining table requires careful preparation, meticulous stripping, sanding, staining, and applying protective finish. The process not only restores the table’s beauty but also enhances its durability and functionality.
- By following the step-by-step guide, you can transform a worn-out veneer dining table into a stunning centerpiece for your home. The final touches add elegance and ensure the table’s enduring beauty and resilience.
Read more: How To Refinish A Teak Dining Table
Materials and Tools
Before diving into the refinishing process, it’s essential to gather the necessary materials and tools. Here’s a comprehensive list of what you’ll need to successfully refinish your veneer dining table:
Materials:
-
Stripping agent: Choose a high-quality paint or varnish stripper suitable for use on veneer surfaces. Opt for a non-toxic, environmentally friendly option if possible.
-
Sandpaper: Invest in a range of sandpaper grits, including coarse, medium, and fine grades. This will allow you to effectively smooth the surface during the refinishing process.
-
Stain: Select a wood stain that complements the existing décor of your dining room. Consider the table's surroundings and the desired aesthetic when choosing a stain color.
-
Finish: Whether you prefer a glossy, satin, or matte finish, ensure you have a high-quality polyurethane or lacquer to protect the refinished surface.
-
Tack cloth: This sticky cloth is perfect for removing dust and debris from the table's surface between sanding and finishing.
-
Paintbrushes and foam brushes: Have a selection of brushes on hand for applying the stripping agent, stain, and finish.
-
Protective gear: Prioritize safety by wearing gloves, safety goggles, and a mask to shield yourself from potentially harmful chemicals and dust particles.
-
Clean rags: Keep plenty of clean, lint-free rags nearby for wiping away excess stain and finish.
Tools:
-
Putty knife: Use a putty knife to gently scrape away old finish and stubborn residue from the table's surface.
-
Sanding block: A sanding block provides stability and control when smoothing the table's veneer.
-
Electric sander: While optional, an electric sander can expedite the sanding process, especially for larger dining tables.
-
Drop cloth or plastic sheeting: Protect your workspace from drips and spills by covering the floor with a drop cloth or plastic sheeting.
-
Ventilation: If refinishing indoors, ensure adequate ventilation to disperse fumes from stripping agents and stains.
By assembling these materials and tools, you'll be well-prepared to tackle the refinishing process with confidence and precision. With everything in place, you're ready to begin the transformative journey of restoring your veneer dining table to its former splendor.
Preparation
Before delving into the refinishing process, it’s crucial to prepare both the workspace and the dining table itself. Proper preparation sets the stage for a successful and efficient refinishing endeavor. Here’s a step-by-step guide to ensure you’re ready to breathe new life into your veneer dining table:
-
Clear the Workspace: Begin by clearing the area where you’ll be refinishing the table. Remove any surrounding furniture, rugs, and décor to create a spacious and unobstructed workspace.
-
Protect the Surroundings: Cover the floor with a drop cloth or plastic sheeting to safeguard it from drips and spills. Additionally, consider using painter’s tape to protect any adjacent walls or furniture from accidental splatters.
-
Ventilation: If refinishing indoors, ensure adequate ventilation by opening windows and using fans to promote air circulation. This helps disperse fumes from stripping agents and stains, creating a safer and more comfortable working environment.
-
Inspect the Table: Carefully examine the dining table’s surface for any existing damage, such as deep scratches, dents, or areas of loose veneer. Addressing these issues before refinishing will contribute to a smoother and more refined end result.
-
Repair Any Damage: If you encounter minor imperfections, such as small scratches or loose veneer, consider using wood filler to mend these blemishes. Allow the filler to dry completely before proceeding to the next step.
-
Clean the Surface: Thoroughly clean the table’s surface to remove any dirt, grime, or residue. A gentle solution of warm water and mild dish soap, followed by a rinse with clean water, can effectively eliminate built-up dirt without damaging the veneer.
-
Allow for Drying Time: After cleaning, allow the table to dry completely before proceeding. A dry surface ensures that the stripping agent and subsequent refinishing materials adhere properly, leading to a more professional and durable finish.
By meticulously preparing the workspace and attending to any necessary repairs, you’ll create an optimal environment for the refinishing process. This thoughtful approach sets the stage for a seamless and rewarding transformation of your veneer dining table. With the groundwork laid and the table primed for refinishing, you’re now ready to embark on the next steps toward revitalizing this cherished piece of furniture.
Stripping the Old Finish
With the workspace prepared and the dining table inspected and cleaned, it’s time to tackle the crucial step of stripping the old finish. This process is essential for removing layers of worn-out varnish or paint, allowing the natural beauty of the wood veneer to shine through once again. Here’s a detailed guide to effectively strip the old finish from your dining table:
-
Apply the Stripping Agent: Using a paintbrush or foam brush, apply the chosen stripping agent evenly over the table’s surface. Ensure complete coverage, and follow the manufacturer’s instructions regarding application and dwell time.
-
Allow Dwell Time: After applying the stripping agent, allow it to dwell on the surface for the specified duration. This allows the agent to penetrate and loosen the old finish for easier removal.
-
Scrape Away the Old Finish: Once the dwell time has elapsed, use a putty knife to gently scrape away the softened finish. Work in the direction of the wood grain, taking care not to apply excessive pressure that could damage the veneer.
-
Repeat if Necessary: Depending on the thickness and stubbornness of the old finish, you may need to repeat the stripping process to achieve complete removal. Patience and thoroughness during this step will contribute to a smooth and flawless end result.
-
Clean the Surface: After successfully stripping the old finish, thoroughly clean the table’s surface to remove any residue from the stripping agent. Use a clean rag and a mild solvent recommended by the stripping agent’s manufacturer to ensure the surface is free of any lingering remnants.
-
Allow for Drying Time: Once cleaned, allow the table to dry completely before proceeding to the next phase of the refinishing process. A dry surface sets the stage for successful sanding and ensures optimal adhesion of the subsequent stain and finish.
By meticulously following these steps, you’ll effectively strip the old finish from your veneer dining table, unveiling the raw beauty of the wood beneath. This transformative process sets the stage for the subsequent stages of refinishing, allowing you to breathe new life into this cherished piece of furniture. With the old finish removed, you’re now ready to embark on the next phase of the refinishing journey: sanding the table’s surface to perfection.
Sanding
With the old finish successfully stripped away, the next crucial step in refinishing your veneer dining table is to meticulously sand the surface. Sanding not only smoothens the wood but also prepares it to absorb the stain, ensuring a flawless and durable finish. Here’s a comprehensive guide to effectively sanding your dining table:
-
Begin with Coarse Grit: Start the sanding process with a coarse-grit sandpaper to eliminate any remaining traces of the old finish and to smooth out imperfections on the surface. Work methodically, following the direction of the wood grain for consistent results.
-
Progress to Medium Grit: Once the surface is uniformly smooth with the coarse grit, transition to a medium-grit sandpaper to further refine the table’s veneer. This step helps to eliminate any visible scratches or uneven areas left by the coarse sandpaper.
-
Finish with Fine Grit: Finally, use a fine-grit sandpaper to achieve a silky-smooth finish on the table’s surface. This fine sanding will prepare the wood to absorb the stain evenly, resulting in a lustrous and professional-looking outcome.
-
Inspect for Consistency: After sanding, carefully inspect the entire surface of the table to ensure it’s uniformly smooth and free of any blemishes. Address any remaining imperfections with the appropriate sandpaper to achieve a flawless foundation for the subsequent stages of refinishing.
-
Remove Sanding Residue: Use a tack cloth to thoroughly remove any dust and debris left behind by the sanding process. A clean surface is essential for the successful application of the stain and finish, so take the time to eliminate all sanding residue.
By meticulously sanding the table’s surface, you’ll create the ideal canvas for the next phase of the refinishing process: staining the wood to enrich its natural beauty. This transformative step not only enhances the aesthetics of the veneer dining table but also sets the stage for a durable and long-lasting finish. With the sanding process complete, you’re now ready to embark on the next phase of this rewarding refinishing journey.
Before refinishing a veneer dining table, make sure to thoroughly clean and sand the surface to remove any existing finish. This will help the new finish adhere better and result in a smoother final look.
Read more: How To Restore A Veneer Dining Table
Staining
With the table’s surface meticulously sanded to perfection, the next pivotal step in refinishing your veneer dining table is the application of the wood stain. Staining not only enriches the natural beauty of the wood but also provides protection and depth to the veneer, creating a captivating and enduring finish. Here’s a comprehensive guide to effectively staining your dining table:
-
Choose the Right Stain: Select a high-quality wood stain that complements the existing decor of your dining room and accentuates the natural characteristics of the wood veneer. Consider conducting a test application on a discreet area to ensure the chosen stain achieves the desired hue and depth.
-
Apply the Stain Evenly: Using a clean, lint-free cloth or a brush, apply the wood stain evenly in the direction of the wood grain. Ensure consistent coverage and work methodically to prevent streaks or blotches on the table’s surface.
-
Allow for Absorption Time: After applying the stain, allow it to penetrate and absorb into the wood veneer for the recommended duration. This absorption time allows the wood to achieve the desired color and depth, enhancing its natural allure.
-
Wipe Excess Stain: Once the stain has absorbed, use a clean cloth to gently wipe away any excess or pooled stain from the table’s surface. This step ensures an even and consistent finish, preventing uneven coloration or tackiness once the stain dries.
-
Inspect for Uniformity: Carefully inspect the stained surface to ensure it exhibits an even and uniform coloration. Address any areas of unevenness or excess stain to achieve a flawless and consistent result across the entire table.
By meticulously applying the wood stain, you’ll enrich the natural allure of the veneer dining table, imbuing it with depth and character. This transformative step not only enhances the aesthetics of the table but also sets the stage for the final phase of the refinishing process: applying the protective finish. With the wood stain applied and the table’s surface enriched, you’re now ready to embark on the next phase of this rewarding refinishing journey.
Applying Finish
With the wood stain enhancing the natural beauty of the veneer dining table, the next pivotal step in the refinishing process is to apply the protective finish. The finish not only seals and protects the wood but also imparts a lustrous sheen, ensuring the longevity and durability of the refinished surface. Here’s a comprehensive guide to effectively applying the finish to your dining table:
-
Choose the Right Finish: Select a high-quality polyurethane or lacquer finish that aligns with your desired level of sheen, whether it’s a glossy, satin, or matte appearance. Consider the table’s intended use and the existing decor of your dining room when choosing the finish.
-
Apply the Finish Evenly: Using a clean, high-quality brush or foam applicator, apply the protective finish evenly in the direction of the wood grain. Work methodically to achieve consistent coverage, ensuring a seamless and professional-looking result.
-
Allow for Drying Time: After applying the first coat of finish, allow it to dry according to the manufacturer’s recommendations. Ensure proper ventilation to expedite the drying process and to disperse any fumes from the finish.
-
Lightly Sand between Coats: Once the first coat has dried, lightly sand the table’s surface with fine-grit sandpaper to promote adhesion and smooth out any imperfections. Remove sanding residue with a tack cloth before applying subsequent coats.
-
Apply Additional Coats: Apply additional coats of finish as needed to achieve the desired level of protection and sheen. Ensure each coat is applied evenly and allowed to dry thoroughly before proceeding to the next application.
-
Inspect for Consistency: After applying the final coat of finish, carefully inspect the entire surface of the table to ensure it exhibits a uniform sheen and flawless coverage. Address any imperfections or uneven areas to achieve a professional and enduring finish.
By meticulously applying the protective finish, you’ll not only safeguard the wood veneer but also impart a luxurious sheen, elevating the aesthetic appeal of the dining table. This transformative step ensures the longevity and durability of the refinished surface, allowing it to grace your home for years to come. With the protective finish applied and the table’s surface enriched, you’re now ready to embark on the final phase of this rewarding refinishing journey.
Final Touches
As you near the completion of the refinishing process for your veneer dining table, it’s time to add the final touches that will elevate its appearance and ensure its long-lasting beauty. These finishing touches not only enhance the aesthetic appeal of the table but also contribute to its overall resilience and functionality. Here’s a comprehensive guide to the final touches that will perfect your refinished dining table:
-
Buff and Polish: After the protective finish has fully cured, gently buff the table’s surface with a soft, lint-free cloth to enhance its sheen and smoothness. This polishing step adds a luxurious luster to the wood, elevating its visual appeal.
-
Protective Pads or Felt: Consider attaching protective pads or felt to the bottom of the table legs to prevent scratches and damage to the floor. These simple additions safeguard both the table and your flooring, ensuring long-term protection.
-
Reattach Hardware: If your dining table features any hardware, such as drawer pulls or hinges, ensure they are securely reattached. Tighten any loose screws or hardware to guarantee the table’s functionality and aesthetic cohesion.
-
Inspect and Touch Up: Carefully inspect the entire table for any overlooked imperfections or areas that may require touch-ups. Address any minor blemishes or inconsistencies to achieve a flawless and professional finish.
-
Reassemble the Dining Area: Once the table has undergone its transformative refinishing journey, reassemble the dining area, placing the revitalized dining table at the heart of the space. Pair it with complementary chairs and decor to create an inviting and harmonious dining environment.
-
Admire Your Handiwork: Take a moment to step back and admire the stunning transformation of your veneer dining table. Revel in the satisfaction of breathing new life into a cherished piece of furniture, and envision the countless memorable gatherings and meals it will host in the years to come.
By attending to these final touches, you’ll not only perfect the appearance and functionality of your refinished dining table but also ensure its enduring beauty and resilience. These thoughtful details add a touch of elegance and practicality, elevating the table to a centerpiece that will be cherished for generations. With the final touches in place, your refinished veneer dining table is ready to grace your home with its renewed splendor and functionality.
Conclusion
Congratulations on successfully completing the transformative journey of refinishing your veneer dining table. Through meticulous preparation, skilled craftsmanship, and a touch of creativity, you’ve revitalized a cherished piece of furniture, breathing new life into its worn-out surface. This rewarding endeavor not only enhances the aesthetics of your dining space but also imbues the table with durability and resilience, ensuring its longevity for years to come.
By following the comprehensive steps outlined in this guide, you’ve not only achieved a professional-quality finish but also honed your skills as a DIY enthusiast. The process of stripping the old finish, sanding the surface to perfection, applying the rich wood stain, and protecting it with a lustrous finish has not only rejuvenated the table but also provided a sense of fulfillment and accomplishment.
As you admire the glistening surface and smooth contours of your refinished dining table, envision the countless gatherings, family meals, and cherished moments that it will host in the future. Its renewed allure and enduring resilience stand as a testament to your dedication and craftsmanship, enriching your home with both beauty and functionality.
With the final touches in place and the table proudly taking its place as the centerpiece of your dining area, take a moment to revel in the satisfaction of a job well done. Your commitment to this refinishing project has not only revived a piece of furniture but also cultivated a sense of pride and creativity within you.
As you embark on future DIY endeavors and creative projects, may the knowledge and skills gained from this refinishing journey continue to inspire and empower you. Whether it’s reviving a cherished heirloom or transforming a forgotten piece of furniture, your newfound expertise and passion for craftsmanship will undoubtedly leave a lasting mark on your home and those who gather around your refinished veneer dining table.
So, here’s to the beauty of transformation, the joy of creating, and the enduring allure of a refinished veneer dining table. May it continue to serve as a symbol of craftsmanship, creativity, and the warmth of shared moments for years to come.
Frequently Asked Questions about How To Refinish A Veneer Dining Table
Was this page helpful?
At Storables.com, we guarantee accurate and reliable information. Our content, validated by Expert Board Contributors, is crafted following stringent Editorial Policies. We're committed to providing you with well-researched, expert-backed insights for all your informational needs.


0 thoughts on “How To Refinish A Veneer Dining Table”