Home>Furniture & Design>Bathroom Accessories>How To Change A Wax Ring On A Toilet Bowl
Bathroom Accessories
How To Change A Wax Ring On A Toilet Bowl
Modified: February 18, 2024
Learn how to change a wax ring on a toilet bowl with our step-by-step guide. Keep your bathroom accessories in top condition with our expert tips.
(Many of the links in this article redirect to a specific reviewed product. Your purchase of these products through affiliate links helps to generate commission for Storables.com, at no extra cost. Learn more)
Introduction
Changing a wax ring on a toilet bowl may not be the most glamorous of tasks, but it is an essential part of maintaining a leak-free and properly functioning bathroom. Over time, the wax ring that seals the connection between the toilet and the drain can degrade, leading to unpleasant leaks and potential water damage. However, with the right tools, a bit of know-how, and a willingness to get your hands dirty, replacing a wax ring can be a manageable DIY project.
In this comprehensive guide, we will walk you through the step-by-step process of changing a wax ring on a toilet bowl. Whether you're a seasoned DIY enthusiast or a first-time homeowner looking to tackle household maintenance tasks, this guide will equip you with the knowledge and confidence to successfully complete this essential repair.
By following these instructions, you can ensure that your toilet remains securely sealed to the floor, preventing any unwanted leaks and maintaining the overall hygiene and functionality of your bathroom. So, roll up your sleeves, gather your tools, and let's dive into the process of replacing a wax ring on a toilet bowl.
Key Takeaways:
- Don’t underestimate the importance of a wax ring! By replacing it, you’re preventing leaks and water damage, and showcasing your DIY skills. Enjoy a leak-free bathroom and the satisfaction of a job well done.
- Turning off the water supply and checking for leaks are crucial steps. Completing this DIY project not only saves money but also gives you a sense of accomplishment and empowerment as a homeowner.
Read more: How To Change Toilet Wax Ring
Step 1: Gather the necessary tools and materials
Before embarking on the task of changing a wax ring on a toilet bowl, it's crucial to gather all the essential tools and materials. Having the right equipment at hand will streamline the process and ensure that you can complete the task efficiently. Here's a comprehensive list of the items you'll need:
Tools:
- Adjustable Wrench: This versatile tool will come in handy for loosening and tightening nuts and bolts during the removal and installation process.
- Putty Knife: Use a putty knife to scrape off the old wax ring and any residual wax from the toilet flange.
- Bucket: Keep a bucket nearby to catch any water that may spill when disconnecting the toilet from the water supply.
- Rags or Towels: Have a supply of rags or towels on hand to clean up any spills and to ensure a dry work area.
- Disposable Gloves: Protect your hands from dirt and grime by wearing disposable gloves throughout the process.
- Plunger: It's a good idea to have a plunger nearby in case you encounter any clogs while removing the toilet.
Materials:
- New Wax Ring: Purchase a high-quality wax ring that is compatible with your toilet and floor type. Opt for a wax ring with a rubber or plastic horn for added durability.
- Replacement Toilet Bolts: In some cases, the existing toilet bolts may need to be replaced. It's advisable to have new bolts on hand in case the old ones are damaged or corroded.
- Cloth or Paper Towels: Keep a supply of cloth or paper towels for cleaning and drying the toilet flange and the bottom of the toilet.
By ensuring that you have all the necessary tools and materials ready before starting the project, you can minimize interruptions and complete the task smoothly. With these items at your disposal, you'll be well-prepared to proceed to the next steps of replacing the wax ring on your toilet bowl.
Step 2: Turn off the water supply
Before beginning the process of replacing the wax ring on your toilet bowl, it's crucial to turn off the water supply to the toilet. This step is essential to prevent any water spillage or leaks during the removal and installation process. Here's a detailed guide on how to turn off the water supply and prepare the toilet for the subsequent steps:
-
Locate the Shut-Off Valve: The shut-off valve is typically located on the wall behind the toilet. It is a small valve connected to the water supply line. Rotate the valve clockwise to shut off the water flow to the toilet. If the valve is difficult to turn, use a pair of pliers or a wrench to gently rotate it until the water supply is fully closed.
-
Flush the Toilet: After shutting off the water supply, flush the toilet to drain the remaining water from the tank and bowl. This will minimize the amount of water that needs to be dealt with when removing the toilet.
-
Disconnect the Water Supply Line: Once the toilet is flushed and the water supply is turned off, disconnect the water supply line from the toilet tank. Use an adjustable wrench to loosen the nut connecting the supply line to the bottom of the tank. Place a bucket or a towel beneath the connection to catch any residual water that may drain out.
-
Ensure the Water Supply is Off: After disconnecting the water supply line, double-check that the water supply is completely turned off. This can be done by attempting to flush the toilet again to verify that no water refills the tank.
By following these steps, you can effectively turn off the water supply to the toilet and prepare it for the subsequent stages of replacing the wax ring. Ensuring that the water supply is securely shut off will prevent any potential water damage and make the removal and installation process more manageable. With the water supply turned off, you can proceed with confidence to the next steps of removing the toilet and replacing the old wax ring.
Read more: How To Prevent Toilet Bowl Rings
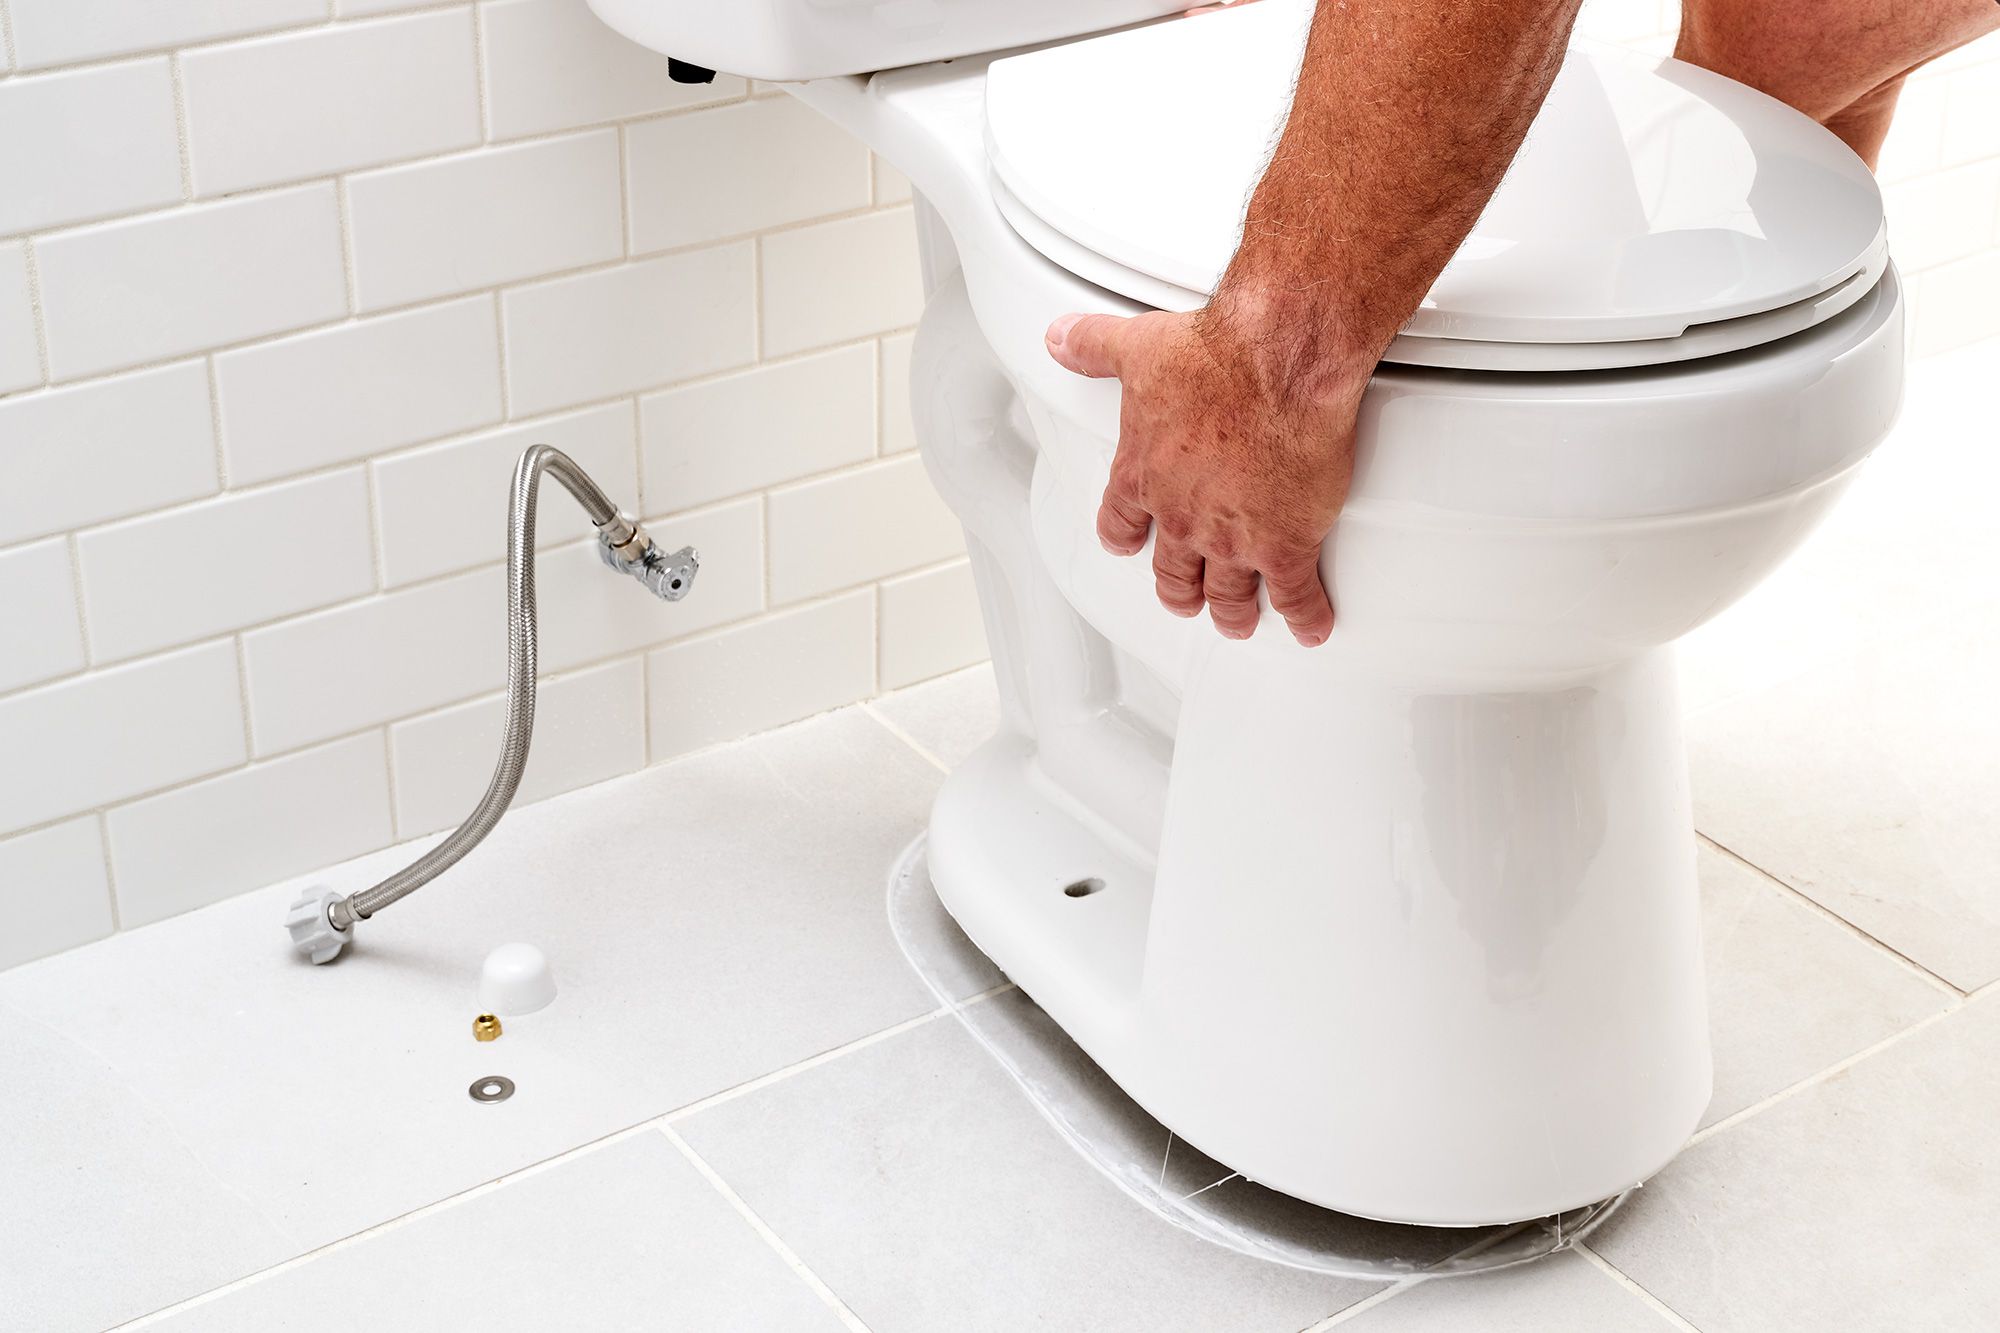
Step 3: Remove the toilet
With the water supply turned off and the toilet flushed, you are now ready to remove the toilet from its position. This step requires careful handling to avoid damage to the toilet and the surrounding area. Follow these detailed instructions to safely and effectively remove the toilet:
-
Clear the Area: Before proceeding, ensure that the immediate area around the toilet is clear of any objects or obstacles. This will provide you with ample space to work and maneuver the toilet during the removal process.
-
Disconnect the Toilet: Start by disconnecting the nuts or bolts securing the toilet to the floor. These are typically located at the base of the toilet. Use an adjustable wrench to loosen and remove the nuts, taking care not to apply excessive force that could damage the bolts or the toilet base.
-
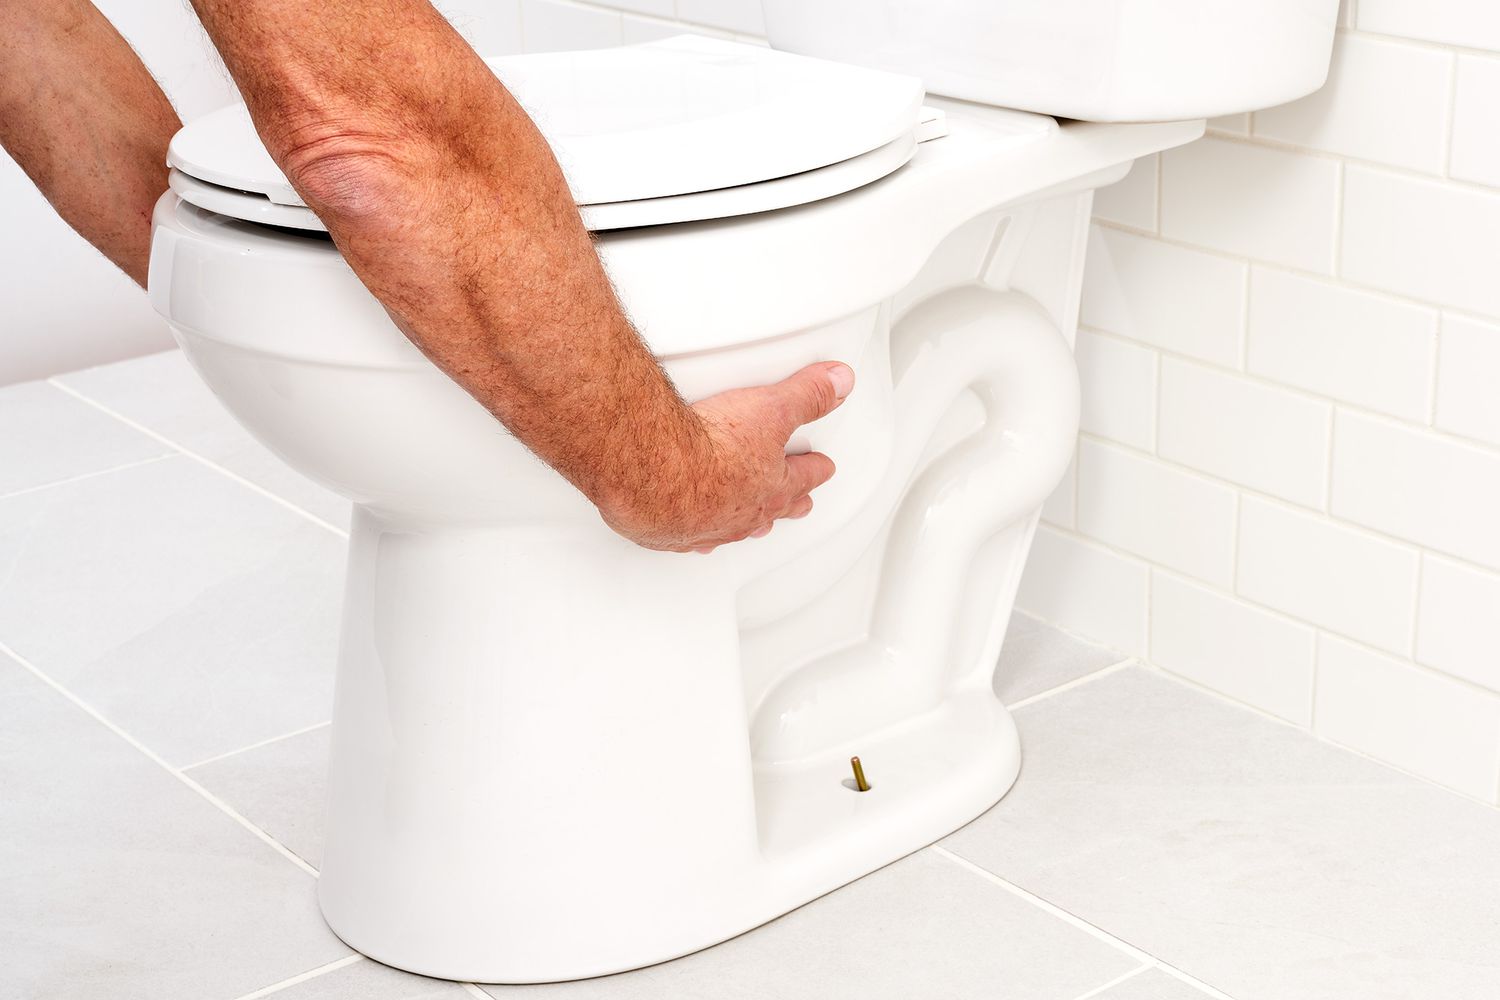
Lift the Toilet: With the nuts or bolts removed, carefully lift the toilet straight up to detach it from the floor. It's advisable to have an assistant to help with this step, as toilets can be heavy and awkward to handle alone. Lift the toilet slowly and steadily to avoid any sudden movements that could cause strain or imbalance.
-
Place the Toilet Securely: Once the toilet is lifted, place it on a protective surface, such as old towels or cardboard, to prevent any damage to the floor or the toilet itself. Take care to position the toilet in a stable and secure manner to avoid any accidental tipping or instability.
-
Cover the Drain Hole: After removing the toilet, it's essential to cover the exposed drain hole with a rag or old towel to prevent any unpleasant odors from escaping and to ensure that no debris falls into the drain during the subsequent steps.
By following these steps, you can safely and effectively remove the toilet from its position without causing any damage or inconvenience. With the toilet successfully detached, you can proceed to the next stage of removing the old wax ring and preparing the toilet flange for the installation of a new wax ring.
Step 4: Remove the old wax ring
With the toilet successfully removed, the next crucial step in replacing a wax ring on a toilet bowl is to remove the old wax ring. This process requires thoroughness and attention to detail to ensure that the toilet flange and surrounding area are clean and ready for the installation of a new wax ring. Follow these detailed instructions to effectively remove the old wax ring:
-
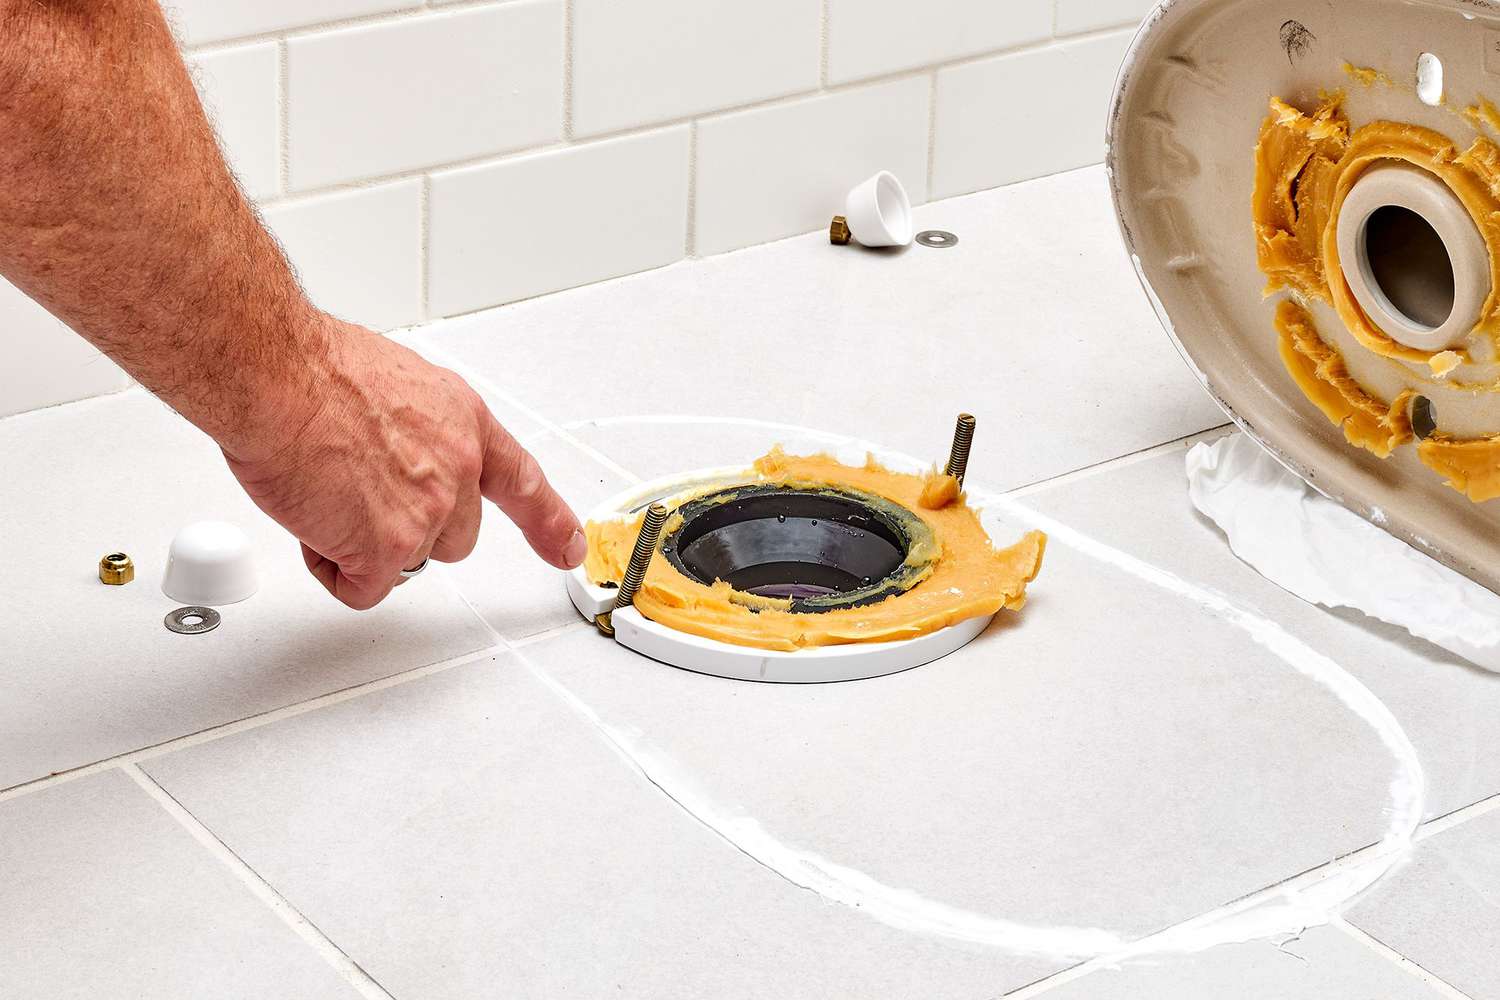
Inspect the Toilet Flange: Begin by inspecting the toilet flange, which is the pipe fitting that connects the toilet to the drainpipe. Ensure that the flange is in good condition and free from any damage or corrosion. Additionally, check for any residual wax or debris around the flange that may need to be cleared.
-
Scrape off the Old Wax Ring: Use a putty knife or a similar tool to carefully scrape off the old wax ring from the toilet flange and the bottom of the toilet. Take care to remove all traces of the old wax, as any remaining residue can compromise the seal and lead to leaks after the new wax ring is installed.
-
Dispose of the Old Wax Ring: Once the old wax ring is removed, dispose of it in a sealed plastic bag to prevent any wax residue from spreading and causing a mess. Properly disposing of the old wax ring will help maintain a clean and organized work area.
-
Clean the Toilet Flange: After removing the old wax ring, thoroughly clean the toilet flange and the surrounding area. Use a rag or paper towels to wipe away any remaining wax, dirt, or debris. Ensure that the flange is dry and free from any obstructions that could interfere with the installation of the new wax ring.
-
Inspect the Toilet Base: While the toilet is removed, take the opportunity to inspect the base of the toilet for any signs of damage or wear. Check for cracks, corrosion, or other issues that may need to be addressed before reinstalling the toilet.
By meticulously following these steps, you can effectively remove the old wax ring and prepare the toilet flange for the installation of a new wax ring. Ensuring that the flange and surrounding area are clean and free from any debris will contribute to a secure and watertight seal once the new wax ring is in place. With the old wax ring successfully removed, you are now ready to proceed to the next step of installing the new wax ring and reattaching the toilet to the floor.
Step 5: Install the new wax ring
With the old wax ring removed and the toilet flange cleaned, it's time to install the new wax ring. This step is crucial in ensuring a secure and watertight seal between the toilet and the drain, preventing any potential leaks or water damage. Follow these detailed instructions to effectively install the new wax ring:
-
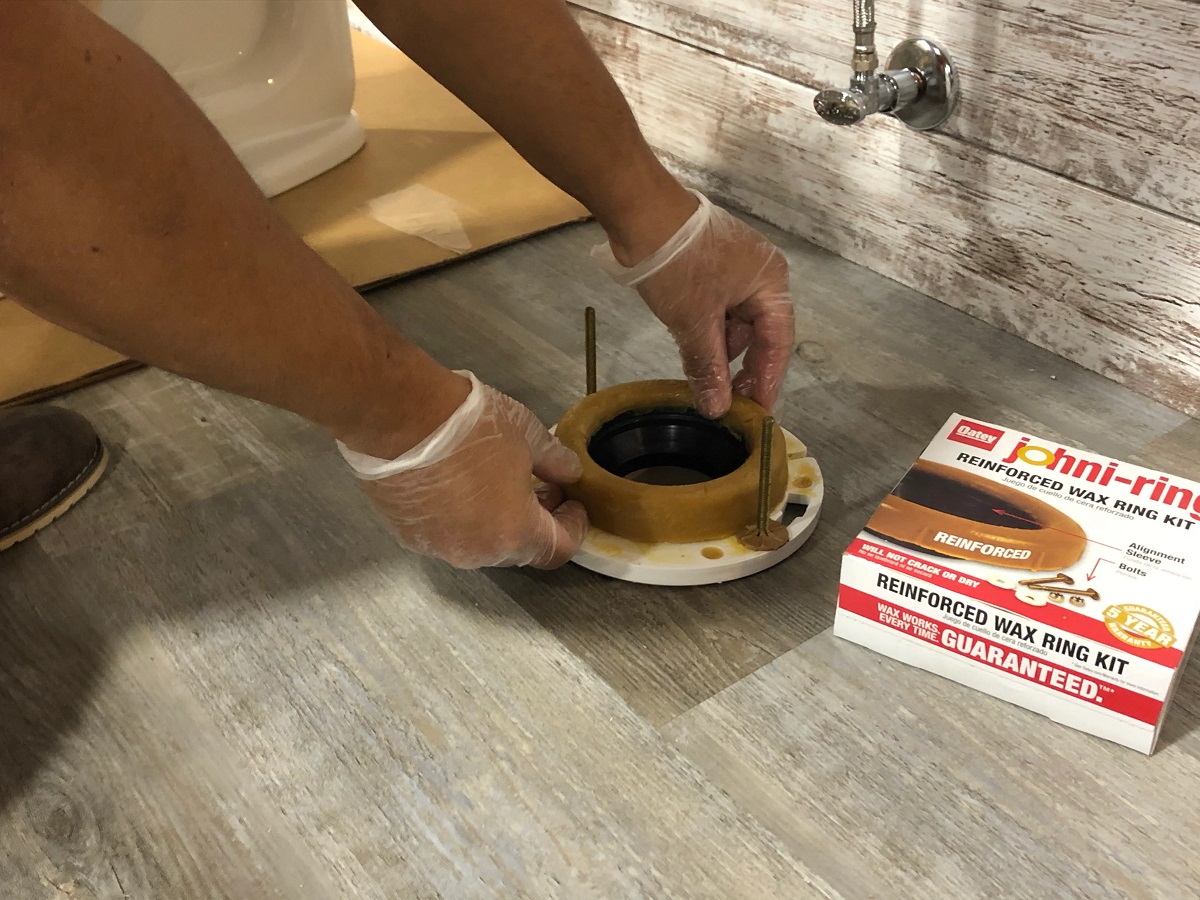
Prepare the New Wax Ring: Carefully remove the new wax ring from its packaging, taking care not to deform or damage its shape. Some wax rings come with a plastic or rubber horn that should be positioned facing up, while others have a flat design. Ensure that the wax ring is compatible with your toilet and floor type, and inspect it for any defects or irregularities.
-
Position the Wax Ring: With the toilet flange clean and dry, position the new wax ring onto the flange. Take care to align the wax ring with the flange opening, ensuring that it sits securely and evenly. If the wax ring has a plastic or rubber horn, make sure it is facing upward to create a proper seal with the toilet horn.
-
Lower the Toilet into Place: Carefully lift the toilet and position it directly over the flange and the new wax ring. Lower the toilet onto the flange, ensuring that the toilet horn aligns with the wax ring. Apply gentle pressure to compress the wax ring and create a secure seal between the toilet and the drain.
-
Secure the Toilet: Once the toilet is in position, carefully align it with the bolts on the floor and lower it onto the bolts. Gently rock the toilet from side to side to help the wax ring settle and create a uniform seal. Take care not to apply excessive force, as this could damage the wax ring or the toilet base.
-
Attach the Nuts or Bolts: Secure the toilet to the floor by reattaching the nuts or bolts to the base of the toilet. Use an adjustable wrench to tighten the nuts, ensuring that the toilet is firmly anchored to the floor without over-tightening, which could crack the porcelain.
-
Reconnect the Water Supply: With the toilet securely in place, reconnect the water supply line to the bottom of the tank. Use an adjustable wrench to tighten the connection, ensuring that it is leak-free and secure.
By following these steps, you can effectively install the new wax ring and reattach the toilet to the floor, creating a reliable and watertight seal. With the new wax ring in place, you can proceed to the final step of turning the water supply back on and testing the toilet for any leaks or issues.
Before replacing the wax ring on a toilet bowl, make sure to turn off the water supply and drain the toilet completely. This will make the process much cleaner and easier to manage.
Step 6: Reinstall the toilet
With the new wax ring securely in place and the toilet reconnected to the water supply, the next crucial step is to reinstall the toilet in its original position. This process requires precision and attention to detail to ensure that the toilet is properly aligned, securely anchored, and free from any leaks. Follow these detailed instructions to effectively reinstall the toilet:
-
Position the Toilet: Lift the toilet carefully and position it directly over the bolts on the floor. Take care to align the toilet with the bolts and the wax ring, ensuring that it sits evenly and securely.
-
Lower the Toilet: Lower the toilet onto the bolts, ensuring that they pass through the mounting holes at the base of the toilet. Apply gentle pressure to ensure that the toilet makes full contact with the new wax ring and the floor.
-
Secure the Toilet: Once the toilet is in position, place a washer and nut onto each bolt and tighten them evenly using an adjustable wrench. Take care not to over-tighten the nuts, as this could damage the toilet base or the flange.
-
Check for Stability: Gently rock the toilet from side to side to ensure that it is stable and securely anchored to the floor. If the toilet wobbles or feels unstable, adjust the nuts and bolts to achieve a secure fit.
-
Reconnect the Water Supply: With the toilet securely in place, reconnect the water supply line to the bottom of the tank. Use an adjustable wrench to tighten the connection, ensuring that it is leak-free and secure.
-
Test for Leaks: Turn the water supply back on and allow the tank to fill. Once the tank is filled, flush the toilet and carefully inspect the base and the surrounding area for any signs of leaks. Check the water supply connection and the base of the toilet for any moisture or water accumulation.
By meticulously following these steps, you can effectively reinstall the toilet, ensuring that it is securely anchored, properly aligned, and free from any leaks. With the toilet successfully reinstalled, you have completed the essential task of replacing the wax ring on a toilet bowl, contributing to a leak-free and properly functioning bathroom.
Read more: What Cleans Toilet Bowl Ring
Step 7: Turn the water supply back on
After successfully reinstalling the toilet and ensuring a secure and leak-free connection, the final step in the process of changing a wax ring on a toilet bowl is to turn the water supply back on. This critical step will restore the flow of water to the toilet, allowing it to function as intended and enabling you to verify that the new wax ring has created a reliable seal. Here's a detailed guide on how to turn the water supply back on and complete the wax ring replacement process:
-
Locate the Shut-Off Valve: Begin by locating the shut-off valve behind the toilet. This valve is the same one that was turned off earlier to stop the water supply. It is typically a small knob or lever connected to the water supply line.
-
Open the Shut-Off Valve: Carefully rotate the shut-off valve counterclockwise to gradually open the water supply. Take care to turn the valve slowly to prevent any sudden surges of water that could lead to splashing or leaks.
-
Monitor for Leaks: As you open the shut-off valve, keep a close eye on the base of the toilet and the water supply connection. Look for any signs of water leakage or seepage around the toilet base or the water supply line. If you notice any leaks, immediately turn the shut-off valve back off and inspect the connections for any issues.
-
Allow the Tank to Fill: Once the water supply is turned back on, allow the toilet tank to fill completely. Listen for any unusual sounds or vibrations that could indicate a problem with the water flow or the tank's internal mechanisms.
-
Flush the Toilet: After the tank is filled, flush the toilet to ensure that it operates smoothly and effectively. Observe the flushing action and listen for any unusual noises that could indicate a problem with the water flow or the seal created by the new wax ring.
-
Check for Proper Functionality: Verify that the toilet flushes properly and that water refills the tank as expected. Look for any signs of water accumulation or leaks around the base of the toilet and the water supply connection.
By following these steps, you can effectively turn the water supply back on and verify that the new wax ring has created a secure and watertight seal. Completing this final step will ensure that the toilet is fully operational and free from any leaks, marking the successful completion of the wax ring replacement process.
Conclusion
Congratulations! You have successfully completed the essential task of changing a wax ring on a toilet bowl. By following the step-by-step instructions outlined in this guide, you have contributed to maintaining a leak-free and properly functioning bathroom. Replacing the wax ring is a crucial aspect of home maintenance, and your proactive approach to this task will ensure the long-term integrity and hygiene of your bathroom.
As you reflect on the process, it's important to recognize the significance of a properly installed wax ring. This small yet vital component plays a pivotal role in sealing the connection between the toilet and the drain, preventing leaks and water damage. By investing the time and effort to replace the wax ring, you have taken a proactive step toward preserving the overall functionality and cleanliness of your bathroom.
Furthermore, the completion of this DIY project demonstrates your capability and willingness to tackle essential home maintenance tasks. By acquiring the necessary tools and materials, carefully following the steps to remove the old wax ring, and installing a new wax ring with precision, you have showcased your ability to handle practical household repairs.
It's worth noting that the successful replacement of the wax ring contributes to a sense of accomplishment and empowerment as a homeowner. Taking charge of essential maintenance tasks not only saves on repair costs but also fosters a deeper connection with your living space. Your proactive approach to maintaining your home reflects a commitment to its upkeep and your own comfort and well-being.
As you admire your handiwork, take a moment to appreciate the impact of your efforts. The secure and watertight seal created by the new wax ring will provide peace of mind, knowing that your bathroom is safeguarded against potential leaks and water-related issues. Your attention to detail and commitment to completing the task thoroughly have contributed to a reliable and durable solution.
In conclusion, the successful replacement of the wax ring on your toilet bowl is a testament to your dedication to maintaining a functional and comfortable living environment. By following this comprehensive guide, you have not only completed a practical repair but also gained valuable knowledge and skills that will serve you well in future home maintenance endeavors. With the new wax ring in place, you can enjoy a well-maintained bathroom, free from the worries of leaks and water damage. Great job!
Frequently Asked Questions about How To Change A Wax Ring On A Toilet Bowl
Was this page helpful?
At Storables.com, we guarantee accurate and reliable information. Our content, validated by Expert Board Contributors, is crafted following stringent Editorial Policies. We're committed to providing you with well-researched, expert-backed insights for all your informational needs.
0 thoughts on “How To Change A Wax Ring On A Toilet Bowl”