Home>Furniture & Design>Bathroom Accessories>How To Change Bulb In Bathroom Exhaust Fan
Bathroom Accessories
How To Change Bulb In Bathroom Exhaust Fan
Modified: August 30, 2024
Learn how to easily change the bulb in your bathroom exhaust fan with our step-by-step guide. Keep your bathroom well-lit and functional with our expert tips. Ideal for anyone looking to maintain their bathroom accessories.
(Many of the links in this article redirect to a specific reviewed product. Your purchase of these products through affiliate links helps to generate commission for Storables.com, at no extra cost. Learn more)
Introduction
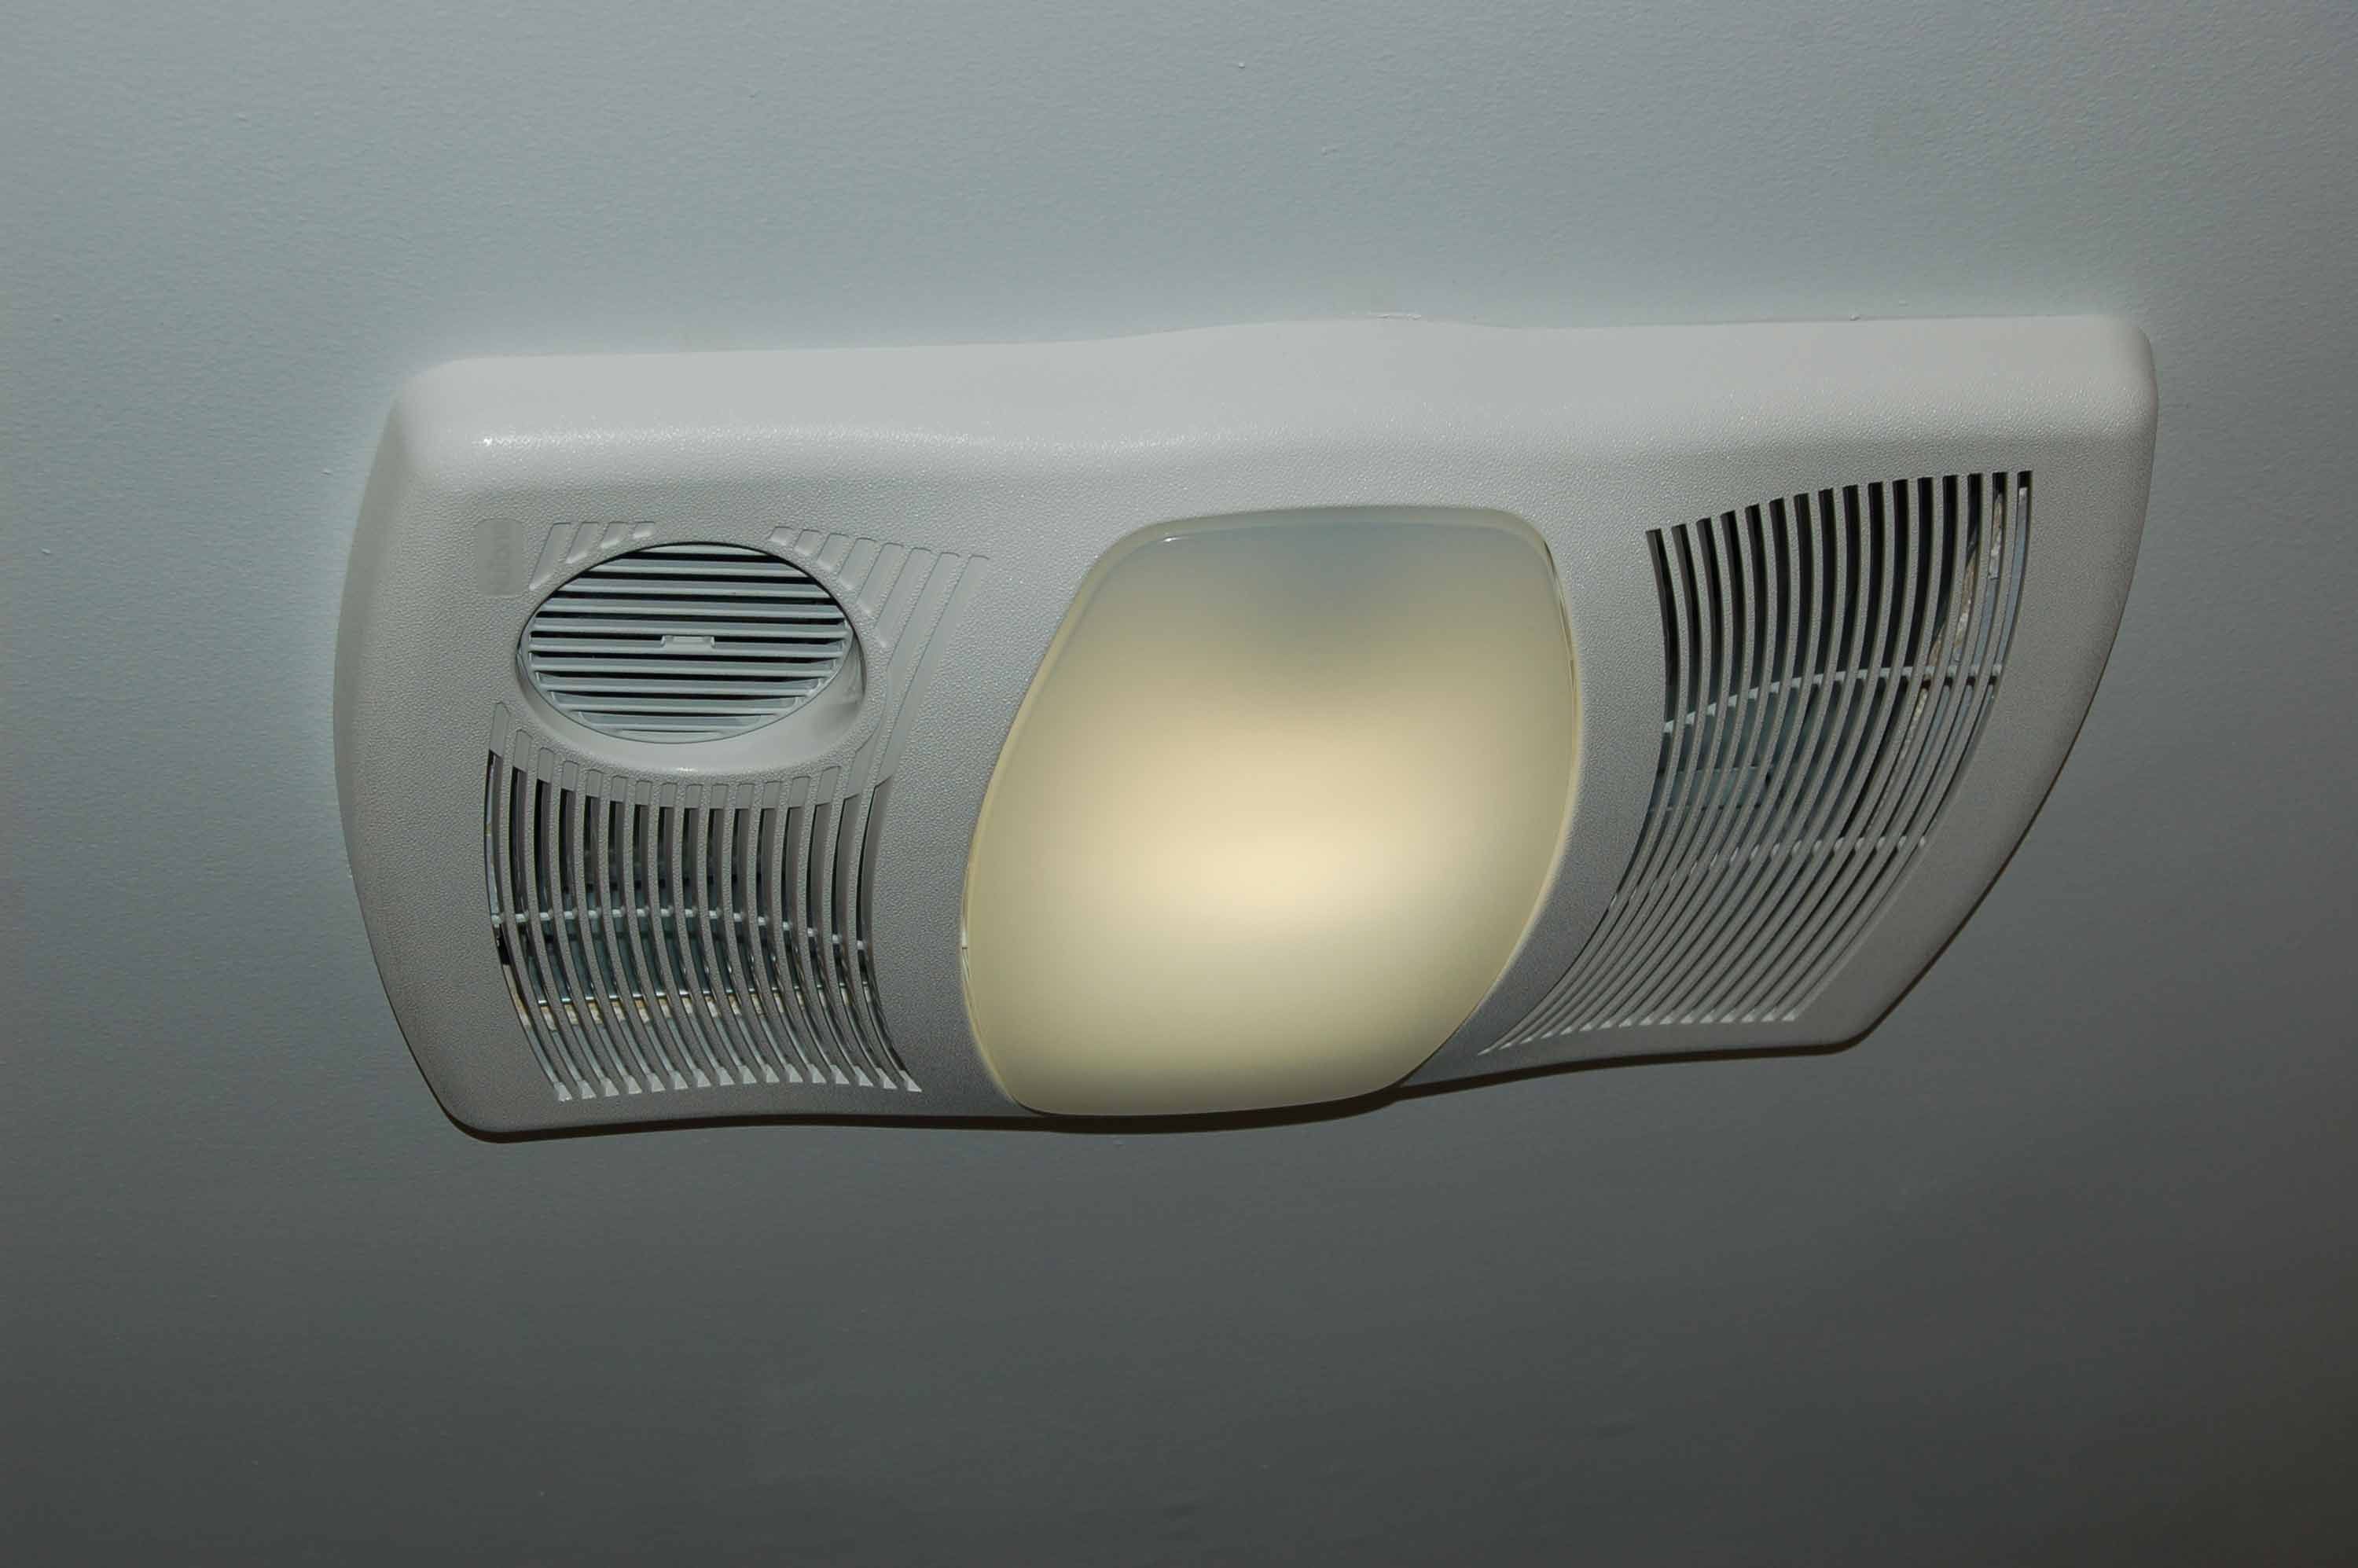
Changing the bulb in a bathroom exhaust fan may seem like a daunting task, but with the right guidance, it can be a straightforward and rewarding DIY project. The exhaust fan plays a crucial role in maintaining proper ventilation and air quality in the bathroom, and a functional light bulb ensures adequate illumination in the space. Over time, the bulb in the exhaust fan may require replacement due to regular wear and tear or simply reaching the end of its lifespan. Fortunately, with a few simple steps and the right tools, you can easily swap out the old bulb for a new one, restoring brightness to your bathroom while ensuring the continued effectiveness of the exhaust fan.
In this comprehensive guide, we will walk you through the step-by-step process of changing the bulb in your bathroom exhaust fan. Whether you're a seasoned DIY enthusiast or a novice looking to tackle your first home maintenance task, this article will provide you with the knowledge and confidence to successfully complete the bulb replacement. By following these instructions, you can ensure that your bathroom remains well-lit and properly ventilated, creating a comfortable and inviting environment for your daily routines.
So, without further ado, let's dive into the details of how to change the bulb in your bathroom exhaust fan. With a few simple tools and a little bit of time, you'll have your bathroom feeling bright and fresh once again.
Key Takeaways:
- Changing the bulb in a bathroom exhaust fan is a manageable DIY task that ensures a well-lit and ventilated bathroom. Prioritize safety, follow step-by-step instructions, and enjoy a bright and fresh bathroom environment.
- By replacing the bulb in your bathroom exhaust fan, you can take an active role in maintaining your home and creating a comfortable space for daily routines. Follow the guide, prioritize safety, and enjoy a well-lit and inviting bathroom.
Read more: How To Change Bathroom Exhaust Fan
Step 1: Turn off the power
Before beginning any work on the bathroom exhaust fan, it is crucial to prioritize safety by turning off the power supply to the fixture. This step is essential to prevent the risk of electrical shock or injury while handling the bulb and accessing the internal components of the fan. By following these precautions, you can ensure a secure and controlled environment for the bulb replacement process.
To start, locate the electrical panel or circuit breaker box in your home. This is where the power supply for the bathroom exhaust fan is controlled. Open the panel or circuit breaker box and identify the corresponding switch or breaker that controls the electricity to the fan. Typically, bathroom exhaust fans are connected to a dedicated circuit, making it easier to pinpoint the correct switch or breaker.
Once you have identified the appropriate switch or breaker, firmly switch it to the "off" position. This action effectively cuts off the electrical supply to the exhaust fan, rendering it safe to proceed with the bulb replacement. It is important to double-check that the power has been successfully turned off by attempting to switch on the fan and light from the bathroom switch. If the fixtures do not respond, you can be confident that the power has been effectively disconnected.
Additionally, it is advisable to use a voltage tester to verify that there is no electrical current flowing to the exhaust fan. This extra precaution can provide added assurance of a safe working environment. Simply place the voltage tester against the wires or terminals connected to the fan to confirm the absence of electrical activity. If the tester does not detect any voltage, you can proceed with the next steps of the bulb replacement process with peace of mind.
By diligently following the procedure to turn off the power, you are taking a proactive approach to safety, minimizing the risk of accidents and ensuring a secure workspace for the subsequent tasks. With the power supply effectively disconnected, you are now ready to move on to the next steps of removing the cover and accessing the bulb within the bathroom exhaust fan.
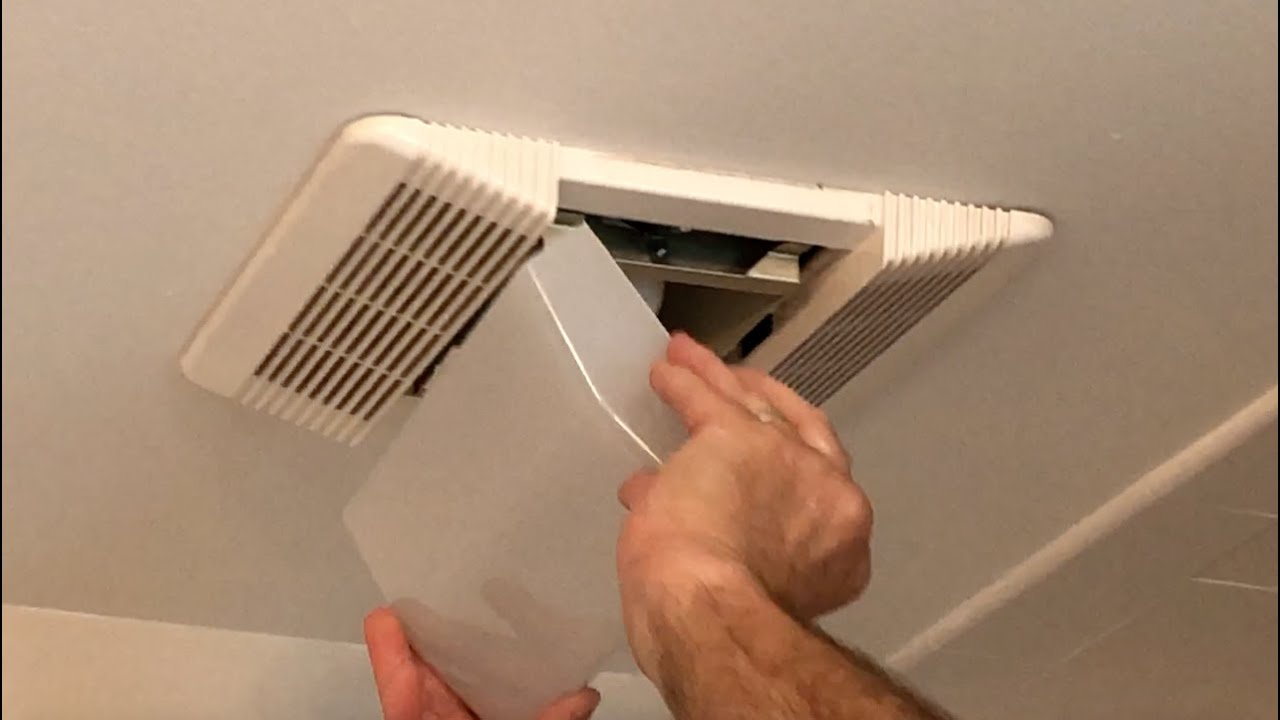
Step 2: Remove the cover
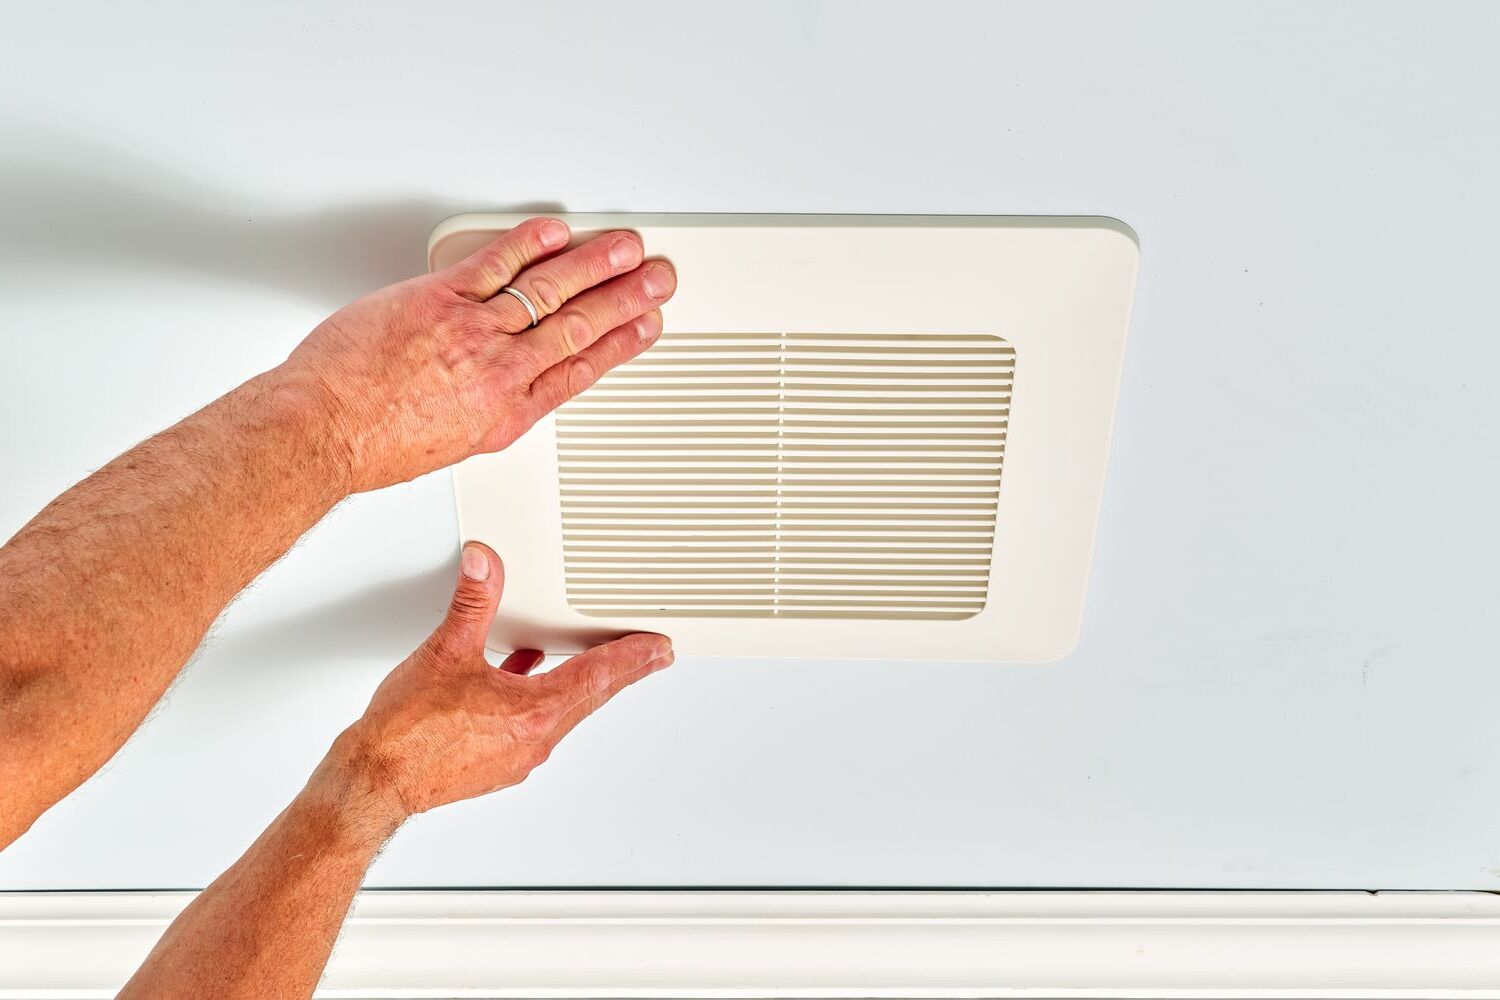
With the power supply to the bathroom exhaust fan safely turned off, the next step in replacing the bulb is to remove the cover that conceals the light fixture. The cover is typically designed to be easily detachable, allowing for convenient access to the bulb and the internal components of the fan. By carefully following the instructions outlined below, you can effectively remove the cover and proceed with the bulb replacement process.
-
Identify the Fastening Mechanism: Begin by examining the cover to determine the type of fastening mechanism used to secure it in place. In most cases, the cover may be held in position by spring clips, screws, or a twist-lock mechanism. Understanding the specific fastening method employed will guide you in the appropriate removal technique.
-
Release Spring Clips or Unscrew Fasteners: If the cover is secured with spring clips, gently press or squeeze the clips to release them from their locked position. Take care to support the cover as you release the clips to prevent it from falling unexpectedly. Alternatively, if screws are used, use a suitable screwdriver to carefully loosen and remove them. For twist-lock covers, rotate the cover counterclockwise to unlock it from the mounting base.
-
Handle the Cover with Care: Once the fasteners are disengaged, carefully lower the cover from its position. Be mindful of any electrical wiring or connections that may be attached to the cover. If the cover is connected to the fan housing via wires, take note of the attachment points and gently detach the wiring to fully remove the cover.
-
Set the Cover Aside: After successfully removing the cover, place it in a safe and easily accessible location. This will prevent any accidental damage to the cover and ensure that it is readily available for reinstallation once the bulb replacement is complete.
By methodically following these steps, you can effectively remove the cover from the bathroom exhaust fan, gaining unhindered access to the existing bulb. With the cover removed, you are now prepared to proceed with the subsequent steps of removing the old bulb and installing the new one. This seamless process ensures that the bulb replacement task is carried out with precision and care, setting the stage for a well-lit and properly ventilated bathroom environment.
Step 3: Remove the old bulb
With the cover successfully removed, you are now ready to proceed with the next crucial step: removing the old bulb from the bathroom exhaust fan. This step requires careful handling to ensure the safe extraction of the old bulb and prepare the fixture for the installation of a new one. By following the detailed instructions outlined below, you can effectively remove the old bulb and pave the way for a seamless transition to the replacement phase.
-
Allow the Bulb to Cool: Before handling the old bulb, it is important to ensure that it has had sufficient time to cool down. If the exhaust fan has been in use, the bulb may retain residual heat, posing a risk of burns or discomfort. To mitigate this, allow the bulb to cool for an appropriate period, ensuring that it is safe to touch before proceeding with its removal.
-
Identify the Bulb Type: Different bathroom exhaust fans may be equipped with varying types of light bulbs, such as incandescent, fluorescent, or LED bulbs. It is essential to identify the specific type of bulb installed in your fan to determine the appropriate removal method. Additionally, take note of the wattage and size of the bulb, as this information will be valuable when selecting a suitable replacement.
-
Unscrew or Unclip the Bulb: Depending on the design of the light fixture, the old bulb may be secured in place by screws, clips, or a twist-lock mechanism. Carefully disengage the fastening mechanism to release the bulb from its socket. If the bulb is a screw-in type, gently rotate it counterclockwise to loosen it from the socket. For bulbs secured by clips, carefully depress or release the clips to detach the bulb. In the case of a twist-lock bulb, follow the manufacturer's instructions to unlock and remove it from the socket.
-
Handle the Bulb with Care: As you remove the old bulb, exercise caution to avoid breakage or damage. Hold the bulb securely as you detach it from the socket, ensuring a firm grip to prevent accidental slippage. If the bulb is stubbornly stuck, consider using a gentle rocking motion to loosen it from the socket without applying excessive force.
-
Inspect the Socket and Wiring: With the old bulb removed, take a moment to inspect the socket and surrounding wiring for any signs of damage or wear. Ensure that the socket is clean and free from debris, and check for any loose or frayed wiring that may require attention. Addressing any issues at this stage will contribute to a smooth and trouble-free installation of the new bulb.
By meticulously following these steps, you can successfully remove the old bulb from your bathroom exhaust fan, setting the stage for the subsequent installation of a new, fully functional bulb. This careful and methodical approach ensures that the bulb replacement process is carried out with precision and attention to detail, ultimately contributing to a well-lit and inviting bathroom environment.
Make sure to turn off the power to the exhaust fan before attempting to change the bulb. Use a step stool or ladder to reach the fan, and carefully remove the old bulb by twisting it counterclockwise. Then, insert the new bulb and twist it clockwise to secure it in place.
Step 4: Install the new bulb
With the old bulb successfully removed, it's time to proceed with the installation of a new bulb in your bathroom exhaust fan. This pivotal step requires careful attention to ensure that the new bulb is securely and correctly positioned, setting the stage for optimal illumination and functionality within the space. By following the detailed instructions outlined below, you can effectively install the new bulb and contribute to a well-lit and inviting bathroom environment.
-
Select the Appropriate Replacement Bulb: Before proceeding with the installation, it's essential to select a replacement bulb that aligns with the specifications of your bathroom exhaust fan. Refer to the manufacturer's guidelines or the existing bulb's wattage and size to ensure that the replacement bulb is a suitable match. Additionally, consider energy-efficient options such as LED bulbs, which offer longevity and reduced power consumption.
-
Align and Insert the New Bulb: Carefully align the base of the new bulb with the socket in the light fixture. For screw-in bulbs, gently insert the base into the socket and rotate it clockwise until it is securely seated. Take care not to overtighten the bulb, as this can lead to difficulties during future removal. If the new bulb features a twist-lock mechanism, follow the manufacturer's instructions to align and lock it into place within the socket.
-
Secure the Bulb in Position: Once the new bulb is correctly inserted into the socket, ensure that it is firmly secured. For screw-in bulbs, perform a gentle clockwise rotation to confirm that the bulb is snugly in place. If the bulb utilizes a twist-lock mechanism, verify that it is securely locked into the socket according to the manufacturer's guidelines. This step is crucial to prevent the bulb from becoming loose or dislodged during operation.
-
Test the Bulb Functionality: Before reattaching the cover and restoring power to the exhaust fan, it's advisable to test the functionality of the new bulb. Turn on the bathroom light switch to verify that the bulb illuminates as expected. Confirm that the brightness and quality of the light meet your satisfaction, ensuring that the new bulb is fully operational and ready for use.
By diligently following these steps, you can effectively install the new bulb in your bathroom exhaust fan, contributing to a well-lit and functional environment within the space. This careful and methodical approach ensures that the bulb replacement process is carried out with precision and attention to detail, ultimately enhancing the overall comfort and usability of your bathroom.
Read more: How To Fix Bathroom Exhaust Fan
Step 5: Replace the cover
With the new bulb successfully installed in the bathroom exhaust fan, the next crucial step is to replace the cover that conceals the light fixture. This step is essential to safeguard the bulb and internal components of the fan while restoring the aesthetic appeal of the fixture. By carefully following the instructions outlined below, you can effectively replace the cover and complete the bulb replacement process with precision and attention to detail.
-
Position the Cover: Begin by aligning the cover with the corresponding mounting base on the exhaust fan. Take care to position the cover correctly, ensuring that it aligns with any grooves or guides designed to secure it in place. Proper alignment is crucial to ensure a seamless and secure fit for the cover.
-
Reattach the Cover: If the cover is equipped with a twist-lock mechanism, follow the manufacturer's instructions to align and lock it into position on the mounting base. For covers secured by spring clips or screws, carefully lift the cover into place, ensuring that it sits flush and level with the fan housing. If the cover is connected to the fan housing via wiring, reattach the wiring to the corresponding terminals, following the original configuration.
-
Engage Fastening Mechanisms: Once the cover is correctly positioned, engage the fastening mechanisms to secure it in place. For covers with spring clips, gently press or squeeze the clips to lock the cover into position. If screws are used, carefully insert and tighten them to secure the cover. Ensure that the cover is firmly and evenly secured to prevent any potential movement or instability.
-
Test the Cover Stability: After reattaching the cover, perform a gentle test to ensure its stability and secure attachment. Gently press on different areas of the cover to verify that it remains firmly in place without any wobbling or shifting. This step is crucial to confirm that the cover is securely fastened and ready for regular use.
By meticulously following these steps, you can effectively replace the cover on your bathroom exhaust fan, completing the bulb replacement process with precision and attention to detail. This careful and methodical approach ensures that the cover is securely reinstalled, safeguarding the new bulb and contributing to the overall functionality and aesthetic appeal of the exhaust fan. With the cover successfully replaced, your bathroom exhaust fan is now ready to be powered on and enjoyed, providing optimal illumination and ventilation for your daily routines.
Step 6: Turn on the power and test the fan
With the new bulb securely installed and the cover properly reattached, the final step in the bulb replacement process is to restore power to the bathroom exhaust fan and test its functionality. This critical phase ensures that the fan operates as intended, providing effective ventilation while the new bulb illuminates the bathroom space. By following the detailed instructions outlined below, you can confidently complete the bulb replacement process and verify the successful restoration of your bathroom's lighting and ventilation capabilities.
-
Restore Power Supply: Return to the electrical panel or circuit breaker box in your home to locate the switch or breaker that controls the electricity to the bathroom exhaust fan. Carefully switch the corresponding breaker or switch to the "on" position, effectively restoring power to the fan and its associated light fixture. It is essential to perform this step with caution, ensuring that the power supply is securely reestablished without any issues or disruptions.
-
Test the Light and Fan: Once the power is restored, return to the bathroom and activate the light switch to test the functionality of the new bulb. Verify that the bulb illuminates as expected, providing adequate brightness and coverage within the space. Additionally, activate the fan switch to ensure that the exhaust fan operates smoothly and effectively, providing the necessary ventilation for the bathroom environment.
-
Observe and Listen: As the light and fan are activated, take a moment to observe and listen to their operation. Confirm that the light emitted by the new bulb meets your satisfaction, providing the desired level of illumination for the bathroom. Simultaneously, listen for any unusual sounds or vibrations emanating from the exhaust fan, ensuring that it functions quietly and efficiently without any signs of malfunction.
-
Check for Proper Ventilation: While the fan is in operation, assess the airflow and ventilation within the bathroom. Stand near the exhaust fan and confirm that it effectively draws in moist or odorous air, expelling it outside to maintain a fresh and comfortable environment. This step is crucial to ensure that the fan performs its essential ventilation function, contributing to improved air quality within the space.
By diligently following these steps, you can confidently turn on the power and test the bathroom exhaust fan, verifying the successful completion of the bulb replacement process. This thorough and attentive approach ensures that the fan and its associated light fixture operate as intended, providing optimal illumination and ventilation for your bathroom. With the power restored and the fan tested, you can now enjoy the benefits of a well-lit, properly ventilated, and inviting bathroom environment.
Conclusion
In conclusion, the process of changing the bulb in a bathroom exhaust fan is a manageable and rewarding DIY task that contributes to the functionality, safety, and aesthetic appeal of the bathroom environment. By following the step-by-step instructions outlined in this comprehensive guide, homeowners and DIY enthusiasts can confidently undertake the bulb replacement process, ensuring that their bathroom remains well-lit and properly ventilated.
The initial step of turning off the power prioritizes safety, creating a secure working environment for the subsequent tasks. By carefully removing the cover, accessing the old bulb, and installing a new one, individuals can effectively maintain the illumination within their bathroom while ensuring the continued functionality of the exhaust fan. The meticulous attention to detail during the cover replacement and the final testing phase underscores the commitment to a thorough and successful bulb replacement process.
Beyond the practical aspects, changing the bulb in a bathroom exhaust fan presents an opportunity for homeowners to engage with their living space, fostering a sense of ownership and accomplishment. This DIY endeavor allows individuals to take an active role in maintaining and enhancing their home environment, contributing to a sense of pride and satisfaction in the upkeep of their property.
Furthermore, the successful completion of the bulb replacement process ensures that the bathroom remains a comfortable and inviting space for daily routines. Adequate illumination and effective ventilation are essential components of a functional bathroom, and by addressing the maintenance needs of the exhaust fan, homeowners can create an environment that promotes well-being and convenience.
In essence, the process of changing the bulb in a bathroom exhaust fan transcends the simple act of replacing a light fixture. It embodies a commitment to safety, maintenance, and personal engagement with the home environment. By following the guidelines provided in this guide, individuals can confidently navigate the bulb replacement process, contributing to the overall comfort, functionality, and appeal of their bathroom.
Frequently Asked Questions about How To Change Bulb In Bathroom Exhaust Fan
Was this page helpful?
At Storables.com, we guarantee accurate and reliable information. Our content, validated by Expert Board Contributors, is crafted following stringent Editorial Policies. We're committed to providing you with well-researched, expert-backed insights for all your informational needs.


0 thoughts on “How To Change Bulb In Bathroom Exhaust Fan”