Articles
How To Change Bathroom Fan Light Bulb
Modified: September 2, 2024
Learn how to easily change the light bulb in your bathroom fan with step-by-step instructions and helpful tips. Read more articles on home improvement projects and DIY solutions.
(Many of the links in this article redirect to a specific reviewed product. Your purchase of these products through affiliate links helps to generate commission for Storables.com, at no extra cost. Learn more)
Introduction
Having a functional bathroom fan with a light is essential for maintaining good air quality and proper lighting in your bathroom. However, like any other light bulb, the bulb in your bathroom fan will eventually need to be replaced. Whether it has burnt out or is simply old and dim, changing the light bulb in your bathroom fan is a relatively simple task that you can do yourself.
In this article, we will guide you through the step-by-step process of changing the light bulb in your bathroom fan. By following these instructions, you will be able to safely and efficiently replace the bulb, ensuring that your bathroom fan continues to operate optimally.
Before we begin, it is important to note that safety should always be your top priority. Make sure to turn off the power before starting any electrical work, and double-check that the power is indeed switched off. Additionally, if you are unsure or uncomfortable performing any of the steps described below, it is always best to consult a professional electrician.
Now, let’s get started with the first step: turning off the power.
Key Takeaways:
- Easily replace your bathroom fan light bulb by following simple steps. Prioritize safety, turn off the power, remove the cover, replace the bulb, reattach the cover, and turn the power back on for a well-lit bathroom.
- Ensure proper lighting and ventilation in your bathroom by safely changing the light bulb in your fan. Follow the step-by-step guide, prioritize safety, and enjoy a well-lit bathroom with a functional fan.
Read more: How To Change A Light Bulb
Step 1: Turn off the Power
Before you begin changing the light bulb in your bathroom fan, it is crucial to turn off the power to ensure your safety. You need to ensure that there is no electrical current flowing through the circuit. Here’s how to do it:
- Locate the electrical panel in your home. Usually, it is a metal box located in the basement, garage, or utility room.
- Open the panel door to reveal the circuit breakers.
- Look for the breaker responsible for supplying power to the bathroom where the fan is located. It is typically labeled or marked for easier identification.
- Switch off the breaker by moving the corresponding switch to the “off” position.
- Verify that the power is indeed off by testing the light switch or using a non-contact voltage tester. It is crucial to double-check before proceeding with any electrical work.
Once you have confirmed that the power is off, you can proceed to the next step of removing the cover of the fan light.
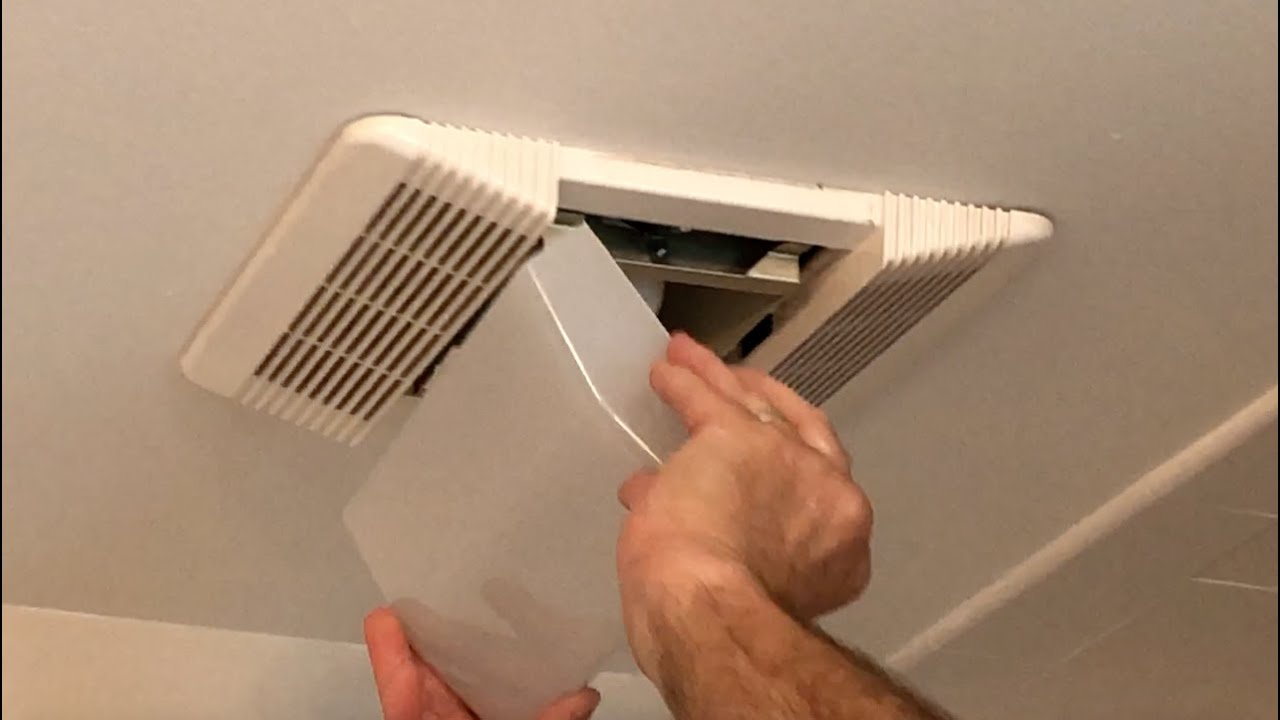
Step 2: Remove the Cover of the Fan Light
With the power turned off, it’s time to remove the cover of the fan light. The cover is typically located on the bottom side of the fan and houses the light bulb. Follow these steps to remove it:
- Examine the fan cover to identify how it is attached. It may be held in place by screws, clips, or a release latch.
- If there are screws, use a Phillips screwdriver to carefully remove them. Place the screws in a safe spot to avoid misplacing them.
- If there are clips, gently press or squeeze them to release the cover from the fan housing. Be cautious, as some clips may be delicate.
- If there is a release latch, locate the latch and slide or press it to detach the cover from the fan.
- Once the cover is loose, carefully remove it by sliding it off or lifting it up. Set it aside in a secure location.
Now that you have successfully removed the cover of the fan light, you can move on to the next step, which is removing the old light bulb.
Step 3: Remove the Old Light Bulb
Now that you have access to the light bulb, it’s time to remove the old one. Follow these simple steps:
- Take a moment to inspect the old light bulb. Look for any signs of damage or discoloration. If the bulb appears to be broken or damaged, handle it with caution to avoid injury.
- Gently grasp the base of the light bulb and firmly twist it counterclockwise. This should loosen the bulb from the socket.
- Continue twisting the light bulb until it is completely detached from the socket. Be careful not to apply too much force, as this could cause the bulb to break.
- Once the old light bulb is removed, set it aside for proper disposal. You can place it in a sealed bag or wrap it in newspaper to prevent injury.
Great job! You have successfully removed the old light bulb. Now, let’s move on to the next step: replacing it with a new one.
Make sure to turn off the power to the fan light before attempting to change the bulb. Use a step stool or ladder for reach, and wear gloves for safety. Check the wattage and size of the old bulb before purchasing a replacement.
Step 4: Replace with a New Light Bulb
Now that you have removed the old light bulb, it’s time to replace it with a new one. Follow these steps to ensure a successful replacement:
- Take your new light bulb out of its packaging. Make sure it is the correct type and wattage for your bathroom fan.
- Inspect the socket where the old bulb was located. Ensure that it is clean and free from any debris or dust. If necessary, use a soft cloth or tissue to wipe away any dirt.
- Hold the new light bulb by the base and carefully align the threads with the socket.
- Gently insert the new bulb into the socket and twist it clockwise. Continue twisting until the bulb is securely in place. Be careful not to overtighten, as this could damage the bulb or the socket.
- Once the new bulb is properly installed, give it a gentle tug to ensure that it is securely seated in the socket.
Great! You have successfully replaced the old light bulb with a new one. Now, let’s proceed to the next step: reattaching the cover of the fan light.
Step 5: Reattach the Cover of the Fan Light
With the new light bulb securely in place, the next step is to reattach the cover of the fan light. Follow these steps to ensure a proper reattachment:
- Take the cover that you removed earlier and align it with the fan housing.
- If there were screws involved in the removal process, gently place the cover back onto the fan housing and line up the screw holes.
- Insert the screws back into the respective holes and use a Phillips screwdriver to tighten them. Be careful not to overtighten to avoid damaging the cover or the fan housing.
- If there were clips or a release latch, carefully position the cover back onto the fan housing. Make sure the clips or latch align correctly with the corresponding slots or latches on the fan housing.
- Press down firmly or slide the cover into place until you hear or feel it click or latch back into position.
Well done! You have successfully reattached the cover of the fan light. Now, let’s move on to the final step: turning the power back on.
Step 6: Turn the Power Back On
Now that you have completed the process of replacing the light bulb and reattaching the cover, it’s time to turn the power back on. Here’s what you need to do:
- Return to the electrical panel where you previously switched off the breaker for the bathroom.
- Locate the breaker that corresponds to the bathroom and switch it back to the “on” position.
- Once you have turned the breaker back on, give it a moment to restore power to the bathroom.
- Now, head back to the bathroom and test the light switch to ensure that the new light bulb is working properly.
Congratulations! You have successfully changed the light bulb in your bathroom fan. The fan should now be properly illuminated, providing you with adequate lighting in your bathroom.
Remember, if you encounter any issues or are unsure about any step in the process, it is always best to seek assistance from a professional electrician. Your safety should always be the top priority.
We hope this guide has been helpful in navigating the process of changing the light bulb in your bathroom fan. Enjoy your well-lit bathroom!
Conclusion
Changing the light bulb in your bathroom fan is a straightforward task that you can easily accomplish on your own. By following the step-by-step guide outlined in this article, you can safely and effectively replace the bulb, ensuring that your bathroom fan continues to provide proper lighting and ventilation.
Remember to always prioritize safety when working with electrical components. Before starting any work, make sure to turn off the power to the bathroom and double-check that it is indeed switched off. If you are unsure or uncomfortable at any point during the process, it is advisable to seek the assistance of a professional electrician.
Throughout the steps, it is important to handle the light bulbs with care, both when removing the old one and when installing the new one. Take the time to inspect the bulbs for any damage and dispose of them properly to prevent injury.
Once the new bulb is installed and the cover of the fan light is reattached, don’t forget to turn the power back on and test the light switch to ensure that everything is in proper working order.
We hope this guide has provided you with the knowledge and confidence to change the light bulb in your bathroom fan. It’s a simple task that can make a significant difference in the lighting and ambiance of your bathroom. So go ahead and give your bathroom fan the brightness it deserves!
Now that you've mastered changing a bathroom fan light bulb, why stop there? Your bathroom could probably use a fresh look. If you're curious about how long updating this space might take, our guide on bathroom renovations is just for you. We cover everything from timelines to tips, ensuring you're well-prepared to tackle that next big project. Don't miss out on transforming your bathroom into a refreshing new space!
Frequently Asked Questions about How To Change Bathroom Fan Light Bulb
Was this page helpful?
At Storables.com, we guarantee accurate and reliable information. Our content, validated by Expert Board Contributors, is crafted following stringent Editorial Policies. We're committed to providing you with well-researched, expert-backed insights for all your informational needs.


0 thoughts on “How To Change Bathroom Fan Light Bulb”