Home>Articles>How To Change Light Bulb In A Harbor Breeze Ceiling Fan
Articles
How To Change Light Bulb In A Harbor Breeze Ceiling Fan
Modified: October 19, 2024
Learn how to change the light bulb in your Harbor Breeze ceiling fan with our helpful articles. Ensure a well-illuminated space with easy-to-follow instructions.
(Many of the links in this article redirect to a specific reviewed product. Your purchase of these products through affiliate links helps to generate commission for Storables.com, at no extra cost. Learn more)
Introduction
Welcome to our comprehensive guide on how to change a light bulb in a Harbor Breeze ceiling fan. Lighting plays a crucial role in creating the ambiance of any space, and it is no different when it comes to ceiling fans. A fully functioning and well-lit ceiling fan not only adds charm and functionality to a room but also keeps it cool during hot summer months. However, over time, light bulbs in ceiling fans may need replacement due to burnout or other issues.
In this article, we will walk you through the step-by-step process of changing the light bulb in a Harbor Breeze ceiling fan. Whether you are a DIY enthusiast or a novice, this guide aims to make the task simple and hassle-free. Before we dive into the process, it is essential to keep in mind some necessary safety precautions to ensure your well-being throughout the project.
Please note that this guide is specifically tailored for Harbor Breeze ceiling fans. While the general steps may be applicable to other ceiling fan models as well, it is always a good idea to consult your fan’s user manual for manufacturer-specific instructions and guidelines. Let’s get started!
Key Takeaways:
- Prioritize safety by turning off the power, identifying the bulb type, and following the step-by-step process to change the light bulb in your Harbor Breeze ceiling fan. Enjoy a well-lit and safe space with these simple yet crucial steps.
- Gather the necessary tools and materials, remove the fixture cover, replace the old bulb with a new one, and test the new bulb to ensure proper functionality. By following these detailed instructions, you can successfully enhance the lighting in your space and enjoy the renewed ambiance.
Read more: How To Install Harbor Breeze Ceiling Fan
Safety Precautions
Before embarking on any home improvement project, including changing a light bulb in a ceiling fan, it is crucial to prioritize safety. Follow these safety precautions to ensure a smooth and hazard-free experience:
- Turn off the power: Before starting any work, make sure to turn off the power supply to the ceiling fan. This can be done by switching off the circuit breaker that controls the fan’s electrical connection. Double-check that the power is off by testing the fan and lights with a non-contact voltage tester.
- Allow the bulb to cool: If the light was recently in use, give it a few minutes to cool down. Handling a hot light bulb can cause burns or injuries. Take this time to gather the necessary tools and materials for the task.
- Gather the appropriate tools: Collect all the necessary tools and materials before starting the project. This typically includes a ladder or step stool to reach the ceiling fan, a non-contact voltage tester to ensure the power is off, and a new light bulb that is compatible with your Harbor Breeze ceiling fan.
- Use personal protective equipment: Wear protective gear such as gloves and safety glasses to safeguard yourself from any potential accidents. It is also a good idea to wear clothing that covers your arms and legs to prevent any scratches or burns when working around the fan.
- Read the fan’s user manual: Before attempting any repairs or maintenance on your Harbor Breeze ceiling fan, carefully read the manufacturer’s user manual for specific instructions and safety guidelines. This will provide you with valuable information on how to properly handle and maintain the fan.
- Get assistance if needed: If you have any doubts about your ability to safely complete the task, it is always wise to seek assistance from a qualified professional or someone experienced in handling electrical work. Safety should be the top priority.
By following these safety precautions, you can ensure a secure working environment and reduce the risk of accidents or injuries. Now that we have covered the safety measures, let’s move on to gathering the required tools and materials for the task.
Gathering Tools and Materials
Before you begin changing the light bulb in your Harbor Breeze ceiling fan, it is essential to gather the necessary tools and materials. Having everything prepared in advance will make the process smoother and more efficient. Here’s a list of items you will need:
- Ladder or step stool: Depending on the height of your ceiling fan, you may need a ladder or a step stool to safely access the fan.
- Non-contact voltage tester: This handy tool will help you ensure that the power supply to the ceiling fan is turned off. It is crucial to double-check before working on any electrical components.
- New light bulb: Consider the appropriate bulb type and wattage for your specific Harbor Breeze ceiling fan. Consult the fan’s user manual for the recommended bulb specifications.
- Gloves and safety glasses: To protect your hands and eyes from any potential accidents, wear gloves and safety glasses throughout the process.
- User manual: Keep the Harbor Breeze ceiling fan’s user manual handy for reference. It provides valuable information specific to your fan model.
- Protective covering: Consider using a drop cloth or plastic sheet to cover nearby furniture or floor surfaces to prevent any potential damage during the bulb replacement process.
- Additional tools: Depending on your fan’s design, you may need a screwdriver, pliers, or a wrench to remove the fixture cover and access the light bulb.
Make sure you have all these items readily available before you start working on your ceiling fan. This will save you time and minimize interruptions during the process. Now that you have gathered your tools and materials let’s move on to identifying the bulb type in your Harbor Breeze ceiling fan.
Identifying the Bulb Type
Before you can change the light bulb in your Harbor Breeze ceiling fan, it is important to identify the type of bulb used in your specific fan model. Different ceiling fans may require different bulb types and wattages. Here are some steps to help you identify the bulb type:
- Refer to the user manual: The first and easiest way to determine the bulb type is by referring to the user manual that came with your Harbor Breeze ceiling fan. The user manual will provide specific information about the type, size, and wattage of the bulb recommended for your fan.
- Check the existing bulb: Inspect the existing bulb in your ceiling fan. Remove the fixture cover to access the bulb. The bulb may have the information printed on the base or side, indicating the type and wattage. Take note of these details for purchasing a replacement bulb.
- Take a picture or note the specifications: If you are unable to find the bulb type information through the user manual or on the existing bulb, consider taking a picture of the bulb or writing down its specifications, such as the shape, size, and wattage. This will help you match it with the appropriate replacement at a hardware store or online retailer.
- Consult professionals or customer support: If you are still unsure about the bulb type after trying the above steps, consider contacting Harbor Breeze customer support or seeking assistance from a professional electrician. They will be able to guide you in identifying the correct bulb type for your ceiling fan.
Once you have identified the bulb type and wattage, you can proceed to the next step of removing the fixture cover to access the old bulb. Refer to your user manual or the following sections of this guide for instructions on removing the fixture cover and replacing the light bulb in your Harbor Breeze ceiling fan.
Removing the Fixture Cover
Now that you have identified the bulb type in your Harbor Breeze ceiling fan, it’s time to remove the fixture cover to access the old bulb. Follow these steps to successfully remove the fixture cover:
- Ensure the power is turned off: Before starting any work, make sure to turn off the power supply to the ceiling fan by switching off the appropriate circuit breaker. This step is essential for your safety.
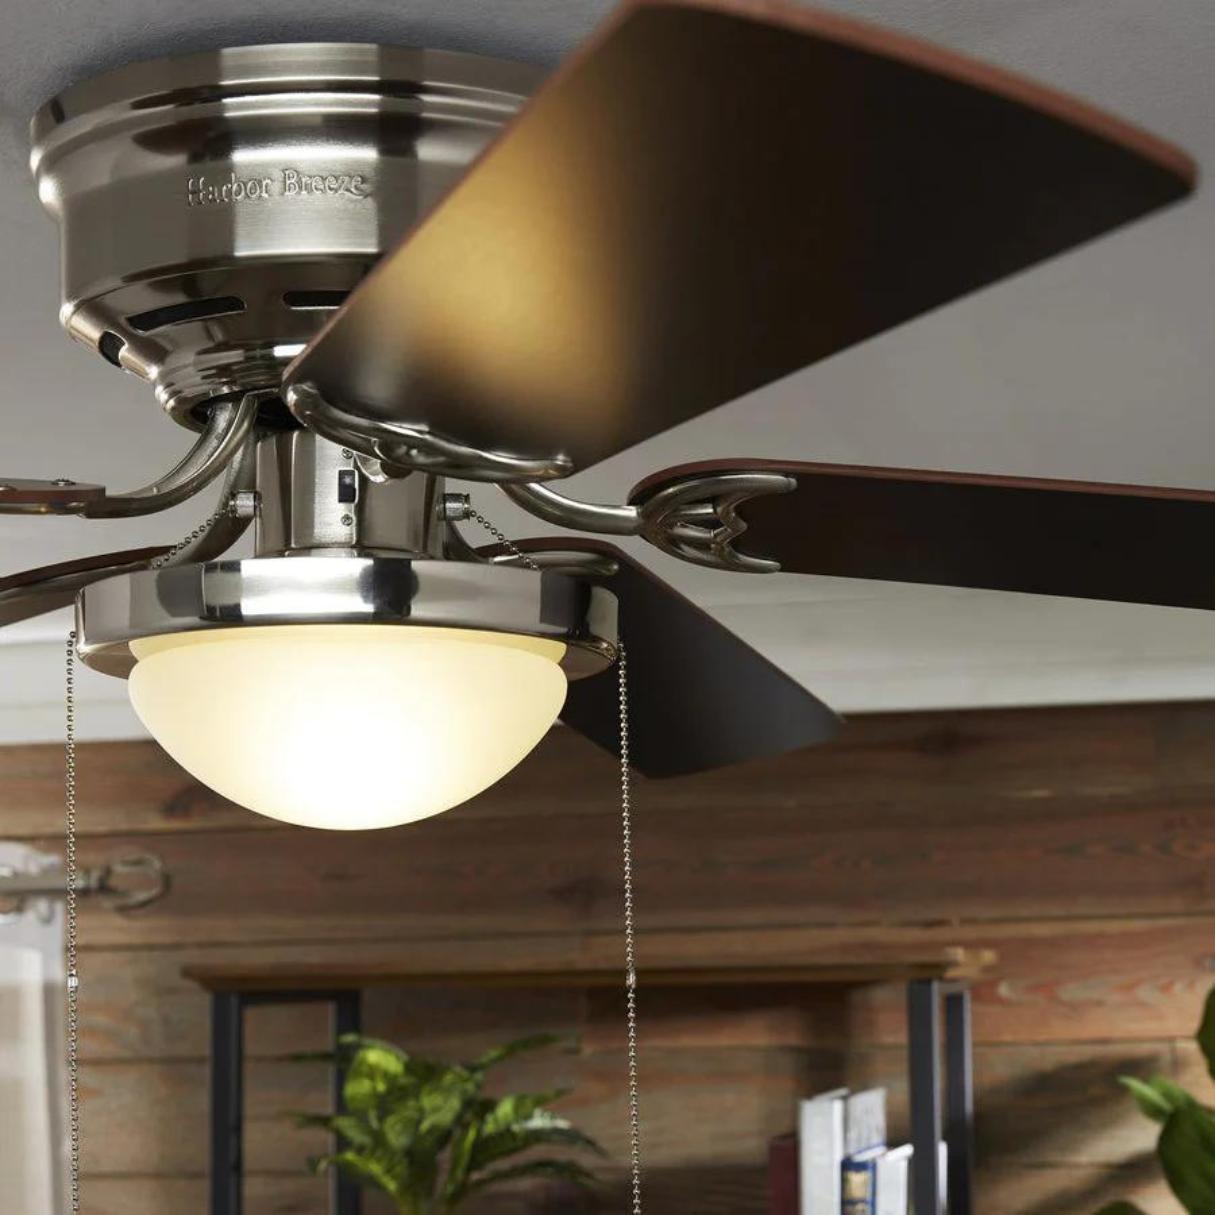
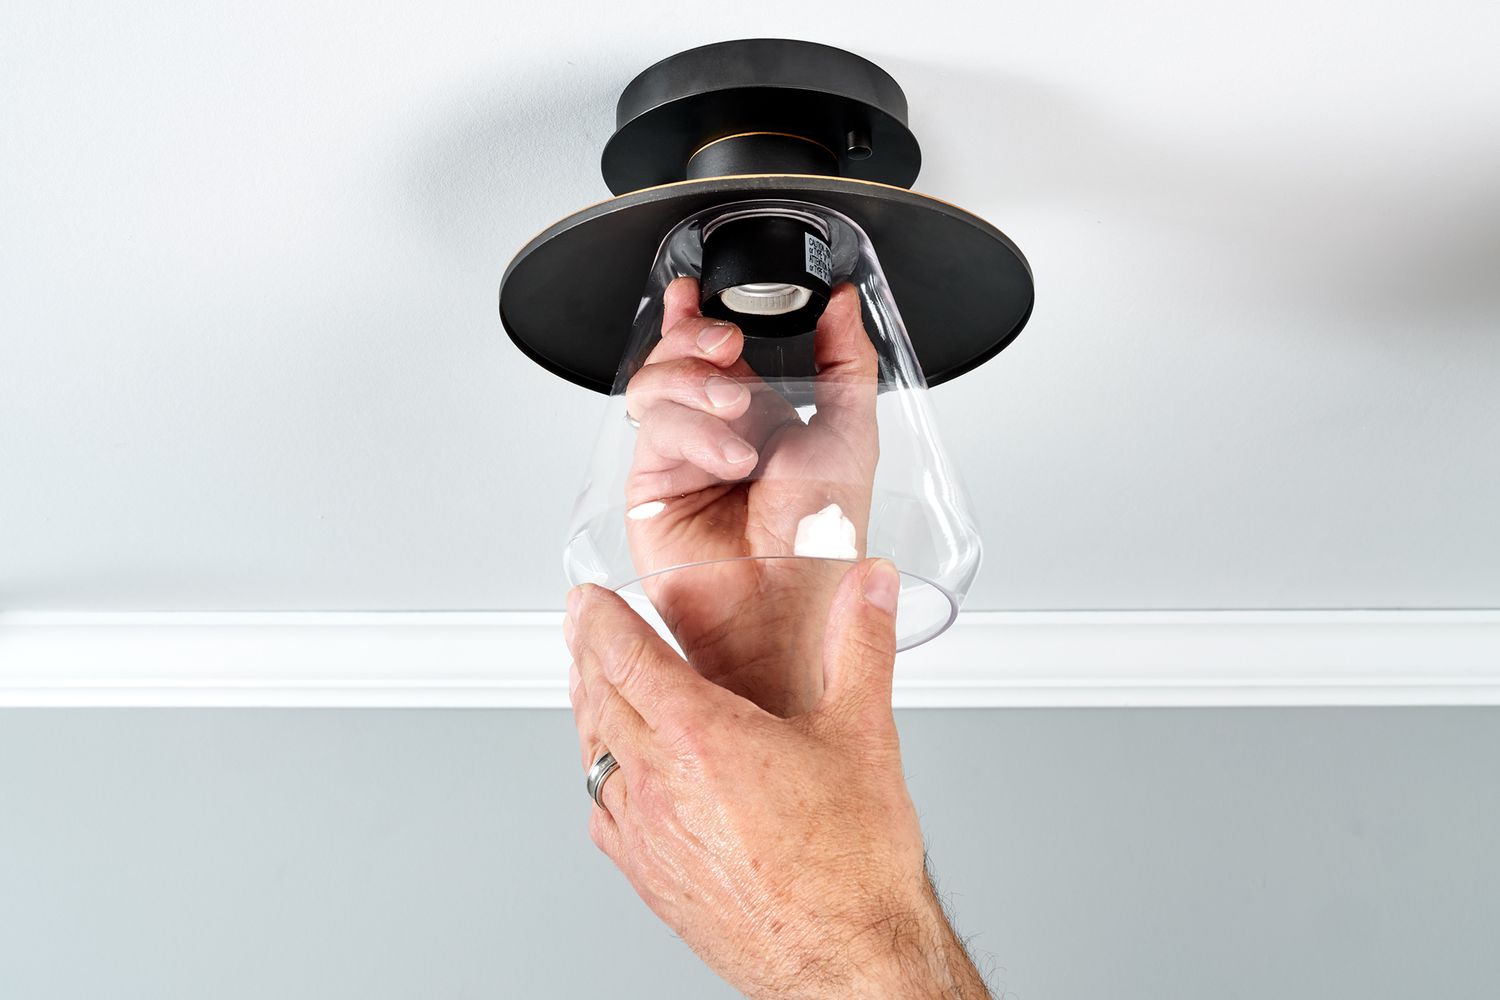
- Locate the fixture cover: The fixture cover is the part of the ceiling fan that surrounds the light bulb. It can usually be found at the bottom of the fan, beneath the blades. Some fans may have a decorative cap or globe that needs to be removed first before accessing the fixture cover.
- Check for screws or fasteners: Examine the fixture cover to see if it is held in place by screws or fasteners. Use a screwdriver or pliers to carefully remove any screws or loosen the fasteners, if present. Be careful not to apply excessive force, as it may damage the cover or other components of the fan.
- Twist or unclip the fixture cover: Depending on the design of your Harbor Breeze ceiling fan, the fixture cover may need to be twisted counterclockwise or unclipped to detach it from the fan. Follow the instructions in your user manual or examine the cover closely to determine the correct method.
- Remove the fixture cover: Once the screws are removed or the cover is fully twisted or unclipped, gently pull it down to detach it from the fan. Keep a firm grip to prevent any accidental dropping or damage to the cover.
- Set aside the fixture cover in a safe place: Place the removed fixture cover in a secure location away from the work area to avoid any potential damage or misplacement. It is essential to handle the cover with care, as some models may be fragile or made of delicate materials.
With the fixture cover successfully removed, you can now proceed to the next step of removing the old bulb from your Harbor Breeze ceiling fan. Continue reading or refer to your user manual for instructions on how to safely handle and install the new bulb.
Make sure the power to the fan is turned off before attempting to change the light bulb. Use a stable step stool or ladder to reach the bulb, and be sure to use the correct type and wattage as recommended by the manufacturer.
Read more: How To Remove A Harbor Breeze Ceiling Fan
Removing the Old Bulb
Now that you have successfully removed the fixture cover, it’s time to remove the old bulb from your Harbor Breeze ceiling fan. Follow these steps to safely remove the old bulb:
- Ensure the power is turned off: Before you begin, make sure to turn off the power supply to the ceiling fan by switching off the appropriate circuit breaker. This step is crucial for your safety.
- Allow the bulb to cool: If the light was recently in use, give it a few minutes to cool down. Handling a hot bulb can cause burns or injuries. It’s best to wait until the bulb is no longer hot to the touch.
- Securely grip the bulb: Using a gentle but firm grip, carefully hold the base of the old bulb. Ensure that your hands are dry to prevent any accidental slippage.
- Twist counterclockwise to remove: Most light bulbs in ceiling fans are installed by twisting them into place. To remove the old bulb, rotate it counterclockwise until it is loose enough to be pulled out.
- Remove the old bulb: Once the old bulb is loosened, gently pull it straight out from the socket. Take care not to apply excessive force or twist it forcefully, as that may cause damage to the bulb or the socket.
- Set aside the old bulb: Place the removed bulb in a safe location away from the work area. Consider wrapping it in a sheet of newspaper or a small towel to prevent breakage and to ensure safe disposal.
With the old bulb successfully removed, you can now proceed to the next step of installing the new bulb in your Harbor Breeze ceiling fan. Keep reading or refer to your user manual for instructions on how to properly handle and install the new bulb.
Installing the New Bulb
Now that you have removed the old bulb, it’s time to install the new bulb in your Harbor Breeze ceiling fan. Follow these steps to safely and properly install the new bulb:
- Ensure the power is turned off: As a safety precaution, make sure the power supply to the ceiling fan is turned off. This can be done by switching off the appropriate circuit breaker.
- Inspect the socket: Take a moment to inspect the socket where the old bulb was previously installed. Look for any signs of damage or debris that may interfere with the new bulb’s installation. If necessary, clean the socket using a dry cloth or a small brush.
- Grip the new bulb: Hold the new bulb by the base, making sure not to touch the glass part of the bulb. Oils from your fingers can create hot spots on the glass, reducing the bulb’s lifespan. If you accidentally touch the glass, clean it with a cloth to remove any fingerprints or oils.
- Align the new bulb: Align the base of the new bulb with the socket in the fan. Make sure the prongs or screw threads on the bulb match the corresponding slots or threads in the socket.
- Insert and twist clockwise: Gently push the new bulb into the socket and twist it clockwise until it is securely in place. Be careful not to overtighten the bulb, as this can cause damage to the socket.
- Test the new bulb: Once the new bulb is installed, turn on the power supply to the ceiling fan and switch on the light. Verify that the bulb is functioning properly and emitting the desired amount of light. If the bulb does not turn on, double-check the installation to ensure it is properly secured in the socket.
Note: Some Harbor Breeze ceiling fans may have specific instructions for the installation of the bulb. In such cases, refer to your user manual for any manufacturer-specified steps or recommendations.
With the new bulb successfully installed and tested, you are now ready to replace the fixture cover. Continue reading or refer to the following section for instructions on how to reinstall the fixture cover on your Harbor Breeze ceiling fan.
Replacing the Fixture Cover
Now that you have installed the new bulb, it’s time to replace the fixture cover on your Harbor Breeze ceiling fan. Follow these steps to securely and properly reinstall the fixture cover:
- Ensure the power is turned off: As a safety precaution, make sure the power supply to the ceiling fan is turned off by switching off the appropriate circuit breaker.
- Hold the fixture cover: Take the fixture cover that you removed earlier and hold it securely. Ensure that you have a firm grip to prevent any accidental dropping or damage to the cover.
- Align the cover: Align the fixture cover with the corresponding slots or holes on the ceiling fan. Make sure it is positioned correctly and evenly over the light bulb and the socket.
- Insert the cover: Gently push the cover upward or into place, depending on the design of your ceiling fan. The cover should fit snugly and securely without any wobbling or looseness.
- Secure the cover: If the fixture cover is held in place by screws or fasteners, use a screwdriver or pliers to tighten them back into position. Be careful not to overtighten, as this may cause damage to the cover or the fan housing. If there are no screws or fasteners, ensure that the cover is firmly pressed against the fan.
With the fixture cover properly replaced, you can now move on to the final step: testing the new bulb to ensure it is functioning correctly in your Harbor Breeze ceiling fan. Read on for instructions on how to test the new bulb or refer to your user manual for any additional recommendations.
Testing the New Bulb
After successfully replacing the fixture cover and installing the new bulb in your Harbor Breeze ceiling fan, it’s important to test the bulb to ensure it is functioning properly. Follow these steps to test the new bulb:
- Ensure the power is turned on: Make sure that the power supply to the ceiling fan is turned on by switching on the appropriate circuit breaker. It’s important to have power running to the fan to test the light bulb.
- Flip the light switch: Locate the light switch that controls the fan’s light function. Flip the switch to the “on” position to activate the light. Depending on the design of your fan, the switch may be located on the fan itself or on a wall switch.
- Observe the bulb: Once you’ve switched on the light, observe the new bulb closely. Check for any signs of flickering, dimness, or abnormal behavior. The bulb should emit a steady and consistent light without any issues.
- Adjust the dimmer, if applicable: If your Harbor Breeze ceiling fan is equipped with a dimmer switch, test the bulb at different dimming levels. Ensure that the bulb responds accurately to the dimmer adjustments and maintains a steady light output.
- Listen for any unusual noises: While the light is on, listen for any abnormal humming, buzzing, or other noises coming from the fan or the light fixture. Unusual noises may indicate a potential issue that should be addressed.
- Replace if necessary: If the new bulb fails to light up, flickers, or exhibits any anomalies, it may be defective or incompatible. In such cases, switch off the power, carefully remove the fixture cover, and double-check the bulb installation. If the problem persists, consult the bulb’s packaging or manufacturer instructions for further troubleshooting or consider replacing the bulb.
By following these steps and carefully testing the new bulb, you can ensure that your Harbor Breeze ceiling fan is properly illuminated and functioning as intended. If the bulb passes the test and emits a satisfactory amount of light, congratulations! You’ve successfully changed the light bulb in your ceiling fan.
Remember, always exercise caution when working with electricity and follow proper safety procedures. If you encounter any difficulties or uncertainties, it is recommended to consult a professional electrician for assistance. Enjoy the improved lighting in your space provided by your newly installed bulb!
Read more: Who Makes Harbor Breeze Ceiling Fans
Conclusion
Congratulations! You have successfully completed the process of changing the light bulb in your Harbor Breeze ceiling fan. Proper lighting is essential for creating a comfortable and inviting atmosphere in any space, and with a well-functioning ceiling fan, you can enjoy both functionality and style.
Throughout this comprehensive guide, we have walked you through the step-by-step process of changing the light bulb in your Harbor Breeze ceiling fan. We discussed important safety precautions to follow, how to gather the necessary tools and materials, and how to identify the bulb type specific to your fan. We also provided detailed instructions on removing the fixture cover, removing the old bulb, installing the new bulb, and replacing the fixture cover.
Remember, always prioritize safety by turning off the power supply before working on any electrical components. Take your time, follow the provided instructions, and consult your Harbor Breeze fan’s user manual for any manufacturer-specific guidelines.
By replacing a worn-out or burnt-out bulb, you can restore the optimal lighting in your ceiling fan and create a visually appealing and functional space once again. Enjoy the renewed brightness and ambiance that your newly installed bulb provides.
Thank you for choosing our guide to help you in changing the light bulb in your Harbor Breeze ceiling fan. We hope this article has been informative and useful in guiding you through the process. If you have any further questions or need additional assistance, do not hesitate to seek help from a qualified professional or consult Harbor Breeze customer support.
Happy bulb changing and enjoy the enhanced lighting experience in your space!
Now that you've mastered changing a light bulb in your Harbor Breeze ceiling fan, why not take your home projects to the next level? Our guide on DIY home improvement offers practical advice and simple techniques to transform your living space without breaking the bank. Whether you're looking to update your kitchen, refresh your bedroom, or just give your home a new vibe, our tips will help you get there smoothly and efficiently. Don't miss out on becoming your own handyman!
Frequently Asked Questions about How To Change Light Bulb In A Harbor Breeze Ceiling Fan
Was this page helpful?
At Storables.com, we guarantee accurate and reliable information. Our content, validated by Expert Board Contributors, is crafted following stringent Editorial Policies. We're committed to providing you with well-researched, expert-backed insights for all your informational needs.


0 thoughts on “How To Change Light Bulb In A Harbor Breeze Ceiling Fan”