Home>Furniture & Design>Bathroom Accessories>How To Change A Bathroom Exhaust Fan With Light
Bathroom Accessories
How To Change A Bathroom Exhaust Fan With Light
Modified: October 20, 2024
Learn how to change a bathroom exhaust fan with light easily and efficiently. Upgrade your bathroom accessories with our step-by-step guide.
(Many of the links in this article redirect to a specific reviewed product. Your purchase of these products through affiliate links helps to generate commission for Storables.com, at no extra cost. Learn more)
Introduction
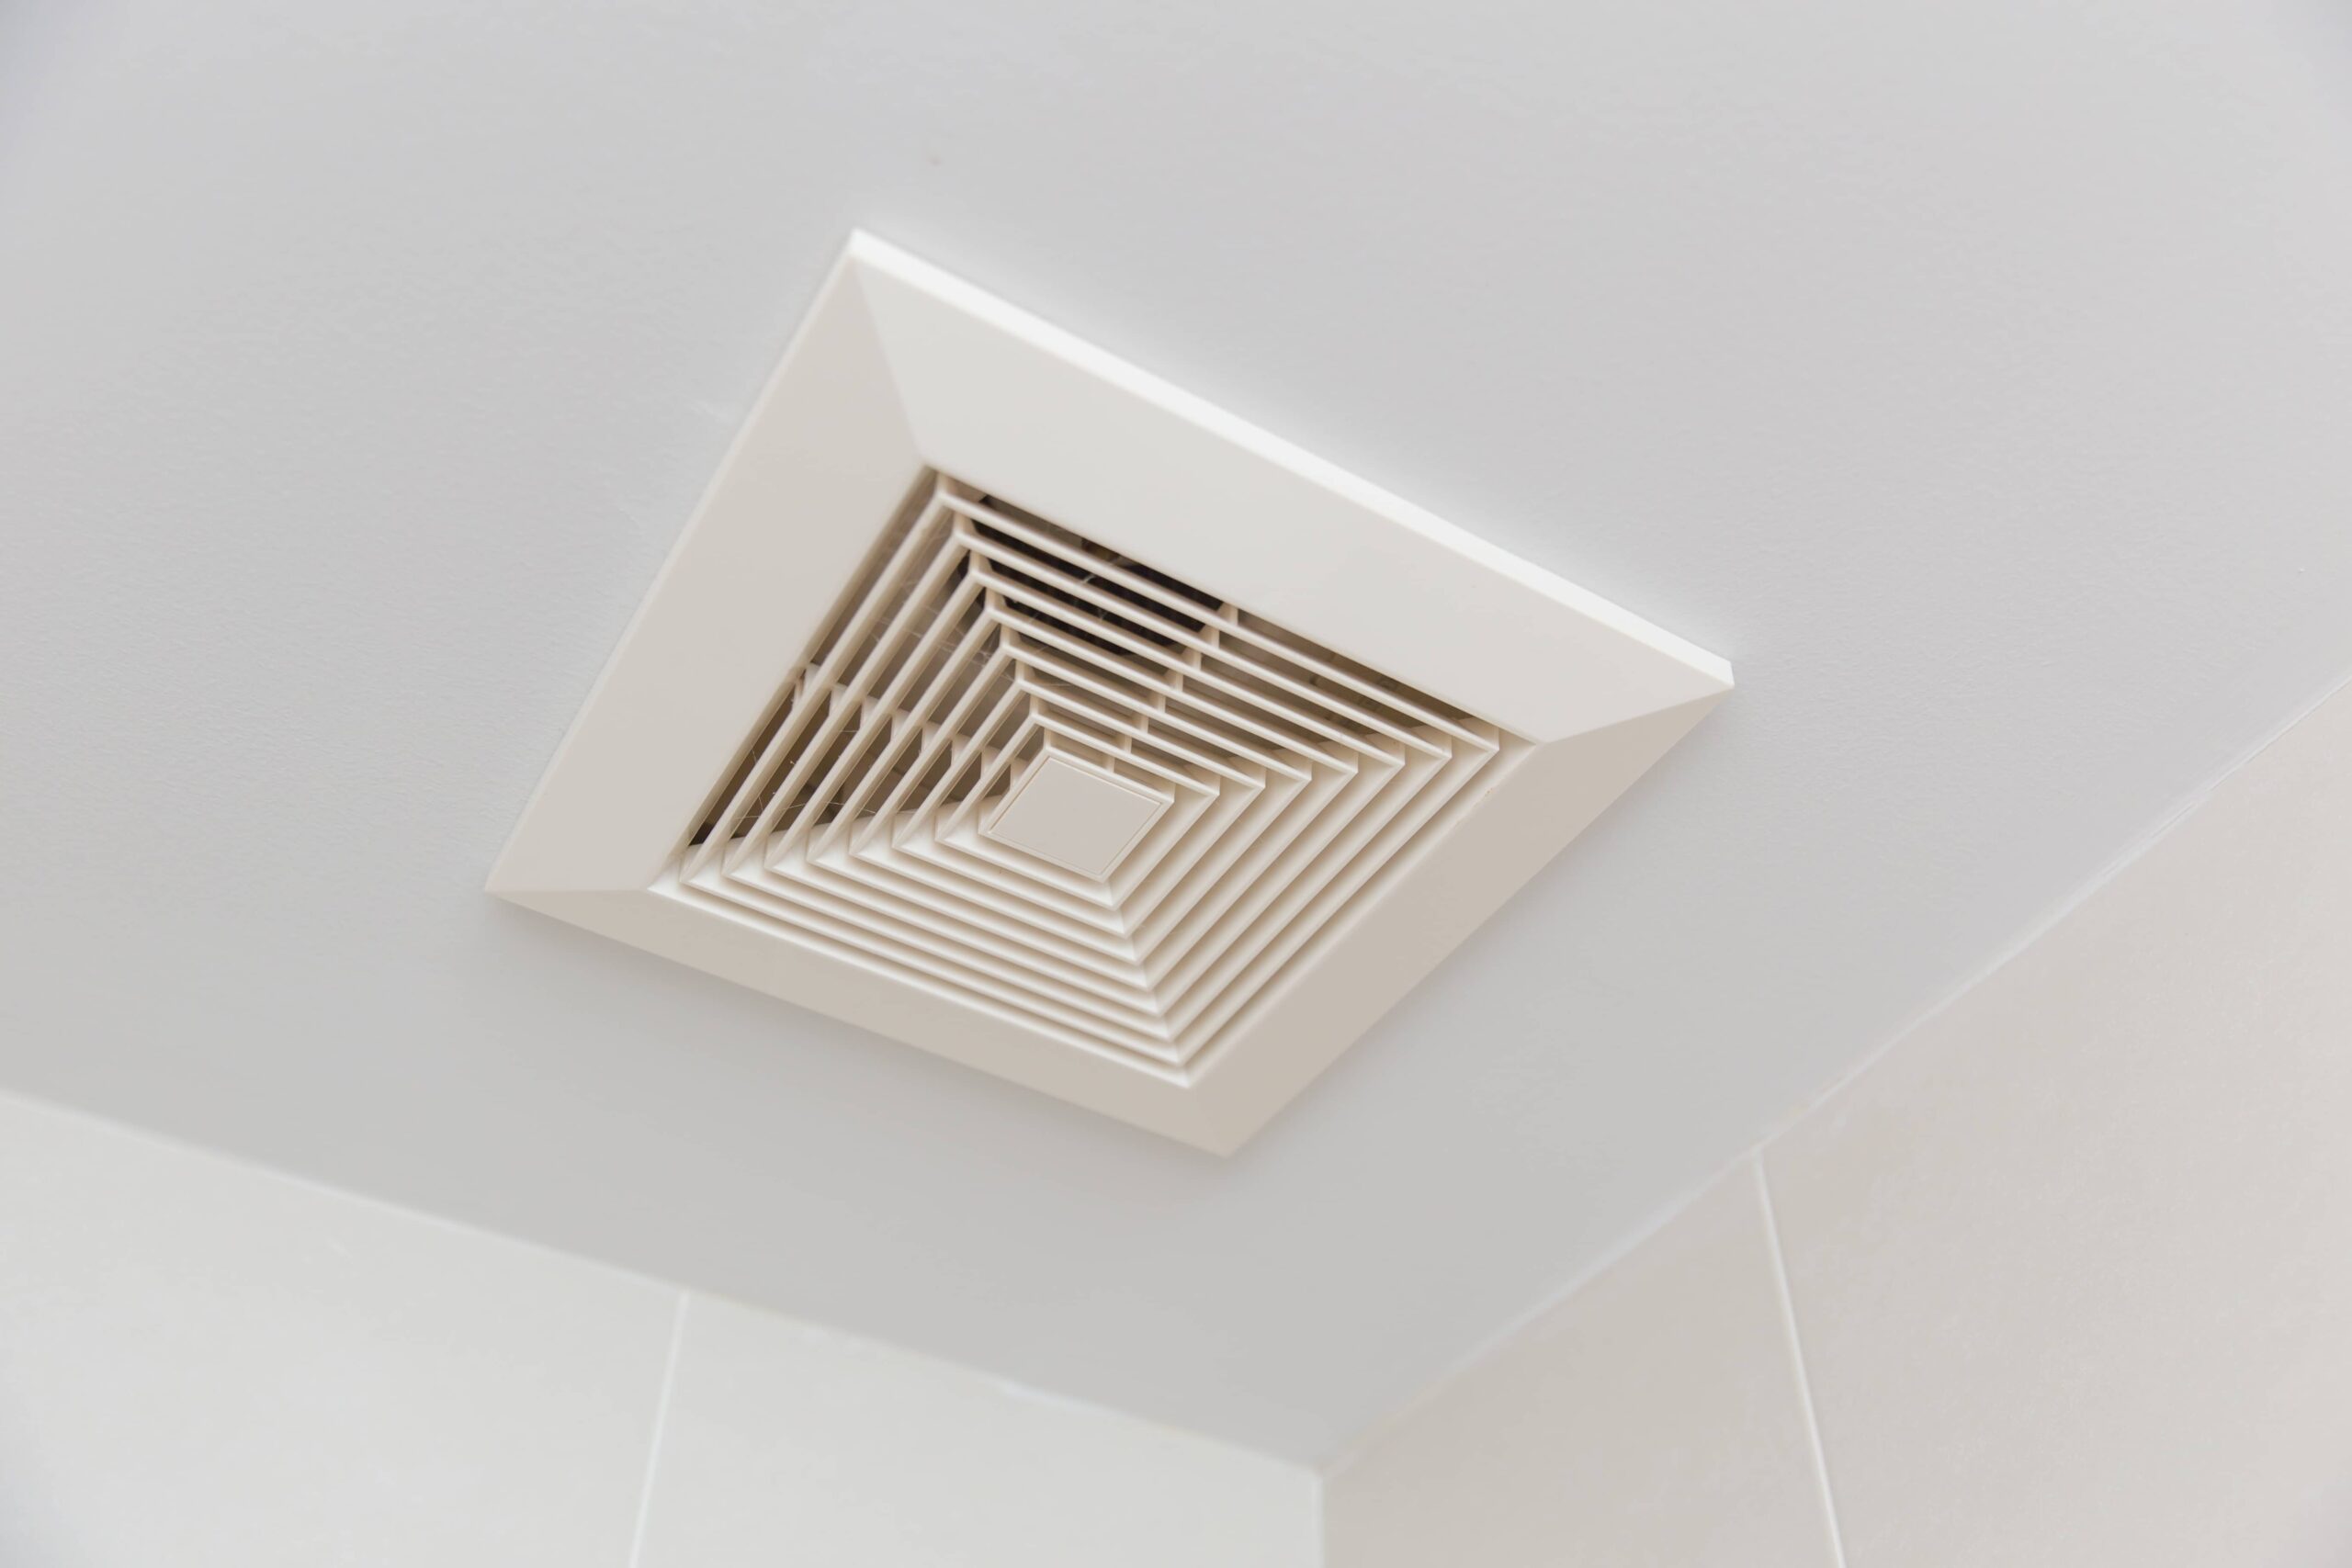
Changing a bathroom exhaust fan with a light is a practical and rewarding home improvement project that can enhance the functionality and aesthetics of your bathroom. Whether you're looking to upgrade to a more efficient model, replace a malfunctioning unit, or simply update the look of your bathroom, installing a new exhaust fan with a light can make a significant difference in the overall comfort and ambiance of the space.
A properly functioning exhaust fan is essential for maintaining good air quality in the bathroom by removing excess moisture, odors, and airborne contaminants. Additionally, the addition of a light feature can improve visibility and create a more inviting atmosphere. With the right tools, materials, and a clear understanding of the installation process, you can successfully complete this project and enjoy the benefits of a well-ventilated and well-lit bathroom.
In this comprehensive guide, we will walk you through the step-by-step process of changing a bathroom exhaust fan with a light. From turning off the power to testing the new unit, each stage of the installation will be explained in detail, providing you with the knowledge and confidence to tackle this project with ease. Whether you're a seasoned DIY enthusiast or a first-time homeowner looking to take on a new challenge, this guide will equip you with the essential information to complete the installation successfully.
Before embarking on this project, it's important to familiarize yourself with the specific requirements of your new exhaust fan with light, including its size, electrical specifications, and any additional features it may have. By taking the time to gather the necessary information and materials, you can ensure a smooth and efficient installation process.
Now, let's dive into the step-by-step instructions for changing a bathroom exhaust fan with a light, and transform your bathroom into a more comfortable and inviting space.
Key Takeaways:
- Upgrade your bathroom with a new exhaust fan and light to improve air quality and create a more inviting atmosphere. Follow the step-by-step guide for a successful DIY project.
- Prioritize safety, precision, and thorough testing when changing your bathroom exhaust fan with a light to ensure a well-integrated and reliable ventilation and lighting solution.
Read more: How To Change Bathroom Exhaust Fan
Step 1: Turn off the power
Before beginning any electrical work, it is crucial to prioritize safety by turning off the power to the existing exhaust fan and light. This step is essential to prevent the risk of electric shock and ensure a secure working environment. Here's a detailed guide on how to safely turn off the power before proceeding with the installation:
-
Locate the Circuit Breaker: Identify the circuit breaker panel in your home. This panel contains a series of switches, also known as circuit breakers, which control the flow of electricity to different areas of the house.
-
Identify the Correct Breaker: Look for the breaker that corresponds to the bathroom exhaust fan and light. In some cases, the breakers may be labeled with specific room names or functions. If the breakers are not labeled, you may need to test the switches to determine the correct one.
-
Switch Off the Breaker: Once you have identified the correct breaker, switch it to the "off" position. This action will cut off the power supply to the exhaust fan and light, ensuring that no electricity is flowing to the fixtures.
-
Verify the Power: After turning off the breaker, it's important to double-check that the power to the bathroom exhaust fan and light has been successfully disconnected. You can do this by using a non-contact voltage tester, which can detect the presence of electrical current. By verifying that the power has been effectively turned off, you can proceed with the installation with confidence.
By following these steps to turn off the power, you can create a safe working environment and minimize the risk of electrical accidents during the installation process. Prioritizing safety at this stage sets the foundation for a successful and secure transition to the next steps of replacing the bathroom exhaust fan with a light.
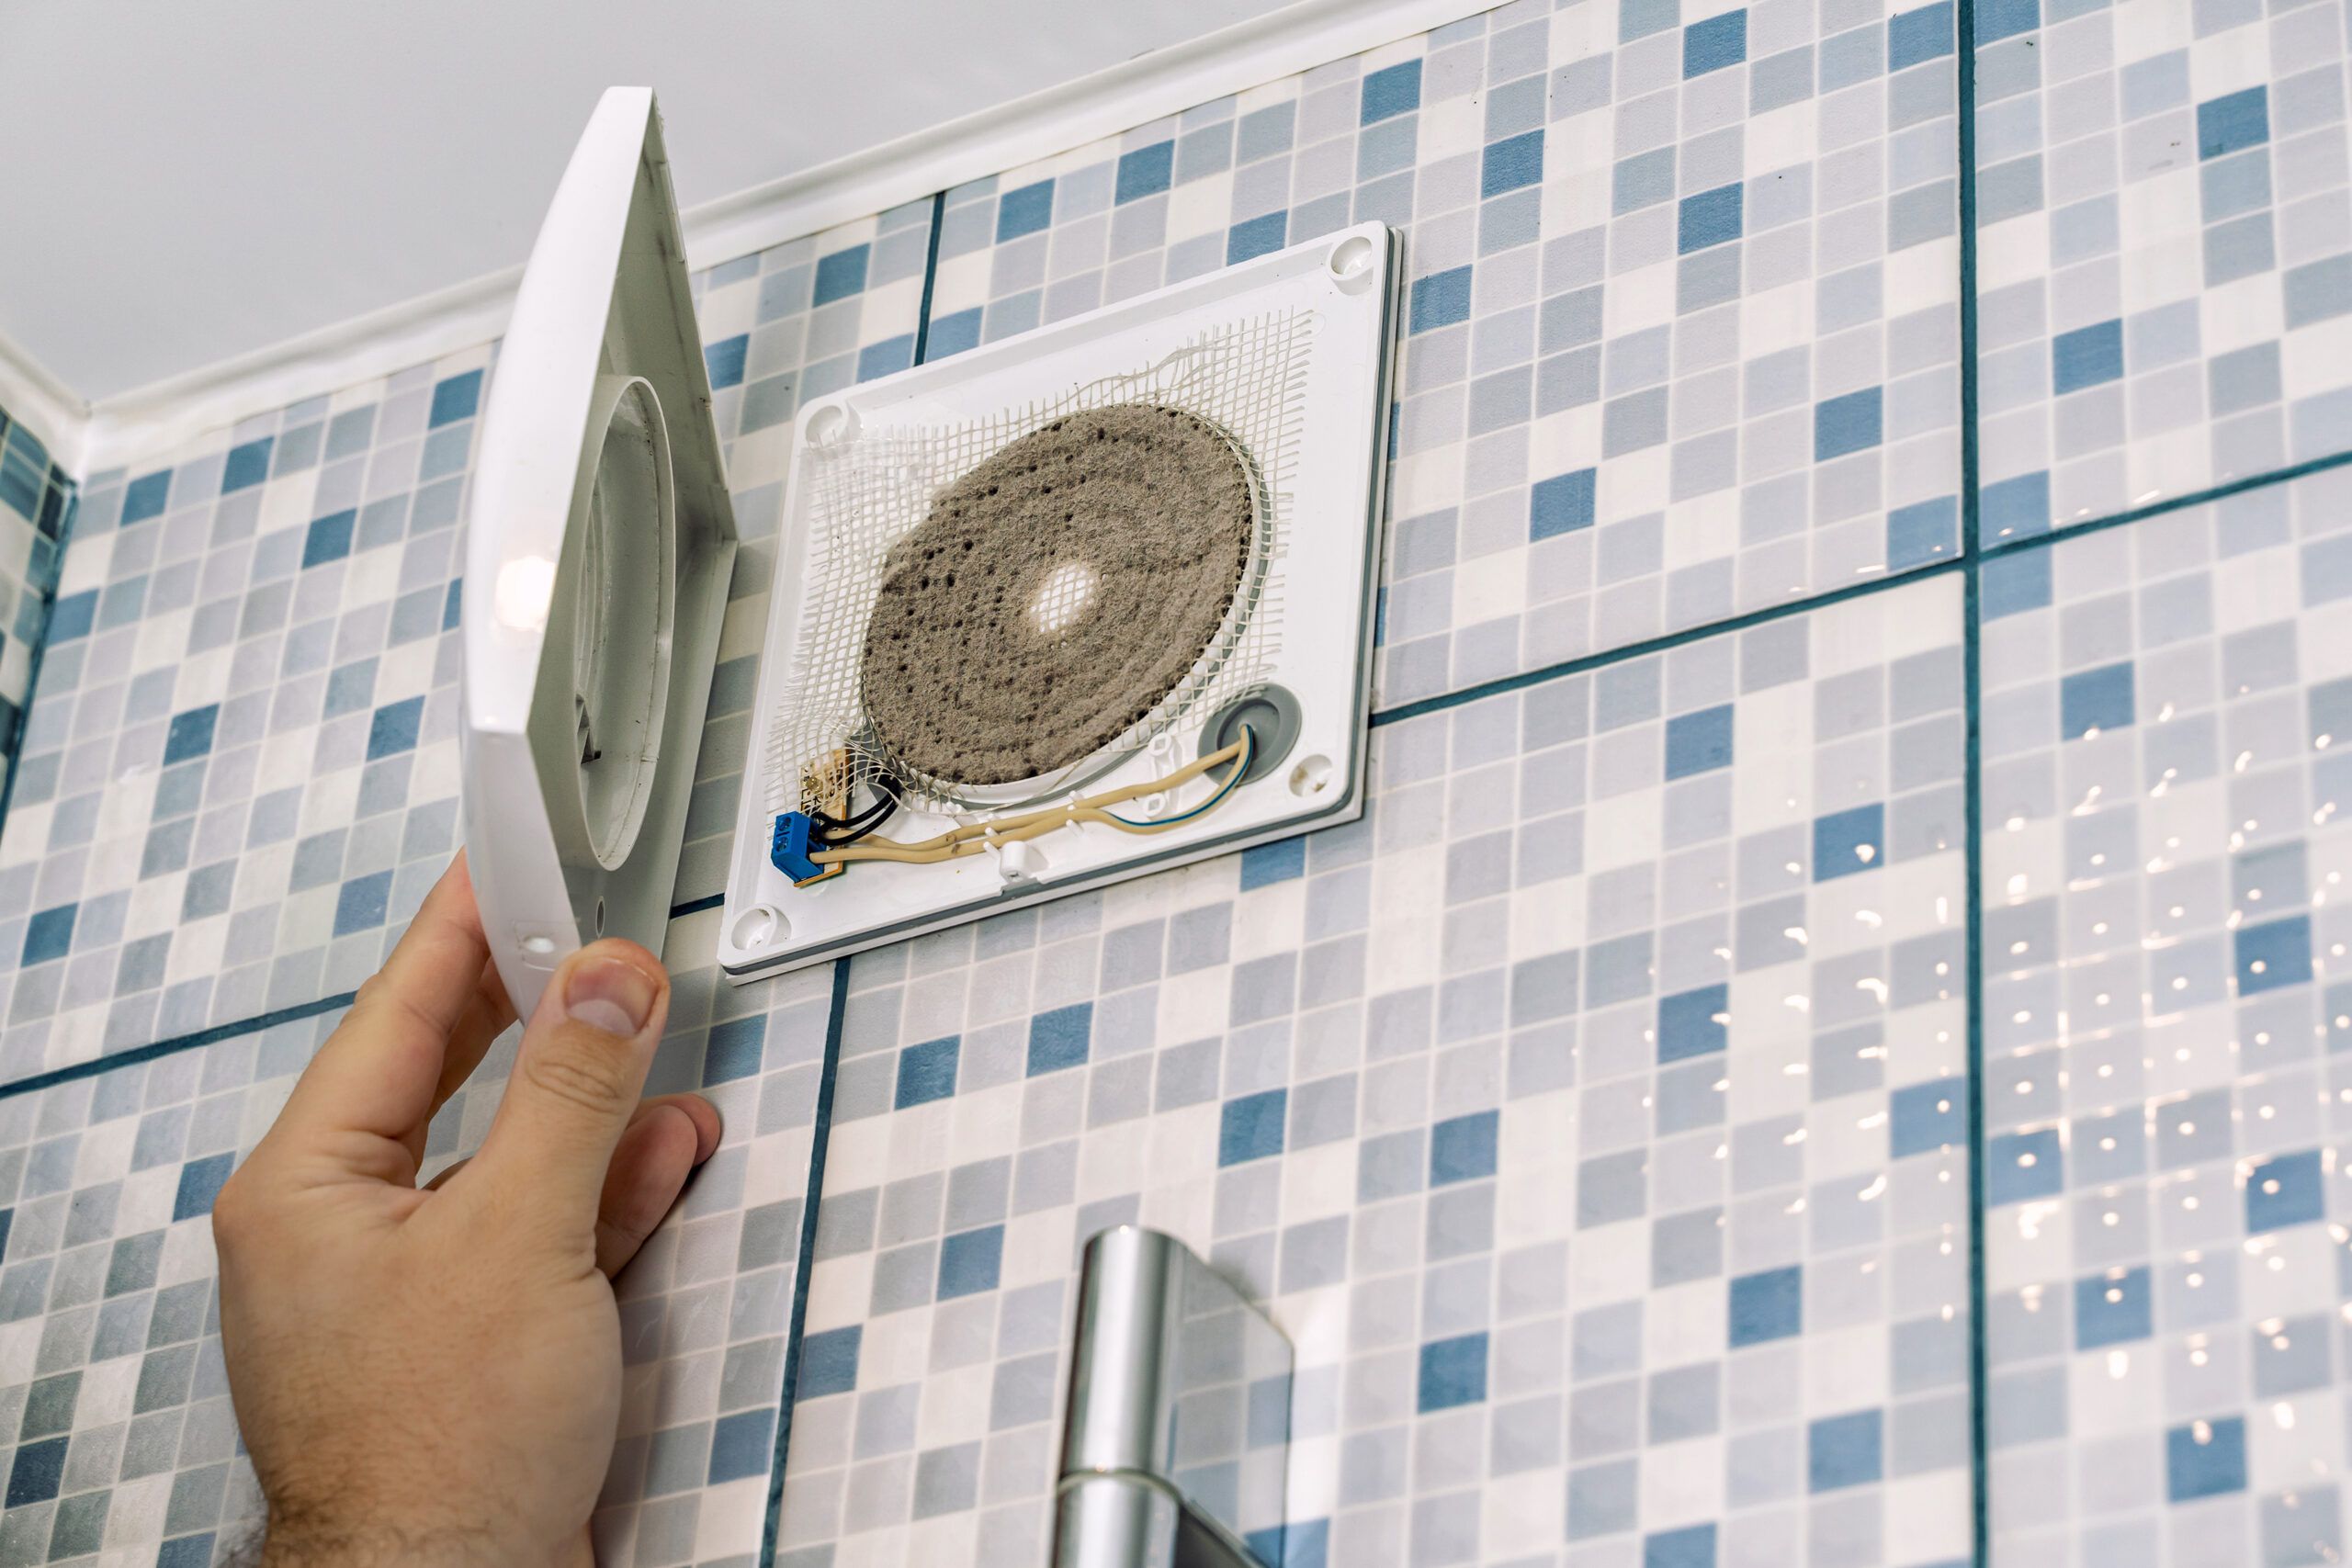
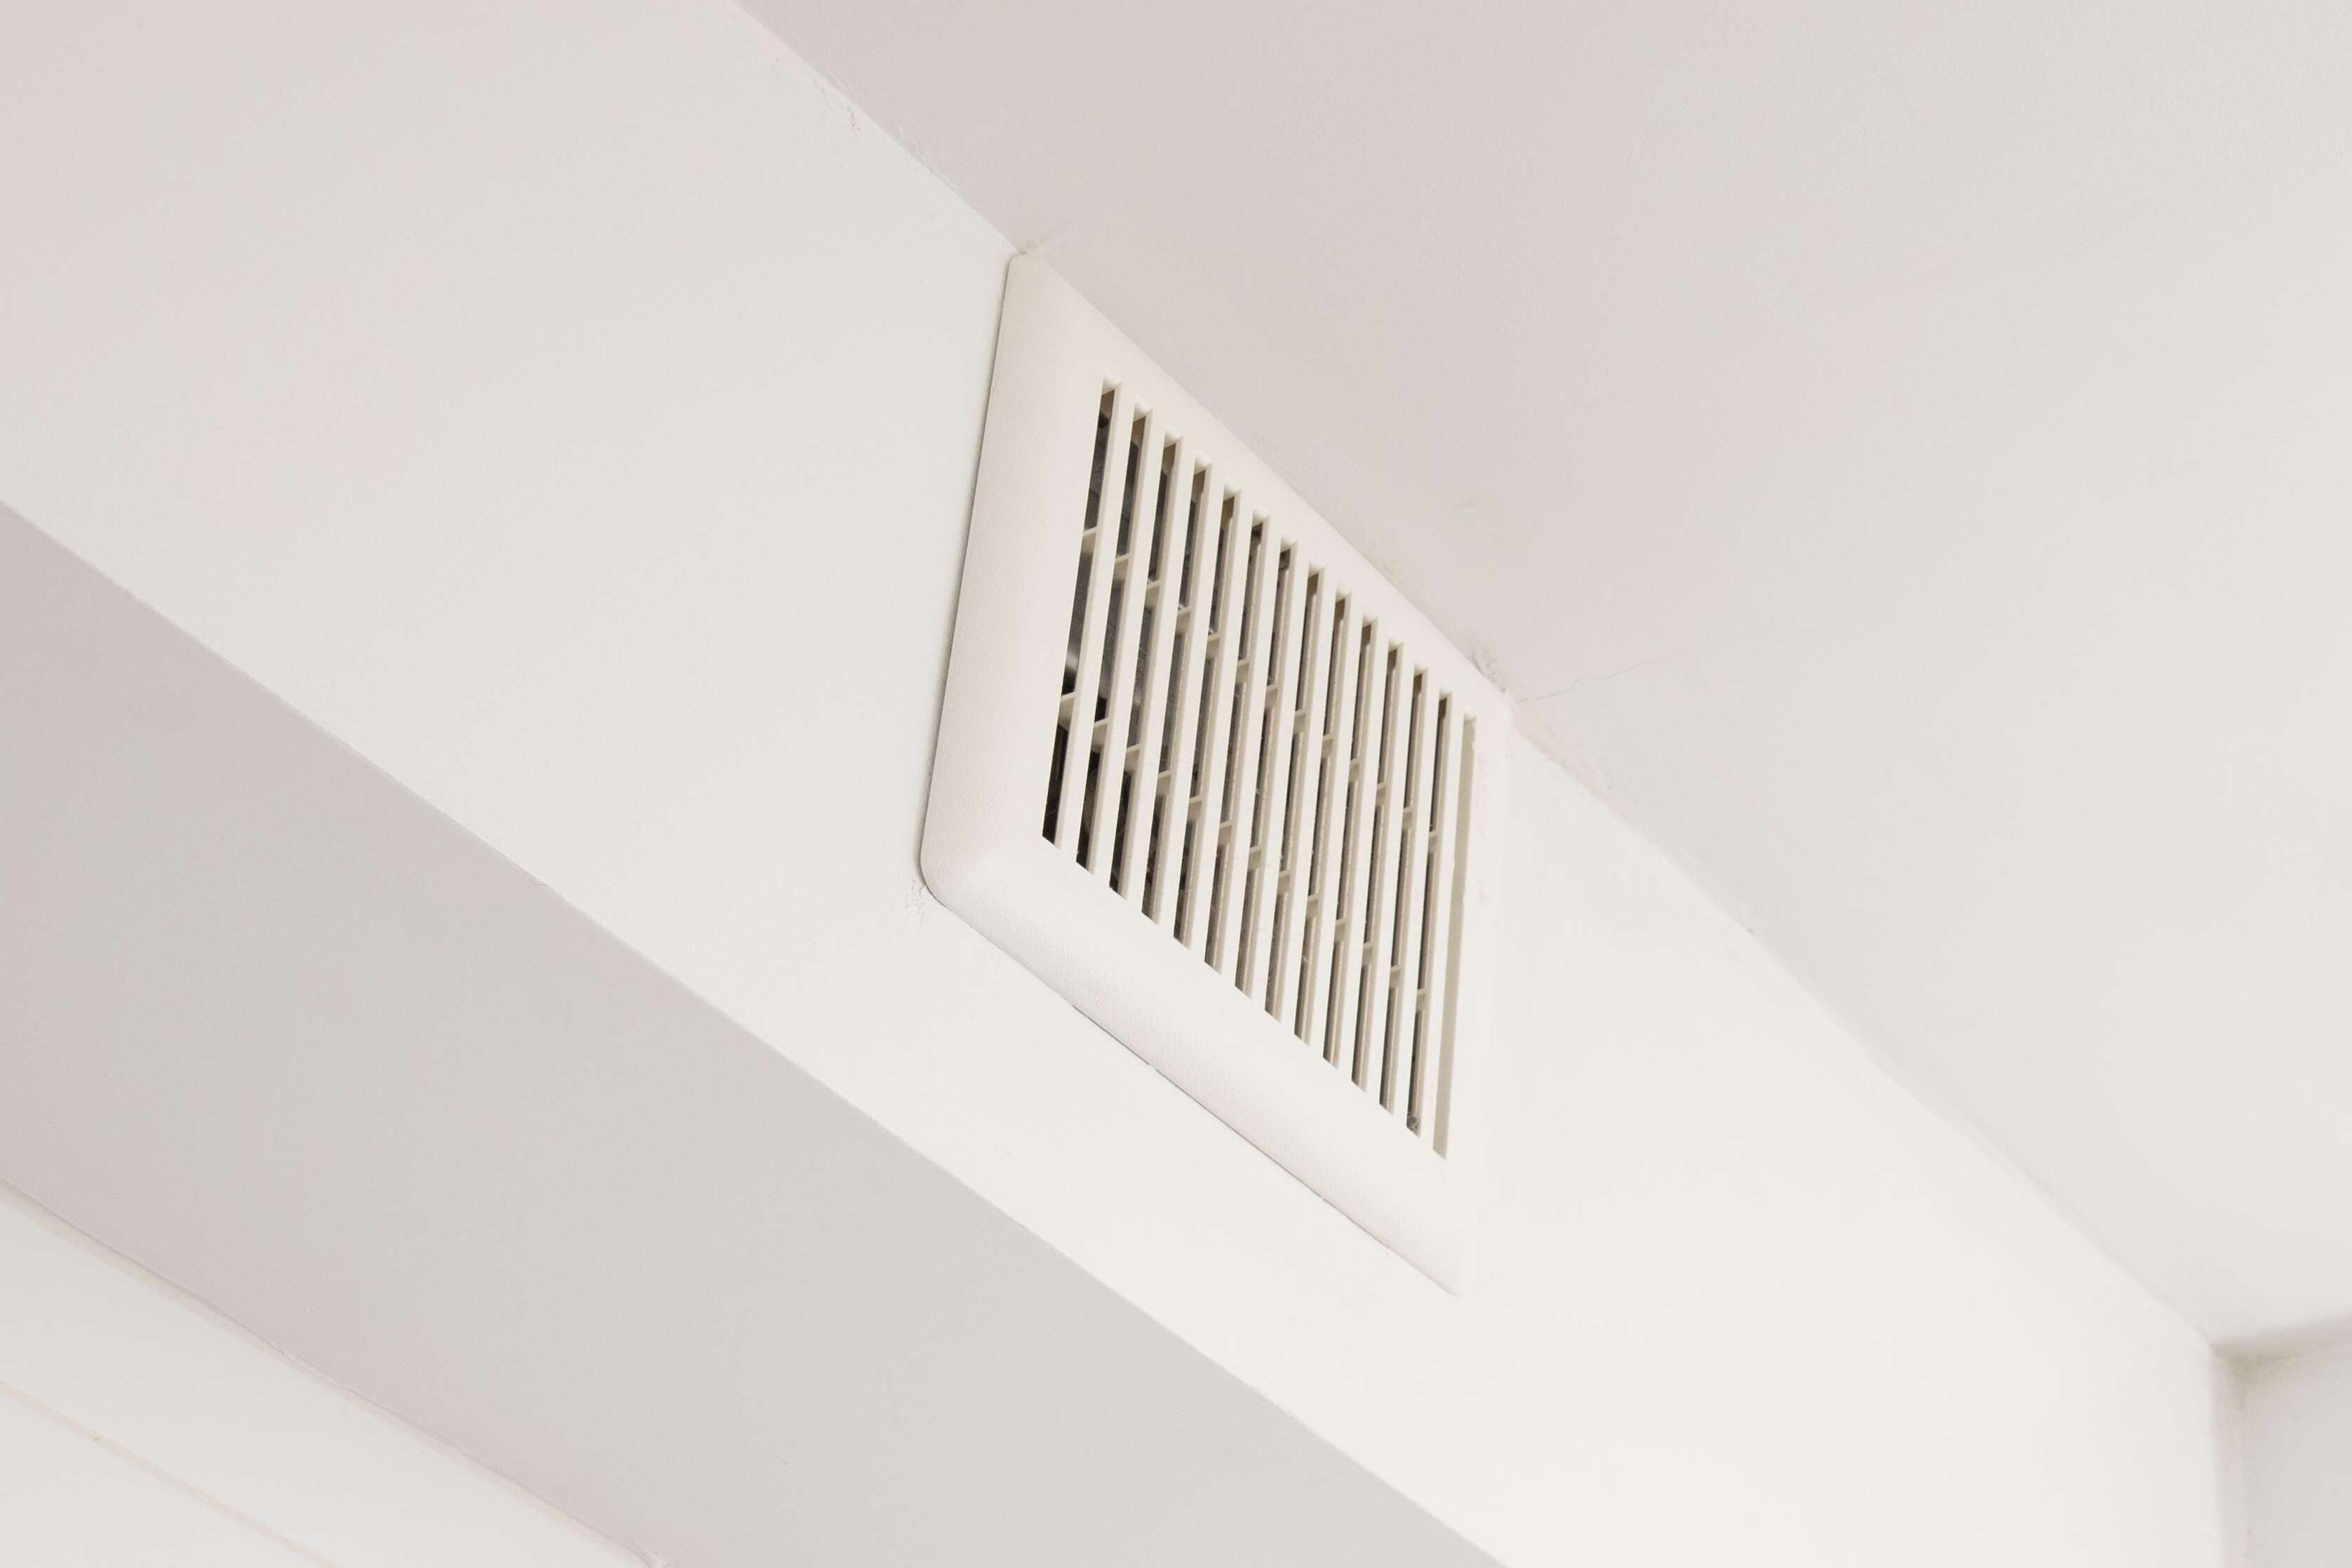
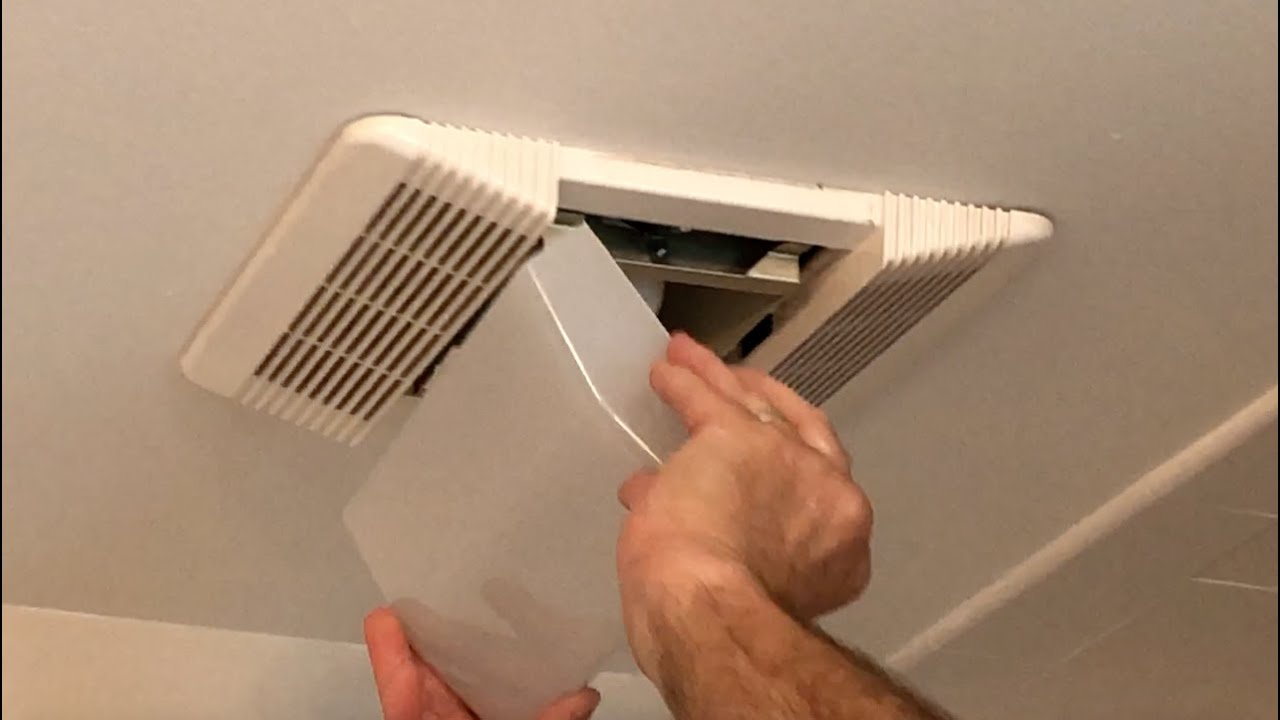
Step 2: Remove the old exhaust fan
Removing the old exhaust fan is a crucial step in the process of upgrading to a new unit with a light. Before starting this step, ensure that the power to the existing fan and light has been safely turned off. Once the power is off, you can proceed with the following detailed process to remove the old exhaust fan:
-
Access the Fan Housing: Begin by accessing the fan housing, which is typically located on the ceiling or wall of the bathroom. Use a stepladder if necessary to reach the fan, ensuring that it is stable and secure before climbing.
-
Remove the Cover or Grille: Most exhaust fans have a cover or grille that conceals the internal components. Depending on the design, the cover may be secured with screws or clips. Use a screwdriver or follow the manufacturer's instructions to detach the cover and expose the fan assembly.
-
Disconnect the Wiring: Once the fan assembly is accessible, identify the electrical wiring that connects the fan to the power source. Carefully disconnect the wiring by removing wire nuts or connectors, ensuring that the wires are separated and no longer connected to the electrical supply.
-
Unscrew and Remove the Fan Assembly: With the wiring disconnected, locate the screws or mounting brackets that secure the fan assembly to the ceiling or wall. Use a screwdriver or appropriate tools to unscrew and remove the fan assembly, taking care to support its weight and handle it with caution to avoid damage.
-
Inspect and Prepare the Opening: After removing the old exhaust fan, take a moment to inspect the opening in the ceiling or wall. Clear away any debris or accumulated dust to ensure a clean and smooth surface for installing the new exhaust fan with a light.
By following these detailed steps, you can effectively remove the old exhaust fan, preparing the space for the installation of the new unit. With the old fan safely removed, you are now ready to proceed to the next stage of disconnecting the wiring and installing the new exhaust fan with a light.
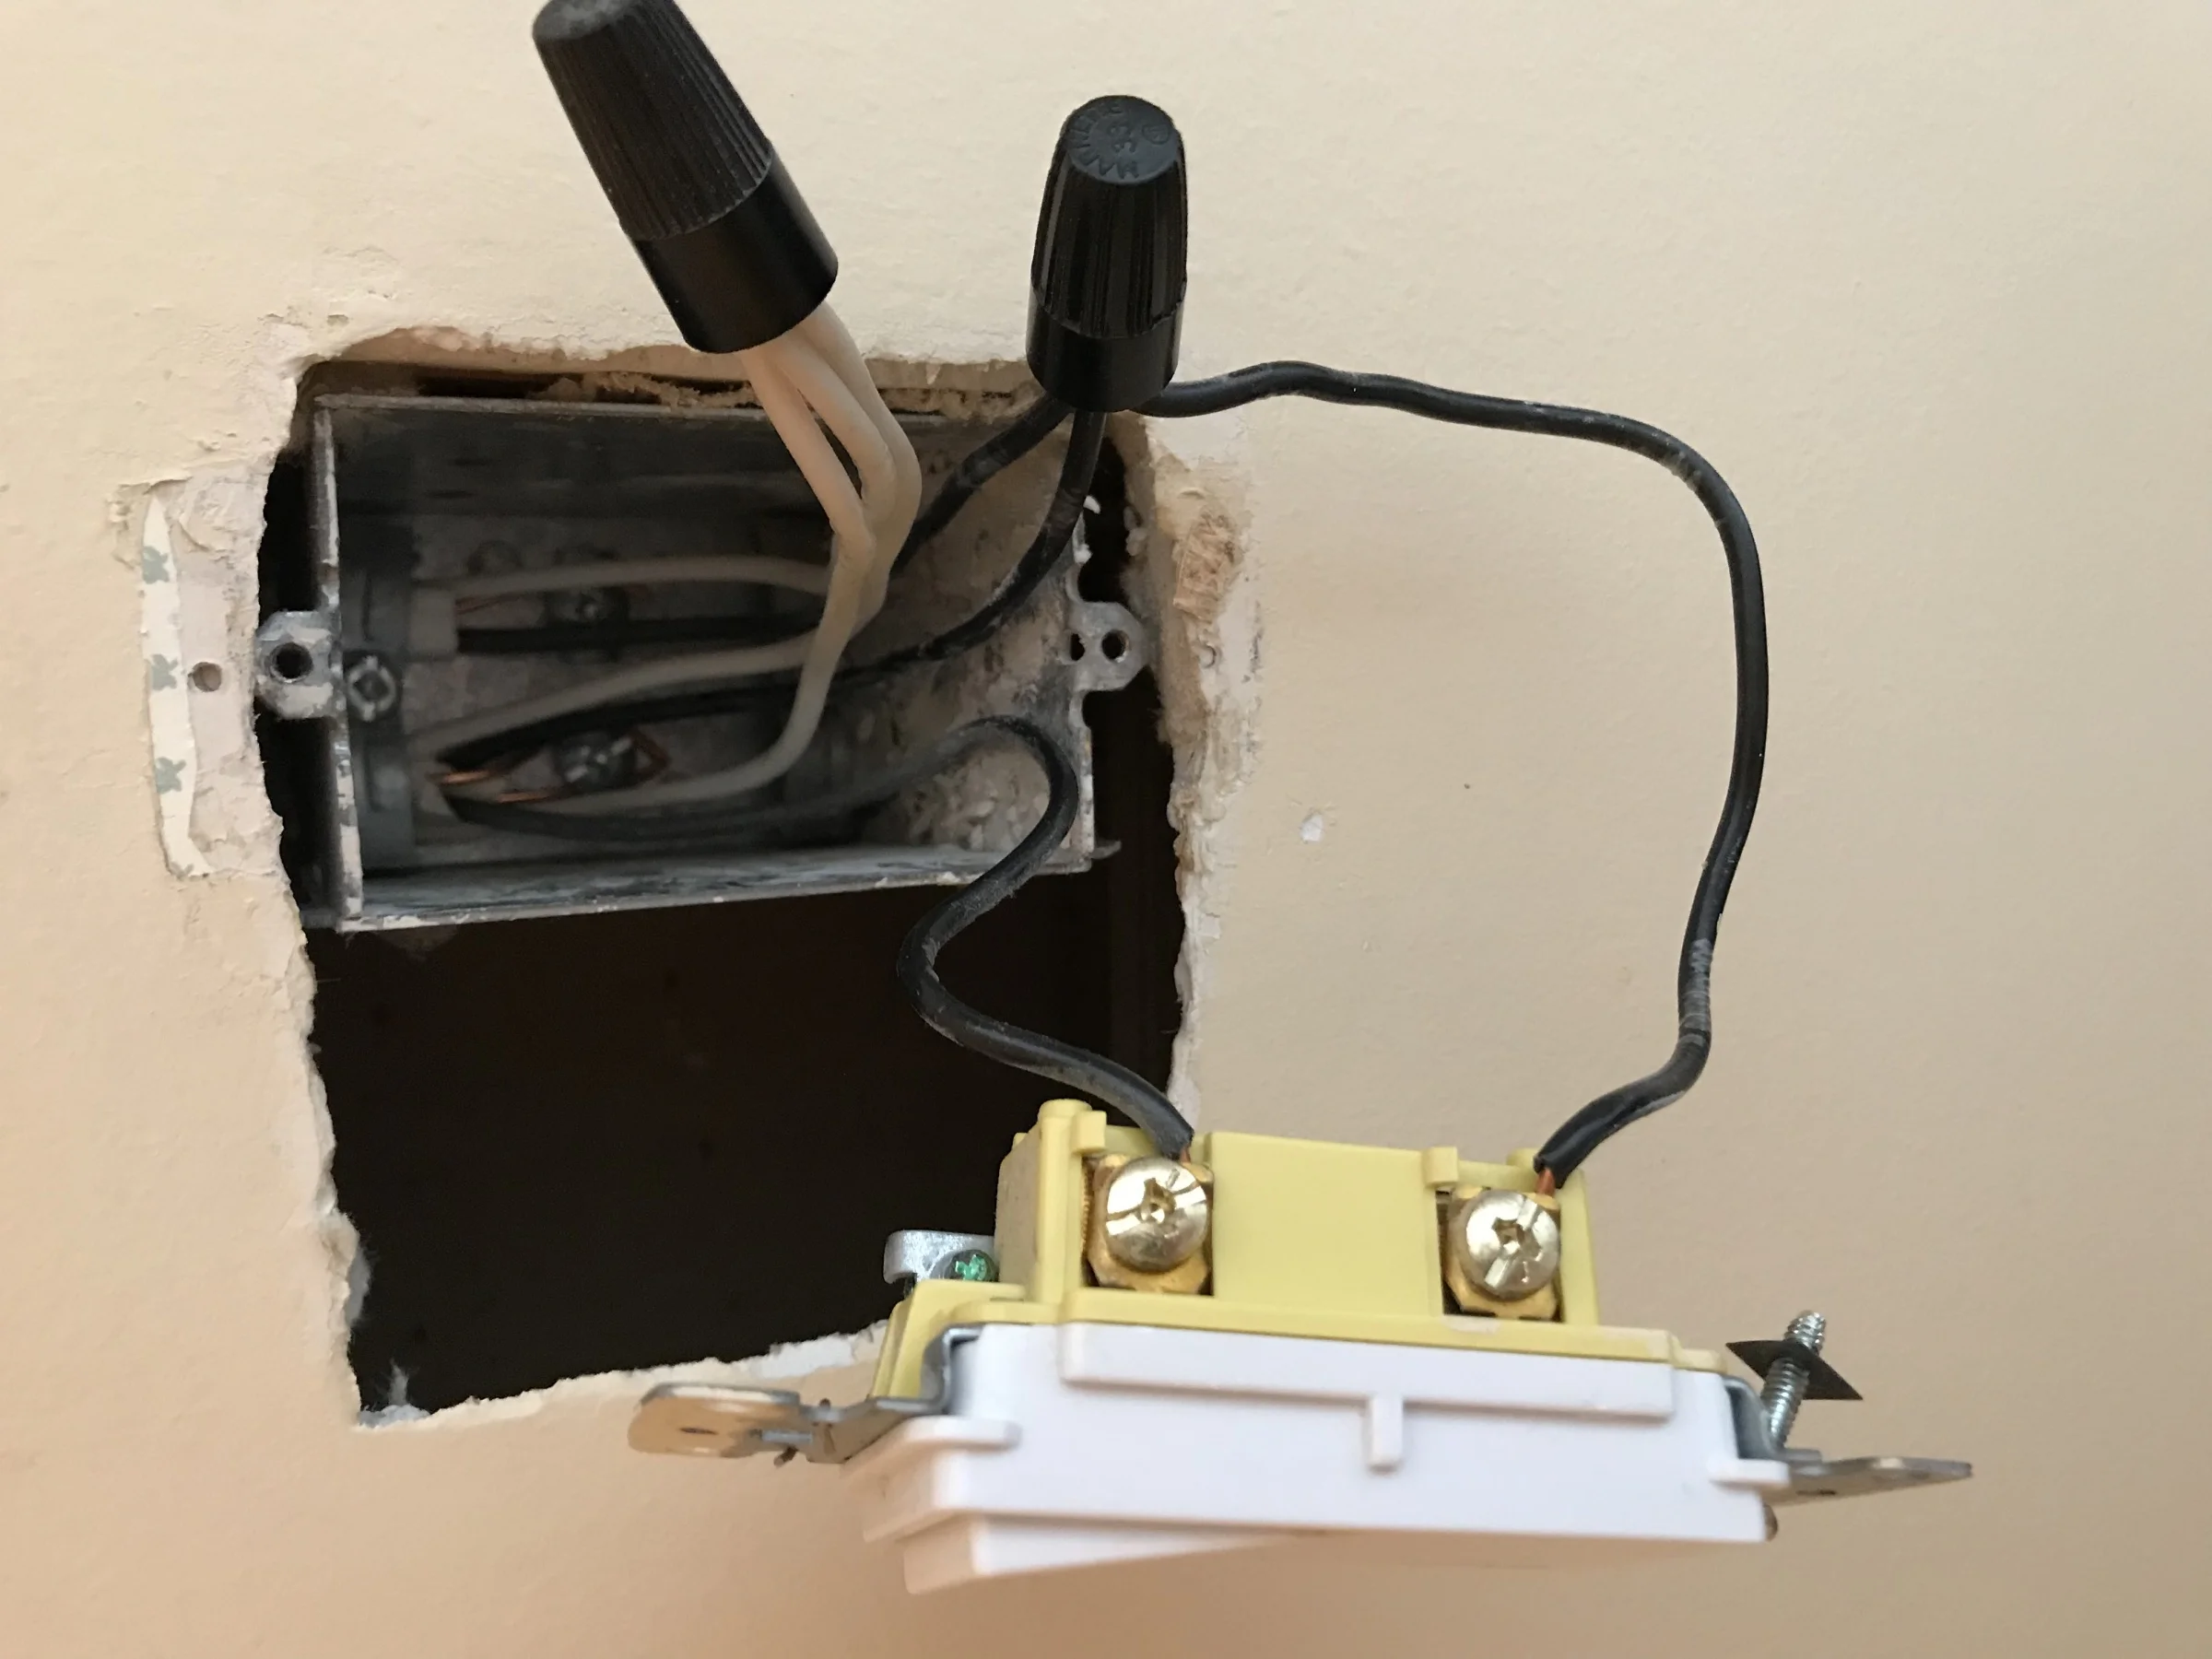
Step 3: Disconnect the wiring
Disconnecting the wiring is a critical step in the process of changing a bathroom exhaust fan with a light. Properly handling the electrical connections ensures safety and paves the way for the seamless installation of the new unit. Here's a detailed guide on how to disconnect the wiring from the old exhaust fan:
-
Identify the Electrical Connections: Before proceeding with the disconnection, it's essential to identify the electrical connections that power the existing exhaust fan and light. The wiring may consist of black (hot), white (neutral), and green or bare copper (ground) wires. Take note of the wire colors and their corresponding functions to facilitate the disconnection process.
-
Turn Off the Power: As a safety precaution, double-check that the power to the existing exhaust fan and light is turned off. This can be verified by using a non-contact voltage tester to ensure that no electrical current is present in the wiring.
-
Remove Wire Nuts or Connectors: Once the power is confirmed to be off, carefully remove the wire nuts or connectors that join the electrical wires of the fan and light to the house wiring. Use a screwdriver or pliers to loosen the wire nuts, and gently separate the wires, ensuring that they are no longer connected.
-
Separate the Wires: After disconnecting the wire nuts, separate the individual wires, including the black, white, and green or bare copper wires. Keep them apart to prevent accidental contact and ensure that they do not come into contact with any live electrical components during the installation process.
-
Secure the Disconnected Wires: To prevent the wires from accidentally re-connecting or coming into contact with other electrical components, consider using electrical tape to secure the separated wires. Wrapping each exposed end with electrical tape provides an additional layer of safety and helps to maintain a clear distinction between the disconnected wires.
By following these detailed steps to disconnect the wiring from the old exhaust fan, you can ensure a safe and organized transition to the installation of the new exhaust fan with a light. Prioritizing precision and caution during the disconnection process sets the stage for a smooth and secure installation of the upgraded unit, ultimately contributing to a more functional and well-lit bathroom space.
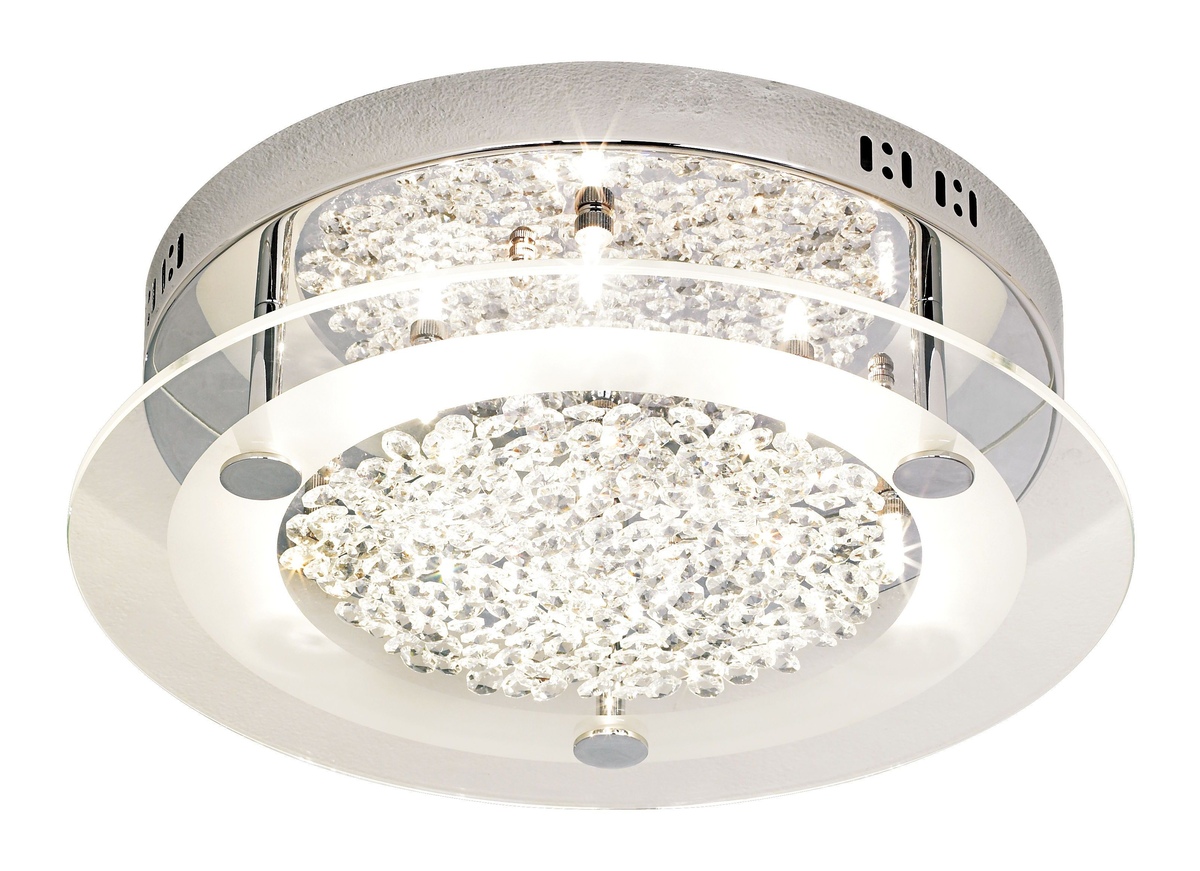
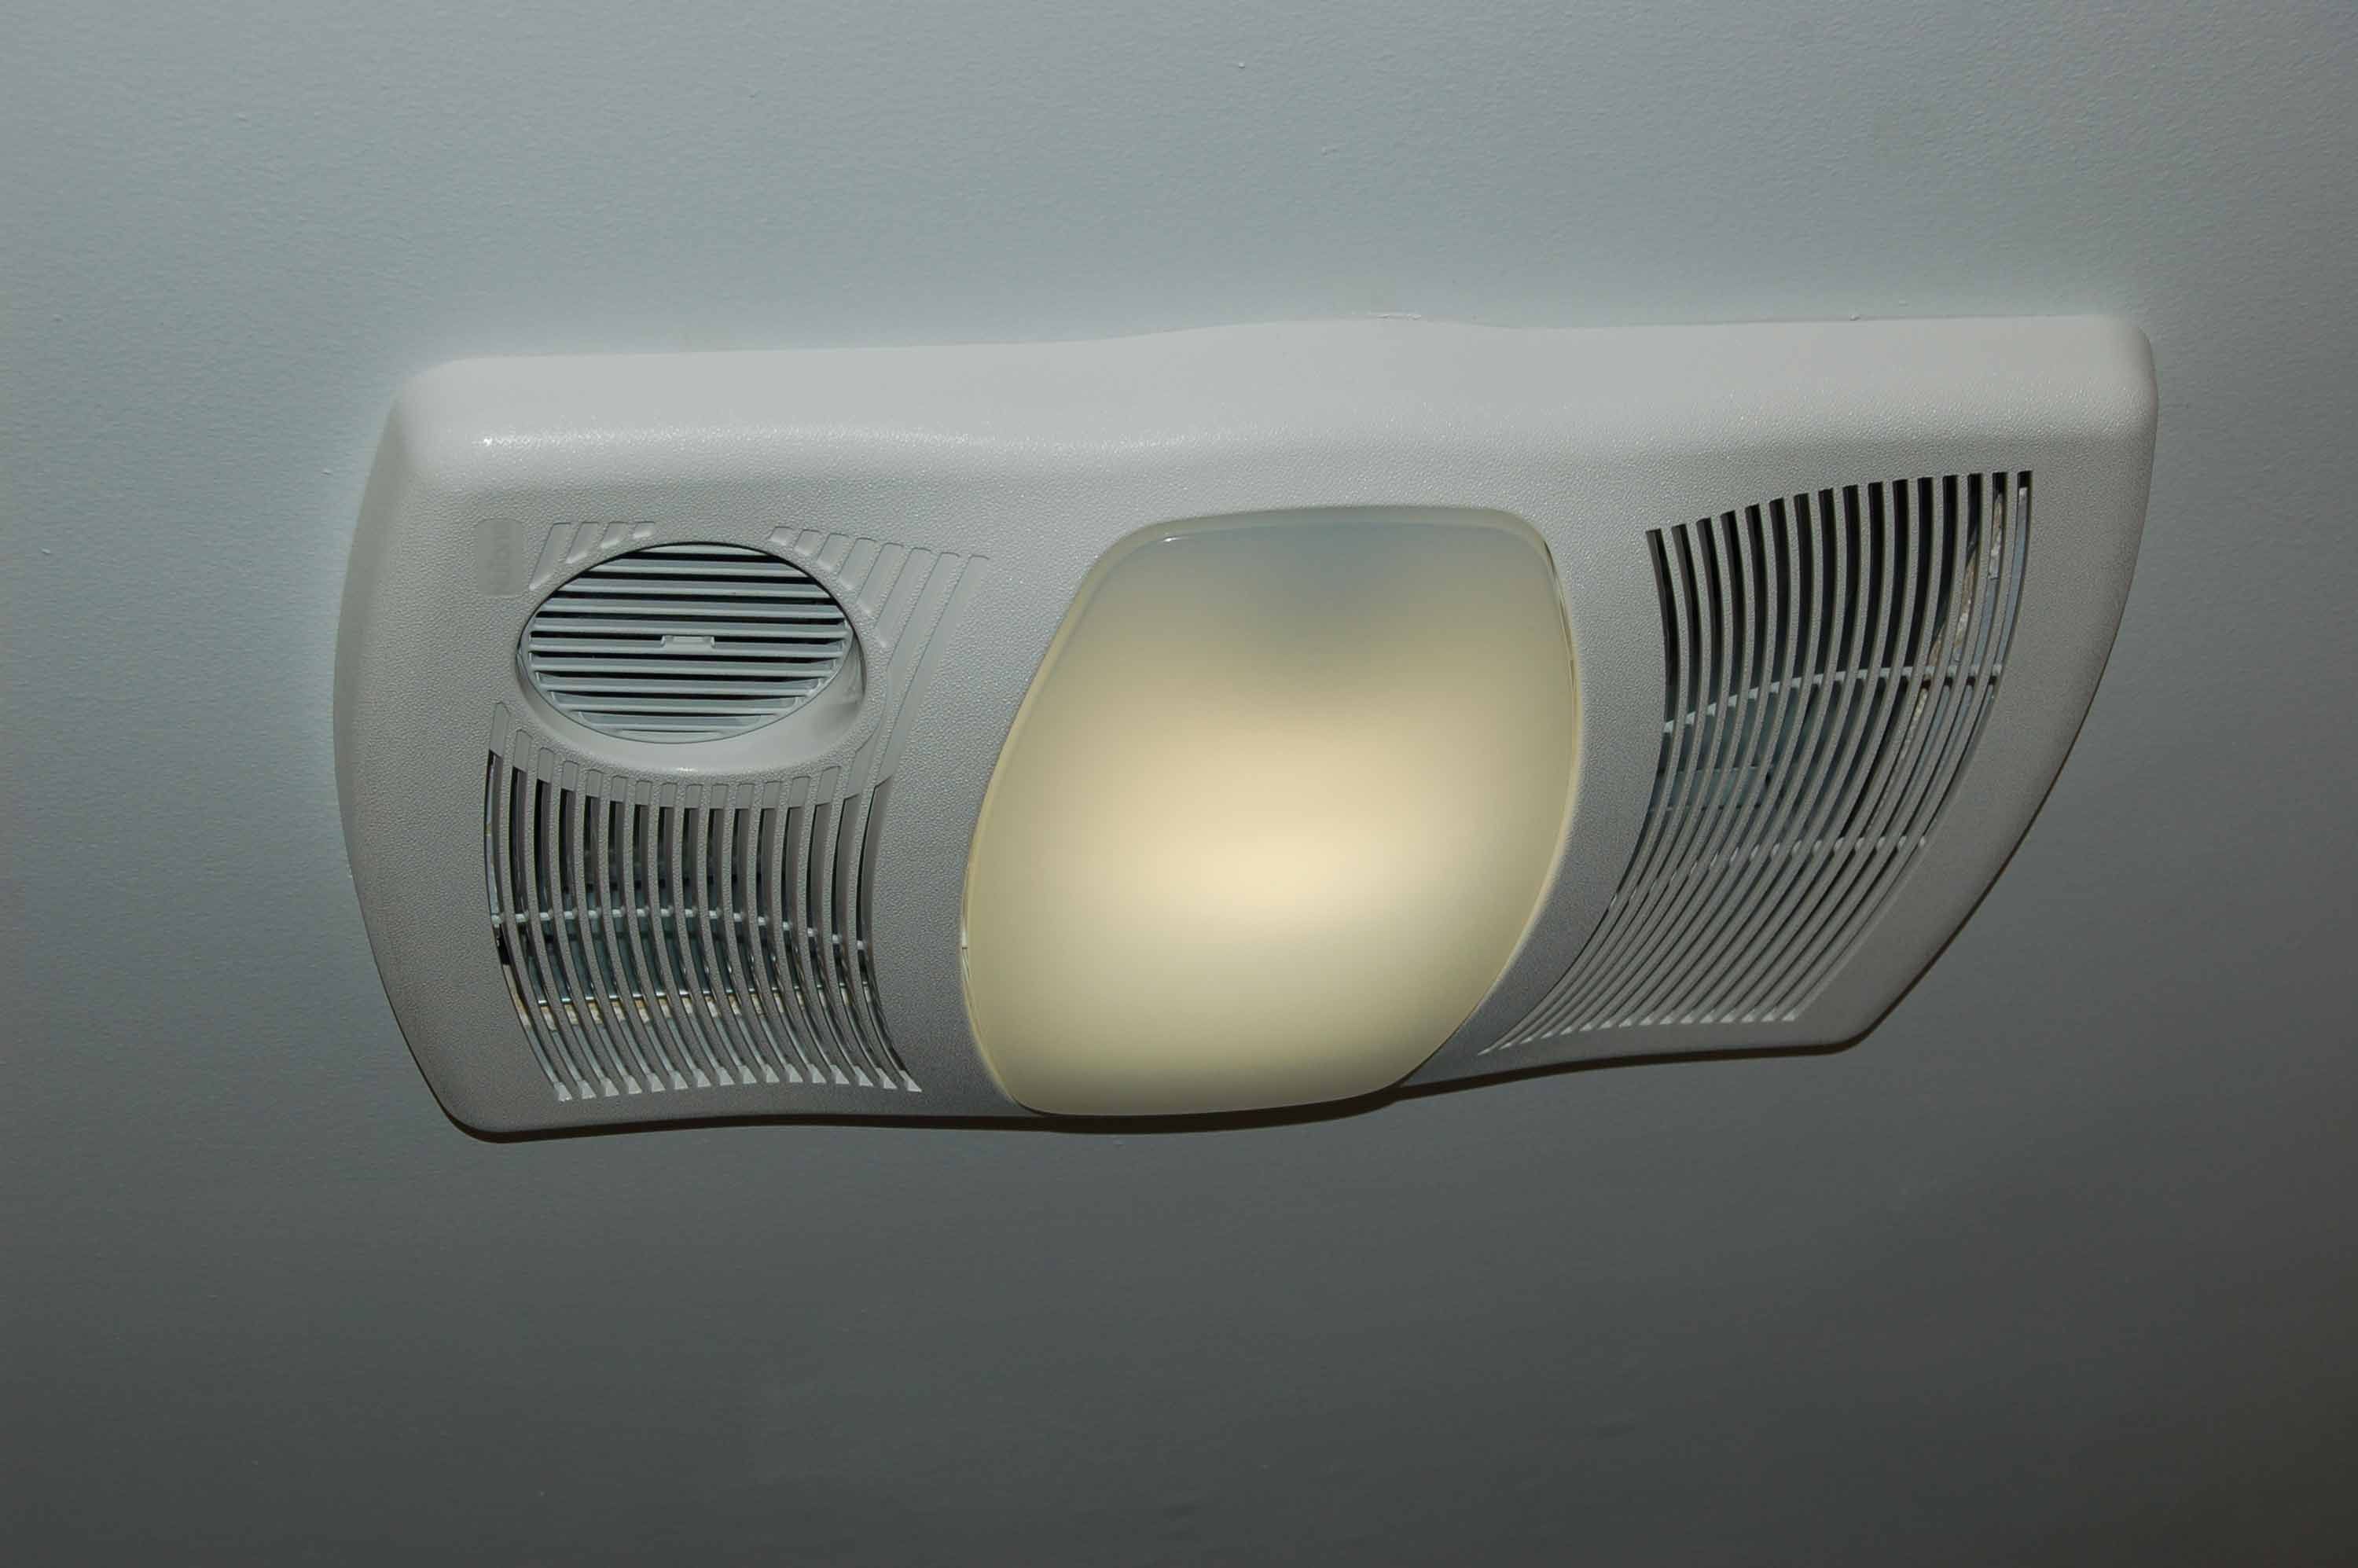
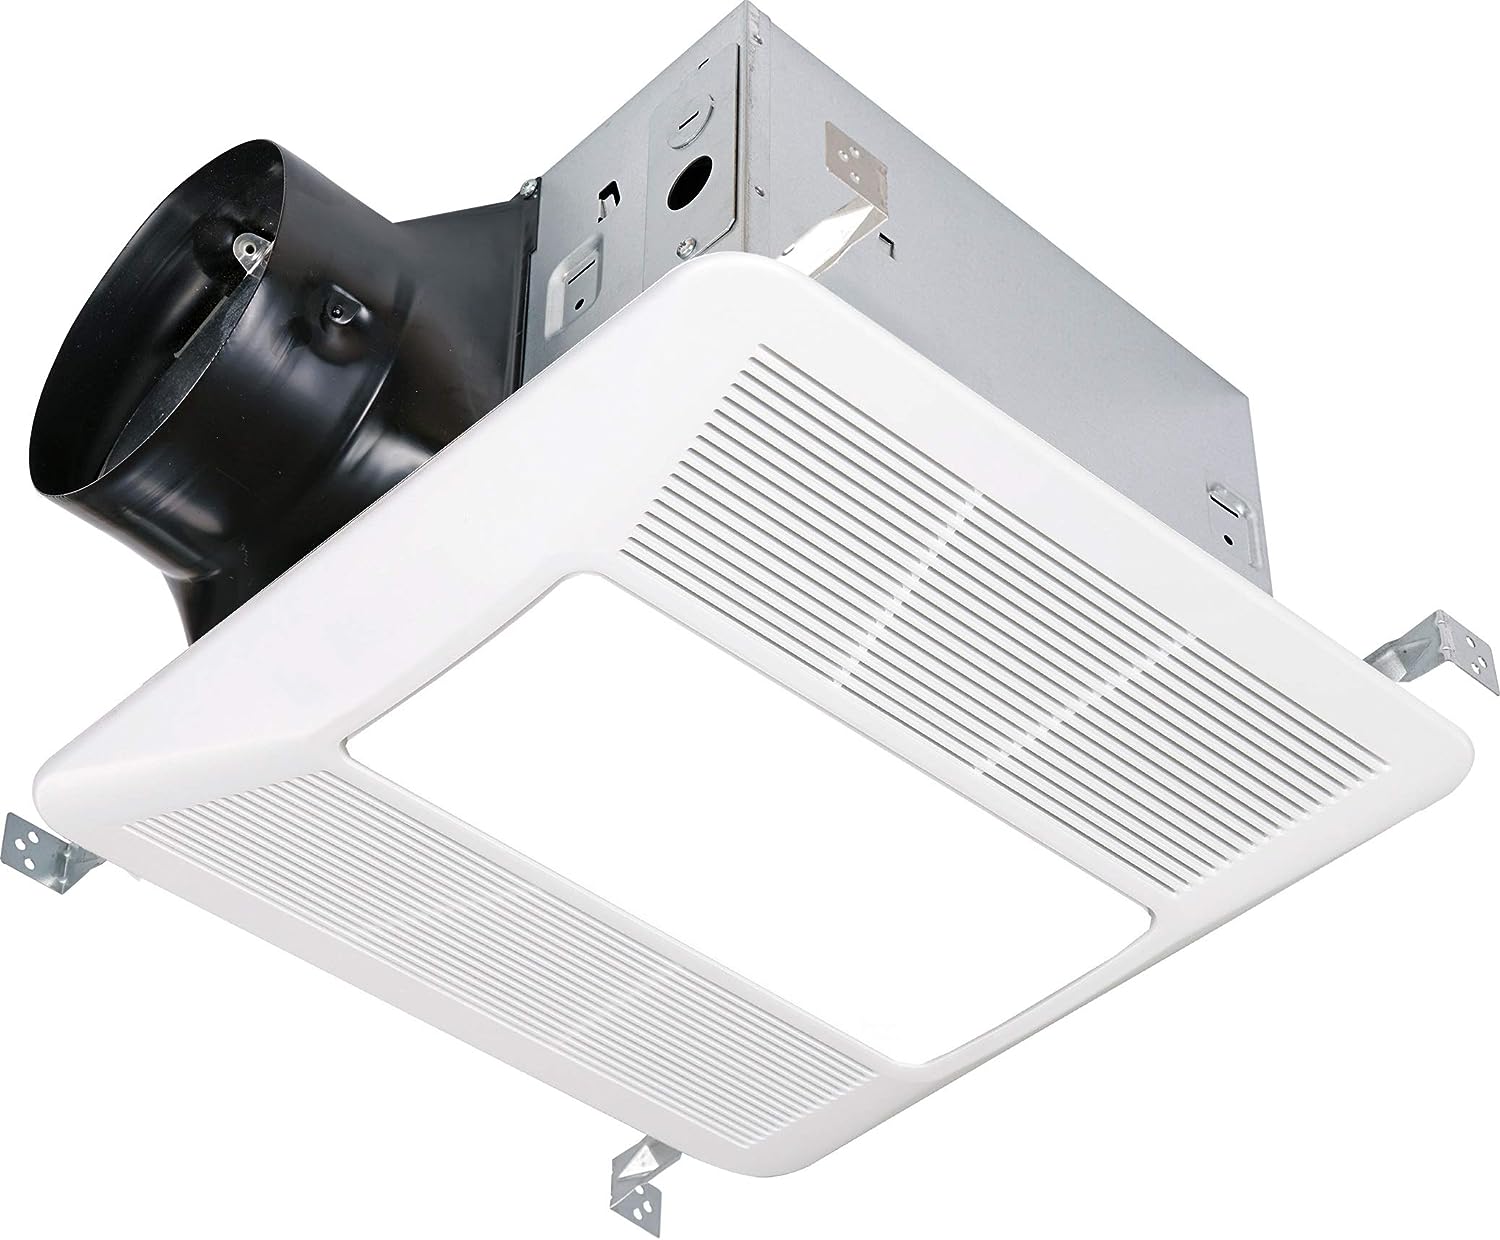
Step 4: Install the new exhaust fan with light
Installing the new exhaust fan with a light marks a pivotal stage in the process of upgrading your bathroom's ventilation and lighting system. This step involves carefully mounting the new unit in place, ensuring secure electrical connections, and preparing the fixture for optimal functionality. Here's a detailed guide on how to install the new exhaust fan with light, transforming your bathroom into a more comfortable and well-lit space.
-
Position the New Unit: Begin by positioning the new exhaust fan with light in the designated installation location. Ensure that the unit aligns with the existing opening in the ceiling or wall, allowing for proper ventilation and light distribution. Use a level to confirm that the unit is positioned evenly and securely before proceeding.
-
Secure the Mounting Brackets: Most exhaust fans come with mounting brackets or screws to secure the unit in place. Follow the manufacturer's instructions to attach the mounting brackets to the ceiling or wall, providing a stable foundation for the new exhaust fan with light. Use appropriate tools to fasten the brackets securely, ensuring that the unit is firmly anchored.
-
Connect the Electrical Wiring: With the new unit positioned and secured, proceed to connect the electrical wiring. Match the corresponding wires from the fan and light to the house wiring, ensuring that the black (hot), white (neutral), and green or bare copper (ground) wires are properly aligned and securely connected. Use wire nuts or connectors to join the wires, and carefully tuck the connected wires into the electrical box.
-
Mount the Fan Assembly: Once the electrical connections are in place, carefully mount the fan assembly into the prepared opening. Align the unit with the mounting brackets and secure it in position according to the manufacturer's guidelines. Take care to support the weight of the unit and ensure that it is firmly attached to the ceiling or wall, ready to deliver efficient ventilation and illumination.
-
Attach the Light Cover or Grille: If the new exhaust fan includes a light feature, attach the light cover or grille as per the manufacturer's instructions. This step adds a finishing touch to the installation, concealing the internal components and enhancing the aesthetic appeal of the unit. Ensure that the light cover or grille is securely fastened for a polished and cohesive look.
By following these detailed steps to install the new exhaust fan with light, you can effectively upgrade your bathroom's ventilation and lighting system, creating a more comfortable and inviting environment. Prioritizing precision and attention to detail during the installation process ensures that the new unit functions optimally, contributing to improved air quality and enhanced illumination in your bathroom.
Make sure to turn off the power to the fan before starting. Use a screwdriver to remove the cover and disconnect the wiring. Then, unscrew the fan from the ceiling and replace it with the new one, following the manufacturer’s instructions.
Step 5: Connect the wiring
Connecting the wiring is a crucial phase in the installation of a new bathroom exhaust fan with a light. This step involves establishing secure electrical connections to power the fan and light, ensuring proper functionality and safety. By following a systematic approach and adhering to electrical standards, you can effectively connect the wiring and pave the way for a seamlessly integrated ventilation and lighting system in your bathroom.
-
Identify the Electrical Connections: Before initiating the wiring process, it's essential to identify the electrical connections within the new exhaust fan with light. The unit will typically have designated wires for the fan, light, and ground, each serving a specific function. Take note of the wire colors and their corresponding roles to facilitate a clear and organized connection process.
-
Prepare the House Wiring: Prior to connecting the new exhaust fan with light, ensure that the house wiring is appropriately prepared. Strip the insulation from the ends of the electrical wires to expose a sufficient length for secure connections. Verify that the black (hot), white (neutral), and green or bare copper (ground) wires are in good condition and free from damage.
-
Match and Connect the Wires: With the house wiring prepared, match the corresponding wires from the fan and light to the black, white, and ground wires of the house supply. Ensure that the connections are aligned according to their functions, with the black wire serving as the hot conductor, the white wire as the neutral, and the green or bare copper wire as the ground. Use wire nuts or connectors to join the wires securely, twisting them in a clockwise direction to create a tight and reliable connection.
-
Secure the Wiring Connections: Once the wires are joined, it's essential to secure the wiring connections to prevent any accidental disconnection or exposure. Carefully tuck the connected wires into the electrical box, ensuring that they are neatly arranged and do not interfere with the fan or light components. Avoid overcrowding the electrical box, as this can impede proper airflow and create potential safety hazards.
-
Test the Electrical Connections: After connecting the wiring, it's prudent to conduct a preliminary test to ensure that the electrical connections are secure and functional. Turn on the power to the exhaust fan and light at the circuit breaker, and verify that both components operate as intended. Confirm that the fan functions smoothly, and the light illuminates without flickering or irregularities, indicating successful electrical connections.
By meticulously following these steps to connect the wiring, you can establish a reliable and safe electrical system for your new bathroom exhaust fan with a light. Prioritizing precision and adherence to electrical guidelines ensures that the unit operates efficiently, contributing to improved ventilation and enhanced illumination in your bathroom.
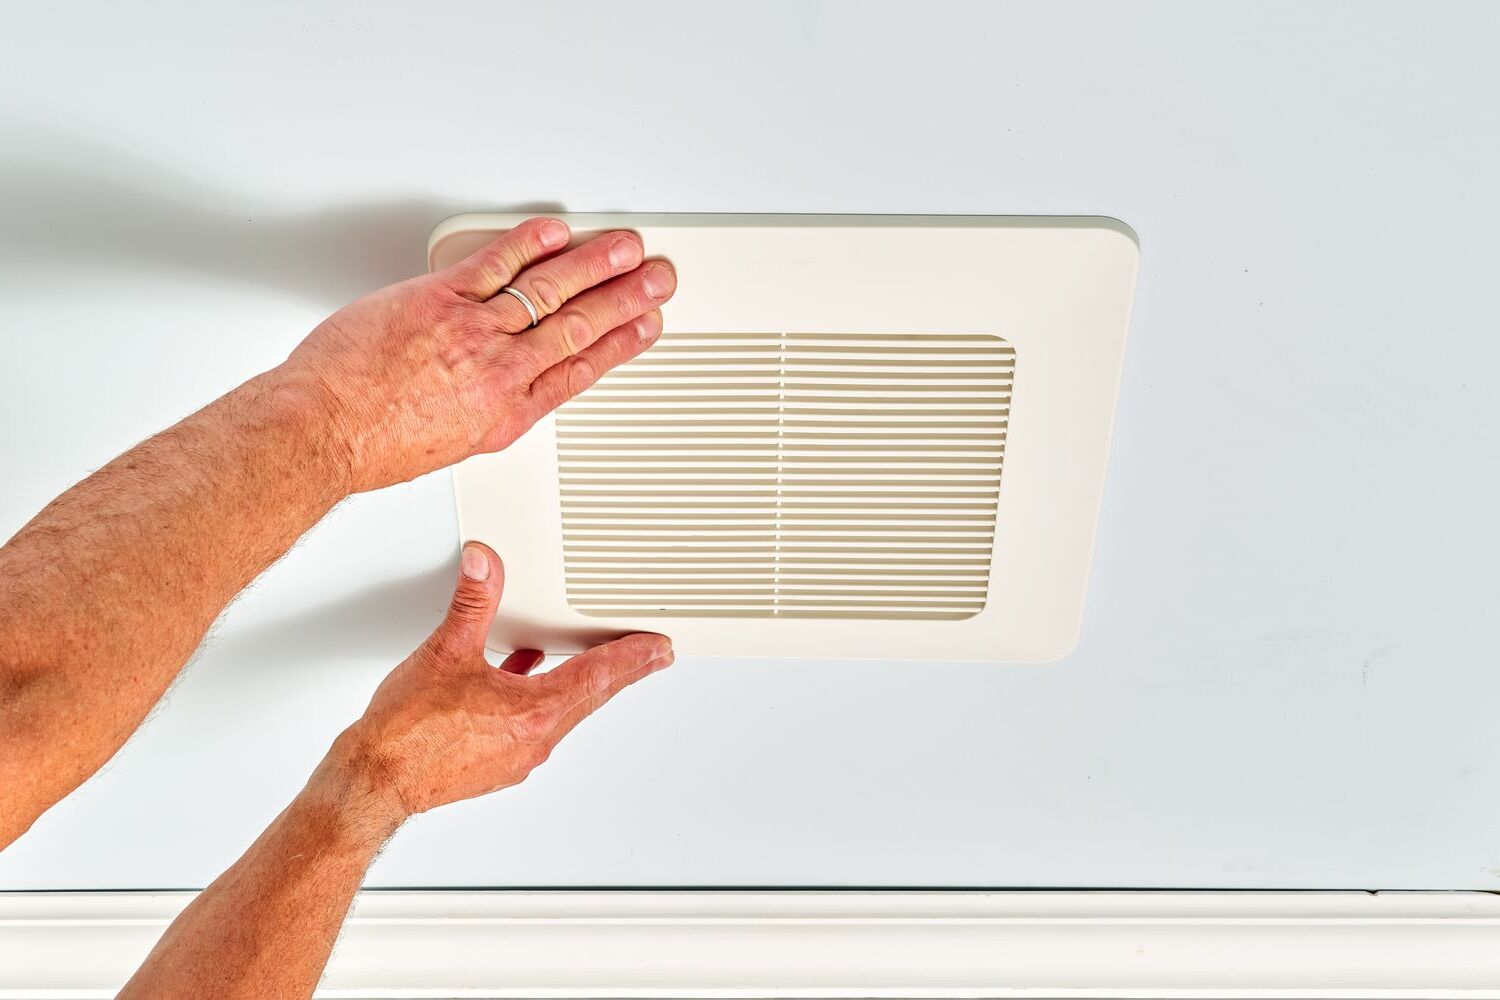
Step 6: Secure the new exhaust fan in place
Securing the new exhaust fan in place is a critical step that ensures stability, proper functionality, and a seamless integration into your bathroom space. By following a systematic approach and employing the appropriate tools and techniques, you can effectively anchor the unit, creating a reliable and long-lasting ventilation and lighting solution.
-
Positioning and Alignment: Before securing the fan, ensure that it is positioned correctly within the designated installation location. Align the unit with the mounting brackets or screws, verifying that it is centered and level. This initial step sets the foundation for a secure and balanced installation, allowing the fan to operate optimally.
-
Fastening the Mounting Brackets: Most exhaust fans come with specific mounting brackets or screws designed to secure the unit in place. Utilize the provided hardware and follow the manufacturer's instructions to fasten the mounting brackets to the ceiling or wall. Use appropriate tools to ensure that the brackets are firmly attached, providing a stable foundation for the fan.
-
Ensuring Structural Support: As you secure the new exhaust fan, pay attention to the structural integrity of the installation area. If the fan is being mounted on the ceiling, ensure that it is anchored to a sturdy ceiling joist or support structure. For wall-mounted units, verify that the mounting surface is robust and capable of supporting the fan's weight.
-
Checking for Secure Attachment: Once the mounting brackets are in place, carefully lift the fan assembly and align it with the brackets. Secure the fan to the brackets according to the manufacturer's guidelines, ensuring that it is firmly attached and does not wobble or shift. This step is crucial for creating a stable and reliable installation.
-
Testing Stability and Functionality: After securing the new exhaust fan, conduct a brief assessment of its stability and functionality. Gently test the fan by applying light pressure to verify that it is securely anchored. Additionally, ensure that the fan operates smoothly and quietly, indicating a successful and secure installation.
By meticulously following these steps to secure the new exhaust fan in place, you can establish a dependable and well-integrated ventilation and lighting system in your bathroom. Prioritizing precision and attention to detail during this phase ensures that the fan functions optimally, contributing to improved air quality and enhanced illumination in your bathroom space.
Step 7: Test the new exhaust fan with light
Testing the new exhaust fan with light is a crucial final step in the installation process, allowing you to verify its functionality and performance before concluding the project. By conducting a comprehensive test, you can ensure that the unit operates as intended, providing efficient ventilation and illumination in your bathroom. Here's a detailed guide on how to test the new exhaust fan with light, ensuring that it meets your expectations and enhances the overall comfort of your bathroom space.
-
Power Activation: Begin by turning on the power to the newly installed exhaust fan with light at the circuit breaker. This action activates the unit, allowing you to assess its operational capabilities. As the power is restored, listen for the sound of the fan motor and observe the illumination from the light feature, confirming that both components are functioning upon activation.
-
Airflow Assessment: Once the fan is operational, assess the airflow within the bathroom to gauge the effectiveness of the ventilation. Stand near the exhaust fan and feel for the airflow, noting the strength and consistency of the air movement. A properly functioning exhaust fan should efficiently remove moisture and odors from the bathroom, contributing to improved air quality and comfort.
-
Lighting Evaluation: Evaluate the lighting performance of the new exhaust fan. Observe the brightness and coverage of the light, ensuring that it adequately illuminates the bathroom space. Assess the quality of the light output, noting any flickering or irregularities that may indicate potential issues with the electrical connections or the light fixture itself.
-
Functional Testing: Test the individual functions of the exhaust fan and light to ensure their independent operation. Activate the fan and light separately, verifying that each component responds as expected. This step allows you to confirm that the fan and light can be controlled independently, providing flexibility in managing ventilation and lighting based on your specific needs.
-
Noise Level Assessment: Pay attention to the noise level produced by the exhaust fan during operation. A well-installed and high-quality fan should operate quietly, minimizing disruptive sounds in the bathroom. Listen for any unusual or excessive noise that may indicate installation issues or mechanical problems, ensuring a peaceful and comfortable environment.
-
Observation and Adjustment: Throughout the testing process, observe the exhaust fan with light closely, noting any irregularities or unexpected behavior. If you encounter any issues such as inadequate airflow, inconsistent lighting, or unusual sounds, consider making adjustments or seeking professional assistance to address the concerns and optimize the unit's performance.
By meticulously following these steps to test the new exhaust fan with light, you can ensure that the installation has been completed successfully, and the unit functions optimally. Prioritizing thorough testing and observation allows you to address any potential issues promptly, ultimately contributing to a well-ventilated, well-lit, and comfortable bathroom environment.
Conclusion
In conclusion, the process of changing a bathroom exhaust fan with a light encompasses a series of essential steps that culminate in the successful installation of a functional and aesthetically pleasing ventilation and lighting solution. By following the comprehensive guide outlined in this article, homeowners and DIY enthusiasts can embark on this home improvement project with confidence, knowing that they have the knowledge and guidance to navigate each stage of the installation process.
From the initial step of turning off the power to disconnecting the wiring, removing the old exhaust fan, and installing the new unit with a light, each phase plays a crucial role in ensuring a safe, efficient, and seamless transition. Prioritizing safety measures, precision in electrical connections, and attention to detail during the mounting process contributes to the creation of a well-integrated and reliable bathroom fixture.
The testing phase serves as the final checkpoint, allowing individuals to assess the functionality, performance, and operational characteristics of the new exhaust fan with light. By conducting a thorough evaluation of the airflow, lighting, noise level, and individual component functions, homeowners can confirm that the installation meets their expectations and enhances the overall comfort and functionality of their bathroom space.
Ultimately, changing a bathroom exhaust fan with a light presents an opportunity to elevate the ambiance, air quality, and functionality of the bathroom. With the right tools, materials, and a clear understanding of the installation process, individuals can embark on this project with confidence, knowing that they have the necessary resources to achieve a successful outcome.
By embracing the guidance provided in this comprehensive guide, homeowners can transform their bathrooms into more comfortable, well-ventilated, and well-lit spaces, enhancing the overall living experience and contributing to a more inviting and functional home environment. Whether it's for personal enjoyment, home improvement, or preparation for a property sale, the installation of a new exhaust fan with a light can make a significant difference in the overall appeal and practicality of the bathroom.
In summary, the process of changing a bathroom exhaust fan with a light is a rewarding endeavor that empowers individuals to enhance their living spaces while contributing to improved comfort, functionality, and aesthetic appeal within the home.
Frequently Asked Questions about How To Change A Bathroom Exhaust Fan With Light
Was this page helpful?
At Storables.com, we guarantee accurate and reliable information. Our content, validated by Expert Board Contributors, is crafted following stringent Editorial Policies. We're committed to providing you with well-researched, expert-backed insights for all your informational needs.


0 thoughts on “How To Change A Bathroom Exhaust Fan With Light”