Home>Furniture & Design>Bathroom Accessories>How To Close A Kitchen Exhaust Fan Hole
Bathroom Accessories
How To Close A Kitchen Exhaust Fan Hole
Modified: February 18, 2024
Learn how to effectively close a kitchen exhaust fan hole with the right bathroom accessories. Find step-by-step instructions and expert tips.
(Many of the links in this article redirect to a specific reviewed product. Your purchase of these products through affiliate links helps to generate commission for Storables.com, at no extra cost. Learn more)
Introduction
Closing a kitchen exhaust fan hole is a common task that many homeowners encounter when renovating or upgrading their kitchen. Whether you're replacing an old exhaust fan with a new one or opting for a different ventilation solution, properly closing the existing hole is essential to maintain the integrity and aesthetics of your kitchen space.
In this comprehensive guide, we will walk you through the step-by-step process of closing a kitchen exhaust fan hole with precision and efficiency. By following these instructions, you can ensure a seamless and professional-looking result, regardless of whether you're tackling this project as a DIY enthusiast or seeking the expertise of a professional contractor.
From removing the existing exhaust fan to measuring the hole and attaching a patch, each stage of the process is crucial for achieving a successful outcome. Additionally, we will explore the importance of cleaning the surrounding area and sealing the patch to prevent any potential issues in the future.
By the end of this guide, you will have the knowledge and confidence to effectively close a kitchen exhaust fan hole, leaving your kitchen with a polished and cohesive appearance. Let's dive into the details and master the art of seamlessly closing a kitchen exhaust fan hole.
Key Takeaways:
- Closing a kitchen exhaust fan hole involves careful steps like removing the fan, cleaning the area, measuring, cutting, attaching a patch, and sealing. Attention to detail and safety are crucial for a polished finish.
- By following the step-by-step process, anyone can effectively close a kitchen exhaust fan hole, ensuring a seamless transition and professional outcome. Prioritizing safety and precision is key to success.
Read more: How To Install An Exhaust Fan
Step 1: Remove the Exhaust Fan
Removing the exhaust fan is the initial and crucial step in closing a kitchen exhaust fan hole. This process requires careful attention to detail and a systematic approach to ensure a smooth transition to the subsequent steps.
First, switch off the power supply to the exhaust fan to eliminate any risk of electrical hazards. This can typically be done by turning off the circuit breaker connected to the exhaust fan. It's essential to prioritize safety throughout this process.
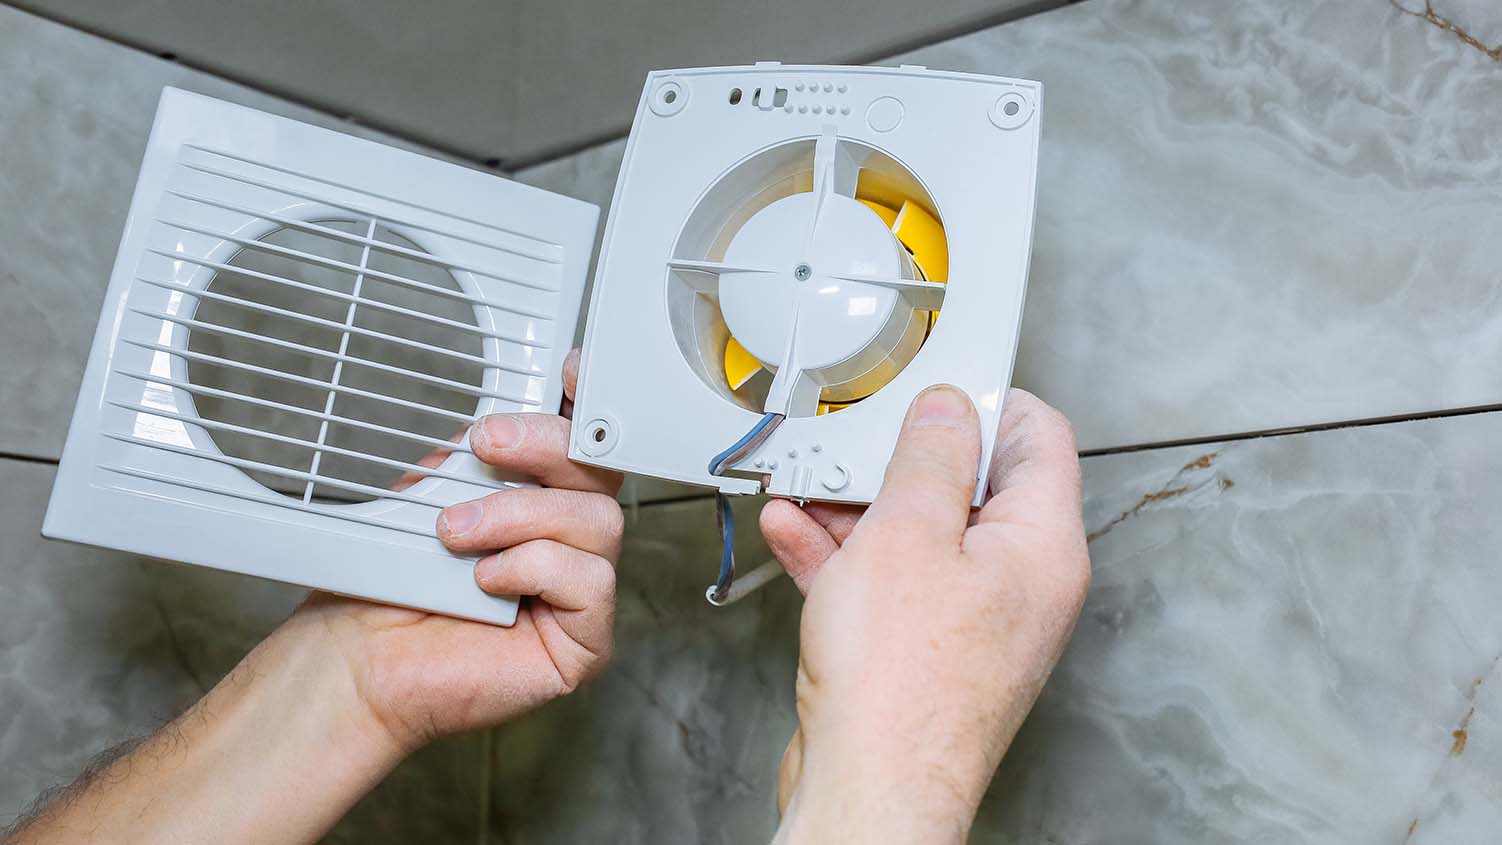
Next, locate the screws or fasteners securing the exhaust fan in place. These are usually found on the cover or housing of the fan. Using a suitable screwdriver or wrench, carefully remove the screws and set them aside for later use. If the fan is connected to ductwork, detach it by loosening the clamps or connectors.
Once the fasteners are removed, gently pull the exhaust fan assembly away from the mounting surface. Be mindful of any electrical wiring connected to the fan. If the fan is hardwired, it's necessary to disconnect the wiring by carefully separating the electrical connections. This should be done with caution and may require the assistance of a qualified electrician if you are not experienced in handling electrical components.
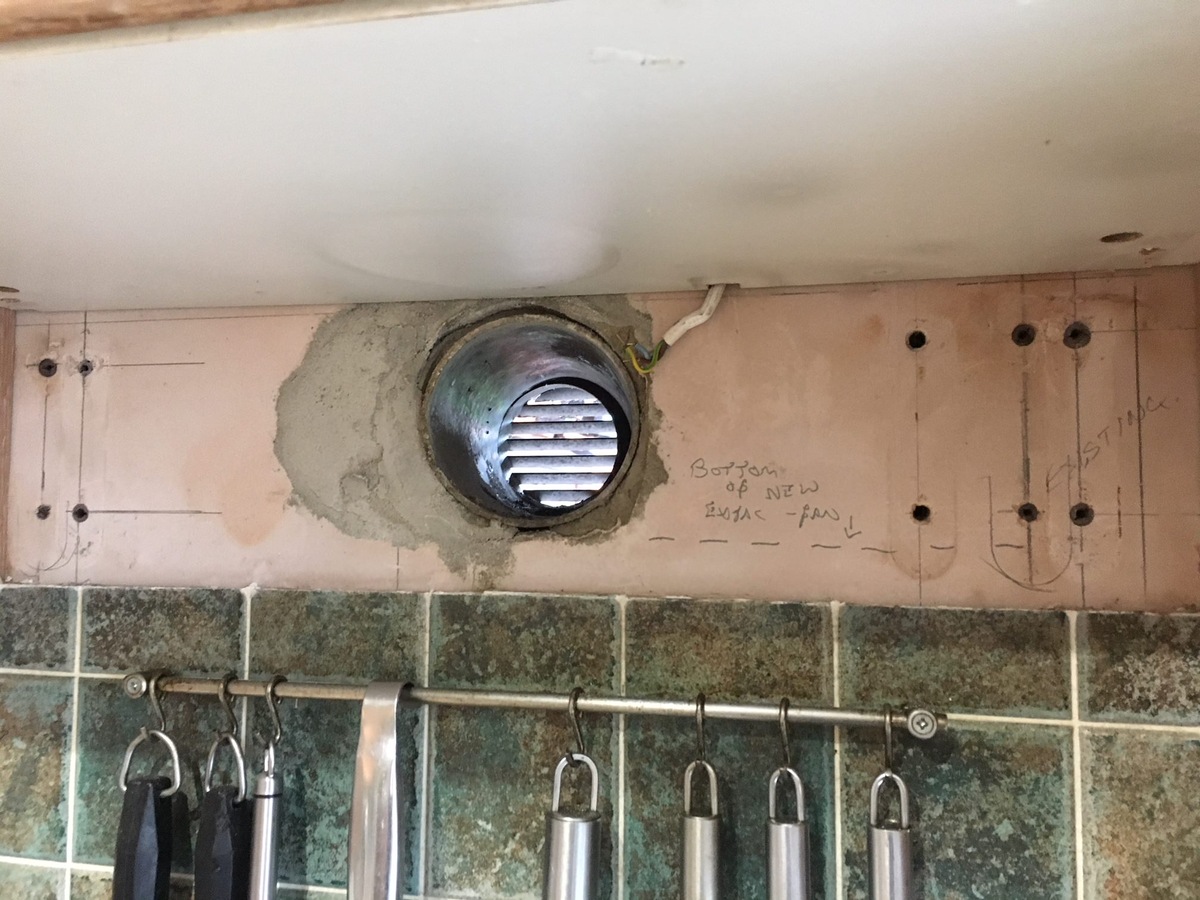
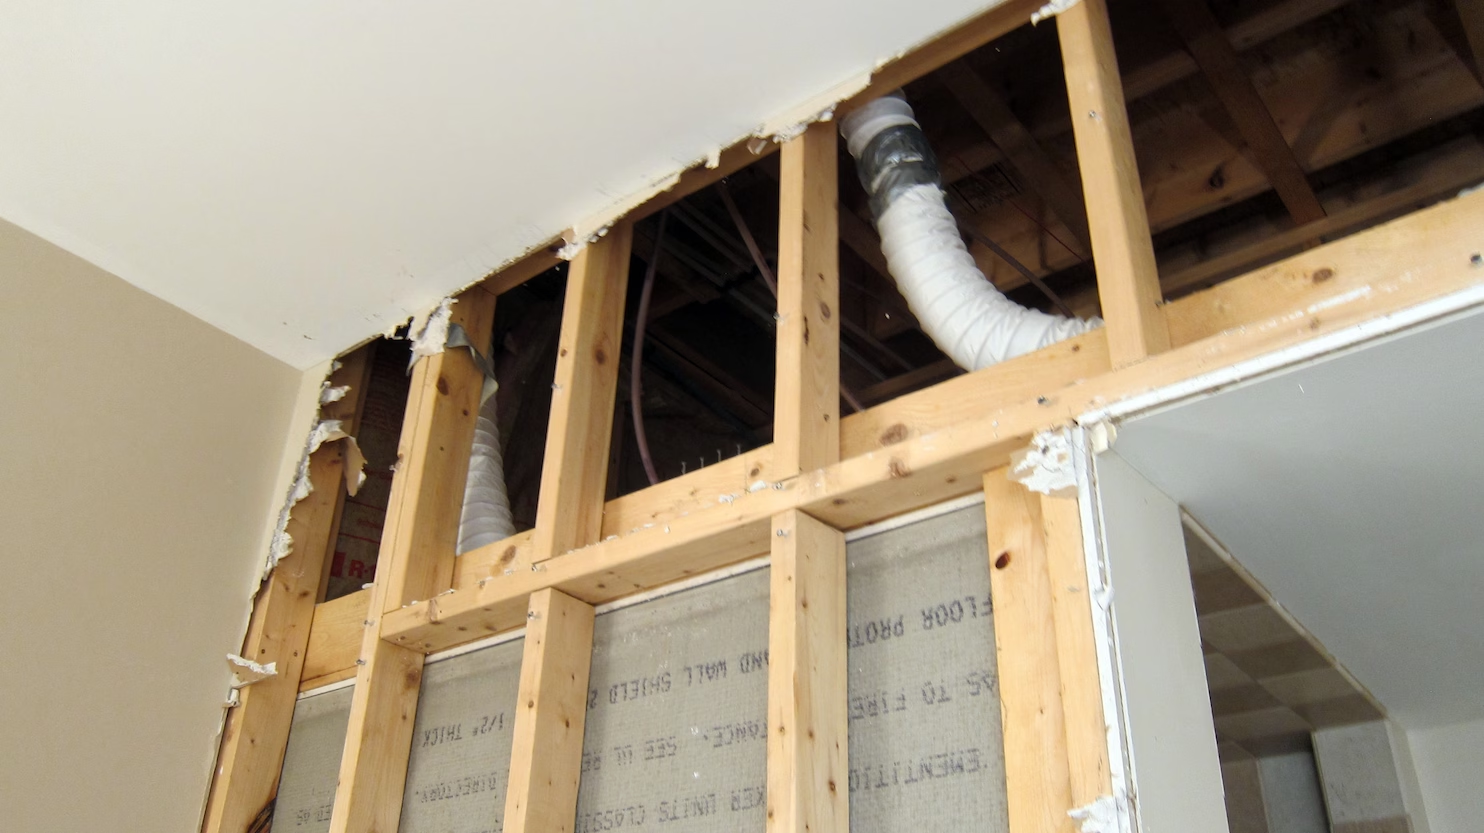
After disconnecting the electrical wiring, the exhaust fan can be fully removed from the hole. Take care to support the weight of the fan to prevent any damage to the surrounding area. Once the fan is successfully removed, inspect the hole to ensure it is free from any debris or obstructions.
By completing this step meticulously, you have set the stage for the subsequent tasks involved in closing the kitchen exhaust fan hole. With the fan safely removed, you are now ready to proceed with the next phase of the process, which involves preparing the area for the closure and ensuring a seamless transition to the subsequent steps.
This careful and methodical approach to removing the exhaust fan sets the foundation for a successful closure of the kitchen exhaust fan hole, ensuring that the subsequent steps can be executed with precision and efficiency.
Step 2: Clean the Surrounding Area
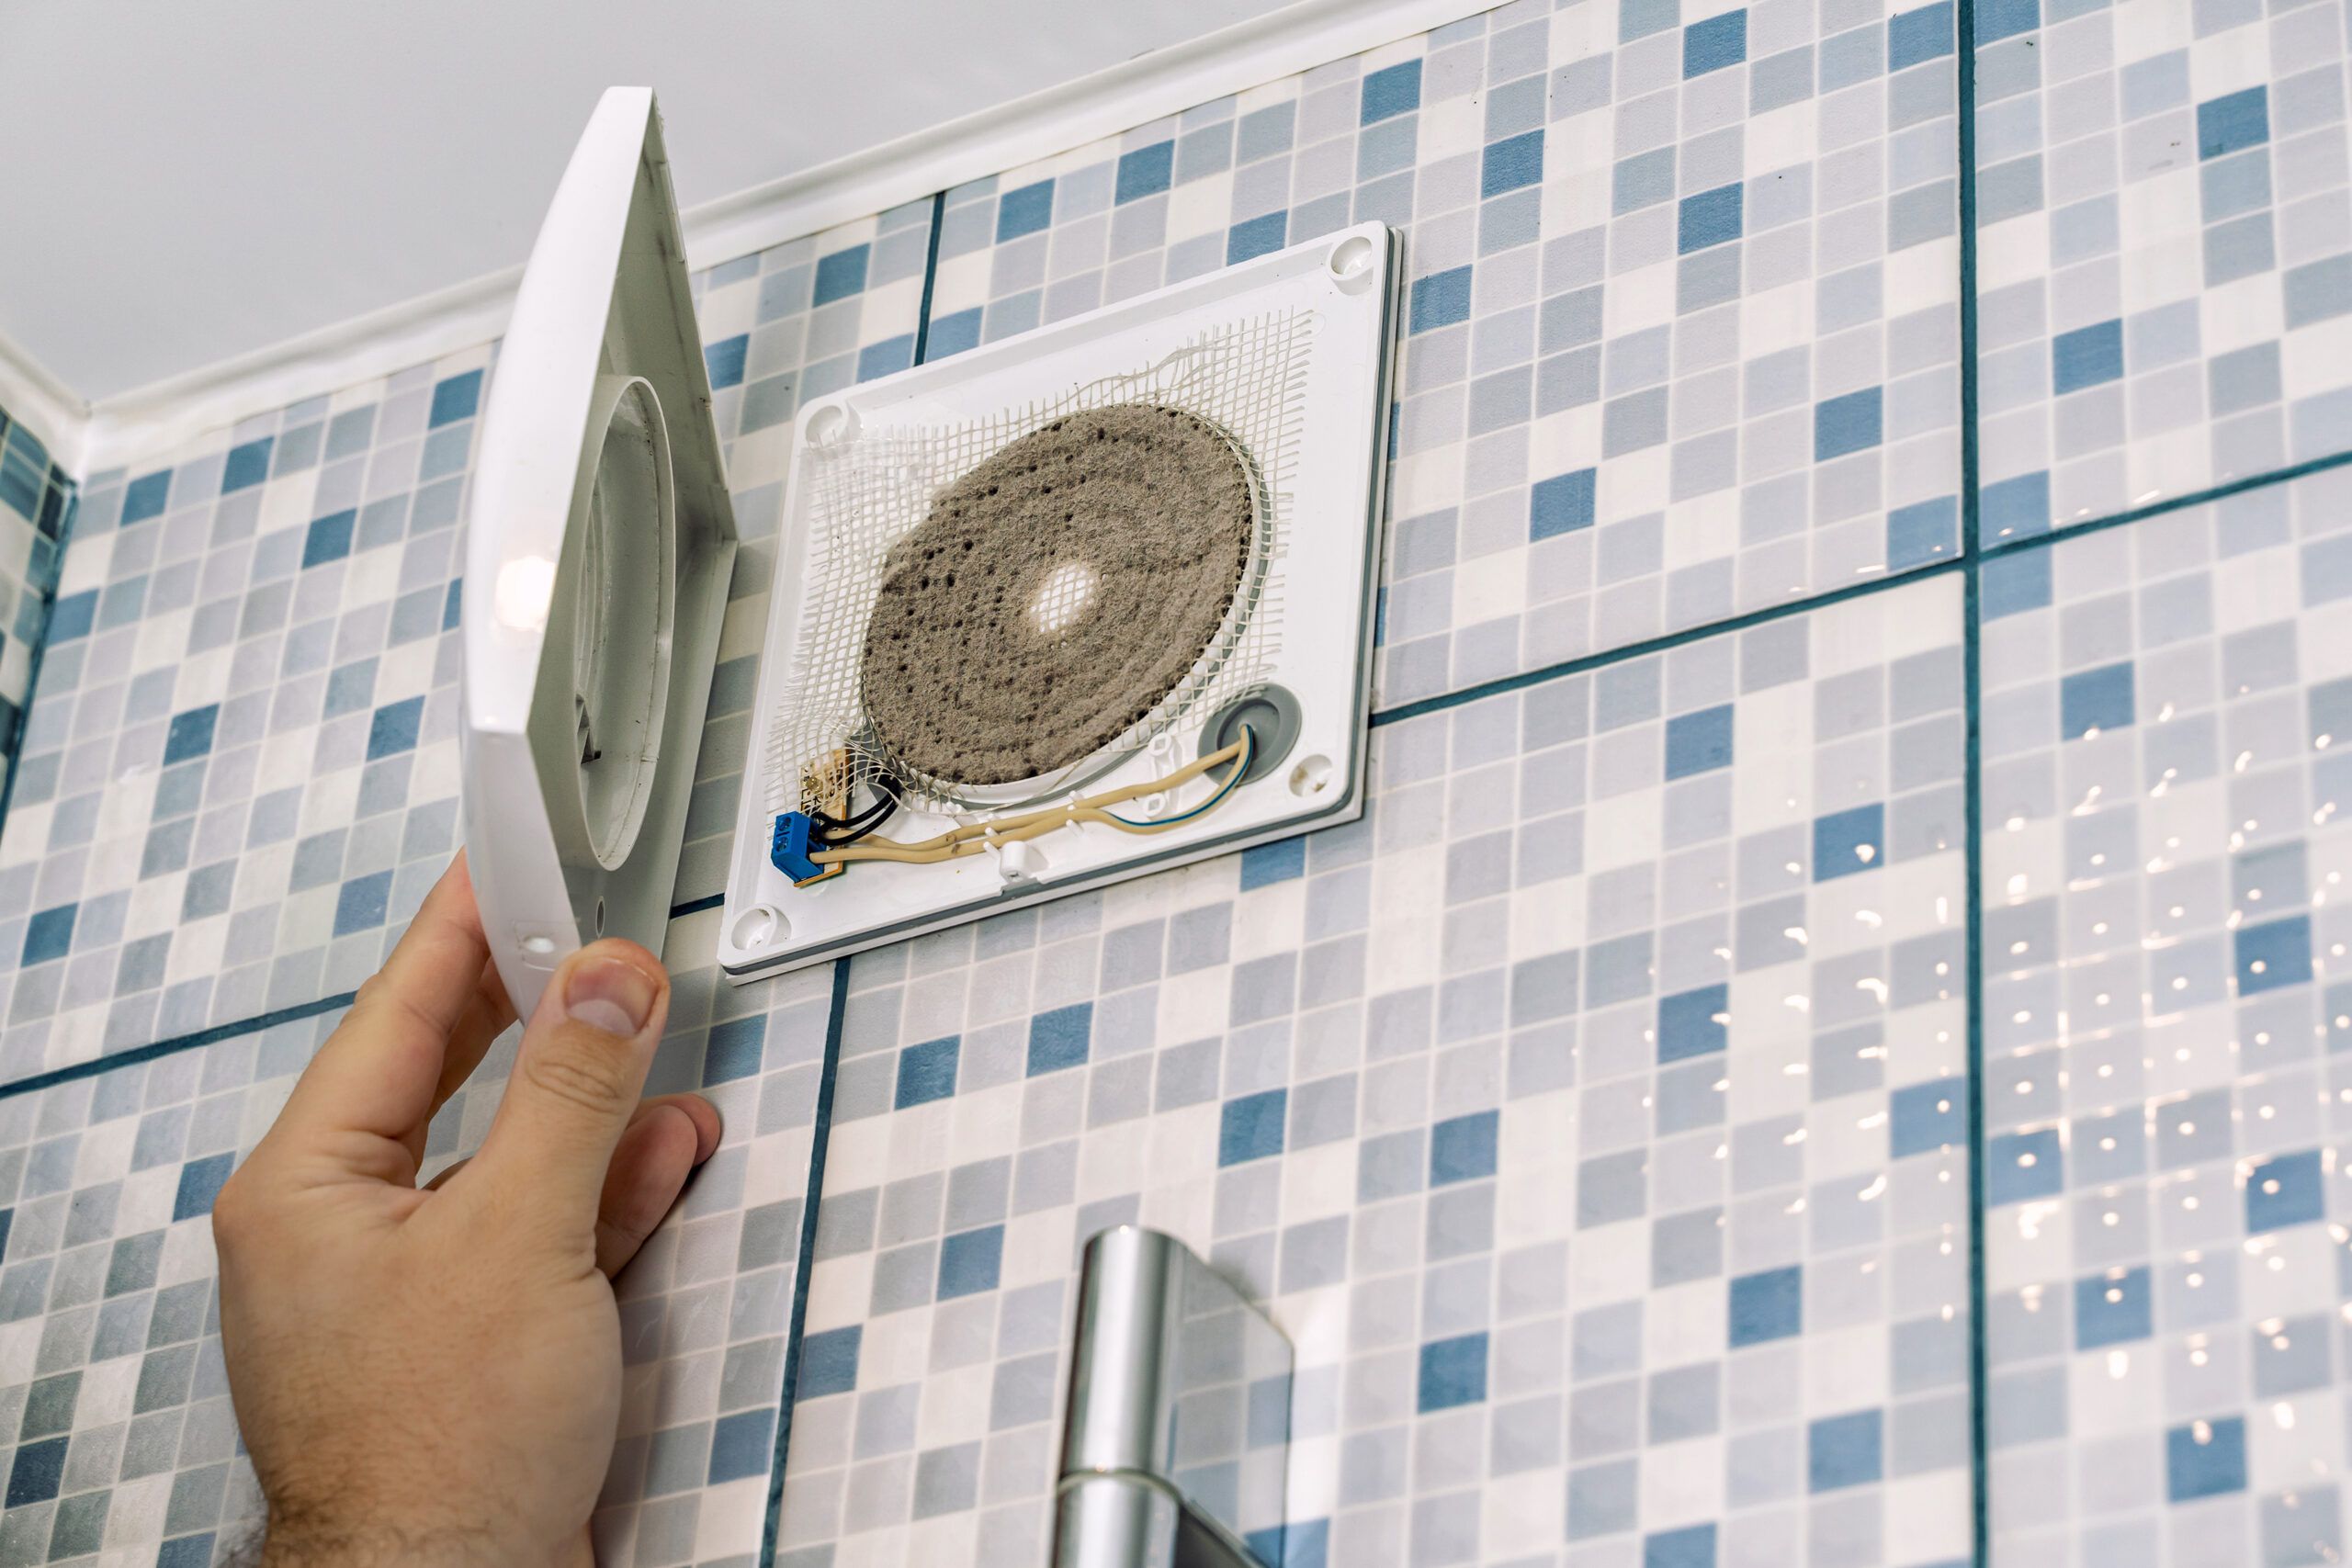
After successfully removing the exhaust fan, the next critical step in closing a kitchen exhaust fan hole is to thoroughly clean the surrounding area. This process is essential for ensuring a smooth and seamless closure, as well as preparing the surface for the subsequent steps.
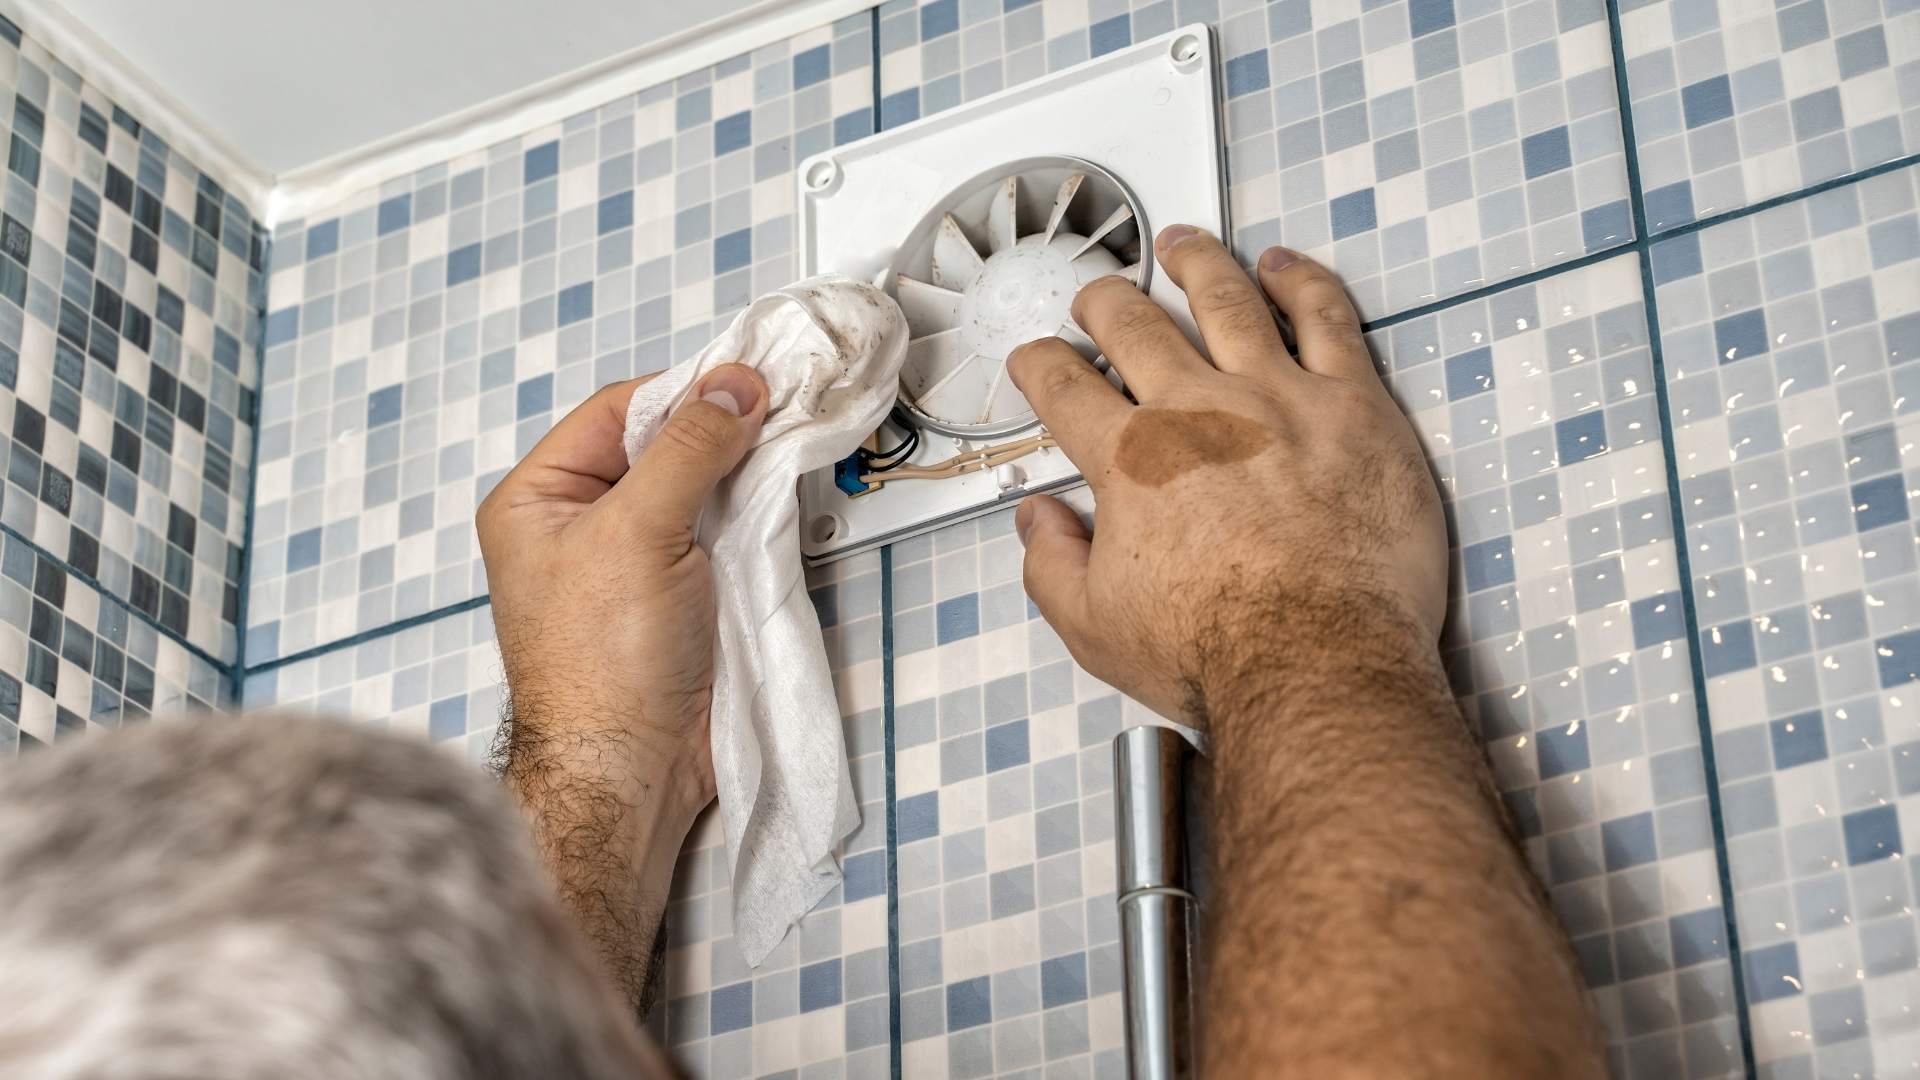
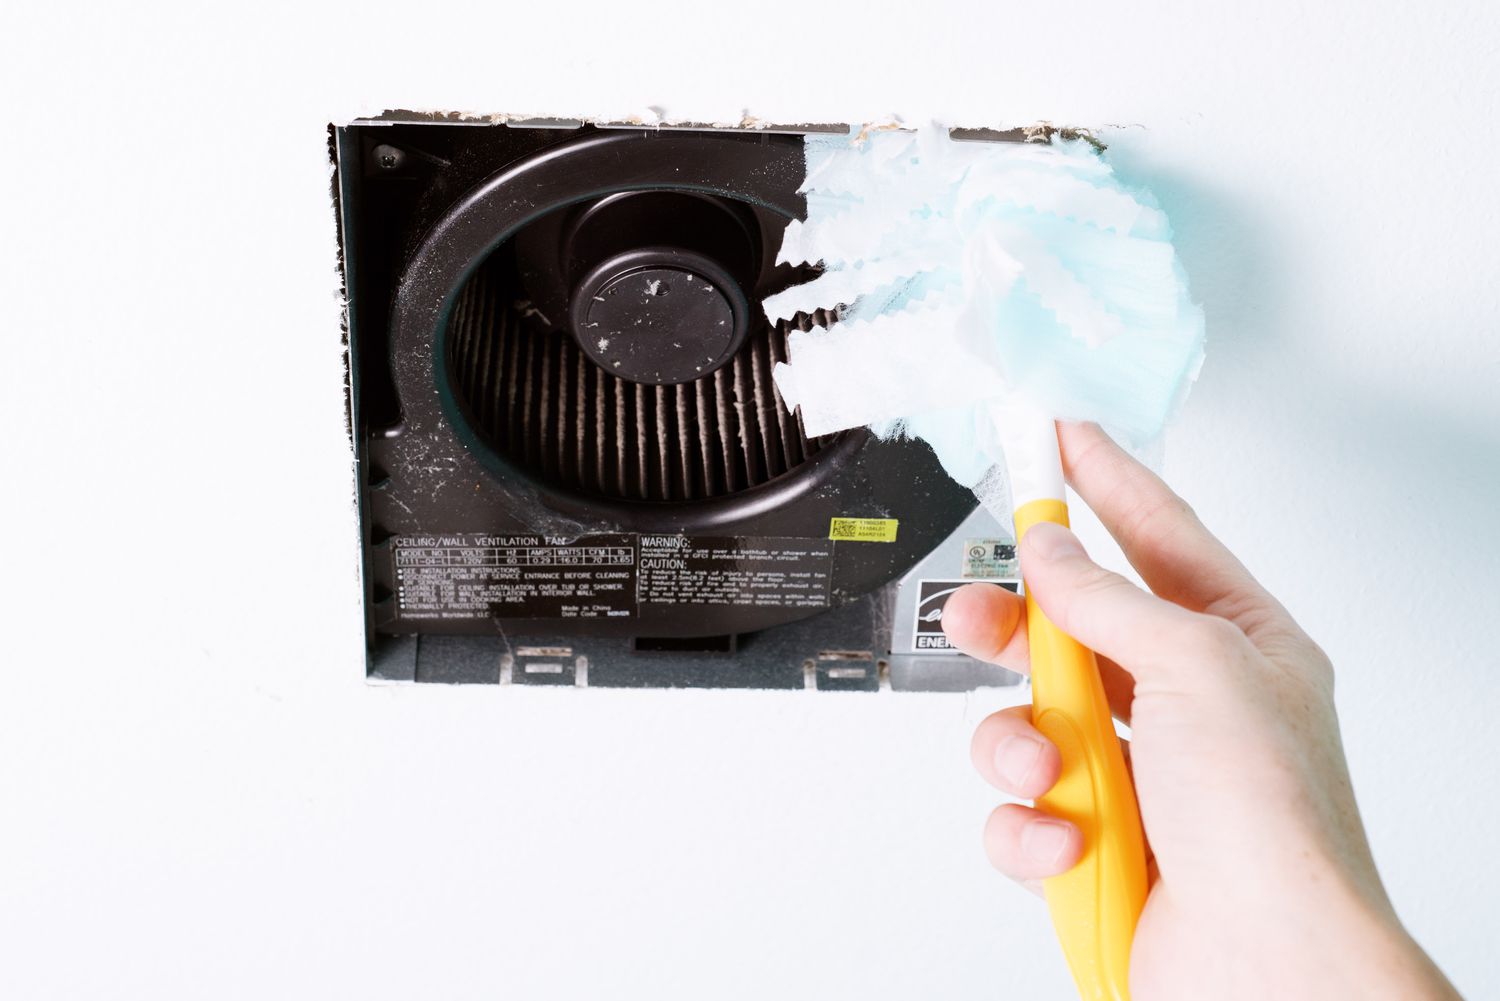
Begin by inspecting the interior and exterior surfaces around the exhaust fan hole. Remove any accumulated dust, grease, or debris using a vacuum cleaner with a brush attachment or a damp cloth. Pay close attention to the edges of the hole and the adjacent wall or ceiling surfaces, as these areas are prone to collecting residue from cooking and everyday kitchen activities.
For stubborn grease or grime buildup, consider using a mild detergent or a specialized kitchen cleaner to effectively remove any lingering residue. Ensure that the cleaning solution is suitable for the specific material of the surrounding surfaces, whether it's drywall, plaster, or another type of wall covering.
Once the surfaces are free from dirt and grease, thoroughly dry the area using a clean, lint-free cloth or allow it to air-dry completely. It's crucial to ensure that the surfaces are completely dry before proceeding to the next steps, as any residual moisture can affect the adhesion of the patch and the effectiveness of the sealing process.
In addition to cleaning the visible surfaces, it's important to inspect the interior of the exhaust fan duct or opening for any accumulated debris or blockages. Use a flashlight to illuminate the interior and remove any dust or obstructions using a vacuum cleaner or a specialized duct cleaning brush. This step is particularly important if the kitchen exhaust fan was in use for an extended period, as it helps maintain optimal ventilation and prevents potential issues with airflow in the future.
By meticulously cleaning the surrounding area, including the interior and exterior surfaces as well as the exhaust fan duct or opening, you are laying the groundwork for a successful closure of the kitchen exhaust fan hole. This attention to detail ensures that the subsequent steps, such as measuring the hole, cutting a patch, and attaching the patch, can be carried out with precision and efficiency, resulting in a professional and polished outcome.
With the surrounding area thoroughly cleaned and prepared, you are now ready to proceed to the next phase of the process, which involves measuring the hole to determine the dimensions of the patch needed for the closure.
Step 3: Measure the Hole
Accurately measuring the hole left by the removed kitchen exhaust fan is a crucial step in the process of closing it effectively. This step requires precision and attention to detail to ensure that the patch fits seamlessly, creating a polished and professional finish.
To begin, use a measuring tape to determine the dimensions of the hole. Measure the width and height of the opening, taking the measurements at multiple points to account for any irregularities in the shape of the hole. It's essential to record the measurements accurately, as they will serve as the basis for cutting the patch to the appropriate size.
In addition to measuring the width and height, assess the depth of the hole to determine the thickness of the material needed for the patch. This step is particularly important if the surrounding wall or ceiling is constructed with different layers of material, such as drywall, plaster, or insulation. Understanding the depth of the hole ensures that the patch will align flush with the existing surface once it is attached.
Once the measurements are recorded, it's advisable to double-check the dimensions to confirm their accuracy. This can be done by comparing the measurements at different points and ensuring that they align consistently. Any discrepancies in the measurements should be addressed before proceeding to the next step to avoid potential issues during the patching process.
In some cases, the shape of the hole may not be perfectly rectangular or square, especially if it was originally designed to accommodate the specific dimensions of the exhaust fan. If this is the case, take note of any irregularities in the shape of the hole, such as rounded corners or asymmetrical edges. These details will be valuable when cutting the patch to match the unique contours of the hole accurately.
By meticulously measuring the dimensions of the hole and accounting for any irregularities in its shape, you are laying the groundwork for a precise and tailored approach to closing the kitchen exhaust fan hole. These measurements will serve as the foundation for cutting a patch that fits seamlessly, ensuring a professional and cohesive result.
With the dimensions of the hole accurately measured and recorded, you are now prepared to proceed to the next phase of the process, which involves cutting a patch to cover the opening effectively.
Use a metal patch and heat-resistant sealant to cover the hole. Secure the patch with screws and apply the sealant around the edges for a tight seal.
Step 4: Cut a Patch
Cutting a patch to cover the kitchen exhaust fan hole is a critical step that demands precision and attention to detail. The patch serves as the seamless barrier between the interior and exterior of the kitchen space, ensuring a polished and professional finish. To achieve this, follow these steps:
-
Select the Patch Material: Choose a suitable material for the patch, such as drywall, plywood, or a specialized patching material designed for wall and ceiling repairs. Ensure that the material matches the thickness of the surrounding surface to maintain a flush and even finish once the patch is attached.
-
Transfer the Measurements: Using the measurements obtained in the previous step, transfer the dimensions of the hole onto the selected patch material. Use a pencil and a straight edge to mark the outline of the patch, ensuring that the lines are precise and accurately reflect the shape and size of the hole.
-
Cut the Patch: With the outline of the patch clearly marked, carefully cut along the lines using a suitable cutting tool, such as a drywall saw, a utility knife, or a jigsaw, depending on the material chosen for the patch. Exercise caution and use appropriate safety measures when cutting the patch to achieve clean and accurate edges.
-
Refine the Fit: After cutting the patch, test its fit by placing it over the hole. Ensure that the patch aligns with the edges of the opening and sits flush with the surrounding surface. Make any necessary adjustments to the size or shape of the patch to achieve a precise and tailored fit.
-
Sand the Edges: Once the patch fits seamlessly over the hole, use fine-grit sandpaper to smooth the edges and remove any rough or uneven surfaces. This step is essential for creating a uniform and seamless transition between the patch and the surrounding wall or ceiling, ensuring a professional and polished appearance.
By following these steps, you can effectively cut a patch that aligns with the dimensions of the kitchen exhaust fan hole and fits seamlessly to create a cohesive and professional finish. With the patch accurately cut and refined, you are now ready to proceed to the next phase of the process, which involves attaching the patch to cover the opening securely.
Read more: How To Install Kitchen Exhaust Fan
Step 5: Attach the Patch
Attaching the patch to cover the kitchen exhaust fan hole is a pivotal stage that demands precision and meticulous attention to detail. The seamless integration of the patch with the surrounding surface is essential for achieving a professional and polished finish. Follow these steps to effectively attach the patch:
-
Apply Adhesive or Joint Compound: Depending on the material of the patch and the surrounding surface, apply a suitable adhesive or joint compound to the back of the patch. This ensures secure adhesion and creates a strong bond between the patch and the wall or ceiling.
-
Position the Patch: Carefully position the patch over the hole, ensuring that it aligns accurately with the edges of the opening. Take time to adjust the placement of the patch to achieve a seamless and flush fit with the surrounding surface.
-
Secure the Patch: Once the patch is positioned correctly, use screws, nails, or drywall clips to secure it in place. Ensure that the fasteners are driven flush with the surface of the patch without causing any damage to the material. The goal is to create a secure and stable attachment that withstands the test of time.
-
Fill Gaps and Seams: If any gaps or seams are present between the patch and the surrounding surface, use joint compound or spackling to fill and smooth them. This step is crucial for creating a uniform and seamless transition, ensuring that the patch blends seamlessly with the existing wall or ceiling.
-
Smooth the Surface: After the patch is securely attached and any gaps are filled, use a putty knife or drywall trowel to smooth the surface of the patch and remove any excess joint compound or spackling. This process creates a uniform and polished appearance, setting the stage for the final step of sealing the patch.
By following these steps with precision and attention to detail, you can effectively attach the patch to cover the kitchen exhaust fan hole, creating a seamless and professional finish. With the patch securely in place and the surface smoothed, you are now prepared to proceed to the final phase of the process, which involves sealing the patch to ensure long-lasting durability and a cohesive appearance.
Step 6: Seal the Patch
Sealing the patch is the final and crucial step in the process of closing a kitchen exhaust fan hole. This step is essential for ensuring the long-term durability and seamless integration of the patch with the surrounding surface. By effectively sealing the patch, you can safeguard against potential issues such as moisture infiltration, structural instability, and aesthetic discrepancies.
To seal the patch effectively, follow these detailed steps:
-
Apply Primer: Before applying the sealant, it's advisable to prime the patch and the surrounding area. This helps create a uniform surface and enhances the adhesion of the sealant. Choose a primer that is compatible with the material of the patch and the surrounding wall or ceiling.
-
Select the Sealant: Choose a high-quality sealant that is suitable for the specific material of the patch and the surrounding surface. For example, if the patch is made of drywall, opt for a paintable acrylic caulk or a specialized drywall sealant. Ensure that the sealant is formulated to withstand the conditions of a kitchen environment, including exposure to moisture and temperature fluctuations.
-
Apply the Sealant: Using a caulking gun or a specialized applicator, carefully apply the sealant along the edges of the patch where it meets the surrounding surface. Ensure that the sealant creates a continuous and uniform barrier, effectively sealing any gaps or seams. Pay close attention to achieving a smooth and consistent application to maintain a polished appearance.
-
Smooth and Blend: After applying the sealant, use a damp cloth or a specialized tool to smooth and blend the sealant with the surrounding surface. This step ensures that the sealant seamlessly integrates with the existing wall or ceiling, creating a cohesive and professional finish. Take time to refine the appearance of the sealed edges for a polished result.
-
Allow for Drying: Allow the sealant to dry completely according to the manufacturer's instructions. This typically involves a curing period during which the sealant sets and forms a durable barrier. Avoid any contact with the sealed area during the drying process to prevent disruptions to the sealant's effectiveness.
By following these detailed steps to seal the patch effectively, you can ensure that the kitchen exhaust fan hole is closed with precision and durability. The sealed patch not only provides a seamless and polished appearance but also offers long-term protection against potential issues, contributing to the overall integrity and aesthetics of the kitchen space.
Conclusion
In conclusion, successfully closing a kitchen exhaust fan hole requires a systematic approach, attention to detail, and a commitment to achieving a polished and professional finish. By following the step-by-step process outlined in this comprehensive guide, homeowners and DIY enthusiasts can effectively navigate the complexities of this task, ensuring a seamless transition from the removal of the exhaust fan to the sealing of the patch.
Throughout the process, prioritizing safety and precision is paramount. From the careful removal of the exhaust fan and thorough cleaning of the surrounding area to the meticulous measurement, cutting, attachment, and sealing of the patch, each step contributes to the overall success of the closure. By adhering to best practices and leveraging the appropriate tools and materials, individuals can achieve a result that not only meets functional requirements but also enhances the visual appeal of the kitchen space.
Furthermore, the attention to detail in measuring the hole and cutting a patch that fits seamlessly ensures that the closure appears as a natural part of the wall or ceiling, maintaining the aesthetic integrity of the kitchen. The attachment and sealing of the patch play a crucial role in ensuring the durability and long-term effectiveness of the closure, safeguarding against potential issues such as moisture infiltration and structural instability.
Ultimately, the successful closure of a kitchen exhaust fan hole contributes to the overall functionality and aesthetics of the kitchen space. By following the outlined steps and embracing a meticulous and methodical approach, individuals can achieve a result that reflects professionalism and attention to detail. Whether undertaking this project as a DIY endeavor or seeking the expertise of a professional contractor, the knowledge and insights gained from this guide empower individuals to navigate the process with confidence and precision.
In closing, the art of seamlessly closing a kitchen exhaust fan hole is a testament to the transformative power of attention to detail and precision. By embracing these principles and following the comprehensive guide provided, individuals can achieve a closure that not only meets functional requirements but also elevates the overall visual appeal and integrity of the kitchen space.
Frequently Asked Questions about How To Close A Kitchen Exhaust Fan Hole
Was this page helpful?
At Storables.com, we guarantee accurate and reliable information. Our content, validated by Expert Board Contributors, is crafted following stringent Editorial Policies. We're committed to providing you with well-researched, expert-backed insights for all your informational needs.


0 thoughts on “How To Close A Kitchen Exhaust Fan Hole”