Home>Furniture & Design>Bathroom Accessories>How To Fix A Bathroom Exhaust Fan
Bathroom Accessories
How To Fix A Bathroom Exhaust Fan
Modified: March 1, 2024
Learn how to fix a bathroom exhaust fan with our step-by-step guide. Keep your bathroom accessories in top condition with our expert tips.
(Many of the links in this article redirect to a specific reviewed product. Your purchase of these products through affiliate links helps to generate commission for Storables.com, at no extra cost. Learn more)
Introduction
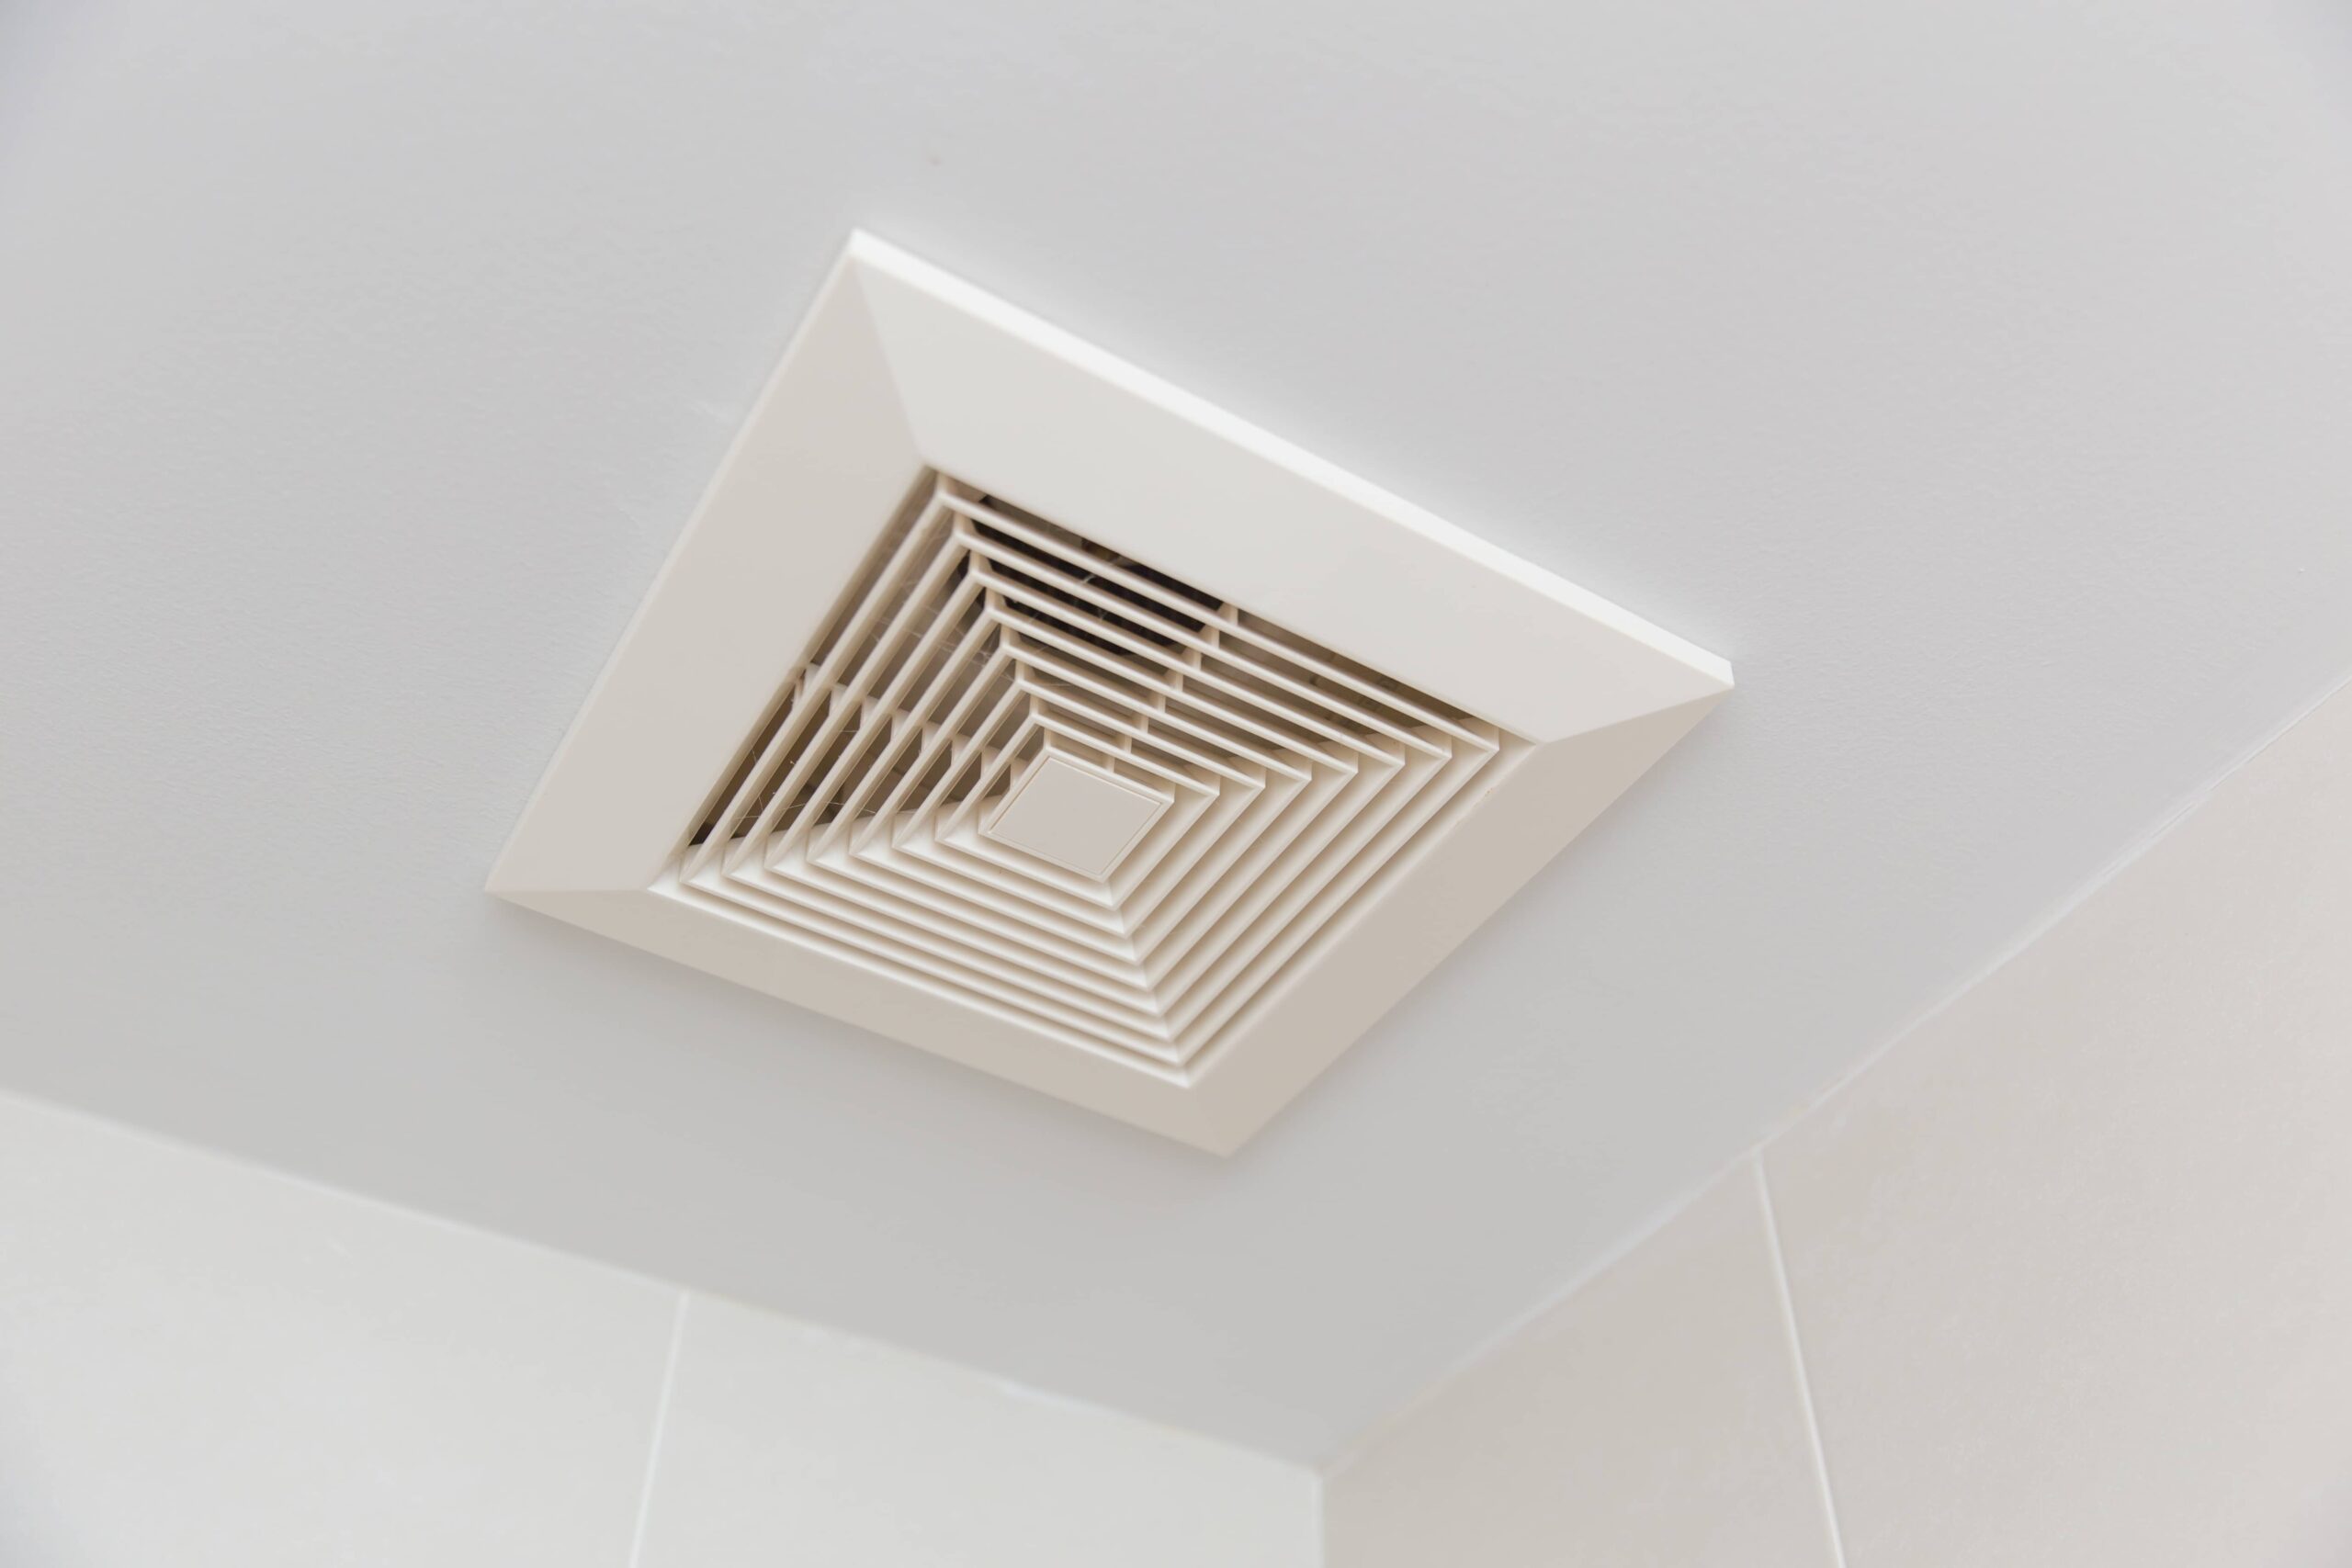
A bathroom exhaust fan is a vital component of any bathroom, as it helps to eliminate excess moisture, odors, and airborne impurities. Over time, these fans can become clogged with dust, debris, and even develop mechanical issues, leading to reduced efficiency or complete malfunction. Fortunately, with a few simple steps, you can troubleshoot and fix common problems with your bathroom exhaust fan, restoring it to optimal functionality.
A malfunctioning bathroom exhaust fan can lead to a host of issues, including mold and mildew growth, peeling paint, and even structural damage. By addressing any problems promptly, you can maintain a healthy indoor environment and prevent potential costly repairs down the line.
In this comprehensive guide, we will walk you through the step-by-step process of fixing a bathroom exhaust fan. From turning off the power to cleaning the fan and housing, checking for obstructions, lubricating the fan motor, and reassembling and testing the fan, we will cover everything you need to know to restore your bathroom exhaust fan to its former glory.
Whether you are experiencing reduced airflow, unusual noises, or the fan simply won't turn on, this guide will equip you with the knowledge and confidence to tackle the issue head-on. By following these instructions, you can save time and money by avoiding the need for professional assistance and ensure that your bathroom exhaust fan operates efficiently for years to come.
Now, let's dive into the step-by-step process of fixing your bathroom exhaust fan, so you can enjoy a fresh, clean, and moisture-free bathroom environment once again.
Key Takeaways:
- Keep your bathroom exhaust fan in top shape by following these steps: turn off the power, clean the fan and housing, check for obstructions, lubricate the fan motor, and reassemble and test the fan.
- Regular maintenance of your bathroom exhaust fan ensures optimal performance, reduces the risk of costly repairs, and promotes a fresh and healthy bathroom environment.
Read more: How To Fix Bathroom Exhaust Fan
Step 1: Turn off the Power
Before beginning any work on your bathroom exhaust fan, it is crucial to ensure that the power supply to the fan is completely shut off. This step is essential for your safety and to prevent any electrical mishaps during the repair process.
-
Locate the Circuit Breaker: Start by identifying the circuit breaker or fuse box that controls the power supply to the bathroom exhaust fan. In most homes, the circuit breaker panel is located in the basement, utility room, or garage. Once you have located the panel, open the door to reveal the circuit breakers or fuses.
-
Identify the Correct Switch: Look for the switch or breaker that corresponds to the bathroom exhaust fan. The switches are usually labeled to indicate which area or appliance they control. If the switches are not labeled, you may need to test each one to determine the correct switch for the fan.
-
Turn Off the Power: Once you have identified the correct switch or breaker, firmly switch it to the "off" position. If you are using a circuit breaker panel, flip the corresponding breaker to the "off" position. This action will cut off the electrical supply to the bathroom exhaust fan, ensuring that it is safe to proceed with the repair.
-
Verify the Power is Off: After turning off the switch or breaker, it is essential to verify that the power to the fan has been successfully cut off. You can do this by attempting to turn on the fan switch or using a non-contact voltage tester to check for the presence of electrical current. It is crucial to double-check this step to avoid any potential electrical hazards.
By following these steps to turn off the power, you can proceed with the repair process confidently, knowing that you have taken the necessary precautions to ensure your safety. Once the power is off, you can move on to the next steps of dismantling, cleaning, and troubleshooting your bathroom exhaust fan without any risk of electrical shock or injury.
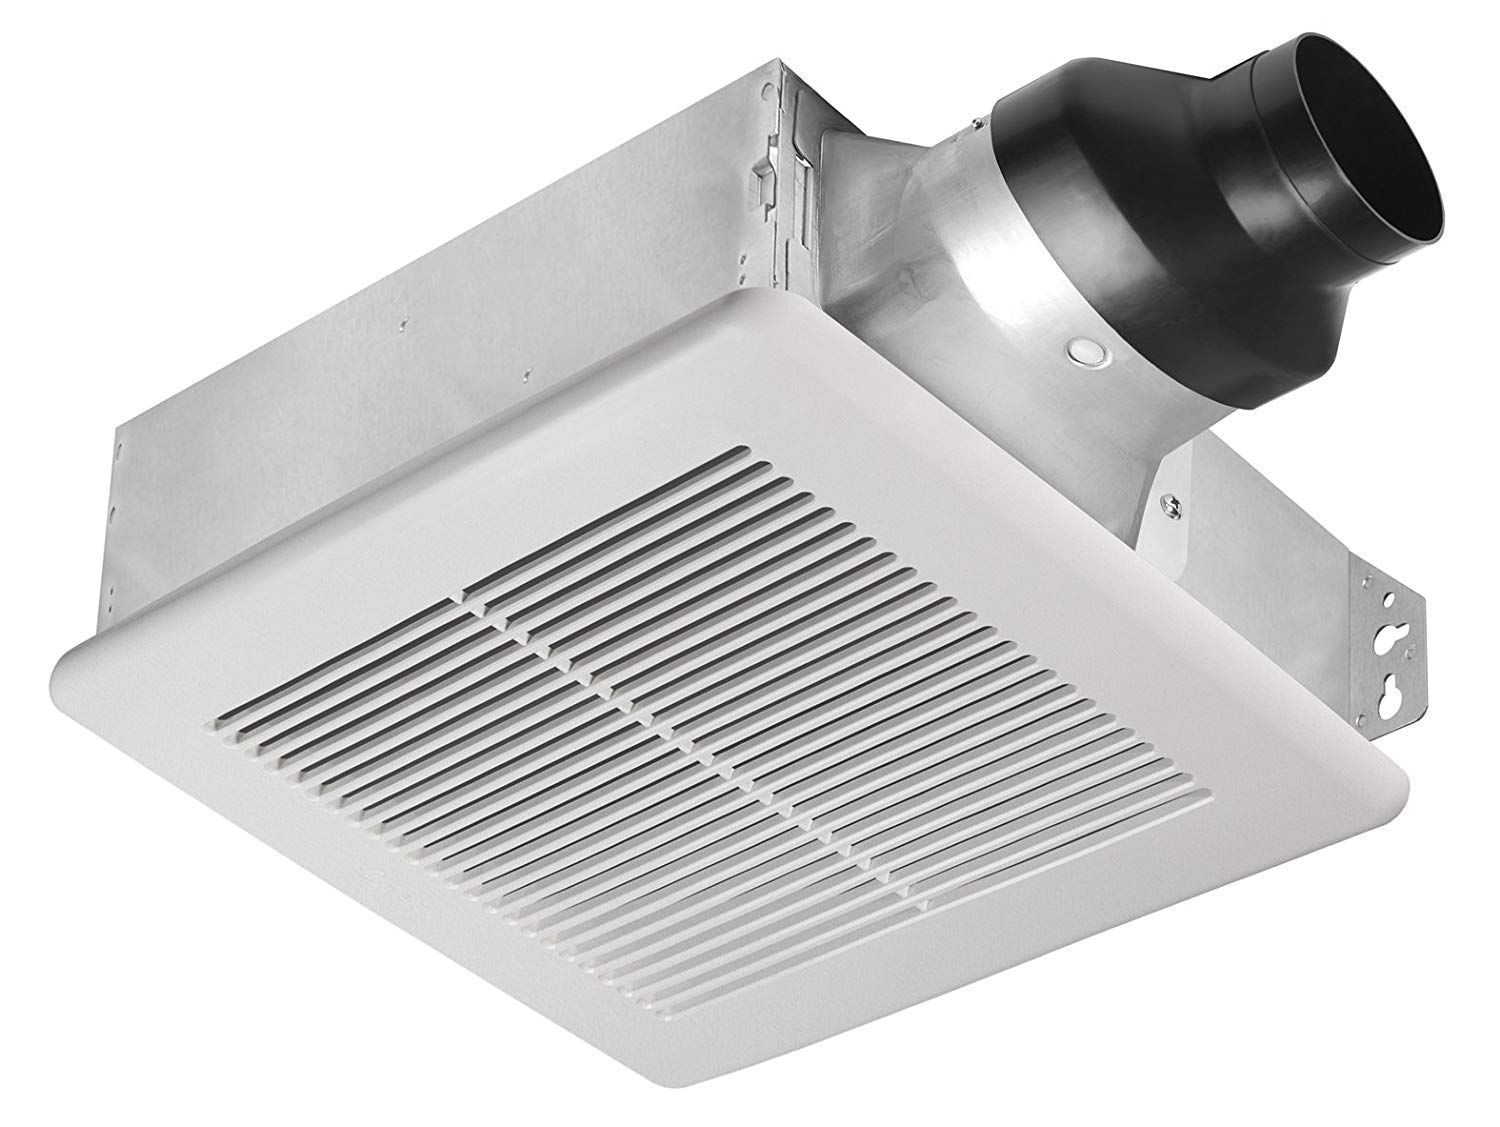
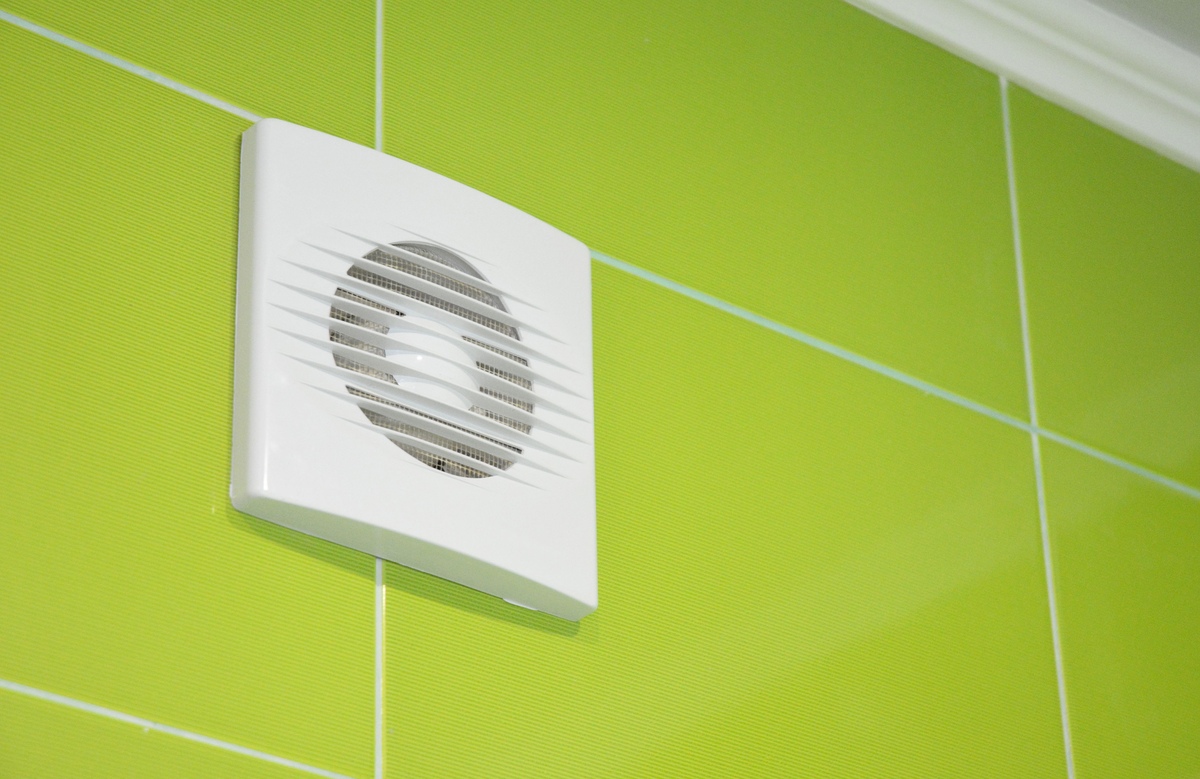
Step 2: Remove the Cover
Removing the cover of your bathroom exhaust fan is the next crucial step in the process of fixing any issues it may be experiencing. The cover not only protects the internal components but also provides access for maintenance and repairs. Here's how to safely and effectively remove the cover:
-
Locate the Fasteners: Most bathroom exhaust fan covers are secured in place by either screws or spring clips. Carefully inspect the perimeter of the cover to identify the type of fasteners used. If screws are present, you will need a screwdriver to remove them. For spring clips, gentle pressure or a flathead screwdriver may be required to release them.
-
Unscrew or Release the Fasteners: If the cover is held in place by screws, use a suitable screwdriver to carefully loosen and remove them. It's important to keep track of the screws to avoid misplacement. For covers secured with spring clips, apply gentle pressure to release them from their slots. Take care not to apply excessive force to prevent damage to the cover or the fan housing.
-
Lower the Cover: Once the fasteners are removed or released, gently lower the cover from the fan housing. Some covers may have electrical connections for built-in lighting or heating elements. If this is the case, carefully disconnect the wiring to fully separate the cover from the fan unit.
-
Inspect the Cover and Housing: With the cover removed, take a moment to inspect both the cover and the fan housing for any signs of damage, excessive dirt, or debris accumulation. Cleaning the cover and housing can be done simultaneously with the fan cleaning process, ensuring that all components are thoroughly maintained.
By following these steps to remove the cover, you can gain access to the internal components of the bathroom exhaust fan, allowing for thorough cleaning, inspection, and any necessary repairs. With the cover safely removed, you are now ready to proceed with the subsequent steps to restore your bathroom exhaust fan to optimal working condition.
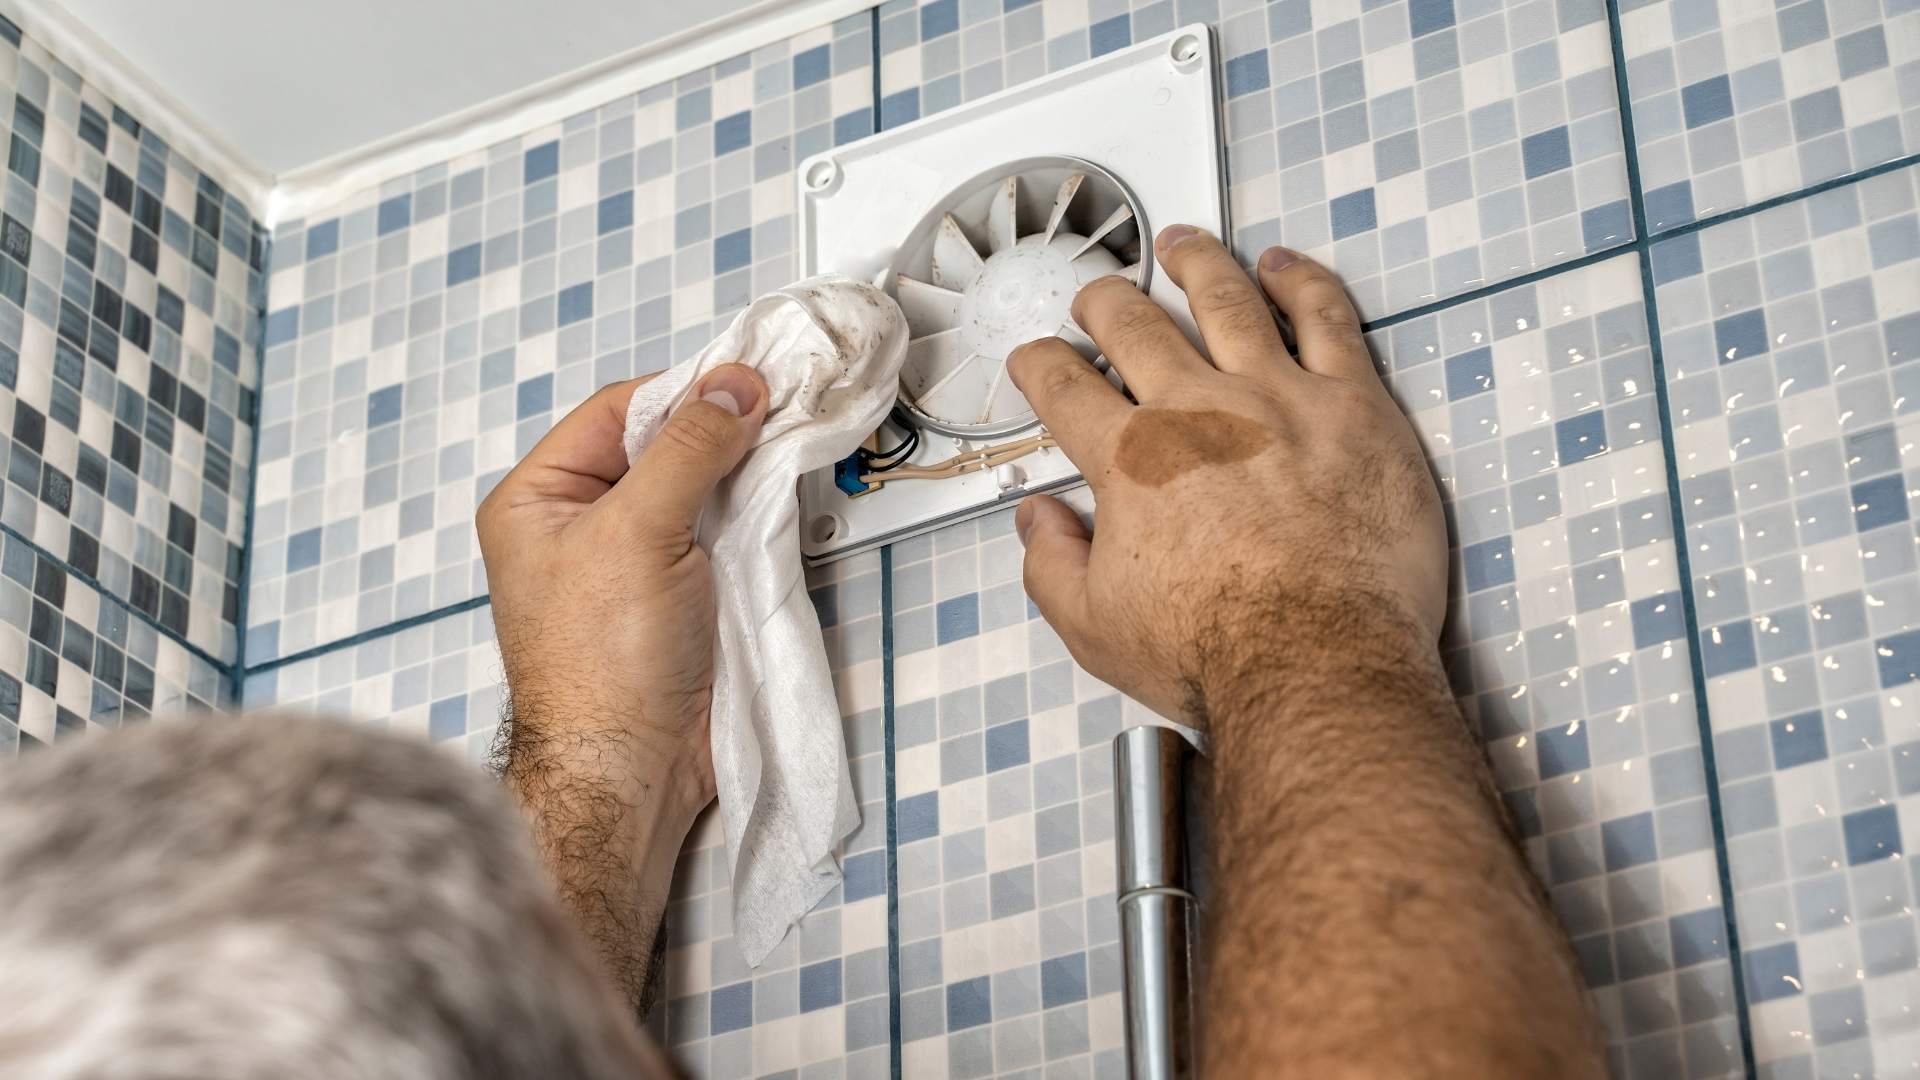
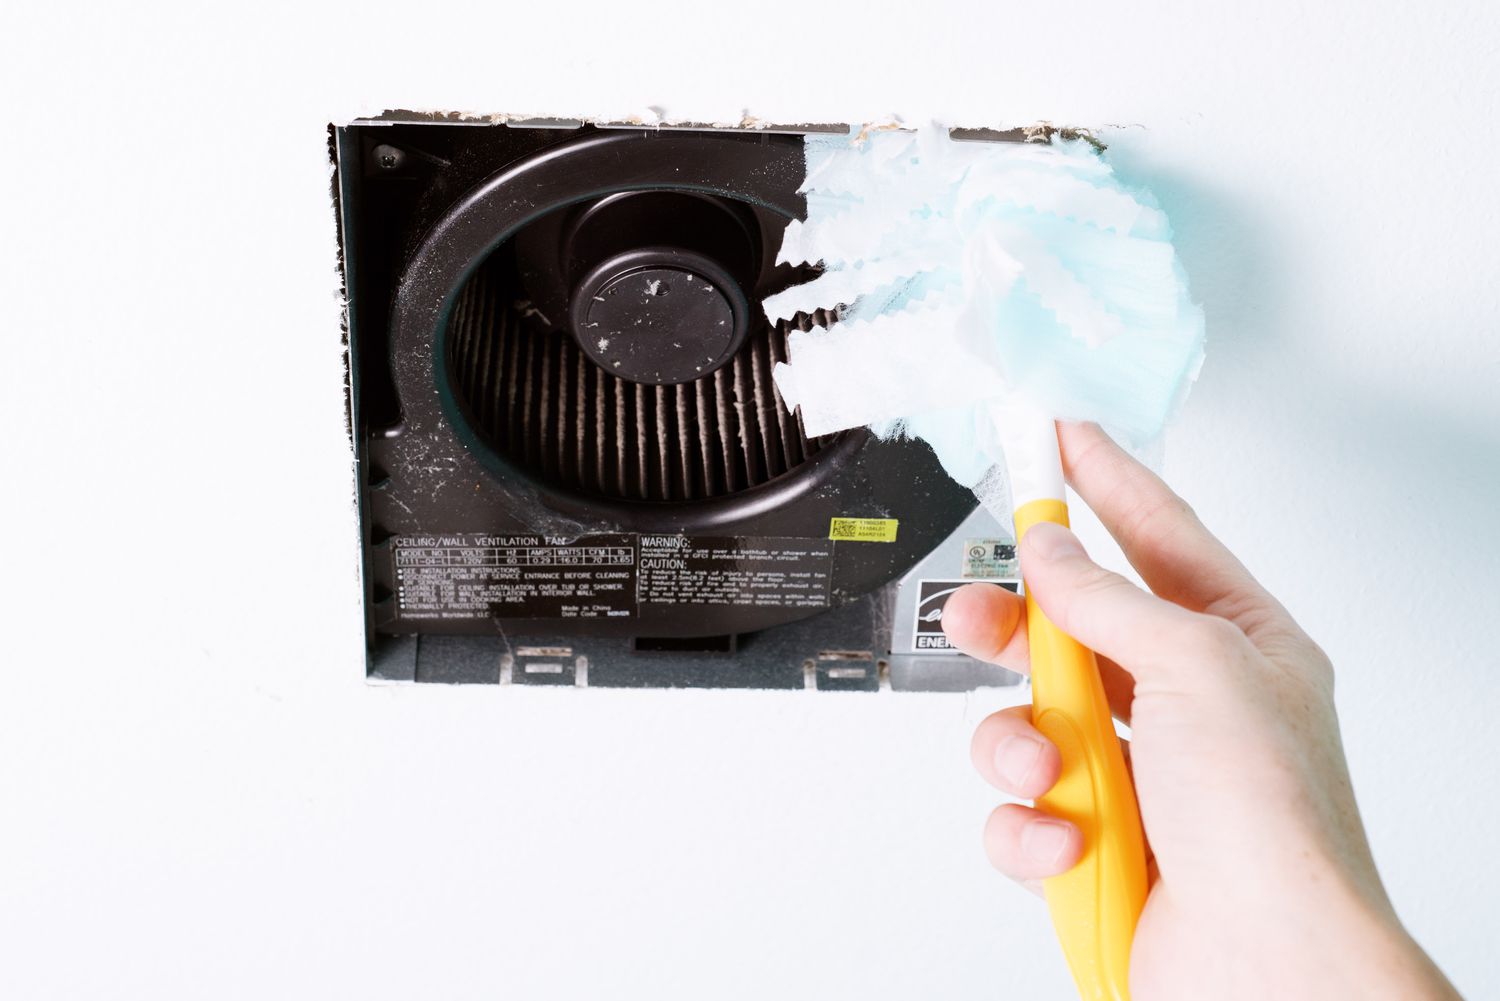
Step 3: Clean the Fan and Housing
Cleaning the fan and housing of your bathroom exhaust fan is a crucial step in restoring its optimal functionality. Over time, dust, dirt, and other airborne particles can accumulate on the fan blades and within the housing, leading to reduced airflow and potential mechanical issues. By following these steps, you can effectively clean the fan and housing, ensuring that your bathroom exhaust fan operates efficiently.
-
Remove Dust and Debris: Begin by using a soft-bristled brush or a vacuum cleaner with a brush attachment to gently remove any visible dust and debris from the fan blades, motor, and housing. Take care to avoid applying excessive pressure to the fan blades to prevent damage.
-
Wipe Down Surfaces: Use a damp cloth or sponge to wipe down the interior surfaces of the fan housing, including the walls and any accessible ductwork. This will help remove stubborn dirt and grime that may have adhered to the surfaces over time.
-
Clean the Fan Blades: For thorough cleaning, dampen a microfiber cloth with a mild household cleaner or a solution of water and mild detergent. Gently wipe the fan blades to remove any remaining dirt and buildup. Take care not to saturate the fan blades with excess liquid, as this can lead to motor damage.
-
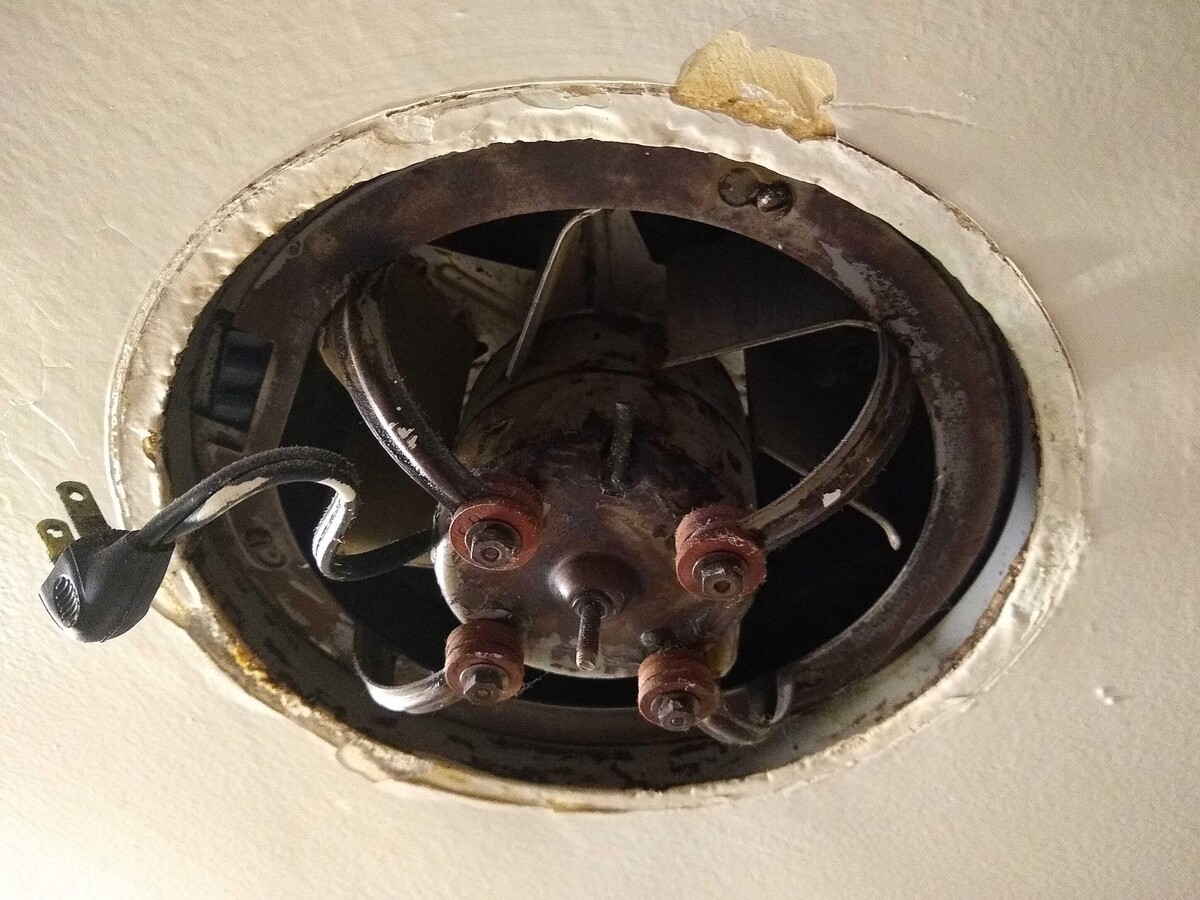
Inspect the Motor: While cleaning the fan, take a moment to inspect the motor for any signs of excessive dirt, debris, or wear. If the motor appears excessively dirty or shows signs of wear, it may be necessary to consult a professional for further inspection and maintenance.
-
Check the Ductwork: If your bathroom exhaust fan is connected to ductwork, inspect the ducts for any blockages or buildup. Use a flashlight to peer into the ducts and ensure that airflow is unobstructed. If necessary, use a vacuum with a long attachment to remove any debris from the ductwork.
-
Allow Components to Dry: After cleaning, allow all components of the fan and housing to thoroughly dry before reassembling the unit. This will help prevent the accumulation of moisture, which can lead to mold growth and potential damage to the fan motor and housing.
By following these steps to clean the fan and housing of your bathroom exhaust fan, you can effectively remove dirt, debris, and buildup that may be impeding its performance. Once the cleaning process is complete, you can proceed with the subsequent steps to further troubleshoot and restore your bathroom exhaust fan to its optimal working condition.
Make sure the fan is turned off, then clean the fan cover and blades to remove dust and debris. Check for any loose or damaged parts and tighten or replace as needed. If the fan still isn’t working, it may need to be replaced.
Step 4: Check for Obstructions
After cleaning the fan and housing, the next crucial step in restoring your bathroom exhaust fan to optimal functionality is to check for any obstructions that may be impeding its operation. Obstructions within the fan or the ductwork can significantly reduce airflow and lead to mechanical strain on the fan motor. By thoroughly inspecting for and removing any obstructions, you can ensure that your bathroom exhaust fan operates efficiently and effectively.
Here's how to check for obstructions and address any issues that may be hindering the performance of your bathroom exhaust fan:
-
Inspect the Fan Blades: Begin by visually inspecting the fan blades for any signs of obstruction, such as accumulated debris or foreign objects. Use a flashlight to illuminate the interior of the fan housing, allowing for a clear view of the fan blades and motor assembly.
-
Rotate the Fan Blades: Carefully rotate the fan blades by hand to check for any resistance or unusual noises. Smooth, unhindered rotation indicates that the fan is free from obstructions. If you encounter resistance or hear scraping or grinding sounds, it may indicate the presence of debris or mechanical issues that require attention.
-
Check the Ductwork: If your bathroom exhaust fan is connected to ductwork, it is essential to inspect the ducts for any blockages or buildup. Use a flashlight to peer into the ducts and ensure that airflow is unobstructed. Look for signs of debris, dust, or even small animals or insects that may have found their way into the ductwork.
-
Remove Obstructions: If you identify any obstructions within the fan housing or ductwork, carefully remove them using a soft brush, vacuum with a narrow attachment, or gentle manual manipulation. Take care to avoid damaging the fan blades or motor during the removal process.
-
Test the Fan: After removing any obstructions, test the fan to ensure that it operates smoothly and without unusual noises. Turn on the power supply and observe the fan in action, listening for any irregular sounds or vibrations that may indicate lingering obstructions or mechanical issues.
By diligently checking for and removing obstructions within the fan and ductwork, you can effectively address potential sources of reduced airflow and mechanical strain on the fan motor. This proactive approach to maintenance and troubleshooting will help ensure that your bathroom exhaust fan operates at its best, providing efficient ventilation and moisture control for your bathroom environment.
Read more: What Is An Exhaust Fan
Step 5: Lubricate the Fan Motor
Lubricating the fan motor is a critical step in the maintenance and restoration of your bathroom exhaust fan. Over time, the fan motor may experience increased friction and wear, leading to reduced efficiency and potential mechanical issues. By applying lubrication to the motor, you can help reduce friction, minimize wear, and ensure smooth, quiet operation of the fan. Here's how to effectively lubricate the fan motor of your bathroom exhaust fan:
-
Identify the Motor Lubrication Points: Begin by identifying the lubrication points on the fan motor. Most bathroom exhaust fan motors have designated oiling ports or access points where lubricant can be applied. These points are typically located at the ends of the motor shaft or near the motor bearings.
-
Select the Appropriate Lubricant: It is essential to use the correct type of lubricant for your fan motor. Consult the manufacturer's guidelines or the fan's user manual to determine the recommended lubricant. In most cases, a high-quality electric motor oil or a specifically formulated lubricant for fan motors is suitable for this purpose.
-
Apply the Lubricant: Using a small, precise applicator such as a needle-tip oiler or a specialized lubrication tool, carefully apply a few drops of the selected lubricant to the designated oiling ports or access points on the fan motor. Take care to avoid over-lubrication, as excess oil can lead to motor damage and attract dust and debris.
-
Rotate the Fan Blades: After applying the lubricant, gently rotate the fan blades by hand to help distribute the oil throughout the motor bearings. This action ensures that the lubricant reaches all critical internal components, promoting smooth and efficient operation of the fan motor.
-
Wipe Excess Lubricant: Once the lubrication process is complete, use a clean, lint-free cloth to wipe away any excess lubricant that may have accumulated around the oiling ports or motor housing. This step helps prevent the accumulation of dust and debris, maintaining the cleanliness of the fan motor.
-
Reassemble the Fan: After lubricating the fan motor, carefully reassemble the fan components, including the cover and any electrical connections. Ensure that all fasteners are securely tightened and that the fan is properly aligned within the housing.
By following these steps to lubricate the fan motor of your bathroom exhaust fan, you can help prolong the life of the motor, reduce friction-related wear, and promote efficient and quiet operation. This proactive maintenance approach contributes to the overall performance and longevity of your bathroom exhaust fan, ensuring that it continues to effectively ventilate your bathroom environment for years to come.
Step 6: Reassemble and Test the Fan
After completing the essential maintenance tasks, it's time to reassemble and test your bathroom exhaust fan to ensure that it operates smoothly and efficiently. Proper reassembly is crucial to the fan's performance and longevity, and testing allows you to verify that the fan is functioning as intended. Here's a detailed guide on reassembling and testing your bathroom exhaust fan:
-
Secure the Cover: Begin by carefully positioning the cover back onto the fan housing, ensuring that it aligns properly with the fastening points. If the cover has electrical connections for built-in lighting or heating elements, reconnect them according to the manufacturer's instructions. Secure the cover in place using the appropriate fasteners, whether screws or spring clips, ensuring a snug and secure fit.
-
Tighten Fasteners: If your fan cover is secured with screws, use a screwdriver to securely tighten them, ensuring that the cover is firmly attached to the fan housing. For covers with spring clips, apply gentle pressure to ensure that the clips engage with the housing, holding the cover in place.
-
Restore Power: Once the cover is securely reattached, restore power to the bathroom exhaust fan by flipping the corresponding switch or breaker back to the "on" position. This step allows you to test the fan's functionality and performance.
-
Test the Fan: Turn on the fan switch or adjust the fan speed settings to initiate the fan's operation. Observe the fan closely, listening for any unusual noises and ensuring that it starts and runs smoothly. Verify that the airflow is consistent and that the fan effectively removes moisture and odors from the bathroom environment.
-
Check for Vibrations: While the fan is running, check for any excessive vibrations or rattling sounds, which may indicate improper reassembly or lingering mechanical issues. Address any abnormal observations promptly to prevent potential damage to the fan and ensure its optimal performance.
-
Verify Airflow: Use a tissue or lightweight piece of paper to test the airflow of the fan. Hold the paper near the fan grille to confirm that the airflow is strong and consistent, indicating that the fan is effectively ventilating the bathroom.
-
Monitor Performance: After reassembly and testing, monitor the fan's performance over the next few days, paying attention to any unusual sounds, vibrations, or changes in airflow. This ongoing observation allows you to detect and address any potential issues promptly.
By following these detailed steps to reassemble and test your bathroom exhaust fan, you can ensure that it operates at its best, providing efficient ventilation and maintaining a fresh and healthy bathroom environment. Regular maintenance and testing contribute to the longevity of your fan, allowing it to continue effectively removing moisture and odors for years to come.
Conclusion
In conclusion, maintaining a properly functioning bathroom exhaust fan is essential for preserving a healthy and comfortable bathroom environment. By following the step-by-step process outlined in this guide, you can effectively troubleshoot and address common issues that may arise with your bathroom exhaust fan, ensuring that it operates efficiently and reliably.
From the initial step of turning off the power to the meticulous cleaning of the fan and housing, checking for obstructions, lubricating the fan motor, and finally reassembling and testing the fan, each stage plays a crucial role in the overall maintenance and restoration of the fan's functionality.
Regular maintenance of your bathroom exhaust fan not only ensures optimal performance but also contributes to the longevity of the fan, reducing the likelihood of costly repairs or premature replacement. By addressing issues such as reduced airflow, unusual noises, or mechanical strain promptly, you can prevent potential damage to the fan motor and housing, ultimately saving time and money in the long run.
Furthermore, a well-maintained bathroom exhaust fan helps mitigate the risk of mold and mildew growth, prevents moisture-related damage to walls and fixtures, and promotes a fresh and inviting bathroom environment. The efficient removal of excess moisture and odors contributes to improved indoor air quality, enhancing the overall comfort and well-being of occupants.
As you complete the repair and maintenance process, it is important to continue monitoring the fan's performance, listening for any irregular sounds, and ensuring consistent airflow. Ongoing observation allows for the prompt detection and resolution of any potential issues, further extending the fan's operational lifespan.
By taking a proactive approach to maintaining your bathroom exhaust fan, you can enjoy the benefits of a clean, moisture-free, and pleasant bathroom environment for years to come. Whether it's a quick cleaning or a more involved repair, the effort invested in maintaining your bathroom exhaust fan is well worth the long-term rewards.
In summary, with the knowledge and confidence gained from this guide, you are well-equipped to address any issues that may arise with your bathroom exhaust fan, ensuring that it continues to serve its vital role in maintaining a healthy and comfortable bathroom space.
Frequently Asked Questions about How To Fix A Bathroom Exhaust Fan
Was this page helpful?
At Storables.com, we guarantee accurate and reliable information. Our content, validated by Expert Board Contributors, is crafted following stringent Editorial Policies. We're committed to providing you with well-researched, expert-backed insights for all your informational needs.


0 thoughts on “How To Fix A Bathroom Exhaust Fan”