Home>Furniture & Design>Bathroom Accessories>How To Get Bathtub Stopper Out
Bathroom Accessories
How To Get Bathtub Stopper Out
Modified: October 18, 2024
Learn how to easily remove a bathtub stopper and upgrade your bathroom accessories with our step-by-step guide. Say goodbye to clogged drains and hello to a more functional space!
(Many of the links in this article redirect to a specific reviewed product. Your purchase of these products through affiliate links helps to generate commission for Storables.com, at no extra cost. Learn more)
Introduction
Removing a bathtub stopper may seem like a daunting task, but with the right knowledge and tools, it can be a straightforward process. Whether you're dealing with a trip lever stopper, push-pull stopper, toe-touch stopper, or lift-and-turn stopper, understanding the specific removal techniques for each type is essential. By following the step-by-step instructions outlined in this guide, you can effectively remove the bathtub stopper and ensure that your drainage system functions optimally.
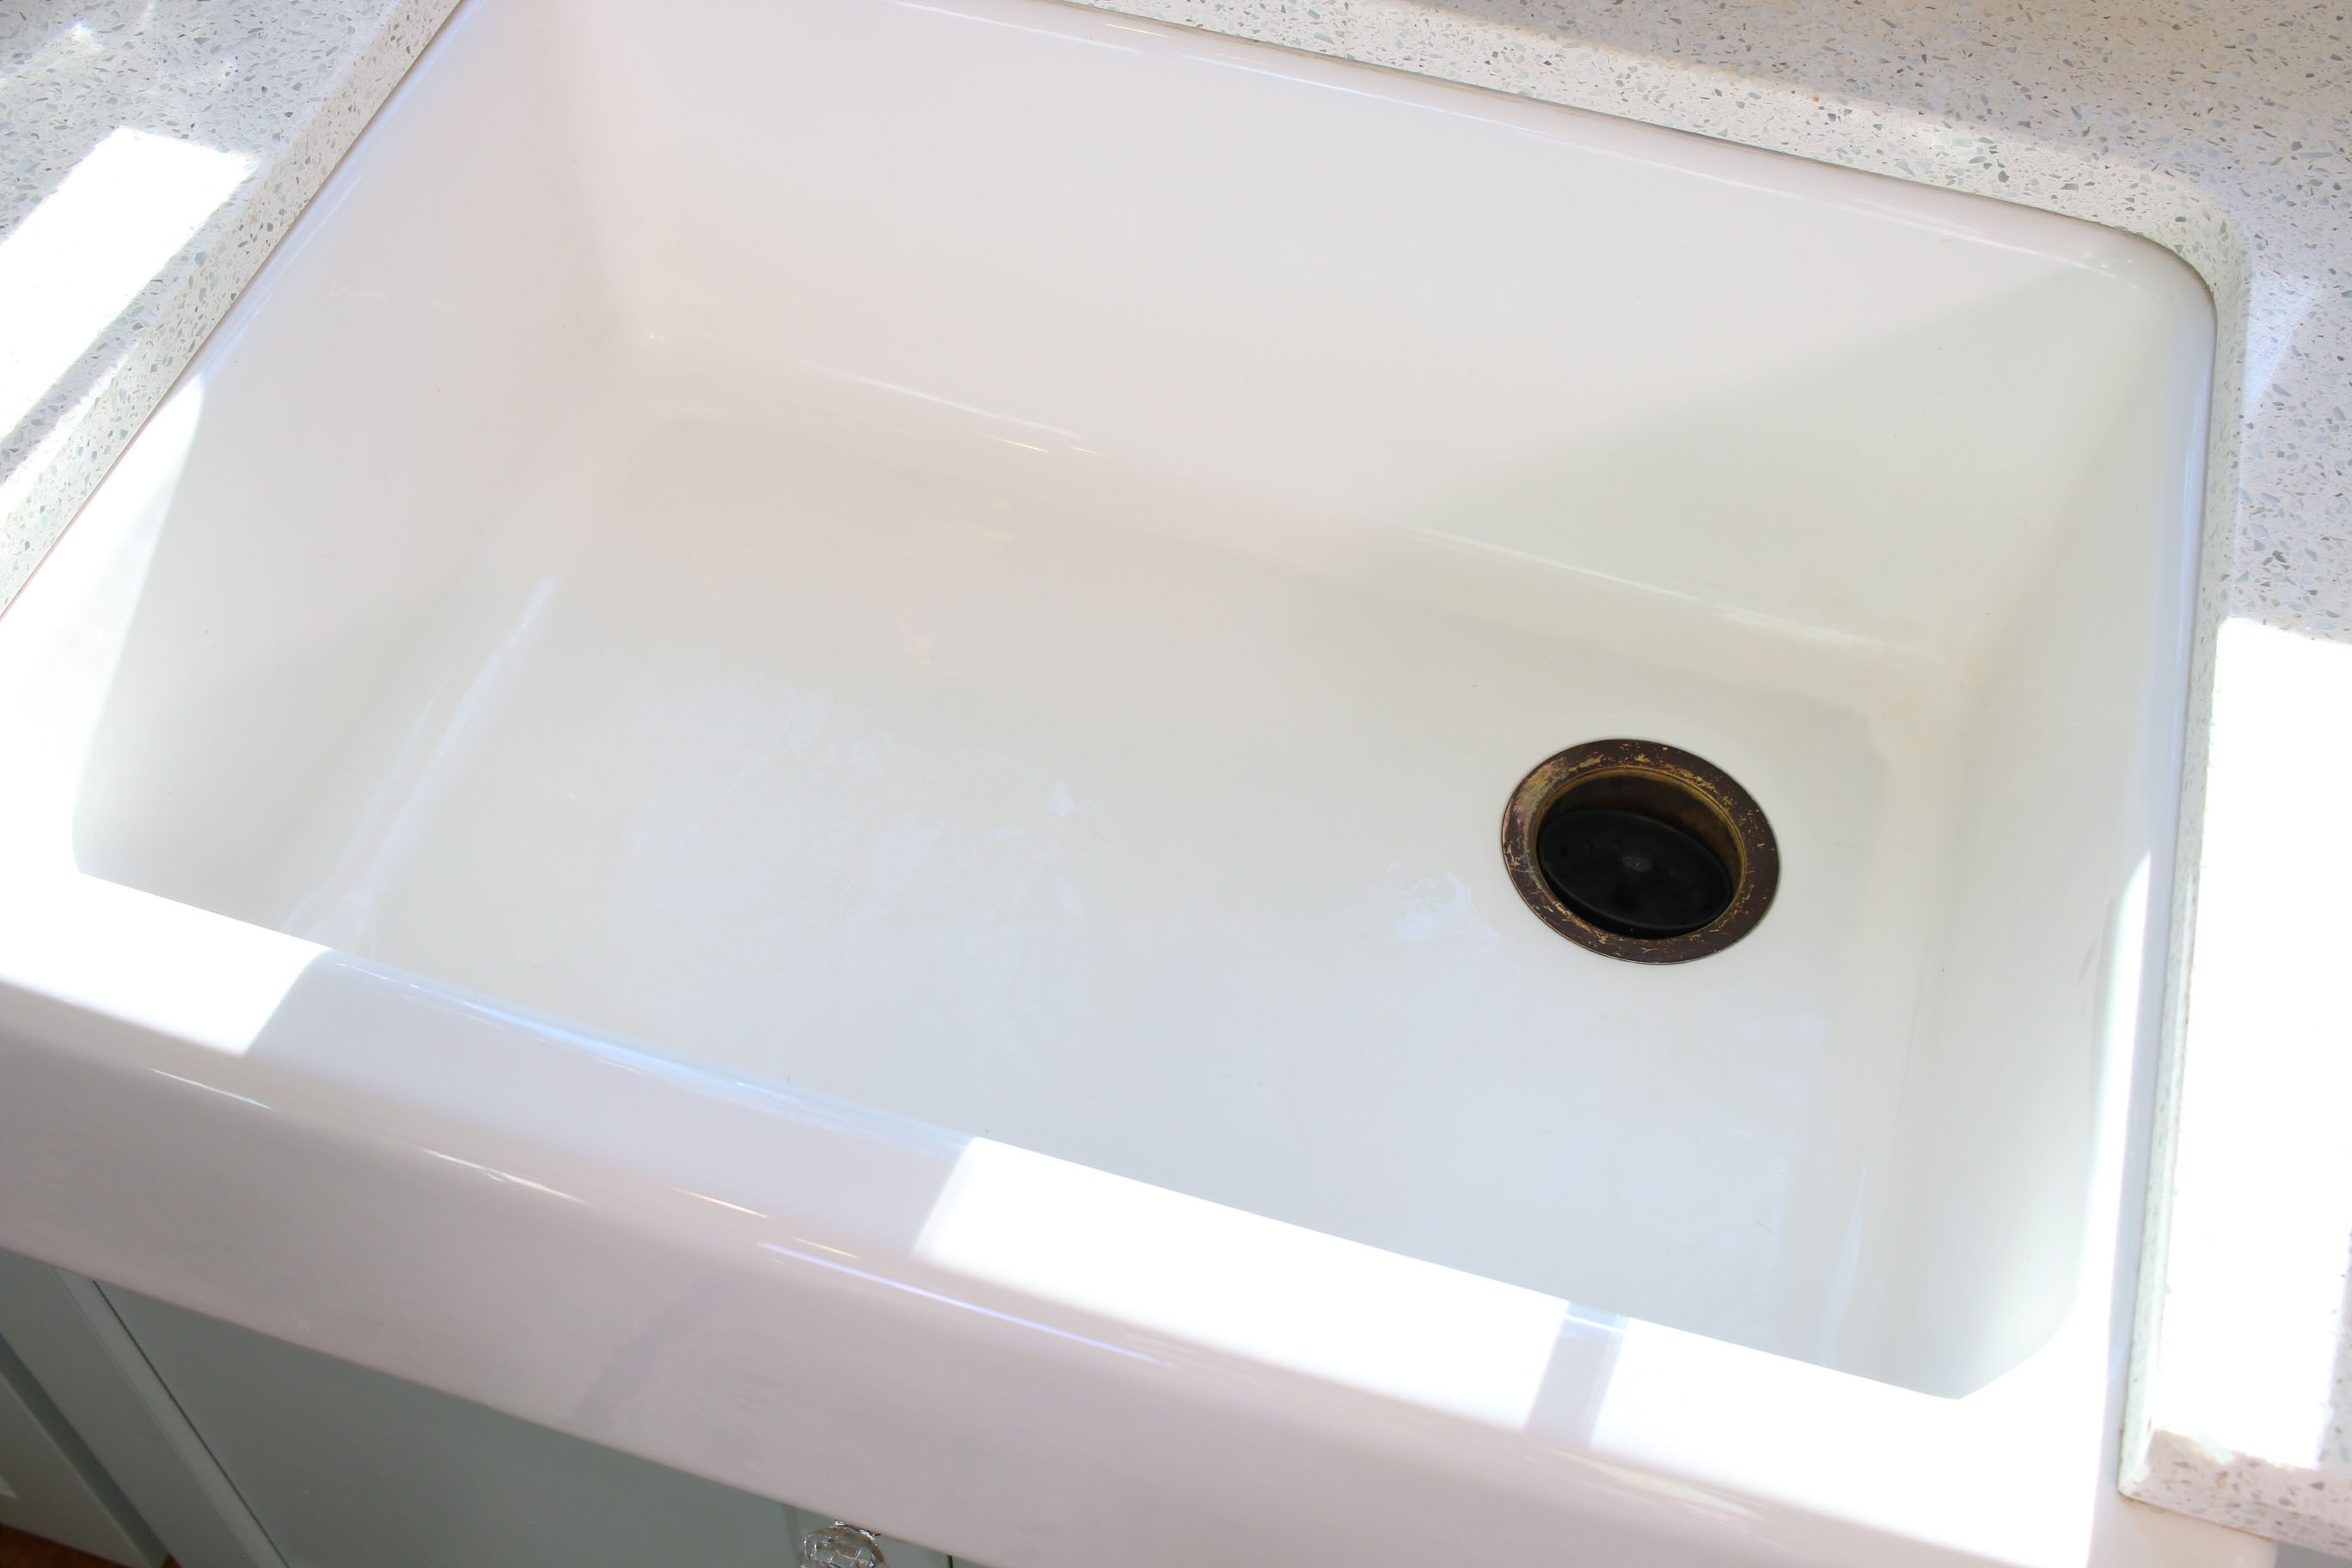
A bathtub stopper plays a crucial role in controlling the water flow and maintaining the water level in your bathtub. Over time, these stoppers may become clogged with debris, develop rust, or simply wear out, leading to drainage issues. By learning how to remove and clean the stopper, you can prevent potential clogs and maintain a smoothly functioning bathtub.
Whether you're a homeowner looking to tackle a DIY project or a professional plumber seeking a comprehensive resource, this guide will equip you with the knowledge and techniques needed to remove various types of bathtub stoppers. From identifying the type of stopper installed in your bathtub to executing the removal process with precision, each step is designed to empower you with the necessary skills to address stopper-related concerns effectively.
As you embark on this journey to remove your bathtub stopper, remember that patience and attention to detail are key. By carefully following the instructions and taking the time to understand the unique features of your stopper, you can successfully complete the removal process and maintain the functionality of your bathtub. So, let's dive into the step-by-step guide and unlock the secrets to removing different types of bathtub stoppers.
Key Takeaways:
- Identify the type of bathtub stopper before removal to ensure the correct technique is used. Trip lever, push-pull, toe-touch, and lift-and-turn stoppers each require specific removal methods for effective maintenance.
- After removing the bathtub stopper, clean, inspect, and lubricate the components to ensure optimal functionality. Reassemble and test the stopper to maintain a hassle-free bathing experience and a well-maintained bathtub.
Read more: How To Get Out Of A Bathtub
Step 1: Assess the Type of Bathtub Stopper
Before embarking on the process of removing a bathtub stopper, it is crucial to accurately identify the type of stopper installed in your bathtub. Different stoppers require distinct removal techniques, making it essential to assess the specific design of your stopper. Here are the common types of bathtub stoppers and how to identify them:
1. Trip Lever Stopper
The trip lever stopper is characterized by a lever located on the overflow plate of the bathtub. To identify this type of stopper, look for a lever or toggle on the bathtub's overflow cover. When the lever is engaged, it operates a linkage that opens and closes the drain, allowing water to either drain out or remain in the tub.
2. Push-Pull Stopper
The push-pull stopper is recognizable by its simple design, featuring a knob or handle that can be pushed down or pulled up to open and close the drain. This type of stopper is often found in modern bathtubs and is relatively easy to identify due to its straightforward operation.
3. Toe-Touch Stopper
The toe-touch stopper is operated by pressing it with your toe to open and close the drain. This type of stopper is commonly found in newer bathtub models and is distinguished by its seamless, toe-activated mechanism. To identify a toe-touch stopper, look for a flat or slightly concave surface at the bottom of the bathtub, where the stopper is located.
Read more: How To Make A Homemade Bathtub Stopper
4. Lift-and-Turn Stopper
The lift-and-turn stopper features a knob that must be lifted and turned to open and close the drain. This type of stopper is often found in older bathtub models and can be identified by its distinctive knob, which requires a lifting and twisting motion to operate.
By carefully examining the design and operation of your bathtub stopper, you can accurately determine its type and proceed with the appropriate removal method. Understanding the unique features of each stopper type is the first step towards successfully removing the stopper and addressing any maintenance or drainage issues effectively.
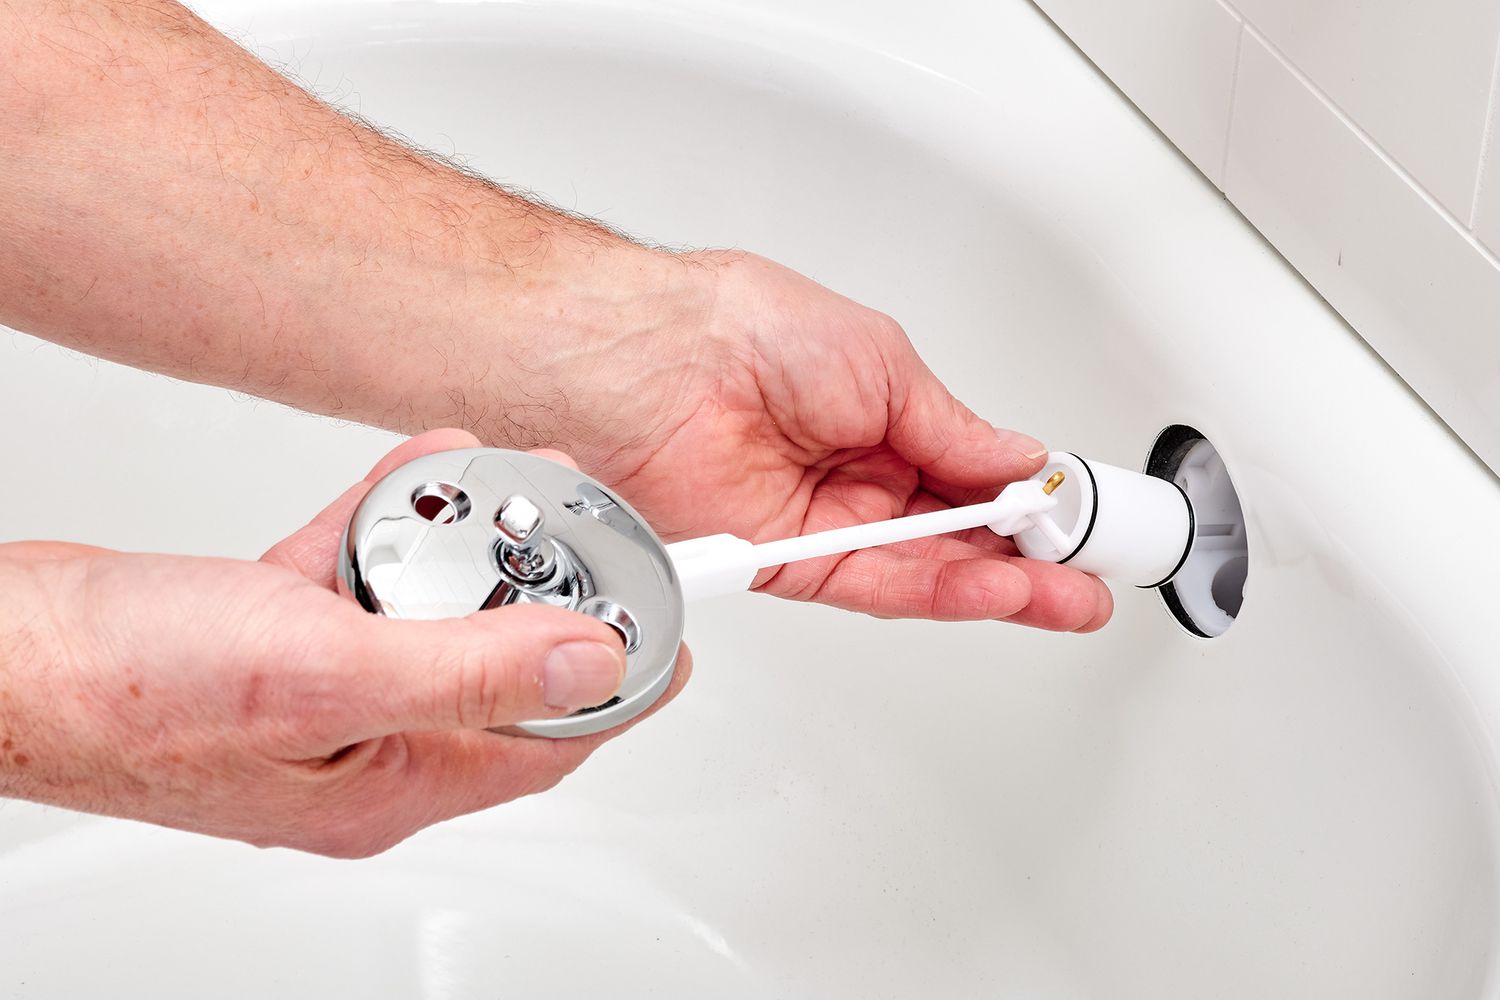
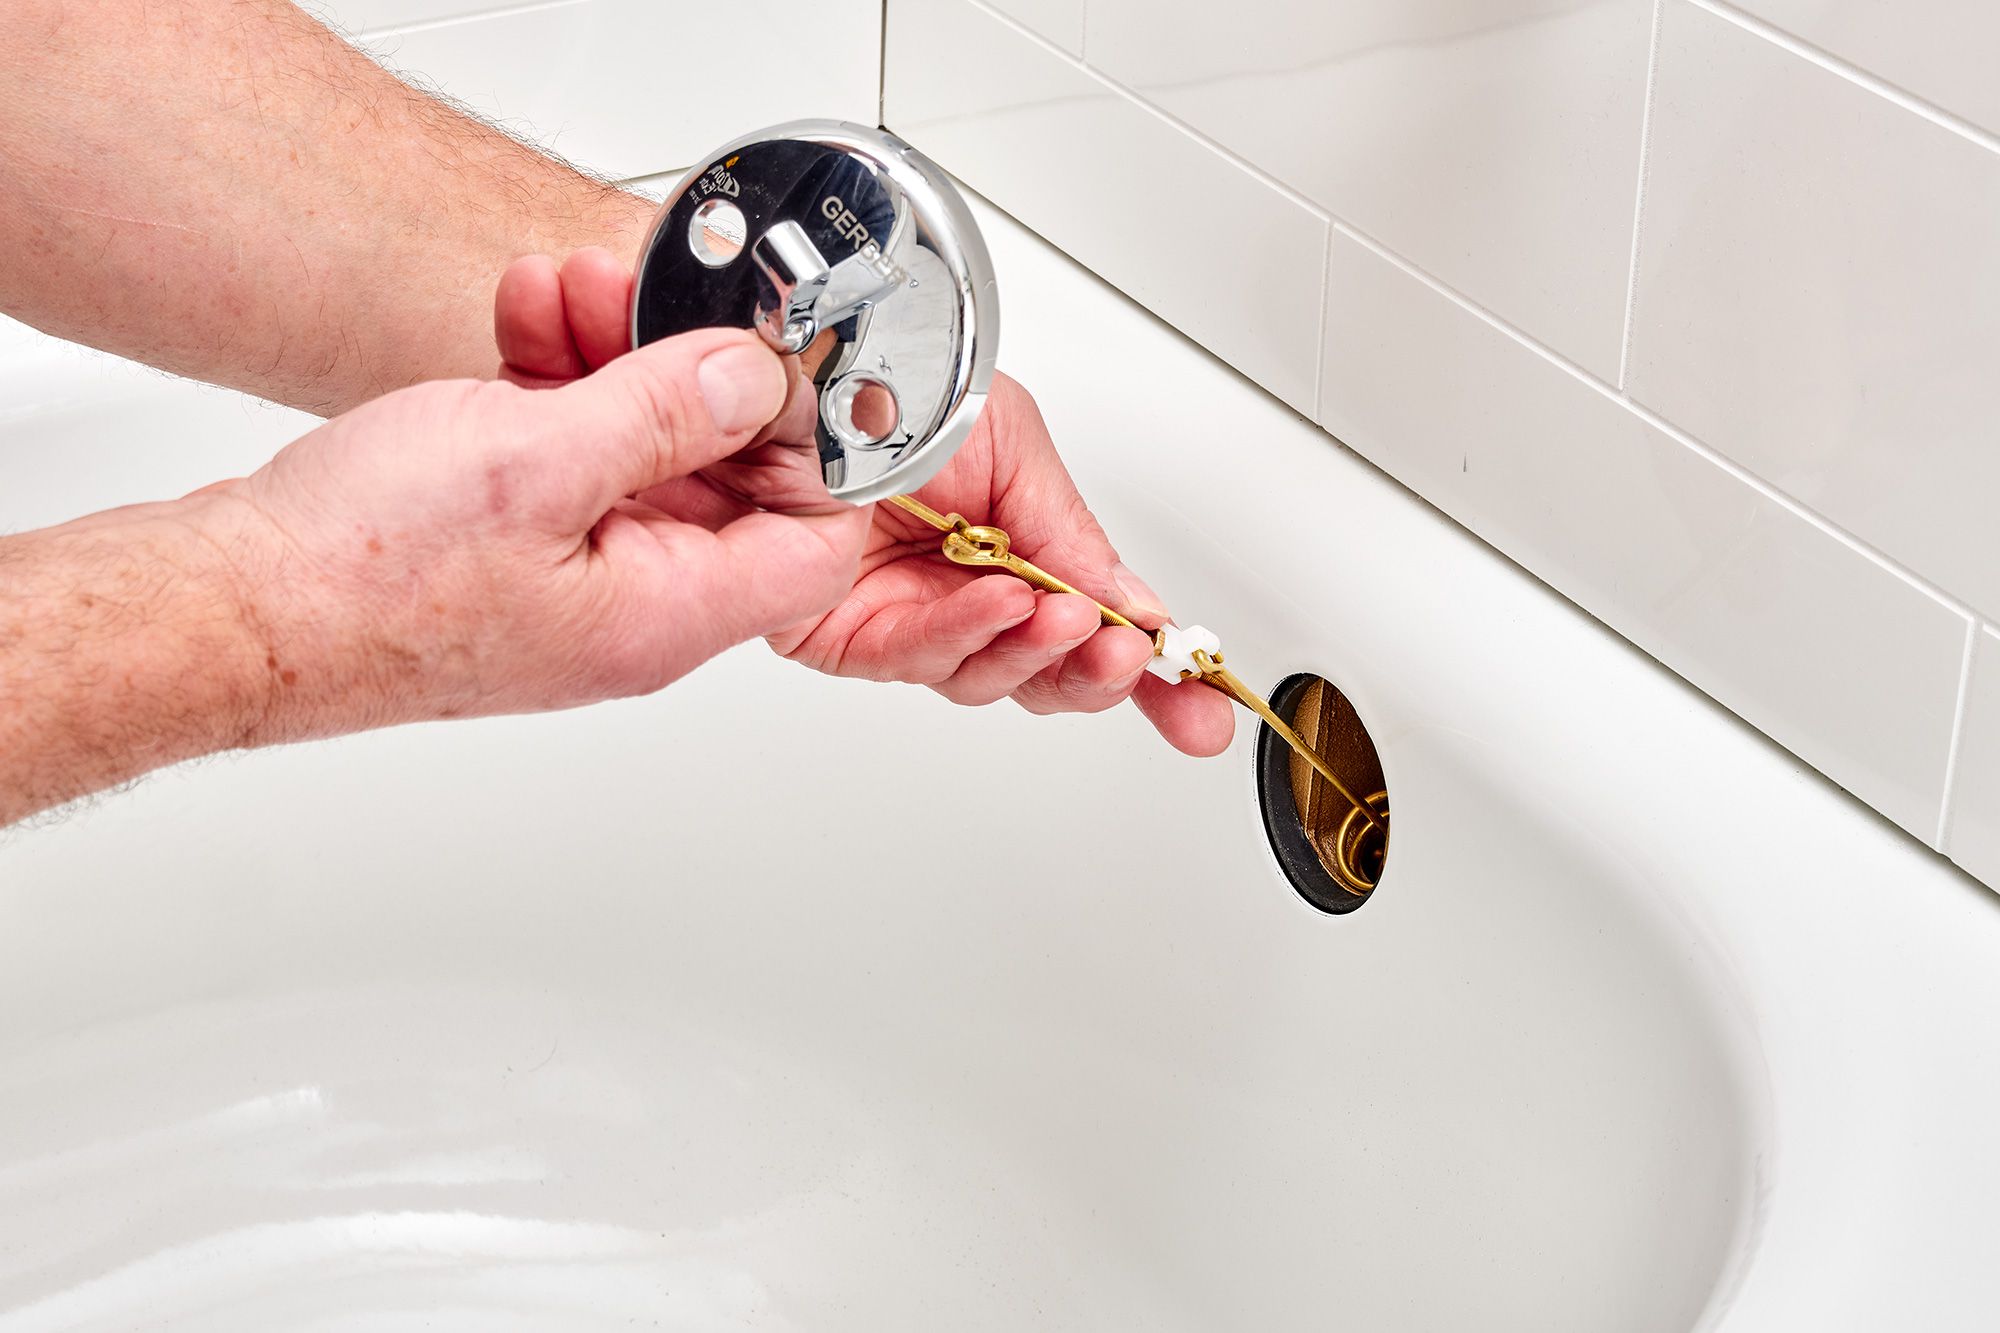
Step 2: Remove the Trip Lever Stopper
The trip lever stopper, a common fixture in many older bathtub models, is characterized by its distinctive lever located on the overflow plate. To initiate the removal process, start by accessing the trip lever assembly behind the bathtub's overflow cover. This typically involves removing the screws securing the cover in place, allowing you to gain access to the trip lever mechanism.
Once the overflow cover is removed, you will encounter the trip lever and linkage assembly. Carefully observe the configuration of the linkage and identify the screw or nut that connects it to the bathtub's drain shoe. Using a screwdriver or pliers, loosen and remove the screw or nut, thereby disconnecting the linkage from the drain shoe.
With the linkage detached, you can proceed to extract the trip lever stopper from the bathtub's drain. This may involve gently pulling the trip lever and stopper assembly out of the overflow opening, taking care to maneuver it through the opening without causing damage to the surrounding components.
As you remove the trip lever stopper, it is essential to inspect the linkage and other associated parts for any signs of wear, corrosion, or accumulation of debris. Cleaning these components thoroughly can help improve the overall functionality of the stopper and prevent potential drainage issues in the future.
Once the trip lever stopper has been successfully removed, take the opportunity to clean the stopper, linkage, and overflow cover to ensure that any accumulated grime or debris is effectively removed. This maintenance step can contribute to the longevity of the stopper and promote optimal drainage performance.
By following these steps, you can confidently remove the trip lever stopper from your bathtub, address any maintenance requirements, and gain a deeper understanding of the intricate mechanisms that contribute to the functionality of your bathtub's drainage system.
Step 3: Remove the Push-Pull Stopper
The push-pull stopper, commonly found in modern bathtub designs, features a straightforward mechanism that allows users to open and close the drain by simply pushing down or pulling up on the stopper knob or handle. Removing this type of stopper involves a systematic process to ensure that it is extracted without causing damage to the surrounding components.
To initiate the removal of a push-pull stopper, start by locating the stopper assembly within the bathtub drain. The stopper is typically situated in the drain opening and may be secured in place by a screw-on attachment or a compression fitting. Carefully examine the stopper to identify the specific method of attachment, as this will dictate the removal technique.
If the push-pull stopper is secured with a screw-on attachment, you will need to twist the stopper in a counterclockwise direction to loosen and remove it from the drain. This can be achieved by gripping the stopper securely and rotating it in the designated direction until it becomes detached from the drain. Exercise caution to avoid applying excessive force, as this may lead to damage or breakage of the stopper assembly.
In the case of a push-pull stopper secured with a compression fitting, the removal process involves unscrewing the knob or handle to release the compression mechanism. Begin by locating the set screw or fastening mechanism on the knob or handle and use an appropriate tool, such as a screwdriver or hex key, to loosen and remove it. Once the set screw is disengaged, the knob or handle can be unscrewed from the stopper assembly, allowing for the subsequent extraction of the stopper.
After successfully detaching the push-pull stopper from the drain, take the opportunity to inspect the stopper assembly and the drain opening for any accumulated debris, corrosion, or signs of wear. Thoroughly clean the components to ensure optimal functionality and prevent potential drainage issues in the future. Additionally, consider applying a mild lubricant to the stopper assembly to facilitate smooth operation and enhance its longevity.
By following these steps, you can effectively remove the push-pull stopper from your bathtub, address any maintenance requirements, and gain a deeper understanding of the intricacies involved in maintaining a functional and efficient drainage system.
Step 4: Remove the Toe-Touch Stopper
The toe-touch stopper, a popular feature in modern bathtub designs, offers a convenient and seamless method for opening and closing the drain. Recognizable by its flat or slightly concave surface at the bottom of the bathtub, the toe-touch stopper is operated by simply pressing it with your toe, eliminating the need for manual manipulation. Removing this type of stopper involves a systematic approach to ensure that it is extracted without causing damage to the surrounding components.
To begin the removal process, locate the toe-touch stopper assembly within the bathtub drain. The stopper is typically situated in the drain opening and may be secured in place by a compression fitting or a threaded attachment. Carefully examine the stopper to identify the specific method of attachment, as this will dictate the removal technique.
If the toe-touch stopper is secured with a compression fitting, the removal process entails unscrewing the stopper from the drain. Start by locating the set screw or fastening mechanism on the stopper and use an appropriate tool, such as a screwdriver or hex key, to loosen and remove it. Once the set screw is disengaged, the stopper can be unscrewed from the drain, allowing for its subsequent extraction.
In the case of a threaded attachment, the removal process involves twisting the stopper in a counterclockwise direction to release it from the drain. This can be achieved by gripping the stopper securely and rotating it in the designated direction until it becomes detached from the drain. Exercise caution to avoid applying excessive force, as this may lead to damage or breakage of the stopper assembly.
After successfully detaching the toe-touch stopper from the drain, take the opportunity to inspect the stopper assembly and the drain opening for any accumulated debris, corrosion, or signs of wear. Thoroughly clean the components to ensure optimal functionality and prevent potential drainage issues in the future. Additionally, consider applying a mild lubricant to the stopper assembly to facilitate smooth operation and enhance its longevity.
By following these steps, you can effectively remove the toe-touch stopper from your bathtub, address any maintenance requirements, and gain a deeper understanding of the intricacies involved in maintaining a functional and efficient drainage system.
Read more: How To Replace Stopper In A Bathtub
Step 5: Remove the Lift-and-Turn Stopper
The lift-and-turn stopper, commonly found in older bathtub models, features a distinctive knob that must be lifted and turned to open and close the drain. Removing this type of stopper requires a systematic approach to ensure that it is extracted without causing damage to the surrounding components.
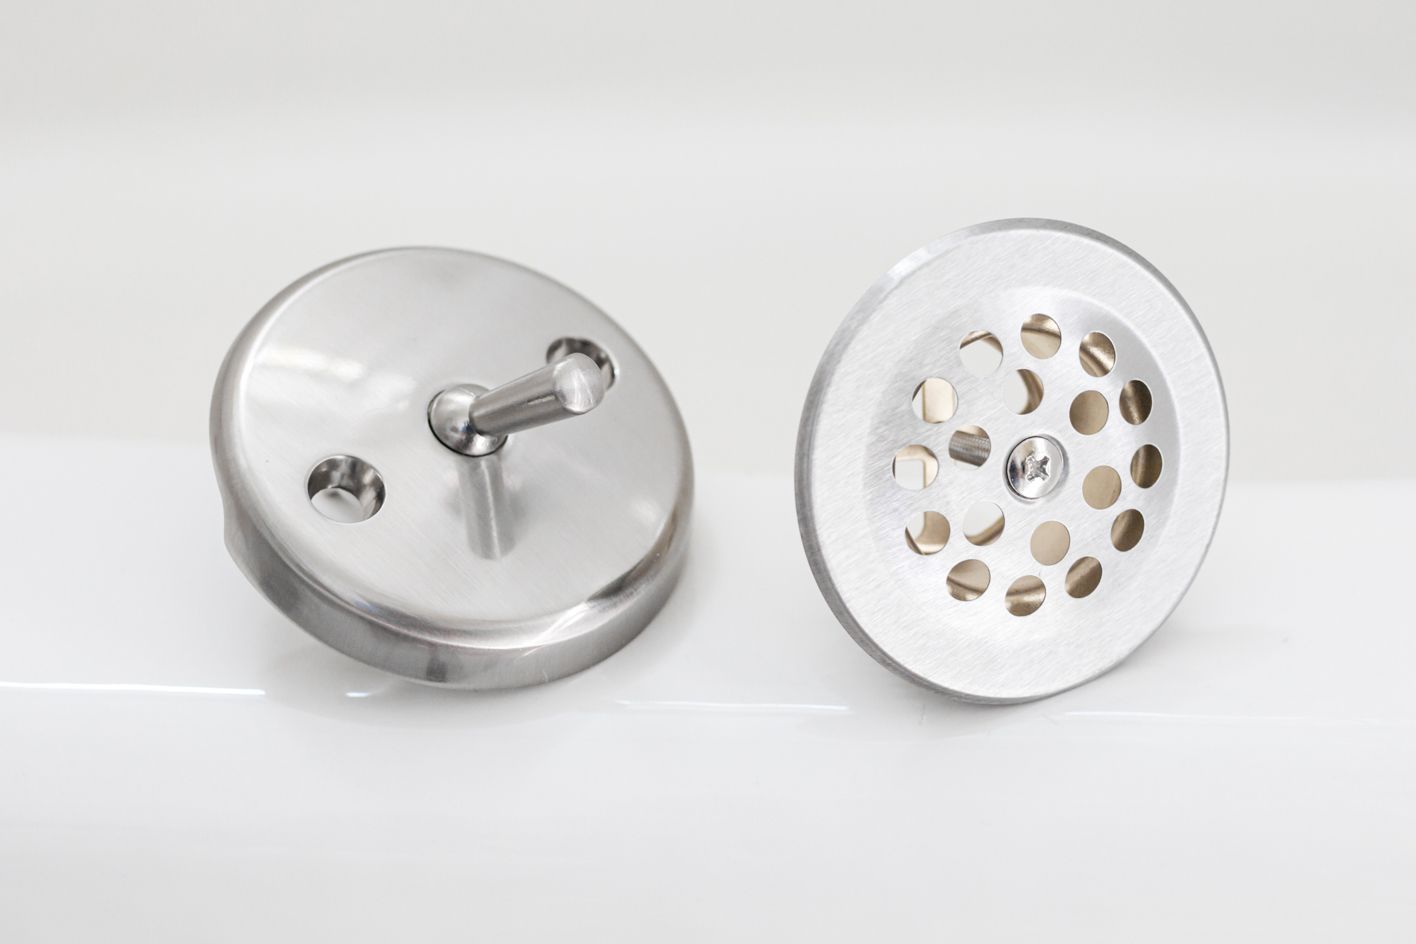
To initiate the removal process, start by locating the lift-and-turn stopper assembly within the bathtub drain. The stopper is typically situated in the drain opening and may be secured in place by a threaded attachment or a compression fitting. Carefully examine the stopper to identify the specific method of attachment, as this will dictate the removal technique.
If the lift-and-turn stopper is secured with a threaded attachment, the removal process involves twisting the stopper in a counterclockwise direction to release it from the drain. This can be achieved by gripping the stopper securely and rotating it in the designated direction until it becomes detached from the drain. Exercise caution to avoid applying excessive force, as this may lead to damage or breakage of the stopper assembly.
In the case of a compression fitting, the removal process entails unscrewing the knob or handle to release the compression mechanism. Begin by locating the set screw or fastening mechanism on the knob or handle and use an appropriate tool, such as a screwdriver or hex key, to loosen and remove it. Once the set screw is disengaged, the knob or handle can be unscrewed from the stopper assembly, allowing for the subsequent extraction of the stopper.
After successfully detaching the lift-and-turn stopper from the drain, take the opportunity to inspect the stopper assembly and the drain opening for any accumulated debris, corrosion, or signs of wear. Thoroughly clean the components to ensure optimal functionality and prevent potential drainage issues in the future. Additionally, consider applying a mild lubricant to the stopper assembly to facilitate smooth operation and enhance its longevity.
By following these steps, you can effectively remove the lift-and-turn stopper from your bathtub, address any maintenance requirements, and gain a deeper understanding of the intricacies involved in maintaining a functional and efficient drainage system.
Step 6: Clean and Maintain the Bathtub Stopper
After successfully removing the bathtub stopper, it is essential to prioritize the cleaning and maintenance of the stopper and its associated components. This crucial step not only ensures the optimal functionality of the stopper but also contributes to the overall efficiency of the bathtub's drainage system. By following a systematic approach to cleaning and maintenance, you can prolong the longevity of the stopper and prevent potential drainage issues in the future.
Cleaning the Stopper and Components
Begin the cleaning process by thoroughly inspecting the removed stopper and its associated parts for any accumulated debris, mineral deposits, or signs of corrosion. Use a mild cleaning solution, such as a mixture of warm water and gentle dish soap, to effectively remove any grime or buildup from the stopper. For stubborn deposits, consider using a non-abrasive cleaning agent to dissolve mineral deposits and restore the stopper's original luster.
In addition to cleaning the stopper itself, pay close attention to the linkage, overflow cover, and any other components that were removed during the extraction process. These parts may also benefit from a thorough cleaning to ensure that any accumulated debris or residue is effectively eliminated. Use a soft-bristled brush or cloth to gently scrub the components, taking care to avoid abrasive materials that could cause damage.
Inspecting for Wear and Damage
As you clean the stopper and its associated components, take the opportunity to inspect them for any signs of wear, corrosion, or damage. Check the stopper's sealing surfaces for any indications of deterioration or deformation, as these issues can compromise the stopper's ability to maintain a watertight seal. Similarly, examine the linkage and other mechanical parts for wear or corrosion, as these factors can impact the overall functionality of the stopper.
If any components exhibit significant wear or damage, consider replacing them to ensure the continued effectiveness of the bathtub stopper. By addressing potential issues proactively, you can prevent future complications and maintain the optimal performance of the drainage system.
Read more: How To Get Oatmeal Out Of Bathtub
Lubricating Moving Parts
Once the cleaning and inspection process is complete, consider applying a mild lubricant to the moving parts of the stopper assembly. This includes the linkage, pivot points, and any other components that facilitate the operation of the stopper. A silicone-based lubricant is recommended for this purpose, as it provides smooth operation and helps prevent corrosion and wear on the moving parts.
By lubricating the moving parts, you can enhance the overall functionality of the stopper and promote seamless operation when opening and closing the drain. This maintenance step contributes to the longevity of the stopper and ensures that it continues to perform optimally over time.
Reassembling and Testing
After cleaning, inspecting, and lubricating the stopper and its components, reassemble the stopper assembly in accordance with the manufacturer's specifications. Ensure that all parts are securely fastened and properly aligned to guarantee the effective operation of the stopper.
Once reassembled, conduct a thorough test of the stopper to verify its functionality. Open and close the drain multiple times to ensure that the stopper operates smoothly and maintains a watertight seal when closed. This testing phase allows you to confirm that the cleaning and maintenance efforts have resulted in an optimally functioning bathtub stopper.
By following these comprehensive cleaning and maintenance steps, you can effectively prolong the lifespan of the bathtub stopper and maintain the efficiency of the drainage system. Prioritizing the care and maintenance of the stopper ensures that it continues to perform its essential function, contributing to a hassle-free bathing experience and a well-maintained bathtub.
Frequently Asked Questions about How To Get Bathtub Stopper Out
Was this page helpful?
At Storables.com, we guarantee accurate and reliable information. Our content, validated by Expert Board Contributors, is crafted following stringent Editorial Policies. We're committed to providing you with well-researched, expert-backed insights for all your informational needs.


0 thoughts on “How To Get Bathtub Stopper Out”