Home>Furniture & Design>Bathroom Accessories>How To Make A Ruffled Shower Curtain
Bathroom Accessories
How To Make A Ruffled Shower Curtain
Modified: February 17, 2024
Learn how to create a stunning ruffled shower curtain to elevate your bathroom decor. Find step-by-step instructions and inspiration for bathroom accessories. Elevate your bathroom decor with a DIY ruffled shower curtain. Step-by-step instructions and inspiration for bathroom accessories.
(Many of the links in this article redirect to a specific reviewed product. Your purchase of these products through affiliate links helps to generate commission for Storables.com, at no extra cost. Learn more)
Introduction
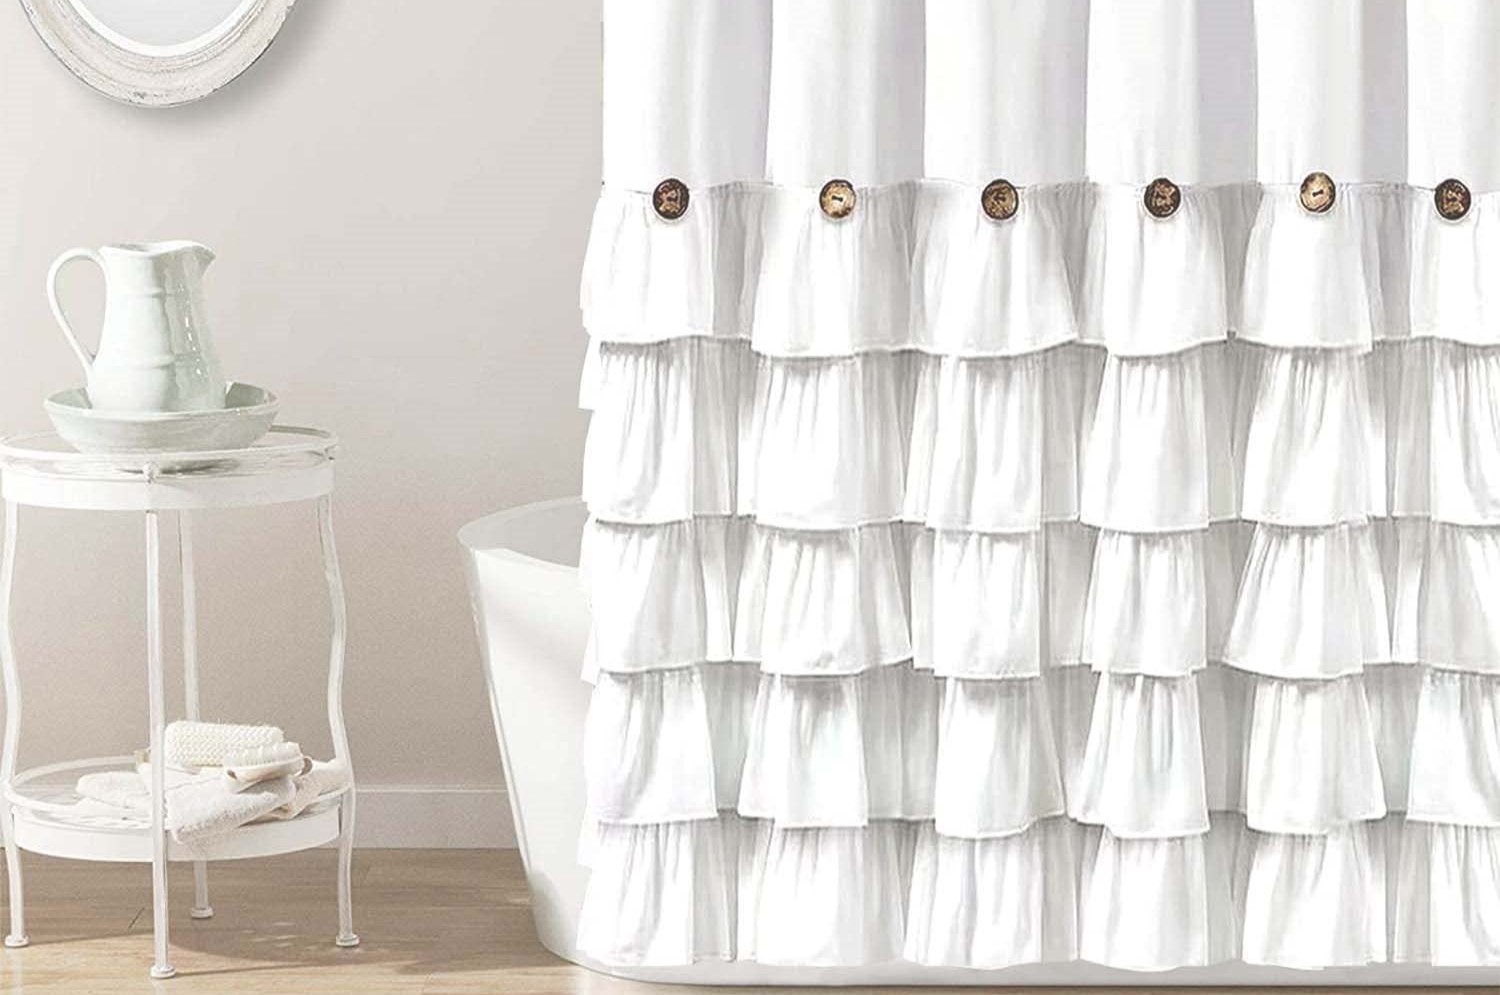
Creating a ruffled shower curtain is a wonderful way to add a touch of elegance and charm to your bathroom. Whether you're looking to revamp your bathroom decor or simply enjoy DIY projects, making a ruffled shower curtain can be a rewarding and creative endeavor. With a few materials and a bit of patience, you can craft a beautiful and unique shower curtain that perfectly complements your personal style and enhances the ambiance of your bathroom.
In this comprehensive guide, we will walk you through the step-by-step process of making a ruffled shower curtain. From measuring and cutting the fabric to adding the finishing touches, you'll learn how to create a stunning curtain that will become the focal point of your bathroom. Whether you're a seasoned crafter or a novice DIY enthusiast, this project is both achievable and enjoyable, offering a fantastic opportunity to unleash your creativity and showcase your sewing skills.
By following the detailed instructions and tips provided in this guide, you'll be able to customize the design, fabric, and ruffle style to suit your preferences, ensuring that your ruffled shower curtain reflects your unique taste and personality. Whether you prefer a classic, romantic look with delicate ruffles or a more modern and playful style with bold, voluminous ruffles, this project allows you to tailor the curtain to your desired aesthetic.
So, gather your materials, set aside some time, and get ready to embark on a fun and fulfilling DIY adventure. With a bit of creativity and a sprinkle of inspiration, you'll soon have a stunning ruffled shower curtain that adds a touch of luxury and sophistication to your bathroom space. Let's dive into the exciting world of DIY crafting and create a ruffled shower curtain that will leave you feeling proud and accomplished.
Key Takeaways:
- Transform your bathroom with a personalized ruffled shower curtain, adding elegance and charm to your space. Enjoy the DIY journey, from selecting fabric to creating enchanting ruffles, and showcase your unique style and creativity.
- Infuse your bathroom with sophistication and allure by crafting a ruffled shower curtain. From measuring and cutting fabric to adding grommets or buttonholes, each step reflects your dedication and craftsmanship, creating a captivating centerpiece for your home.
Read more: How To Make Ruffle Curtains
Materials Needed
To embark on the journey of creating a beautiful ruffled shower curtain, you'll need a selection of essential materials to bring your vision to life. Here's a comprehensive list of the items required for this delightful DIY project:
-
Fabric: Select a fabric that complements your bathroom decor and meets your preferences in terms of color, pattern, and texture. Consider the weight and drape of the fabric to achieve the desired ruffle effect. Light to medium-weight fabrics such as cotton, linen, or polyester blends are ideal choices for creating elegant and flowing ruffles.
-
Measuring Tape: A reliable measuring tape is essential for accurately determining the dimensions of your shower curtain. Precise measurements are crucial for ensuring that the curtain fits perfectly and drapes beautifully in your bathroom space.
-
Fabric Scissors: High-quality fabric scissors are indispensable for cutting the fabric to the required dimensions and shaping the ruffles. Sharp, durable scissors will facilitate clean and precise cuts, allowing you to achieve professional-looking results.
-
Sewing Machine: A sewing machine equipped with a straight stitch and gathering foot will streamline the process of creating ruffles and assembling the curtain. While it's possible to hand-sew the ruffles, using a sewing machine will save time and effort, making the project more efficient.
-
Thread: Choose a thread color that complements or contrasts with the fabric to ensure neat and inconspicuous stitching. Opt for a durable, high-quality thread that can withstand the weight of the fabric and the tension of the ruffles.
-
Pins or Clips: Utilize straight pins or fabric clips to secure the ruffles and fabric layers in place during the sewing process. These tools will help maintain the alignment of the ruffles and prevent shifting or bunching, resulting in a polished and professional finish.
-
Iron and Ironing Board: A well-functioning iron and ironing board are essential for pressing the fabric and ruffles, ensuring crisp edges and smooth, uniform ruffle pleats. Proper pressing is crucial for achieving a refined and elegant appearance for your ruffled shower curtain.
-
Grommet Kit or Buttonhole Maker (Optional): If you plan to add grommets or buttonholes to your curtain for hanging, a grommet kit or buttonhole maker will be necessary. These tools will enable you to create sturdy and visually appealing openings for the curtain rings or hooks.
Gathering these materials will set the stage for an enjoyable and rewarding crafting experience, allowing you to transform these basic components into a stunning ruffled shower curtain that elevates the aesthetic appeal of your bathroom. With these essentials at your disposal, you're ready to embark on the exciting journey of creating a personalized and enchanting addition to your bathroom decor.
Step 1: Measure and Cut Fabric
The initial step in creating a ruffled shower curtain involves measuring and cutting the fabric to the desired dimensions. Accurate measurements are crucial for ensuring that the curtain fits perfectly and drapes elegantly in your bathroom space. Here's a detailed guide to help you navigate through this essential phase of the project.
Gather Your Supplies
Before you begin, ensure that you have all the necessary supplies at hand, including the fabric, measuring tape, fabric scissors, and a flat, spacious work surface. Having these items readily available will streamline the process and minimize interruptions as you embark on this creative endeavor.
Measure the Shower Area
Start by measuring the width and height of your shower area to determine the dimensions of the curtain. Use a measuring tape to obtain precise measurements, ensuring that you account for any variations in the shower rod height and the desired curtain length. It's advisable to add a few extra inches to the width for proper fullness and coverage.
Read more: How To Make A Shower Curtain
Cut the Fabric
Once you have the accurate measurements, lay the fabric on a clean, flat surface, ensuring that it is smooth and free of wrinkles. Use fabric scissors to carefully cut the fabric according to the measured dimensions, taking care to maintain straight, even edges. If you prefer a seamless look, consider joining multiple fabric panels to achieve the desired width.
Consider Ruffle Length
If you plan to incorporate ruffles into your curtain design, factor in the additional length required for the ruffles when cutting the fabric. The ruffle length will depend on your preferred style, whether you opt for subtle, delicate ruffles or voluminous, statement-making ruffles. Be mindful of this when determining the overall curtain length.
Optional Embellishments
If you intend to add decorative elements or trims to the curtain, such as lace, fringe, or contrasting fabric accents, account for these details when cutting the fabric. Incorporating these embellishments into the initial cutting phase will ensure that the curtain's design elements are seamlessly integrated into the fabric panels.
By meticulously measuring and cutting the fabric with precision and attention to detail, you set the foundation for a beautifully tailored ruffled shower curtain. This meticulous approach ensures that the curtain not only fits flawlessly but also serves as a stunning focal point in your bathroom, reflecting your unique style and creative flair. With the fabric cut to perfection, you're ready to proceed to the next exciting phase of the project: creating the enchanting ruffles that will adorn your exquisite shower curtain.
Step 2: Create Ruffles
With the fabric panels cut to the desired dimensions, the next step in crafting a stunning ruffled shower curtain is to create the enchanting ruffles that will adorn the curtain, adding a touch of elegance and charm to your bathroom decor. The process of crafting ruffles involves gathering and stitching the fabric to achieve voluminous, flowing folds that impart a sense of luxury and sophistication to the curtain. Here's a detailed guide to help you master the art of creating exquisite ruffles for your shower curtain.
Read more: How To Make A Shower Curtain Longer
Selecting Ruffle Width
Before diving into the ruffling process, consider the width of the ruffles and how it complements the overall design of the curtain. The width of the ruffles can vary based on personal preference and the desired aesthetic. For a subtle and delicate look, opt for narrower ruffles, while wider ruffles can create a more dramatic and impactful effect. Keep in mind that the width of the ruffles will influence the overall fullness and visual appeal of the curtain.
Creating Ruffle Strips
To begin creating the ruffles, cut long strips of fabric that are approximately two to three times the length of the curtain's width. The exact length of the strips will depend on the desired ruffle density and fullness. Ensure that the strips are cut uniformly to maintain consistency in the ruffle appearance across the curtain.
Stitching Ruffle Rows
Using a sewing machine equipped with a gathering foot or a basting stitch, sew rows of long, straight stitches along the length of each fabric strip, leaving long thread tails at both ends. The distance between the rows of stitches will determine the depth of the ruffles. For denser ruffles, sew the rows closer together, while spacing them farther apart will result in more relaxed, flowing ruffles.
Gathering the Fabric
Once the rows of stitches are in place, gently pull the bobbin threads at one end of the fabric strip to gather the fabric, creating the ruffled effect. Gradually distribute the gathers evenly along the length of the strip, adjusting the ruffles to achieve a uniform and balanced appearance. Take care not to break the threads during this process to maintain the integrity of the ruffles.
Read more: How To Make A Shower Curtain Look Good
Pressing the Ruffles
After gathering the fabric and arranging the ruffles to your satisfaction, use an iron to press the ruffles gently, ensuring that they are smooth and well-defined. Pressing the ruffles will set the folds in place and create a polished, professional finish, enhancing the overall appearance of the curtain.
By following these steps, you can master the art of creating exquisite ruffles that will elevate your shower curtain to a new level of sophistication and allure. With the ruffles meticulously crafted and ready to adorn the fabric panels, you're one step closer to completing your personalized and enchanting ruffled shower curtain.
Step 3: Attach Ruffles to Curtain
With the enchanting ruffles meticulously crafted and ready to adorn the fabric panels, the next pivotal step in the creation of a stunning ruffled shower curtain is to attach the ruffles to the curtain, bringing the vision to life and infusing the fabric with elegance and charm. This phase of the project involves carefully securing the ruffles to the fabric panels, ensuring that they are evenly distributed and impeccably aligned to achieve a harmonious and visually captivating result. Here's a detailed guide to help you seamlessly integrate the ruffles into the curtain, transforming the fabric into a breathtaking centerpiece for your bathroom decor.
Positioning the Ruffles
Begin by laying the fabric panels flat on a spacious work surface, ensuring that they are smooth and free of wrinkles. Determine the placement of the ruffles on the fabric, taking into account the desired spacing and arrangement. Whether you opt for a single row of ruffles near the top of the curtain or multiple tiers of ruffles cascading down the fabric, visualize the design and ensure that the ruffles will enhance the overall aesthetic of the curtain.
Securing the Ruffles
Using straight pins or fabric clips, carefully secure the ruffles to the fabric panels, ensuring that they are evenly distributed and aligned according to the predetermined design. Take time to adjust the positioning of the ruffles, ensuring that they create a cohesive and visually appealing pattern across the fabric. This meticulous approach will result in a polished and professional finish, elevating the curtain to a new level of sophistication.
Read more: How To Make A Fitted Ruffled Tablecloth
Stitching the Ruffles
Once the ruffles are securely positioned and aligned, use a sewing machine to stitch the ruffles onto the fabric panels, ensuring that the stitches are inconspicuous and do not detract from the beauty of the ruffles. A straight stitch or a carefully placed zigzag stitch can be used to affix the ruffles to the fabric, providing a durable and seamless attachment that withstands the test of time. Take care to maintain even tension and smooth stitching to achieve a refined and elegant appearance.
Pressing the Curtain
After attaching the ruffles, use an iron to gently press the curtain, ensuring that the ruffles are smooth and well-defined. Pressing the curtain will set the stitches in place and create a cohesive, polished finish, enhancing the overall allure of the ruffled shower curtain. Pay attention to the edges and seams, ensuring that they are crisp and immaculately pressed for a professional and sophisticated look.
By following these detailed steps, you can seamlessly attach the meticulously crafted ruffles to the fabric panels, transforming the curtain into a captivating and enchanting centerpiece for your bathroom. With the ruffles securely affixed and the fabric panels adorned with elegance and charm, you're one step closer to completing your personalized and breathtaking ruffled shower curtain.
Step 4: Hem the Bottom
After the ruffles have been meticulously attached to the fabric panels, the next crucial step in the creation of a stunning ruffled shower curtain is to hem the bottom edge of the curtain, providing a clean and polished finish that enhances the overall appearance and durability of the fabric. Hemming the bottom edge not only adds a professional touch to the curtain but also ensures that the fabric is neatly secured and free from fraying, contributing to a refined and elegant aesthetic.
Preparing for Hemming
Before commencing the hemming process, ensure that the fabric panels are laid flat on a clean, spacious work surface, allowing for easy access to the bottom edge. Smooth out any wrinkles or creases in the fabric to facilitate precise and even hemming. Additionally, ensure that the fabric is cut to the desired length, accounting for any variations in the shower area and the preferred curtain length.
Determining Hem Width
When hemming the bottom edge of the curtain, consider the desired hem width and how it complements the overall design. A standard hem width of approximately 1 to 2 inches is recommended for shower curtains, providing a balanced and visually appealing finish. However, the hem width can be adjusted based on personal preference and the weight of the fabric, ensuring that the hem adds a tailored and refined touch to the curtain.
Folding and Pressing
To begin the hemming process, fold the bottom edge of the fabric panels up to the predetermined hem width, ensuring that the fold is even and uniform across the entire width of the curtain. Use an iron to press the fold firmly, creating a crisp and well-defined edge that serves as the foundation for the hem. Proper pressing is essential for achieving a professional and polished appearance, ensuring that the hem maintains its shape and integrity.
Securing the Hem
After pressing the fold, secure the hem in place using straight pins or fabric clips, ensuring that the fabric remains smooth and taut along the bottom edge. This step is crucial for maintaining the evenness and consistency of the hem, preventing any shifting or unevenness during the sewing process. Take time to adjust the fold and ensure that it aligns perfectly with the desired hem width.
Stitching the Hem
Using a sewing machine equipped with a straight stitch, carefully sew along the top edge of the folded fabric, securing the hem in place with neat and inconspicuous stitches. Take care to maintain even tension and smooth stitching, ensuring that the hem is securely affixed and complements the overall appearance of the curtain. Backstitching at the beginning and end of the seam will reinforce the hem, providing added durability and longevity.
By meticulously hemming the bottom edge of the fabric panels, you can elevate the ruffled shower curtain to a new level of sophistication and refinement, ensuring that it exudes a tailored and polished appearance. With the hem securely in place, the curtain is now poised to become a captivating and enchanting centerpiece in your bathroom, reflecting your unique style and creative flair.
Read more: How Long Is A Shower Curtain
Step 5: Add Grommets or Buttonholes
After hemming the bottom edge of the ruffled shower curtain, the final step involves adding grommets or buttonholes to facilitate effortless hanging and enhance the visual appeal of the curtain. This phase of the project allows for personalization and customization, enabling you to select the preferred method of curtain attachment that aligns with your aesthetic preferences and functional requirements.
Choosing Grommets or Buttonholes
When deciding between grommets and buttonholes, consider the overall design of the curtain and the desired hanging mechanism. Grommets, typically made of metal or plastic, offer a modern and sleek appearance, allowing the curtain rings or hooks to glide smoothly for easy opening and closing. On the other hand, buttonholes provide a classic and timeless look, accommodating traditional curtain hooks or rings for a charming and elegant presentation.
Marking the Placement
Before adding grommets or buttonholes, carefully mark the placement on the fabric panels, ensuring that the spacing is uniform and visually balanced. Consider the size and weight of the curtain rings or hooks to determine the appropriate distance between the grommets or buttonholes, ensuring that the curtain hangs evenly and drapes gracefully when installed.
Installing Grommets
If you opt for grommets, use a grommet kit to create sturdy and visually appealing openings in the fabric. Follow the manufacturer's instructions to cut holes in the fabric and attach the grommets securely, ensuring that they are evenly spaced and aligned along the top edge of the curtain. The addition of grommets imparts a contemporary and polished finish to the curtain, elevating its functionality and aesthetic allure.
Read more: How To Shorten A Shower Curtain
Crafting Buttonholes
For those choosing buttonholes, utilize a buttonhole maker or a sewing machine equipped with a buttonhole foot to create neat and durable openings in the fabric. Carefully stitch the buttonholes along the top edge of the curtain, ensuring that they are evenly spaced and reinforced to withstand the weight of the curtain rings or hooks. The presence of buttonholes adds a touch of timeless elegance to the curtain, infusing it with a classic and refined charm.
By adding grommets or buttonholes to the ruffled shower curtain, you complete the transformation of the fabric panels into a functional and captivating centerpiece for your bathroom. Whether you opt for the modern allure of grommets or the classic charm of buttonholes, the curtain is now ready to adorn your bathroom space, exuding a personalized and enchanting allure that reflects your unique style and attention to detail.
Conclusion
In conclusion, the journey of creating a ruffled shower curtain is a delightful and fulfilling endeavor that allows you to infuse your bathroom space with elegance, charm, and a personalized touch. From meticulously measuring and cutting the fabric to crafting enchanting ruffles and attaching them to the fabric panels, each step in the process contributes to the creation of a stunning and unique curtain that serves as a captivating centerpiece in your bathroom.
As you embark on this creative journey, the opportunity to select the fabric, ruffle style, and embellishments enables you to tailor the curtain to your specific preferences, ensuring that it harmonizes seamlessly with your bathroom decor. Whether you opt for delicate, understated ruffles or bold, voluminous folds, the ruffled shower curtain becomes a reflection of your individual style and creative vision.
The meticulous attention to detail, from hemming the bottom edge to adding grommets or buttonholes, results in a professionally finished curtain that exudes sophistication and refinement. The tailored and polished appearance of the curtain elevates the ambiance of your bathroom, transforming it into a space that exudes luxury and allure.
Furthermore, the process of creating a ruffled shower curtain offers a rewarding opportunity to showcase your sewing skills, unleash your creativity, and indulge in a fulfilling DIY project. The sense of accomplishment and pride that accompanies the completion of the curtain is a testament to your dedication and craftsmanship, underscoring the value of infusing your living space with personalized and handcrafted elements.
Ultimately, the ruffled shower curtain becomes more than a functional accessory; it becomes a statement piece that adds character and personality to your bathroom, leaving a lasting impression on anyone who enters the space. The allure of the ruffled curtain lies not only in its visual appeal but also in the story behind its creation, embodying the passion, creativity, and attention to detail that went into crafting a unique and enchanting addition to your home.
As you admire the finished ruffled shower curtain adorning your bathroom, take pride in the journey you undertook to bring this vision to life. The curtain stands as a testament to your creativity and craftsmanship, enriching your living space with its timeless elegance and personalized charm.
Frequently Asked Questions about How To Make A Ruffled Shower Curtain
Was this page helpful?
At Storables.com, we guarantee accurate and reliable information. Our content, validated by Expert Board Contributors, is crafted following stringent Editorial Policies. We're committed to providing you with well-researched, expert-backed insights for all your informational needs.


0 thoughts on “How To Make A Ruffled Shower Curtain”