Home>Furniture & Design>Bathroom Accessories>How To Re Enamel A Bathtub
Bathroom Accessories
How To Re Enamel A Bathtub
Modified: August 28, 2024
Learn how to re-enamel a bathtub and give your bathroom a fresh new look with our expert tips and techniques. Transform your bathroom accessories with this easy DIY project.
(Many of the links in this article redirect to a specific reviewed product. Your purchase of these products through affiliate links helps to generate commission for Storables.com, at no extra cost. Learn more)
Introduction
Re-enameling a bathtub is a cost-effective and eco-friendly way to revitalize your bathroom and extend the life of your tub. Over time, bathtubs can become worn, chipped, or stained, detracting from the overall aesthetic of the bathroom. However, with the right tools and techniques, re-enameling can restore the tub to its former glory, giving it a fresh, glossy finish that looks as good as new.
Whether you're a seasoned DIY enthusiast or a first-time home improver, re-enameling a bathtub is a manageable project that can yield impressive results. By following a few simple steps and using high-quality enamel products, you can transform your bathtub into a focal point of your bathroom once again. Not only does re-enameling improve the appearance of the tub, but it also provides a protective barrier against further wear and tear, ensuring its longevity for years to come.
In this comprehensive guide, we will walk you through the step-by-step process of re-enameling a bathtub, from preparing the surface to applying the enamel coating and achieving a smooth, professional finish. By the end of this tutorial, you will have the knowledge and confidence to tackle this rewarding home improvement project and enjoy a beautifully restored bathtub in your home. So, roll up your sleeves, gather your supplies, and let's get started on transforming your bathtub into a stunning centerpiece of your bathroom!
Key Takeaways:
- Re-enameling a bathtub is a manageable DIY project that can revitalize your bathroom, providing a cost-effective and eco-friendly way to restore the tub’s appearance and ensure its longevity.
- Thoroughly preparing the bathtub surface, applying multiple coats of enamel, and allowing for proper drying and sanding are crucial steps in achieving a professional-quality finish that transforms the bathtub into a stunning centerpiece of the bathroom.
Read more: What To Do In The Bathtub When You’re Bored?
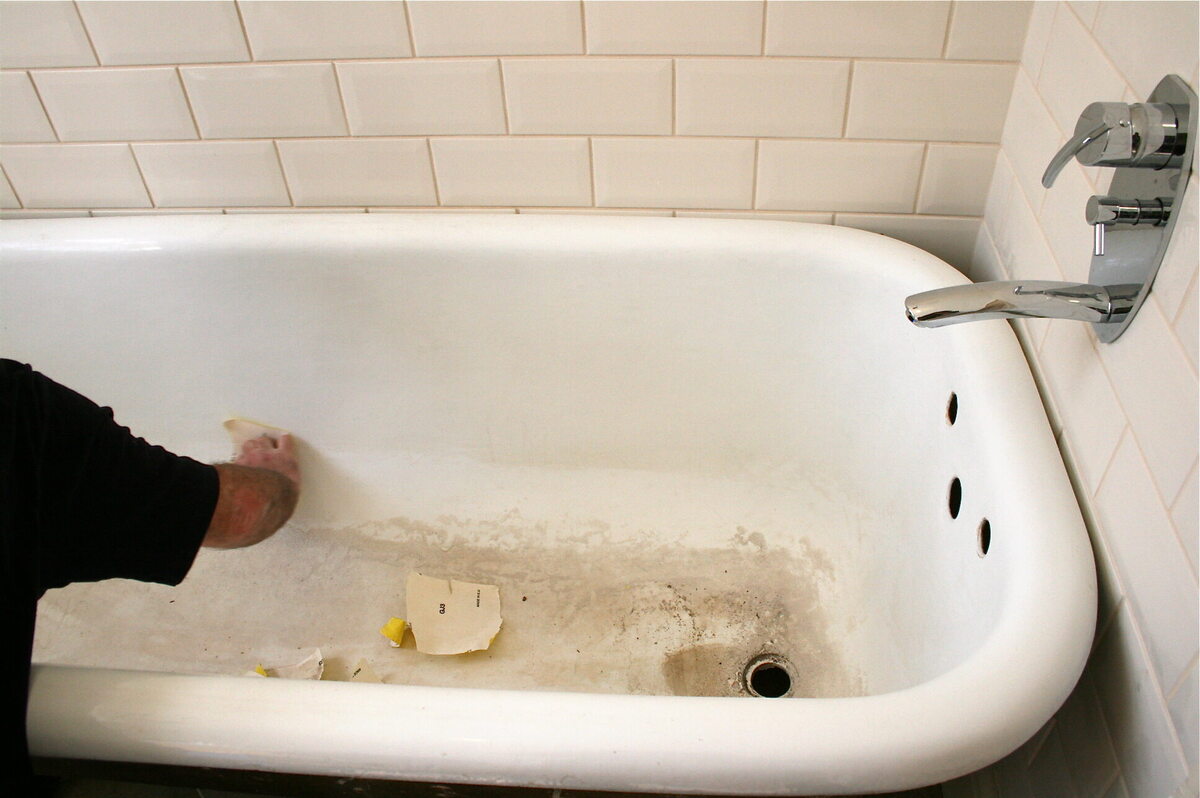
Step 1: Prepare the bathtub surface
Before you begin the re-enameling process, it's crucial to thoroughly prepare the bathtub surface to ensure optimal adhesion and a smooth, long-lasting finish. Here's a detailed breakdown of the essential steps involved in preparing the bathtub surface:
-
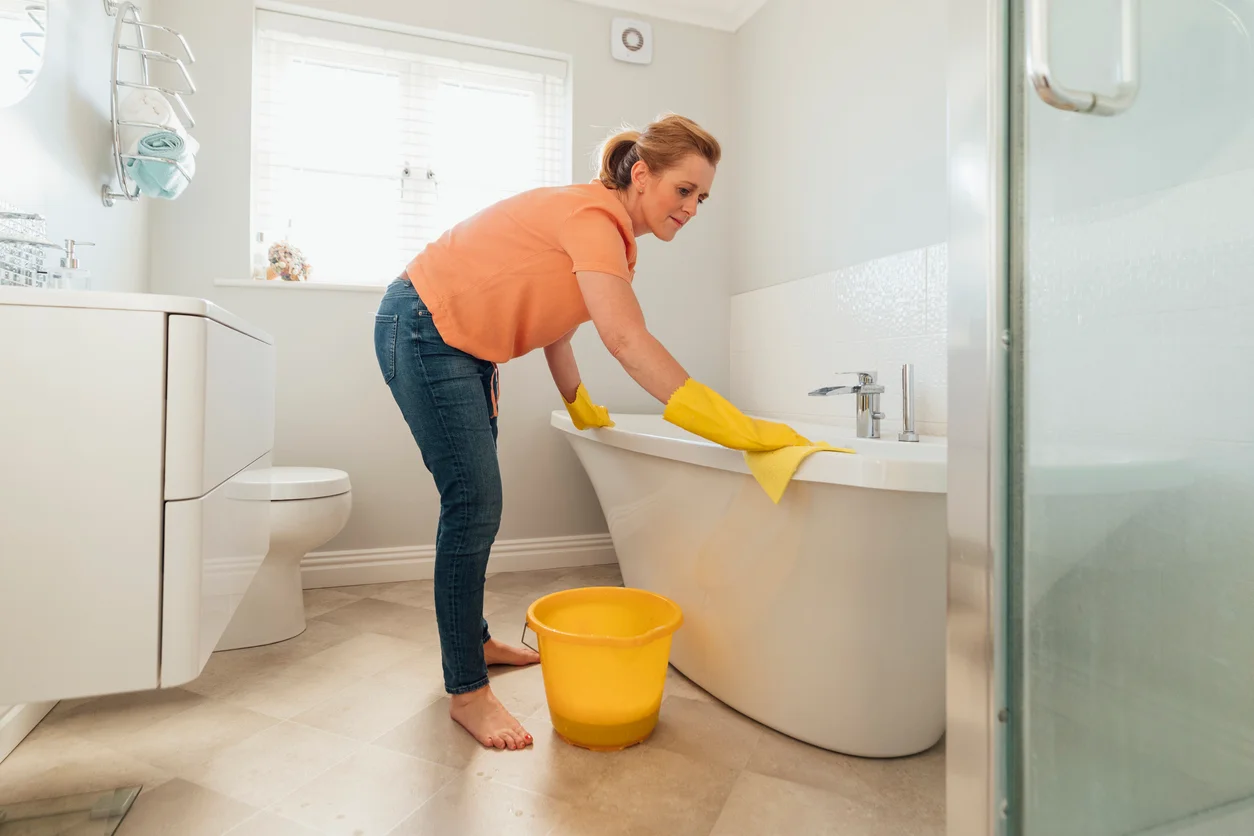
Clean the Surface: Start by cleaning the bathtub surface with a mild abrasive cleaner and a non-abrasive sponge. This will remove any soap scum, mineral deposits, and other residues that could interfere with the bonding of the enamel coating. Rinse the bathtub thoroughly with water to remove any cleaning residue, and allow it to dry completely.
-
Remove Old Caulking and Hardware: Inspect the bathtub for old caulking and hardware, such as faucets and drain covers. Use a utility knife or a caulk removal tool to carefully remove the old caulking around the edges of the tub. Additionally, unscrew and remove any hardware attached to the bathtub, such as the overflow cover and drain stopper.
-
Repair Chips and Cracks: Examine the bathtub surface for any chips, cracks, or deep scratches. Use a high-quality epoxy filler specifically designed for bathtubs to repair these imperfections. Follow the manufacturer's instructions for the application and drying time of the filler. Once the filler has cured, sand it down gently to create a smooth, even surface.
-
Degrease the Surface: After completing the repairs, thoroughly degrease the bathtub surface using a solvent-based cleaner or a mixture of water and denatured alcohol. This step is crucial for removing any residual oils, waxes, or silicone-based products that could hinder the adhesion of the enamel coating.
-
Mask Off Surrounding Areas: To protect the surrounding areas from accidental overspray or drips, use painter's tape and plastic sheeting to mask off the walls, tiles, and any other surfaces adjacent to the bathtub. This will create a clean boundary and prevent the enamel coating from spreading onto unintended areas.
By meticulously preparing the bathtub surface through these steps, you'll create an ideal foundation for the application of the enamel coating. This thorough preparation is key to achieving a professional-looking finish and ensuring the longevity of the re-enameling process. Once the surface is properly prepared, you'll be ready to move on to the next step of applying the enamel coating.
Step 2: Apply the enamel coating
With the bathtub surface meticulously prepared, it's time to apply the enamel coating, a critical step that will rejuvenate the tub's appearance and provide a durable, protective finish. Here's a detailed guide on how to effectively apply the enamel coating to your bathtub:
Gather Your Supplies
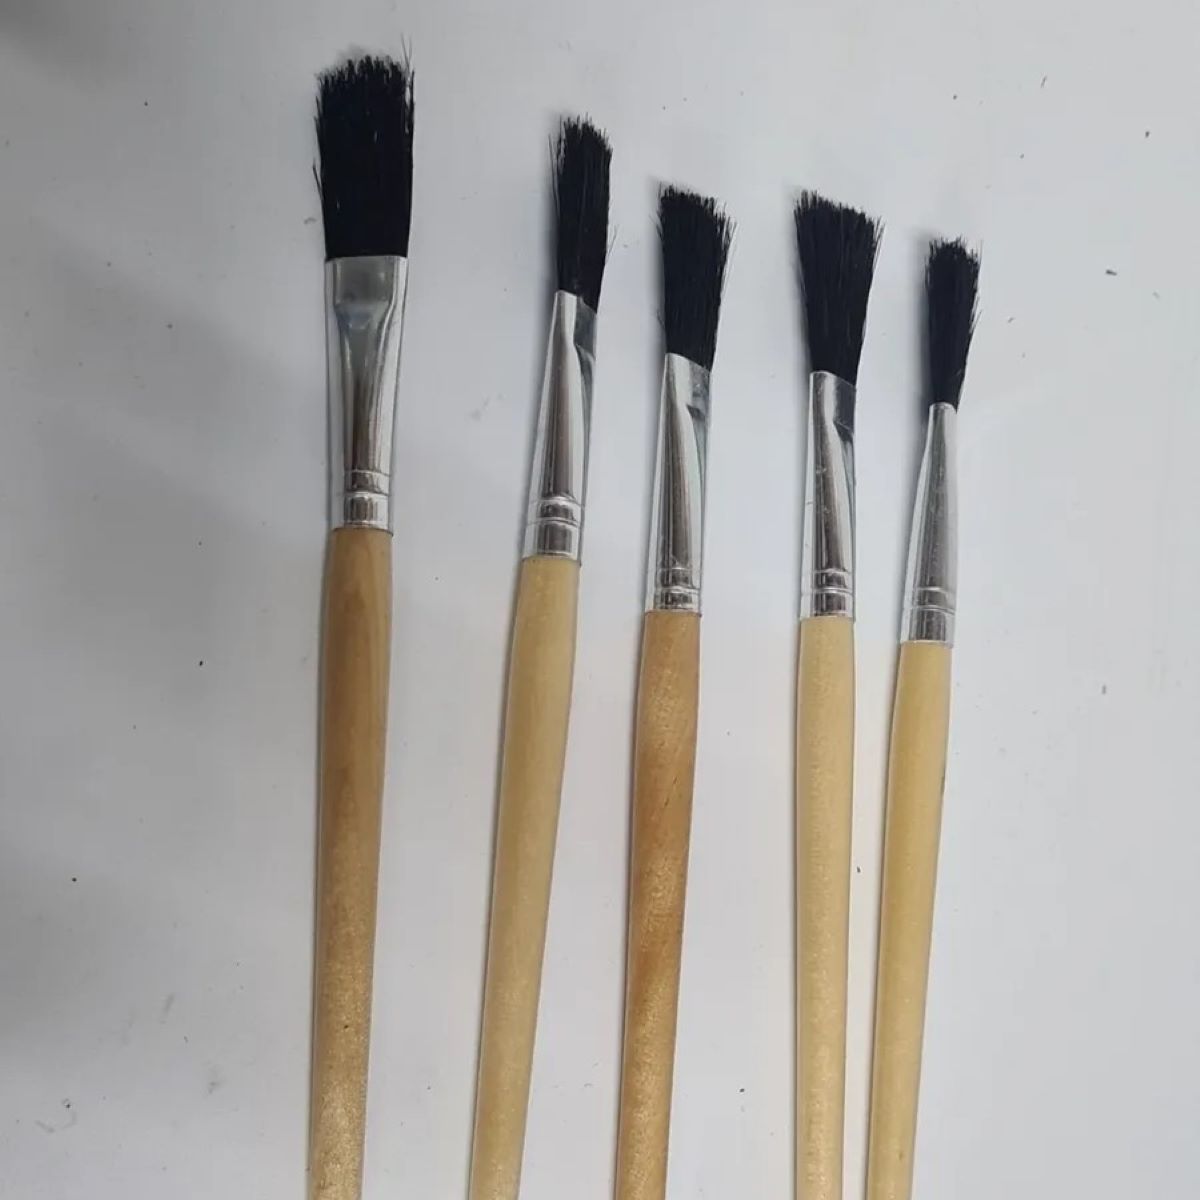
Before you begin, ensure that you have all the necessary supplies on hand. You'll need high-quality bathtub enamel paint, a paintbrush or a high-volume, low-pressure (HVLP) spray gun for a smooth application, and a respirator mask to protect yourself from fumes. Additionally, have a stirring stick, a paint tray, and a clean, lint-free cloth ready for any spills or drips.
Ventilate the Area
Proper ventilation is crucial when working with enamel paint due to the strong fumes it emits. Open windows and doors to allow fresh air to circulate through the bathroom. If possible, use a fan to further improve air circulation and minimize the inhalation of fumes.
Read more: How To Re-Grass A Yard
Apply the First Coat
If you're using a paintbrush, dip it into the enamel paint and begin applying a thin, even coat to the bathtub surface. Work methodically, starting from one end and moving towards the other to ensure consistent coverage. If you're using an HVLP spray gun, adjust the settings according to the manufacturer's instructions and apply the enamel in smooth, overlapping passes to achieve a uniform coat.
Maintain a Consistent Thickness
Whether using a paintbrush or a spray gun, aim to maintain a consistent thickness of the enamel coating across the entire bathtub surface. Avoid applying the enamel too thickly, as this can lead to drips, runs, and uneven drying. Multiple thin coats are preferable to a single thick coat, as they promote better adhesion and a smoother finish.
Allow for Proper Drying Time
After applying the first coat, allow the enamel to dry according to the manufacturer's recommendations. This typically involves waiting for the paint to become touch-dry before proceeding to the next step. Be patient during this phase, as rushing the drying process can compromise the quality of the finish.
Clean Up
Once the first coat has dried, carefully clean your paintbrush or spray gun according to the manufacturer's instructions to prevent the enamel from hardening and clogging the equipment. Proper maintenance of your tools will ensure they remain in good condition for future use.
By following these steps, you'll successfully apply the enamel coating to your bathtub, setting the stage for the subsequent stages of the re-enameling process. With the first coat in place, you're well on your way to achieving a beautifully restored bathtub that will enhance the overall appeal of your bathroom.
Read more: How To Store Enamel Pins
Step 3: Let the enamel dry
Once the first coat of enamel has been meticulously applied to the bathtub surface, it's crucial to allow for proper drying time to ensure a flawless finish. The drying process is a critical stage in the re-enameling journey, as it directly impacts the durability and visual appeal of the final result. Here's a detailed overview of the essential steps involved in letting the enamel dry effectively:
Follow Manufacturer's Recommendations
Refer to the manufacturer's instructions on the enamel paint can or packaging to determine the recommended drying time for the first coat. Different enamel products may have varying drying times based on factors such as humidity, temperature, and application thickness. Adhering to the manufacturer's guidelines will help you achieve optimal results and prevent premature handling that could compromise the finish.
Ensure Proper Ventilation
During the drying period, maintain adequate ventilation in the bathroom to facilitate the evaporation of solvents and promote the curing of the enamel. Open windows and doors to allow fresh air to circulate, and consider using a fan to expedite the drying process. Proper ventilation not only accelerates drying but also helps disperse any lingering fumes from the enamel paint.
Avoid Disturbance
Once the first coat has been applied, it's essential to avoid any activities that could disturb or damage the drying enamel. Prevent contact with dust, debris, or pet hair that could mar the surface. Similarly, refrain from using the bathtub or allowing moisture to come into contact with the freshly coated surface, as this could compromise the integrity of the finish.
Read more: How To Clean Enamel Paint Brushes
Assess Dryness Before Proceeding
Before moving on to the next steps in the re-enameling process, carefully assess the dryness of the enamel. Gently touch a discreet area of the coated surface to gauge its tackiness. If the enamel feels dry to the touch and no longer exhibits a sticky or tacky texture, it may be ready for the next phase. However, if it still feels slightly tacky, allow more time for thorough drying.
Exercise Patience
While it may be tempting to expedite the drying process, exercising patience is crucial to achieving a professional-quality finish. Rushing the drying phase can lead to imperfections, such as smudges, fingerprints, or uneven texture, which may necessitate corrective measures. By allowing the enamel to dry thoroughly, you'll set the stage for the subsequent steps of the re-enameling process, ensuring a stunning and long-lasting result.
By meticulously following these steps and allowing the enamel to dry properly, you'll pave the way for the next stages of the re-enameling process, ultimately leading to a beautifully restored bathtub that enhances the overall aesthetic of your bathroom.
Step 4: Sand and smooth the surface
After the enamel coating has thoroughly dried, the next crucial step in the re-enameling process involves sanding and smoothing the bathtub surface to achieve a flawless and professional finish. This step is essential for removing any imperfections, leveling the coating, and creating a smooth, uniform surface that enhances the visual appeal of the bathtub. Here's a detailed guide on how to effectively sand and smooth the enamel-coated surface of your bathtub:
-
Select the Right Sandpaper: Begin by choosing the appropriate sandpaper for the job. Opt for fine-grit sandpaper, such as 400-grit or higher, to gently abrade the enamel surface without causing damage. Coarser sandpaper should be avoided, as it can leave visible scratches and compromise the smoothness of the finish.
-
Lightly Sand the Surface: Using light pressure, gently sand the entire enamel-coated surface of the bathtub. Work in small, circular motions to ensure even abrasion and avoid concentrating on specific areas, which could result in uneven texture. The goal is to create a uniformly smooth surface while removing any minor imperfections or irregularities.
-
Check for Consistency: Periodically stop sanding to inspect the surface for consistency. Look for any remaining rough patches, drips, or uneven areas that may require additional attention. Continue sanding until the entire surface exhibits a uniform texture and any visible imperfections have been addressed.
-
Smooth the Edges and Corners: Pay special attention to the edges and corners of the bathtub, as these areas can be challenging to sand effectively. Use a gentle, back-and-forth motion to smooth out any rough edges and ensure a seamless transition between the coated surface and the surrounding areas.
-
Clean the Surface: Once the sanding process is complete, thoroughly clean the bathtub surface to remove any dust, debris, or residue generated during sanding. Use a damp cloth or sponge to wipe down the entire surface, ensuring that it is free from any particles that could mar the final finish.
-
Inspect for Smoothness: After cleaning the surface, carefully inspect the bathtub to ensure that it exhibits a smooth, consistent texture. Run your hand over the entire surface to detect any remaining rough spots or irregularities. Address any lingering imperfections by lightly sanding those specific areas until the surface achieves the desired smoothness.
By meticulously following these steps, you'll effectively sand and smooth the enamel-coated surface of your bathtub, setting the stage for the final phase of the re-enameling process. This critical step ensures that the bathtub surface is impeccably prepared for the application of the second coat of enamel, ultimately leading to a stunning and long-lasting finish that revitalizes the appearance of your bathroom.
Step 5: Apply a second coat of enamel
With the bathtub surface meticulously prepared and the initial coat of enamel dried and smoothed, the next pivotal step in the re-enameling process is the application of a second coat of enamel. This additional layer serves to further enhance the durability, visual appeal, and protective qualities of the re-enameling, ensuring a long-lasting and professional-quality finish. Here's a detailed guide on how to effectively apply the second coat of enamel to your bathtub:
Read also: 12 Superior Enamel Paint For 2025
Assess the Need for a Second Coat
Before proceeding with the second coat, carefully evaluate the results of the first coat. Look for any areas where the enamel coverage may be uneven or where the underlying surface is still visible. Additionally, consider the overall thickness and consistency of the first coat to determine if a second coat is necessary. While a single coat may suffice for some applications, a second coat can provide added resilience and a more lustrous finish.
Prepare the Enamel for Application
If the decision is made to proceed with a second coat, thoroughly stir the enamel paint to ensure a uniform consistency. Properly mixing the paint is crucial for achieving consistent coverage and color across the entire bathtub surface. Additionally, ensure that your paintbrush or spray gun is clean and free from any residual enamel or debris that could affect the application of the second coat.
Apply the Second Coat Methodically
Using the same meticulous approach as with the first coat, begin applying the second coat of enamel to the bathtub surface. Whether using a paintbrush or an HVLP spray gun, maintain a steady and even application to achieve uniform coverage. Pay particular attention to any areas that may have been missed or require additional coverage, ensuring that the entire surface is evenly coated.
Maintain Consistent Thickness and Coverage
As with the first coat, aim to maintain a consistent thickness and coverage across the entire bathtub surface. Avoid overapplying the enamel, as this can lead to drips, runs, or uneven texture. Multiple thin coats are preferable to a single thick coat, as they promote better adhesion and a smoother, more resilient finish.
Allow for Proper Drying Time
After applying the second coat, allow the enamel to dry thoroughly according to the manufacturer's recommendations. Proper drying is essential for the formation of a durable and flawless finish. Exercise patience during this phase, refraining from any activities that could disturb the drying enamel.
By meticulously following these steps and applying a second coat of enamel with precision and care, you'll significantly enhance the overall quality and longevity of the re-enameling process. This additional layer of enamel will contribute to a beautifully restored bathtub that elevates the aesthetic appeal of your bathroom, providing a durable and visually stunning centerpiece for years to come.
Step 6: Let the second coat dry
Properly allowing the second coat of enamel to dry is a critical phase in the re-enameling process, as it directly impacts the durability, visual appeal, and overall quality of the final finish. After meticulously applying the second coat, it's essential to exercise patience and diligence in ensuring thorough drying to achieve a flawless and long-lasting result.
Following the application of the second coat, refer to the manufacturer's guidelines to determine the recommended drying time. Different enamel products may have varying drying times based on factors such as humidity, temperature, and application thickness. Adhering to these recommendations is crucial for optimizing the quality and resilience of the finish.
During the drying period, maintain proper ventilation in the bathroom to facilitate the evaporation of solvents and promote the curing of the enamel. Open windows and doors to allow fresh air to circulate, and consider using a fan to expedite the drying process. Adequate ventilation not only accelerates drying but also helps disperse any lingering fumes from the enamel paint.
It's imperative to avoid any activities that could disturb or damage the drying enamel. Prevent contact with dust, debris, or pet hair that could mar the surface. Similarly, refrain from using the bathtub or allowing moisture to come into contact with the freshly coated surface, as this could compromise the integrity of the finish.
Carefully assess the dryness of the enamel before proceeding to the next steps in the re-enameling process. Gently touch a discreet area of the coated surface to gauge its tackiness. If the enamel feels dry to the touch and no longer exhibits a sticky or tacky texture, it may be ready for the next phase. However, if it still feels slightly tacky, allow more time for thorough drying.
By allowing the second coat of enamel to dry properly, you'll pave the way for the final stages of the re-enameling process, ultimately leading to a beautifully restored bathtub that enhances the overall aesthetic of your bathroom.
Conclusion
In conclusion, re-enameling a bathtub is a rewarding and cost-effective way to breathe new life into your bathroom, transforming a worn and dated tub into a stunning focal point. By following the comprehensive steps outlined in this guide, you can confidently undertake the re-enameling process and achieve professional-quality results that enhance the overall aesthetic of your bathroom.
From meticulously preparing the bathtub surface to applying multiple coats of high-quality enamel, each step plays a crucial role in revitalizing the tub and ensuring its long-term durability. The thorough preparation of the surface, including cleaning, repairing imperfections, and degreasing, sets the stage for the successful adhesion of the enamel coating. Additionally, the application of the enamel, followed by proper drying and meticulous sanding, contributes to a smooth and flawless finish that rejuvenates the bathtub's appearance.
It's important to note that re-enameling a bathtub requires patience and attention to detail, particularly during the drying and sanding phases. Rushing these critical steps can compromise the overall quality of the finish, so taking the time to allow for proper drying and achieving a smooth surface is essential for a successful outcome.
Ultimately, the re-enameling process not only restores the visual appeal of the bathtub but also provides a protective barrier against future wear and tear, ensuring its longevity for years to come. The newly enameled bathtub becomes a centerpiece of the bathroom, exuding a fresh and glossy finish that adds a touch of elegance to the space.
By embarking on this DIY re-enameling journey, you not only save on the cost of replacing the bathtub but also contribute to environmental sustainability by extending the life of an existing fixture. With the right tools, materials, and a methodical approach, re-enameling a bathtub becomes an achievable and gratifying home improvement project that yields impressive and long-lasting results.
In conclusion, re-enameling a bathtub is a testament to the transformative power of DIY home improvement, allowing you to revitalize your bathroom and enjoy a beautifully restored bathtub that enhances the overall ambiance of your home.
Frequently Asked Questions about How To Re Enamel A Bathtub
Was this page helpful?
At Storables.com, we guarantee accurate and reliable information. Our content, validated by Expert Board Contributors, is crafted following stringent Editorial Policies. We're committed to providing you with well-researched, expert-backed insights for all your informational needs.


0 thoughts on “How To Re Enamel A Bathtub”