Home>Furniture & Design>Bathroom Accessories>How To Refinish An Old Cast Iron Bathtub
Bathroom Accessories
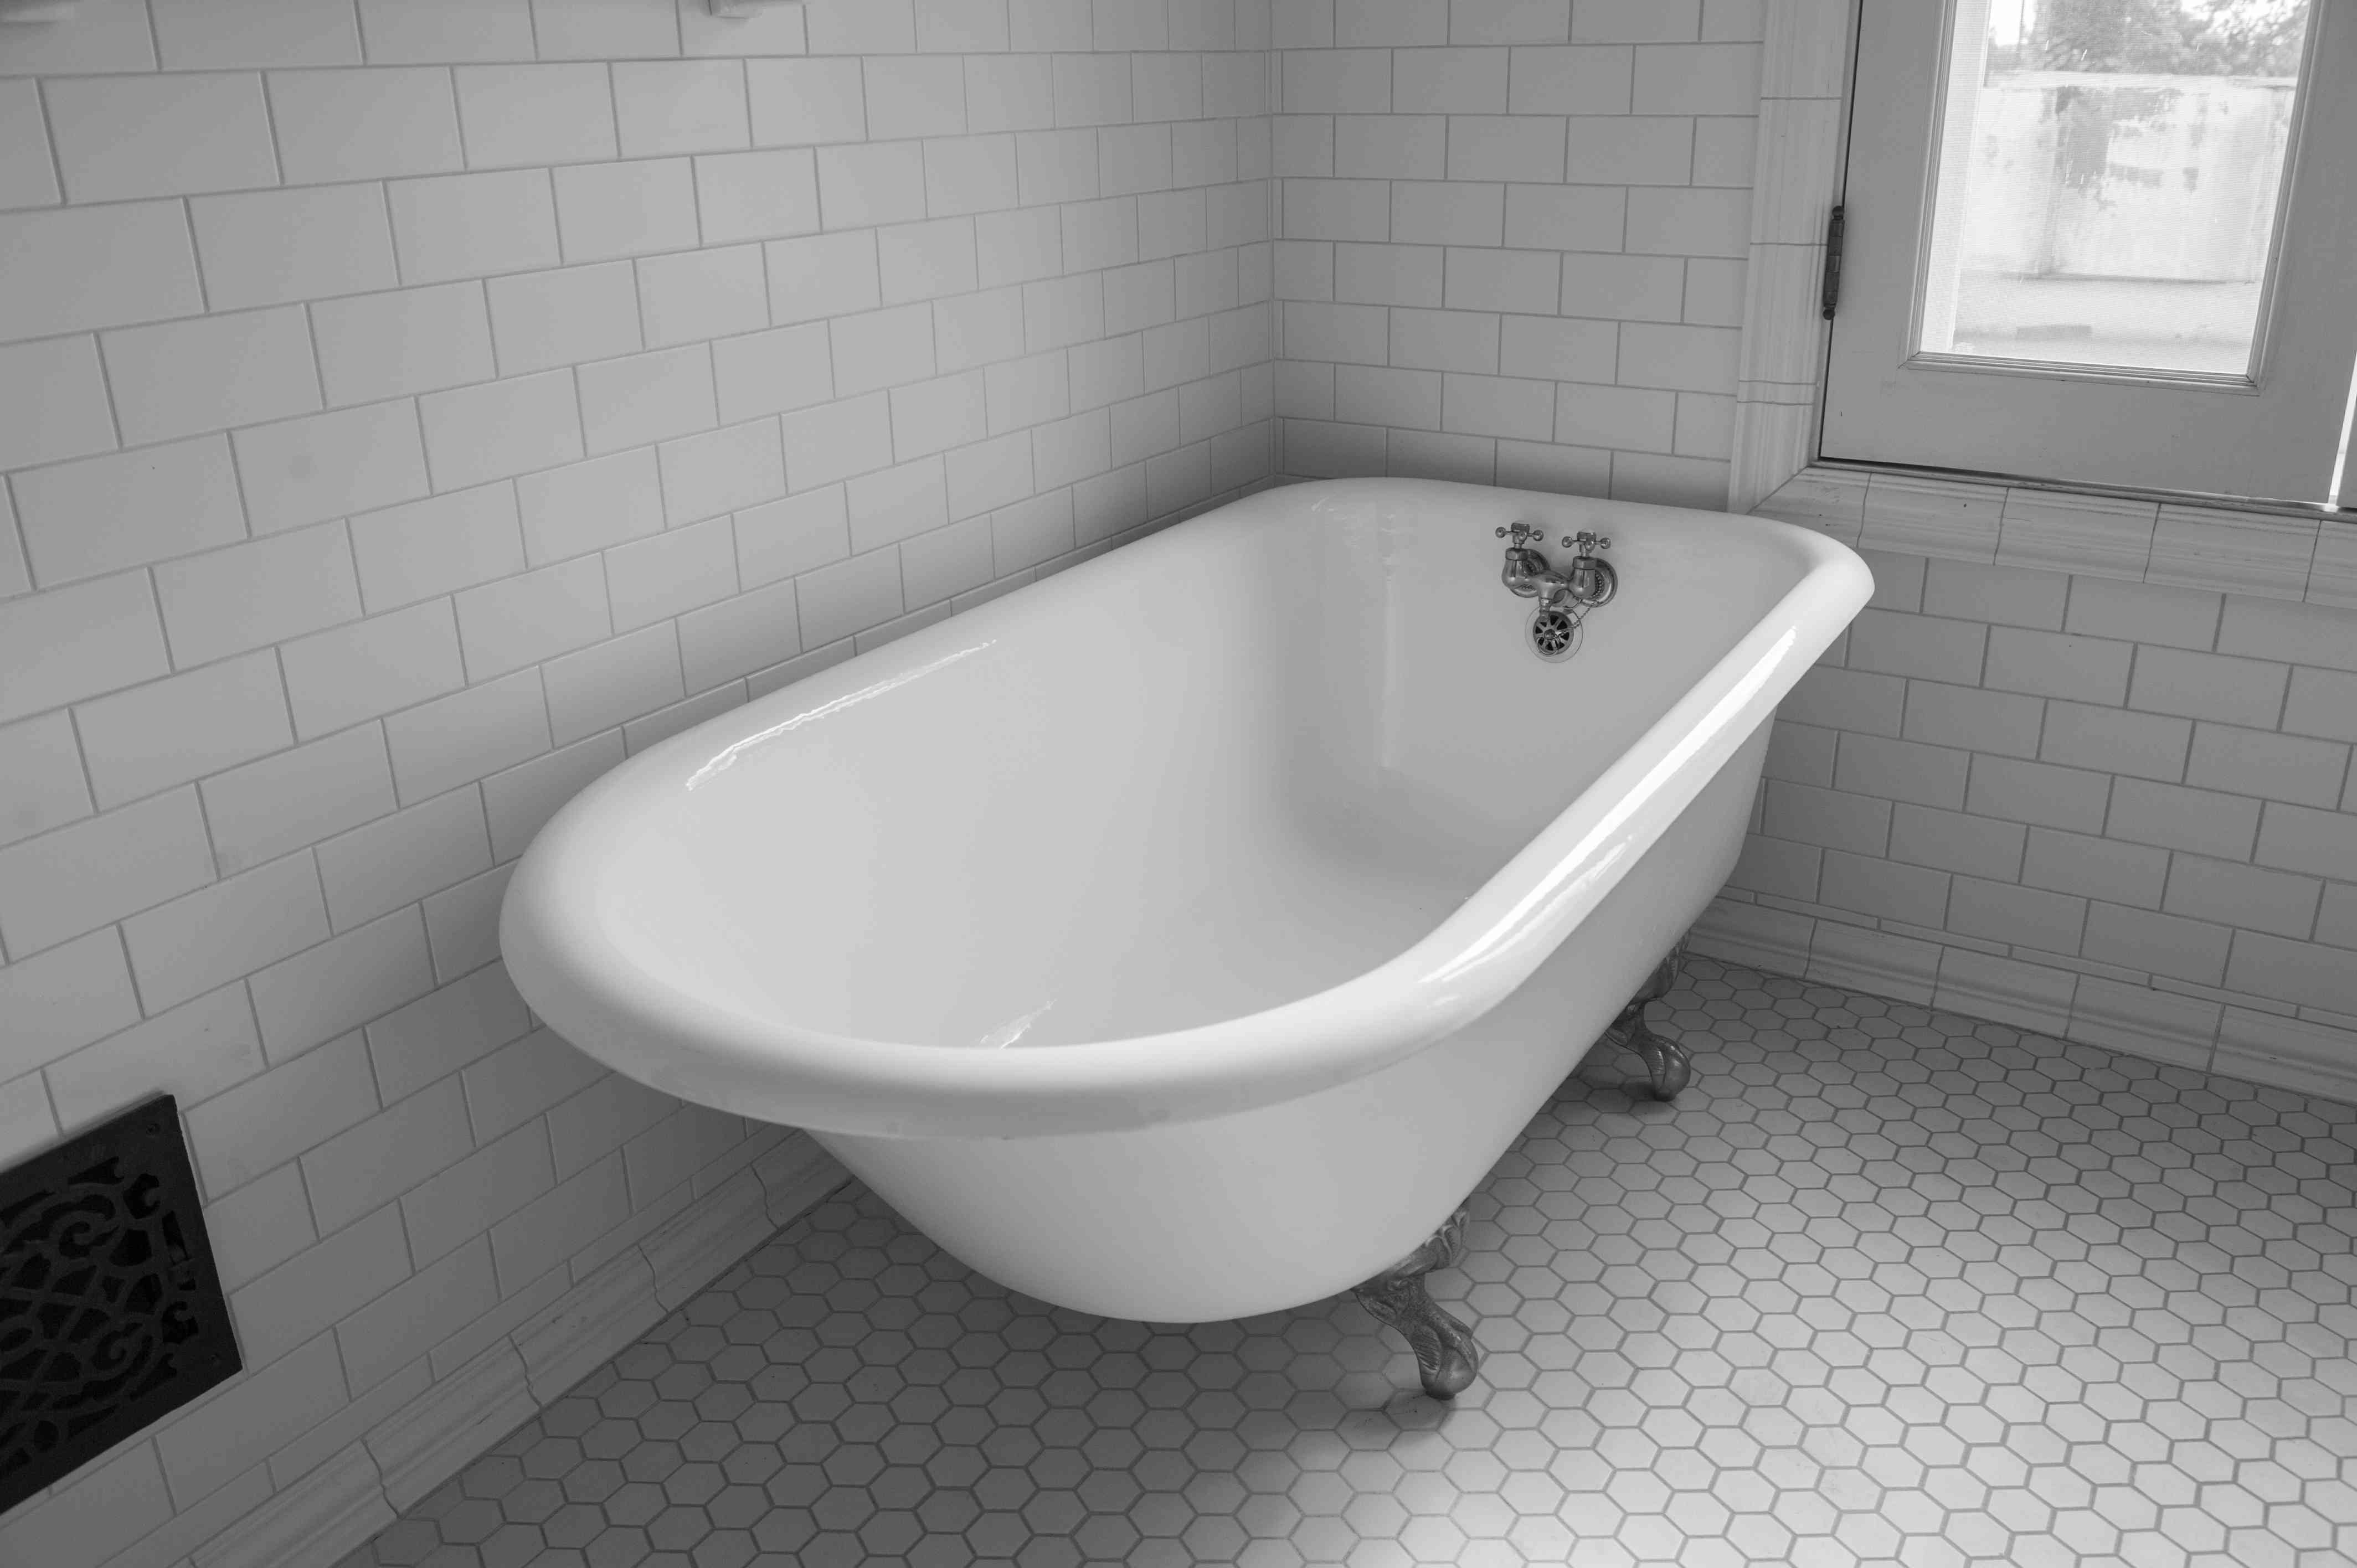
How To Refinish An Old Cast Iron Bathtub
Modified: April 22, 2024
Learn how to refinish an old cast iron bathtub to give your bathroom a fresh new look. Explore the best techniques and bathroom accessories for a stunning transformation.
(Many of the links in this article redirect to a specific reviewed product. Your purchase of these products through affiliate links helps to generate commission for Storables.com, at no extra cost. Learn more)
Introduction
Refinishing an old cast iron bathtub can breathe new life into your bathroom and add a touch of vintage charm to your home. Over time, the original finish of a cast iron bathtub may become worn, chipped, or discolored, detracting from the overall aesthetic of the bathroom. However, with the right tools, materials, and a bit of elbow grease, you can restore your old cast iron bathtub to its former glory without the need for a costly replacement.
Refinishing a cast iron bathtub is a rewarding DIY project that allows you to revitalize a key feature of your bathroom while saving money. By following a few simple steps, you can transform your worn-out bathtub into a stunning focal point that enhances the overall appeal of your bathroom space.
In this comprehensive guide, we will walk you through the step-by-step process of refinishing an old cast iron bathtub. From gathering the necessary materials to applying the new finish, each stage of the refinishing process will be thoroughly explained, providing you with the knowledge and confidence to tackle this project with ease.
Whether you're a seasoned DIY enthusiast or a novice looking to take on your first home improvement project, refinishing a cast iron bathtub is a manageable task that yields impressive results. By the end of this guide, you'll be equipped with the expertise to transform your old bathtub into a stunning centerpiece that exudes timeless elegance and charm.
So, roll up your sleeves, gather your supplies, and get ready to embark on a rewarding journey to rejuvenate your old cast iron bathtub. With a little patience and a lot of determination, you'll soon be enjoying the luxurious comfort of a beautifully refinished bathtub in your own home.
Key Takeaways:
- Revitalize your bathroom by refinishing your old cast iron bathtub. Save money and enjoy a rewarding DIY project that adds vintage charm to your home.
- Transform your worn-out bathtub into a stunning centerpiece. Follow the step-by-step guide to achieve impressive results and enjoy the luxurious comfort of a beautifully refinished bathtub.
Read more: How To Remove An Old Cast Iron Bathtub
Step 1: Gather the necessary materials
Before embarking on the journey of refinishing your old cast iron bathtub, it's essential to gather all the necessary materials and tools to ensure a smooth and successful process. Here's a comprehensive list of items you'll need to have on hand before you begin:
-
Protective Gear: Start by prioritizing your safety. Gather protective gear such as gloves, safety goggles, and a respirator mask to shield yourself from harmful fumes and chemicals during the refinishing process.
-
Cleaning Supplies: To prepare the bathtub for refinishing, you'll need a heavy-duty cleaner or degreaser to remove any built-up grime, soap scum, and mineral deposits. Additionally, gather scrubbing pads or brushes to effectively clean the surface.
-
Sandpaper and Sanding Block: Invest in a variety of sandpaper grits, including coarse, medium, and fine, to remove the old finish and create a smooth surface for the new coating. A sanding block will provide stability and control during the sanding process.
-
Epoxy Filler: In case your bathtub has any chips, cracks, or dents, an epoxy filler will be essential for repairing these imperfections before applying the new finish.
-
Primer and Topcoat: Acquire a high-quality bathtub refinishing kit that includes epoxy primer and a durable topcoat specifically designed for cast iron surfaces. Ensure that the products are compatible with each other for optimal adhesion and longevity.
-
Paint Sprayer or Brush: Depending on your preference and the size of the bathtub, you can choose to use a paint sprayer or a high-quality brush for applying the new finish. A paint sprayer can provide a smooth, even application, while a brush offers precision and control.
-
Drop Cloths and Masking Tape: Protect the surrounding area from overspray and drips by laying down drop cloths and using masking tape to cover fixtures, walls, and flooring near the bathtub.
-
Ventilation: Proper ventilation is crucial during the refinishing process. Consider using a fan or opening windows to ensure adequate airflow and minimize exposure to fumes.
By gathering these essential materials and tools, you'll be well-prepared to tackle the first step of refinishing your old cast iron bathtub. With a clear understanding of the items required, you can proceed to the next stage of preparing the bathtub for refinishing.
Step 2: Prepare the bathtub for refinishing
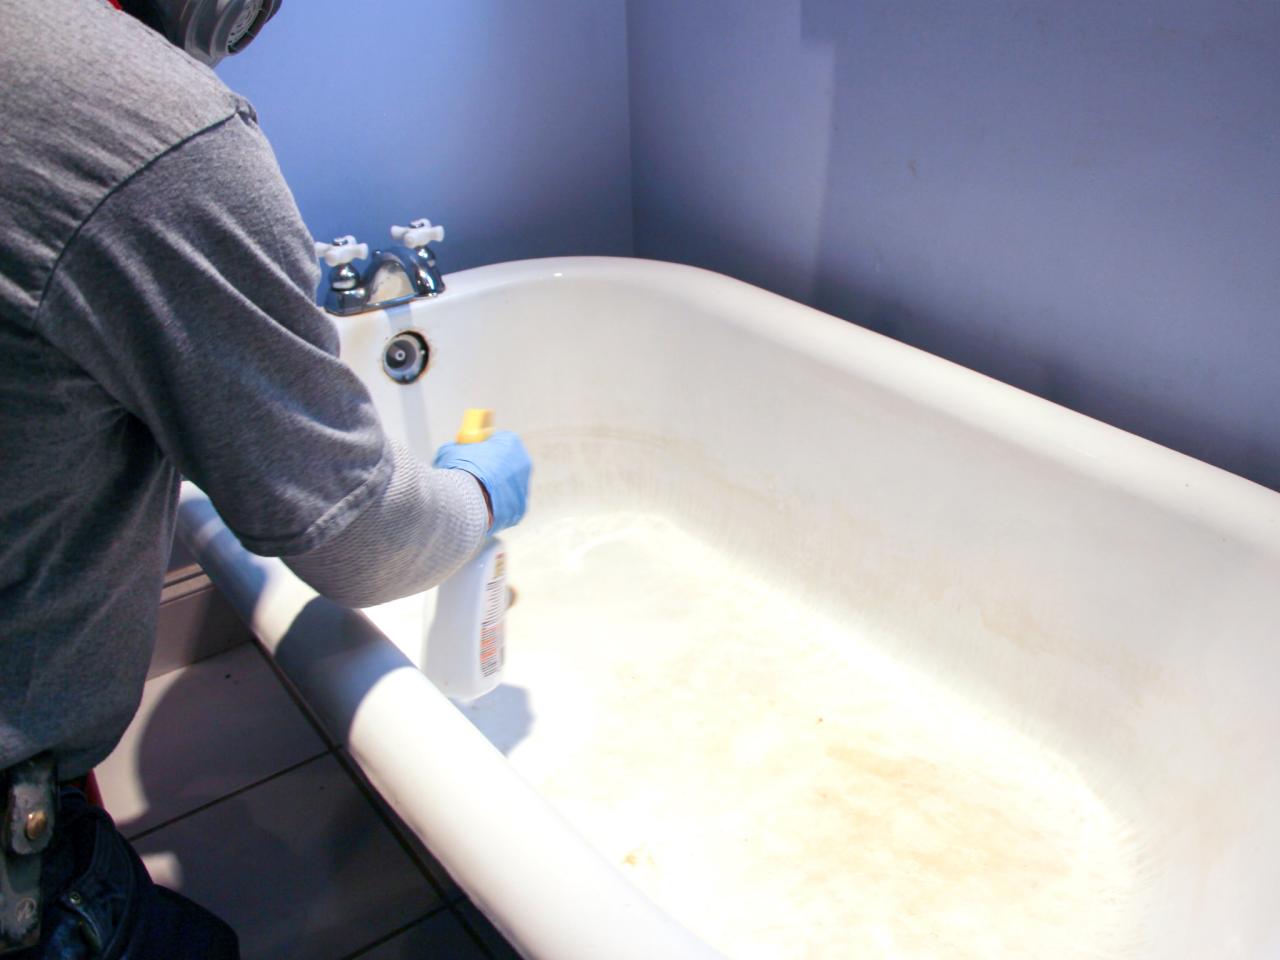
Before diving into the process of applying a new finish to your old cast iron bathtub, it's crucial to thoroughly prepare the surface to ensure optimal adhesion and a flawless end result. The preparation stage involves a series of meticulous steps aimed at removing any existing residue, creating a clean and smooth surface, and addressing any imperfections that may affect the final finish. Here's a detailed breakdown of how to prepare your bathtub for refinishing:
1. Clean the Surface:
Begin by thoroughly cleaning the bathtub surface using a heavy-duty cleaner or degreaser. Remove any accumulated grime, soap scum, and mineral deposits by scrubbing the surface with a suitable cleaning solution and abrasive pads. Ensure that the entire bathtub is free from dirt and residue before proceeding to the next step.
2. Remove Hardware and Caulking:
If your bathtub features any hardware such as faucets, handles, or drain covers, carefully remove these components to facilitate thorough cleaning and prevent them from being coated during the refinishing process. Additionally, remove any existing caulking around the edges of the bathtub to allow for a seamless application of the new finish.
Read more: How To Refinish A Cast Iron Sink
3. Sand the Surface:
Using a variety of sandpaper grits, including coarse, medium, and fine, gently sand the entire bathtub surface to remove the old finish and create a smooth, uniform texture. Pay special attention to areas with visible imperfections, ensuring that the surface is even and free from any remaining residue.
4. Repair Imperfections:
Inspect the bathtub for any chips, cracks, or dents, and address these imperfections using an epoxy filler. Apply the filler according to the manufacturer's instructions, smoothing it over damaged areas to restore the surface to its original condition. Allow the filler to cure completely before proceeding.
5. Clean and Dry Thoroughly:
Once the surface has been sanded and any imperfections have been repaired, thoroughly clean the bathtub again to remove any dust or debris resulting from the preparation process. After cleaning, ensure that the bathtub is completely dry before moving on to the next stage.
By meticulously preparing your bathtub for refinishing, you'll create an ideal foundation for the application of the new finish, ensuring a durable and visually appealing result. With the surface cleaned, repaired, and ready for the next step, you're one step closer to transforming your old cast iron bathtub into a stunning centerpiece for your bathroom.
Step 3: Remove the old finish
Removing the old finish from your cast iron bathtub is a critical step in the refinishing process, as it sets the stage for the application of the new coating. The goal is to completely strip away the existing finish, whether it's enamel or paint, to ensure a clean and smooth surface for the subsequent layers. Here's a detailed guide on how to effectively remove the old finish from your bathtub:
Read more: How To Cut Up A Cast Iron Bathtub
1. Select the Right Tools:
Before beginning the removal process, gather the necessary tools for the job. Depending on the type of finish on your bathtub, you may need paint stripper, chemical solvent, or a combination of both. Additionally, have a supply of clean rags, a putty knife, and a scrubbing pad or brush on hand to aid in the removal process.
2. Apply the Paint Stripper or Solvent:
If your bathtub has a painted finish, apply a suitable paint stripper according to the manufacturer's instructions. Ensure that the area is well-ventilated and wear protective gear to minimize exposure to fumes. Allow the paint stripper to penetrate the old finish, softening it for easier removal. For enamel finishes, a chemical solvent designed for enamel removal can be used in a similar manner.
3. Scrape Off the Old Finish:
Once the paint stripper or solvent has had time to work its magic, use a putty knife to gently scrape away the softened finish. Take care not to apply excessive force, as this can damage the underlying surface of the bathtub. Work methodically, removing the old finish in sections until the entire bathtub surface is free from the previous coating.
4. Clean and Rinse the Surface:
After successfully removing the old finish, thoroughly clean the bathtub surface to eliminate any residue from the paint stripper or solvent. Use a clean rag and a mild detergent to wipe down the entire area, ensuring that no traces of the old finish or stripping agent remain. Rinse the bathtub with water and allow it to dry completely before proceeding to the next stage of the refinishing process.
By following these steps, you can effectively remove the old finish from your cast iron bathtub, preparing it for the subsequent stages of refinishing. With the old finish stripped away, you're now ready to address any damage and apply the new finish, bringing your bathtub one step closer to its revitalized and rejuvenated state.
Read more: How To Use A Cast Iron Waffle Iron
Step 4: Repair any damage
Inspecting the cast iron bathtub for any chips, cracks, or dents is a crucial step in the refinishing process. Over time, these imperfections can detract from the overall appearance and structural integrity of the bathtub. Fortunately, addressing such damage is achievable through the application of an epoxy filler, which effectively restores the surface to its original condition.
To begin the repair process, carefully examine the bathtub for any visible damage, paying close attention to areas that may have been compromised over time. Common areas prone to damage include the edges of the bathtub, the bottom surface, and around the drain. Once identified, thoroughly clean the damaged areas to ensure that the epoxy filler adheres effectively.
Next, prepare the epoxy filler according to the manufacturer's instructions, ensuring that it is thoroughly mixed and ready for application. Using a putty knife or a similar tool, carefully apply the filler to the damaged areas, smoothing it over any chips, cracks, or dents. Take care to fill the imperfections completely, creating a level surface that seamlessly blends with the surrounding bathtub material.
After applying the epoxy filler, allow it to cure completely as per the manufacturer's guidelines. This curing process is essential for ensuring the durability and longevity of the repairs. Once the filler has hardened, sand the repaired areas to achieve a smooth and even surface, seamlessly integrating the repaired sections with the rest of the bathtub.
By effectively repairing any damage present on the cast iron bathtub, you not only enhance its visual appeal but also reinforce its structural integrity. The meticulous application of the epoxy filler ensures that the bathtub's surface is free from imperfections, setting the stage for the successful application of the new finish.
With the damage repaired and the surface meticulously prepared, the bathtub is now ready for the transformative process of applying the new finish. This repair stage plays a pivotal role in revitalizing the bathtub, ensuring that it emerges as a stunning centerpiece in your bathroom, exuding timeless elegance and charm.
Step 5: Apply the new finish
Applying the new finish to your cast iron bathtub is the transformative stage that breathes new life into the worn-out surface, rejuvenating it with a fresh and durable coating. The process of applying the new finish requires precision, patience, and attention to detail to ensure a flawless result that enhances the overall aesthetic of the bathtub. Here's a comprehensive guide on how to effectively apply the new finish to your cast iron bathtub:
1. Prepare the Workspace:
Before commencing the application of the new finish, ensure that the surrounding area is adequately protected. Lay down drop cloths to shield the floor and nearby fixtures from overspray, and use masking tape to cover any areas that are not being refinished. Proper ventilation is essential, so ensure that the workspace is well-ventilated to minimize exposure to fumes.
2. Prime the Surface:
Begin by applying an epoxy primer to the prepared bathtub surface. The primer serves as a crucial bonding agent, promoting adhesion between the cast iron material and the subsequent topcoat. Follow the manufacturer's instructions for the application of the primer, ensuring that it is spread evenly and allowed to dry thoroughly before proceeding to the next step.
Read more: How To Season A Cast Iron Kettle
3. Apply the Topcoat:
Once the primer has dried, it's time to apply the topcoat to the bathtub surface. Whether using a paint sprayer or a high-quality brush, ensure that the topcoat is applied evenly and consistently across the entire bathtub. Work methodically, starting from one end and progressing towards the other to achieve a seamless finish. Multiple thin coats are preferable to a single thick application, as this promotes even coverage and minimizes the risk of drips or runs.
4. Allow for Proper Curing:
After applying the topcoat, allow the bathtub to cure according to the manufacturer's recommendations. This curing period is essential for the new finish to fully bond and harden, ensuring its durability and longevity. Avoid using the bathtub during this curing phase to prevent any potential damage to the freshly applied finish.
5. Reinstall Hardware and Caulking:
Once the new finish has cured completely, reinstall any hardware that was removed and reapply caulking around the edges of the bathtub. Take care to ensure that the reinstalled components are secure and that the caulking is applied neatly for a polished and professional appearance.
By following these steps, you can effectively apply a new finish to your cast iron bathtub, transforming it into a stunning centerpiece that revitalizes your bathroom space. The meticulous application of the primer and topcoat, coupled with proper curing and attention to detail, ensures that your refinished bathtub exudes timeless elegance and charm, enhancing the overall appeal of your home.
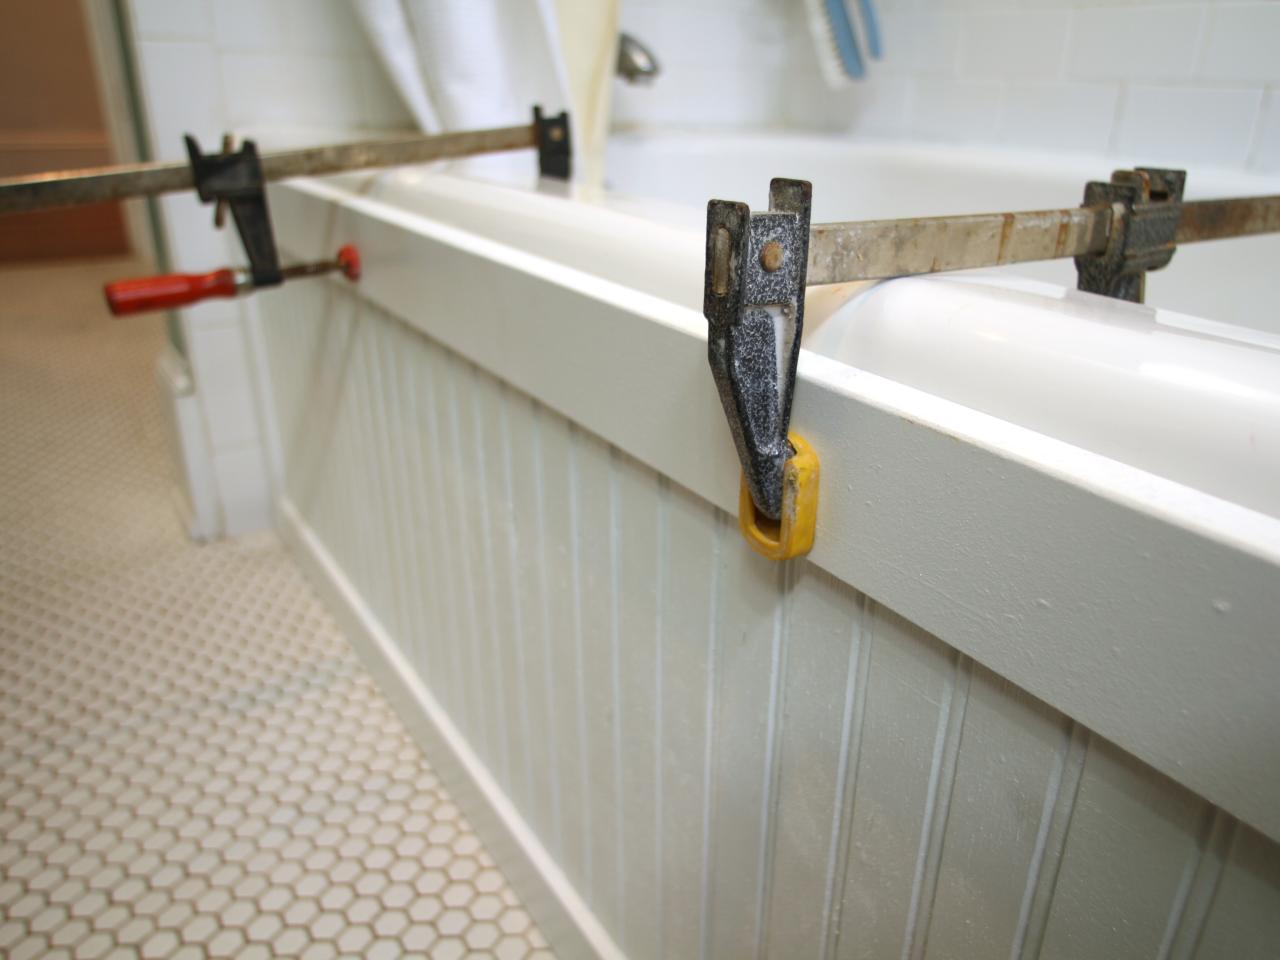
Step 6: Reinstall the bathtub
Reinstalling the cast iron bathtub is the final step in the refinishing process, marking the culmination of your efforts to rejuvenate this essential fixture in your bathroom. While the previous stages focused on preparing and transforming the bathtub's surface, the reinstalling phase ensures that the newly refinished bathtub is securely and seamlessly integrated back into its designated space. Here's a detailed guide on how to effectively reinstall the cast iron bathtub:
-
Assess the Surrounding Area: Before reinstalling the bathtub, carefully inspect the surrounding area to ensure that it is clean, level, and free from any debris or obstructions. Clear the space around the bathtub, allowing for easy access and maneuverability during the reinstallation process.
-
Lift and Position the Bathtub: With the assistance of a capable helper, carefully lift the refinished bathtub and position it in its designated space. Take care to align the bathtub with the plumbing fixtures and ensure that it sits level and stable on the floor.
-
Reconnect the Plumbing: Once the bathtub is in place, reconnect the plumbing fixtures, including the drain, faucet, and any additional hardware. Ensure that all connections are secure and leak-free, testing the functionality of the fixtures to confirm proper operation.
-
Secure the Bathtub: Use shims or adjustable feet to level the bathtub if necessary, ensuring that it sits securely and does not wobble. Once the bathtub is level, secure it in place by anchoring it to the surrounding walls or floor, following the manufacturer's guidelines for installation.
-
Apply New Caulking: To achieve a polished and watertight finish, apply fresh caulking around the edges of the bathtub. Use a high-quality silicone or acrylic caulk to seal the gaps between the bathtub and the surrounding walls, creating a clean and professional appearance.
-
Clean and Inspect: After reinstalling the bathtub, thoroughly clean the surface to remove any fingerprints, smudges, or debris resulting from the installation process. Inspect the bathtub and its surroundings to ensure that everything is in place and that the reinstallation has been executed to a high standard.
By following these steps, you can effectively reinstall the refinished cast iron bathtub, completing the transformation and reintroducing a stunning centerpiece to your bathroom. The meticulous attention to detail during the reinstallation process ensures that the bathtub is not only visually appealing but also fully functional and seamlessly integrated into your bathroom space. With the bathtub securely in place, you can now revel in the satisfaction of a successful refinishing project, enjoying the luxurious comfort and timeless elegance it brings to your home.
Read more: How To Refinish A Plastic Bathtub
Conclusion
In conclusion, the process of refinishing an old cast iron bathtub is a transformative journey that revitalizes a key feature of your bathroom, breathing new life into a worn-out fixture and elevating the overall aesthetic of your home. By following the comprehensive steps outlined in this guide, you have gained the knowledge and confidence to undertake this rewarding DIY project, allowing you to achieve impressive results while saving on the cost of a full replacement.
Throughout the refinishing process, you have embarked on a meticulous journey, starting with the gathering of essential materials and tools, preparing the bathtub for refinishing, removing the old finish, repairing any damage, applying the new finish, and finally, reinstalling the bathtub. Each stage has been carefully orchestrated to ensure that your old cast iron bathtub emerges as a stunning centerpiece, exuding timeless elegance and charm.
By meticulously preparing the bathtub surface, addressing any imperfections, and applying a new finish with precision and care, you have transformed a worn-out fixture into a rejuvenated centerpiece that enhances the overall appeal of your bathroom. The attention to detail and the dedication invested in each step of the refinishing process have culminated in the successful revitalization of your cast iron bathtub.
As you stand back and admire the newly refinished bathtub, you can take pride in the accomplishment of this DIY project, knowing that your efforts have resulted in a visually stunning and fully functional fixture that adds a touch of vintage charm to your home. The revitalized bathtub serves as a testament to your dedication and craftsmanship, showcasing the transformative power of a well-executed refinishing endeavor.
With the bathtub securely reinstalled and seamlessly integrated into your bathroom space, you can now revel in the luxurious comfort and timeless elegance it brings to your home. The revitalized fixture stands as a testament to your dedication and craftsmanship, showcasing the transformative power of a well-executed refinishing endeavor.
In conclusion, the successful refinishing of your old cast iron bathtub not only enhances the visual appeal of your bathroom but also reflects your ability to undertake rewarding DIY projects that breathe new life into your living space. As you enjoy the comfort and beauty of your refinished bathtub, you can take pride in the accomplishment of this transformative endeavor, knowing that you have added a touch of timeless elegance to your home through your own skill and determination.
Frequently Asked Questions about How To Refinish An Old Cast Iron Bathtub
Was this page helpful?
At Storables.com, we guarantee accurate and reliable information. Our content, validated by Expert Board Contributors, is crafted following stringent Editorial Policies. We're committed to providing you with well-researched, expert-backed insights for all your informational needs.

0 thoughts on “How To Refinish An Old Cast Iron Bathtub”