Home>Furniture & Design>Bathroom Accessories>How To Remove An Old Cast Iron Bathtub
Bathroom Accessories
How To Remove An Old Cast Iron Bathtub
Modified: August 24, 2024
Learn how to safely remove an old cast iron bathtub and update your bathroom accessories with our step-by-step guide. Upgrade your bathroom with ease!
(Many of the links in this article redirect to a specific reviewed product. Your purchase of these products through affiliate links helps to generate commission for Storables.com, at no extra cost. Learn more)
Introduction
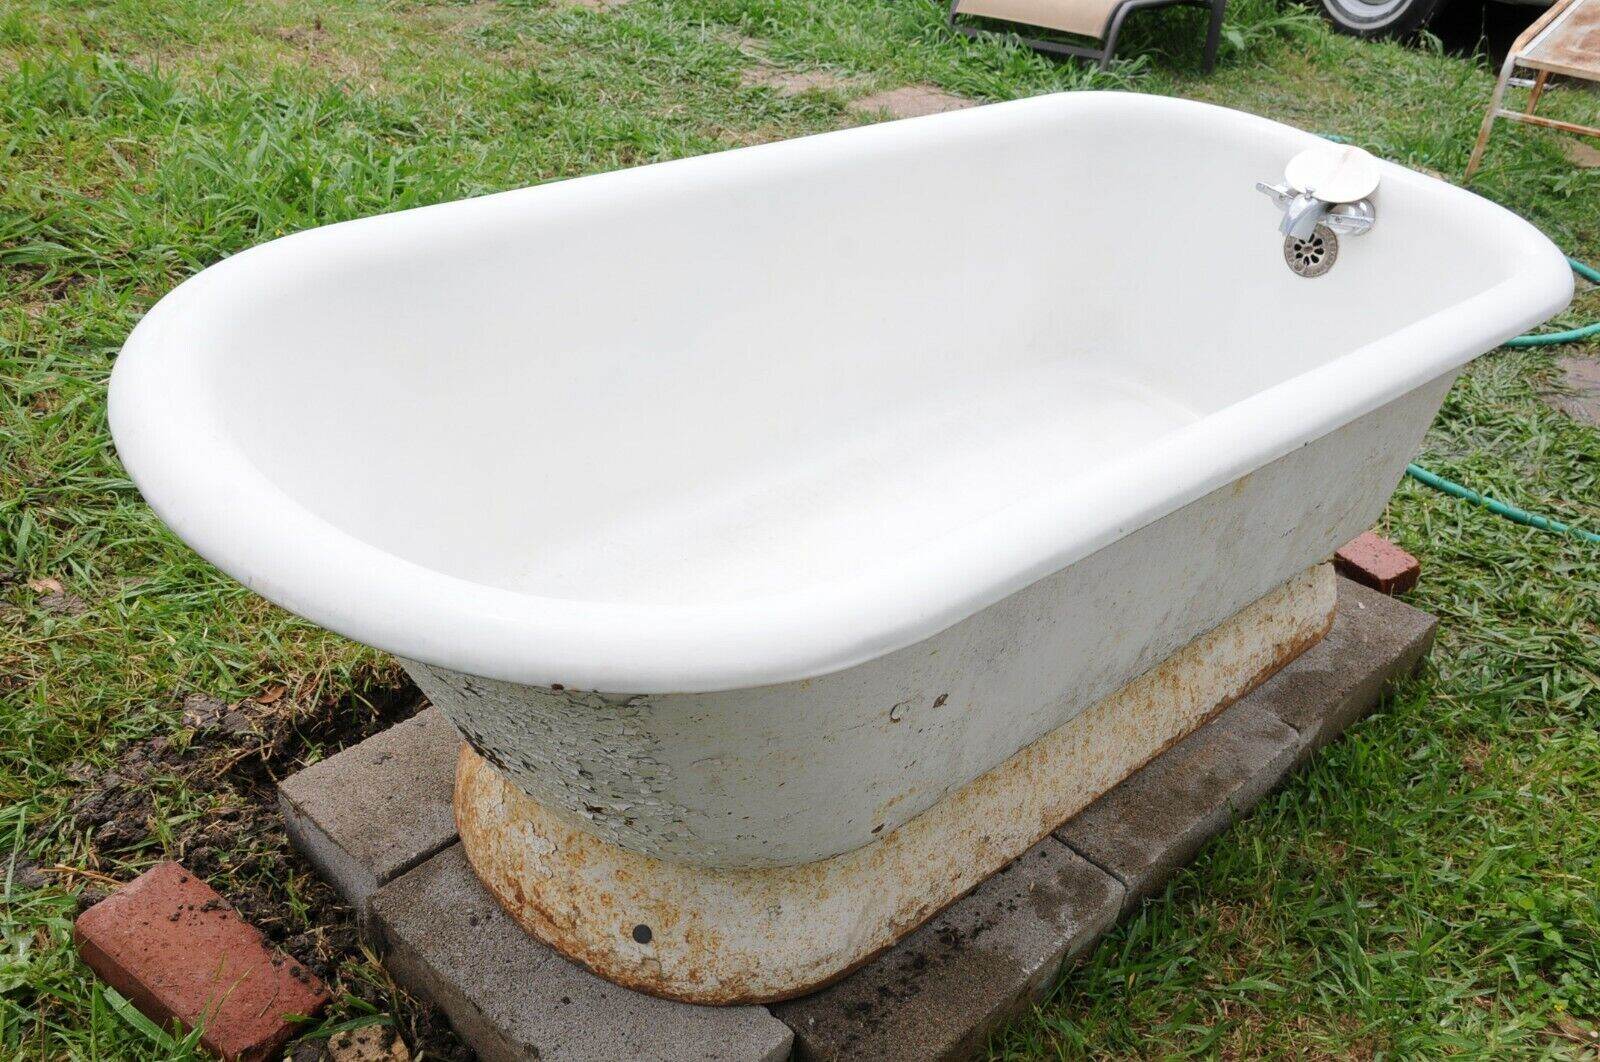
Removing an old cast iron bathtub can be a daunting task, but with the right tools, materials, and know-how, it's a project that can be tackled successfully. Whether you're renovating your bathroom or simply replacing the old bathtub with a new one, the process requires careful planning and execution to ensure a smooth transition. In this comprehensive guide, we will walk you through the step-by-step process of removing an old cast iron bathtub, from gathering the necessary tools and materials to cleaning up and preparing for the installation of the new bathtub.
Removing a cast iron bathtub is a significant undertaking that requires careful consideration of safety measures and proper disposal methods. Cast iron bathtubs are known for their durability and weight, making them challenging to remove compared to other types of bathtubs. However, with the right approach and attention to detail, the task can be accomplished efficiently and safely.
Before embarking on this project, it's essential to assess the condition of the old bathtub and the surrounding area. This will help you determine the extent of the work required and identify any potential challenges that may arise during the removal process. Additionally, it's crucial to have a clear understanding of the steps involved in removing the old bathtub to ensure a smooth and successful transition to the new installation.
By following the steps outlined in this guide, you'll be equipped with the knowledge and confidence to tackle the removal of an old cast iron bathtub effectively. From disconnecting the plumbing to breaking up the old bathtub and disposing of it, each step is crucial in ensuring a seamless transition to the new bathtub installation. So, roll up your sleeves, gather your tools, and let's dive into the process of removing an old cast iron bathtub.
Key Takeaways:
- Removing an old cast iron bathtub requires careful planning, the right tools, and safety precautions. From disconnecting plumbing to breaking up the bathtub, each step is crucial for a successful transition to a new installation.
- Prioritize safety and prepare the bathroom before removing an old cast iron bathtub. Disconnect plumbing, remove the surround, break up the bathtub, and dispose of debris responsibly for a seamless installation of the new bathtub.
Read more: How To Refinish An Old Cast Iron Bathtub
Step 1: Gather the necessary tools and materials
Before embarking on the task of removing an old cast iron bathtub, it's essential to gather all the necessary tools and materials to ensure a smooth and efficient process. Here's a comprehensive list of items you'll need:
Tools:
- Safety Gear: Prioritize safety by wearing protective gear, including heavy-duty gloves, safety goggles, and a dust mask to shield yourself from potential hazards such as sharp edges and dust particles.
- Wrenches and Pliers: Have an assortment of wrenches and pliers on hand to disconnect the plumbing fixtures securely.
- Sledgehammer and Chisel: These tools will be essential for breaking up the cast iron bathtub into manageable pieces for removal.
- Reciprocating Saw: A reciprocating saw equipped with a metal-cutting blade will facilitate the cutting of the bathtub into smaller sections.
- Utility Knife: Use a utility knife to cut through any caulking or sealant around the bathtub edges and fixtures.
- Pry Bar: A sturdy pry bar will aid in loosening and removing the bathtub surround and other fixtures.
- Heavy-Duty Trash Bags: Prepare heavy-duty trash bags for the disposal of broken pieces of the bathtub and other debris.
- Measuring Tape and Level: These tools will come in handy when assessing the space for the new bathtub installation.
Materials:
- Drop Cloths or Tarps: Protect the bathroom floor and surrounding area by laying down drop cloths or tarps to catch debris and minimize damage.
- Plastic Sheeting: Cover nearby surfaces and fixtures with plastic sheeting to prevent dust and debris from spreading.
- Cardboard or Plywood: Use cardboard or plywood to protect the floor and create a pathway for moving heavy pieces of the bathtub.
- Sealable Plastic Bags: Have sealable plastic bags ready for storing and organizing small parts and hardware removed during the process.
- Duct Tape: Keep duct tape on hand to secure the plastic sheeting and protect fixtures from damage.
- Marker and Labels: Use a marker and labels to identify and organize removed parts for easy reassembly or disposal.
By ensuring that you have all the necessary tools and materials at your disposal, you'll be well-prepared to tackle the challenging task of removing an old cast iron bathtub. With safety as a top priority, these items will enable you to approach the project with confidence and efficiency, setting the stage for a successful transition to the new bathtub installation.
Step 2: Prepare the bathroom
Preparing the bathroom for the removal of an old cast iron bathtub is a crucial step that sets the foundation for a smooth and efficient process. This phase involves safeguarding the surrounding area, ensuring proper ventilation, and creating a clear workspace for the task at hand. Here's a detailed breakdown of the essential steps to prepare the bathroom for the bathtub removal:
Read more: How To Cut Up A Cast Iron Bathtub
Clear the Surrounding Area
Begin by removing any personal items, toiletries, and bathroom accessories from the vicinity of the bathtub. Clearing the area will provide ample space for maneuvering and prevent any items from getting damaged during the removal process. Additionally, remove any rugs or floor mats to create a clear pathway for moving tools and materials in and out of the bathroom.
Protect the Floors and Fixtures
To safeguard the bathroom floors and fixtures, lay down drop cloths or tarps to create a protective barrier. This will help prevent damage from falling debris and minimize the impact of heavy tools and equipment on the floor. Furthermore, cover nearby surfaces and fixtures with plastic sheeting to shield them from dust and potential damage during the removal process.
Ensure Adequate Ventilation
Proper ventilation is essential during the bathtub removal process to minimize the accumulation of dust and fumes. Open windows and doors to allow fresh air to circulate, and consider using a fan to improve air circulation within the bathroom. Adequate ventilation will create a more comfortable and safe working environment while reducing the impact of dust and debris on other areas of the home.
Create a Clear Workspace
Designate a clear workspace around the bathtub area by removing any unnecessary clutter and obstacles. This will provide ample room for maneuvering tools and equipment, as well as facilitate the safe and efficient removal of the bathtub. Additionally, ensure that pathways are clear to allow for the transportation of heavy pieces of the bathtub out of the bathroom.
Read more: How To Remove An Old Bathtub Spout
Secure Fragile Fixtures and Surfaces
Take proactive measures to protect fragile fixtures and surfaces in the bathroom. Use duct tape to secure plastic sheeting over delicate fixtures, such as sinks and countertops, to prevent damage from falling debris or accidental impacts. By securing these areas, you can minimize the risk of costly repairs or replacements resulting from the bathtub removal process.
By meticulously preparing the bathroom for the removal of the old cast iron bathtub, you'll create a safe, organized, and efficient environment for the subsequent steps in the process. This proactive approach sets the stage for a successful and stress-free bathtub removal, ensuring that the surrounding area remains protected and ready for the installation of the new bathtub.
Step 3: Disconnect the plumbing
Disconnecting the plumbing is a critical step in the process of removing an old cast iron bathtub. Properly disconnecting the plumbing fixtures ensures a safe and efficient removal process while minimizing the risk of damage to the surrounding area. Here's a detailed breakdown of the essential tasks involved in disconnecting the plumbing:
-
Turn Off the Water Supply: Begin by shutting off the water supply to the bathtub. Locate the shut-off valves for the hot and cold water lines leading to the bathtub and turn them clockwise to close the valves. This step is crucial in preventing any water leakage or spills during the plumbing disconnection process.
-
Drain the Water: After shutting off the water supply, open the bathtub faucet to drain any remaining water from the plumbing lines. Allow the water to flow out completely, ensuring that the lines are free of water before proceeding with the disconnection.
-
Disconnect the Water Lines: Use a wrench to loosen and disconnect the hot and cold water supply lines from the bathtub's faucet. Place a bucket or container beneath the disconnected lines to catch any residual water that may drain out.
-
Remove the Drain Assembly: Locate the bathtub drain and remove the drain cover or stopper. Use a wrench to loosen and disconnect the drain assembly from the plumbing system. Be prepared for residual water to drain out as the assembly is removed.
-
Disconnect the Overflow Drain: If the bathtub is equipped with an overflow drain, carefully disconnect the overflow pipe from the plumbing system. This may require removing screws or fasteners securing the overflow cover to access the drain connection.
-
Cap the Plumbing Lines: After disconnecting the water supply lines, drain assembly, and overflow drain, cap the exposed plumbing lines to prevent any debris or contaminants from entering the pipes. Use appropriate-sized caps or plugs to seal off the open ends of the plumbing lines securely.
-
Inspect for Leaks: Once the plumbing fixtures are disconnected and capped, inspect the connections for any signs of leakage. This visual inspection will help ensure that the plumbing lines are properly sealed and ready for the next phase of the bathtub removal process.
By meticulously following these steps to disconnect the plumbing, you'll effectively prepare the bathtub for the subsequent stages of removal. Properly managing the plumbing disconnection process is essential in maintaining a safe and controlled environment, setting the stage for a successful transition to the removal of the old cast iron bathtub.
Step 4: Remove the bathtub surround
Removing the bathtub surround is a pivotal step in the process of removing an old cast iron bathtub. The surround, typically made of tile, fiberglass, or other materials, encases the bathtub and is essential to address before proceeding with the actual removal of the bathtub. Here's a detailed breakdown of the essential tasks involved in removing the bathtub surround:
-
Assess the Surrounding Area: Before initiating the removal process, carefully inspect the bathtub surround to identify any fixtures, caulking, or adhesives securing it to the walls. Take note of any areas where the surround may be attached to the bathtub or adjacent walls, as these will require attention during the removal process.
-
Remove Fixtures and Trim: Begin by removing any fixtures, such as faucets, handles, and showerheads, attached to the bathtub surround. Use appropriate tools, such as wrenches and screwdrivers, to detach these fixtures carefully. Additionally, remove any trim or molding surrounding the bathtub to facilitate the subsequent removal of the surround.
-
Loosen the Surround: Depending on the type of material used for the surround, it may be secured to the walls with adhesive, caulk, or screws. Use a utility knife or a putty knife to carefully cut through any caulking or adhesive sealing the surround to the walls. If the surround is held in place by screws, use a screwdriver to remove them and gradually loosen the surround from the walls.
-
Work in Sections: If the bathtub surround consists of multiple sections, work on removing one section at a time. Start from the top and work your way down, ensuring that each section is detached from the walls and the bathtub. Take caution to avoid damaging the walls or the bathtub during this process.
-
Carefully Pry and Remove: Utilize a sturdy pry bar to gently pry the surround away from the walls. Exercise patience and caution to prevent any sudden or forceful movements that could cause damage. Work methodically around the entire perimeter of the surround, gradually loosening and removing it from the walls.
-
Inspect and Clean: Once the surround is removed, inspect the walls and the exposed areas around the bathtub for any remaining adhesive, caulk, or debris. Clean the surfaces thoroughly to prepare them for the subsequent steps in the bathtub removal process.
By meticulously following these steps to remove the bathtub surround, you'll effectively prepare the bathtub for the final stages of removal. Addressing the surround with care and attention will set the stage for a successful transition to the subsequent steps in the process of removing the old cast iron bathtub.
Step 5: Break up the old cast iron bathtub
Breaking up the old cast iron bathtub is a pivotal phase in the process of removing it from the bathroom. Cast iron bathtubs are renowned for their durability and weight, making them challenging to maneuver and remove compared to other types of bathtubs. However, with the right approach and tools, this task can be accomplished efficiently and safely.
Read more: How To Use A Cast Iron Waffle Iron
Safety Precautions
Before initiating the process of breaking up the cast iron bathtub, it's crucial to prioritize safety. Ensure that you are wearing heavy-duty gloves, safety goggles, and a dust mask to shield yourself from potential hazards such as sharp edges and dust particles. Additionally, consider wearing sturdy work boots to protect your feet from any debris that may fall during the process.
Tools for the Task
To effectively break up the cast iron bathtub, you'll need a sledgehammer, chisel, and reciprocating saw equipped with a metal-cutting blade. These tools will enable you to tackle the formidable task of breaking the bathtub into manageable pieces for removal. The sledgehammer and chisel will allow you to carefully and strategically break the bathtub into sections, while the reciprocating saw will facilitate the cutting of the bathtub into smaller, more manageable pieces.
Methodical Approach
Begin by assessing the bathtub to identify potential weak points or areas where the cast iron may be more susceptible to breaking. Using the sledgehammer and chisel, carefully strike the identified areas to create fractures in the cast iron. Work methodically and patiently, focusing on breaking the bathtub into sections that can be easily lifted and removed from the bathroom.
Cutting with Precision
In addition to using the sledgehammer and chisel, the reciprocating saw will be instrumental in cutting through the cast iron bathtub. Utilize the saw to create precise cuts along the weakened areas, further dividing the bathtub into smaller, more manageable pieces. Exercise caution and precision when using the reciprocating saw to ensure safe and effective cutting of the cast iron.
Read more: How To Remove Old Caulking From Bathtub
Disposal of Debris
As you break up the old cast iron bathtub, be prepared to handle and dispose of the resulting debris. Use heavy-duty trash bags to collect the broken pieces of the bathtub, ensuring that they are securely contained for safe disposal. Additionally, consider using cardboard or plywood to create a pathway for moving the debris out of the bathroom without causing damage to the floors or surrounding surfaces.
By following this methodical approach and utilizing the appropriate tools, you'll effectively break up the old cast iron bathtub, preparing it for safe and efficient removal from the bathroom. This phase sets the stage for the final step of disposing of the old bathtub and preparing for the installation of the new one.
Step 6: Dispose of the old bathtub
Once the old cast iron bathtub has been successfully broken up into manageable pieces, the next crucial step is to responsibly dispose of the debris. Proper disposal is essential to ensure a safe and environmentally conscious approach to removing the old bathtub from the premises. Here's a detailed breakdown of the essential tasks involved in disposing of the old bathtub:
Secure Debris for Disposal
Gather the broken pieces of the cast iron bathtub and carefully place them into heavy-duty trash bags. It's important to ensure that the debris is securely contained to prevent any sharp edges or protruding fragments from causing injury during handling and transportation. Seal the trash bags tightly to minimize the risk of dust or debris escaping during disposal.
Arrange for Disposal Services
Contact local waste management or disposal services to inquire about the proper procedures for disposing of large and heavy debris, such as a cast iron bathtub. Some municipalities may have specific guidelines or designated facilities for handling and disposing of construction debris, including old bathtubs. Arrange for a pickup or drop-off at a designated disposal site, ensuring compliance with local regulations and environmental standards.
Read more: How To Season A Cast Iron Kettle
Consider Recycling Options
Explore the possibility of recycling the cast iron bathtub debris. Some recycling facilities may accept metal components, including cast iron, for processing and repurposing. Recycling the old bathtub can contribute to sustainable waste management practices and reduce the environmental impact of disposing of metal materials. Consult with local recycling centers or scrap metal facilities to determine the feasibility of recycling the cast iron debris.
Coordinate Safe Transportation
If transporting the debris to a disposal or recycling facility independently, take precautions to ensure safe handling and transportation. Use appropriate lifting techniques and protective gear when moving the heavy pieces of the bathtub. Consider utilizing a vehicle capable of transporting large and heavy items, and secure the debris to prevent shifting or movement during transit.
Adhere to Environmental Regulations
When disposing of the old bathtub, it's essential to adhere to environmental regulations and guidelines governing the disposal of construction debris. Avoid illegal dumping or improper disposal methods that could harm the environment or violate local ordinances. By following responsible disposal practices, you contribute to maintaining a clean and sustainable community.
By meticulously following these steps to dispose of the old cast iron bathtub, you contribute to the safe and environmentally conscious removal of the debris. Proper disposal ensures that the remnants of the old bathtub are handled responsibly, paving the way for a seamless transition to the installation of the new bathtub.
Step 7: Clean up and prepare for installation of the new bathtub
With the old cast iron bathtub successfully removed and responsibly disposed of, the final step involves thorough cleanup and preparation for the installation of the new bathtub. This phase is crucial in ensuring that the bathroom space is primed for the seamless transition to the new fixture. Here's a detailed guide on the essential tasks involved in cleaning up and preparing for the installation of the new bathtub.
Read more: How To Clean A Cast Iron Fireplace
Clear Debris and Residues
Begin by clearing the bathroom of any remaining debris, dust, and residues resulting from the removal of the old bathtub. Use a vacuum cleaner or broom to thoroughly sweep the floors, walls, and surrounding areas, ensuring that all traces of debris are removed. Additionally, wipe down surfaces with a damp cloth to eliminate any lingering dust or particles, creating a clean and fresh canvas for the new bathtub installation.
Inspect and Repair
Conduct a comprehensive inspection of the bathroom space to identify any potential damage or areas requiring repair. Check the walls, flooring, and plumbing fixtures for any signs of wear, damage, or leaks that may need attention before the new bathtub is installed. Addressing any underlying issues at this stage will contribute to a smooth and trouble-free installation process.
Measure and Prepare
Take precise measurements of the designated bathtub installation area to ensure that the new fixture will fit seamlessly. Use a measuring tape and level to confirm the dimensions and alignment of the space, allowing for any necessary adjustments or modifications. Additionally, prepare the plumbing connections and fixtures for the installation, ensuring that they are in optimal condition and ready to accommodate the new bathtub.
Protect Surrounding Surfaces
Prior to the installation of the new bathtub, take proactive measures to protect the surrounding surfaces and fixtures. Lay down drop cloths or tarps to shield the floors and nearby areas from potential damage during the installation process. Cover delicate fixtures and surfaces with plastic sheeting to prevent accidental scratches or marks, maintaining the pristine condition of the bathroom space.
Read more: How To Repair A Cast Iron Pipe
Organize Installation Tools and Materials
Gather the necessary tools and materials required for the installation of the new bathtub, including wrenches, plumbing fixtures, sealants, and any additional components specific to the chosen bathtub model. Organize these items in close proximity to the installation area, ensuring easy access and a streamlined process when the installation commences.
By meticulously following these steps to clean up and prepare for the installation of the new bathtub, you set the stage for a successful and efficient transition to the new fixture. This proactive approach ensures that the bathroom space is primed and ready for the installation, creating a welcoming and functional environment for the new bathtub to take its place.
Frequently Asked Questions about How To Remove An Old Cast Iron Bathtub
Was this page helpful?
At Storables.com, we guarantee accurate and reliable information. Our content, validated by Expert Board Contributors, is crafted following stringent Editorial Policies. We're committed to providing you with well-researched, expert-backed insights for all your informational needs.


0 thoughts on “How To Remove An Old Cast Iron Bathtub”