Home>Furniture & Design>Bathroom Accessories>How To Refinish A Plastic Bathtub

Bathroom Accessories
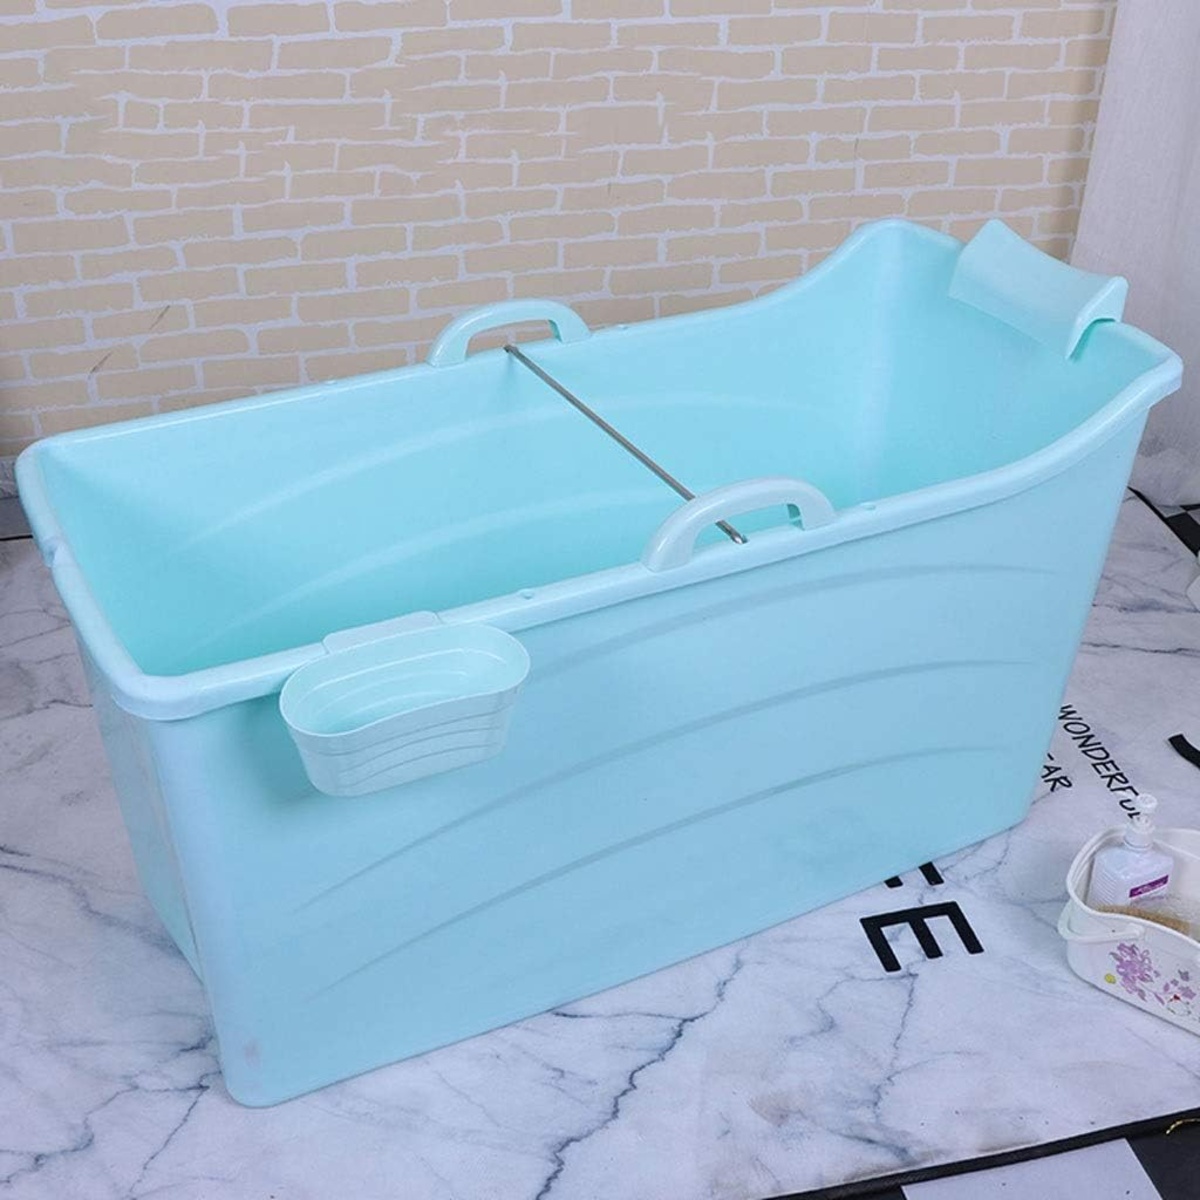
How To Refinish A Plastic Bathtub
Modified: March 6, 2024
Learn how to refinish a plastic bathtub and give your bathroom a fresh look with our step-by-step guide. Transform your bathroom accessories with this easy DIY project.
(Many of the links in this article redirect to a specific reviewed product. Your purchase of these products through affiliate links helps to generate commission for Storables.com, at no extra cost. Learn more)
Introduction
Refinishing a plastic bathtub is a cost-effective and rewarding way to breathe new life into your bathroom. Over time, plastic bathtubs can become worn, stained, or discolored, detracting from the overall aesthetic of the space. Fortunately, with the right materials and a bit of elbow grease, you can restore your bathtub to its former glory without the need for a full replacement.
Refinishing a plastic bathtub involves several key steps, including cleaning the surface, sanding it to create a suitable texture for the new finish, and applying primer and topcoat to achieve a smooth and durable result. By following these steps carefully, you can transform your bathtub into a fresh, clean focal point in your bathroom.
In this comprehensive guide, we will walk you through each stage of the refinishing process, providing valuable tips and insights to help you achieve professional-looking results. Whether you're a seasoned DIY enthusiast or a first-time refinishing novice, this guide will equip you with the knowledge and confidence to tackle this project with ease.
So, roll up your sleeves, gather your materials, and get ready to revitalize your plastic bathtub. With a little patience and attention to detail, you can enjoy a beautifully refinished bathtub that enhances the overall appeal of your bathroom. Let's dive into the step-by-step process of refinishing your plastic bathtub and unlock the transformative potential of this rewarding home improvement project.
Key Takeaways:
- Refinishing a plastic bathtub is a cost-effective DIY project that involves cleaning, sanding, applying primer, and topcoat. It transforms worn tubs into fresh focal points, enhancing bathroom aesthetics.
- By following the step-by-step guide, you can revitalize your bathtub, minimize waste, and gain valuable DIY skills. The refinished bathtub adds elegance and freshness to your daily routine.
Read more: How To Refinish A Bathtub
Step 1: Gather Your Materials
Before embarking on the journey of refinishing your plastic bathtub, it's essential to gather all the necessary materials and tools. Having everything at hand will streamline the process and ensure that you can work efficiently without interruptions. Here's a comprehensive list of the materials you'll need:
Materials:
- Bathtub Refinishing Kit: Look for a high-quality kit specifically designed for refinishing plastic surfaces. The kit typically includes a primer, topcoat, and other essential components for the refinishing process.
- Sandpaper: Opt for medium-grit sandpaper (around 220 grit) to create a suitable texture on the bathtub surface for the new finish to adhere to.
- Masking Tape and Plastic Sheets: These will be used to protect surrounding areas from overspray during the refinishing process.
- Cleaning Supplies: Gather mild detergent, a scrubbing sponge, and a non-abrasive cleaner to thoroughly clean the bathtub before refinishing.
- Respirator Mask: Ensure you have a respirator mask rated for chemical fumes to protect yourself during the refinishing process.
- Gloves and Protective Eyewear: It's crucial to prioritize safety, so be sure to have gloves and protective eyewear on hand.
- Ventilation: If your bathroom lacks proper ventilation, consider using a fan or opening windows to ensure adequate airflow during the refinishing process.
Tools:
- Screwdriver and Wrench: These may be needed to remove any fixtures or hardware from the bathtub before refinishing.
- Spray Gun or Paintbrush: Depending on the type of refinishing kit you choose, you'll need a suitable application tool to apply the primer and topcoat.
- Stir Sticks and Mixing Containers: If the refinishing kit requires mixing components, have stir sticks and containers ready for this purpose.
- Drop Cloth: Lay down a drop cloth to protect the floor and surrounding areas from drips and spills during the refinishing process.
By ensuring you have all these materials and tools on hand, you'll be well-prepared to tackle the refinishing process with confidence and efficiency. With everything gathered, you can proceed to the next step of cleaning the bathtub to prepare it for refinishing.
Step 2: Clean the Bathtub
Cleaning the bathtub is a crucial preparatory step that sets the foundation for a successful refinishing process. Before applying any new coatings, it's essential to thoroughly clean the bathtub to remove soap scum, mineral deposits, and any other residues that could compromise the adhesion of the new finish. Here's a detailed guide on how to clean the bathtub effectively:
Read more: How To Refinish Old Bathtub
1. Remove Fixtures and Hardware:
Start by removing any fixtures or hardware attached to the bathtub, such as faucets, handles, and drain covers. This will allow you to clean the entire surface without any obstructions and ensure that every area is properly addressed.
2. Prepare the Cleaning Solution:
Create a cleaning solution by mixing a mild detergent with warm water. Alternatively, you can use a non-abrasive cleaner specifically formulated for removing tough stains and residues from bathtubs. Follow the manufacturer's instructions for dilution ratios if using a commercial cleaner.
3. Scrub the Surface:
Using a scrubbing sponge or non-abrasive cleaning pad, apply the cleaning solution to the bathtub surface and scrub thoroughly. Pay close attention to areas with visible stains, discoloration, or soap scum buildup. For stubborn stains, allow the cleaning solution to sit for a few minutes before scrubbing.
4. Address Hard Water Deposits:
If your bathtub is plagued by hard water deposits, consider using a vinegar solution to dissolve the mineral buildup. Mix equal parts of white vinegar and water, apply the solution to the affected areas, and let it sit for a few minutes before scrubbing with a sponge or brush.
5. Rinse and Dry:
Once the entire surface has been scrubbed and all residues have been lifted, thoroughly rinse the bathtub with clean water to remove any remaining cleaning solution. Use a clean cloth or towel to dry the surface completely, ensuring there are no lingering moisture or soap residues.
6. Inspect for Lingering Residues:
After drying the bathtub, inspect the surface carefully to ensure that all residues have been effectively removed. Any remaining soap scum, mineral deposits, or greasy residues can compromise the adhesion of the new finish, so it's crucial to achieve a clean, residue-free surface.
By diligently cleaning the bathtub, you'll create an optimal foundation for the subsequent steps of the refinishing process. A clean and properly prepared surface will facilitate better adhesion of the primer and topcoat, ultimately leading to a durable and professional-looking finish. With the bathtub now thoroughly cleaned, you're ready to proceed to the next step of sanding the surface to prepare it for the refinishing coatings.
Step 3: Sand the Surface
Sanding the surface of the bathtub is a critical step in the refinishing process, as it creates a textured surface that promotes strong adhesion of the primer and topcoat. By carefully sanding the bathtub, you'll effectively remove any remaining residues, smooth out imperfections, and create a suitable surface for the new finish to bond to. Here's a detailed guide on how to sand the bathtub surface effectively:
-
Prepare the Sandpaper: Begin by preparing the medium-grit sandpaper (around 220 grit) for the sanding process. Ensure that the sandpaper is securely attached to a sanding block or a sanding tool to facilitate even and controlled sanding.
-
Start Sanding: With the prepared sandpaper, gently sand the entire surface of the bathtub in a circular motion. Focus on areas where residues may be present, such as around the drain and along the edges. The goal is to create a uniformly textured surface while removing any remaining glossy finish.
-
Address Imperfections: If the bathtub surface has any noticeable imperfections, such as scratches or rough patches, pay extra attention to these areas during the sanding process. By smoothing out imperfections, you'll ensure a more consistent and professional-looking result.
-
Check for Smoothness: Periodically stop and run your hand over the sanded surface to check for smoothness and uniform texture. The surface should feel slightly rough to the touch, indicating that the new finish will adhere effectively.
-
Remove Sanding Residues: As you sand, be mindful of the sanding residues that accumulate on the bathtub surface. Periodically wipe the surface with a clean, dry cloth to remove these residues and maintain a clear view of your progress.
-
Thoroughly Sand Edges and Corners: Pay special attention to the edges and corners of the bathtub, as these areas can be more challenging to sand thoroughly. Use a smaller piece of sandpaper or a sanding sponge to ensure that these areas receive adequate attention.
-
Ensure Even Texture: Aim for a consistent and even texture across the entire bathtub surface. This uniformity will contribute to the overall visual appeal of the refinished bathtub and promote the longevity of the new finish.
By diligently sanding the bathtub surface, you'll create an ideal foundation for the subsequent steps of the refinishing process. The textured surface resulting from the sanding process will facilitate strong adhesion of the primer and topcoat, ultimately leading to a durable and professional-looking finish. With the bathtub surface now properly sanded, you're ready to proceed to the next step of applying the primer to prepare for the final topcoat application.
Step 4: Apply the Primer
Applying the primer is a pivotal stage in the bathtub refinishing process, as it sets the groundwork for the adhesion and durability of the final topcoat. The primer serves as a bonding agent, creating a strong interface between the bathtub surface and the topcoat, ensuring a long-lasting and professional finish. Here's a detailed guide on how to apply the primer effectively:
-
Prepare the Primer: Begin by thoroughly mixing the primer according to the manufacturer's instructions. If the primer requires any specific preparation or activation steps, such as stirring or shaking, ensure that these are carried out meticulously to achieve a consistent and effective primer solution.
-
Protect Surrounding Areas: Use masking tape and plastic sheets to cover and protect any surrounding areas, such as the walls and flooring near the bathtub. This precaution will prevent accidental overspray and ensure that the refinishing process remains contained to the bathtub area.
-
Apply the Primer: Depending on the type of refinishing kit you're using, you may apply the primer using a spray gun or a paintbrush. Follow the manufacturer's guidelines for the recommended application method. Begin by applying a thin, even coat of primer to the entire bathtub surface, working methodically to cover all areas evenly.
-
Focus on Even Coverage: Pay close attention to achieving uniform coverage as you apply the primer. Ensure that no areas are missed, and strive for a consistent application thickness across the entire bathtub surface. This even coverage will contribute to the overall quality and longevity of the refinished bathtub.
-
Allow for Proper Drying: Once the primer has been applied, allow it to dry according to the manufacturer's specified drying time. Adequate drying time is essential to ensure that the primer forms a strong bond with the bathtub surface, setting the stage for the subsequent topcoat application.
-
Inspect for Smoothness: After the primer has dried, inspect the bathtub surface to ensure that the primer has created a smooth and uniform base. Any inconsistencies or imperfections should be addressed before proceeding to the topcoat application.
By meticulously applying the primer and allowing it to dry properly, you'll establish a solid foundation for the final topcoat, setting the stage for a professional and long-lasting finish. With the primer in place, you're now ready to move on to the next step of applying the topcoat to complete the refinishing process.
Read more: How Long Does Refinishing A Bathtub Last?
Step 5: Apply the Topcoat
Applying the topcoat is the culminating step in the bathtub refinishing process, where the transformation truly takes shape. The topcoat serves as the protective and aesthetic layer, providing durability, sheen, and a fresh, rejuvenated appearance to the bathtub surface. Here's a comprehensive guide on how to apply the topcoat effectively, ensuring a professional and long-lasting finish:
-
Prepare the Topcoat: Before applying the topcoat, thoroughly mix the contents of the topcoat component in the refinishing kit. Follow the manufacturer's instructions meticulously to achieve a consistent and well-blended topcoat solution. Proper preparation is essential to ensure the topcoat performs optimally and delivers a smooth, flawless finish.
-
Protect Surrounding Areas: Just as with the primer application, use masking tape and plastic sheets to shield surrounding areas from overspray during the topcoat application. This precaution will maintain the cleanliness of the surrounding space and prevent unintended contact with the topcoat.
-
Apply the Topcoat: Depending on the refinishing kit, use a spray gun or a paintbrush to apply the topcoat to the bathtub surface. Begin by applying a thin, even layer of the topcoat, working methodically to cover the entire surface. Aim for consistent coverage and avoid over-application, as this can lead to drips or uneven texture.
-
Ensure Uniform Coverage: Pay close attention to achieving uniform coverage as you apply the topcoat. Work systematically to ensure that all areas receive an even application, resulting in a visually appealing and durable finish. Consistent coverage is key to the overall quality and longevity of the refinished bathtub.
-
Allow for Proper Curing: Once the topcoat has been applied, allow it to cure according to the manufacturer's specified curing time. Proper curing is crucial for the topcoat to harden and form a resilient protective layer on the bathtub surface. Avoid any contact with the newly applied topcoat during the curing process to prevent imperfections.
-
Inspect the Finish: After the topcoat has fully cured, inspect the bathtub surface to ensure that the topcoat has created a smooth, glossy, and uniform finish. Any imperfections or irregularities should be addressed promptly to maintain the overall quality of the refinished bathtub.
By meticulously applying the topcoat and allowing it to cure properly, you'll achieve a beautifully renewed bathtub surface that enhances the aesthetic appeal of your bathroom. The topcoat not only provides a fresh and vibrant appearance but also contributes to the longevity and resilience of the refinished bathtub. With the topcoat applied and cured, your bathtub will be ready to reclaim its position as a stunning focal point in your bathroom.
Step 6: Let It Cure
After applying the topcoat to the bathtub surface, the final and crucial step is to allow it to cure thoroughly. Curing is a process where the topcoat undergoes chemical reactions to harden and form a durable, protective layer. Proper curing is essential to ensure that the refinished bathtub achieves optimal resilience, longevity, and visual appeal.
During the curing period, it's imperative to prevent any contact with the newly applied topcoat to avoid compromising its integrity. Here's a detailed overview of the curing process and the key considerations to ensure a successful outcome:
1. Follow Manufacturer's Instructions:
Refer to the instructions provided by the manufacturer of the refinishing kit to determine the recommended curing time for the topcoat. Different products may have varying curing times, and it's crucial to adhere to the specific guidelines to achieve the best results.
2. Maintain Controlled Environment:
Create a controlled environment in the bathroom to facilitate proper curing. Ensure adequate ventilation to promote air circulation, but avoid excessive airflow that may introduce dust or particles onto the freshly coated surface. If necessary, use fans to maintain a consistent temperature and humidity level in the space.
Read more: How To Refinish An Old Cast Iron Bathtub
3. Prevent Moisture and Contaminants:
During the curing period, it's essential to prevent any exposure to moisture, steam, or contaminants that could mar the finish. Avoid using the bathtub for bathing or showering until the topcoat has fully cured. Additionally, refrain from placing any objects on the bathtub surface to prevent imprints or blemishes.
4. Exercise Patience:
Curing times can vary depending on factors such as temperature, humidity, and the specific formulation of the topcoat. Exercise patience and allow the recommended curing duration to elapse before resuming regular use of the bathtub. Rushing the curing process can compromise the finish and diminish its durability.
5. Conduct Post-Curing Inspection:
Once the topcoat has completed the curing process, conduct a thorough inspection of the bathtub surface. Check for any imperfections, irregularities, or areas that may require additional attention. Addressing any issues promptly will contribute to the overall quality and longevity of the refinished bathtub.
By allowing the topcoat to cure properly, you'll ensure that the bathtub surface attains the desired level of durability, resilience, and visual appeal. The curing process is a critical final step that solidifies the transformation, allowing you to enjoy a beautifully refinished bathtub that enhances the overall ambiance of your bathroom.
Conclusion
Congratulations on successfully completing the refinishing process for your plastic bathtub! By following the comprehensive steps outlined in this guide, you've transformed a worn, stained, or discolored bathtub into a rejuvenated focal point in your bathroom. The dedication and attention to detail you've invested in this project have undoubtedly paid off, resulting in a professional-looking finish that enhances the overall aesthetic of your bathroom.
As you stand back and admire the newly refinished bathtub, it's important to reflect on the transformative power of this home improvement endeavor. Not only have you revitalized the appearance of your bathroom, but you've also demonstrated the cost-effectiveness and sustainability of refinishing as an alternative to full replacement. By breathing new life into your plastic bathtub, you've minimized waste and contributed to a more environmentally conscious approach to home maintenance.
Furthermore, the skills and knowledge you've gained from this refinishing project can be applied to future DIY endeavors, empowering you to take on additional home improvement tasks with confidence. The hands-on experience of preparing, priming, and applying the topcoat has expanded your skill set and deepened your understanding of surface refinishing techniques.
As you revel in the success of your bathtub refinishing project, take a moment to appreciate the impact it has had on the overall ambiance of your bathroom. The renewed bathtub serves as a testament to your dedication to maintaining a welcoming and aesthetically pleasing home environment. Whether you're preparing for a relaxing soak or simply admiring the visual transformation, the refinished bathtub stands as a testament to your commitment to creating a space that reflects your personal style and attention to detail.
Moving forward, the knowledge and experience gained from this project will continue to serve you well in your ongoing pursuit of home improvement and maintenance. As you enjoy the refreshed appearance of your bathtub, you can take pride in the fact that you've successfully completed a challenging yet rewarding project that has elevated the overall appeal of your bathroom.
With the refinishing process now complete, you can look forward to enjoying a beautifully refinished bathtub that adds a touch of elegance and freshness to your daily routine. Whether you're unwinding after a long day or preparing for a new morning, the refinished bathtub stands as a testament to your dedication to maintaining a comfortable and visually appealing home environment.
Frequently Asked Questions about How To Refinish A Plastic Bathtub
Was this page helpful?
At Storables.com, we guarantee accurate and reliable information. Our content, validated by Expert Board Contributors, is crafted following stringent Editorial Policies. We're committed to providing you with well-researched, expert-backed insights for all your informational needs.



0 thoughts on “How To Refinish A Plastic Bathtub”