Home>Furniture & Design>Bathroom Accessories>How To Remove Grab Bars
Bathroom Accessories
How To Remove Grab Bars
Published: February 10, 2024
Learn how to safely remove grab bars and other bathroom accessories with our step-by-step guide. Keep your bathroom looking fresh and functional.
(Many of the links in this article redirect to a specific reviewed product. Your purchase of these products through affiliate links helps to generate commission for Storables.com, at no extra cost. Learn more)
Introduction
Removing grab bars from your bathroom may seem like a daunting task, but with the right tools and techniques, it can be a straightforward process. Whether you're looking to replace the grab bars, redecorate your bathroom, or make modifications to the wall, knowing how to remove them properly is essential. This guide will walk you through the step-by-step process of removing grab bars without causing damage to your walls.
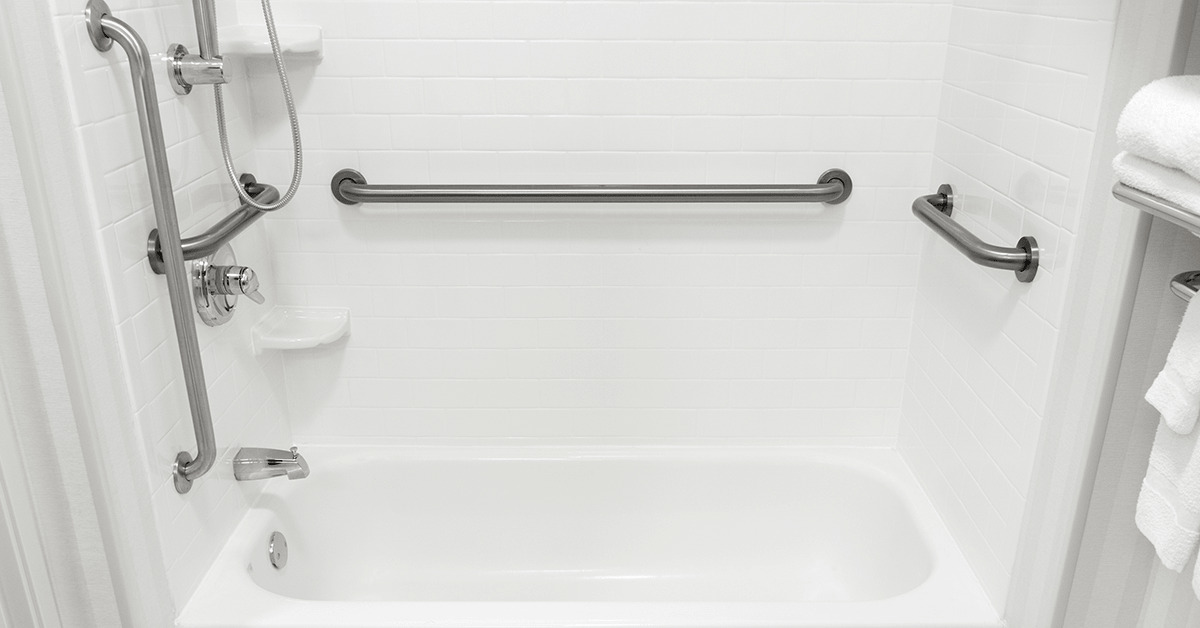
Grab bars are commonly installed in bathrooms to provide support and stability for individuals with limited mobility or balance issues. While they serve an important function, there are instances when you may need to remove them, such as when renovating the bathroom, changing the layout, or simply updating the decor. Understanding the proper procedure for removing grab bars will help you accomplish this task efficiently and safely.
By following the steps outlined in this guide, you can ensure that the grab bars are removed without leaving unsightly marks or causing structural damage to the wall. Additionally, learning how to remove grab bars can empower you to take on DIY projects and make changes to your bathroom with confidence.
Now, let's delve into the step-by-step process of removing grab bars, starting with gathering the necessary tools for the job.
Key Takeaways:
- Removing grab bars from your bathroom is a manageable task with the right tools and techniques. By following a systematic approach, you can safely and confidently update your bathroom decor or make modifications to the wall.
- The process involves gathering essential tools, locating mounting screws, unscrewing them carefully, removing the grab bar without causing damage, and patching and repairing the wall. This empowers you to make changes to your bathroom environment with confidence.
Read more: What Is The Purpose Of Grab Bars?
Step 1: Gather Necessary Tools
Before embarking on the task of removing grab bars from your bathroom, it's essential to gather the necessary tools to ensure a smooth and efficient process. Having the right tools at your disposal will not only make the job easier but also help prevent any accidental damage to the walls or surrounding areas. Here's a comprehensive list of tools you'll need for this task:
-
Screwdriver: A screwdriver is a fundamental tool for removing grab bars. Depending on the type of screws used to secure the grab bar, you may require a flat-head or Phillips-head screwdriver. Ensure that the screwdriver fits the screws snugly to avoid stripping them during the removal process.
-
Putty Knife: A putty knife will come in handy for prying the grab bar away from the wall once the screws have been removed. It helps to gently loosen the grab bar without causing damage to the wall surface.
-
Utility Knife: This tool is useful for cutting through any caulking or adhesive that may have been used to secure the grab bar to the wall. It allows for precise cutting without harming the surrounding area.
-
Pliers: In some cases, the mounting screws may be stubborn or corroded, making them difficult to remove with a screwdriver alone. Pliers can provide additional leverage and grip to loosen and extract stubborn screws.
-
Safety Gear: It's important to prioritize safety when undertaking any DIY project. Wear protective gloves and safety goggles to shield your hands and eyes from any debris or sharp edges that may be encountered during the removal process.
By ensuring that you have these essential tools on hand, you'll be well-prepared to tackle the task of removing grab bars from your bathroom. With the right tools and a methodical approach, you can proceed to the next step with confidence, knowing that you're equipped for a successful grab bar removal process.
Step 2: Locate the Mounting Screws
Locating the mounting screws is a crucial initial step in the process of removing grab bars from your bathroom. The mounting screws are responsible for securing the grab bar to the wall, and identifying their placement is essential for a systematic removal process. Here's how you can effectively locate the mounting screws:
Visual Inspection:
Begin by visually inspecting the grab bar to identify any visible screws or mounting brackets. In most cases, grab bars are attached to the wall using screws that are either concealed beneath decorative caps or directly exposed. Take a close look at the ends and underside of the grab bar to spot any visible screws or coverings.
Use a Magnet:
If the screws are not immediately visible, you can use a small magnet to locate them. Run the magnet along the length of the grab bar, as well as the wall surface where the grab bar is attached. The magnet will be attracted to the metal screws, providing a clear indication of their location behind the wall.
Read more: Who Installs Grab Bars?
Check for Decorative Caps:
Some grab bars feature decorative caps that conceal the mounting screws. Gently pry or unscrew these caps to reveal the screws beneath. Once the caps are removed, you'll be able to visually confirm the exact placement of the screws and prepare for their removal.
Refer to the Installation Manual:
If the grab bar was professionally installed or came with a set of instructions, referring to the installation manual can provide valuable insights into the location of the mounting screws. The manual may include detailed diagrams or instructions that specify the positioning of the screws, offering guidance for their identification.
By carefully inspecting the grab bar, using a magnet to detect hidden screws, checking for decorative caps, and referring to the installation manual if available, you can effectively locate the mounting screws. Once the screws have been identified, you'll be ready to proceed to the next step of unscrewing and removing the grab bar from the wall. This systematic approach ensures that the removal process is carried out with precision and minimal disruption to the surrounding area.
Step 3: Unscrew the Mounting Screws
With the mounting screws located, the next step in removing grab bars from your bathroom is to unscrew them carefully. This process requires precision and attention to detail to ensure that the grab bar is detached from the wall without causing any damage. Here's a detailed guide on how to effectively unscrew the mounting screws:
-
Select the Correct Screwdriver: Before proceeding, ensure that you have the appropriate screwdriver for the type of screws used to secure the grab bar. Whether it's a flat-head or Phillips-head screw, using the right screwdriver is crucial to prevent stripping the screws during the removal process.
-
Stabilize the Grab Bar: While unscrewing the mounting screws, it's important to stabilize the grab bar to prevent it from shifting or causing any accidental damage. Hold the grab bar firmly with one hand while using the screwdriver with the other hand to maintain control throughout the unscrewing process.
-
Apply Gentle Pressure: Insert the screwdriver into the screw head and apply gentle, steady pressure in a counterclockwise direction to loosen the screws. Avoid using excessive force, as this can lead to the screws becoming stuck or damaged, complicating the removal process.
-
Inspect for Corrosion: If the mounting screws show signs of corrosion or rust, consider applying a penetrating oil or lubricant to facilitate easier unscrewing. Allow the oil to penetrate the screw threads for a few minutes before attempting to loosen the screws again.
-
Work Methodically: Unscrew each mounting screw gradually, alternating between them to ensure balanced removal. By unscrewing each screw partially before moving to the next, you can release the grab bar evenly without placing undue stress on any specific area.
-
Secure the Screws: As the screws are removed, keep them in a safe place to prevent misplacement. This ensures that they can be reused if the grab bar is being reinstalled or disposed of properly if it's no longer needed.
By following these steps and exercising patience and precision, you can successfully unscrew the mounting screws and detach the grab bar from the wall. Once the screws are removed, the grab bar will be ready for the next stage of removal, allowing you to proceed with confidence and a clear understanding of the process.
Step 4: Remove the Grab Bar
With the mounting screws successfully unscrewed, the grab bar is now ready to be removed from the wall. This step requires careful handling to ensure that the grab bar is detached without causing any damage to the surrounding area. Here's a detailed guide on how to effectively remove the grab bar:
-
Gently Pry the Grab Bar: Using a putty knife or a flat-edged tool, gently pry the grab bar away from the wall. Start at one end and work your way along the length of the grab bar, gradually loosening it from the wall surface. Exercise caution to avoid applying excessive force, as this could result in damage to the wall or the grab bar itself.
-
Check for Adhesive or Caulking: In some cases, grab bars may be secured to the wall using adhesive or caulking in addition to mounting screws. If you encounter resistance while attempting to remove the grab bar, carefully inspect the edges for any signs of adhesive or caulking. Use a utility knife to cut through the adhesive, allowing the grab bar to be separated from the wall more easily.
-
Lift and Remove the Grab Bar: Once the grab bar has been loosened from the wall, carefully lift it away, ensuring that any remaining adhesive or caulking is disengaged. Hold the grab bar securely to prevent it from accidentally falling or causing damage as it is removed.
-
Inspect the Wall Surface: After the grab bar has been removed, inspect the wall surface for any residual adhesive, caulking, or marks left behind. Use a gentle cleaning solution and a soft cloth to remove any remaining residue, ensuring that the wall is left clean and undamaged.
-
Dispose or Store the Grab Bar: Depending on your plans for the grab bar, decide whether it will be reused, disposed of, or stored for future use. If the grab bar is in good condition and you intend to reinstall it, store it in a safe and dry location. If it's no longer needed, dispose of it responsibly according to local regulations.
By following these steps, you can successfully remove the grab bar from your bathroom, leaving the wall surface clean and undamaged. With the grab bar removed, you can proceed to the final step of patching and repairing the wall, ensuring that it is restored to its original condition or prepared for any subsequent modifications.
Read more: How To Install Grab Bars On Tile
Step 5: Patch and Repair the Wall
After successfully removing the grab bar from your bathroom, the next crucial step is to patch and repair the wall to restore it to its original condition. This process ensures that any holes, marks, or damage resulting from the grab bar installation are effectively addressed, leaving the wall surface smooth and visually appealing. Here's a detailed guide on how to patch and repair the wall:
Assess the Wall Damage:
Begin by carefully assessing the wall to identify any holes, indentations, or blemishes left behind after the removal of the grab bar. Inspect the area where the mounting screws were located, as well as the surrounding region, to pinpoint any imperfections that require attention.
Fill Holes and Indentations:
Using a high-quality wall patching compound or spackling paste, fill in any holes or indentations left by the mounting screws. Apply the patching compound with a putty knife, ensuring that it is spread evenly and smoothly over the damaged areas. Allow the compound to dry completely according to the manufacturer's instructions.
Sand the Patched Areas:
Once the patching compound has dried, gently sand the patched areas using fine-grit sandpaper. This step helps to smooth out the patched surfaces and blend them seamlessly with the surrounding wall, creating a uniform and polished finish. Be mindful of the pressure applied to avoid damaging the surrounding wall surface.
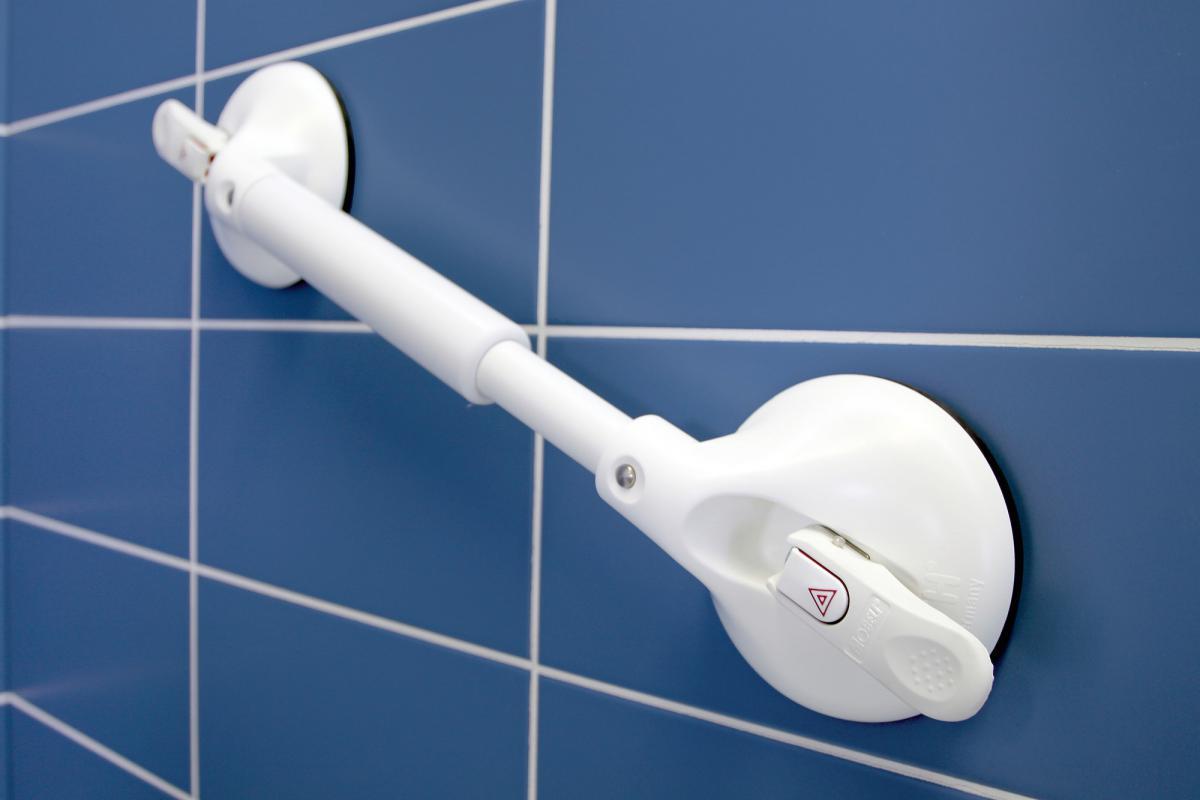
Read more: How To Install Suction Grab Bars
Repaint or Touch Up the Wall:
If the wall was previously painted, consider repainting the patched areas to match the existing wall color. Use a high-quality paint that closely matches the original wall color and carefully apply it to the patched regions. Alternatively, if the wall has a different finish, such as wallpaper or tile, ensure that the patched areas are touched up to maintain a cohesive appearance.
Final Inspection:
After the patching and repainting process, conduct a thorough inspection of the wall to ensure that the repaired areas blend seamlessly with the surrounding surface. Check for any remaining imperfections or discrepancies, addressing them as needed to achieve a flawless result.
By following these steps, you can effectively patch and repair the wall, restoring it to its original state after the removal of the grab bar. This meticulous approach ensures that the wall maintains its aesthetic integrity and structural integrity, allowing you to proceed with confidence, knowing that the wall is in pristine condition.
Conclusion
In conclusion, the process of removing grab bars from your bathroom involves a systematic approach that prioritizes precision, care, and attention to detail. By following the step-by-step guide outlined in this article, you can successfully navigate the removal process while safeguarding the integrity of your walls and achieving a seamless transition. From gathering the necessary tools to patching and repairing the wall, each step contributes to a comprehensive and effective grab bar removal experience.
Understanding the importance of gathering the essential tools sets the stage for a well-prepared and organized approach. The inclusion of tools such as screwdrivers, putty knives, pliers, and safety gear ensures that you are equipped to handle any challenges that may arise during the removal process. This proactive measure not only facilitates a smoother removal but also minimizes the risk of accidental damage to the walls or surrounding areas.
Locating the mounting screws is a critical step that requires a keen eye and methodical inspection. Whether through visual examination, the use of a magnet, or referencing the installation manual, identifying the precise placement of the screws is essential for a targeted and efficient removal process. This attention to detail ensures that the grab bar is detached with precision, leaving the wall surface intact and ready for the next phase.
Unscrewing the mounting screws demands patience and a steady hand to prevent any mishaps or damage. The careful selection of the correct screwdriver, coupled with a methodical unscrewing process, ensures that the grab bar is released from the wall without compromising its structural integrity. This step sets the stage for the subsequent removal of the grab bar, marking a pivotal transition in the overall process.
Removing the grab bar itself requires a delicate touch and a keen awareness of potential adhesives or caulking that may have been used during installation. By gently prying the grab bar, checking for adhesives, and lifting it away with care, you can ensure that the wall surface remains unscathed, ready for the final phase of restoration.
Patching and repairing the wall represents the culmination of the removal process, where any residual marks or imperfections are meticulously addressed. This meticulous approach ensures that the wall is restored to its original condition, free from any remnants of the grab bar installation. The seamless integration of the patched areas with the surrounding wall surface signifies the successful completion of the removal process, leaving the bathroom with a refreshed and polished appearance.
In essence, the process of removing grab bars from your bathroom is not only a practical endeavor but also a transformative one. It empowers you to make changes to your bathroom environment with confidence, knowing that you can navigate the removal process with precision and care. By following the steps outlined in this guide, you can embark on the journey of grab bar removal with a clear understanding of the process, equipped with the necessary tools and knowledge to achieve a successful outcome.
Frequently Asked Questions about How To Remove Grab Bars
Was this page helpful?
At Storables.com, we guarantee accurate and reliable information. Our content, validated by Expert Board Contributors, is crafted following stringent Editorial Policies. We're committed to providing you with well-researched, expert-backed insights for all your informational needs.

0 thoughts on “How To Remove Grab Bars”