Home>Furniture & Design>Bathroom Fixtures>How To Secure A Shower Rod
Bathroom Fixtures
How To Secure A Shower Rod
Modified: October 19, 2024
Learn how to properly secure a shower rod in your bathroom. Get expert tips on installing and maintaining bathroom fixtures for a secure and stylish space.
(Many of the links in this article redirect to a specific reviewed product. Your purchase of these products through affiliate links helps to generate commission for Storables.com, at no extra cost. Learn more)
Introduction
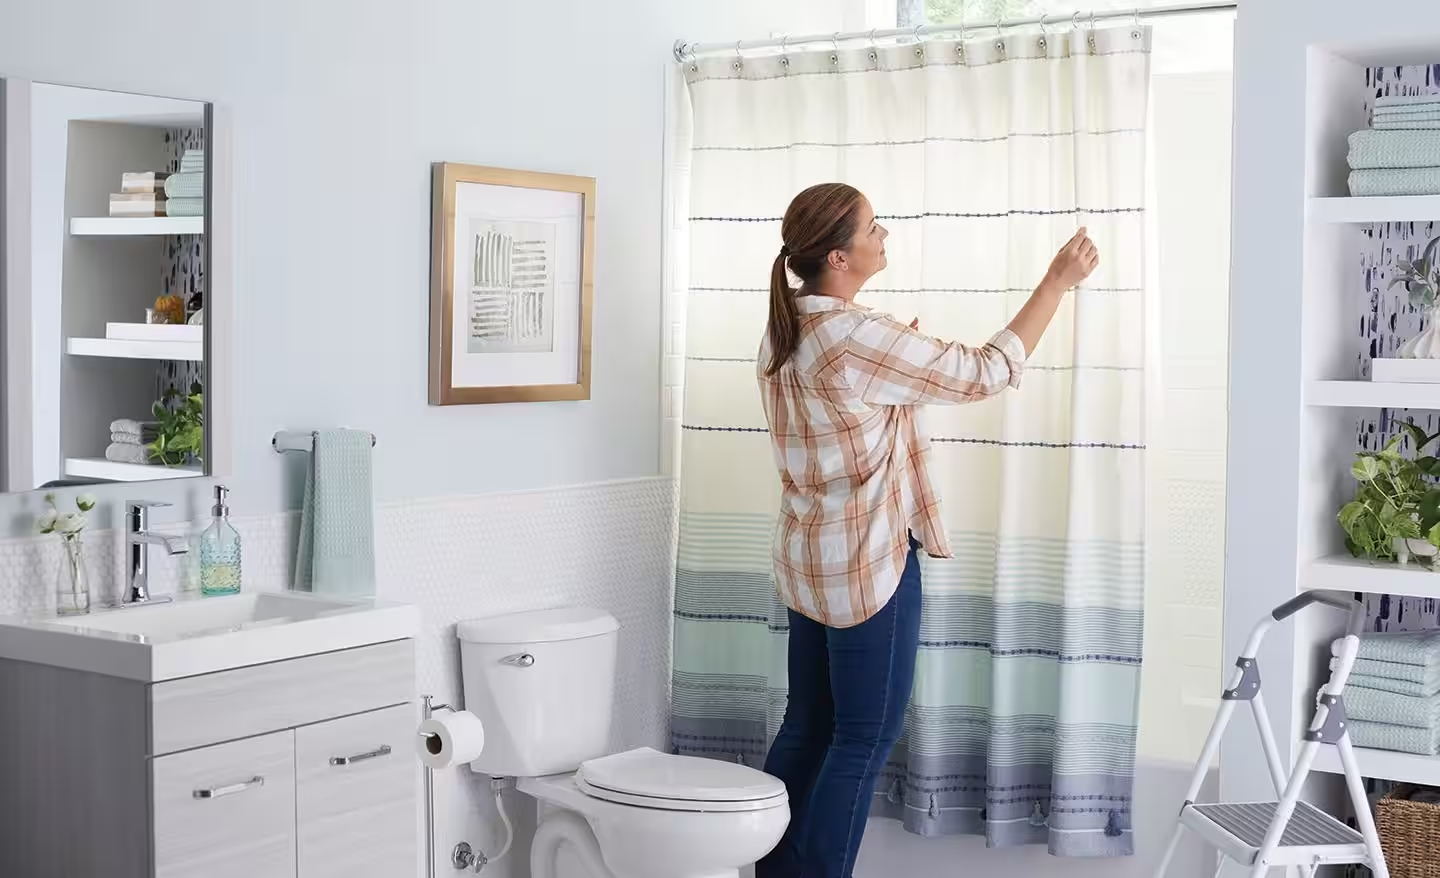
When it comes to bathroom fixtures, the shower rod plays a crucial role in not only providing structural support for the shower curtain but also adding to the overall aesthetic appeal of the bathroom. Whether you're renovating your bathroom or simply replacing an old shower rod, knowing how to secure a shower rod properly is essential for a hassle-free and durable installation.
A secure shower rod ensures that your shower curtain stays in place, preventing water from splashing onto the bathroom floor and maintaining privacy while you shower. Additionally, a well-installed shower rod can contribute to the visual harmony of the bathroom, complementing the existing decor and enhancing the overall ambiance.
In this comprehensive guide, we will walk you through the step-by-step process of securing a shower rod with precision and confidence. From selecting the right shower rod to testing its stability, each stage of the installation process is crucial for achieving a secure and reliable result. By following these instructions, you can ensure that your shower rod remains steadfast and functional for years to come.
Now, let's delve into the details of how to secure a shower rod effectively, ensuring that your bathroom not only looks great but also functions seamlessly. Whether you're a seasoned DIY enthusiast or a novice in home improvement projects, this guide will equip you with the knowledge and skills needed to complete the task with ease and efficiency. So, roll up your sleeves and get ready to transform your bathroom with a securely installed shower rod!
Key Takeaways:
- Choose the right shower rod by considering material, adjustability, style, and mounting options to ensure a secure and visually appealing installation that suits your bathroom’s specific needs and preferences.
- Secure the shower rod with precision and confidence by following the step-by-step process for tension-mounted or wall-mounted installations, and test for stability to ensure a reliable and durable result that enhances your bathroom’s functionality and visual appeal.
Read more: How To Fix A Shower Rod
Step 1: Choose the Right Shower Rod
Selecting the right shower rod is the foundational step in ensuring a secure and functional installation. With a wide variety of options available, it's essential to consider the specific needs of your bathroom and personal preferences when choosing a shower rod. Here's a detailed look at the factors to consider when selecting the right shower rod:
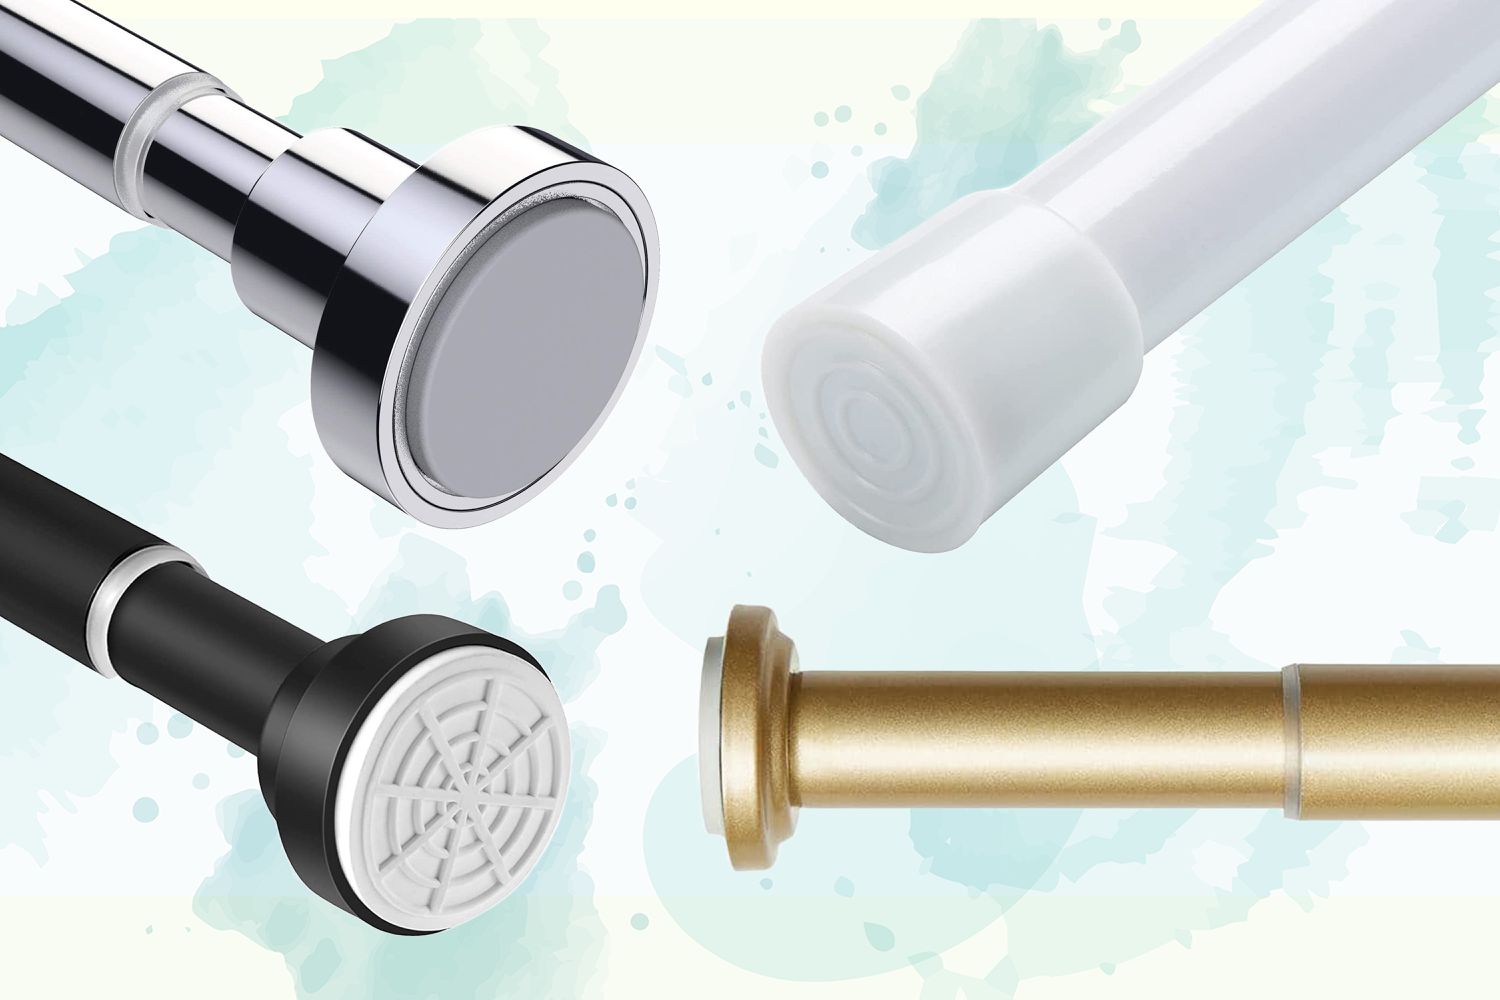
1. Material and Durability
When choosing a shower rod, consider the material and its durability. Stainless steel and aluminum shower rods are popular choices due to their resistance to rust and corrosion, making them ideal for humid bathroom environments. Additionally, these materials offer long-lasting durability, ensuring that the shower rod remains sturdy and reliable over time.
2. Adjustable vs. Fixed Length
Shower rods are available in both adjustable and fixed-length options. Adjustable rods provide flexibility in terms of length, making them suitable for various shower and bathtub sizes. On the other hand, fixed-length rods offer a seamless and tailored look, especially for standard-sized showers. Consider the dimensions of your shower space to determine whether an adjustable or fixed-length shower rod is the best fit.
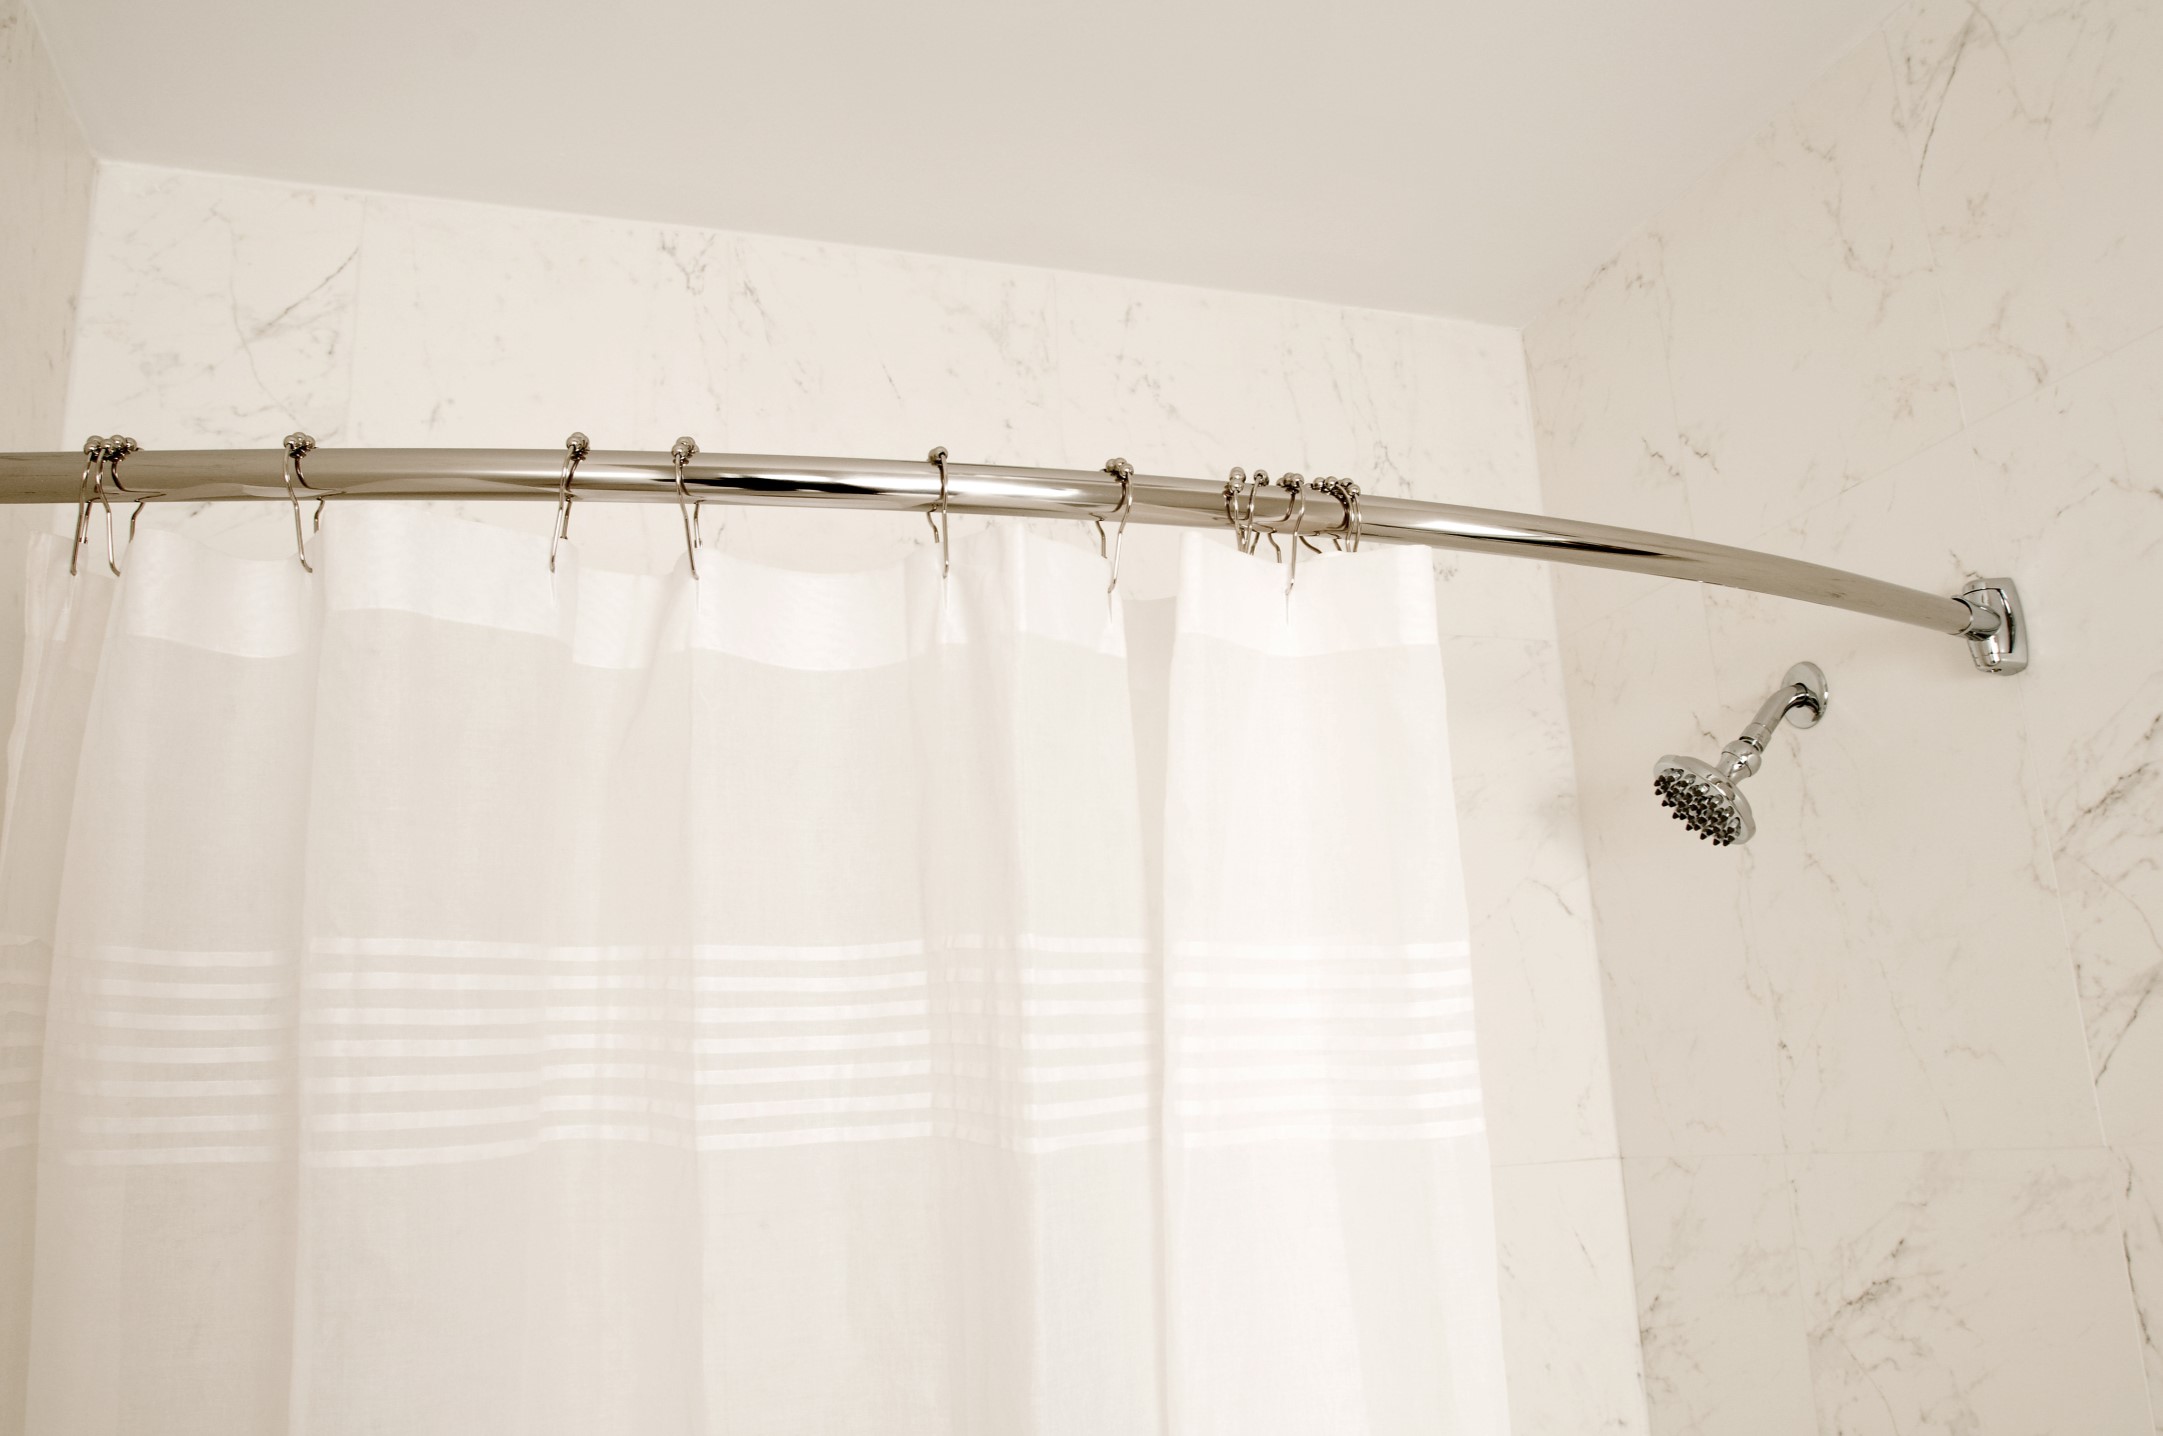
3. Style and Design
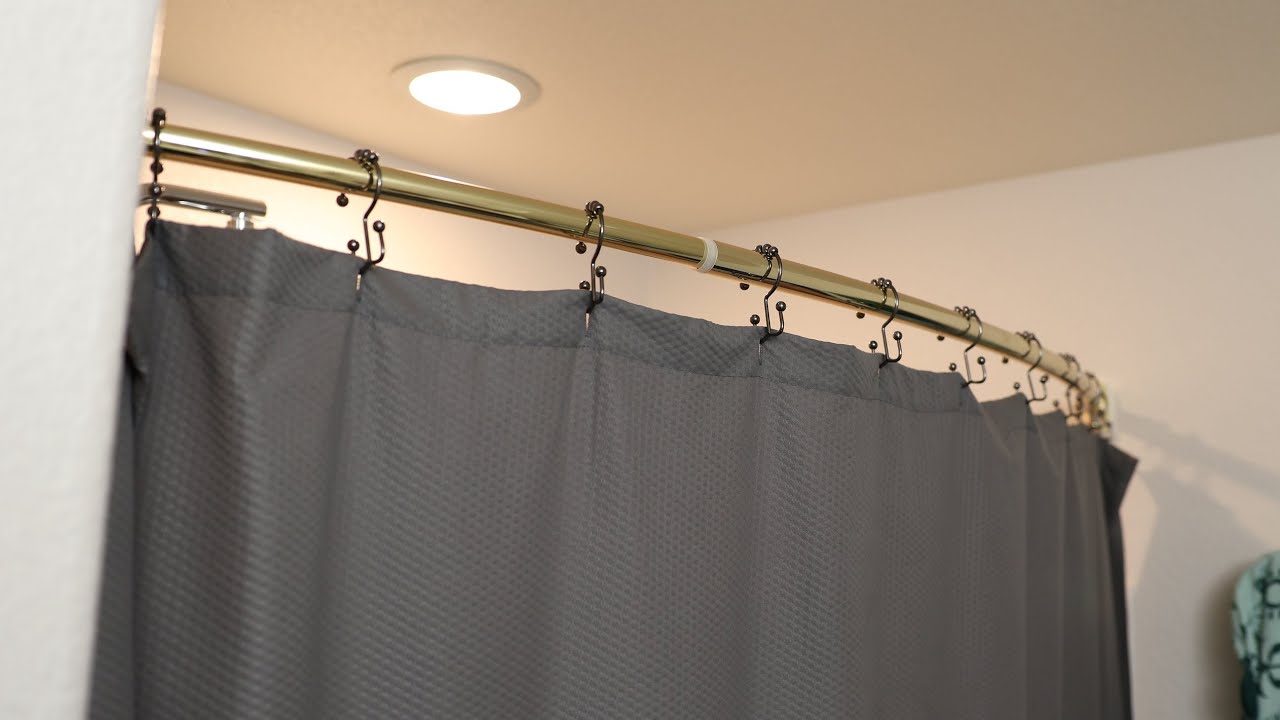
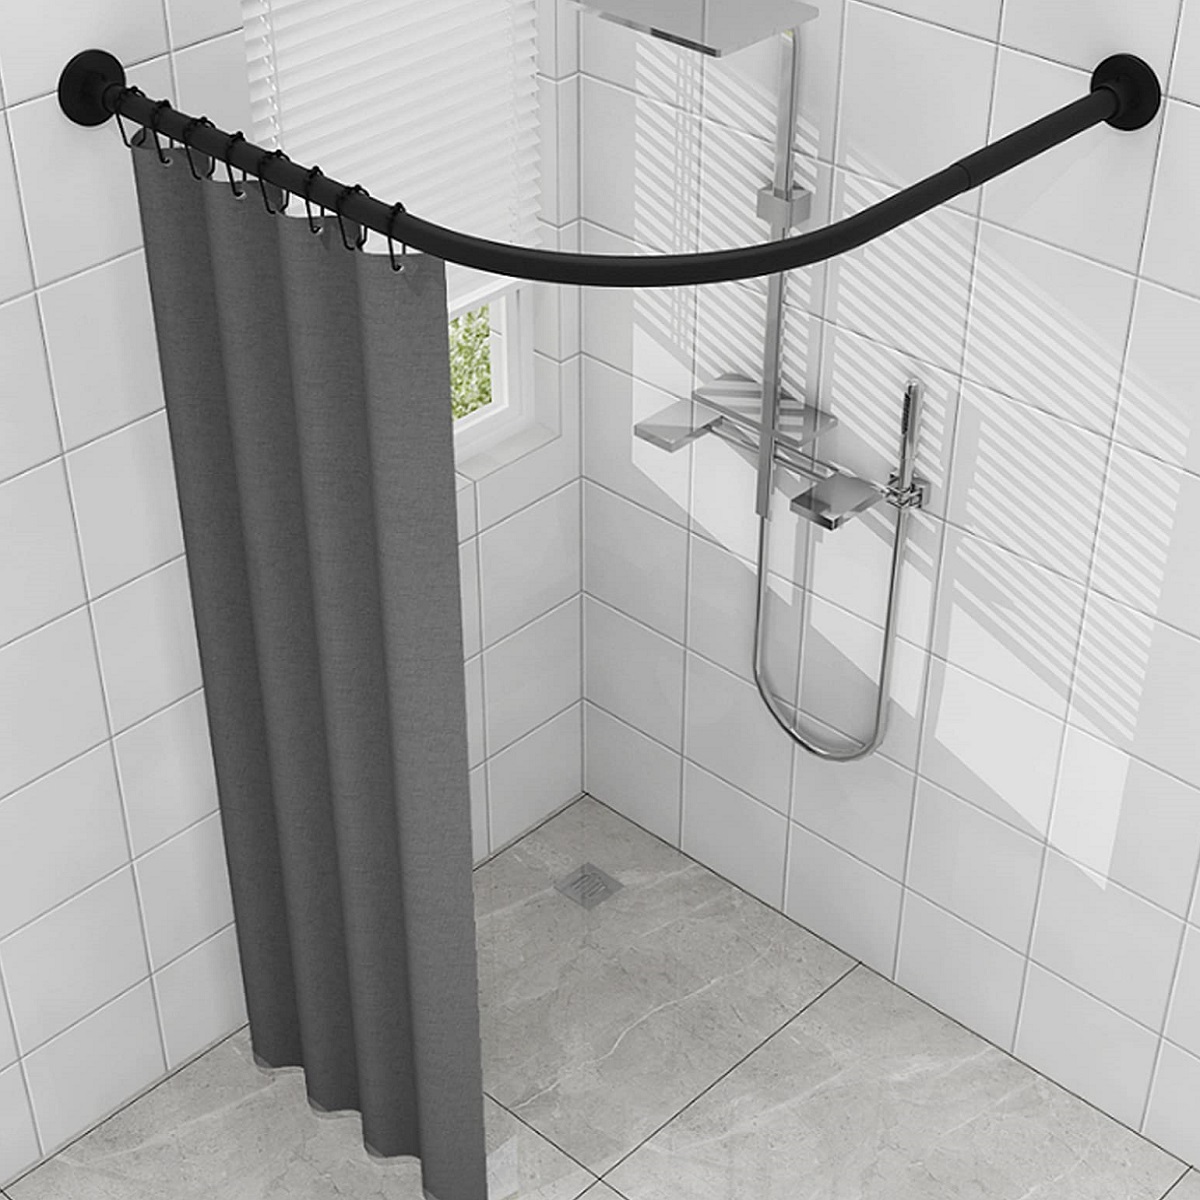
The style and design of the shower rod can significantly impact the overall aesthetic of the bathroom. Choose a design that complements the existing decor and fixtures in your bathroom. Whether you prefer a sleek and modern look or a more traditional style, there are numerous options available, including curved, straight, and double rods, allowing you to customize the appearance of your shower area.
Read more: How Long Is A Standard Shower Rod
4. Mounting Options
Consider the mounting options for the shower rod. Tension-mounted rods are easy to install without the need for drilling, making them a convenient choice for renters or those who prefer a non-permanent installation. Alternatively, wall-mounted rods provide a more secure and permanent solution, ideal for homeowners looking for a long-term and robust installation.
By carefully considering these factors, you can choose a shower rod that not only meets your functional requirements but also enhances the visual appeal of your bathroom. Once you've selected the right shower rod, you're ready to move on to the next step in the installation process.
Step 2: Measure and Mark the Placement
Accurate measurement and precise marking are crucial for ensuring the proper placement of the shower rod. Before diving into the installation process, take the time to measure the designated area and mark the placement points. This meticulous approach will lay the foundation for a secure and visually appealing installation.
1. Measure the Width
Begin by measuring the width of the shower or bathtub area where the shower rod will be installed. Use a measuring tape to determine the exact width, ensuring that the shower rod will fit seamlessly within the space. If you're installing a curved or angled shower rod, take precise measurements to accommodate the specific design of the rod.
2. Determine the Height
Next, determine the ideal height for the shower rod. The standard height for a shower rod is typically around 72 inches from the floor. However, it's essential to consider your personal preferences and the dimensions of the shower space. Mark the desired height on both walls to indicate where the top of the shower rod will be positioned.
Read more: How High To Hang A Shower Rod
3. Mark the Placement Points
Using a pencil, mark the placement points on the walls based on your measurements. For tension-mounted rods, mark the spots where the tension mechanism will be secured. If you're installing a wall-mounted rod, mark the positions for the mounting brackets. Ensure that the marks are level and aligned to guarantee a balanced and symmetrical installation.
4. Double-Check the Measurements
Before proceeding to the installation phase, double-check the measurements and placement marks to confirm their accuracy. This extra step can help prevent errors and ensure that the shower rod is positioned correctly, minimizing the need for adjustments during the installation process.
By meticulously measuring and marking the placement points, you set the stage for a seamless and secure installation. These preparatory steps lay the groundwork for the subsequent stages of the installation process, allowing you to proceed with confidence and precision.
With the placement points clearly marked, you're now ready to move on to the next step, where you'll gather the necessary tools for the installation process.
Step 3: Use the Proper Tools for Installation
Gathering the appropriate tools for installing a shower rod is essential for a smooth and efficient installation process. Having the right tools at your disposal not only ensures precision and accuracy but also minimizes the likelihood of encountering unexpected challenges during the installation. Here's a detailed look at the essential tools needed for securing a shower rod:
1. Measuring Tape
A reliable measuring tape is indispensable for accurately determining the width and height of the installation area. Whether you're installing a tension-mounted or wall-mounted shower rod, precise measurements are crucial for achieving a secure and balanced installation.
Read more: How To Adjust A Shower Curtain Rod
2. Pencil or Marker
A pencil or marker is used for marking the placement points on the walls based on the measurements taken. These marks serve as a guide during the installation process, ensuring that the shower rod is positioned at the designated locations.
3. Level
A level is a fundamental tool for ensuring that the shower rod is installed horizontally and evenly. By using a level to align the placement marks and verify the straightness of the rod during installation, you can achieve a visually pleasing and structurally sound result.
4. Screwdriver or Drill
Depending on the type of shower rod and mounting method, a screwdriver or drill may be required for securing the mounting brackets or tension mechanism in place. For wall-mounted rods, a drill is used to create pilot holes for the screws, while tension-mounted rods may require a screwdriver for adjusting the tension mechanism.
5. Mounting Hardware
If you're installing a wall-mounted shower rod, ensure that you have the necessary mounting hardware, including screws and wall anchors. High-quality mounting hardware is essential for providing a secure and durable attachment to the walls, especially in tiled or drywall surfaces.
Read more: How To Remove A Curved Shower Rod
6. Step Stool or Ladder
In cases where the installation area is out of reach, a step stool or ladder is essential for safely accessing and working within the designated space. Safety should always be a priority during home improvement projects, and using a stable platform to reach elevated areas is crucial for injury prevention.
By assembling these essential tools, you can approach the installation process with confidence and efficiency. With the proper tools at your disposal, you're well-equipped to proceed to the next step, where you'll secure the shower rod in place, bringing you one step closer to completing the installation with precision and ease.
Step 4: Secure the Shower Rod in Place
With the measurements taken and the necessary tools at hand, it's time to secure the shower rod in place, bringing the installation process one step closer to completion. Whether you're installing a tension-mounted or wall-mounted shower rod, the following steps will guide you through the process of securing the shower rod with precision and confidence.
Tension-Mounted Shower Rods
If you've opted for a tension-mounted shower rod, the installation process is relatively straightforward, requiring minimal hardware and no drilling into the walls. Here's how to secure a tension-mounted shower rod:
-
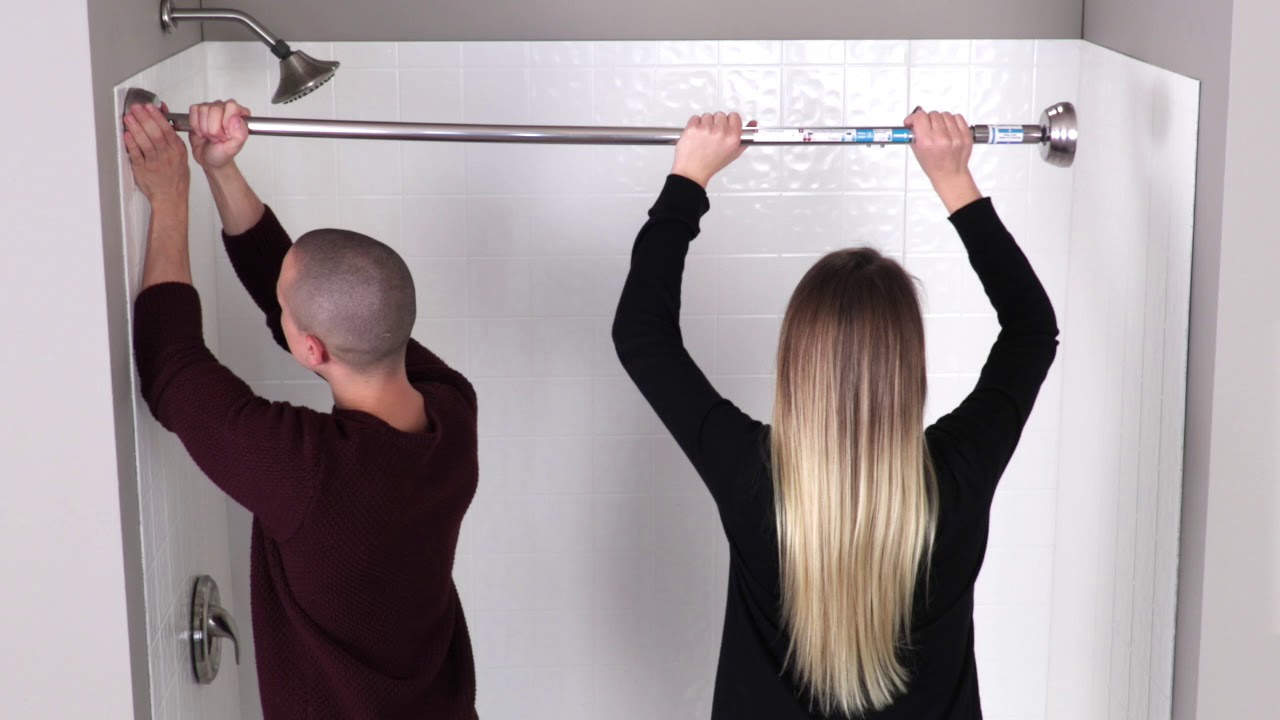
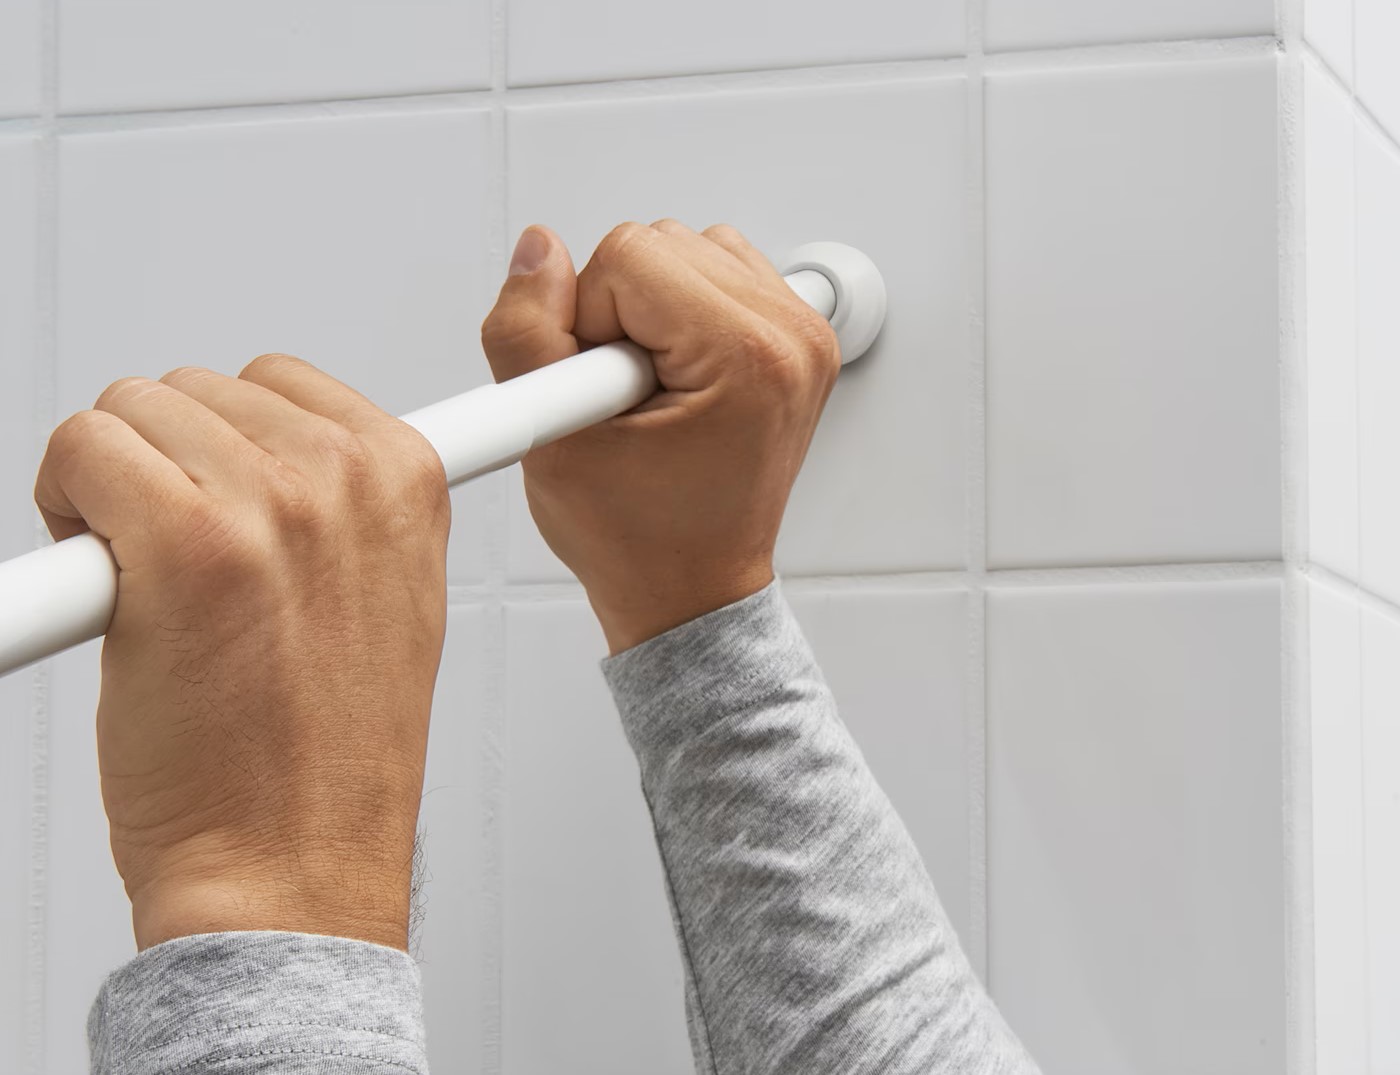
Adjust the Rod: Extend the shower rod to the desired width, ensuring a snug fit within the shower or bathtub area. The tension mechanism should create a firm and stable grip against the walls.
-
Position the Rod: Place the rod at the designated height, aligning it with the placement marks on the walls. Ensure that the rod is level and centered within the space.
-
Tighten the Tension: Use the provided mechanism or adjustment knob to tighten the tension, securing the rod firmly against the walls. Test the stability of the rod by gently pulling on it to ensure that it remains in place.
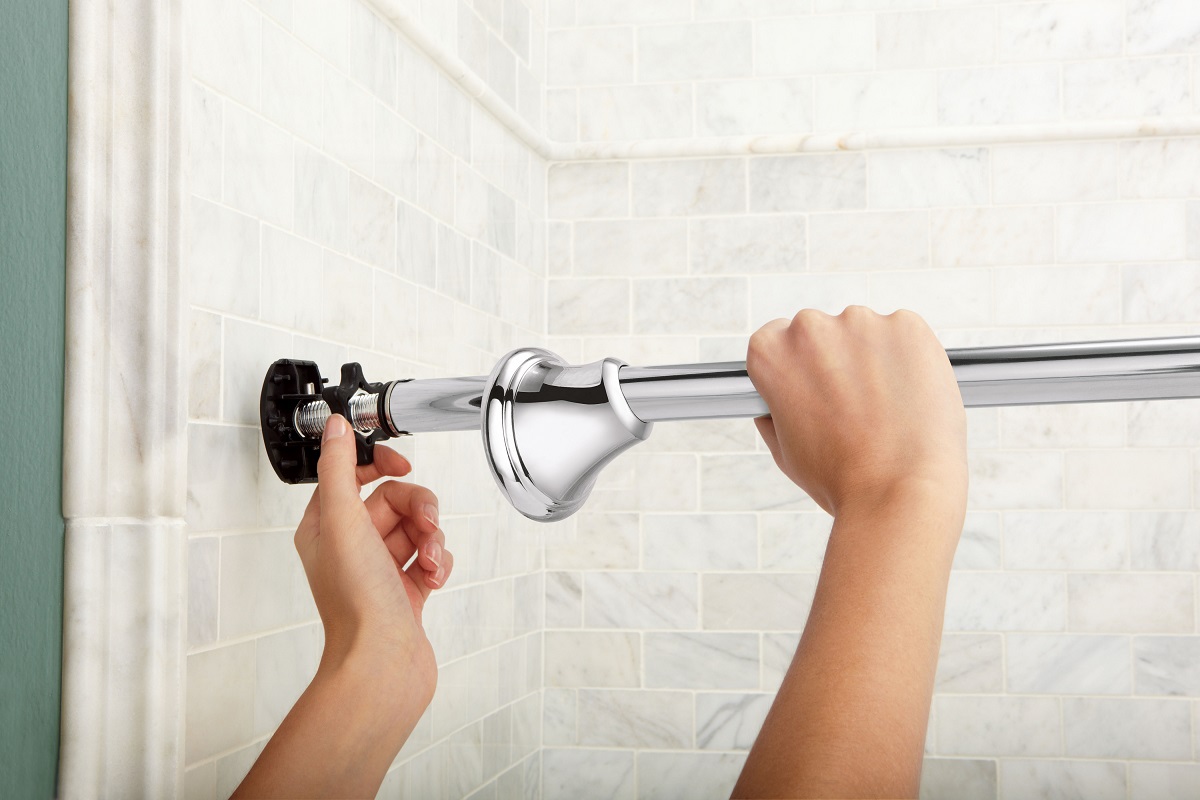
Wall-Mounted Shower Rods
For wall-mounted shower rods, the installation process involves securing the mounting brackets to the walls using screws and ensuring a sturdy attachment. Here's how to secure a wall-mounted shower rod:
-
Attach the Brackets: Position the mounting brackets at the marked placement points on the walls. Use a level to ensure that the brackets are aligned and straight. If necessary, create pilot holes using a drill to facilitate the screwing process.
-
Secure the Brackets: Using a screwdriver or drill, fasten the mounting brackets to the walls using the provided screws. Ensure that the brackets are firmly attached and capable of supporting the weight of the shower rod and curtain.
-
Install the Shower Rod: Once the brackets are securely in place, insert the shower rod into the brackets, following the manufacturer's instructions. Verify that the rod is properly seated and stable within the brackets.
By following these steps, you can secure the shower rod in place, ensuring a reliable and visually appealing installation. With the shower rod firmly anchored, you're ready to proceed to the final step of the installation process, where you'll test the stability of the secured shower rod to confirm its durability and functionality.
Now that the shower rod is securely in place, the next step involves testing for stability to ensure a reliable and durable installation.
Read more: Where To Place A Shower Curtain Rod
Step 5: Test for Stability
After securing the shower rod in place, it's crucial to perform a stability test to ensure that the installation is reliable and capable of withstanding daily use. Testing for stability not only verifies the effectiveness of the installation but also provides peace of mind, knowing that the shower rod is securely positioned and ready to fulfill its functional and aesthetic purposes.
Tension-Mounted Shower Rods
For tension-mounted shower rods, the stability test involves applying gentle pressure to the rod, simulating the movement that occurs when opening and closing the shower curtain. By exerting controlled force on the rod, you can assess its ability to remain in place without slipping or dislodging from the walls. Additionally, observe the tension mechanism to ensure that it maintains a firm grip, preventing the rod from shifting or loosening during the test.
Wall-Mounted Shower Rods
When testing the stability of wall-mounted shower rods, gently pull on the shower curtain or apply slight pressure to the rod to evaluate its resistance to movement. The goal is to confirm that the mounting brackets provide robust support, preventing the rod from swaying or detaching from the walls. Pay close attention to any signs of instability or wobbling, as these indicate the need for adjustments to enhance the overall security of the installation.
Visual Inspection
In addition to physical testing, perform a visual inspection of the installed shower rod. Check for any signs of misalignment, uneven positioning, or structural issues that may compromise its stability. Ensure that the rod is level and centered within the designated space, contributing to a cohesive and visually pleasing appearance.
Read more: Why Use A Curved Shower Rod
Adjustment and Reinforcement
If the stability test reveals any concerns or inconsistencies, take the necessary steps to address them promptly. For tension-mounted rods, consider adjusting the tension mechanism to achieve a more secure fit against the walls. In the case of wall-mounted rods, reinforce the mounting brackets by tightening the screws or making adjustments to enhance their stability.
Final Verification
Once adjustments have been made, perform a final stability test to verify the effectiveness of the corrective measures. By repeating the testing process, you can confirm that the shower rod is securely installed and capable of withstanding the demands of daily use, providing confidence in its long-term reliability.
By conducting a thorough stability test, you can ensure that the shower rod is securely installed and ready to fulfill its functional and aesthetic roles in the bathroom. This final step serves as a crucial validation of the installation process, affirming that the shower rod is steadfast and dependable, ready to enhance the overall functionality and visual appeal of the shower area.
Conclusion
In conclusion, securing a shower rod is a fundamental aspect of maintaining a functional and visually appealing bathroom space. By following the step-by-step process outlined in this guide, you can achieve a secure and reliable installation that enhances both the practicality and aesthetics of your shower area.
Choosing the right shower rod sets the stage for a successful installation. Considering factors such as material durability, adjustable versus fixed length, style and design, and mounting options empowers you to select a shower rod that aligns with your specific needs and preferences. Whether you opt for a stainless steel tension-mounted rod or a decorative wall-mounted rod, the choice of the right shower rod forms the foundation of a secure installation.
Accurate measurement and precise marking of the placement points are essential preparatory steps. By meticulously measuring the width and height of the installation area and marking the placement points, you establish the framework for a seamless and balanced installation. These preparatory measures ensure that the shower rod is positioned with precision, contributing to its stability and visual harmony within the bathroom space.
Equipping yourself with the proper tools, including a measuring tape, level, screwdriver or drill, and mounting hardware, streamlines the installation process and minimizes the likelihood of unexpected challenges. With the right tools at your disposal, you can approach the installation with confidence, knowing that you have the necessary resources to secure the shower rod effectively.
Securing the shower rod in place, whether it's a tension-mounted or wall-mounted installation, is a pivotal step in the process. By following the specific guidelines for each type of shower rod, you can ensure that the installation is robust, stable, and capable of withstanding the demands of daily use. Whether it's adjusting the tension mechanism for a snug fit or securing the mounting brackets with precision, the act of securing the shower rod brings you one step closer to a fully functional and visually appealing shower area.
Testing for stability provides the assurance that the installation is reliable and durable. By conducting a thorough stability test and addressing any concerns that arise, you can verify that the shower rod is steadfast and capable of fulfilling its intended purpose. This final validation ensures that the installation process has resulted in a secure and dependable shower rod, ready to enhance the functionality and visual appeal of the bathroom.
In essence, securing a shower rod is not just about practicality; it's about creating a space that reflects your personal style and attention to detail. By following the steps outlined in this guide, you can achieve a secure and visually appealing installation, transforming your shower area into a functional and inviting part of your home.
Frequently Asked Questions about How To Secure A Shower Rod
Was this page helpful?
At Storables.com, we guarantee accurate and reliable information. Our content, validated by Expert Board Contributors, is crafted following stringent Editorial Policies. We're committed to providing you with well-researched, expert-backed insights for all your informational needs.

0 thoughts on “How To Secure A Shower Rod”