Home>Furniture & Design>Interior Design Trends>How To Paint Glass
Interior Design Trends
How To Paint Glass
Modified: February 3, 2024
Learn the latest interior design trends for painting glass surfaces. Discover expert tips and techniques for achieving stunning results in your home. Explore the possibilities today!
(Many of the links in this article redirect to a specific reviewed product. Your purchase of these products through affiliate links helps to generate commission for Storables.com, at no extra cost. Learn more)
Introduction
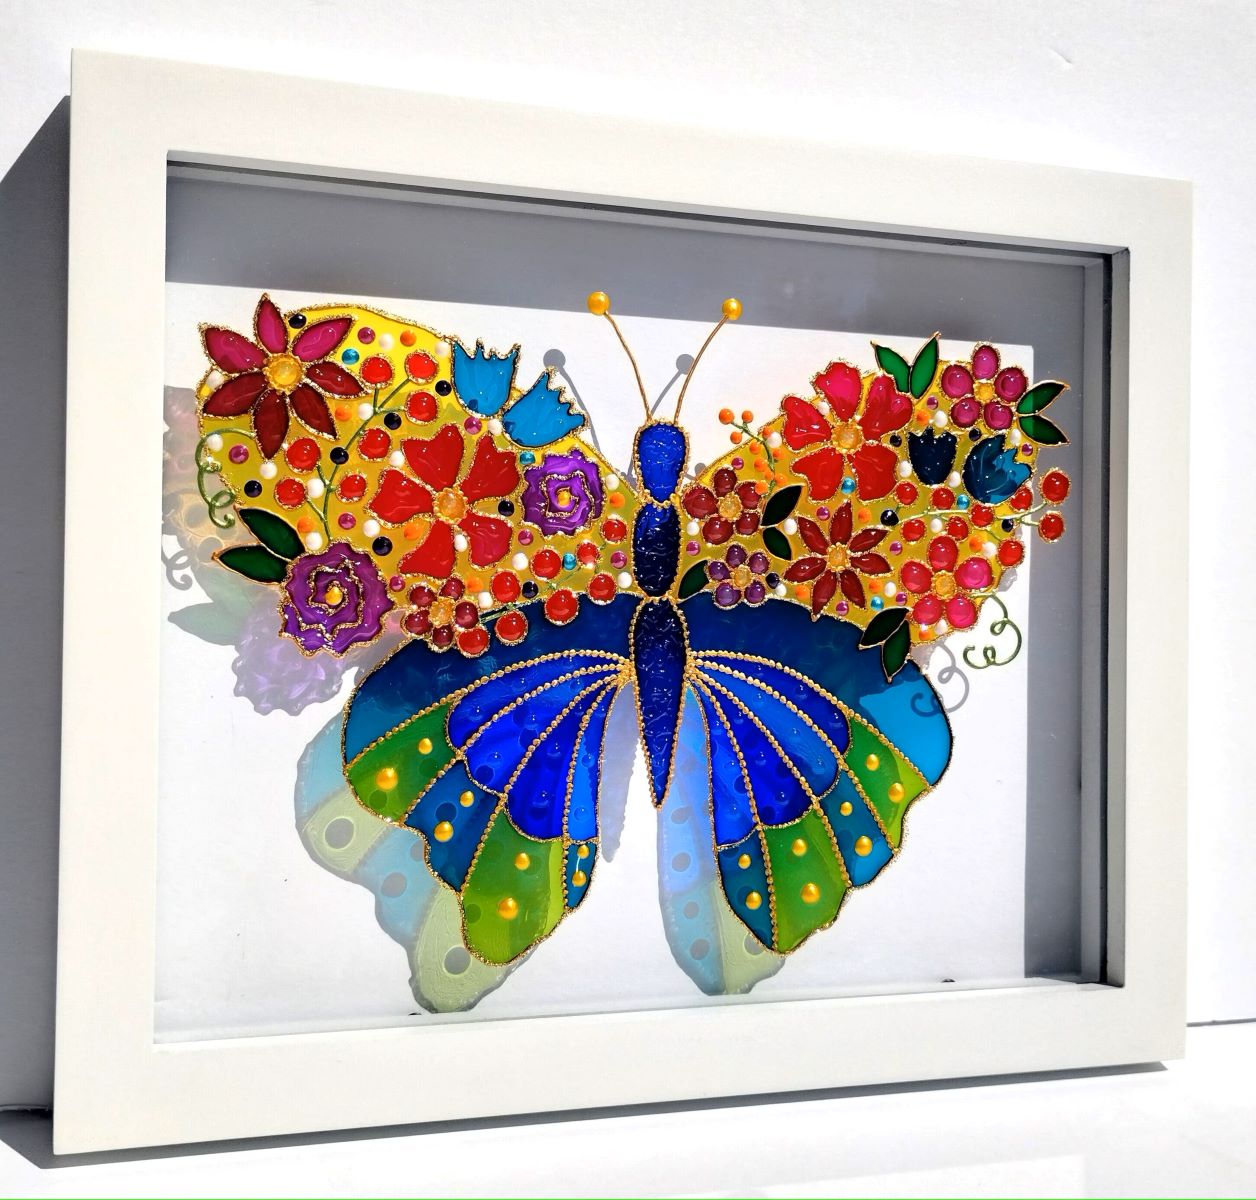
Painting glass is a versatile and creative way to add a personal touch to your home decor. Whether you're looking to revamp old glassware, create custom decorations, or add a pop of color to your windows, mastering the art of glass painting can unlock a world of possibilities. With the right materials, techniques, and a dash of creativity, you can transform ordinary glass surfaces into stunning works of art.
In this comprehensive guide, we'll explore the step-by-step process of painting glass, from selecting the appropriate materials to adding intricate designs and sealing the paint for long-lasting vibrancy. Whether you're a seasoned artist or a novice crafter, this guide will equip you with the knowledge and skills to embark on your glass painting journey with confidence.
By understanding the nuances of glass painting, you can unleash your creativity and personalize your living space with unique, hand-painted pieces. From elegant floral motifs to vibrant abstract patterns, the possibilities for glass painting are as endless as your imagination. So, roll up your sleeves, gather your supplies, and let's dive into the world of glass painting to unleash your inner artist and breathe new life into plain glass surfaces.
Key Takeaways:
- Unleash Your Creativity: Glass painting offers a versatile and rewarding way to personalize your living space with vibrant designs and intricate details. With the right materials and techniques, you can transform ordinary glass surfaces into stunning works of art.
- Preserve Your Masterpieces: Sealing your glass paintings with a high-quality varnish or sealant ensures long-lasting vibrancy and protection against wear. By following the proper preparation and application techniques, you can safeguard your artistic creations for years to come.
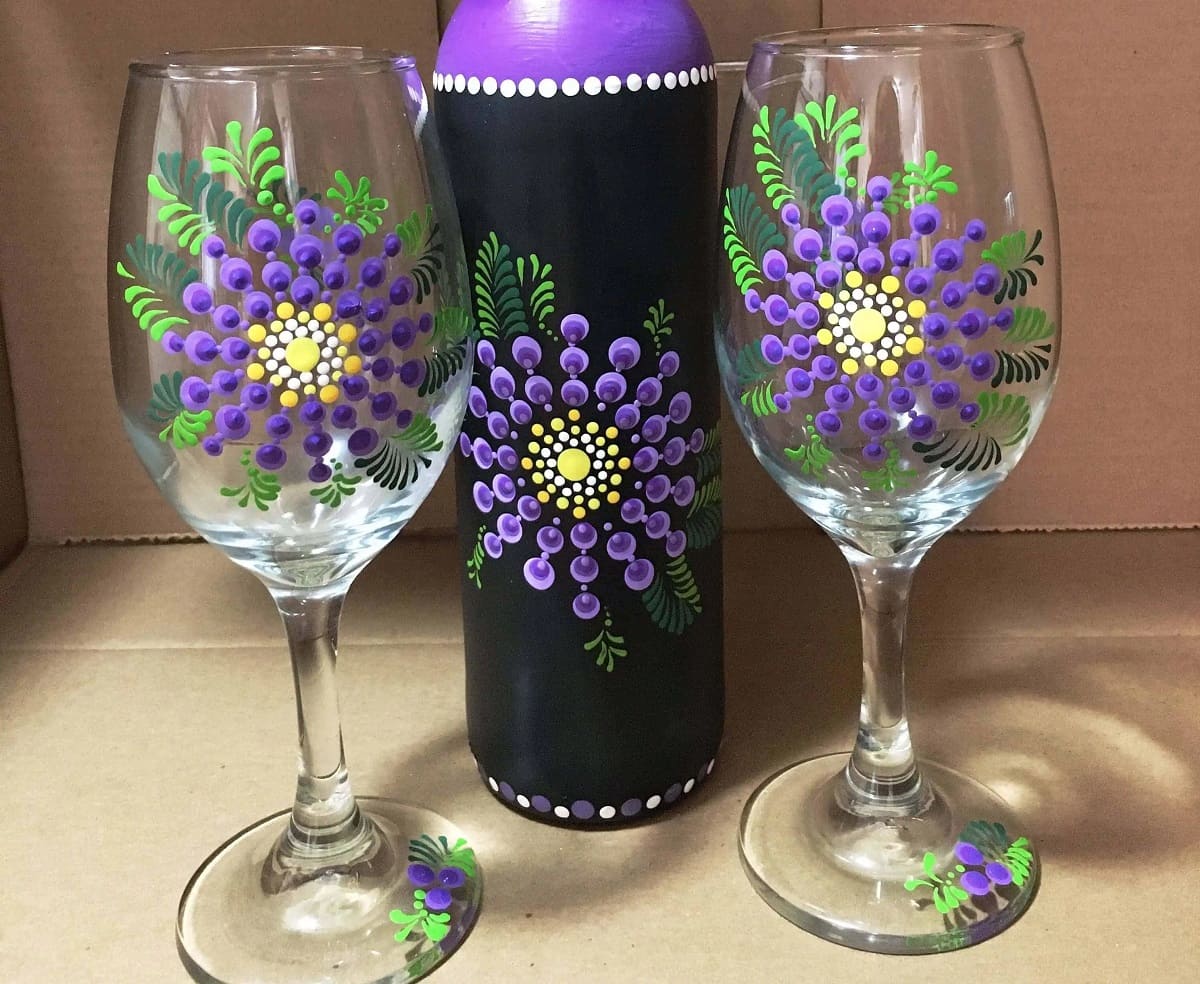
Read more: How To Paint Wine Glasses
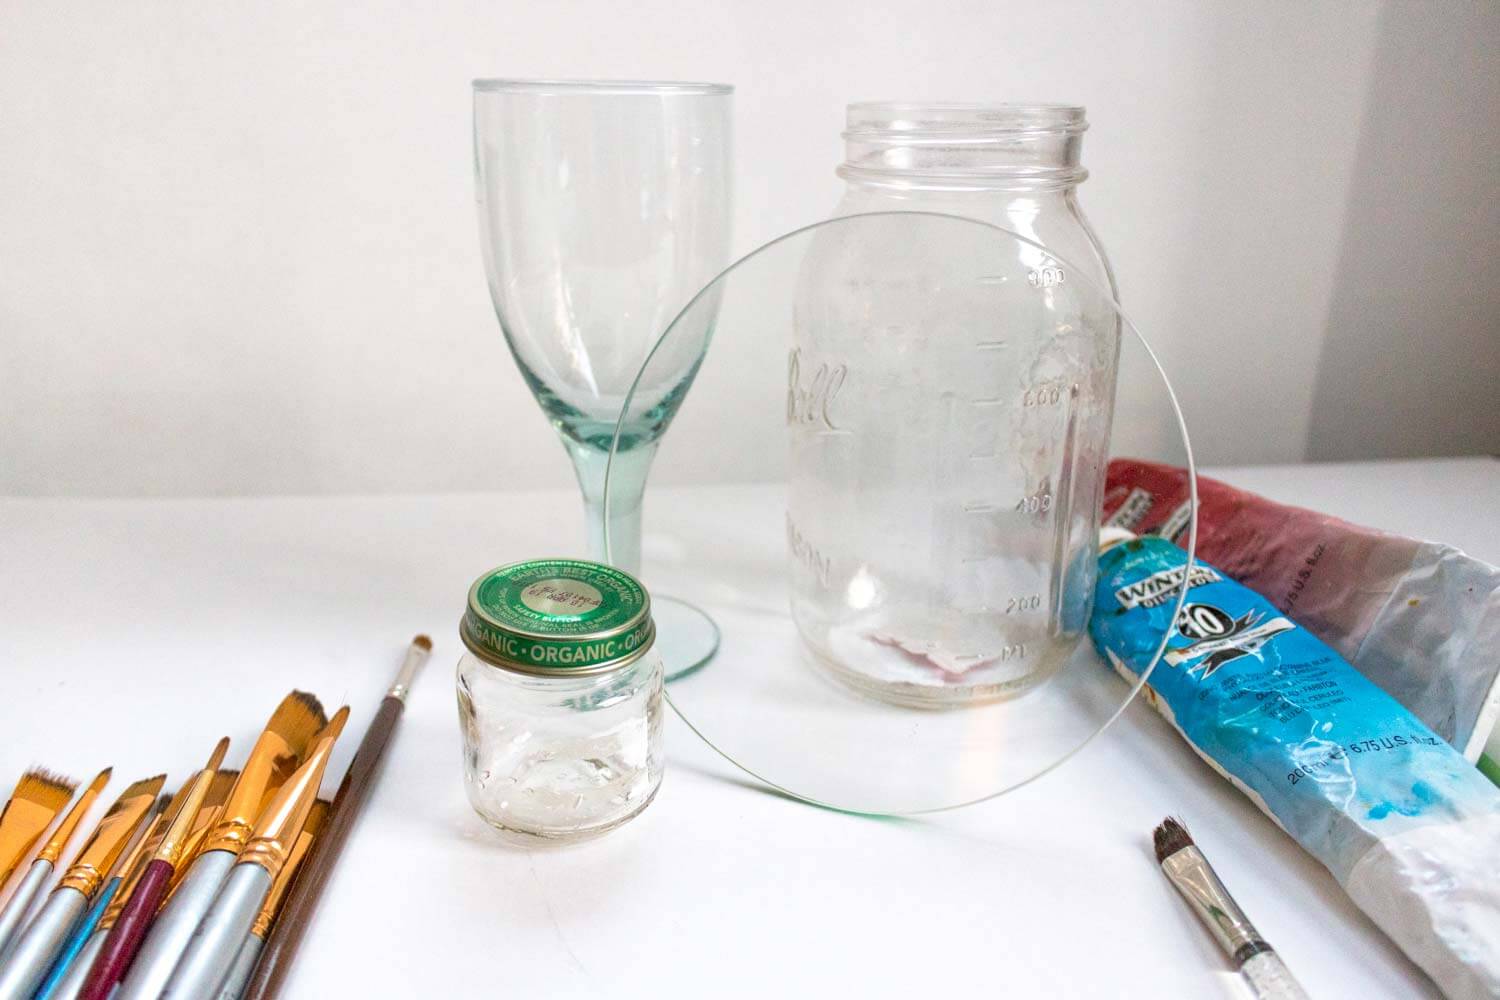
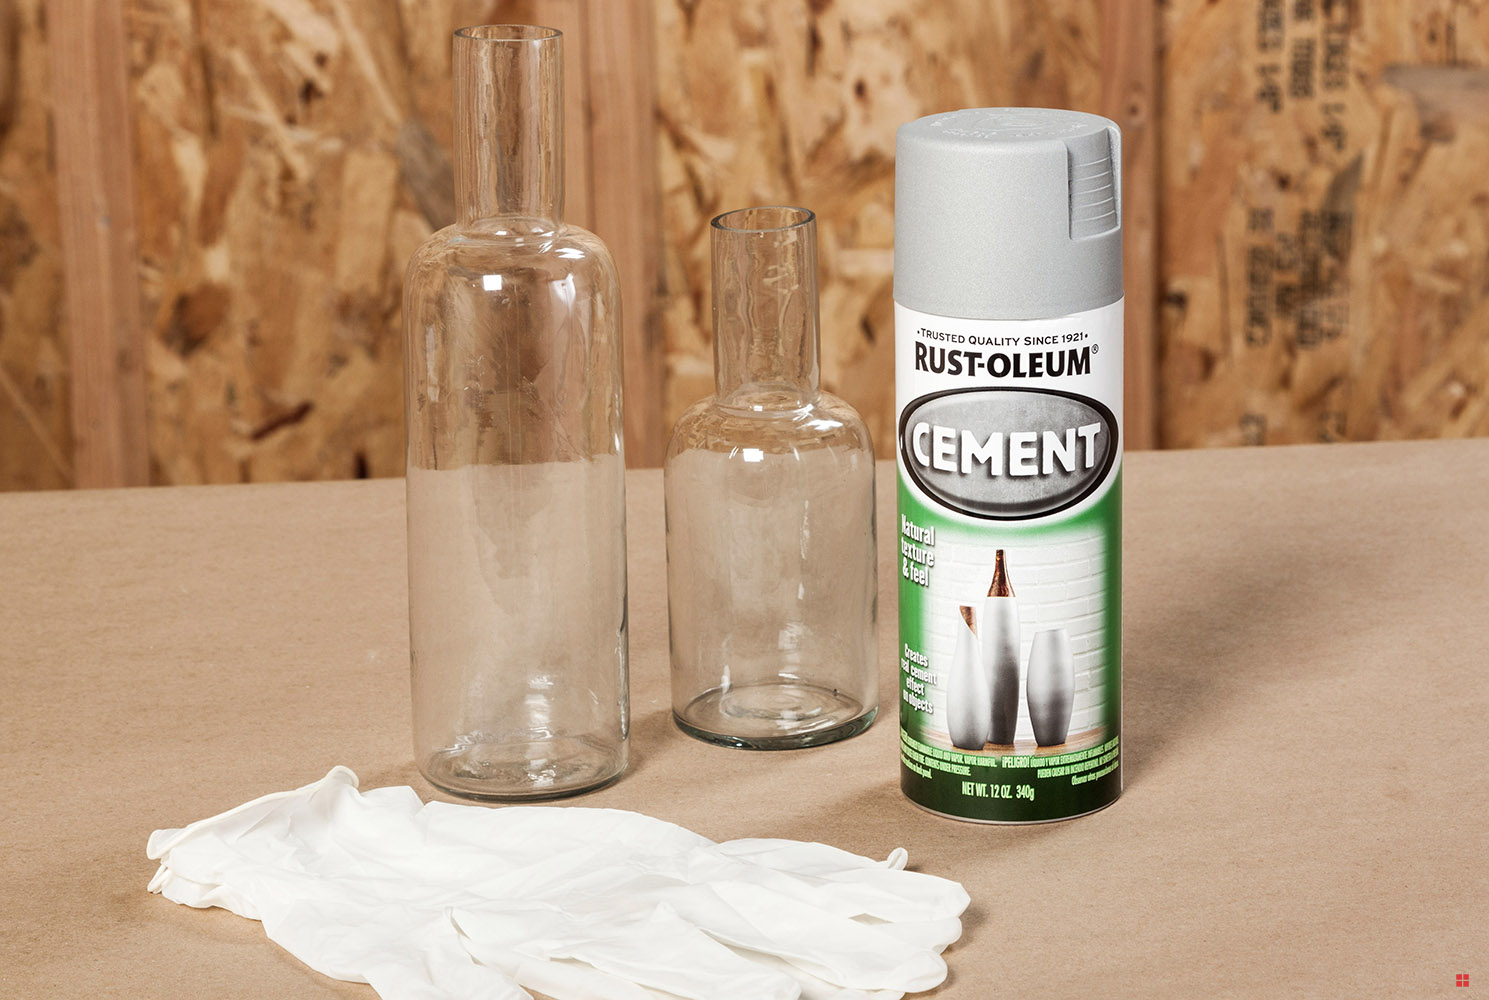
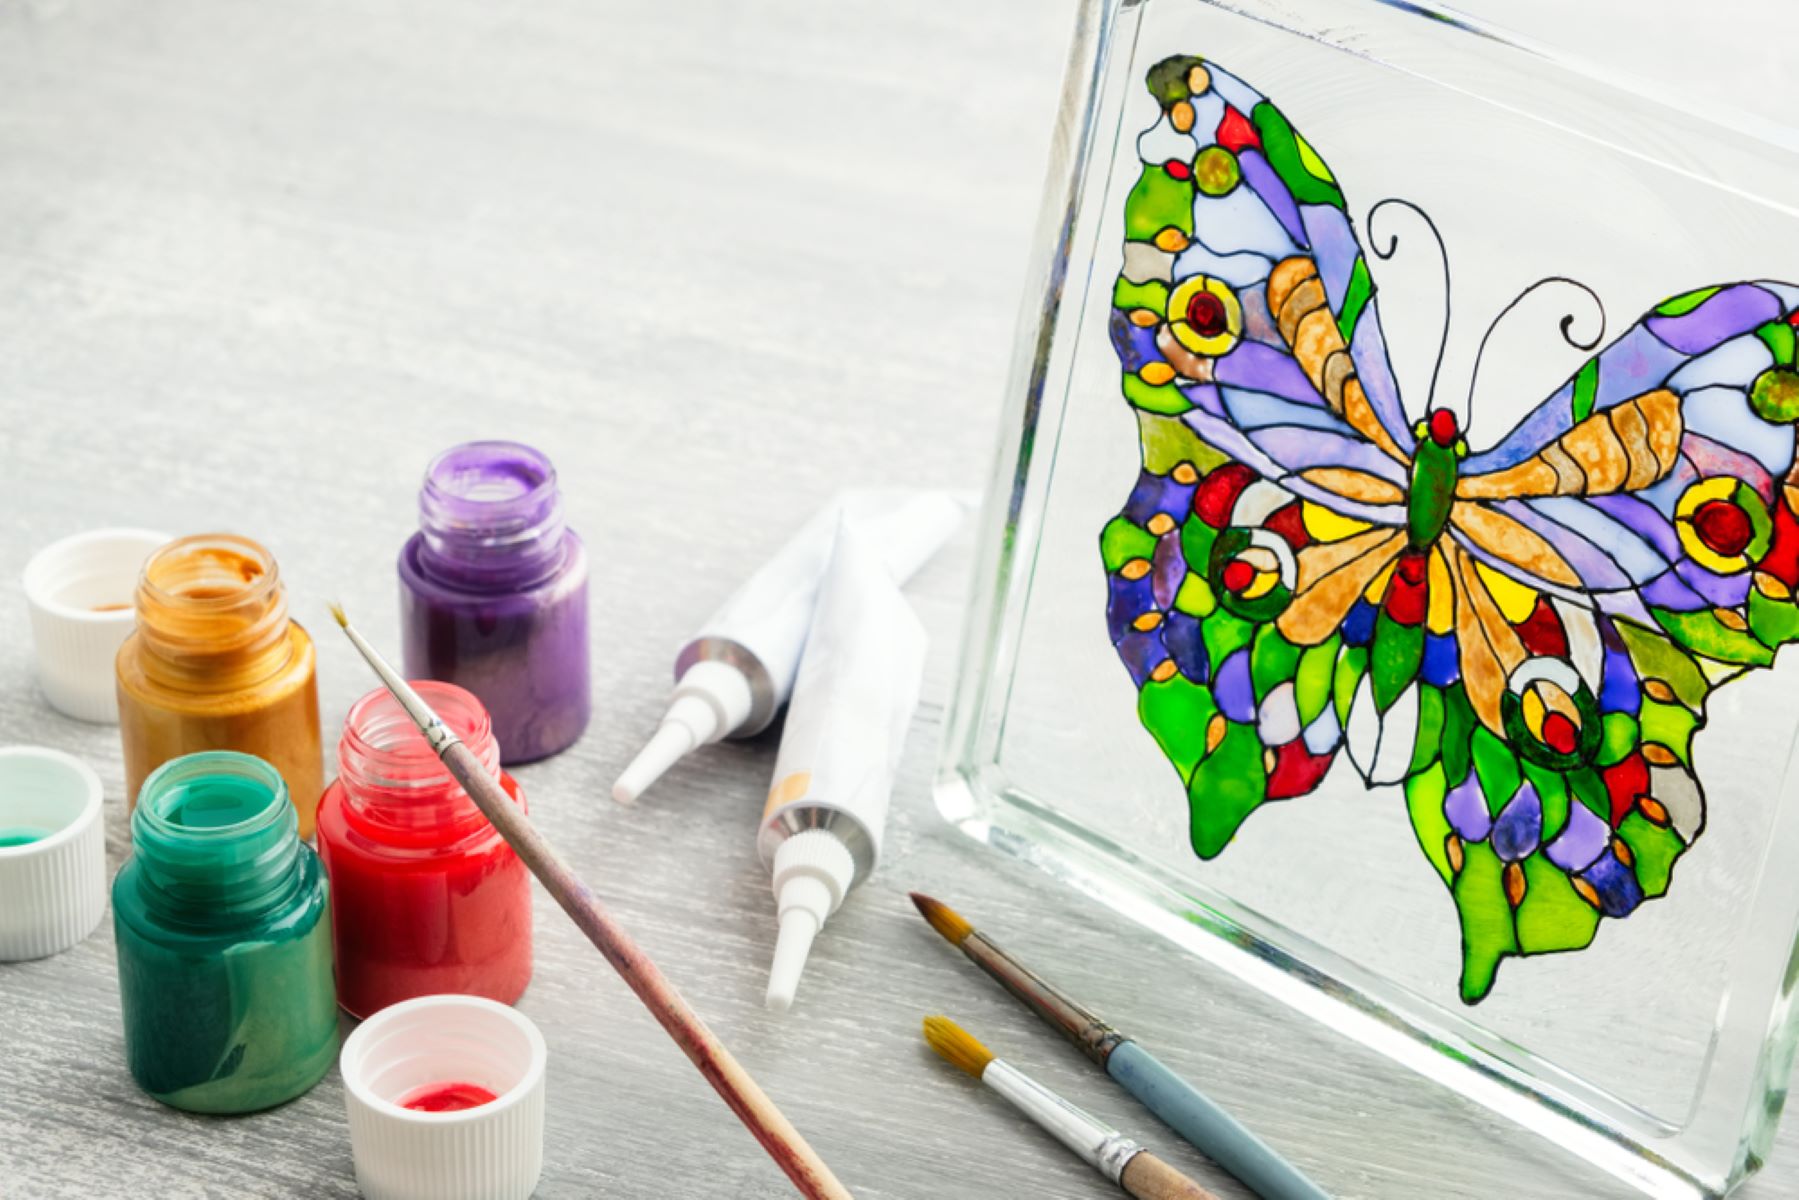
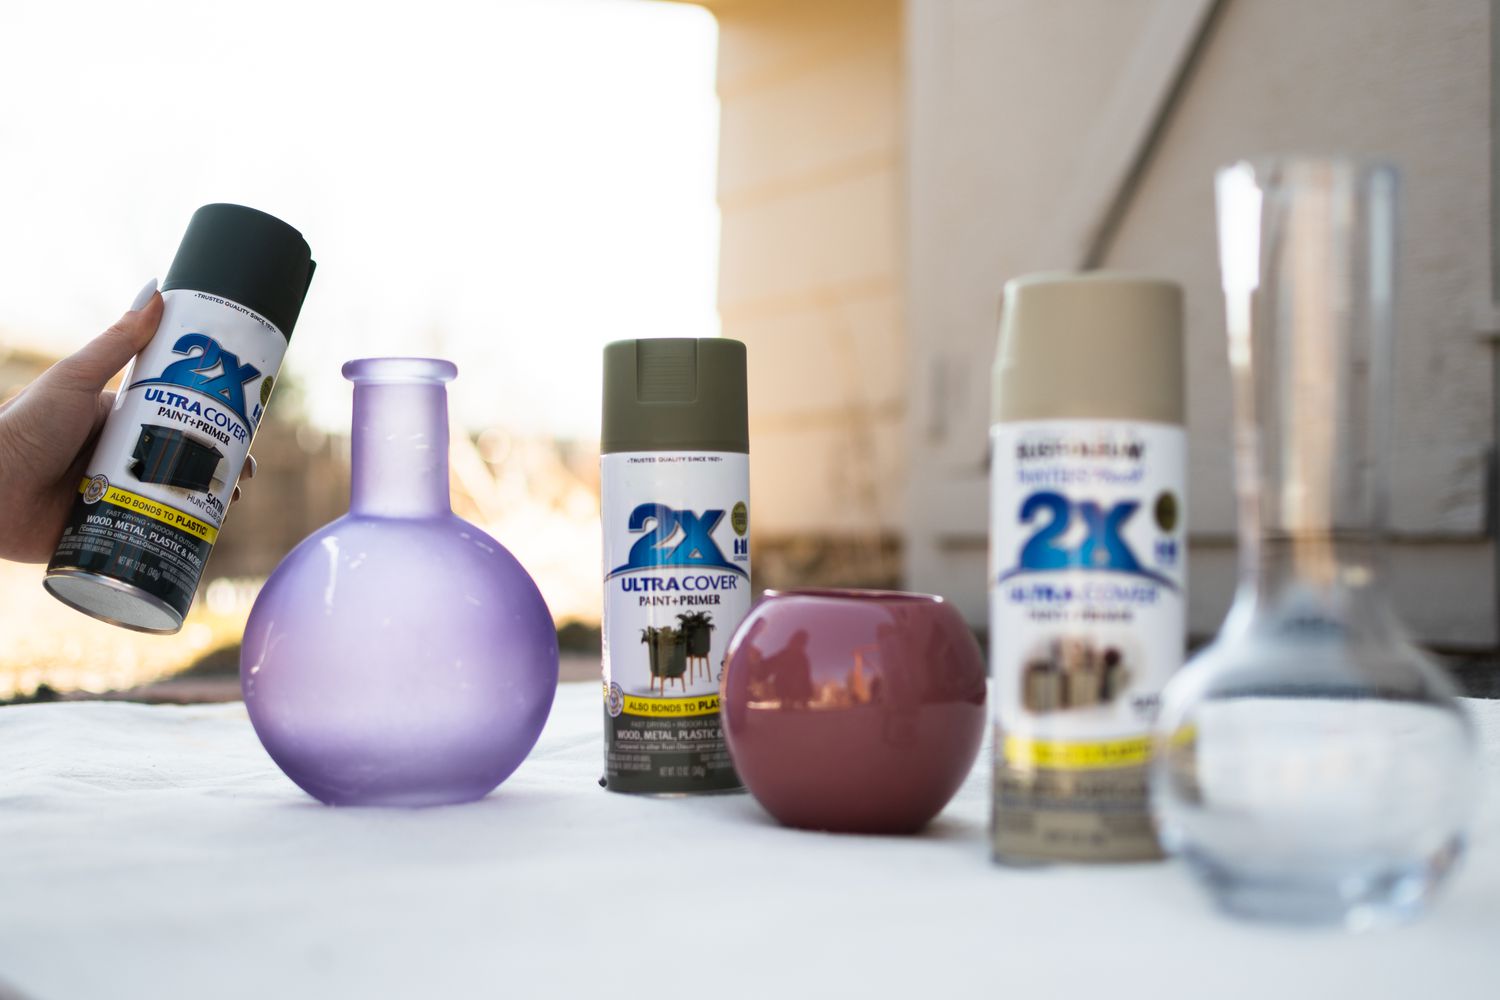
Choosing the Right Materials
Selecting the right materials is the foundation of a successful glass painting project. From paints to brushes and surface preparation tools, each component plays a crucial role in achieving professional-looking results. Here's a detailed look at the essential materials you'll need to embark on your glass painting journey:
1. Glass Surfaces:
- Glassware: Choose glass items such as vases, jars, wine glasses, or ornaments as your canvas. Ensure that the glass is clean and free from any dust or residue before starting the painting process.
- Glass Panels: If you're painting windows or glass panels, opt for tempered or acrylic glass for durability and ease of handling.
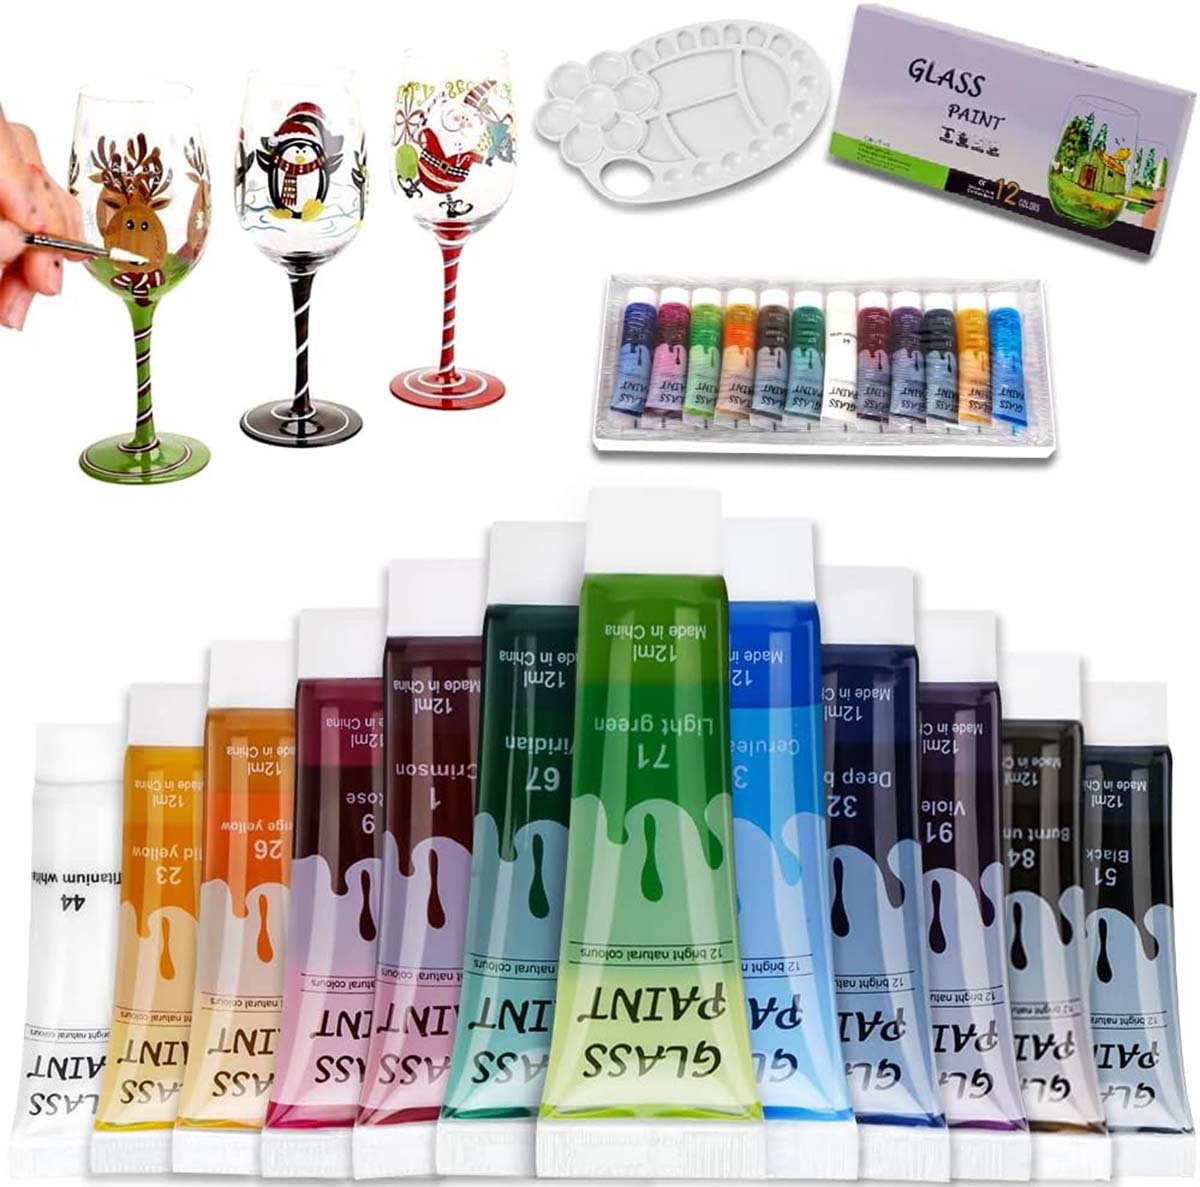
2. Glass Paints:
- Acrylic Glass Paints: These versatile paints are ideal for glass painting due to their quick-drying nature and vibrant color payoff. Look for paints specifically formulated for glass surfaces to ensure adhesion and longevity.
- Transparent Medium: If you prefer a translucent effect, consider adding a transparent medium to your acrylic paints to achieve a stained glass-like appearance.
3. Brushes:
- Fine-Tipped Brushes: Invest in a set of fine-tipped brushes for intricate detailing and precise lines. Look for brushes designed for acrylic or glass painting to ensure optimal performance.
Read more: How To Do Glass Painting
4. Surface Preparation:
- Rubbing Alcohol: Use rubbing alcohol to thoroughly clean the glass surface before painting. This step is crucial for removing any oils, fingerprints, or debris that could hinder paint adhesion.
- Painter's Tape: If you're creating geometric designs or delineating specific areas, painter's tape can help create clean, sharp edges and prevent paint bleed.
5. Palette and Mixing Tools:
- Palette: A smooth, non-porous palette is essential for mixing and diluting paints. Consider using a glass or plastic palette for easy cleanup and paint preservation.
- Mixing Sticks: Wooden or plastic mixing sticks are handy for blending colors and achieving custom shades.
6. Sealant:
- Varnish or Sealant: Once your glass painting is complete, a high-quality varnish or sealant designed for glass surfaces will protect the paint from scratches and ensure long-term durability.
By carefully selecting these materials, you'll set the stage for a seamless and rewarding glass painting experience. With the right tools at your disposal, you can unleash your creativity and bring your artistic vision to life on glass surfaces with confidence and precision.
Preparing the Glass Surface
Properly preparing the glass surface is a critical step that sets the foundation for a successful painting project. By ensuring that the glass is clean and free from any contaminants, you can promote optimal paint adhesion and long-lasting results. Here's a detailed guide on how to prepare the glass surface for painting:
-
Clean the Glass Thoroughly: Before applying any paint, it's essential to clean the glass surface thoroughly to remove any dirt, dust, or oils that could compromise the adhesion of the paint. Start by washing the glass with mild soap and water to eliminate surface grime. Once cleaned, rinse the glass with water and allow it to air dry completely.
-
Use Rubbing Alcohol: After the glass has dried, use rubbing alcohol and a lint-free cloth to wipe down the entire surface. This step is crucial for removing any remaining oils, fingerprints, or residue that may not have been eliminated during the initial cleaning process. The alcohol will evaporate quickly, leaving behind a pristine, oil-free surface ready for painting.
-
Avoid Touching the Glass: Once the glass has been cleaned and prepped, it's important to handle it with care to prevent any new fingerprints or oils from transferring onto the surface. Consider wearing gloves or holding the glass with clean, lint-free cloths to maintain its pristine condition until the painting process begins.
-
Protect Surrounding Areas: If you're working on glass items such as vases or jars, consider using painter's tape to mask off any areas that you don't intend to paint. This will create clean, defined edges and prevent accidental paint smudges on unaffected areas.
-
Ensure a Dust-Free Environment: To prevent dust particles from settling onto the glass surface during the painting process, work in a clean, well-ventilated area free from excessive airborne debris. This will help maintain the integrity of the glass surface and ensure a smooth painting experience.
By meticulously preparing the glass surface, you can create an optimal canvas for your painting endeavors. This attention to detail will not only enhance the adhesion and longevity of the paint but also contribute to the overall professional finish of your glass painting project. With a clean and pristine surface, you're now ready to embark on the next steps of the glass painting process, bringing your artistic vision to life with confidence and precision.
Read more: How To Paint A Glass Lamp
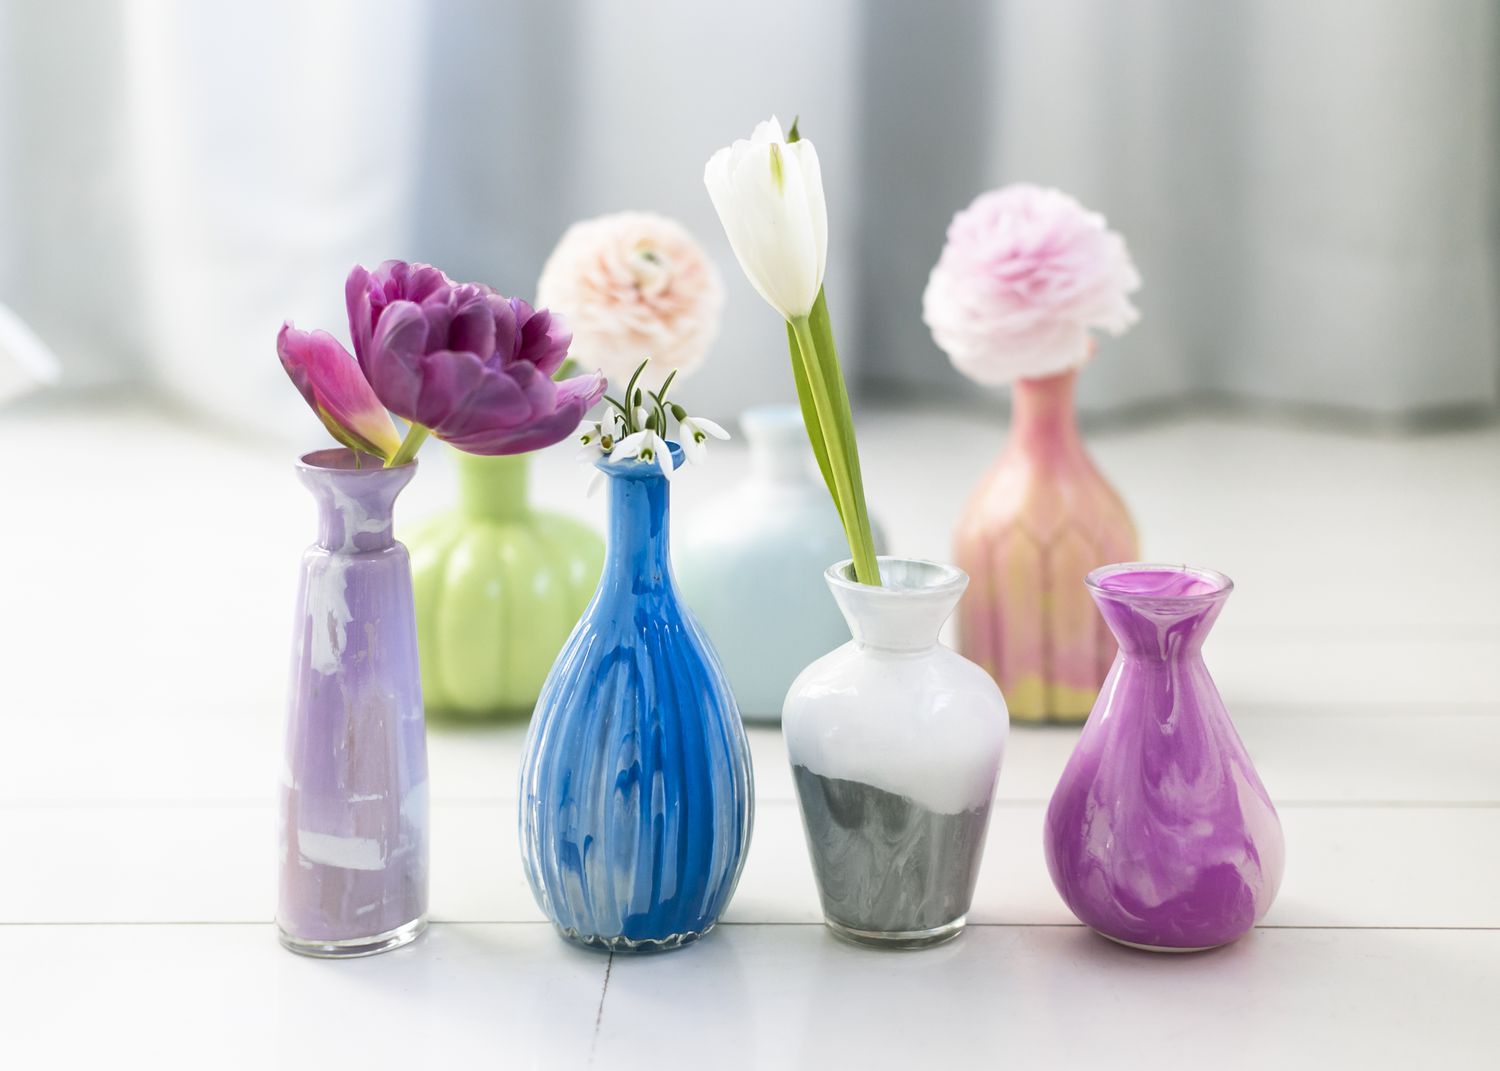
Applying the Base Coat
Applying the base coat is a pivotal stage in the glass painting process, as it sets the groundwork for the subsequent layers of color and detailing. The base coat not only provides a foundation for the design but also enhances the vibrancy and adhesion of the final paint layers. Here's a detailed walkthrough of the steps involved in applying the base coat to your glass surface:
-
Selecting the Base Color: Begin by choosing the base color that will serve as the backdrop for your design. Whether you opt for a bold, solid base or a translucent wash of color, consider how it will complement the overall aesthetic of your artwork. Keep in mind that lighter base colors may allow light to pass through the glass, creating a unique luminous effect.
-
Preparing the Paint: If you're using acrylic glass paints, ensure that the paint is well-mixed and free from any lumps or clumps. Consistency is key when it comes to the base coat, so aim for a smooth, even texture that will glide effortlessly onto the glass surface.
-
Applying the Base Coat: Using a fine-tipped brush or a foam brush, apply the base coat evenly across the glass surface. Work methodically to avoid streaks or uneven coverage, ensuring that the entire area is coated with a consistent layer of paint. If you're painting a large glass panel or window, consider using a larger brush or a foam roller for efficient coverage.
-
Allowing for Drying Time: Once the base coat is applied, allow sufficient time for it to dry completely. This step is crucial for ensuring that the subsequent layers of paint adhere properly and that the colors remain true to their intended hue. Depending on the type of paint used and the environmental conditions, drying times may vary, so refer to the manufacturer's recommendations for guidance.
-
Assessing the Coverage: After the base coat has dried, inspect the glass surface to ensure that the coverage is uniform and free from any imperfections. If necessary, apply a second coat to achieve the desired opacity and color intensity. Take care to maintain a smooth and even application, as the base coat serves as the backdrop for the intricate details and designs that will follow.
By meticulously executing the base coat application, you'll establish a solid foundation for your glass painting project, setting the stage for the creative embellishments and intricate designs that will bring your artwork to life. With the base coat in place, you're now ready to delve into the next phase of the glass painting process, adding captivating details and designs that will showcase your artistic prowess and creativity.
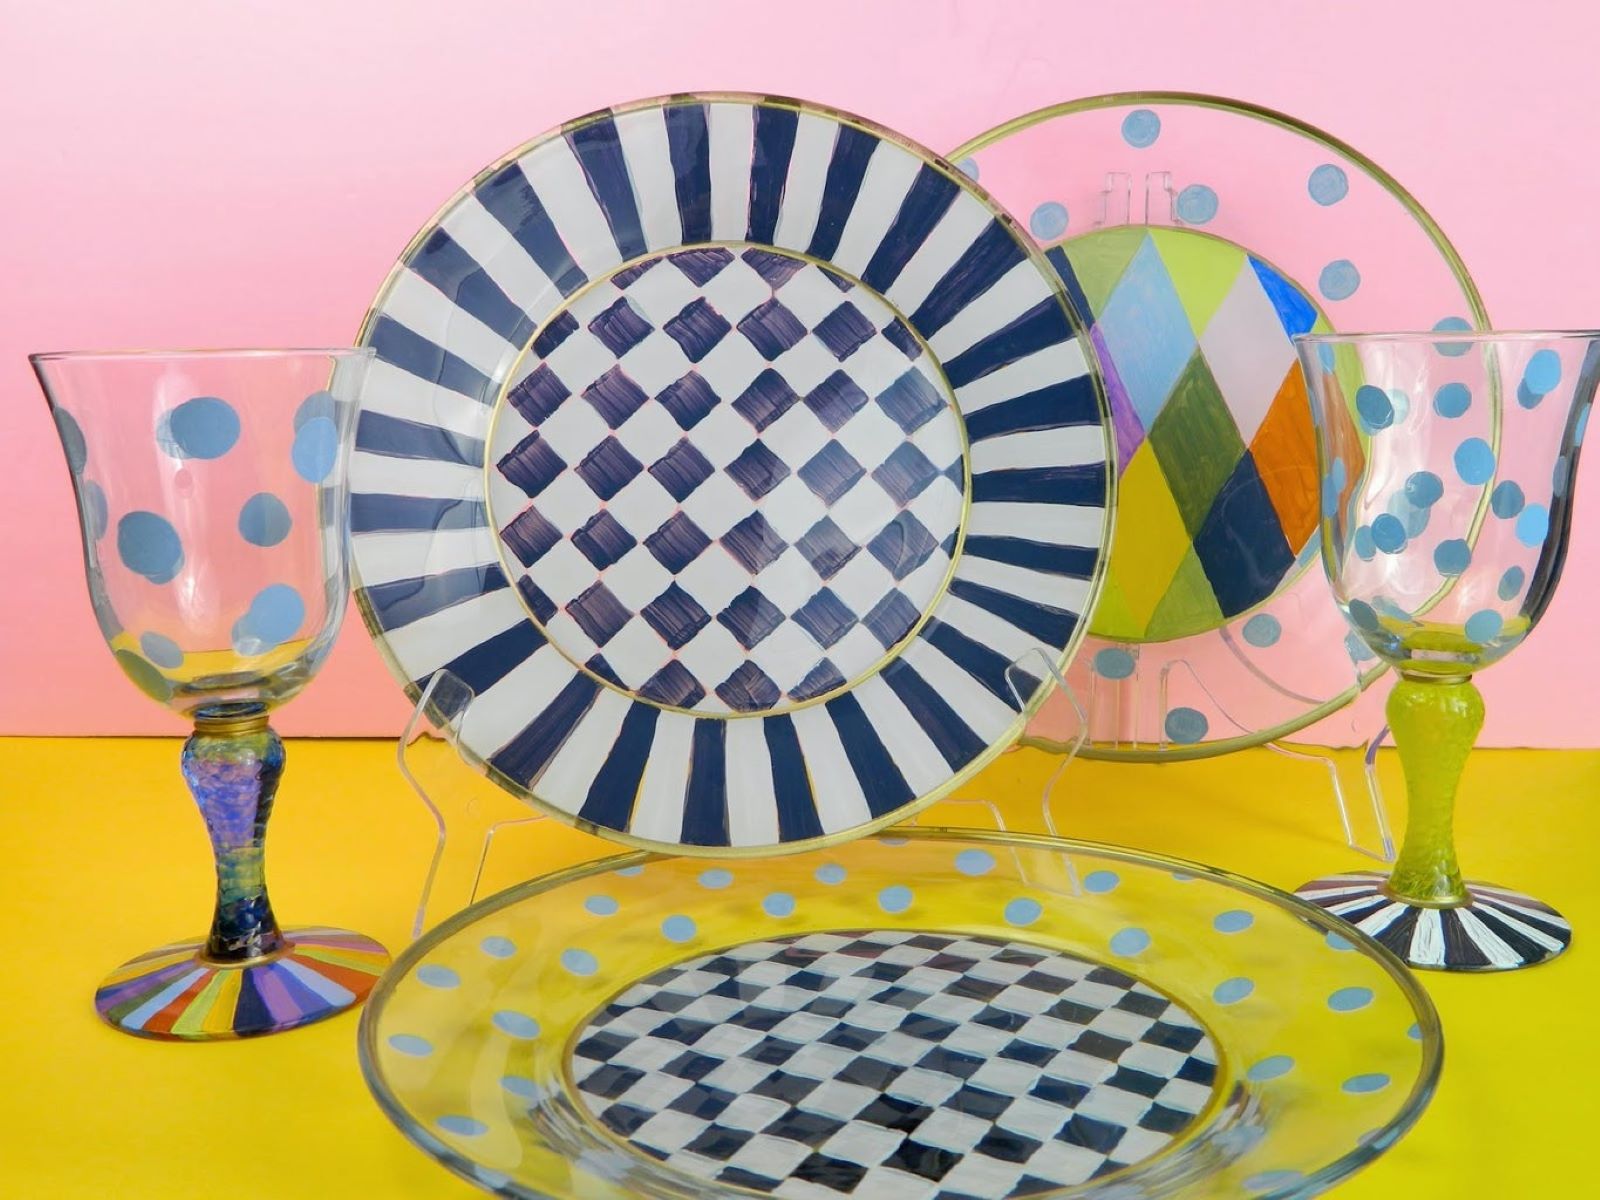
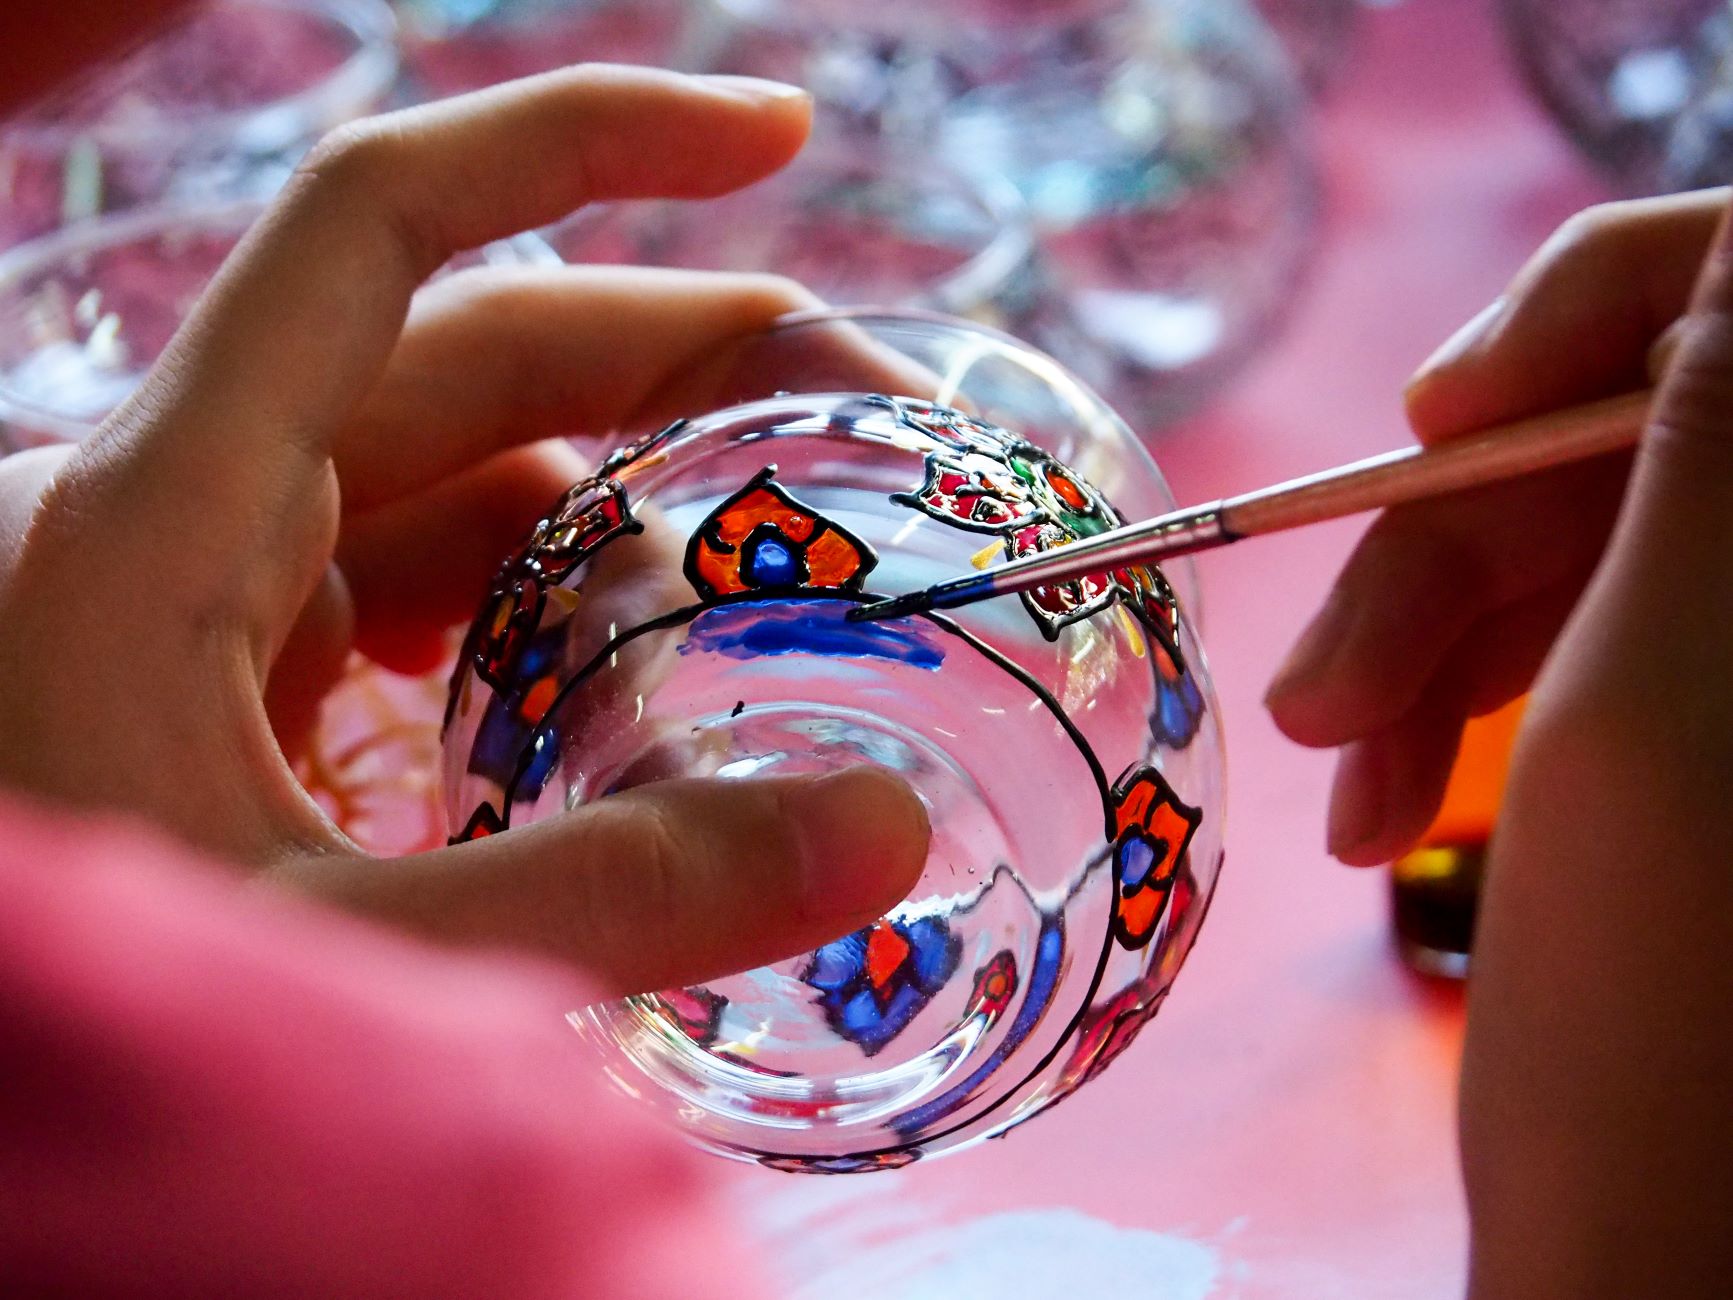
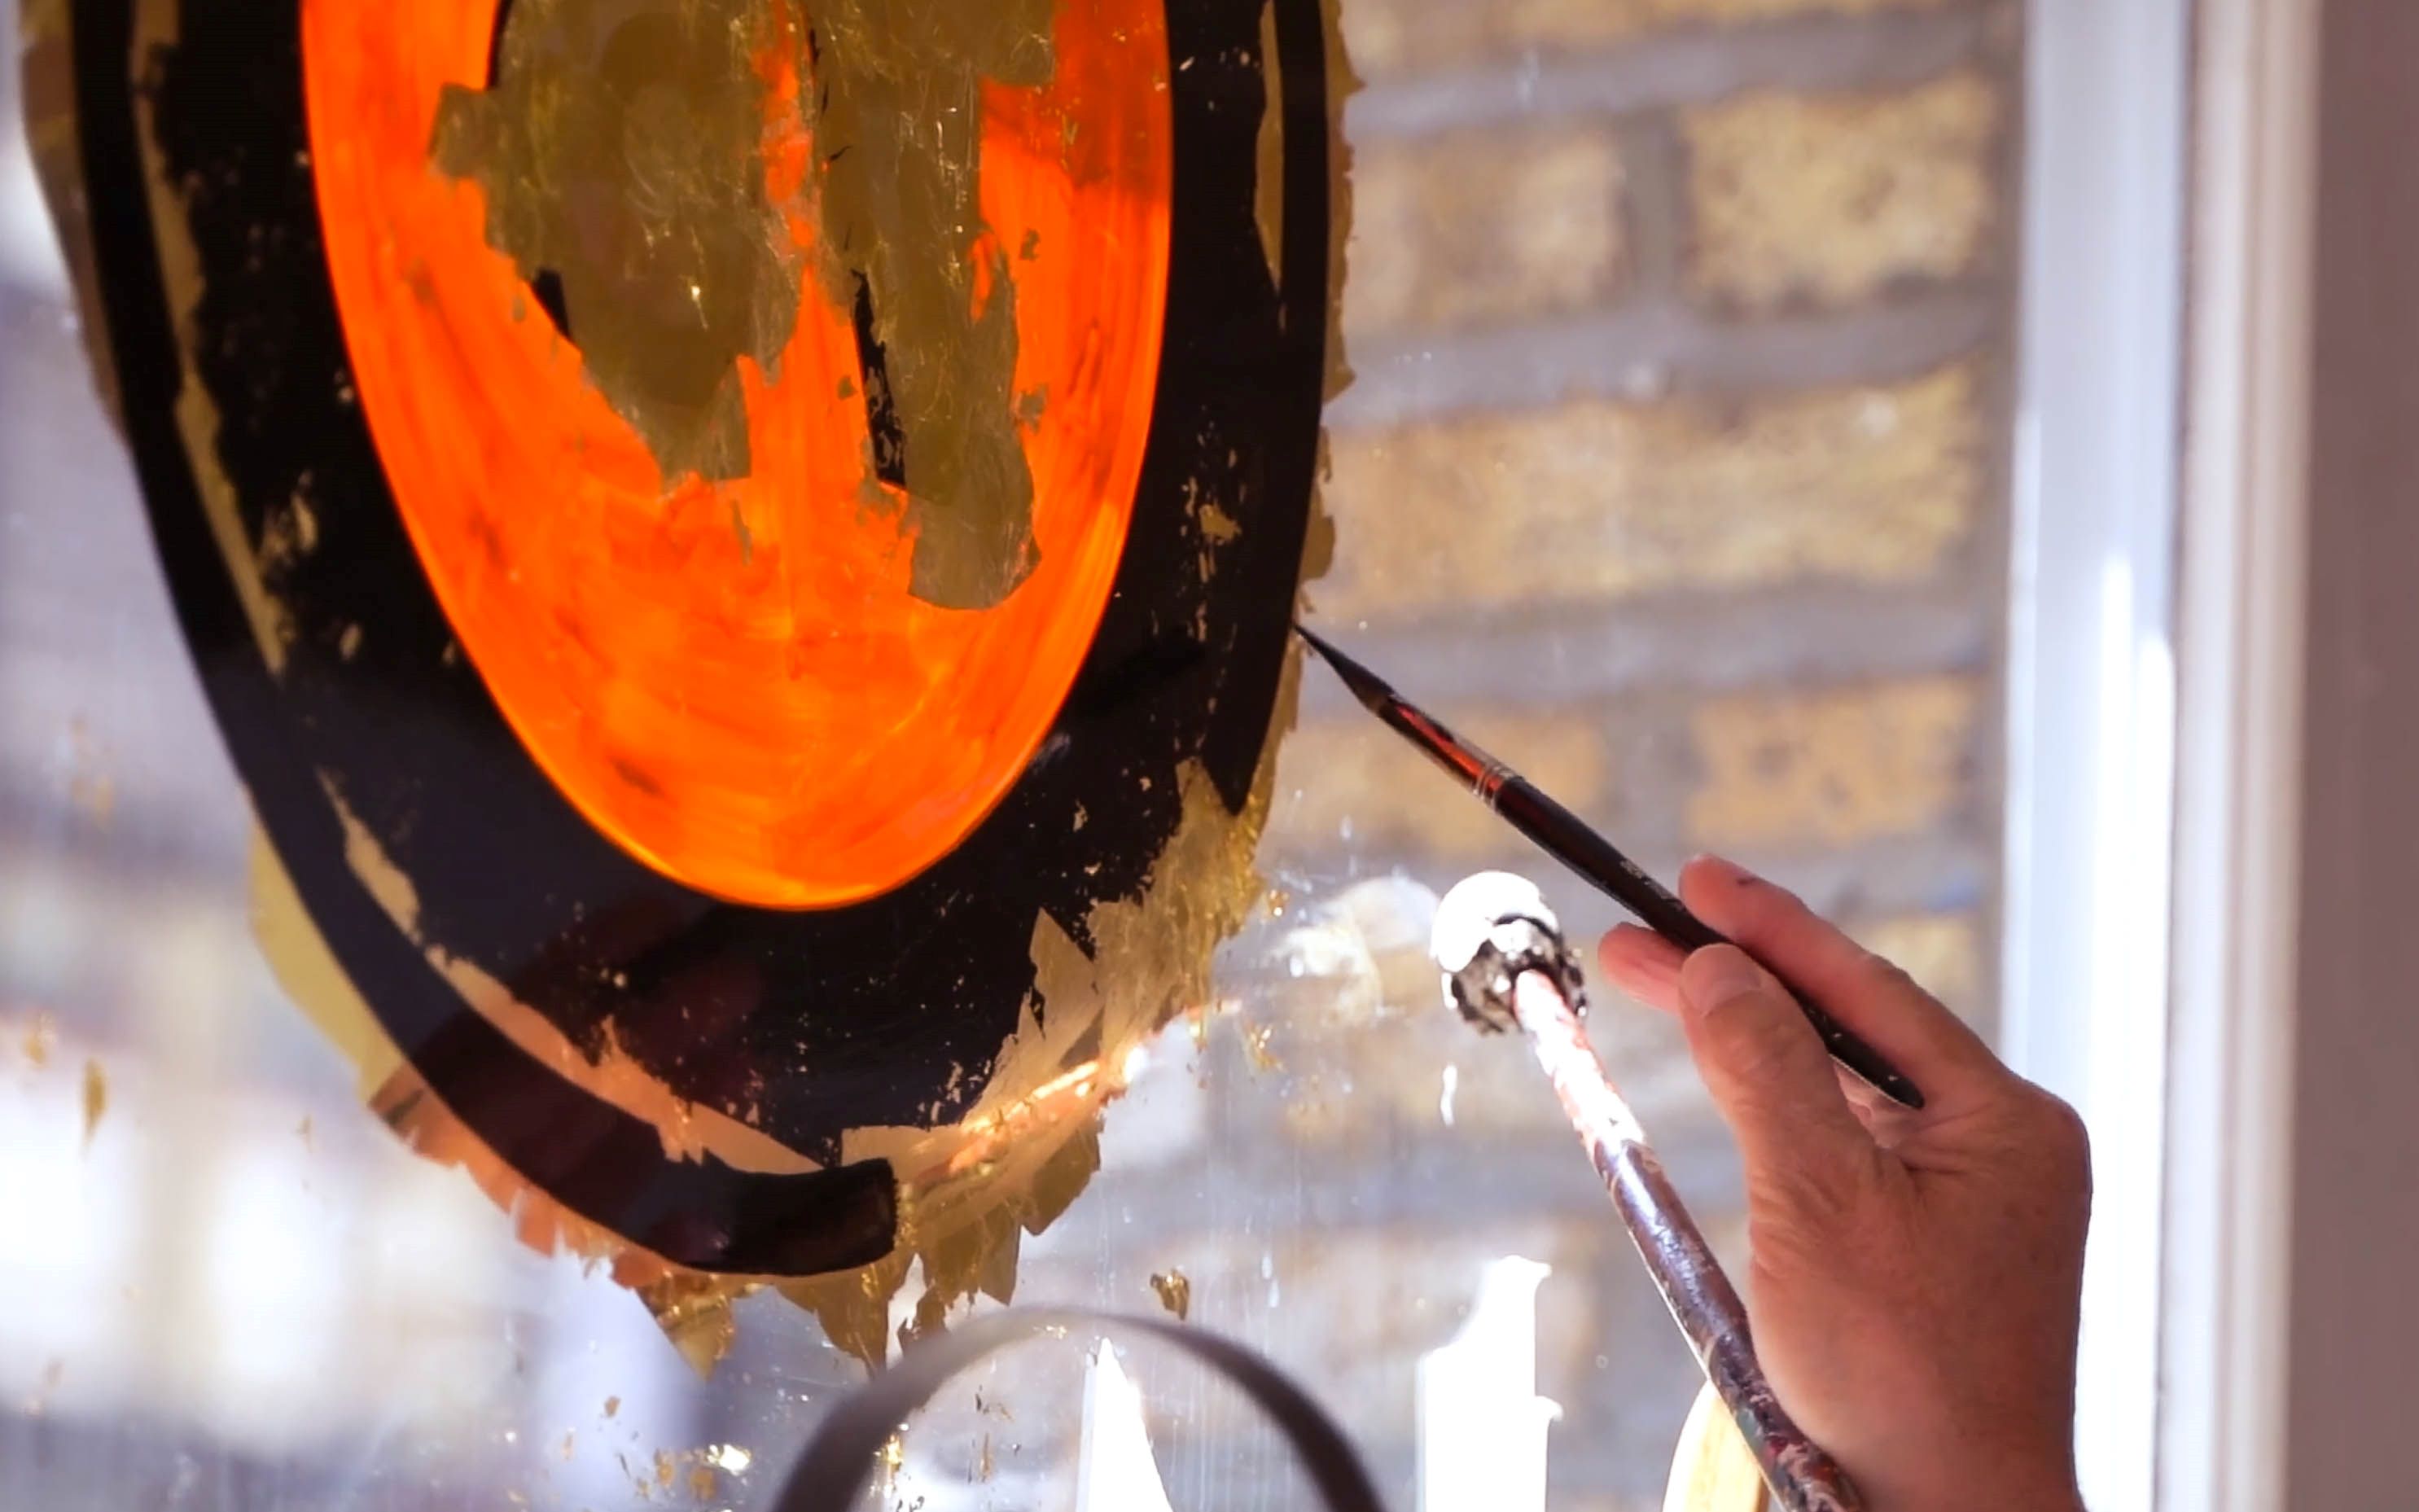
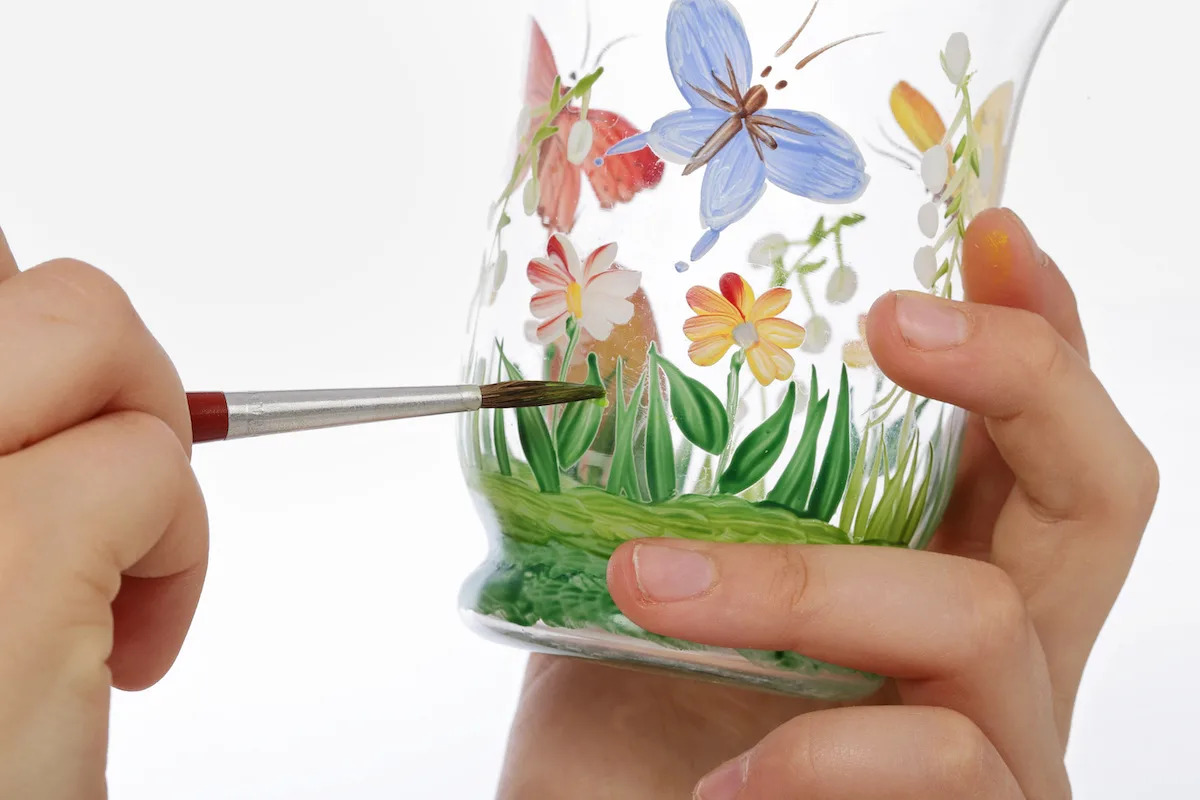
Adding Details and Designs
With the base coat serving as the canvas for your artistic expression, the stage is set to infuse your glass surface with captivating details and designs that reflect your unique style and creativity. Whether you're aiming for intricate patterns, lifelike motifs, or abstract compositions, the process of adding details and designs to your glass painting involves precision, creativity, and a keen eye for visual balance. Here's a comprehensive exploration of the steps involved in elevating your glass painting with captivating details and designs:
-
Sketching the Design: Before diving into the application of intricate details, consider sketching out your design on paper to visualize the composition and ensure a cohesive layout. This preliminary step allows you to experiment with different arrangements and motifs, refining your concept before transferring it onto the glass surface.
-
Selecting the Right Brushes: When adding fine details and intricate designs, opt for fine-tipped brushes that offer precision and control. From delicate linework to intricate flourishes, the right brushes can elevate the visual impact of your artwork and bring your designs to life with finesse.
-
Layering Techniques: Explore the art of layering to create depth and dimension in your glass painting. By strategically layering translucent and opaque paints, you can achieve a sense of depth, luminosity, and visual interest within your designs, adding a dynamic quality to your artwork.
-
Incorporating Textures: Experiment with texture mediums and techniques to introduce tactile elements into your glass painting. Whether it's creating raised textures with specialized glass gels or incorporating subtle embossed patterns, adding tactile dimensions can enrich the sensory experience of your artwork.
-
Embracing Negative Space: Embrace the concept of negative space to create striking contrasts and visual impact within your designs. By strategically leaving areas of the glass surface unpainted, you can leverage the transparency of the glass to enhance the overall composition, allowing light to interact with the artwork in captivating ways.
-
Exploring Color Harmonies: Delve into the realm of color theory to create harmonious palettes that evoke emotion and visual intrigue. Whether you're aiming for complementary contrasts or monochromatic elegance, thoughtful color selection can elevate the impact of your designs and imbue them with a sense of balance and cohesion.
-
Refining and Detailing: As you progress with adding details and designs, take the time to refine and fine-tune each element of your artwork. Pay attention to intricate details, refine edges, and ensure a cohesive visual flow throughout the composition, elevating the overall impact of your glass painting.
By infusing your glass painting with captivating details and designs, you can transform ordinary glass surfaces into captivating works of art that reflect your artistic vision and creativity. With a meticulous approach to detail and a passion for creative expression, the process of adding intricate designs becomes a journey of self-expression and artistic exploration, culminating in a stunning display of personalized artistry.
Sealing the Paint
Sealing the paint is a crucial step in the glass painting process, as it not only enhances the longevity of the artwork but also provides protection against wear, scratches, and environmental factors. By sealing the paint, you can ensure that your glass painting retains its vibrancy and visual impact for years to come. Here's a comprehensive overview of the essential considerations and techniques for effectively sealing your glass painting:
-
Selecting the Right Sealant: When it comes to sealing glass paintings, opt for a high-quality varnish or sealant specifically designed for use on glass surfaces. Look for products that offer UV protection to prevent fading and yellowing over time. Additionally, consider whether a glossy or matte finish aligns with the aesthetic of your artwork, as different sealants can impart varying levels of sheen to the finished piece.
-
Preparing the Surface: Before applying the sealant, ensure that the glass surface is clean and free from any dust, debris, or fingerprints. Use a lint-free cloth and a gentle glass cleaner to remove any surface impurities that could interfere with the sealant's adhesion.
-
Application Technique: When applying the sealant, use smooth, even strokes to create a uniform layer across the entire painted surface. Take care to avoid over-brushing, as excessive manipulation can lead to streaks or uneven coverage. If you're sealing a large glass panel or window, consider using a foam brush or a soft, lint-free cloth for efficient application.
-
Drying and Curing: Allow the sealant to dry and cure according to the manufacturer's recommendations. This typically involves allowing the painted glass to air-dry in a well-ventilated area for the specified duration. Avoid exposing the freshly sealed artwork to excessive moisture or handling during the curing process to ensure optimal results.
-
Inspecting the Finish: Once the sealant has dried, inspect the glass painting to ensure that the finish is uniform and free from any imperfections. Look for areas that may require additional touch-ups or refinements, and address them before the sealant fully cures.
-
Reapplying if Necessary: Depending on the specific sealant used and the intended level of protection, you may consider applying multiple coats of sealant to enhance durability and resilience. Follow the manufacturer's guidelines for reapplication intervals and techniques to achieve the desired level of protection.
By meticulously sealing your glass painting, you can safeguard your artistic creation against the rigors of daily use and environmental exposure, ensuring that it remains a cherished centerpiece in your decor for years to come. With the application of a high-quality sealant, your glass painting will not only retain its visual allure but also stand as a testament to your creative expression and artistic dedication.
Tips and Tricks for Painting Glass
Mastering the art of glass painting involves a blend of technique, creativity, and attention to detail. Whether you're a novice exploring the world of glass artistry or a seasoned painter seeking to refine your skills, incorporating the following tips and tricks into your glass painting endeavors can elevate the quality of your work and enhance your overall painting experience.
-
Practice on Test Surfaces: Before embarking on a major glass painting project, consider practicing your techniques on small test surfaces such as spare glass pieces or inexpensive glassware. This allows you to familiarize yourself with the behavior of the paints, brushes, and surface preparation methods, helping you refine your approach before tackling larger, more intricate designs.
-
Utilize Stencil Designs: Stencils can be invaluable tools for achieving precise and intricate patterns on glass surfaces. Whether you're aiming for geometric shapes, ornate motifs, or repetitive designs, stencils provide a consistent framework for creating visually striking compositions with ease and accuracy.
-
Experiment with Different Brushes: Explore a variety of brush types and sizes to discover which ones best suit your painting style and the intricacy of your designs. Fine-tipped brushes are ideal for detailed work, while broader brushes can facilitate efficient coverage for larger areas.
-
Embrace Layering and Blending: Experiment with layering and blending techniques to create depth and dimension in your glass paintings. By strategically layering translucent and opaque colors, you can achieve nuanced shading, highlights, and color transitions that add richness and visual interest to your artwork.
-
Incorporate Metallic Accents: Introducing metallic paints or accents can infuse your glass paintings with a touch of elegance and sophistication. Whether it's adding metallic highlights to floral motifs or creating gilded borders, metallic elements can elevate the overall aesthetic appeal of your artwork.
-
Consider Reverse Painting: Reverse painting involves applying details and designs on the reverse side of the glass, creating a sense of depth and protection for the artwork. This technique allows for a unique perspective, especially when viewed against a contrasting background or light source.
-
Maintain a Clean Workspace: Keeping your workspace organized and free from clutter can contribute to a focused and enjoyable painting experience. Clearing away unnecessary distractions and maintaining a tidy environment can enhance your concentration and allow for seamless execution of intricate designs.
-
Seek Inspiration from Nature and Art: Draw inspiration from nature, art, and diverse cultural motifs to infuse your glass paintings with unique themes and visual narratives. Whether it's emulating the delicate beauty of botanical elements or drawing from historical art styles, inspiration can fuel your creativity and enrich your artistic expressions.
By integrating these tips and tricks into your glass painting practice, you can expand your artistic repertoire, refine your techniques, and unlock the full potential of glass as a captivating medium for creative expression. Whether you're aiming to adorn your living space with personalized glass art or delve into the realm of professional glass painting, these insights can serve as valuable companions on your artistic journey.
When painting glass, make sure to clean the surface thoroughly with rubbing alcohol to remove any oils or dirt. This will help the paint adhere better and prevent peeling.
Read more: How To Bake Painted Glass
Conclusion
In conclusion, the art of glass painting offers a captivating avenue for self-expression, creativity, and personalized home decor. By mastering the techniques of selecting the right materials, preparing the glass surface, applying the base coat, adding intricate details and designs, and sealing the paint, individuals can embark on a fulfilling journey of transforming ordinary glass surfaces into stunning works of art. The fusion of artistic vision, technical skill, and a touch of creativity culminates in glass paintings that not only adorn living spaces but also serve as testaments to the artist's dedication and passion for creative expression.
As individuals delve into the realm of glass painting, they are invited to explore a myriad of possibilities, from vibrant floral motifs to abstract compositions, each reflecting the artist's unique style and aesthetic sensibilities. The process of painting glass transcends mere decoration, evolving into a form of artistic storytelling that breathes new life into everyday objects and spaces. Whether it's reviving old glassware, adorning windows with colorful designs, or creating custom gifts, the art of glass painting empowers individuals to infuse their surroundings with personalized artistry and visual allure.
Furthermore, the journey of glass painting extends beyond the act of creation, encompassing a sense of mindfulness, focus, and artistic growth. As artists meticulously prepare surfaces, blend colors, and add intricate details, they engage in a meditative process that fosters a deeper connection with their creative instincts. The act of painting on glass becomes a harmonious interplay of technical precision and imaginative expression, offering a sanctuary for artistic exploration and self-discovery.
Ultimately, the allure of glass painting lies in its ability to transcend the boundaries of traditional art forms, inviting individuals to reimagine the potential of glass as a canvas for their creative visions. Whether it's the play of light through translucent colors, the tactile textures of raised designs, or the interplay of vibrant hues, glass paintings captivate the senses and evoke a sense of wonder and delight. As artists venture into this captivating realm, they not only adorn their surroundings with personalized art but also embark on a journey of artistic fulfillment and self-expression.
In essence, the art of glass painting stands as a testament to the enduring allure of creativity, offering individuals a medium through which they can infuse their living spaces with beauty, individuality, and the timeless charm of handcrafted art. With each brushstroke and carefully curated design, glass painters weave a narrative of artistic passion and imaginative flair, leaving an indelible mark on the surfaces they adorn and the hearts they inspire.
Frequently Asked Questions about How To Paint Glass
Was this page helpful?
At Storables.com, we guarantee accurate and reliable information. Our content, validated by Expert Board Contributors, is crafted following stringent Editorial Policies. We're committed to providing you with well-researched, expert-backed insights for all your informational needs.
0 thoughts on “How To Paint Glass”