Home>Furniture & Design>Interior Design Trends>How To Take Out A Sliding Glass Door

Interior Design Trends
How To Take Out A Sliding Glass Door
Modified: August 27, 2024
Learn the latest interior design trends for taking out a sliding glass door. Find expert tips and ideas for a stylish home transformation.
(Many of the links in this article redirect to a specific reviewed product. Your purchase of these products through affiliate links helps to generate commission for Storables.com, at no extra cost. Learn more)
Introduction
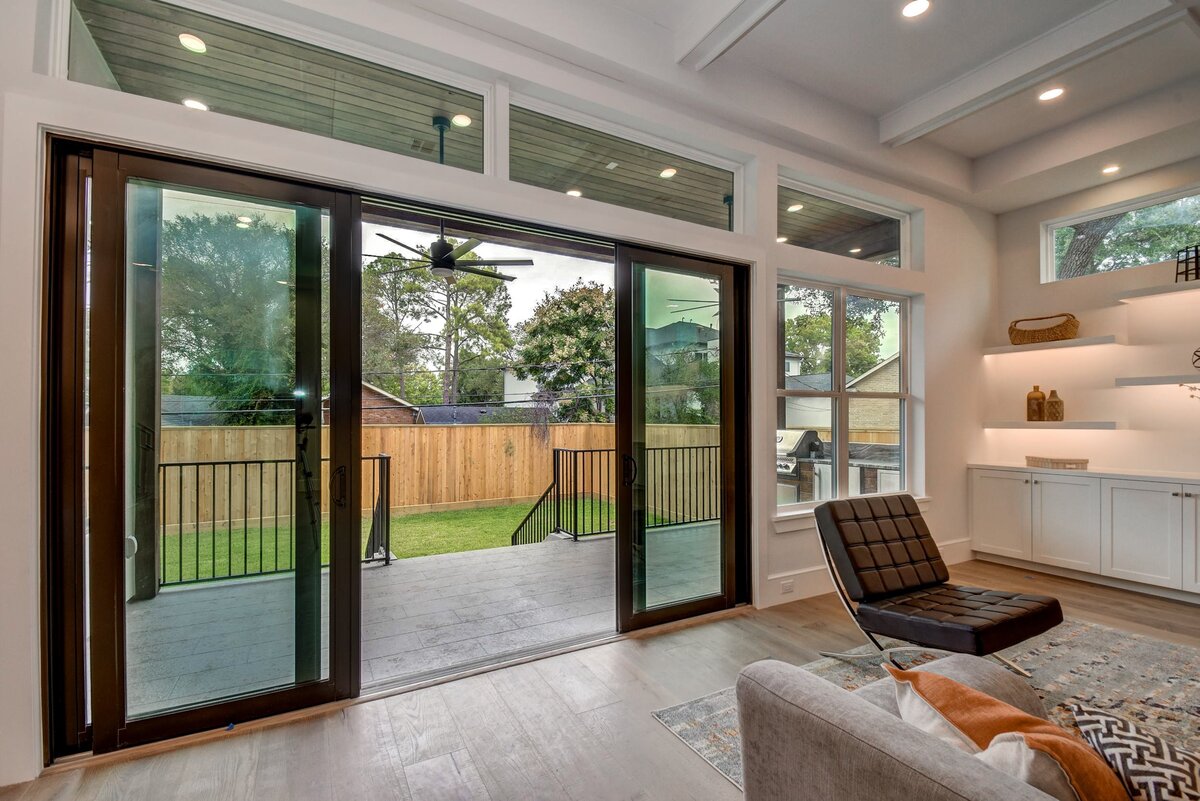
Replacing a sliding glass door can breathe new life into your living space, enhancing both its aesthetic appeal and functionality. Whether you're upgrading to a more energy-efficient model or simply seeking a fresh look, this project can significantly transform your home. However, before diving into the process, it's essential to understand the steps involved in taking out a sliding glass door.
By following a systematic approach and using the right tools, you can successfully remove the old door and prepare the opening for a new one. This guide will walk you through the process, from gathering the necessary tools and materials to installing the new sliding glass door. With careful attention to detail and a methodical approach, you can tackle this project with confidence and achieve a professional-looking result.
Taking out a sliding glass door involves several key steps, each of which plays a crucial role in the overall process. From removing the door panels to cleaning and preparing the opening, each stage requires precision and care to ensure a seamless transition. Additionally, installing the new door and making any necessary adjustments are vital to achieving a secure and functional final product.
As you embark on this home improvement journey, it's important to approach the task with patience and a willingness to learn. While the process may seem daunting at first, breaking it down into manageable steps can make it more approachable. By the end of this guide, you'll have the knowledge and confidence to take out a sliding glass door and usher in a fresh, updated look for your home. So, let's gather our tools and materials and begin this transformative project together.
Key Takeaways:
- Removing and replacing a sliding glass door can transform your home’s look and functionality. With the right tools and careful steps, you can achieve a professional result and bring new life to your living space.
- By following a systematic approach and paying attention to detail, you can successfully take out an old sliding glass door and install a new one. This project can enhance your home’s appeal and create a fresh, updated atmosphere.
Read more: How Much Wind Can Sliding Glass Doors Take
Step 1: Gather the necessary tools and materials
Before embarking on the task of taking out a sliding glass door, it's crucial to gather all the essential tools and materials to ensure a smooth and efficient process. Here's a comprehensive list of what you'll need:
Tools:
- Screwdriver Set: A set of screwdrivers, including both flathead and Phillips head, will be indispensable for removing screws and hardware from the door frame.
- Pry Bar: This versatile tool will aid in gently prying the door frame and panels away from the surrounding structure.
- Utility Knife: Use this to carefully cut through any caulking or sealant securing the door frame in place.
- Hammer: A hammer will come in handy for tapping and nudging stubborn components during the removal process.
- Measuring Tape: Accurate measurements are crucial when preparing for the installation of the new door, making a measuring tape an essential tool.
- Safety Glasses and Gloves: Prioritize safety by wearing protective glasses and gloves to shield your eyes and hands from debris and sharp edges.
Materials:
- Replacement Door: If you're planning to install a new sliding glass door, ensure that you have the replacement door on hand before removing the old one.
- Sealant/Caulk: Depending on the condition of the surrounding structure, you may need to reseal the opening after removing the old door. Having a high-quality sealant or caulk at the ready is essential.
- Shims: These thin, wedge-shaped pieces of wood or plastic are invaluable for adjusting and leveling the new door during installation.
- Screws and Fasteners: Keep an assortment of screws and fasteners on hand to secure the new door in place.
- Cleaning Supplies: Prepare a bucket of soapy water, a sponge, and a rag for cleaning the opening and removing any debris or residue.
By ensuring that you have all the necessary tools and materials at your disposal, you'll be well-equipped to tackle the task of taking out a sliding glass door with confidence and efficiency. With this comprehensive toolkit, you're ready to move on to the next step of the process: removing the sliding door panel.
Step 2: Remove the sliding door panel
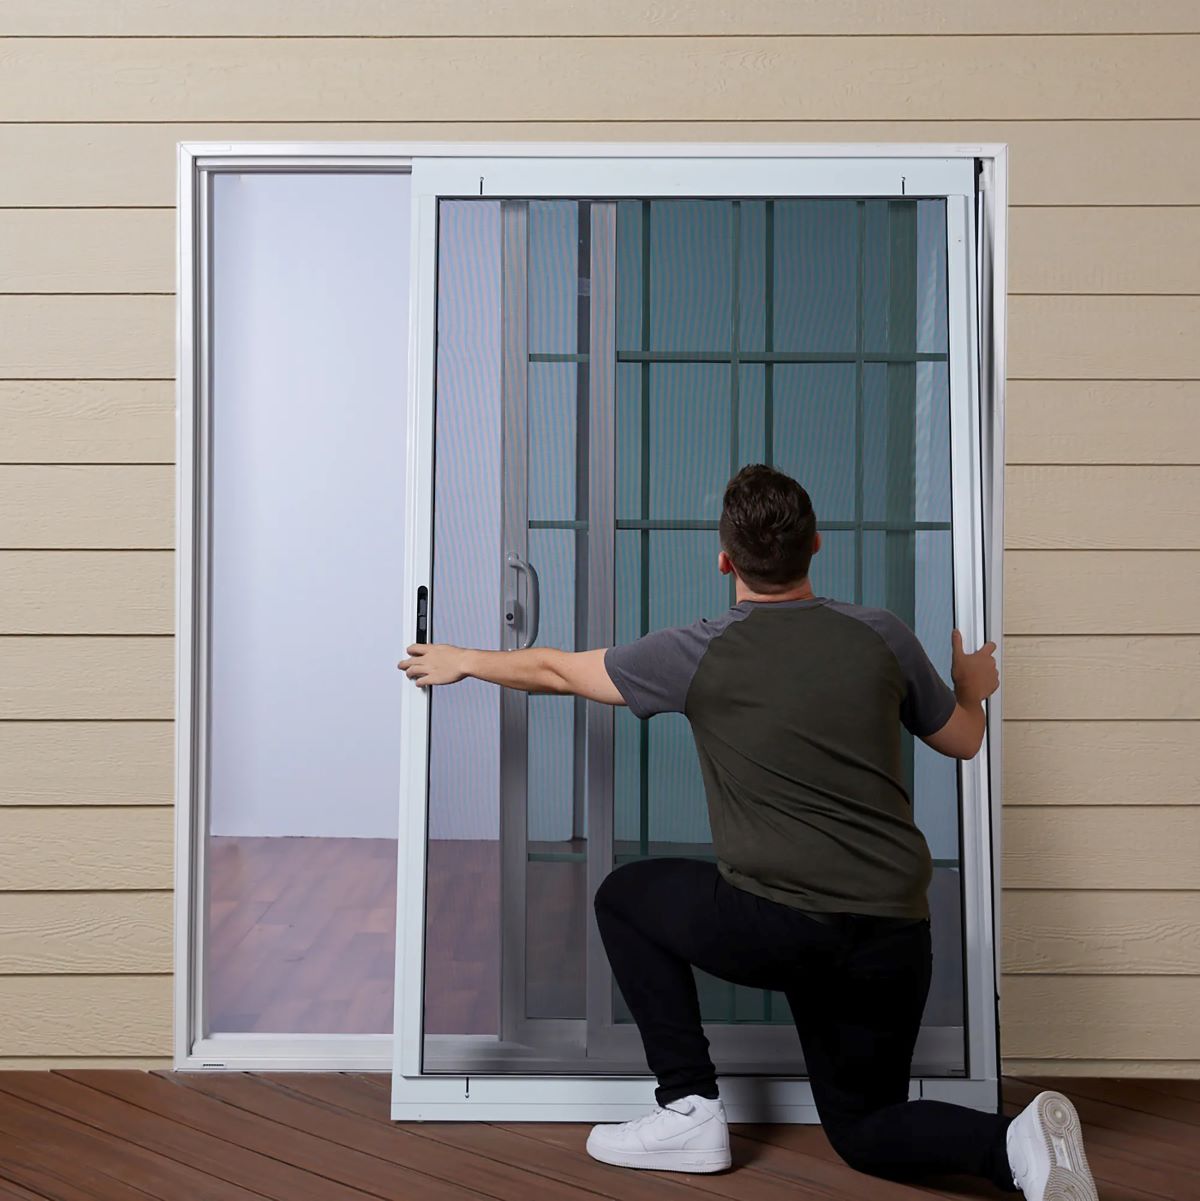
Removing the sliding door panel is a crucial step in the process of taking out a sliding glass door. This part of the door is typically the movable section that slides along the track, and it requires careful attention to detail to ensure a smooth extraction.
To begin, carefully examine the sliding door to identify any screws or fasteners securing it in place. Using the appropriate screwdriver from your toolkit, carefully remove these screws, taking care to keep them organized for reassembly later. Once the screws are removed, gently lift the door panel upward to disengage it from the track. Depending on the design of the door, you may need to tilt the bottom of the panel towards you to release it from the track fully.
It's important to note that sliding door panels can be heavy and cumbersome, so enlisting the help of a partner to assist with lifting and maneuvering the panel can make the process safer and more manageable. Additionally, placing a soft, protective barrier on the floor where the panel will be set down can prevent damage to the door and the surrounding area.
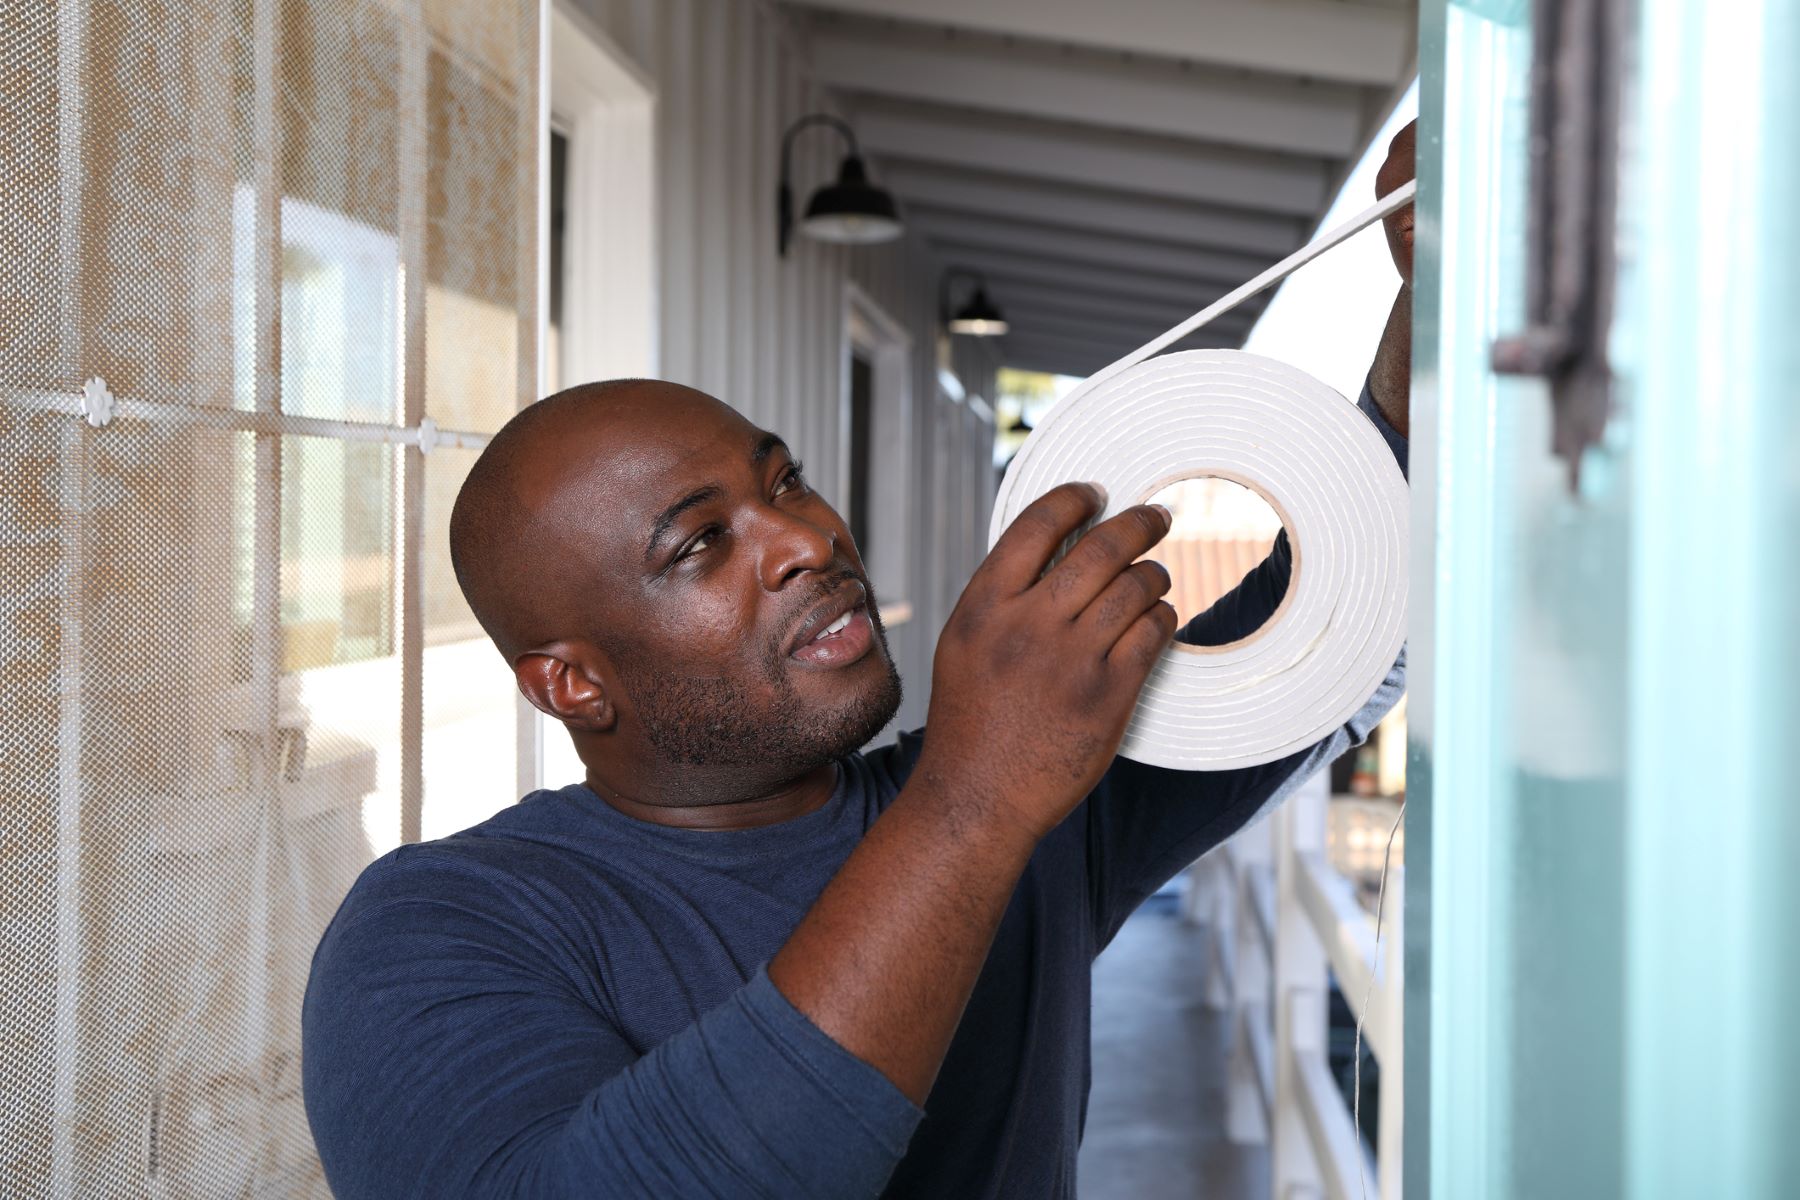
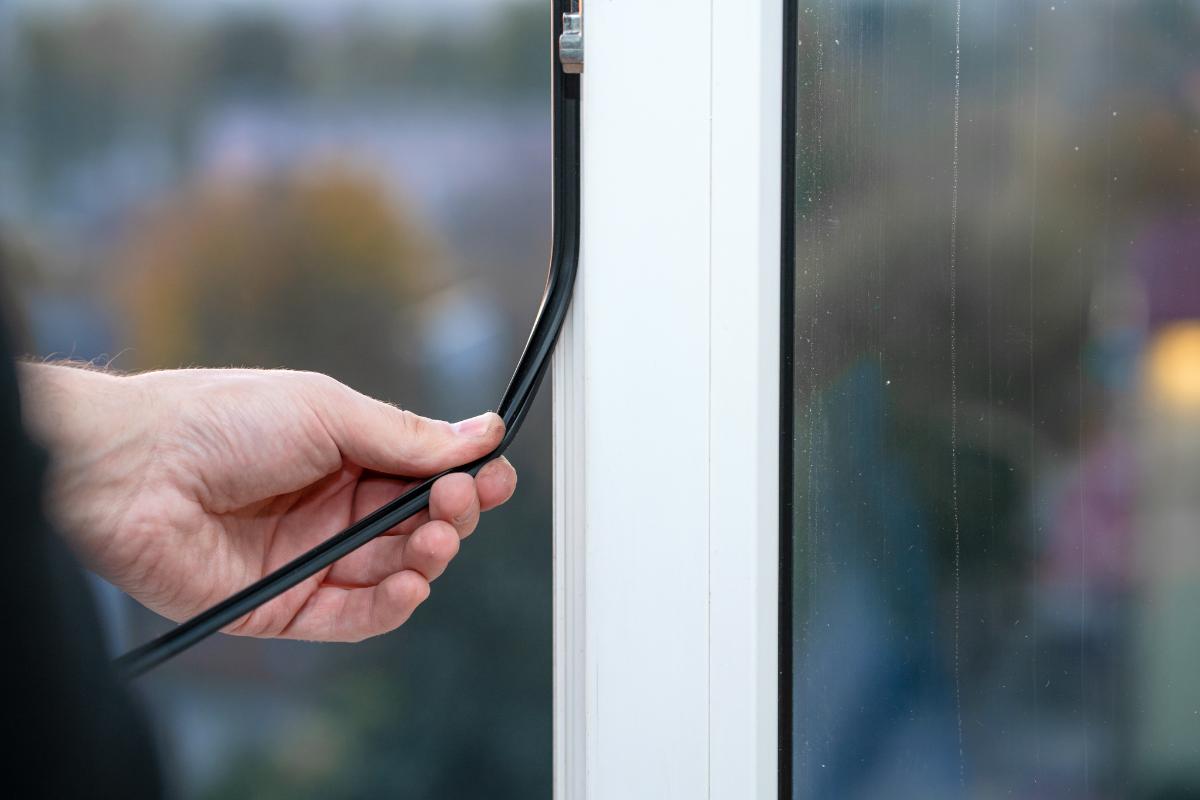
As you remove the sliding door panel, be mindful of any weatherstripping or seals that may be attached to the edges. Take care to preserve these components, as they may be reusable when installing the new door. If the weatherstripping is worn or damaged, this is an opportune time to make a note of it for potential replacement.
Once the sliding door panel has been successfully removed, set it aside in a safe, designated area, taking care to avoid any accidental damage. With the panel out of the way, you've completed a significant portion of the removal process, setting the stage for the next step: removing the stationary panel.
By approaching the removal of the sliding door panel with patience and attention to detail, you can ensure that this critical phase of the project is executed smoothly and safely. With the panel successfully removed, you're one step closer to completing the process of taking out a sliding glass door and preparing for the installation of a new one.
Step 3: Remove the stationary panel
After successfully removing the sliding door panel, the next crucial step in taking out a sliding glass door is to address the stationary panel. While the stationary panel does not move along the track like the sliding panel, it is an integral part of the door assembly and requires careful attention during the removal process.
To begin, carefully examine the stationary panel to identify any screws, fasteners, or brackets securing it in place. Using the appropriate screwdriver from your toolkit, carefully remove these fasteners, ensuring that they are safely set aside for reassembly later. It's important to approach this step methodically, taking note of the specific locations of the fasteners to facilitate a smooth reinstallation process.
Once the fasteners are removed, gently lift the stationary panel upward to disengage it from the track or frame. Depending on the design of the door, you may need to tilt the bottom of the panel towards you to release it from the track fully. As with the sliding panel, the stationary panel may be heavy and unwieldy, so exercising caution and enlisting the help of a partner can make the removal process safer and more manageable.
As you lift the stationary panel, be mindful of any weatherstripping, seals, or insulation attached to the edges. Take care to preserve these components, as they may be reusable when installing the new door. Additionally, inspect the condition of the weatherstripping and seals, noting any wear or damage for potential replacement.
Once the stationary panel has been successfully removed, set it aside in a safe, designated area, taking care to avoid any accidental damage. With both the sliding and stationary panels out of the way, the opening is now clear, setting the stage for the next phase of the project: cleaning and preparing the opening for the installation of the new sliding glass door.
Approaching the removal of the stationary panel with precision and attention to detail ensures that this critical phase of the project is executed smoothly and safely. With the stationary panel successfully removed, you're one step closer to completing the process of taking out a sliding glass door and preparing for the installation of a new one.
Step 4: Clean and prepare the opening
With the sliding and stationary panels successfully removed, the next crucial step in the process of taking out a sliding glass door is to thoroughly clean and prepare the opening for the installation of the new door. This phase is essential for ensuring a smooth and secure fit for the replacement door, as well as addressing any underlying issues that may impact its performance.
Begin by inspecting the opening for any debris, dust, or remnants of the old door components. Use a vacuum cleaner or a broom to carefully remove any loose particles and dirt from the tracks, frame, and surrounding areas. Pay close attention to the corners and crevices, as these areas can accumulate debris that may hinder the proper seating of the new door.
Once the visible debris has been cleared, it's time to address any residual adhesive, caulking, or sealant that may remain from the previous installation. A utility knife or a putty knife can be used to gently scrape away any old sealant, taking care not to damage the surrounding surfaces. Additionally, a solvent or adhesive remover can help dissolve stubborn residues, facilitating a clean and smooth surface for the new door.
After removing the old sealant, take the opportunity to inspect the condition of the surrounding structure, including the frame, tracks, and sill. Look for signs of water damage, rot, or deterioration, as addressing these issues before installing the new door is crucial for long-term performance and durability. If any structural concerns are identified, it's advisable to consult a professional to assess and address the underlying issues.
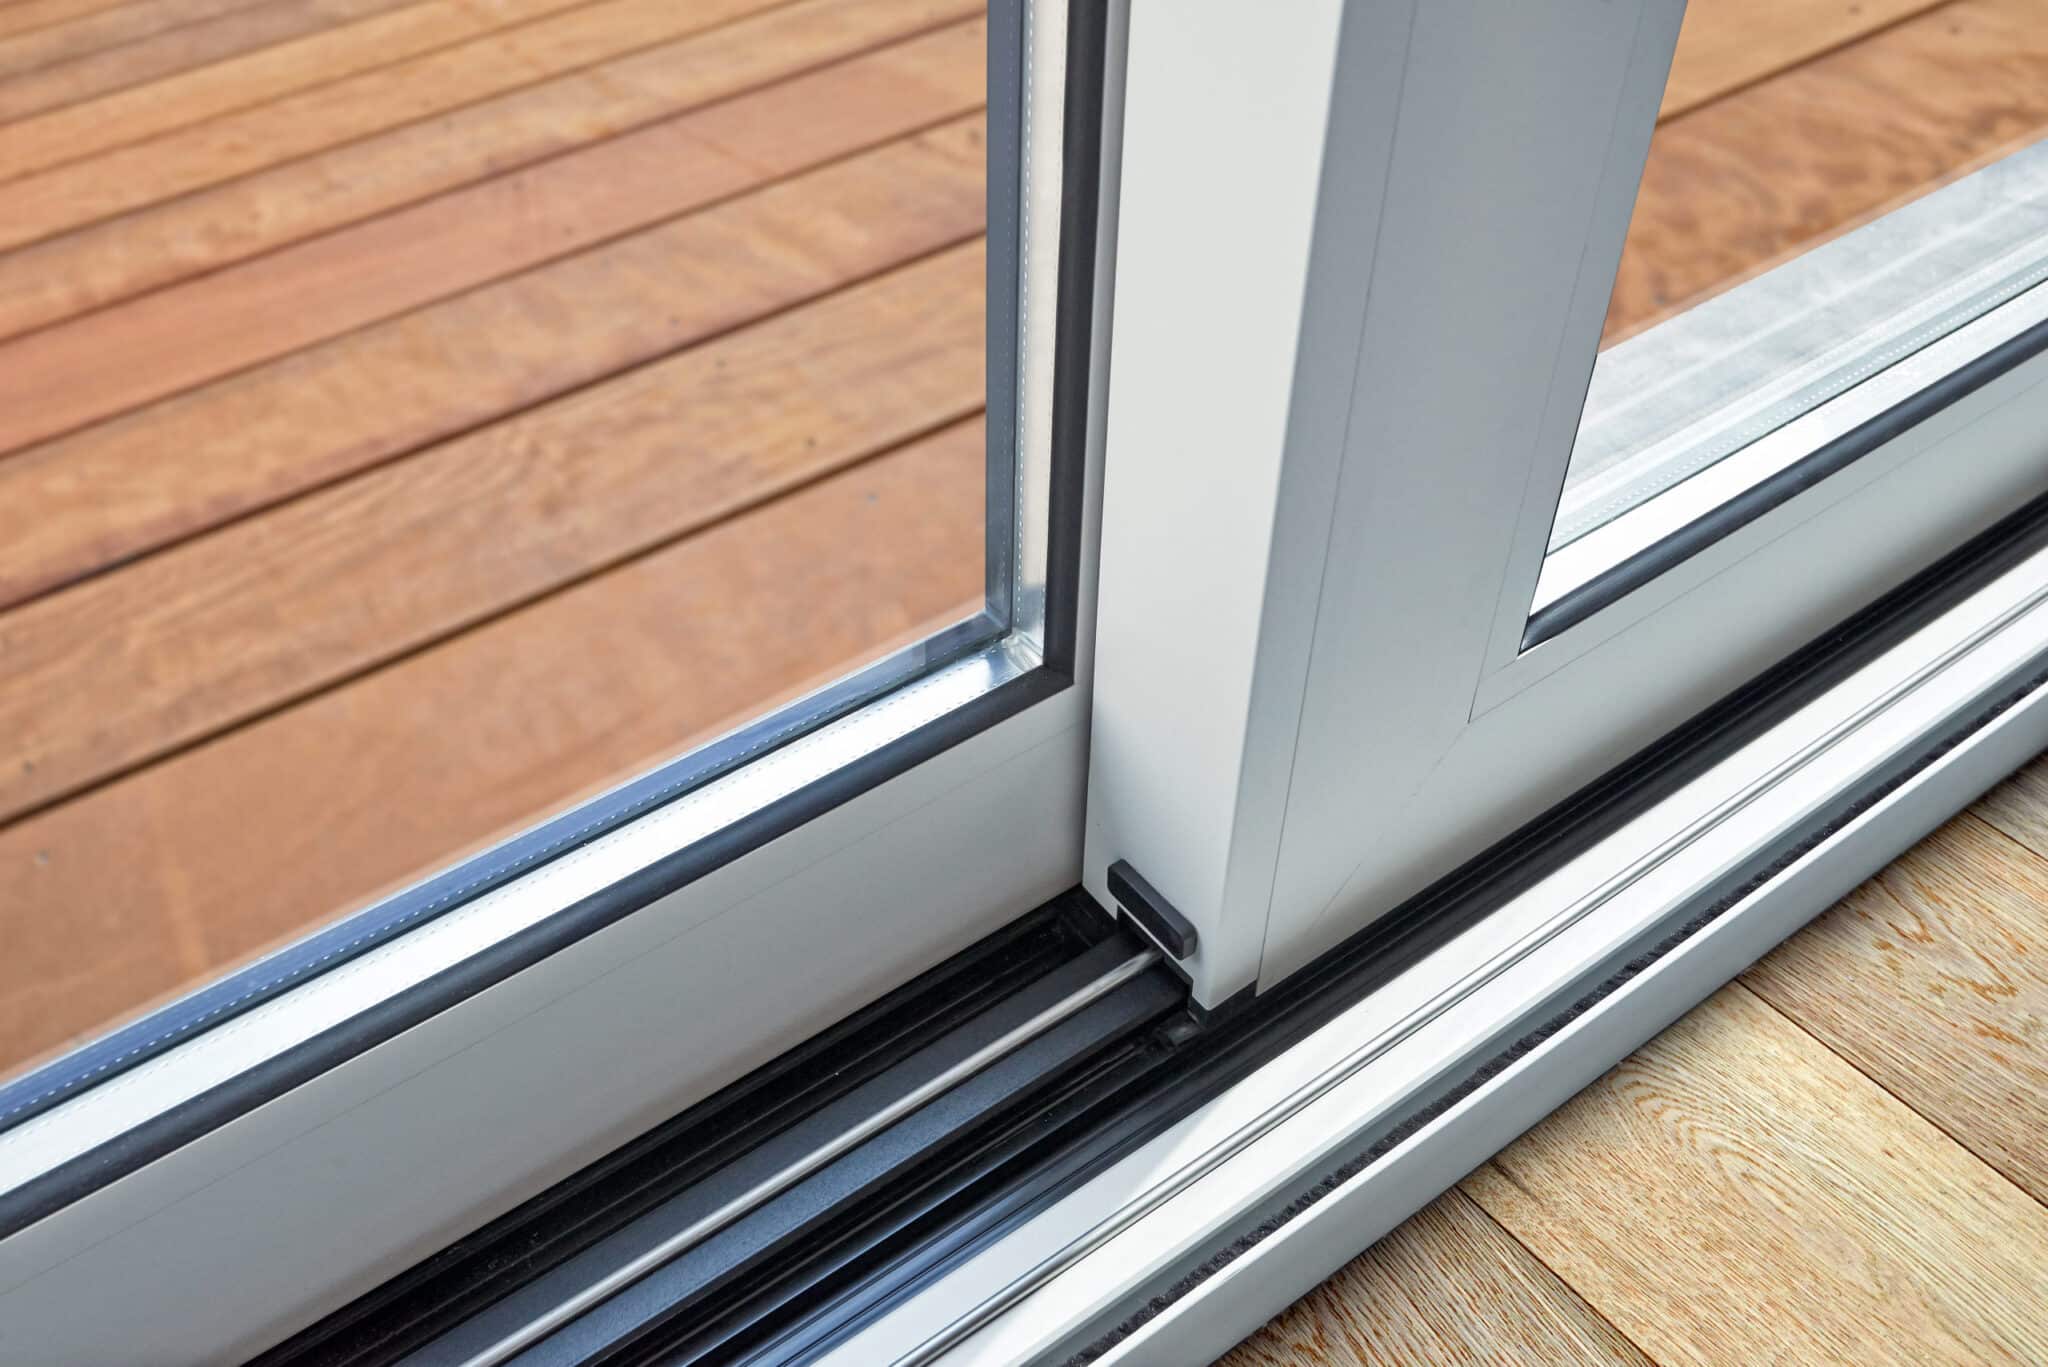
With the opening thoroughly cleaned and any underlying issues addressed, it's time to prepare the area for the installation of the new sliding glass door. Begin by ensuring that the opening is level and square, as these factors are essential for the proper operation and sealing of the replacement door. Shims can be used to adjust and level the opening as needed, providing a stable and even base for the new door.
Finally, take a moment to review the manufacturer's instructions for the new door, familiarizing yourself with the specific requirements for installation. By carefully cleaning and preparing the opening, you're laying the groundwork for a successful and seamless installation, setting the stage for the next phase of the project: installing the new sliding glass door.
Approaching the cleaning and preparation of the opening with thoroughness and attention to detail ensures that the installation of the new door will proceed smoothly and result in a secure and professional-looking final product. With the opening cleaned and prepared, you're ready to move on to the next step and bring your vision of a refreshed and updated living space one step closer to reality.
Before removing a sliding glass door, make sure to secure the door in place to prevent it from falling. Then, carefully lift the door up and tilt it outward to remove it from the track.
Step 5: Install the new sliding glass door
With the opening thoroughly cleaned and prepared, the time has come to embark on the exciting phase of installing the new sliding glass door. This pivotal step in the process represents the culmination of careful preparation and marks the transition towards revitalizing your living space with a fresh and updated look.
Begin by carefully positioning the new door within the opening, ensuring that it is aligned and seated securely. Enlist the assistance of a partner to help support the door during this process, as sliding glass doors can be heavy and unwieldy. Take precise measurements to confirm that the door is centered within the opening and that there is an even gap on all sides.
Next, carefully insert shims between the door frame and the opening to ensure that the door is level and plumb. Shims play a crucial role in stabilizing the door and compensating for any irregularities in the opening. Use a level to verify that the door is perfectly vertical and adjust the shims as needed to achieve a secure and balanced fit.
Once the door is properly positioned and leveled, it's time to secure it in place. Follow the manufacturer's guidelines for fastening the door to the surrounding structure, using the appropriate screws and fasteners. Pay close attention to the recommended placement of screws and ensure that they are driven in securely to provide a stable and reliable attachment.
After securing the door in place, carefully inspect the operation of the sliding mechanism to ensure that it moves smoothly along the track. Test the door for proper alignment and functionality, making any necessary adjustments to guarantee a seamless and effortless operation.
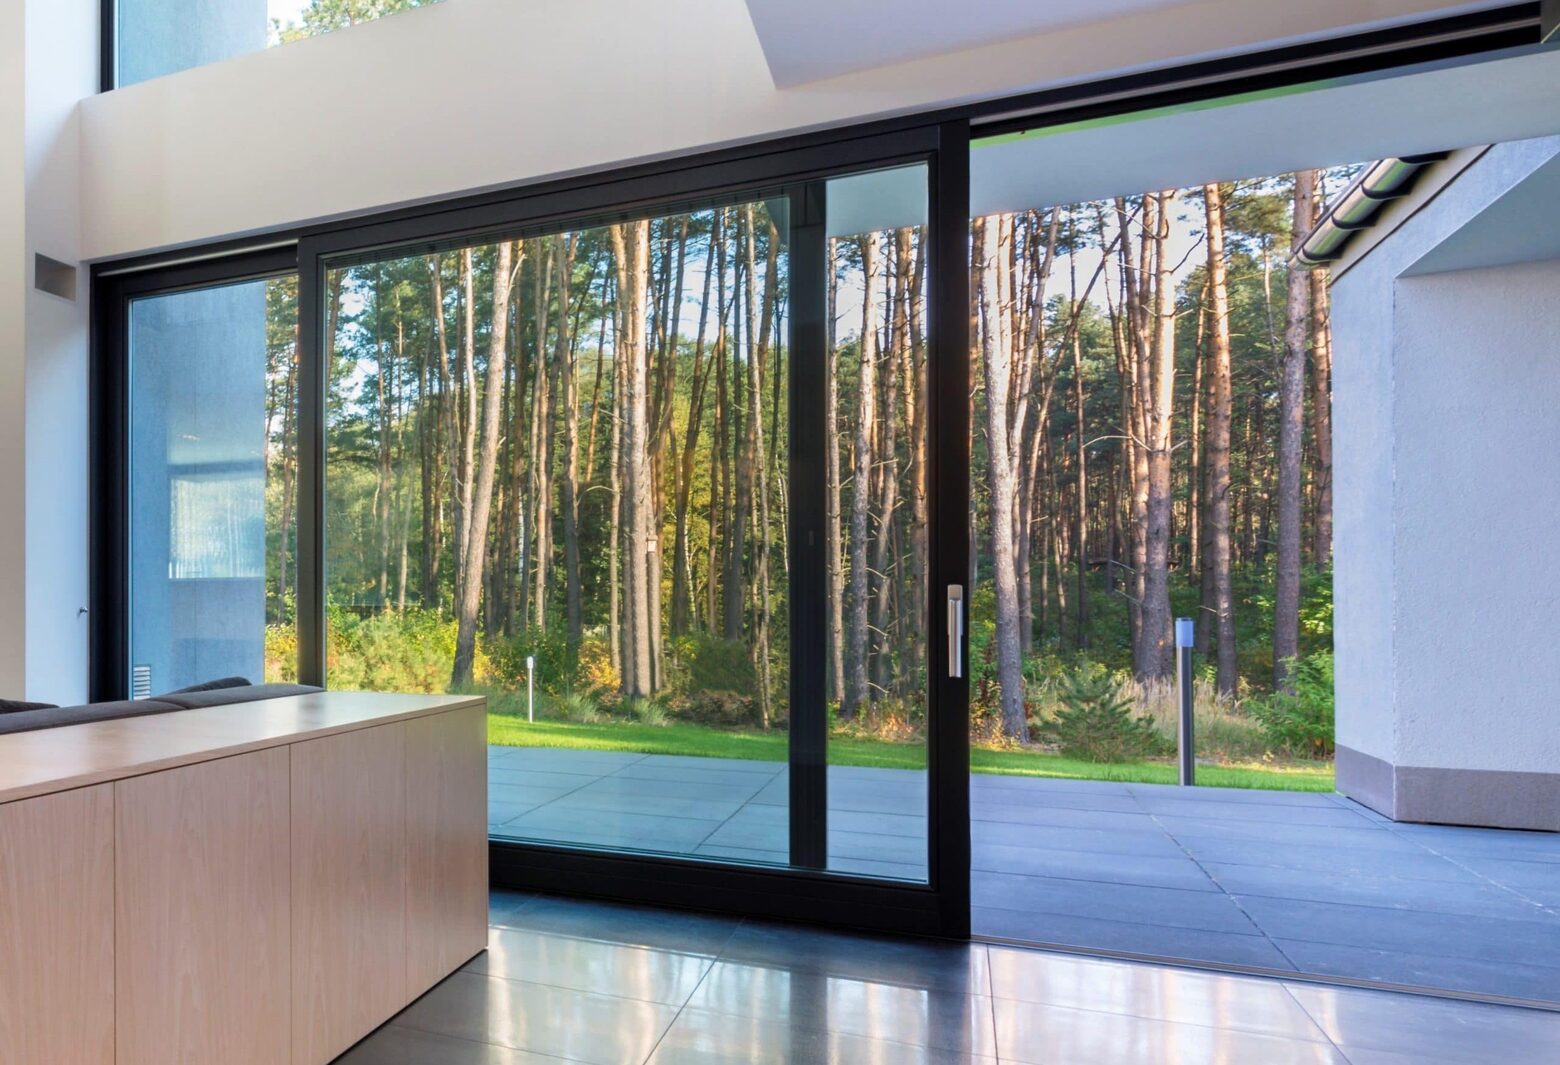
With the new sliding glass door successfully installed, take a moment to appreciate the transformation it has brought to your living space. The clean lines, enhanced natural light, and improved energy efficiency are just a few of the benefits that this upgrade brings to your home.
As you stand back and admire the newly installed door, you can take pride in the accomplishment of completing this significant home improvement project. The installation of the new sliding glass door represents a tangible step towards creating a more inviting and aesthetically pleasing environment for you and your family to enjoy.
By approaching the installation process with precision and attention to detail, you have successfully brought your vision of a refreshed and updated living space to life. With the new sliding glass door in place, you're one step closer to realizing the full potential of your home and creating a welcoming and stylish atmosphere for years to come.
Step 6: Test the new door and make any necessary adjustments
With the new sliding glass door securely installed, the final step in the process is to thoroughly test its functionality and make any necessary adjustments to ensure optimal performance. This critical phase ensures that the door operates smoothly, seals effectively, and provides the desired level of security and energy efficiency.
Begin by testing the sliding mechanism to ensure that the door moves along the track with ease. Open and close the door several times, paying close attention to any resistance or uneven movement. Smooth, effortless operation is indicative of a well-installed door, while any stiffness or misalignment may signal the need for adjustments.
Next, inspect the door's alignment and sealing. Check for consistent gaps around the edges of the door when it is closed, ensuring that the weatherstripping provides a tight seal to prevent drafts and moisture infiltration. If any gaps or inconsistencies are observed, adjustments may be necessary to achieve a secure and weathertight fit.
In the event of misalignment or uneven gaps, shims can be strategically adjusted to fine-tune the positioning of the door within the opening. Carefully remove and reposition shims as needed, verifying the alignment and seal after each adjustment. This meticulous approach ensures that the door is properly seated and provides an effective barrier against external elements.
Additionally, verify the locking mechanism to ensure that it engages smoothly and securely. Test the locking and latching functions, confirming that the door closes and locks without difficulty. If any issues are identified, adjustments to the hardware or alignment may be necessary to achieve a reliable and secure locking mechanism.
Finally, conduct a thorough inspection of the surrounding areas to identify any signs of air or water infiltration. Run a hand along the edges of the door to detect any drafts, and visually inspect the seals for any signs of gaps or damage. Addressing any potential issues at this stage ensures that the door provides the desired level of energy efficiency and protection.
By meticulously testing the new door and making any necessary adjustments, you can ensure that the installation is completed to the highest standards. This thorough approach guarantees that the new sliding glass door not only enhances the aesthetic appeal of your living space but also delivers reliable functionality and performance for years to come.
Read more: How To Remove Sliding Glass Door
Conclusion
In conclusion, the process of taking out a sliding glass door represents a transformative home improvement project that can breathe new life into your living space. By following the systematic steps outlined in this guide and approaching the task with patience and attention to detail, you can achieve a professional-looking result while ushering in a fresh, updated look for your home.
From gathering the necessary tools and materials to meticulously cleaning and preparing the opening, each phase of the process plays a crucial role in ensuring a successful transition from the old door to the new one. The careful removal of the sliding and stationary panels, coupled with thorough cleaning and preparation, sets the stage for the exciting phase of installing the new sliding glass door.
The installation of the new door represents the culmination of your efforts, bringing your vision of a refreshed and updated living space to fruition. By carefully positioning, leveling, and securing the new door, you have not only enhanced the aesthetic appeal of your home but also improved its functionality and energy efficiency.
The final step of testing the new door and making any necessary adjustments ensures that the installation is completed to the highest standards, guaranteeing reliable functionality and performance for years to come. The meticulous attention to detail throughout the process reflects your commitment to creating a welcoming and stylish atmosphere for you and your family to enjoy.
As you stand back and admire the newly installed door, take pride in the accomplishment of completing this significant home improvement project. The clean lines, enhanced natural light, and improved energy efficiency are just a few of the benefits that this upgrade brings to your home. With the new sliding glass door in place, you're one step closer to realizing the full potential of your home and creating a welcoming and stylish atmosphere for years to come.
In essence, taking out a sliding glass door and installing a new one is not just a practical upgrade but a transformative endeavor that elevates the ambiance and functionality of your living space. By embracing this project with enthusiasm and attention to detail, you have successfully enhanced your home and created a more inviting environment for yourself and your loved ones.
Frequently Asked Questions about How To Take Out A Sliding Glass Door
Was this page helpful?
At Storables.com, we guarantee accurate and reliable information. Our content, validated by Expert Board Contributors, is crafted following stringent Editorial Policies. We're committed to providing you with well-researched, expert-backed insights for all your informational needs.


0 thoughts on “How To Take Out A Sliding Glass Door”