Home>Furniture & Design>Interior Design Trends>How To Unstick A Picture From Glass
Interior Design Trends
How To Unstick A Picture From Glass
Published: February 4, 2024
Learn how to unstick a picture from glass with these interior design trends. Get expert tips and tricks to safely remove and reposition your artwork.
(Many of the links in this article redirect to a specific reviewed product. Your purchase of these products through affiliate links helps to generate commission for Storables.com, at no extra cost. Learn more)
Introduction
When you have a cherished picture or artwork stuck to glass, it can be a frustrating and delicate situation. Whether it's due to humidity, moisture, or an adhesive, the bond between the picture and the glass can seem unbreakable. However, fear not, as there are effective methods to safely unstick a picture from glass without causing damage to the precious item.
In this comprehensive guide, we will explore the step-by-step process of freeing a picture from glass, providing you with the knowledge and confidence to tackle this task with ease. By understanding the materials needed and the techniques involved, you can restore your picture to its former glory and preserve it for years to come.
Unsticking a picture from glass requires patience, precision, and the right tools. By following the methods outlined in this guide, you can navigate this delicate process with care and precision, ensuring that your picture remains intact and unharmed. So, let's delve into the intricacies of this endeavor and equip ourselves with the knowledge to tackle this challenge effectively.
Key Takeaways:
- Delicately free a picture from glass using heat, a razor blade, or lubricant. Clean the glass to showcase the liberated picture, preserving it for years to come.
- Assess the situation, choose the right method, and apply heat, a razor blade, or lubricant to unstick a picture from glass. Then, clean the glass for a pristine display.
Read more: How To Unstick A Picture From Glass
Understanding the Problem
When a picture becomes stuck to glass, it can be a perplexing and exasperating issue. The root cause of this problem often stems from environmental factors such as humidity, moisture, or the use of inappropriate adhesives. Over time, these elements can lead to the picture adhering firmly to the glass surface, making it challenging to remove without causing damage.
Humidity and moisture play a significant role in causing a picture to stick to glass. When exposed to high levels of humidity, the paper or canvas of the picture can absorb moisture, causing it to adhere to the glass. Additionally, if an adhesive was used to mount the picture, it may have degraded over time, further cementing the bond between the picture and the glass.
Understanding the nature of the problem is crucial in devising an effective solution. It's essential to approach the situation with care and precision, as attempting to force the picture off the glass can result in tearing or damage to the artwork. By acknowledging the factors contributing to the picture being stuck to the glass, we can tailor our approach to address these specific challenges.
In addition to the physical bond between the picture and the glass, emotional attachment often compounds the urgency of resolving this issue. The picture may hold sentimental value, making it imperative to handle the removal process delicately to preserve its integrity. Recognizing the emotional significance of the picture underscores the importance of employing gentle and meticulous techniques to unstick it from the glass.
By comprehending the complexities of the problem at hand, we can approach the task of freeing the picture from the glass with empathy, expertise, and a clear understanding of the underlying factors contributing to its adhesion. With this knowledge in mind, we can proceed to gather the necessary materials and embark on the journey to restore the picture to its original state.
Materials Needed
To embark on the endeavor of unsticking a picture from glass, it is essential to gather the appropriate materials that will facilitate a safe and effective removal process. Each item serves a specific purpose in addressing the delicate task at hand, ensuring that the picture is liberated from the glass without sustaining any damage. Here are the essential materials required for this undertaking:
-
Heat Source: A hairdryer or heat gun will serve as a crucial tool in loosening the bond between the picture and the glass. The application of heat will help soften any adhesive or moisture that may be securing the picture to the glass surface.
-
Razor Blade or Utility Knife: A sharp and precise cutting tool is indispensable for carefully separating the picture from the glass. A razor blade or utility knife will enable controlled and strategic maneuvering to gently pry the picture away from the glass without causing harm.
-
Lubricant: Utilizing a gentle lubricant, such as rubbing alcohol or a commercial adhesive remover, can aid in dissolving any residual adhesive or moisture, facilitating the separation of the picture from the glass.
-
Soft Cloth or Microfiber Towel: A soft, lint-free cloth or microfiber towel will be utilized to clean the glass surface after the picture has been successfully removed. This ensures that any remaining residue or lubricant is carefully wiped away, leaving the glass pristine.
-
Protective Gloves: It is advisable to wear protective gloves to safeguard your hands during the removal process. Gloves provide an added layer of protection and ensure a secure grip when handling the picture and working with the tools.
-
Protective Eyewear: When using a razor blade or utility knife, protective eyewear is essential to shield your eyes from any potential debris or splinters that may arise during the delicate maneuvering of the tools.
By assembling these materials, you will be equipped with the necessary resources to approach the task of unsticking a picture from glass with confidence and precision. Each item plays a pivotal role in the removal process, safeguarding the integrity of the picture and the glass while ensuring a successful and damage-free separation. With these materials at your disposal, you are prepared to proceed to the next phase of assessing the situation and initiating the step-by-step process of freeing the picture from its glass confinement.
Step 1: Assess the Situation
Before embarking on the process of freeing a picture from glass, it is imperative to meticulously assess the situation to gain a comprehensive understanding of the bond between the picture and the glass. This initial step sets the foundation for a methodical and informed approach, ensuring that the subsequent removal process is executed with precision and care.
Begin by examining the condition of the picture and the extent of its adhesion to the glass. Take note of any visible signs of moisture, adhesive residue, or areas where the picture is firmly affixed to the glass surface. Carefully inspect the edges of the picture to determine the points of contact with the glass, as these areas will require focused attention during the removal process.
Next, evaluate the type of adhesive, if any, that may have been used to mount the picture to the glass. Understanding the nature of the adhesive, whether it is water-based, solvent-based, or a commercial mounting adhesive, will inform the selection of appropriate removal methods and materials. Additionally, assess the level of moisture present between the picture and the glass, as excessive humidity or moisture absorption may have contributed to the adhesion.
Consider the fragility of the picture and the type of material it is composed of, whether it is paper, canvas, or another medium. Delicate materials require a more cautious approach to prevent tearing or damage during the removal process. Take note of any existing tears, wrinkles, or areas of vulnerability on the picture, as these areas will necessitate gentle handling and targeted removal techniques.
Furthermore, evaluate the overall condition of the glass surface and identify any existing blemishes, such as scratches or imperfections. Understanding the state of the glass will guide the selection of appropriate tools and cleaning methods to restore its pristine condition after the picture has been successfully removed.
By meticulously assessing these key elements, you will gain a comprehensive understanding of the intricacies involved in freeing the picture from the glass. This informed evaluation sets the stage for the subsequent steps, empowering you to choose the most suitable removal methods and materials tailored to the specific characteristics of the picture and the glass surface. With a thorough assessment of the situation, you are prepared to proceed to the next phase of selecting the right method to initiate the picture removal process.
Step 2: Choose the Right Method
After meticulously assessing the condition of the picture and the nature of its adhesion to the glass, the next crucial step is to select the most appropriate method for freeing the picture. The choice of method is pivotal in ensuring a safe and effective removal process, tailored to the specific characteristics of the picture and the glass surface.
Read more: How To Unstick Two Glass Bowls
Heat Application
If the picture is adhered to the glass due to moisture or a water-based adhesive, utilizing a heat source, such as a hairdryer, can be an effective initial approach. The application of heat serves to gently soften the adhesive or moisture, loosening the bond between the picture and the glass. Begin by directing the heat source evenly across the back of the glass, maintaining a moderate distance to prevent overheating. The gradual application of heat will facilitate the separation of the picture from the glass, allowing for controlled maneuvering during the removal process.
Razor Blade or Utility Knife
In cases where the picture is firmly affixed to the glass, employing a razor blade or utility knife can aid in delicately prying the picture away from the surface. Exercise caution and precision when using the razor blade, ensuring that it is held at a shallow angle to avoid damage to the picture or the glass. Begin by gently inserting the blade at the edges of the picture, maneuvering it with controlled movements to gradually separate the picture from the glass. This method allows for targeted and strategic separation, particularly in areas where the adhesion is most pronounced.
Lubricant Application
For pictures adhered with a stubborn adhesive or exhibiting signs of excessive moisture, the application of a gentle lubricant can facilitate the removal process. Utilize a soft cloth or cotton swab to apply a small amount of rubbing alcohol or a commercial adhesive remover along the edges of the picture. The lubricant works to dissolve any residual adhesive or moisture, gradually weakening the bond between the picture and the glass. Exercise patience and precision when applying the lubricant, ensuring that it is distributed evenly to effectively loosen the adhesion.
By carefully considering the specific characteristics of the picture and the nature of its adhesion to the glass, the most suitable method can be chosen to initiate the removal process. Each method offers a targeted approach to addressing the unique challenges presented by the picture's adhesion, ensuring that the removal process is executed with precision and care. With the right method selected, you are prepared to proceed to the subsequent steps, applying the chosen technique to liberate the picture from its glass confinement.
Step 3: Apply Heat
When dealing with a picture that is stubbornly stuck to glass, the application of heat serves as a valuable technique to soften the adhesive or moisture, facilitating the separation of the picture from the glass surface. The controlled use of heat can effectively weaken the bond between the picture and the glass, allowing for a more manageable removal process.
To initiate the application of heat, a hairdryer or heat gun can be employed as the primary heat source. It is essential to set the heat source to a moderate level to avoid overheating the glass or causing damage to the picture. Begin by directing the heat evenly across the back of the glass, maintaining a distance of approximately 6 to 8 inches between the heat source and the glass surface. This gradual application of heat serves to gently warm the area, softening any adhesive or moisture that may be securing the picture to the glass.
As the heat is applied, it is crucial to monitor the temperature and ensure that the glass does not become excessively hot. The goal is to achieve a gentle warming effect that loosens the bond without subjecting the glass to extreme temperatures. By maintaining a moderate and consistent application of heat, the adhesive or moisture begins to soften, allowing for increased flexibility in maneuvering the picture away from the glass.
During the heat application process, it is advisable to periodically test the adhesion of the picture by gently attempting to lift the edges. As the heat gradually takes effect, the picture may exhibit signs of loosening from the glass surface. Exercise patience and avoid applying excessive force, as the goal is to allow the heat to work its magic in weakening the bond naturally.
Once the picture shows signs of loosening, carefully maneuver it away from the glass using a gentle and controlled approach. It is essential to maintain a steady and even pressure to prevent any tearing or damage to the picture during the separation process. As the picture begins to detach from the glass, continue to apply heat as needed to ensure a smooth and gradual removal.
By applying heat in a controlled and methodical manner, the bond between the picture and the glass can be effectively weakened, allowing for a more manageable and damage-free removal process. This gentle technique harnesses the power of heat to soften the adhesive or moisture, providing a safe and effective means of liberating the picture from its glass confinement.
Read more: How To Put Pictures On Glass
Step 4: Use a Razor Blade
When the picture is firmly affixed to the glass, employing a razor blade or utility knife becomes a crucial technique in delicately prying the picture away from the surface. This method allows for targeted and strategic separation, particularly in areas where the adhesion is most pronounced.
To initiate the use of a razor blade, it is essential to exercise caution and precision. Ensure that the blade is sharp and held at a shallow angle to avoid damage to the picture or the glass. Begin by gently inserting the blade at the edges of the picture, maneuvering it with controlled movements to gradually separate the picture from the glass.
As you carefully navigate the razor blade along the edges of the picture, it is important to maintain a steady and even pressure, allowing the blade to glide smoothly between the picture and the glass. This controlled maneuvering ensures that the separation process is executed with precision, minimizing the risk of damage to the picture or the glass surface.
When encountering areas of heightened adhesion, exercise patience and finesse in guiding the razor blade to gently pry the picture away from the glass. By employing strategic movements and targeted pressure, you can gradually weaken the bond between the picture and the glass, allowing for a more manageable removal process.
Throughout the use of the razor blade, it is advisable to periodically assess the progress of the separation, ensuring that the picture is being liberated from the glass without encountering resistance or potential damage. By maintaining a cautious and deliberate approach, the razor blade serves as a valuable tool in navigating the delicate process of freeing the picture from its glass confinement.
As the picture begins to detach from the glass, continue to utilize the razor blade with precision and care, ensuring that the separation process proceeds smoothly and without incident. By harnessing the controlled maneuvering and targeted pressure of the razor blade, the picture can be liberated from the glass surface, setting the stage for the subsequent steps in the removal process.
The use of a razor blade offers a meticulous and strategic approach to delicately prying the picture away from the glass, ensuring that the separation process is executed with precision and care. With the targeted guidance of the razor blade, the picture can be freed from its glass confinement, paving the way for the final steps in restoring the picture to its original state.
Use a hairdryer on low heat to warm the glass and soften the adhesive. Gently wiggle the picture to loosen it from the glass. Be patient and avoid using excessive force to prevent damage.
Step 5: Apply Lubricant
In situations where a picture is stubbornly adhered to glass, the application of a gentle lubricant serves as a valuable technique to facilitate the removal process. By utilizing a lubricant such as rubbing alcohol or a commercial adhesive remover, the residual adhesive or moisture binding the picture to the glass can be effectively dissolved, weakening the bond and allowing for a smoother separation.
To initiate the application of the lubricant, it is essential to exercise precision and care. Utilize a soft cloth or cotton swab to apply a small amount of the lubricant along the edges of the picture, ensuring that it is distributed evenly to target the areas of adhesion. The gentle application of the lubricant serves to penetrate the bond between the picture and the glass, gradually loosening the adhesion and preparing the picture for removal.
As the lubricant takes effect, it is important to monitor the progress of the separation, periodically assessing the flexibility of the picture and its detachment from the glass. Exercise patience and allow the lubricant to work its magic in dissolving the residual adhesive or moisture, ensuring that the separation process proceeds smoothly and without incident.
When encountering areas of heightened adhesion, continue to apply the lubricant with precision, ensuring that it is distributed evenly to effectively weaken the bond. By allowing the lubricant to permeate the areas of adhesion, the picture becomes increasingly flexible, facilitating a more manageable and damage-free removal process.
As the lubricant gradually weakens the bond between the picture and the glass, carefully maneuver the picture away from the surface using a gentle and controlled approach. It is essential to maintain a steady and even pressure to prevent any tearing or damage to the picture during the separation process. By harnessing the power of the lubricant, the picture can be liberated from its glass confinement, setting the stage for the final steps in restoring the picture to its original state.
The application of a lubricant offers a gentle and effective approach to dissolving the residual adhesive or moisture, ensuring that the separation process is executed with precision and care. With the targeted application of the lubricant, the picture can be freed from its glass confinement, paving the way for the final steps in restoring the picture to its original state.
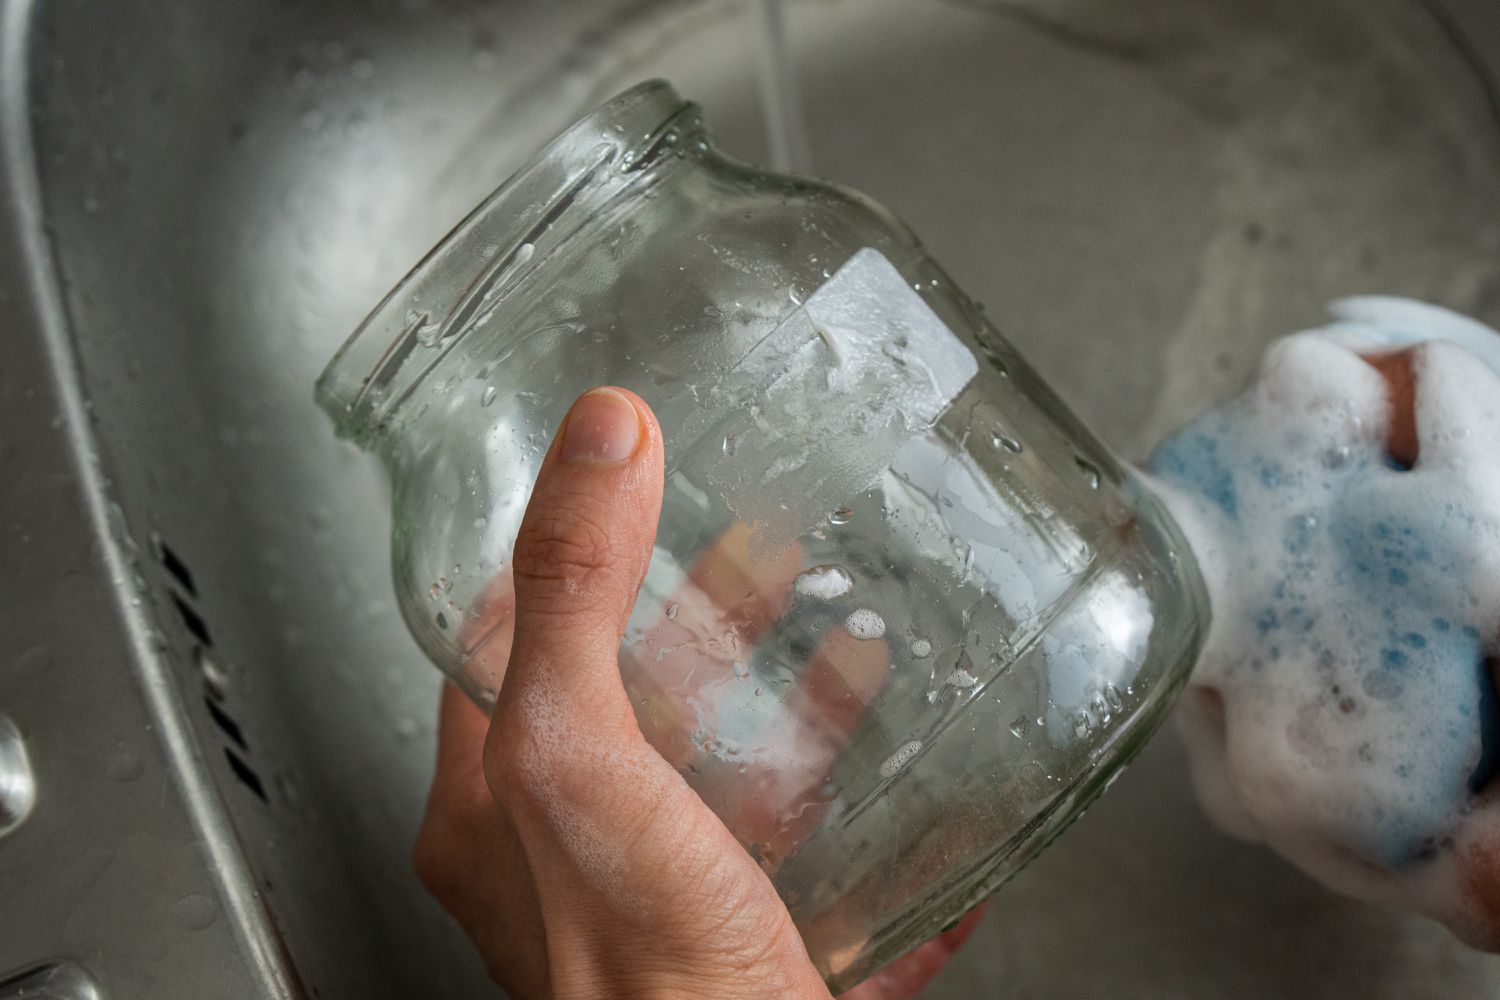
Step 6: Clean the Glass
After successfully freeing the picture from the glass, the final step in this delicate process involves restoring the glass surface to its pristine condition. Cleaning the glass ensures that any residual adhesive, lubricant, or debris is carefully removed, leaving behind a clear and unblemished surface.
To begin the cleaning process, gather a soft, lint-free cloth or a microfiber towel. These materials are ideal for gently wiping the glass surface without leaving behind lint or streaks. It is essential to avoid using abrasive materials or harsh chemicals that may scratch or damage the glass.
Next, inspect the glass surface for any remaining residue or marks. If there are visible remnants of adhesive or lubricant, consider using a gentle glass cleaner or a solution of mild dish soap and water. Apply the cleaner to the cloth or towel, ensuring that it is damp but not excessively wet.
With the damp cloth, carefully wipe the glass surface in smooth, circular motions, focusing on areas where residue or marks are present. Exercise patience and thoroughness in the cleaning process, ensuring that all remnants of adhesive or lubricant are effectively removed.
After wiping the glass surface, utilize a dry portion of the cloth or a fresh microfiber towel to gently buff the glass, leaving it free of any moisture or streaks. This final buffing ensures that the glass surface is left clear and immaculate, ready to showcase the picture once again.
Upon completing the cleaning process, take a moment to admire the restored glass surface, now free of any remnants or blemishes. The meticulous cleaning ensures that the glass is in optimal condition, providing a pristine backdrop for displaying the liberated picture.
By carefully cleaning the glass, the removal process culminates in the successful restoration of both the picture and the glass surface. This final step ensures that the glass is prepared to showcase the picture once again, free from any traces of its previous confinement.
The completion of the cleaning process marks the culmination of the journey to unstick a picture from glass, restoring both the picture and the glass to their original states. With the glass now immaculate and the picture liberated, the preservation of this cherished item is secured, ready to be displayed and admired once more.
Conclusion
In conclusion, the process of unsticking a picture from glass is a delicate and meticulous endeavor that requires patience, precision, and the right tools. By understanding the factors contributing to the picture's adhesion to the glass and employing targeted removal methods, it is possible to liberate the picture without causing damage to the precious item.
The journey begins with a thorough assessment of the situation, encompassing the condition of the picture, the type of adhesion, and the fragility of the materials involved. This initial evaluation sets the stage for choosing the most suitable method to initiate the removal process, whether it involves the application of heat, the use of a razor blade, or the application of a gentle lubricant.
Throughout the removal process, the application of heat serves as a valuable technique to soften the adhesive or moisture, allowing for a more manageable separation of the picture from the glass. The controlled use of a razor blade or utility knife enables targeted and strategic maneuvering, delicately prying the picture away from the glass surface. Additionally, the application of a lubricant facilitates the dissolution of residual adhesive or moisture, ensuring a smoother removal process.
Upon successfully freeing the picture from the glass, the final step involves restoring the glass surface to its pristine condition. Carefully cleaning the glass ensures that any residual adhesive, lubricant, or debris is removed, leaving behind a clear and unblemished surface ready to showcase the picture once again.
The completion of the removal process marks the successful restoration of both the picture and the glass surface. With the glass now immaculate and the picture liberated, the preservation of this cherished item is secured, ready to be displayed and admired once more.
By approaching the task of unsticking a picture from glass with empathy, expertise, and a clear understanding of the underlying factors contributing to its adhesion, it is possible to navigate this delicate process with care and precision. With the right methods and materials at your disposal, you can restore your picture to its former glory and preserve it for years to come.
Frequently Asked Questions about How To Unstick A Picture From Glass
Was this page helpful?
At Storables.com, we guarantee accurate and reliable information. Our content, validated by Expert Board Contributors, is crafted following stringent Editorial Policies. We're committed to providing you with well-researched, expert-backed insights for all your informational needs.


0 thoughts on “How To Unstick A Picture From Glass”