Home>Furniture & Design>Interior Design Trends>How To Unstick A Picture From Glass
Interior Design Trends
How To Unstick A Picture From Glass
Published: February 4, 2024
Learn how to unstick a picture from glass and keep up with the latest interior design trends. Expert tips and tricks for a modern and stylish home.
(Many of the links in this article redirect to a specific reviewed product. Your purchase of these products through affiliate links helps to generate commission for Storables.com, at no extra cost. Learn more)
Introduction
Unsticking a picture from glass can be a daunting task, especially when you want to preserve the picture and the glass without causing any damage. Whether it's a cherished family photograph, a vintage print, or a valuable piece of art, the thought of attempting to remove it from the glass can be intimidating. However, with the right approach and materials, it's possible to safely separate the picture from the glass without compromising its integrity.
In this comprehensive guide, we will explore the step-by-step process of unsticking a picture from glass, providing you with valuable insights and practical tips to tackle this delicate task with confidence. By understanding the problem, gathering the necessary materials, and following the recommended techniques, you can successfully remove the picture from the glass while minimizing the risk of damage.
Throughout this guide, we will delve into the use of heat, razor blades, and solvents to effectively release the picture from the glass surface. Additionally, we will discuss the importance of cleaning the glass after the picture has been removed, ensuring that it remains free from any residue or marks.
Whether you're a DIY enthusiast, an art collector, or simply someone looking to salvage a precious memento, this guide will equip you with the knowledge and strategies needed to unstick a picture from glass in a safe and efficient manner. Let's embark on this journey to discover the best practices for separating pictures from glass, empowering you to preserve your cherished memories and valuable artworks with care and precision.
Key Takeaways:
- Safely unstick a picture from glass by using heat, a razor blade, and a mild solvent. This preserves the picture and the glass, ensuring a safe and successful separation process.
- Thoroughly clean the glass after unsticking the picture to restore its pristine condition, ready for re-framing or display. This final step completes the separation process, leaving the glass surface immaculate and visually appealing.
Read more: How To Unstick A Picture From Glass
Understanding the Problem
When a picture becomes stuck to glass, it can present a challenging situation due to the adhesion between the photograph and the smooth, non-porous surface of the glass. This adhesion is often caused by moisture, humidity, or the use of improper framing materials. Over time, these factors can lead to the picture adhering firmly to the glass, making it difficult to remove without causing damage.
One of the primary issues with a picture being stuck to glass is the risk of damage to the photograph itself. Attempting to forcibly separate the picture from the glass can result in tearing, creasing, or surface abrasions, compromising the visual integrity of the image. Moreover, the use of incorrect techniques or harsh materials can leave behind residue or marks on the glass, further complicating the situation.
Understanding the nature of the problem is crucial in devising an effective strategy for safely unsticking the picture from the glass. It requires a delicate balance of patience, precision, and the right tools to address the adhesion without causing harm to the picture or the glass. By recognizing the factors that led to the picture becoming stuck to the glass, such as environmental conditions or framing methods, it becomes possible to approach the problem with a clear understanding of its underlying causes.
Furthermore, the type of photograph and the materials used in its production can influence the approach to resolving the issue. For instance, vintage photographs may be more delicate and susceptible to damage, requiring a gentler technique for separation. Similarly, modern prints or artworks may have specific coatings or finishes that necessitate careful handling to prevent any alterations or blemishes.
In essence, understanding the problem of a picture being stuck to glass involves acknowledging the potential risks to both the picture and the glass, as well as recognizing the contributing factors that led to the adhesion. By gaining insight into these aspects, it becomes possible to proceed with the subsequent steps, armed with the knowledge needed to address the problem effectively and safeguard the integrity of the picture and the glass.
Materials Needed
To successfully unstick a picture from glass, you will need a set of specific materials that are essential for executing the separation process with precision and care. These materials are designed to facilitate the safe removal of the picture from the glass surface while minimizing the risk of damage to both the photograph and the glass. By ensuring that you have the necessary tools at your disposal, you can approach the task with confidence and efficiency.
-
Heat Source: A heat source, such as a hairdryer or a heat gun, is crucial for softening the adhesive that binds the picture to the glass. The application of heat helps to loosen the grip of the adhesive, making it easier to gently separate the picture from the glass without causing any tearing or distortion.
-
Razor Blade or Utility Knife: A sharp razor blade or a precision utility knife is indispensable for delicately sliding between the picture and the glass. This tool enables you to create a separation point and carefully maneuver along the edges of the picture, gradually releasing it from the glass surface.
-
Solvent or Adhesive Remover: A mild solvent or adhesive remover, such as isopropyl alcohol or acetone, can aid in dissolving any stubborn adhesive residue that remains on the glass after the picture has been removed. This helps in ensuring that the glass surface is thoroughly cleaned and free from any lingering adhesion.
-
Soft, Lint-Free Cloths: Clean, lint-free cloths are essential for wiping the glass surface and applying the solvent or adhesive remover. These cloths help in gently removing any residue or marks from the glass, leaving it pristine and ready for re-framing or display.
-
Protective Gloves: It is advisable to wear protective gloves, such as nitrile or latex gloves, to shield your hands from any solvents or adhesives used during the separation process. This precaution ensures safety and minimizes direct contact with potentially harsh substances.
-
Protective Eyewear: When using a razor blade or utility knife, wearing protective eyewear is recommended to safeguard your eyes from any accidental splinters or debris that may arise during the separation process.
By assembling these essential materials, you will be well-equipped to undertake the task of unsticking a picture from glass with the necessary tools and precautions in place. These materials are instrumental in facilitating a methodical and careful approach to separating the picture from the glass, allowing you to preserve the integrity of both the photograph and the glass surface.
Step 1: Assess the Situation
Before embarking on the process of unsticking a picture from glass, it is crucial to thoroughly assess the situation to gain a clear understanding of the adhesion and the condition of the picture and the glass. This initial step sets the foundation for the subsequent actions, allowing for a methodical and informed approach to the separation process.
Begin by examining the extent of the adhesion between the picture and the glass. Take note of any areas where the picture appears to be firmly stuck or where the adhesion is particularly strong. This assessment helps in identifying the areas that may require more attention and precision during the separation process. Additionally, observe the edges of the picture to determine the level of contact and adhesion along the perimeter.
Next, evaluate the type of picture and the materials used in its production. Consider whether the picture is a vintage photograph, a modern print, or a valuable artwork, as this information can influence the approach to unsticking it from the glass. Vintage photographs, for instance, may be more delicate and susceptible to damage, necessitating a gentler technique for separation.
Inspect the condition of the glass surface, noting any marks, residue, or signs of previous attempts to remove the picture. Understanding the state of the glass helps in preparing for the subsequent cleaning process, ensuring that the glass is restored to a pristine condition after the picture has been successfully separated.
Furthermore, take into account the environmental factors that may have contributed to the adhesion, such as humidity, temperature fluctuations, or prolonged exposure to moisture. These factors can provide insights into the underlying causes of the adhesion and inform the approach to addressing the problem effectively.
By meticulously assessing the situation, including the degree of adhesion, the type of picture, the condition of the glass, and the environmental factors at play, you can form a comprehensive understanding of the task at hand. This assessment lays the groundwork for proceeding with the subsequent steps, equipped with the knowledge needed to approach the separation process with precision and care.
Step 2: Applying Heat
The application of heat is a fundamental technique in the process of unsticking a picture from glass. By utilizing a heat source, such as a hairdryer or a heat gun, the adhesive binding the picture to the glass can be effectively softened, facilitating a gradual and gentle separation without causing damage to the photograph or the glass surface.
To begin, set the heat source to a low or medium setting, ensuring that it is not too intense to avoid any potential heat damage to the picture or the glass. Hold the heat source at a moderate distance from the glass, directing the warm airflow evenly across the back of the glass where the picture is adhered. This allows the heat to penetrate through the glass, reaching the adhesive and gradually loosening its grip on the picture.
As the heat is applied, observe the area where the picture is stuck to the glass, paying attention to any subtle changes in the adhesion. The goal is to gently warm the adhesive without overheating the glass or the picture. The heat encourages the adhesive to become more pliable, making it easier to initiate the separation process without causing undue stress on the picture or the glass.
It is important to exercise patience during this step, allowing the heat to work its way through the adhesive gradually. Avoid rushing the process, as a gradual application of heat ensures a controlled and safe loosening of the adhesion. As the adhesive softens, you may notice slight movements or separations between the picture and the glass, indicating that the heat is effectively weakening the bond.
Once the heat has been applied consistently across the back of the glass, proceed to gently test the adhesion by carefully attempting to lift a corner of the picture. Use a soft, non-abrasive tool, such as a plastic spatula or a silicone wedge, to cautiously create a separation point between the picture and the glass. If the adhesion has sufficiently loosened, the corner of the picture should begin to lift gradually, indicating that the heat application has been successful in softening the adhesive.
By applying heat in a controlled and methodical manner, you can effectively prepare the picture and the glass for the subsequent steps in the separation process. The gentle application of heat serves as a pivotal technique in initiating the safe and precise release of the picture from the glass, setting the stage for the careful maneuvering and separation that follows.
Try using a hairdryer on low heat to warm the glass and soften the adhesive. Gently wiggle the picture to loosen it from the glass. Be patient and avoid using excessive force to prevent damage.
Read more: How To Unstick Two Glass Bowls
Step 3: Using a Razor Blade
After successfully softening the adhesive with the application of heat, the next step involves delicately using a razor blade or a precision utility knife to create a separation point and gradually maneuver along the edges of the picture, facilitating its release from the glass surface.
Begin by selecting a sharp razor blade or a precision utility knife with a thin, flexible blade. It is essential to ensure that the blade is clean and free from any debris or residue to prevent any unintended marks or damage to the picture or the glass. Additionally, exercise caution when handling the razor blade, maintaining a steady and controlled grip to avoid any accidental slips or mishaps.
With the softened adhesive providing a degree of flexibility between the picture and the glass, carefully insert the razor blade or the utility knife at the corner of the picture where the adhesion is most accessible. Gently slide the blade along the edge, applying minimal pressure to avoid any tearing or distortion of the picture. The goal is to create a gradual separation between the picture and the glass, allowing the adhesive to release its grip without causing any damage.
As you maneuver along the edges of the picture, maintain a steady and deliberate pace, ensuring that the blade glides smoothly and evenly to prevent any abrupt movements that could compromise the integrity of the picture. It is crucial to exercise patience and precision during this process, as a methodical approach minimizes the risk of unintended damage to the picture or the glass.
Continue to navigate along the perimeter of the picture, periodically testing the adhesion by gently lifting the edges to assess the progress. If the adhesion has been effectively weakened by the heat and the razor blade, the picture should gradually begin to release from the glass, indicating that the separation process is proceeding smoothly.
In instances where the adhesion proves to be particularly stubborn in certain areas, exercise caution and patience, adjusting the angle and pressure of the razor blade to delicately work through these areas. It is essential to prioritize the preservation of the picture and the glass, ensuring that the separation is carried out with the utmost care and attention to detail.
By methodically using a razor blade or a precision utility knife to create a separation point and maneuver along the edges of the picture, you can effectively facilitate its release from the glass surface. This meticulous approach sets the stage for the subsequent steps in the separation process, guiding the picture towards a safe and successful detachment from the glass.
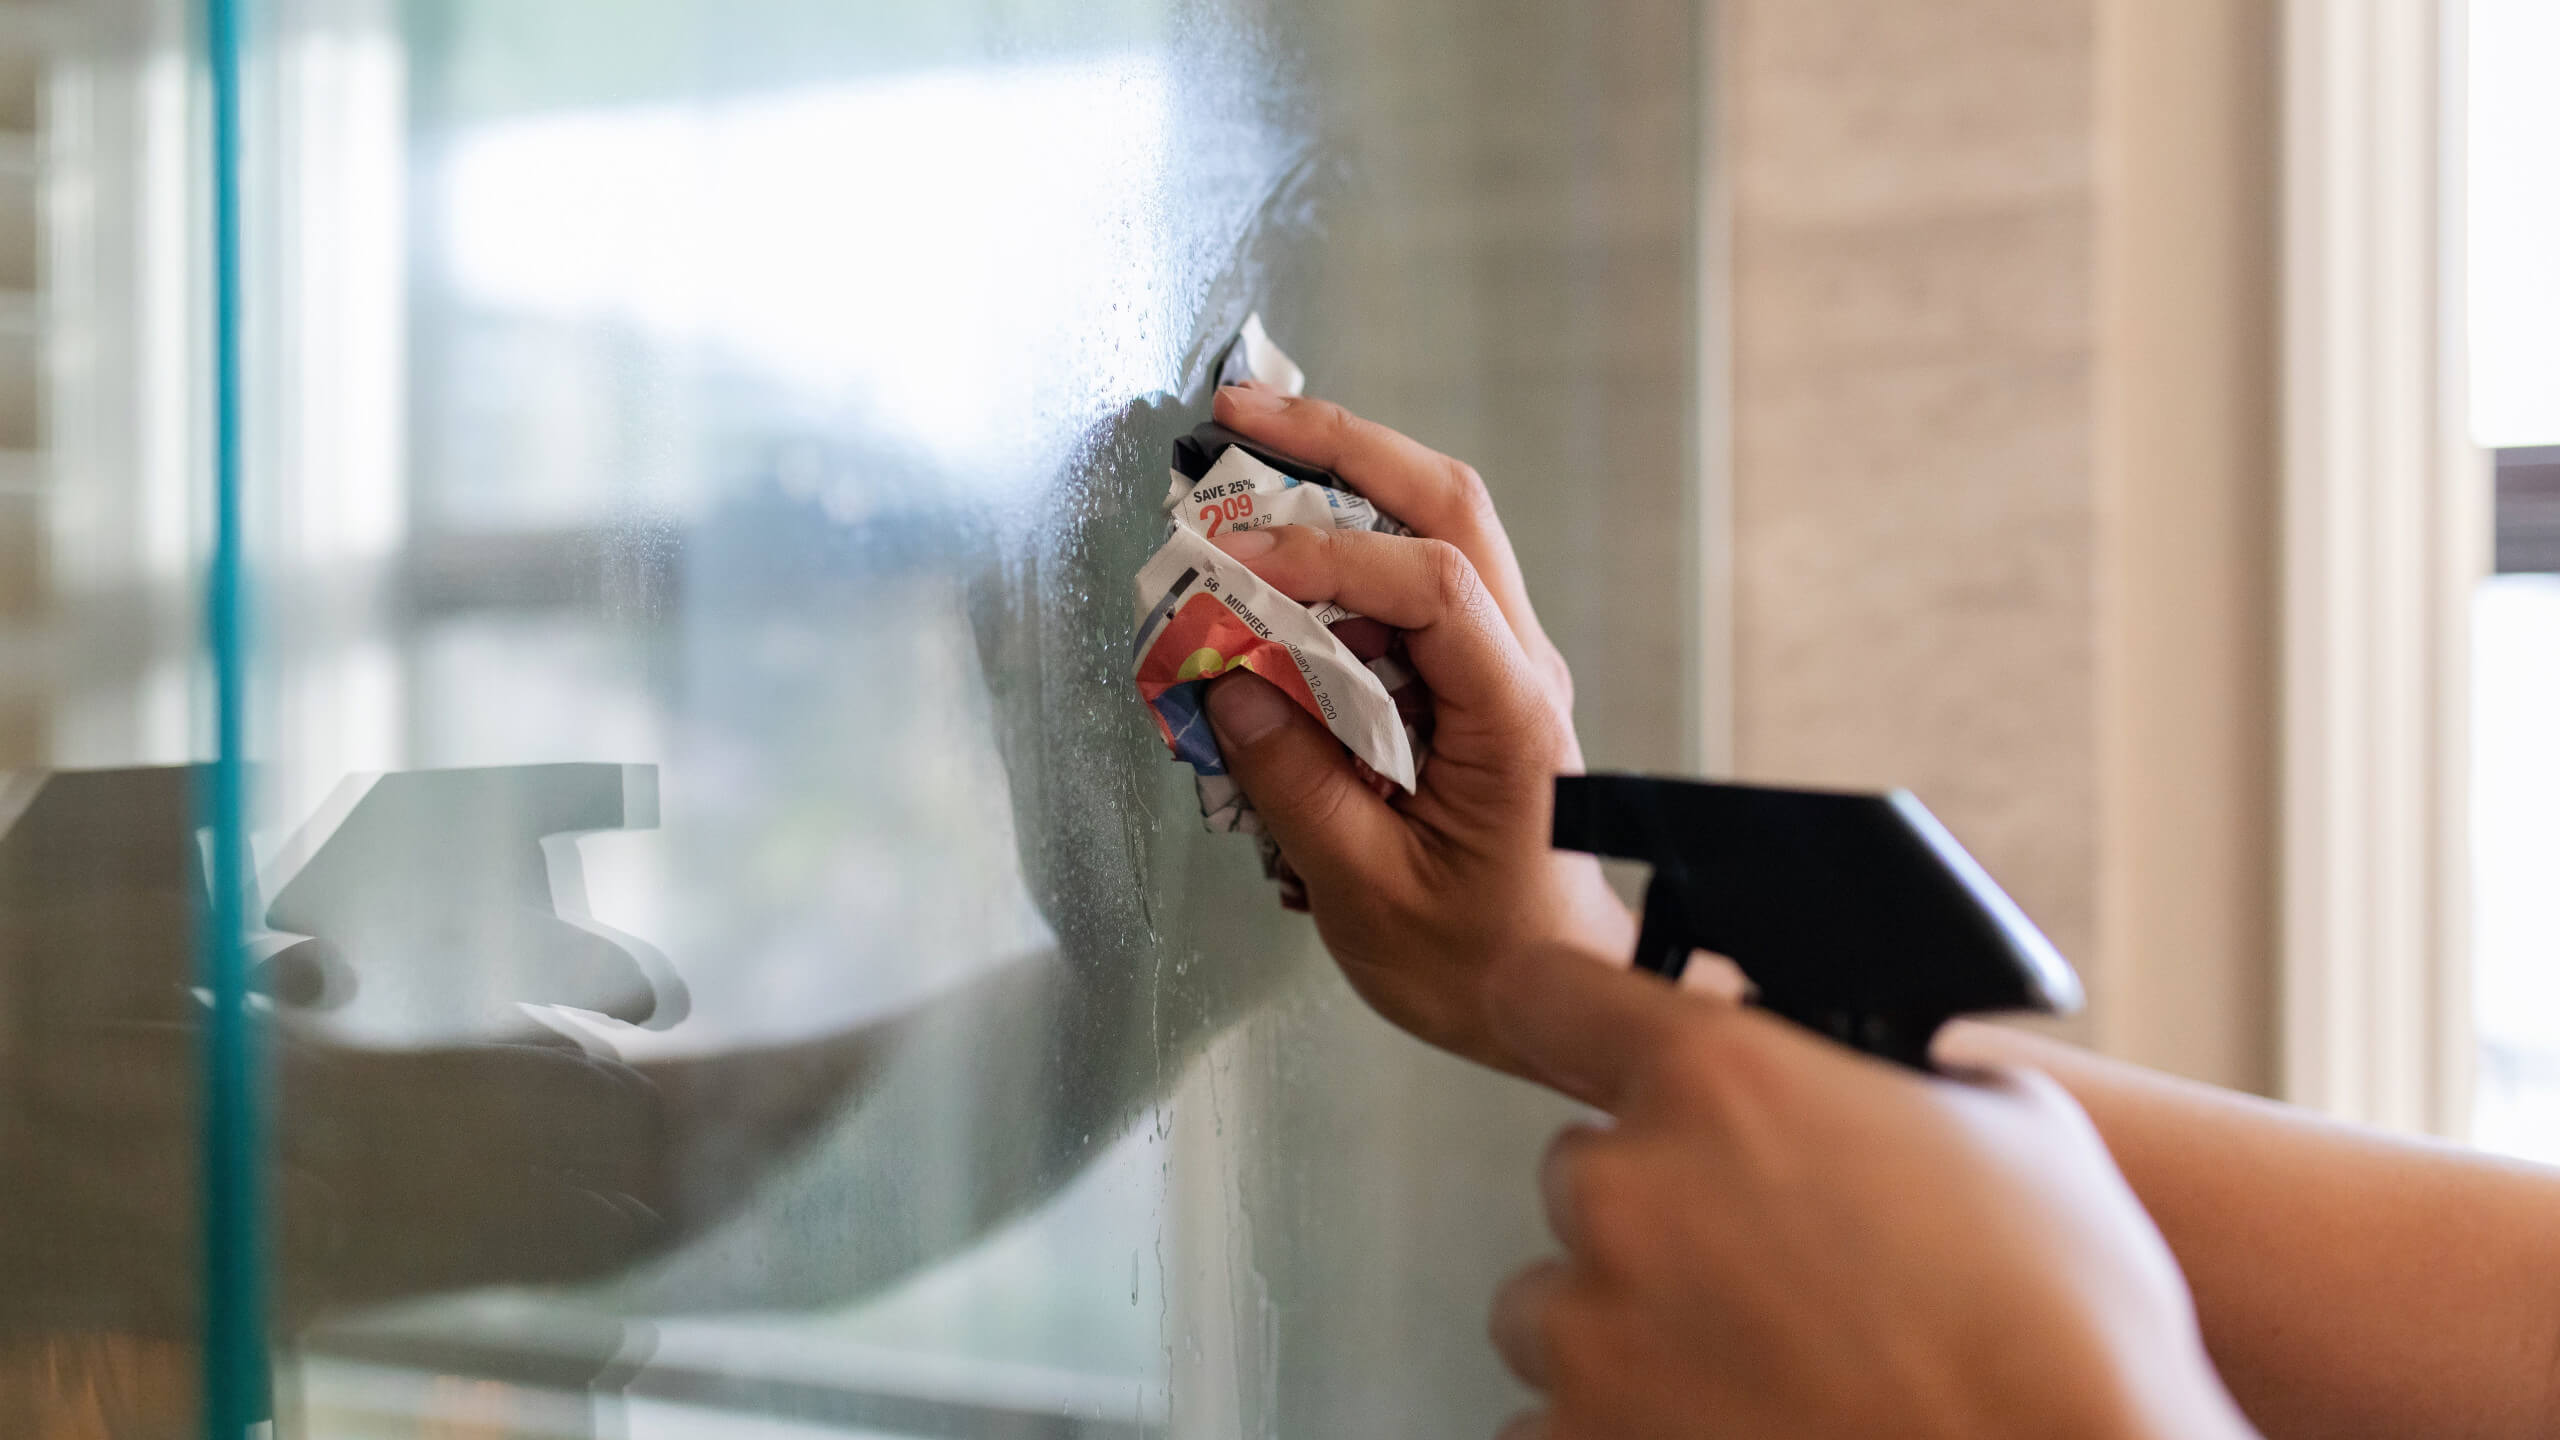
Step 4: Using a Solvent
After employing heat and delicately maneuvering with a razor blade to loosen the picture from the glass, the next phase involves the strategic use of a solvent to dissolve any residual adhesive and ensure a thorough separation. A mild solvent or adhesive remover, such as isopropyl alcohol or acetone, serves as a valuable ally in this critical stage of the process.
Begin by selecting a mild solvent that is suitable for use on glass surfaces and is effective in dissolving adhesive residues. Isopropyl alcohol, commonly known as rubbing alcohol, is a popular choice due to its gentle yet potent adhesive-dissolving properties. Alternatively, acetone, often found in nail polish removers, can also serve as an effective solvent for stubborn adhesives.
Apply a small amount of the chosen solvent to a clean, lint-free cloth, ensuring that the cloth is damp but not saturated. Gently dab the cloth onto the areas of the glass where adhesive residue remains, allowing the solvent to work its way through the remnants of the adhesive. Exercise caution to avoid excessive saturation of the glass, as this can lead to unnecessary exposure to the solvent.
As the solvent interacts with the adhesive residue, you may notice a gradual softening and dissolution of the remaining adhesion. This process allows for the thorough cleansing of the glass surface, ensuring that any lingering traces of the adhesive are effectively dissolved and removed. It is important to approach this step with patience, allowing the solvent to work its magic without rushing the process.
In instances where the adhesive residue proves to be particularly stubborn, consider gently rubbing the affected areas with the solvent-dampened cloth, applying slight pressure to encourage the dissolution of the adhesive. Exercise care and precision to avoid any abrasive actions that could potentially damage the glass surface.
Once the solvent has been applied and the adhesive residue effectively dissolved, use a separate clean, lint-free cloth to gently wipe the glass surface, removing any remaining traces of the solvent and adhesive. This final step ensures that the glass is left pristine and free from any residue, preparing it for re-framing or display without any lingering marks or blemishes.
By incorporating the use of a mild solvent in the separation process, you can effectively address any residual adhesive and ensure that the glass surface is thoroughly cleansed. This meticulous approach sets the stage for the final step of cleaning the glass, ensuring that it remains in optimal condition after the picture has been successfully unstuck.
Step 5: Cleaning the Glass
After successfully unsticking the picture from the glass and addressing any residual adhesive, the final step involves thoroughly cleaning the glass to ensure that it is free from any marks, residue, or solvent remnants. This critical phase of the process is essential for preparing the glass surface for re-framing or display, ensuring that it remains pristine and visually appealing.
Begin by inspecting the glass surface to identify any remaining traces of adhesive, solvent, or debris. Use a clean, lint-free cloth to gently wipe the entire glass surface, removing any residual particles or marks. It is important to approach this initial cleaning with care, ensuring that the cloth is soft and non-abrasive to prevent any unintended scratches or damage to the glass.
Next, dampen a fresh lint-free cloth with a mild glass cleaner or a solution of water and vinegar. This gentle cleaning solution is effective in removing any stubborn marks or residue that may have persisted after the previous steps. Avoid using harsh or abrasive cleaners, as they can potentially damage the glass surface or leave behind streaks.
Carefully wipe the entire glass surface with the dampened cloth, ensuring that any remaining traces of adhesive or solvent are thoroughly removed. Pay close attention to the edges and corners of the glass, as these areas may harbor residual marks that require meticulous cleaning. It is important to maintain a methodical and thorough approach to ensure that the glass is impeccably clean.
Once the glass has been cleaned with the mild solution, use a dry lint-free cloth to gently buff the surface, removing any moisture or streaks. This final step ensures that the glass is left sparkling and free from any residue, ready to showcase the picture or be re-framed without any visual imperfections.
In cases where the glass exhibits stubborn marks or residue that are resistant to the mild cleaning solution, consider using a specialized glass cleaner designed to address tougher stains. Exercise caution when using such cleaners, ensuring that they are compatible with the type of glass and do not pose any risk of damage.
By meticulously cleaning the glass after unsticking the picture, you can ensure that the glass surface is restored to a pristine condition, ready to showcase the picture or artwork without any remnants of the adhesion. This final step completes the process of safely and effectively separating the picture from the glass, leaving the glass surface immaculate and visually appealing.
Conclusion
In conclusion, successfully unsticking a picture from glass requires a delicate and methodical approach, prioritizing the preservation of the picture and the glass while addressing the adhesion with precision and care. By understanding the problem, gathering the necessary materials, and following the recommended techniques, it is possible to safely separate the picture from the glass without compromising their integrity.
The process begins with a thorough assessment of the situation, encompassing the degree of adhesion, the type of picture, the condition of the glass, and the environmental factors at play. This initial step sets the stage for the subsequent actions, providing a comprehensive understanding of the task at hand and guiding the approach to the separation process.
The strategic use of a heat source serves as a fundamental technique in softening the adhesive that binds the picture to the glass. By applying heat in a controlled and methodical manner, the adhesive becomes more pliable, facilitating a gradual and gentle separation without causing damage to the photograph or the glass surface.
Delicately using a razor blade or a precision utility knife to create a separation point and maneuver along the edges of the picture is instrumental in facilitating its release from the glass surface. This meticulous approach sets the stage for the subsequent steps in the separation process, guiding the picture towards a safe and successful detachment from the glass.
Incorporating the use of a mild solvent in the separation process effectively addresses any residual adhesive and ensures that the glass surface is thoroughly cleansed. This meticulous approach sets the stage for the final step of cleaning the glass, ensuring that it remains in optimal condition after the picture has been successfully unstuck.
Thoroughly cleaning the glass after unsticking the picture ensures that the glass surface is restored to a pristine condition, ready to showcase the picture or be re-framed without any visual imperfections. This final step completes the process of safely and effectively separating the picture from the glass, leaving the glass surface immaculate and visually appealing.
In essence, the successful separation of a picture from glass requires patience, precision, and the use of appropriate materials and techniques. By following the step-by-step process outlined in this guide, individuals can confidently tackle the task of unsticking a picture from glass, preserving cherished memories and valuable artworks with care and expertise.
Frequently Asked Questions about How To Unstick A Picture From Glass
Was this page helpful?
At Storables.com, we guarantee accurate and reliable information. Our content, validated by Expert Board Contributors, is crafted following stringent Editorial Policies. We're committed to providing you with well-researched, expert-backed insights for all your informational needs.


0 thoughts on “How To Unstick A Picture From Glass”