Home>Furniture & Design>Living Room Furniture>How To Fix Recliner Mechanism

Living Room Furniture
How To Fix Recliner Mechanism
Modified: October 19, 2024
Learn how to fix your living room furniture and design with our step-by-step guide on repairing a recliner mechanism. Keep your favorite chair in top condition!
(Many of the links in this article redirect to a specific reviewed product. Your purchase of these products through affiliate links helps to generate commission for Storables.com, at no extra cost. Learn more)
Introduction
A recliner is a beloved piece of furniture that offers unparalleled comfort and relaxation. Whether it's the focal point of your living room or a cherished spot for unwinding after a long day, a malfunctioning recliner mechanism can be a major inconvenience. Fortunately, with the right guidance and a bit of DIY spirit, you can learn how to fix a recliner mechanism and restore your favorite seat to its former glory.
In this comprehensive guide, we will walk you through the step-by-step process of diagnosing and repairing common issues that may arise with your recliner mechanism. From identifying damaged components to reassembling the recliner with precision, you'll gain the knowledge and confidence needed to tackle this repair project with ease.
By following the instructions outlined in this guide, you can save both time and money by avoiding the need for professional repairs or premature replacement of your recliner. With a few basic tools and a systematic approach, you'll be well-equipped to address a variety of issues, such as unresponsive or noisy reclining mechanisms, ensuring that your recliner continues to provide the comfort and support you've come to rely on.
So, if you're ready to roll up your sleeves and embark on a rewarding DIY endeavor, let's dive into the essential tools and materials you'll need to get started on fixing your recliner mechanism.
Key Takeaways:
- Fixing a recliner mechanism is a DIY project that can save time and money. With the right tools and a methodical approach, you can restore your recliner’s comfort and functionality, ensuring it remains a cherished piece of furniture in your home.
- By following a step-by-step process, you can diagnose and repair common issues with your recliner mechanism. From removing the recliner to reassembling it with precision, this guide empowers you to tackle the repair journey with confidence and achieve a sense of accomplishment.
Read more: How Recliner Mechanism Works
Tools and Materials Needed
Before delving into the repair process, it's crucial to gather the necessary tools and materials to ensure a smooth and efficient experience. Here's a comprehensive list of items you'll need to have on hand before beginning the recliner mechanism repair:
Tools:
- Screwdriver Set: A set of screwdrivers with various head types, including Phillips and flathead, will be essential for disassembling and reassembling the recliner components.
- Pliers: Both regular and needle-nose pliers will aid in gripping and manipulating small parts during the repair process.
- Adjustable Wrench: This versatile tool will come in handy for tightening or loosening nuts and bolts as needed.
- Hammer: A lightweight hammer can assist in gently tapping components back into place or adjusting metal parts.
- Allen Wrench Set: If your recliner features hex screws or bolts, an Allen wrench set will be necessary for loosening and tightening these fasteners.
- Flashlight: A reliable flashlight will help illuminate hard-to-reach areas within the recliner's frame, making it easier to identify and address issues.
Materials:
- Replacement Parts: Depending on the specific problem with your recliner mechanism, you may need to acquire replacement parts such as springs, cables, or levers. It's advisable to consult the recliner's manual or contact the manufacturer to obtain the correct replacement components.
- Lubricant: A high-quality lubricant, such as silicone-based or lithium grease, will be essential for addressing squeaks and ensuring smooth operation of the recliner's moving parts.
- Clean Cloth: Keeping a clean cloth on hand will allow you to wipe down components and remove any debris or old lubricant during the repair process.
- Safety Gloves: To protect your hands from sharp edges and potential pinching hazards, a pair of durable safety gloves is highly recommended.
- Safety Glasses: When working with tools and moving parts, safety glasses will provide essential eye protection, reducing the risk of injury from debris or accidental contact.
By ensuring that you have these tools and materials readily available, you'll be well-prepared to address a wide range of issues that may arise with your recliner mechanism. With everything in place, you can proceed confidently to the next step of removing the recliner from its frame to begin the repair process.
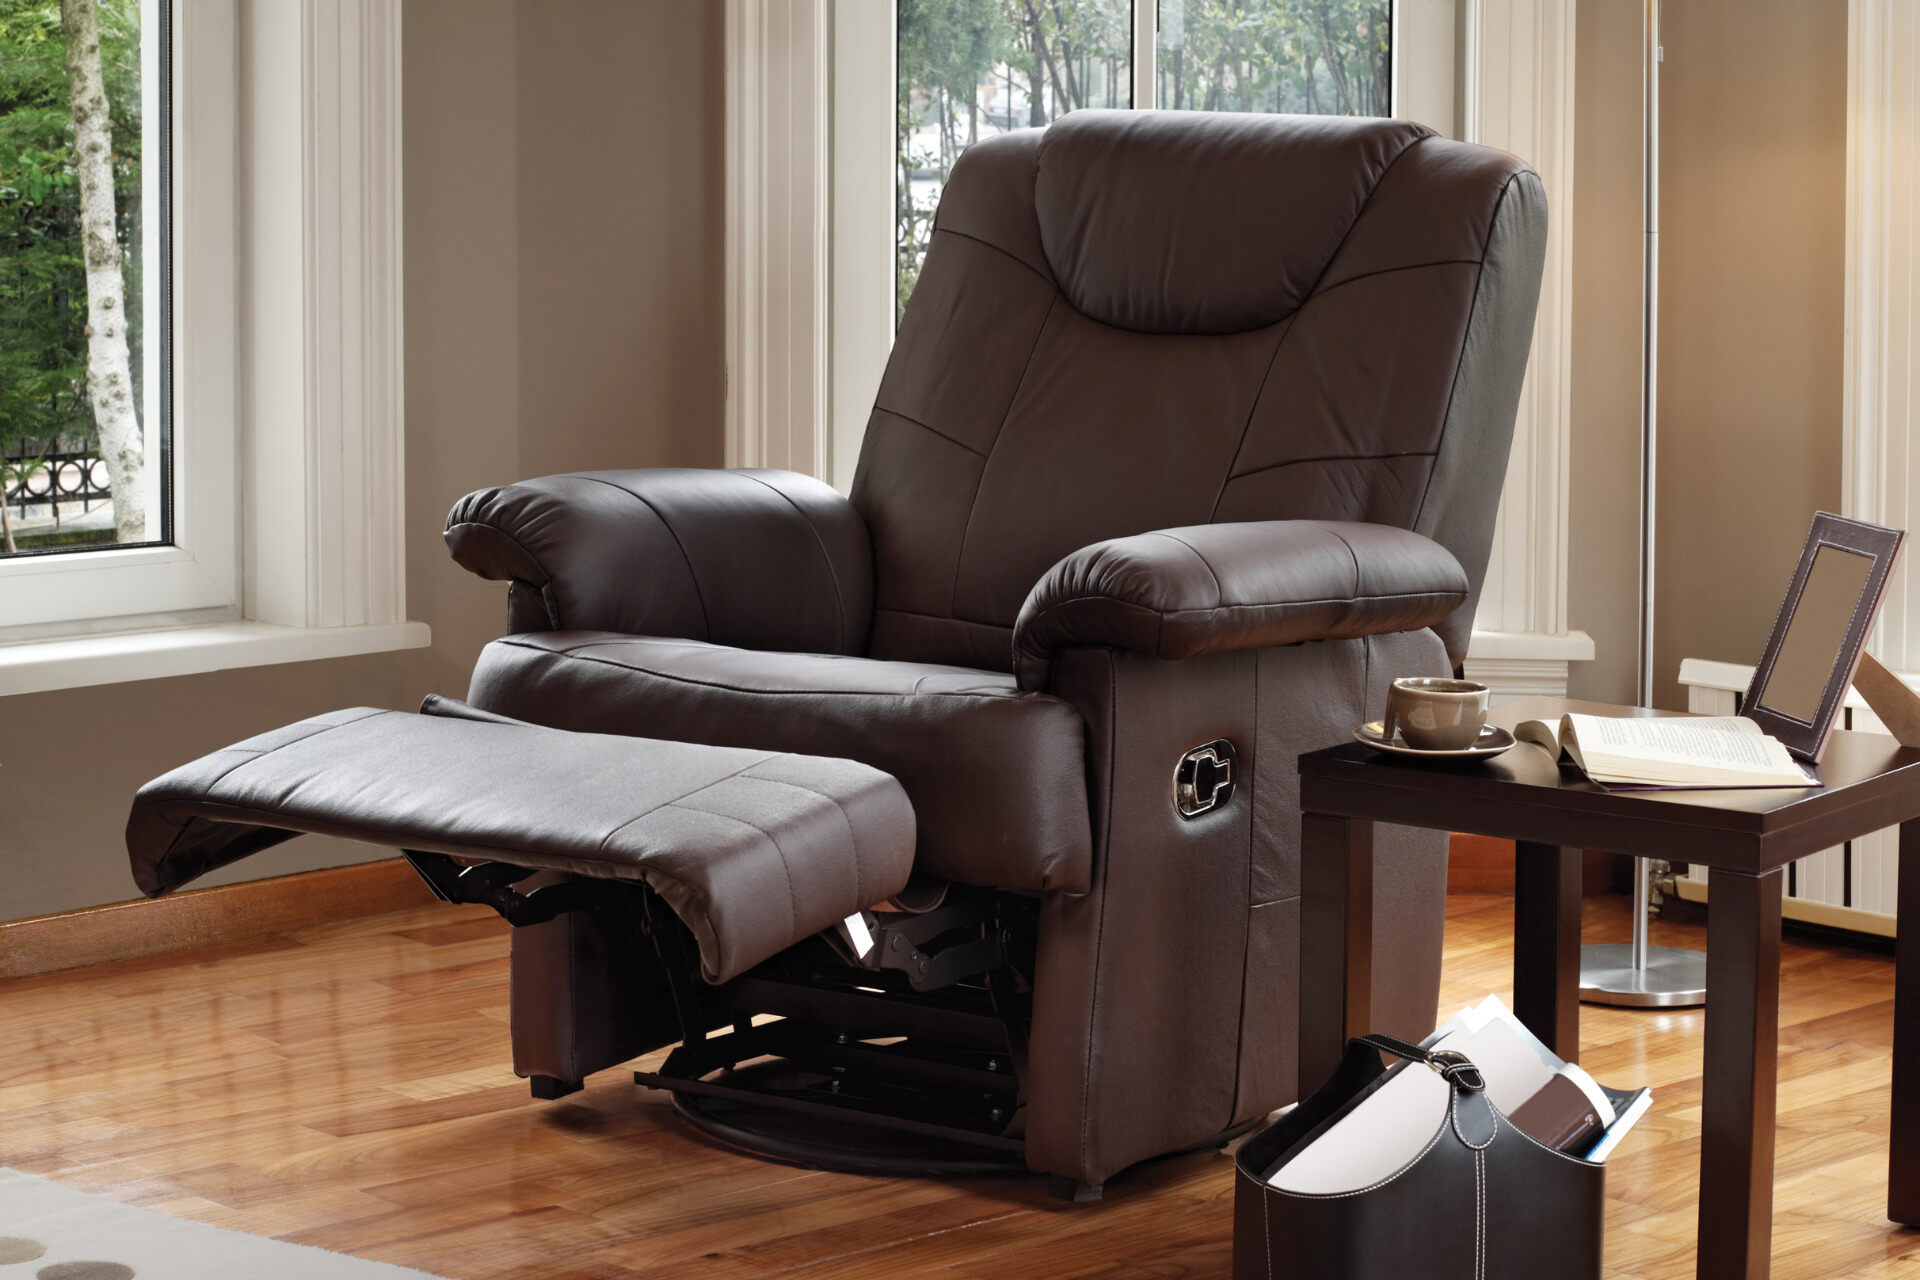
Step 1: Remove the Recliner from the Frame
Before diving into the intricate process of diagnosing and repairing the recliner mechanism, it's essential to start by removing the recliner from its frame. This initial step sets the stage for a thorough inspection and repair, allowing for better access to the internal components. Here's a detailed guide on how to safely and effectively remove the recliner from the frame:
Read more: How To Repair A Recliner Chair Mechanism
1. Positioning the Recliner
Begin by carefully reclining the chair to its fully extended position. This will make it easier to access the underside of the recliner and locate the attachment points to the frame.
2. Locate Attachment Points
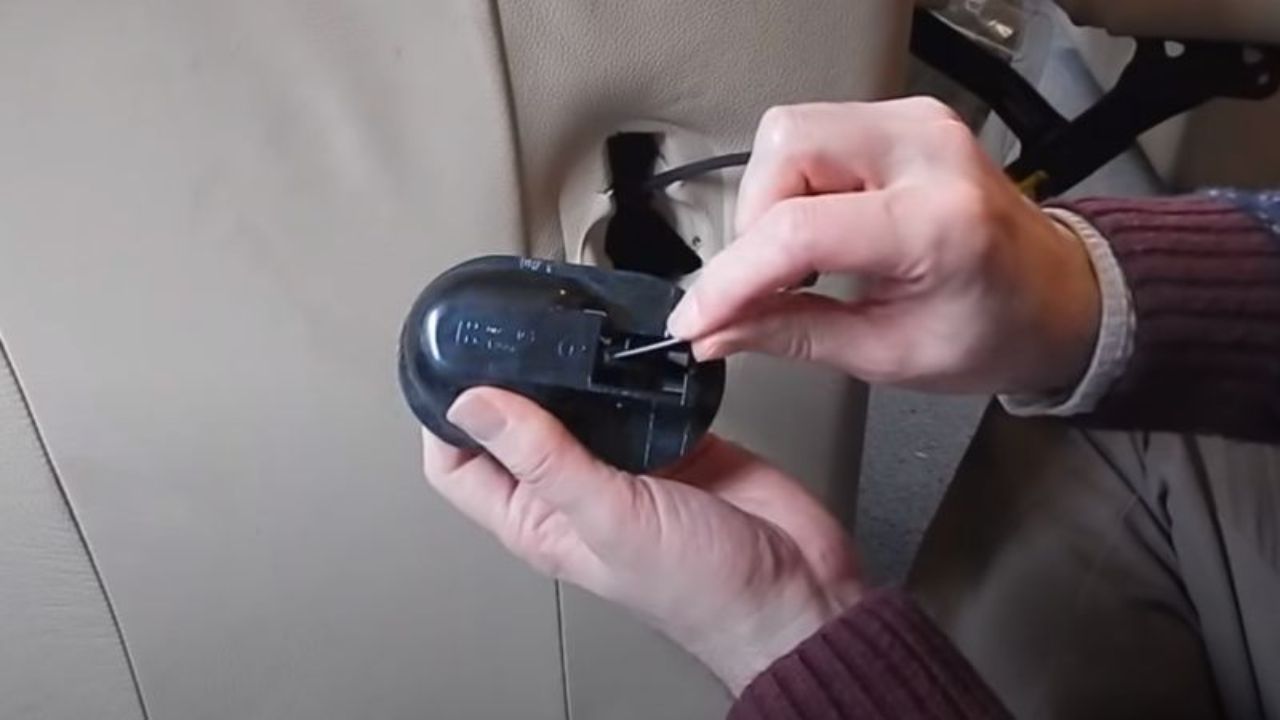
Inspect the underside of the recliner to identify the attachment points securing it to the frame. These attachment points may consist of screws, bolts, or clips, depending on the recliner's design.
3. Use the Right Tools
Select the appropriate tools based on the attachment points. A screwdriver, wrench, or Allen key may be required to loosen and remove the fasteners holding the recliner in place.
4. Enlist Assistance if Needed
If the recliner is heavy or cumbersome to handle alone, consider enlisting the help of a friend or family member to assist with lifting and maneuvering the chair during the removal process.
Read more: How To Fix A Recliner
5. Lift and Remove
With the fasteners loosened, carefully lift the recliner from the frame, ensuring that it is fully detached before gently setting it aside in a safe and accessible location.
By following these steps, you can safely detach the recliner from its frame, setting the stage for a thorough assessment of the recliner mechanism. With the chair removed, you'll have clear access to the internal components, allowing for a comprehensive inspection to identify any issues that may be affecting its functionality. This preparatory step is crucial for gaining a deeper understanding of the recliner's mechanism and laying the groundwork for the subsequent repair or replacement of damaged parts.
Now that the recliner is removed from the frame, the next step involves inspecting the mechanism for any signs of damage or wear, which will be covered in detail in the following section.
Step 2: Inspect the Mechanism for Damage
With the recliner removed from its frame, it's time to delve into a thorough inspection of the mechanism to identify any signs of damage or wear. This critical step will provide valuable insights into the underlying issues affecting the recliner's functionality, guiding the subsequent repair process. Here's a detailed guide on how to methodically inspect the recliner mechanism for potential damage:
1. Visual Examination
Begin by visually examining the various components of the recliner mechanism, paying close attention to areas where wear and tear are commonly observed. Look for any visible signs of damage, such as broken springs, frayed cables, or bent metal parts. Additionally, check for loose or detached fasteners that may be contributing to the malfunction.
2. Test Movement and Functionality
Next, test the movement and functionality of the recliner mechanism by gently manipulating the levers, handles, and other control elements. Observe how the recliner responds to adjustments and take note of any irregularities, such as stiffness, grinding noises, or unresponsiveness. This hands-on assessment will help pinpoint specific areas of concern within the mechanism.
Read more: How To Fix Recliner Footrest
3. Check for Misalignments
Inspect the alignment of the recliner's moving parts, ensuring that they are properly positioned and engage smoothly during operation. Misalignments can lead to excessive friction, hindering the recliner's ability to recline or extend properly. Look for any obstructions or obstacles that may be impeding the smooth movement of the mechanism.
4. Evaluate Upholstery and Padding
While focusing on the mechanism itself, it's important to also assess the condition of the upholstery and padding surrounding the recliner's frame. Tears, rips, or excessive wear in these areas can impact the overall comfort and appearance of the recliner. Addressing any upholstery-related issues alongside the mechanical repairs will ensure a comprehensive restoration of the recliner.
5. Document Findings
As you conduct the inspection, document your findings, including any specific areas of damage or malfunction. Taking photographs or making notes can serve as valuable references when proceeding with the repair or replacement of components. This documentation will aid in maintaining a clear overview of the necessary repairs and parts needed.
By meticulously inspecting the recliner mechanism for damage, you'll gain a deeper understanding of the underlying issues affecting its performance. This comprehensive assessment sets the stage for the subsequent repair or replacement of damaged components, ensuring that the recliner is restored to optimal functionality. With a clear picture of the mechanism's condition, you can confidently proceed to the next step of repairing or replacing any identified damaged parts.
Now, let's move on to the crucial process of repairing or replacing the damaged components, which will be covered in detail in the following section.
Step 3: Repair or Replace Broken Parts
After conducting a thorough inspection of the recliner mechanism and identifying any damaged or worn components, the next pivotal step involves addressing these issues through repair or replacement. This meticulous process is essential for restoring the functionality and comfort of the recliner, ensuring that it continues to provide the relaxation and support you expect. Here's a detailed guide on how to effectively repair or replace broken parts within the recliner mechanism:
-
Assess the Extent of Damage: Begin by assessing the extent of damage to the identified components. Determine whether the damage can be remedied through repair, such as reattaching a loose spring or realigning a bent metal part, or if complete replacement is necessary due to irreparable damage.
-
Obtain Replacement Parts: If replacement is required, acquire the appropriate replacement parts based on the specific components that need to be addressed. Consult the recliner's manual or reach out to the manufacturer to ensure that you obtain the correct parts that are compatible with your recliner model.
-
Follow Manufacturer Guidelines: Adhere to any manufacturer-provided guidelines or instructions for repairing or replacing components within the recliner mechanism. This will ensure that the repair process aligns with the intended design and functionality of the recliner.
-
Secure Loose Fasteners: If the inspection revealed loose or detached fasteners, such as screws or bolts, use the appropriate tools to securely fasten these components back into place. Ensure that the fasteners are tightened to the recommended specifications to prevent future issues.
-
Repair Springs and Cables: For damaged or worn springs and cables, carefully address any issues by reattaching or replacing these vital components. Pay close attention to the proper positioning and tension of springs and cables to maintain the recliner's smooth operation.
-
Lubricate Moving Parts: Apply a high-quality lubricant to the moving parts of the recliner mechanism, such as hinges, pivot points, and sliding tracks. This will reduce friction, eliminate squeaks, and ensure that the recliner moves effortlessly during operation.
-
Realign and Adjust Components: If misalignments were identified during the inspection, take the necessary steps to realign and adjust the components to their proper positions. This will promote smooth and consistent movement within the recliner mechanism.
-
Test Functionality: After repairing or replacing the broken parts, thoroughly test the functionality of the recliner mechanism. Verify that the recliner reclines smoothly, extends without resistance, and operates quietly without any unusual noises.
By meticulously addressing the damaged components through repair or replacement, you can effectively restore the functionality and comfort of your recliner. This proactive approach ensures that the recliner continues to serve as a reliable and inviting piece of furniture in your living space.
Now, let's proceed to the final step of reassembling the recliner, which will be covered in detail in the following section.
Read more: How To Fix A Leaning Recliner
Step 4: Reassemble the Recliner
With the damaged components repaired or replaced, it's time to reassemble the recliner, bringing together all the intricately restored parts to ensure its seamless functionality. This crucial step marks the culmination of the repair process, setting the stage for the recliner to reclaim its position as a source of comfort and relaxation in your living space. Here's a detailed guide on how to methodically reassemble the recliner:
-
Refer to Documentation: Begin by referencing the recliner's manual or any documentation that outlines the assembly process. This will provide valuable insights into the specific sequence and techniques required for reassembling the recliner with precision.
-
Organize Components: Lay out all the repaired or replaced components in an organized manner, ensuring that you have everything you need to complete the reassembly. This includes springs, cables, fasteners, and any other essential parts that were addressed during the repair process.
-
Follow Reverse Order: Reassemble the recliner in the reverse order of disassembly, carefully following the steps you took to remove it from the frame. This systematic approach will help ensure that each component is reintegrated correctly, minimizing the risk of errors or oversights.
-
Secure Fasteners: As you reattach the recliner to its frame, secure all fasteners, such as screws, bolts, or clips, with the appropriate tools. Pay close attention to the recommended torque specifications to prevent over-tightening or under-tightening of the fasteners.
-
Check Alignment and Movement: Once the recliner is reassembled, verify that all components are properly aligned and that the mechanism moves smoothly without any obstructions. Test the reclining function and extension to confirm that the repaired components operate as intended.
-
Apply Lubrication: Apply a final round of lubrication to the moving parts of the recliner mechanism, ensuring that all hinges, pivot points, and sliding tracks are adequately lubricated. This will contribute to the recliner's smooth operation and longevity.
-
Inspect Upholstery: Take a moment to inspect the upholstery and padding, ensuring that they are securely in place and free from any damage incurred during the repair process. Address any issues related to the upholstery to restore the recliner's overall comfort and appearance.
By meticulously reassembling the recliner with attention to detail and precision, you can ensure that the repair process culminates in a fully restored and functional piece of furniture. With the recliner securely reattached to its frame and all components operating smoothly, you can once again enjoy the comfort and relaxation it provides.
This completes the comprehensive process of fixing a recliner mechanism, empowering you to address common issues and restore the functionality of your beloved recliner. With the right tools, materials, and a methodical approach, you've successfully navigated the repair journey, allowing your recliner to continue serving as a cherished oasis of comfort in your home.
Conclusion
In conclusion, the process of fixing a recliner mechanism encompasses a series of essential steps that empower you to address common issues and restore the functionality of your beloved recliner. By following the comprehensive guide outlined in this article, you've gained the knowledge and confidence needed to tackle this DIY endeavor with ease.
From the initial removal of the recliner from its frame to the meticulous inspection of the mechanism for damage, each step has been designed to provide a systematic approach to diagnosing and addressing issues that may arise with the recliner mechanism. The utilization of the right tools and materials, combined with a methodical repair process, ensures that your recliner can be restored to its optimal condition.
By meticulously repairing or replacing broken parts and reassembling the recliner with precision, you've taken proactive steps to ensure that it continues to serve as a reliable and inviting piece of furniture in your living space. The attention to detail and the thoroughness of the repair process contribute to the longevity and functionality of the recliner, allowing you to continue enjoying its comfort and support for years to come.
It's important to note that while the guide provides a comprehensive overview of the repair process, individual recliner models may have unique characteristics or components that require specific attention. Always refer to the manufacturer's guidelines and documentation for detailed insights into the assembly and repair of your particular recliner model.
Ultimately, the ability to fix a recliner mechanism not only saves time and money by avoiding professional repairs but also fosters a sense of accomplishment and self-sufficiency. By taking on this DIY project, you've demonstrated a proactive approach to maintaining and enhancing the comfort and functionality of your living room furniture.
With the knowledge and skills acquired through this guide, you're well-equipped to address a variety of issues that may arise with your recliner, ensuring that it remains a cherished oasis of relaxation in your home. So, as you settle back into the comfort of your newly restored recliner, take pride in the accomplishment of successfully fixing its mechanism and preserving its role as a beloved piece of furniture in your living space.
Frequently Asked Questions about How To Fix Recliner Mechanism
Was this page helpful?
At Storables.com, we guarantee accurate and reliable information. Our content, validated by Expert Board Contributors, is crafted following stringent Editorial Policies. We're committed to providing you with well-researched, expert-backed insights for all your informational needs.

0 thoughts on “How To Fix Recliner Mechanism”