Home>Furniture & Design>Living Room Furniture>How To Refinish A Teak Dining Table
Living Room Furniture
How To Refinish A Teak Dining Table
Published: January 4, 2024
Learn how to refinish a teak dining table to bring new life to your living room furniture. Our expert guide covers the best techniques and design tips.
(Many of the links in this article redirect to a specific reviewed product. Your purchase of these products through affiliate links helps to generate commission for Storables.com, at no extra cost. Learn more)
Introduction
So, you've got a beautiful teak dining table that's seen better days. Whether it's been subjected to years of wear and tear or you've recently acquired a second-hand piece, it's time to breathe new life into it. Refinishing a teak dining table is a rewarding project that can revitalize the look of your furniture and add a touch of elegance to your dining space. Teak is a durable and attractive wood that's commonly used for outdoor furniture, but it's equally stunning when incorporated into interior décor. By following the right steps and using the proper techniques, you can restore your teak dining table to its former glory and enjoy its natural beauty for years to come.
In this comprehensive guide, we'll walk you through the process of refinishing a teak dining table, from gathering the necessary materials to applying the finishing touches. You'll learn how to clean the table, sand it to perfection, and apply a finish that enhances its natural appeal. Additionally, we'll provide tips on maintaining the newly refinished table so that it remains a focal point of your dining area for the long haul. So, roll up your sleeves, put on your DIY hat, and let's get started on transforming your teak dining table into a stunning centerpiece that exudes timeless charm and sophistication.
Key Takeaways:
- Refinishing a teak dining table involves cleaning, sanding, and applying a protective finish to restore its natural beauty and ensure longevity. With the right materials and techniques, you can transform your table into a stunning centerpiece.
- After refinishing, maintain your teak dining table by establishing a cleaning routine, protecting it from environmental factors, and embracing its natural aging process. With proper care, your table will continue to exude timeless elegance.
Read more: How To Clean A Teak Dining Table
Step 1: Gather Your Materials
Before diving into the refinishing process, it’s essential to gather all the necessary materials and tools. Here’s a comprehensive list of items you’ll need to ensure a successful teak table refinishing project:
- Protective Gear: Start by prioritizing your safety. Wear protective gloves, safety goggles, and a face mask to shield yourself from dust, chemicals, and splinters during the refinishing process.
- Cleaning Supplies: To effectively clean the table, gather mild dish soap, a soft-bristled brush, and a bucket of warm water. Alternatively, you can use teak cleaner specifically designed for wooden furniture.
- Sanding Tools: Invest in high-quality sandpaper or sanding pads with varying grits (coarse, medium, and fine) to smoothen the table surface and remove any existing finish or blemishes. You may also opt for a power sander for larger projects.
- Finishing Products: Choose a teak oil, teak sealer, or teak finish that suits your preferences. Additionally, consider purchasing a clean, soft cloth or brush for applying the finish evenly.
- Protective Finish: If you desire added protection for your table, look for a clear polyurethane or varnish to seal the wood and safeguard it from spills and scratches.
- Applicators: Depending on the chosen finish, have foam brushes, paintbrushes, or lint-free cloths on hand for smooth and controlled application.
- Surface Protection: To shield your work area, gather drop cloths, plastic sheets, or old newspapers to prevent spills and drips from damaging the surroundings.
- Optional Supplies: If the table requires extensive repairs, consider obtaining wood filler, a putty knife, and a small chisel to address any cracks, gouges, or imperfections.
By ensuring that you have all the essential materials and tools at your disposal, you’ll be well-prepared to embark on the teak dining table refinishing journey with confidence and efficiency.
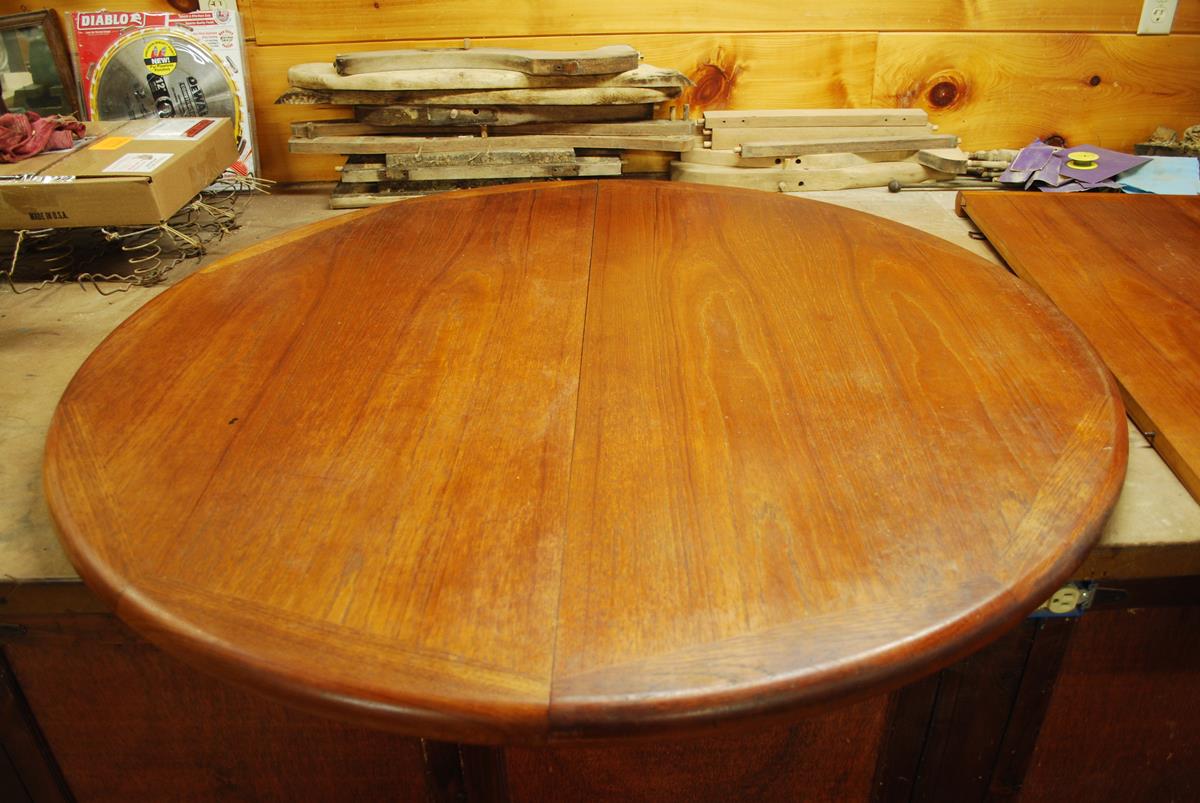
Step 2: Clean the Table
Before you can begin the refinishing process, it’s crucial to thoroughly clean the teak dining table to remove dirt, grime, and any residual finish. Follow these steps to ensure a pristine surface for the subsequent sanding and finishing stages:
- Remove Table Accessories: Clear the table of any decorative items, tableware, or other objects to create unobstructed access to the entire surface.
- Mix Cleaning Solution: Prepare a gentle cleaning solution by combining warm water with a small amount of mild dish soap. Alternatively, if you’re using a teak cleaner, follow the manufacturer’s instructions for dilution.
- Scrub the Surface: Dip a soft-bristled brush or a sponge into the cleaning solution and gently scrub the entire table, working in the direction of the wood grain. Pay special attention to areas with visible dirt or stains.
- Rinse Thoroughly: Once the table is clean, rinse off the cleaning solution with a separate bucket of clean water or a hose, ensuring that no soap residue remains on the surface.
- Dry Completely: Allow the table to air dry completely before proceeding to the next step. This step is crucial to prevent moisture from interfering with the subsequent sanding and finishing processes.
- Inspect for Lingering Stains: If any stubborn stains persist, consider using a teak cleaner specifically formulated to address deep-seated discolorations. Follow the product’s instructions for targeted stain removal.
By meticulously cleaning the table, you’ll create a pristine canvas for the refinishing efforts, ensuring that the wood’s natural beauty can shine through once the process is complete. A clean surface also allows for optimal adhesion of the new finish, resulting in a professional-looking outcome that enhances the table’s appearance and longevity.
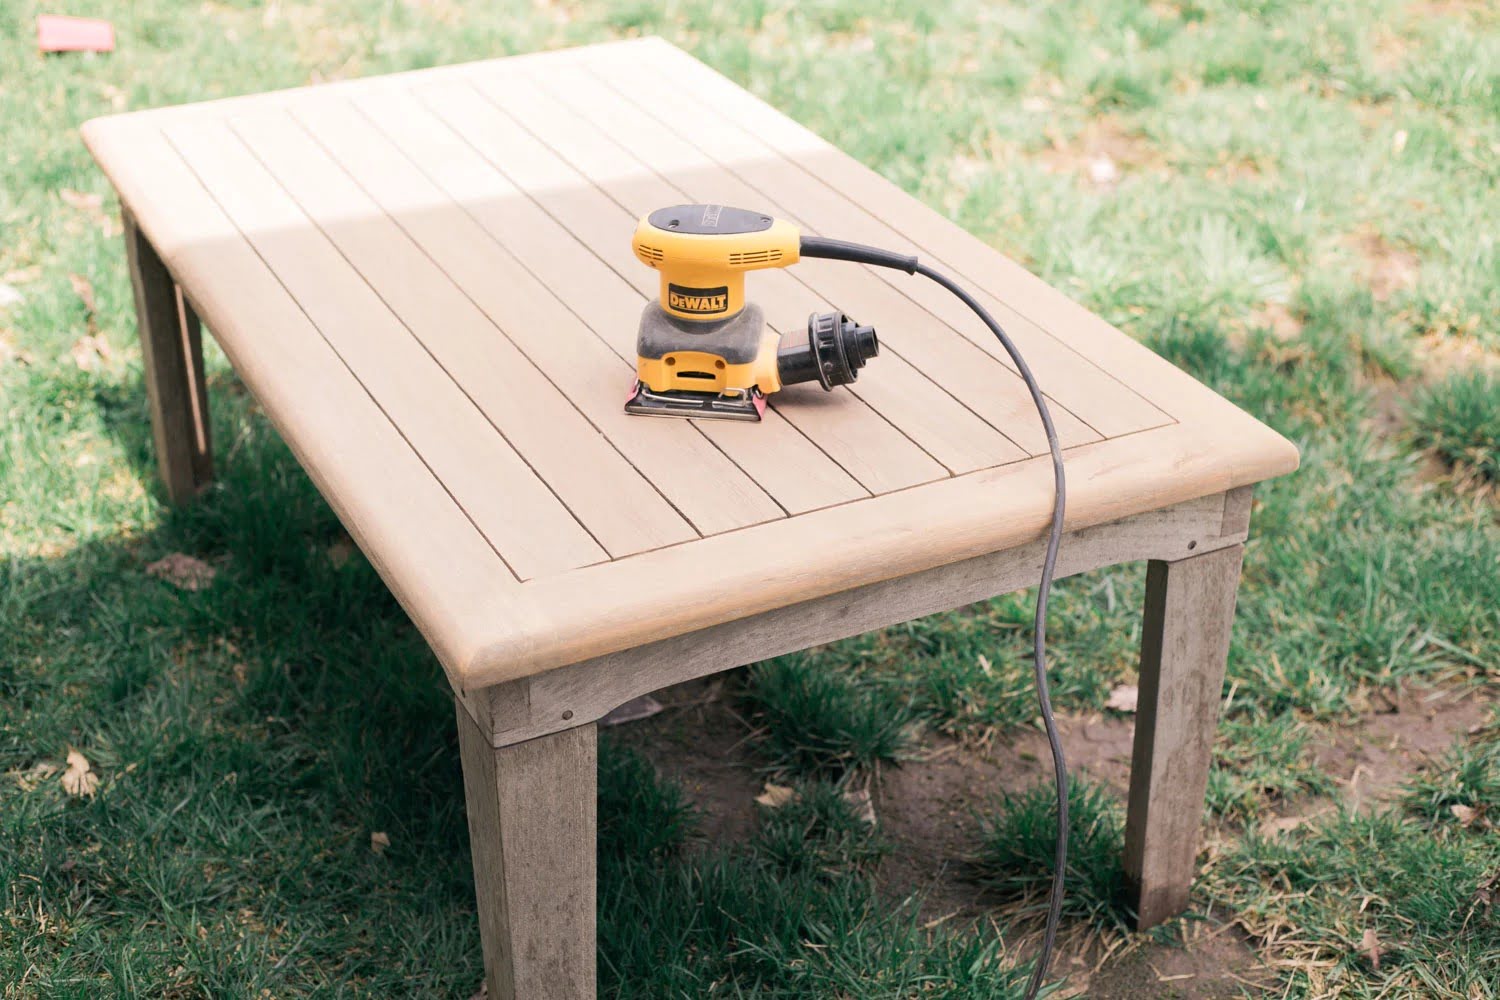
Step 3: Sand the Table
Once the table is thoroughly cleaned and completely dry, the next crucial step in the refinishing process is to sand the surface. Sanding is essential for smoothing out imperfections, removing any existing finish, and preparing the wood to absorb the new finish evenly. Follow these steps to achieve a beautifully sanded teak dining table:
- Choose the Right Grit: Begin with a coarse-grit sandpaper (around 80-100 grit) to address any rough patches, stubborn finish, or deep scratches. Progress to medium-grit sandpaper (around 150-180 grit) and finish with fine-grit sandpaper (around 220-240 grit) for a smooth, polished surface.
- Sand in the Direction of the Grain: Always sand in the direction of the wood grain to avoid creating visible scratches or marks that could detract from the table’s natural beauty.
- Even Pressure: Apply even pressure while sanding to ensure consistent results across the entire surface. Keep the sander or sandpaper flat against the wood to prevent uneven areas.
- Address Edges and Corners: For intricate areas, edges, and corners, use sandpaper or sanding pads designed for detail work. Take care to maintain the table’s original contours and profiles during this process.
- Remove Sanding Residue: After each sanding stage, use a clean, damp cloth to wipe away the sanding dust and inspect the surface for any remaining imperfections that require further attention.
- Smooth and Consistent Finish: Aim for a smooth and consistent finish across the entire table, ensuring that all blemishes, rough spots, and traces of the previous finish are effectively addressed.
By meticulously sanding the table, you’ll create a flawless foundation for the subsequent application of the new finish. The smooth and uniform surface achieved through proper sanding will enhance the table’s visual appeal and set the stage for the final refinishing steps.
Before refinishing a teak dining table, make sure to thoroughly clean the surface with a teak cleaner to remove any dirt and grime. This will ensure a smooth and even finish when applying the new stain or sealant.
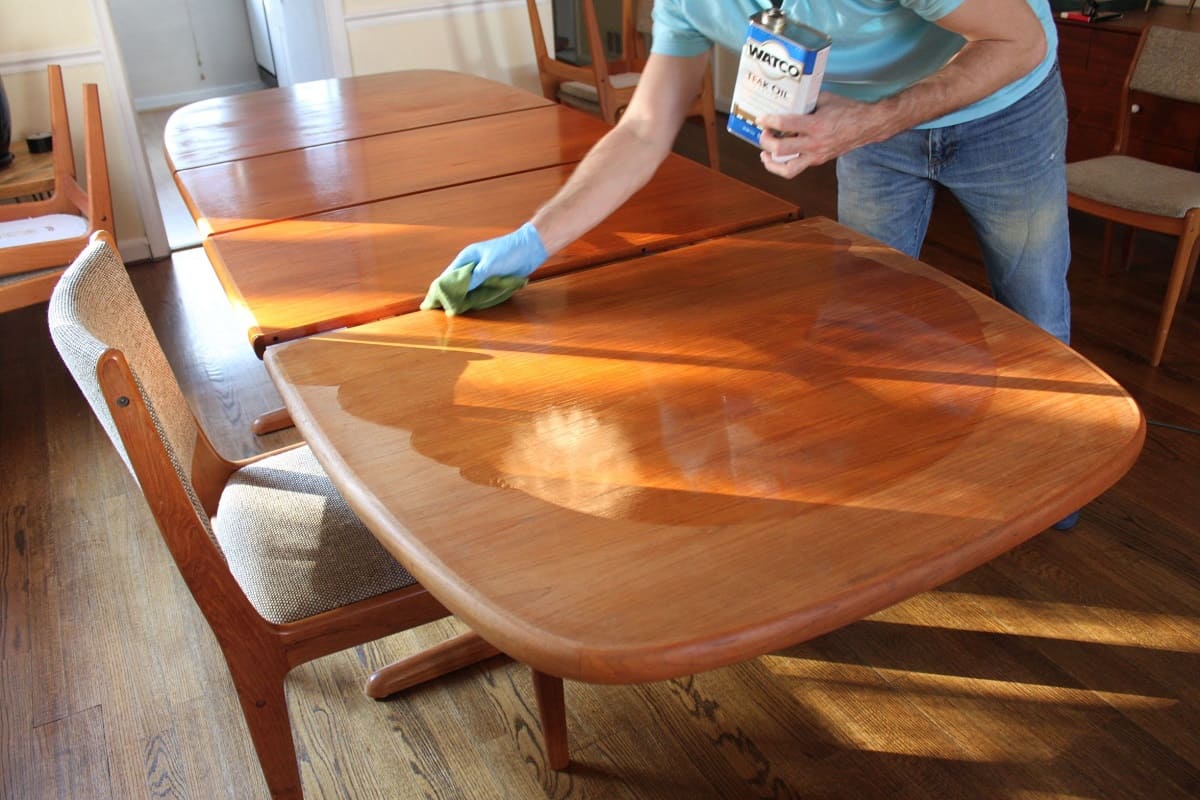
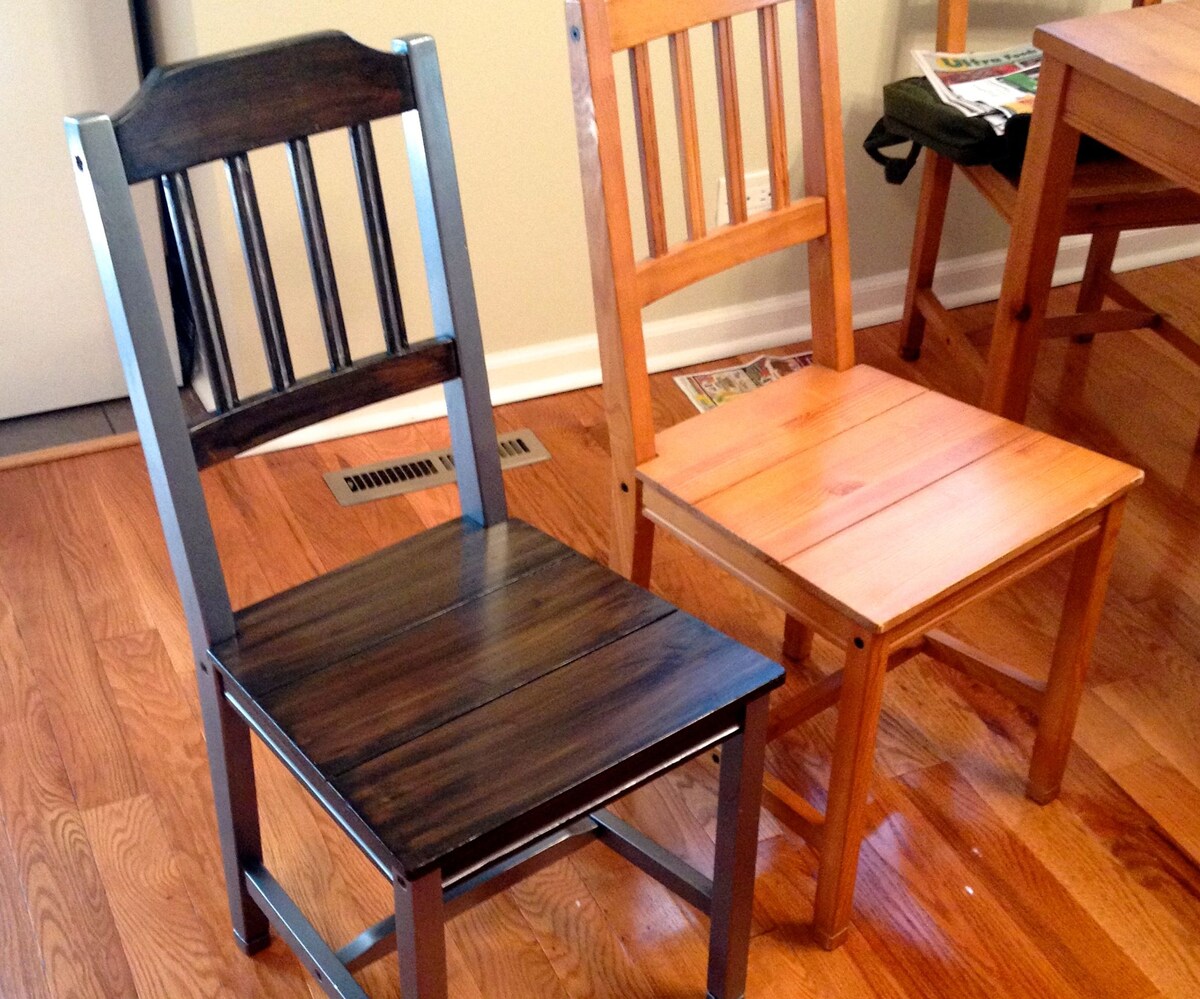
Step 4: Apply the Finish
With the table thoroughly cleaned and impeccably sanded, it’s time to apply the chosen finish to enhance the natural beauty of the teak wood and protect it from daily use and environmental factors. Whether you opt for a teak oil, sealer, or varnish, the application process requires precision and care to achieve a professional and long-lasting result. Follow these steps to expertly apply the finish to your teak dining table:
- Choose an Appropriate Finish: Select a finish that aligns with your aesthetic preferences and provides the level of protection you desire for your table. Teak oil enhances the wood’s natural color and grain, while a sealer or varnish offers added durability and resistance to moisture and stains.
- Prepare the Work Area: Lay down protective coverings to safeguard the surrounding space from drips and spills. Ensure proper ventilation to facilitate the drying process and minimize exposure to fumes.
- Apply the Finish Evenly: Use a clean, lint-free cloth, foam brush, or paintbrush to apply the finish in smooth, even strokes, following the direction of the wood grain. Take care to avoid pooling or excessive application, as this can lead to uneven drying and an unsightly finish.
- Allow for Absorption: Depending on the chosen finish, allow the table to absorb the initial coat for the specified duration before applying subsequent coats. This allows the wood to soak in the finish, enhancing its luster and protection.
- Apply Additional Coats (If Necessary): For optimal protection and sheen, consider applying multiple coats of the finish, ensuring that each layer is allowed to dry completely before the next application. Follow the manufacturer’s recommendations for the recommended number of coats.
- Inspect and Touch Up: After the final coat has dried, inspect the table for any unevenness or missed spots. Touch up any imperfections with a light sanding and a final application of the finish for a flawless result.
By applying the finish with precision and attention to detail, you’ll not only enrich the natural allure of the teak wood but also safeguard it from daily use, ensuring that your newly refinished dining table remains a stunning centerpiece for years to come.
Read more: How To Refinish A Veneer Dining Table
Step 5: Final Touches and Maintenance
As you near the completion of the teak dining table refinishing process, it’s essential to attend to final touches and establish a maintenance routine that will preserve the table’s beauty and integrity. Follow these steps to add the finishing touches and ensure ongoing care for your newly refinished table:
- Buff and Polish: Once the final coat of finish has dried, gently buff the table surface with a soft, clean cloth to enhance the sheen and smooth out any minor imperfections.
- Reassemble and Decorate: Once the table is fully cured, reassemble any removed components and adorn it with your favorite tableware, centerpieces, or decorative elements to showcase its renewed splendor.
- Establish a Cleaning Routine: Maintain the table’s radiance by regularly dusting it with a soft, dry cloth and wiping up spills promptly to prevent staining. Avoid harsh chemical cleaners that can compromise the finish.
- Periodic Maintenance: Depending on the level of use and exposure, periodically assess the table’s condition and reapply the finish as needed to uphold its protective properties and aesthetic appeal.
- Protect from Environmental Factors: Shield the table from prolonged exposure to direct sunlight, extreme temperatures, and excessive moisture to prevent premature aging and damage to the wood and finish.
- Embrace the Patina: Over time, teak wood develops a graceful patina that adds character to its appearance. Embrace this natural aging process as part of the table’s charm and beauty.
By tending to these final touches and establishing a consistent maintenance regimen, you’ll ensure that your teak dining table remains a cherished and enduring feature of your home. With proper care and attention, the refinished table will continue to exude timeless elegance and serve as a gathering place for cherished moments and shared meals.
Conclusion
Congratulations! You’ve successfully embarked on a transformative journey to refinish your teak dining table, breathing new life into a cherished piece of furniture and enhancing the ambiance of your dining space. By following the comprehensive steps outlined in this guide, you’ve harnessed the power of proper cleaning, meticulous sanding, and expert finishing techniques to revitalize the natural beauty of the teak wood and ensure its longevity.
Throughout the refinishing process, you’ve not only restored the table’s aesthetic appeal but also imbued it with a layer of protection against daily wear and tear. The newly refinished table now stands as a testament to your dedication to preserving and elevating the elements that make your home uniquely yours.
As you admire the gleaming surface and smooth contours of your teak dining table, take pride in the craftsmanship and care you’ve invested in this project. Whether you’re savoring intimate family meals, hosting lively gatherings, or simply enjoying quiet moments around the table, the beauty and durability of the refinished teak table will continue to enrich your home for years to come.
Remember, the journey doesn’t end here. Embrace the opportunity to maintain and cherish your refinished table, nurturing its timeless allure and allowing it to bear witness to the cherished moments and shared experiences that unfold in your home. With regular care and a touch of reverence, your teak dining table will remain a source of pride and a focal point of warmth and hospitality in your living space.
So, as you take a moment to admire the stunning transformation you’ve achieved, revel in the knowledge that your teak dining table now stands as a testament to the enduring beauty of craftsmanship, the resilience of natural materials, and the art of preservation. Here’s to the timeless elegance and lasting allure of your refinished teak dining table!
Frequently Asked Questions about How To Refinish A Teak Dining Table
Was this page helpful?
At Storables.com, we guarantee accurate and reliable information. Our content, validated by Expert Board Contributors, is crafted following stringent Editorial Policies. We're committed to providing you with well-researched, expert-backed insights for all your informational needs.


0 thoughts on “How To Refinish A Teak Dining Table”