Home>Furniture & Design>Outdoor Furniture>How To Build Outdoor Putting Green
Outdoor Furniture
How To Build Outdoor Putting Green
Modified: August 27, 2024
Learn how to create your own outdoor putting green with our expert tips and advice. Transform your backyard with our outdoor furniture and design ideas. Start practicing your golf game at home today!
(Many of the links in this article redirect to a specific reviewed product. Your purchase of these products through affiliate links helps to generate commission for Storables.com, at no extra cost. Learn more)
Introduction
Welcome to the world of outdoor putting greens! Whether you’re a golf enthusiast looking to practice your short game or a homeowner seeking to elevate your outdoor space, a custom putting green can be an exciting and rewarding addition to your property. As you embark on this journey, you’ll discover that building an outdoor putting green involves a blend of creativity, precision, and a touch of landscaping finesse. From planning and design to installation and maintenance, each step plays a crucial role in creating a functional and visually appealing putting green.
In this comprehensive guide, we’ll walk you through the step-by-step process of building an outdoor putting green, providing valuable insights and practical tips to help you bring your vision to life. By the end of this journey, you’ll not only have a stunning putting green to enjoy but also a newfound appreciation for the craftsmanship and artistry behind this outdoor feature. So, grab your putter and let’s tee off on this exciting endeavor!
Key Takeaways:
- Building an outdoor putting green involves careful planning, creative design, and precise installation. It’s a blend of artistry and functionality, offering a space for leisure and skill refinement in your outdoor sanctuary.
- From selecting the site to adding finishing touches, creating an outdoor putting green is a journey of dedication and creativity. Embrace maintenance to ensure lasting beauty and enjoyment of your green oasis.
Read more: How To Build A Putting Green With Real Grass
Step 1: Planning and Site Selection
Before breaking ground on your outdoor putting green, thoughtful planning and meticulous site selection are essential. Start by evaluating your outdoor space to determine the most suitable location for the putting green. Consider factors such as sunlight exposure, existing landscaping features, and the natural slope of the terrain. Ideally, you’ll want a spot that receives ample sunlight throughout the day and offers a relatively flat surface for the green.
Next, take measurements of the chosen area to determine the dimensions of the putting green. Consider the layout of your landscape and how the putting green will integrate with the surrounding elements. It’s also important to consider the overall design aesthetic and how the putting green will complement the existing outdoor environment.
Additionally, assess the soil quality and drainage in the selected area. Proper drainage is crucial to prevent water accumulation on the putting green, which could impact its playability and longevity. If necessary, consult with a landscaping professional to address any soil or drainage concerns before proceeding with the project.
Furthermore, take into account any potential obstacles or underground utilities that may affect the installation process. By thoroughly surveying the site and identifying any potential challenges in advance, you can mitigate unexpected setbacks and ensure a smoother construction process.
Lastly, consider your budget and timeline for the project. Establishing a clear budget and timeline will guide the decision-making process and help you align your expectations with the practical aspects of building the putting green.
By carefully planning and selecting the ideal site for your outdoor putting green, you’ll set the stage for a successful and visually harmonious addition to your outdoor living space.
Step 2: Designing the Putting Green
With the site selected, it’s time to delve into the creative process of designing your outdoor putting green. The design phase is where you can unleash your imagination and tailor the putting green to your preferences and playing style. Whether you envision a classic, undulating green or a modern, contoured surface, the design stage sets the tone for the overall aesthetic and functionality of the putting green.
Begin by sketching out a rough layout of the putting green, considering the placement of holes, contours, and potential obstacles such as bunkers or fringe areas. Take inspiration from professional golf courses or iconic putting greens to guide your design choices. Keep in mind that the size of the putting green should be proportional to the available space while allowing for a variety of putting challenges.
When designing the contours and slopes of the green, aim for a natural and seamless appearance. Gentle undulations and subtle breaks can enhance the visual appeal and provide an authentic putting experience. However, it’s essential to strike a balance to ensure that the putting green remains playable and enjoyable for practice sessions.
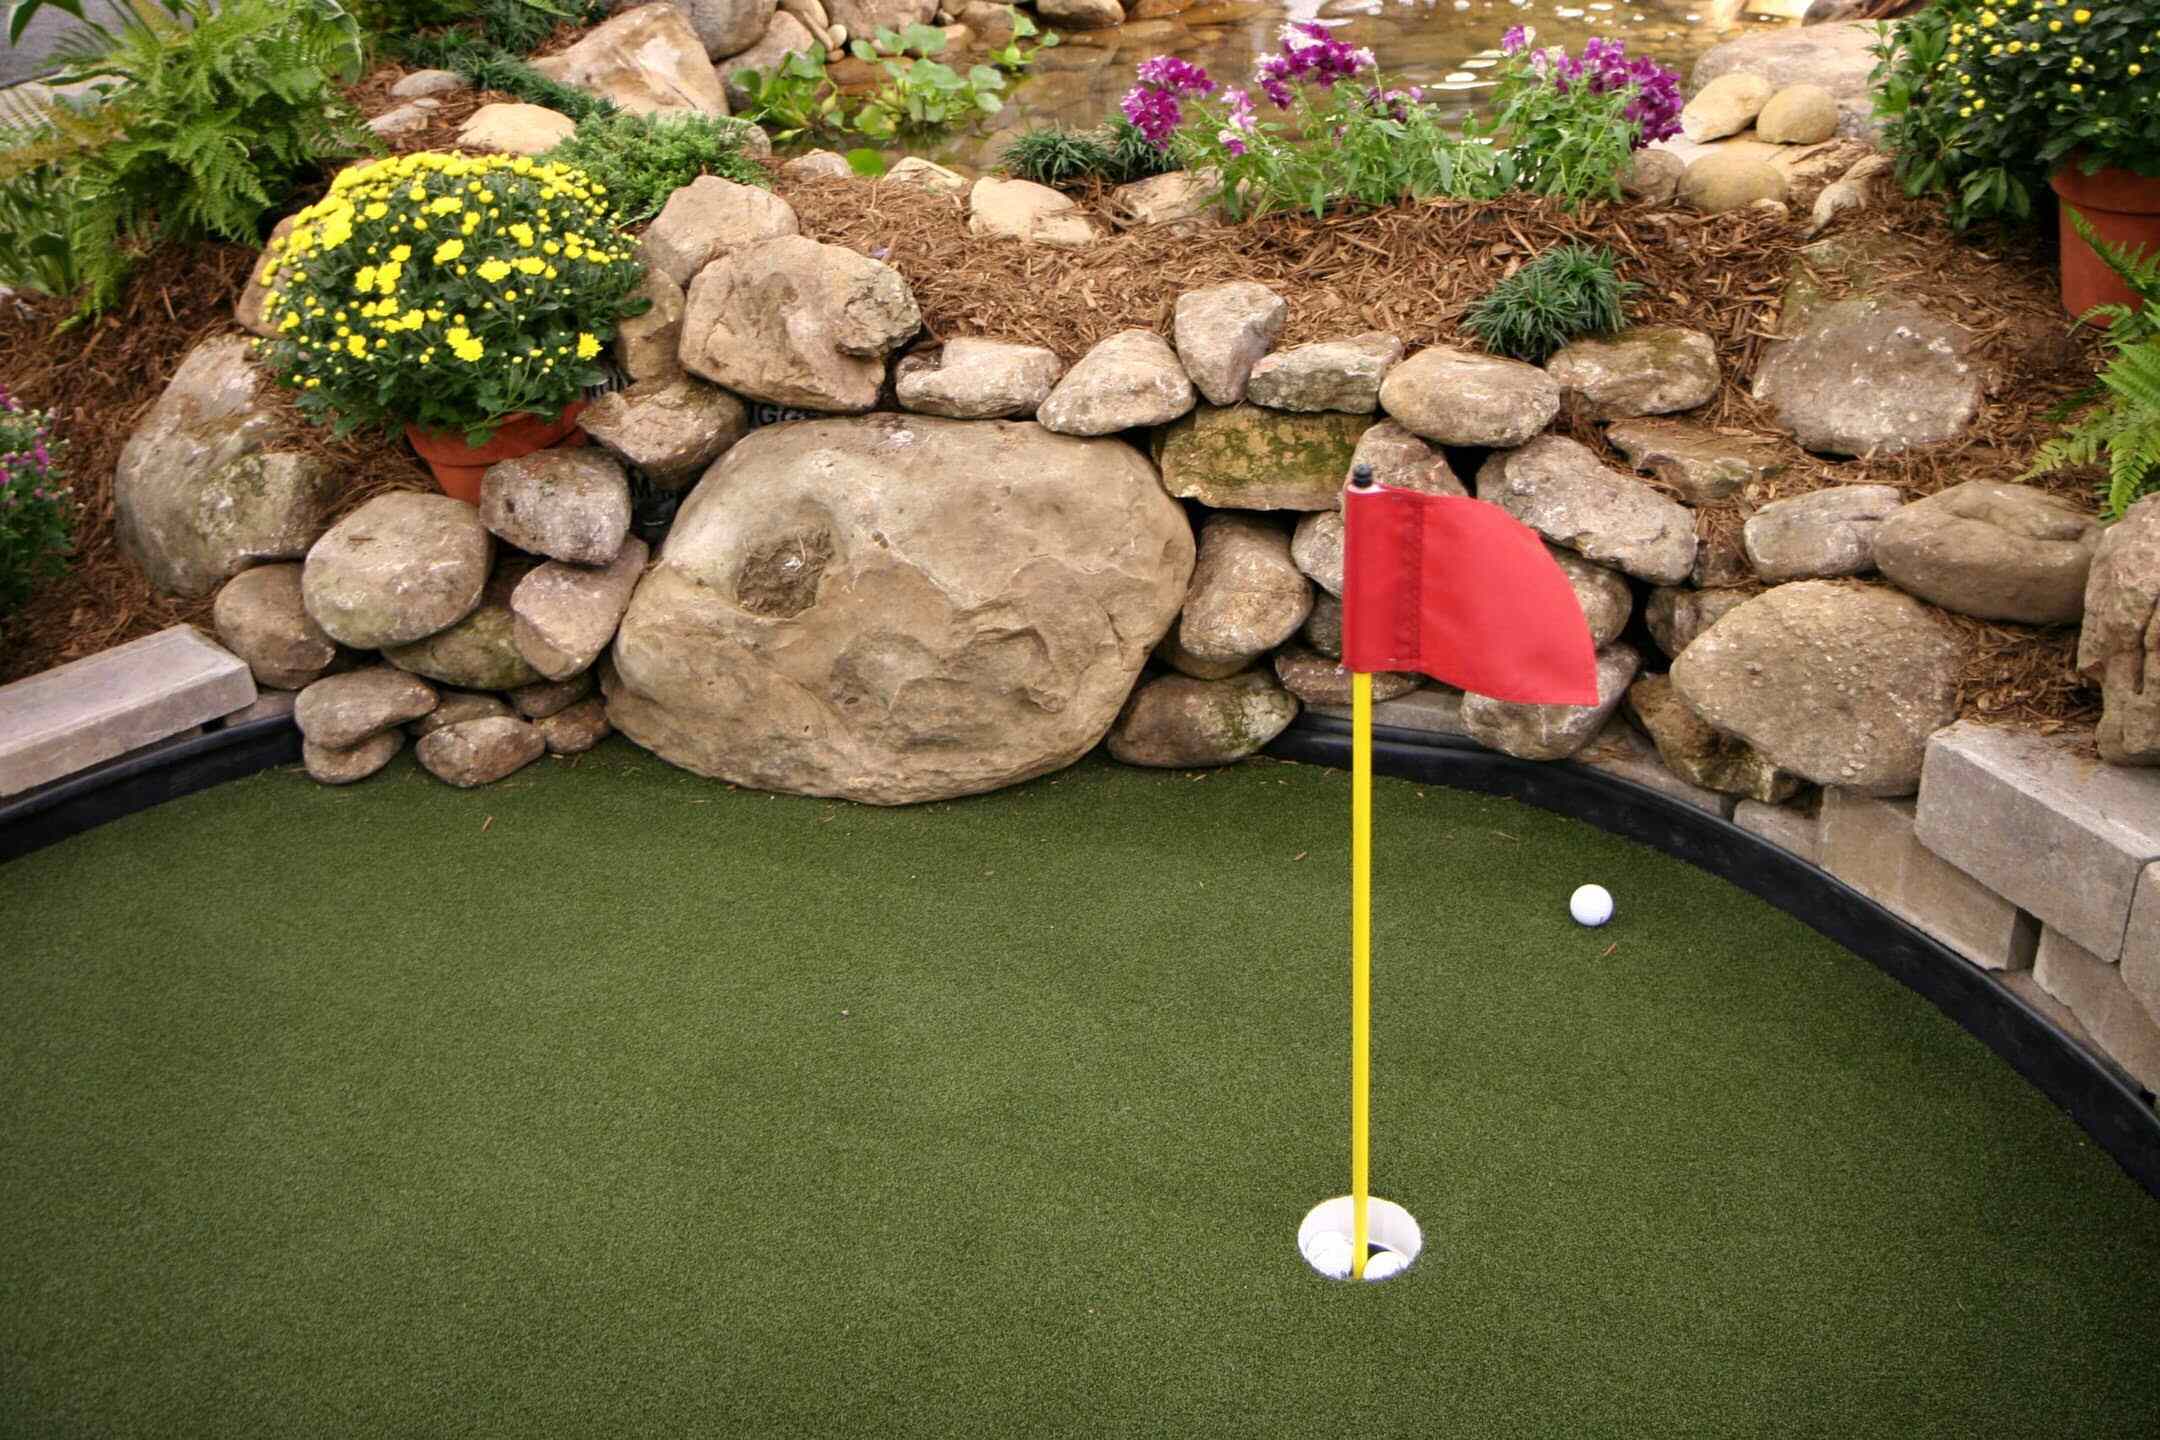
Consider incorporating landscaping elements around the putting green to create a cohesive and inviting setting. This could involve the strategic placement of ornamental plants, decorative rocks, or low-maintenance turf varieties to frame the putting surface and add visual interest to the surrounding area.
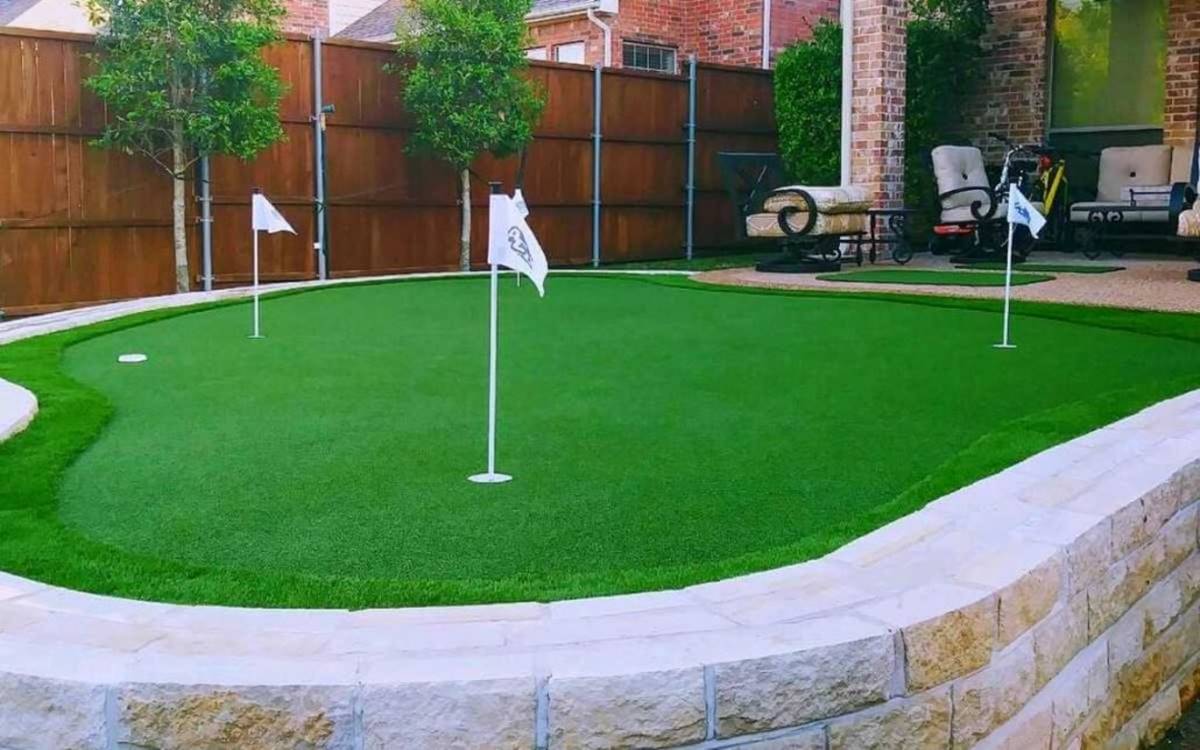
Furthermore, explore the option of integrating synthetic turf for the putting surface, as it offers durability, consistent ball roll, and low maintenance requirements. Select a high-quality synthetic turf product designed specifically for putting greens to achieve an authentic feel and performance.
Throughout the design process, keep an open line of communication with the installation team or landscaping professionals who will bring your design to life. Collaboration and feedback from experienced professionals can enrich the design process and ensure that the final product aligns with your vision.
By investing time and creativity into the design phase, you’ll lay the groundwork for a captivating and functional outdoor putting green that reflects your personal style and enhances your outdoor living space.
Step 3: Preparing the Ground
As you transition from the design phase to the practical implementation of your outdoor putting green, meticulous ground preparation becomes a critical focus. Properly preparing the ground sets the stage for a stable foundation and ensures the long-term integrity of the putting green.
Commence the preparation process by clearing the selected area of any existing vegetation, debris, or obstructions. This step may involve excavation to achieve a level surface and remove any roots or rocks that could impact the integrity of the putting green.
Next, evaluate the soil composition and make any necessary amendments to optimize its suitability for the putting green. This may involve soil testing to assess factors such as pH levels, compaction, and drainage. Depending on the findings, soil amendments such as sand, organic matter, or specialized soil blends may be incorporated to create an optimal growing medium for the turf.
Following soil preparation, establish proper grading to ensure effective water drainage away from the putting green. Proper grading helps prevent water accumulation, which can compromise the playability and longevity of the putting surface. Additionally, consider installing a perimeter edging system to contain the base materials and provide a defined border for the putting green.
For projects involving synthetic turf, the ground preparation phase may also include the installation of a compacted aggregate base. This base layer serves as a stable foundation for the synthetic turf and contributes to consistent ball roll and overall performance. Proper compaction and leveling of the aggregate base are essential to achieve a smooth and uniform surface for the putting green.
Throughout the ground preparation process, attention to detail and precision are paramount. By dedicating the necessary time and effort to prepare the ground meticulously, you’ll establish a solid foundation for the subsequent installation stages, ensuring that your outdoor putting green stands the test of time.
Step 4: Installing the Base Material
With the ground meticulously prepared, the installation process transitions to the crucial step of installing the base material. The base material serves as the foundation for the putting surface, providing stability, drainage, and a resilient support system for the synthetic turf or natural grass.
For projects involving natural grass putting greens, the base material typically consists of a specialized soil blend designed to promote healthy turf growth, optimal root development, and efficient water drainage. This soil blend is carefully applied and graded to create a smooth and uniform surface, laying the groundwork for the successful establishment of the putting green turf.
When installing a synthetic turf putting green, the base material comprises a compacted aggregate layer, such as decomposed granite or crushed stone. The aggregate base is meticulously installed and compacted to achieve a consistent and stable foundation for the synthetic turf. Proper compaction is essential to minimize settling and ensure a level surface that facilitates an authentic putting experience.
Following the installation of the base material, precise grading and leveling are performed to fine-tune the surface, ensuring that it aligns with the intended design and contours of the putting green. Smooth transitions and seamless integration of the base material set the stage for the next pivotal phase: installing the putting surface.
Throughout the installation of the base material, attention to detail and adherence to industry best practices are paramount. By meticulously executing this foundational stage, you’ll establish a solid base that underpins the performance, longevity, and visual appeal of your outdoor putting green.
When building an outdoor putting green, make sure to properly prepare the ground by removing any existing grass and weeds, and then compact the soil to create a smooth and level surface for the putting green.
Read more: How To Build A Green Roof On A Shed
Step 5: Installing the Putting Surface
As the groundwork is laid and the base material is in place, the focus shifts to the exciting stage of installing the putting surface. Whether you’ve opted for natural grass or synthetic turf, the putting surface is the centerpiece of the outdoor putting green, defining its playability, aesthetics, and overall appeal.
For natural grass putting greens, the installation of the putting surface involves carefully laying and establishing the turf. Select high-quality putting green turf varieties that are well-suited for the local climate and provide the desired ball roll characteristics. The turf is meticulously installed, ensuring proper seam integration and a seamless appearance across the putting green.
During the installation process, attention is given to achieving an even and consistent turf height, promoting a smooth and uniform putting experience. Additionally, irrigation systems may be integrated to support the health and vitality of the natural grass, ensuring optimal moisture levels for the putting surface.
For synthetic turf putting greens, the installation of the putting surface entails precisely fitting and securing the synthetic turf to the prepared base. High-quality synthetic turf products designed specifically for putting greens offer a realistic ball roll, durability, and low maintenance requirements. The turf is expertly installed, paying close attention to seam placement, infill distribution, and overall smoothness of the surface.
Upon completion of the putting surface installation, meticulous grooming and brushing techniques are employed to refine the appearance and performance of the turf. This step enhances the aesthetics and ensures that the putting green provides a consistent and enjoyable putting experience.
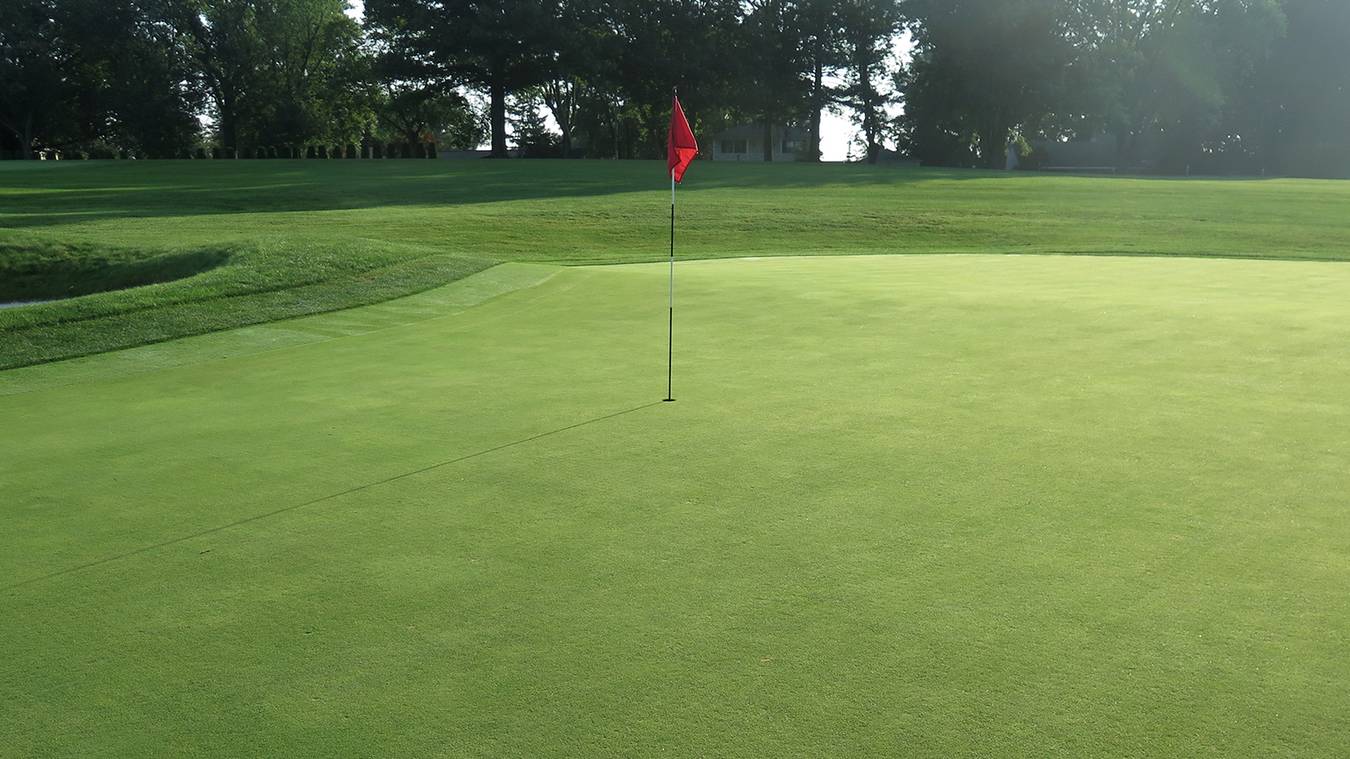
Whether natural or synthetic, the putting surface serves as the focal point of the outdoor putting green, embodying the artistry and precision that define this unique outdoor feature.
Step 6: Adding the Fringe and Bunkers
With the putting surface in place, the attention turns to enhancing the visual appeal and strategic elements of the outdoor putting green by incorporating the fringe and bunkers. These features not only add aesthetic charm but also introduce additional challenges and variety to the putting experience, creating a dynamic and engaging practice environment.
The fringe surrounding the putting green serves as a transitional zone between the putting surface and the surrounding landscape. It is typically covered with a low-maintenance turf variety that complements the putting green turf, creating a seamless and visually appealing border. The fringe area can be further enhanced with ornamental plants, decorative rocks, or other landscaping elements to frame the putting green and integrate it harmoniously with the outdoor environment.
Strategically positioned bunkers can elevate the challenge and excitement of the putting green, simulating the hazards found on professional golf courses. The installation of bunkers involves shaping and contouring designated areas, followed by the placement of specialized bunker sand to create authentic playing conditions. Well-designed bunkers not only add visual interest but also encourage golfers to refine their short game skills and creativity when navigating around these obstacles.
Throughout the installation of the fringe and bunkers, attention is given to achieving a seamless transition between these features and the putting green. The goal is to create a cohesive and inviting setting that reflects the artistry and attention to detail synonymous with professional golf courses.
By incorporating the fringe and bunkers, you’ll transform your outdoor putting green into a captivating and dynamic space that invites exploration and mastery of various putting challenges.
Step 7: Finishing Touches and Maintenance
As the construction phase nears completion, attention turns to the finishing touches that will elevate the overall appeal and functionality of your outdoor putting green. Additionally, establishing a comprehensive maintenance routine is essential to preserve the beauty and performance of the putting green for years to come.
For the finishing touches, consider adding subtle yet impactful elements such as pathway lighting, seating areas, and decorative landscaping features to enhance the ambiance of the putting green. Thoughtfully placed lighting fixtures not only extend the usability of the putting green into the evening hours but also contribute to a welcoming and enchanting atmosphere.
Seating areas strategically positioned near the putting green provide a comfortable vantage point for spectators and players alike, fostering a sense of community and relaxation within the outdoor space. Incorporating decorative landscaping features, such as ornamental planters or garden sculptures, adds a touch of artistry and character to the surroundings.
Following the completion of the finishing touches, establishing a tailored maintenance regimen is crucial to uphold the pristine condition and playability of the putting green. For natural grass putting greens, regular mowing, fertilization, aeration, and irrigation are essential to promote healthy turf growth and maintain optimal playing conditions.
Similarly, synthetic turf putting greens benefit from routine maintenance, including periodic brushing, debris removal, and infill replenishment to uphold the resilience and consistent ball roll characteristics of the turf. Additionally, inspecting the perimeter edging, drainage systems, and any integrated features such as bunkers or fringe areas is vital to address any maintenance needs promptly.
By diligently attending to the finishing touches and implementing a proactive maintenance plan, you’ll ensure that your outdoor putting green remains a captivating and functional feature that enriches your outdoor living experience for years to come.
Conclusion
Congratulations on embarking on the journey to create your very own outdoor putting green! Throughout this comprehensive guide, we’ve explored the intricate process of transforming a designated outdoor space into a captivating and functional putting green, seamlessly blending artistry, precision, and landscaping finesse.
Building an outdoor putting green is a testament to creativity and dedication, from the meticulous planning and site selection to the installation of the putting surface and the thoughtful addition of fringe and bunkers. Each step in the process contributes to the transformation of your outdoor space into a dynamic and engaging environment that beckons both leisurely enjoyment and skill refinement.
As you reflect on the journey from inception to completion, it’s evident that the outdoor putting green embodies the fusion of aesthetics and functionality, offering a space for relaxation, recreation, and honing golf skills. Whether you’re a golf enthusiast seeking to practice your short game or a homeowner envisioning an inviting outdoor retreat, the putting green stands as a testament to the art of outdoor design and the pursuit of leisure.
Moreover, the completion of the putting green marks the beginning of a new chapter—one that involves nurturing and maintaining this outdoor oasis to ensure its lasting beauty and performance. By embracing a proactive maintenance routine and infusing the finishing touches that enhance the ambiance, you’ll continue to derive joy and satisfaction from your outdoor putting green for years to come.
Ultimately, the outdoor putting green represents a harmonious blend of artistry, functionality, and the joy of outdoor living. It serves as a canvas for creativity, a haven for leisure, and a stage for refining the art of putting. As you take in the tranquil beauty and the allure of the putting green, may it inspire moments of joy, camaraderie, and personal achievement within your outdoor sanctuary.
So, as you prepare to take that first satisfying putt on your new green, remember the journey that brought you here and the countless moments of enjoyment and relaxation that await in this captivating outdoor space.
Frequently Asked Questions about How To Build Outdoor Putting Green
Was this page helpful?
At Storables.com, we guarantee accurate and reliable information. Our content, validated by Expert Board Contributors, is crafted following stringent Editorial Policies. We're committed to providing you with well-researched, expert-backed insights for all your informational needs.


0 thoughts on “How To Build Outdoor Putting Green”