Home>Furniture & Design>Outdoor Furniture>How To Fix Ac Outdoor Unit
Outdoor Furniture
How To Fix Ac Outdoor Unit
Modified: February 18, 2024
Learn how to fix your outdoor furniture with our expert tips and design ideas. Transform your outdoor space with our furniture solutions. Discover more!
(Many of the links in this article redirect to a specific reviewed product. Your purchase of these products through affiliate links helps to generate commission for Storables.com, at no extra cost. Learn more)
Introduction
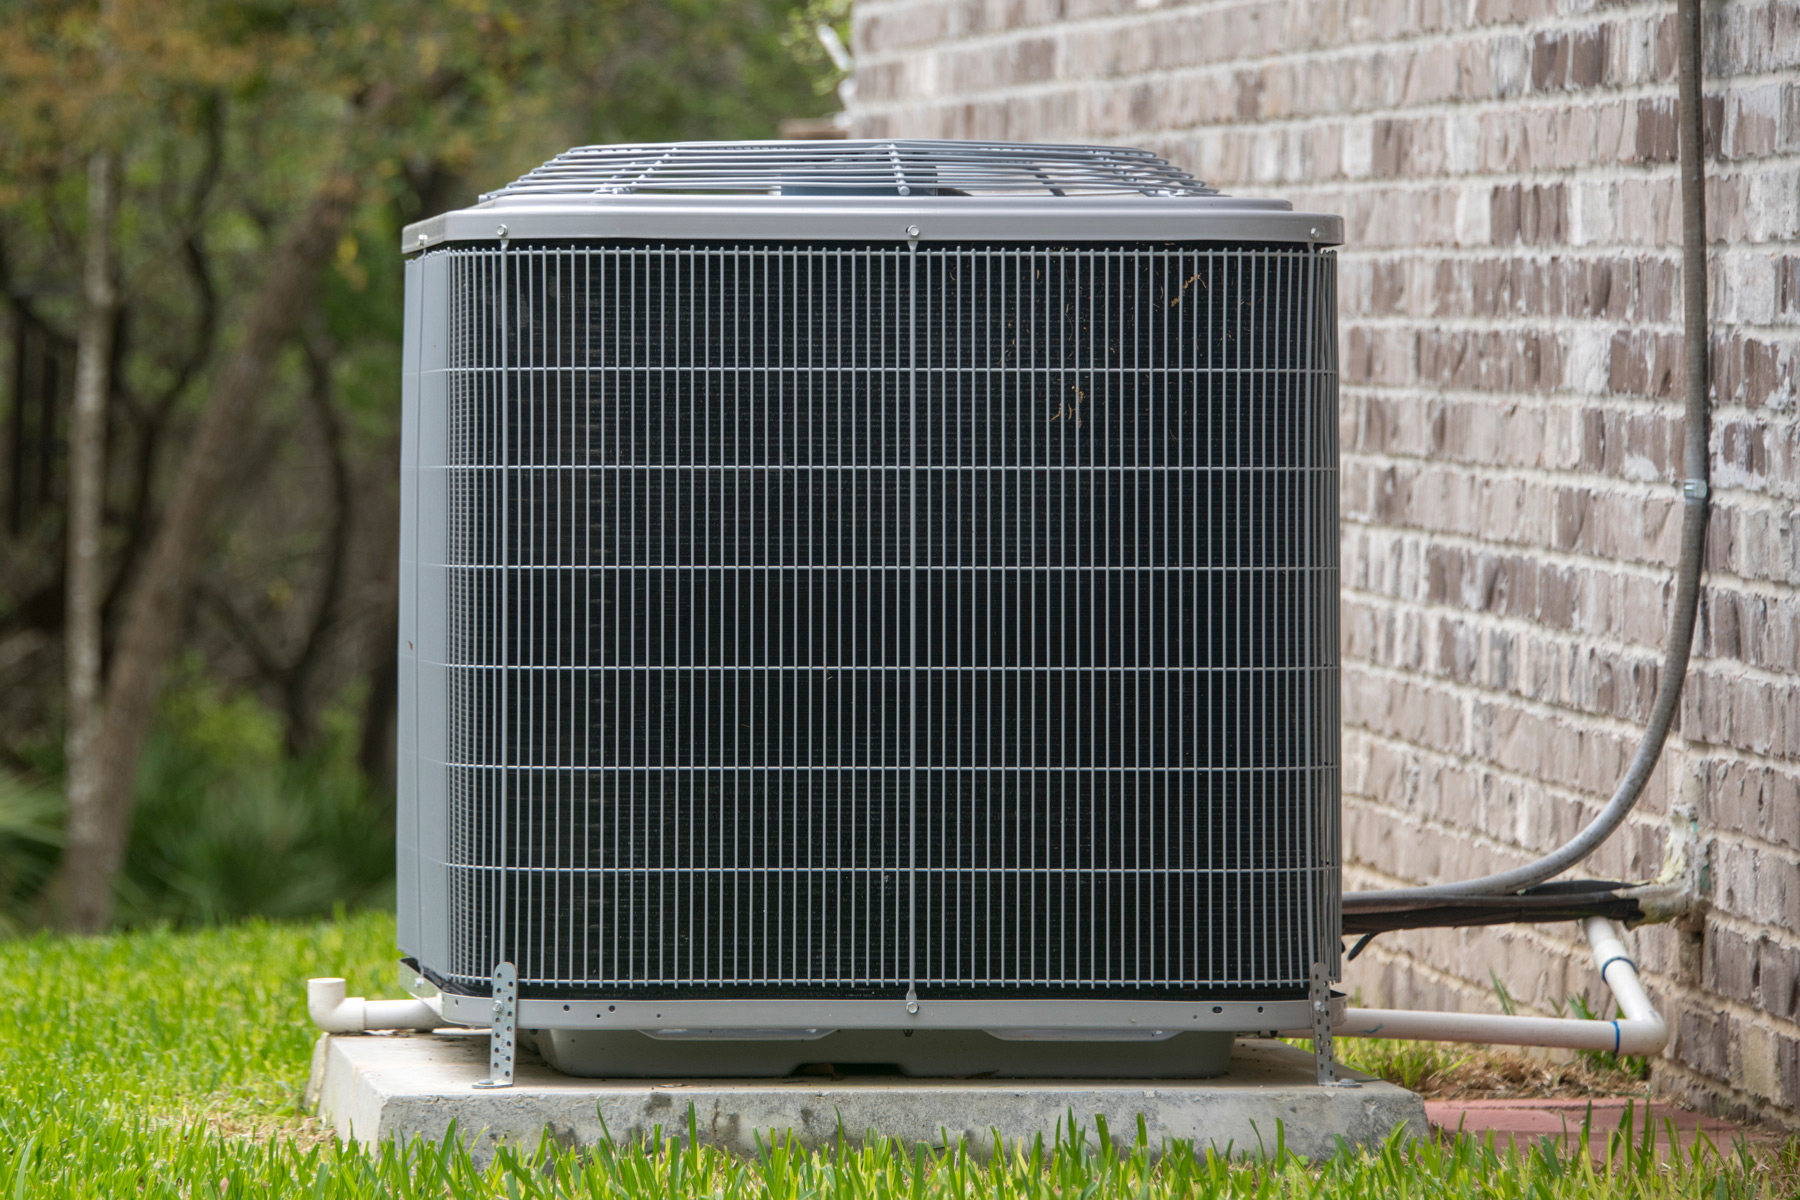
Welcome to our comprehensive guide on fixing your AC outdoor unit. Your outdoor AC unit plays a crucial role in keeping your home cool and comfortable, especially during the scorching summer months. However, like any mechanical system, it may encounter issues that require troubleshooting and maintenance. In this guide, we will walk you through the step-by-step process of addressing common problems with your AC outdoor unit.
Understanding the basics of AC maintenance and repair can save you time and money while ensuring that your cooling system operates efficiently. Whether you are dealing with a lack of cooling, strange noises, or other performance issues, this guide will equip you with the knowledge and skills to diagnose and resolve the issues effectively.
Before we dive into the specific steps for fixing your AC outdoor unit, it's important to emphasize the significance of safety precautions. Working with electrical components and moving parts requires careful attention and adherence to safety guidelines. By following the recommended safety measures and using the appropriate tools, you can mitigate the risks associated with AC maintenance and repair.
Let's embark on this insightful journey to restore the optimal functionality of your AC outdoor unit, ensuring a refreshing and comfortable indoor environment for you and your family.
Key Takeaways:
- Keep your AC outdoor unit clean and free from obstructions to ensure optimal performance and efficiency. Regular maintenance and safety precautions contribute to a comfortable indoor environment for you and your family.
- Prioritize safety and thorough inspections to maintain your AC outdoor unit’s longevity and reliability. Proactive care reduces the risk of unexpected malfunctions and costly repairs, ensuring consistent comfort in your home.
Read more: How To Fix Overcharged AC
Safety Precautions
Prior to initiating any maintenance or repair work on your AC outdoor unit, it is imperative to prioritize safety. By adhering to the following precautions, you can minimize the risk of accidents and ensure a secure working environment:
- Power Off: Before commencing any work on the outdoor unit, turn off the power supply to the AC system at the main electrical panel. This precautionary measure prevents the risk of electric shock while handling the unit’s components.
- Protective Gear: Equip yourself with appropriate personal protective equipment, such as safety goggles and gloves, to safeguard against potential hazards, including debris and sharp edges.
- Stable Surface: Ensure that the outdoor unit is positioned on a stable and level surface before conducting any maintenance tasks. This stability reduces the likelihood of the unit toppling over during the inspection or repair process.
- Clean Surroundings: Clear the area around the outdoor unit of any obstructions or debris to create a safe workspace. This includes removing vegetation, tools, and other items that may impede your access to the unit.
- Caution with Moving Parts: Exercise caution when handling the fan blades and other moving components of the outdoor unit. Avoid placing any body parts or loose clothing near these parts while the unit is operational or during the inspection process.
- Professional Assistance: If you encounter complex issues or are uncertain about performing certain tasks, it is advisable to seek professional assistance from a certified HVAC technician. Safety should always take precedence, and professional expertise can prevent potential mishaps.
By prioritizing safety precautions and maintaining a vigilant approach throughout the maintenance and repair process, you can safeguard yourself and others while working on the AC outdoor unit. Now that we have established the essential safety measures, let’s proceed to the tools and materials required for the task at hand.
Tools and Materials Required
Before delving into the maintenance and repair of your AC outdoor unit, it is vital to gather the necessary tools and materials to facilitate the process. By ensuring that you have the following items on hand, you can streamline the troubleshooting and maintenance tasks effectively:
- Insulated Screwdriver Set: A set of insulated screwdrivers is essential for safely accessing and inspecting electrical components within the outdoor unit.
- Adjustable Wrench: An adjustable wrench enables you to loosen and tighten various nuts and bolts during the maintenance process.
- Soft-Bristle Brush: A soft-bristle brush is useful for gently removing dirt, dust, and debris from the exterior of the outdoor unit without causing damage to the components.
- Fin Comb: This specialized tool allows you to straighten any bent fins on the outdoor unit’s condenser coil, optimizing airflow and heat transfer.
- Refrigerant Leak Detector: If you suspect a refrigerant leak, a refrigerant leak detector can help pinpoint the source of the issue for timely repair.
- Capacitor Tester: A capacitor tester is essential for evaluating the condition and functionality of the capacitors within the outdoor unit’s electrical system.
- Protective Gear: Equip yourself with safety goggles, work gloves, and appropriate footwear to safeguard against potential hazards during the maintenance process.
- Cleaners and Coil Sprays: Utilize specialized coil cleaners and sprays to effectively remove dirt, grime, and debris from the condenser and evaporator coils, promoting optimal heat exchange.
- Replacement Parts: Depending on the issues identified during the inspection, it may be necessary to have replacement components on hand, such as capacitors, contactors, or fan motors.
- User Manual or Schematics: Keep the user manual or schematics for your AC unit readily accessible for reference and guidance during the troubleshooting and repair process.
By ensuring that you have these essential tools and materials at your disposal, you can approach the maintenance and repair of your AC outdoor unit with confidence and preparedness. With the groundwork laid out, let’s proceed to the step-by-step process of addressing common issues and restoring your outdoor unit’s optimal functionality.
Step 1: Turn Off the Power
Before initiating any inspection or maintenance tasks on your AC outdoor unit, it is crucial to ensure that the power supply to the system is completely shut off. This precautionary measure is essential for your safety and prevents the risk of electric shock or injury while working on the unit’s components.
To safely turn off the power to your AC outdoor unit, follow these steps:
- Locate the Electrical Disconnect: Identify the electrical disconnect switch for your outdoor unit. This switch is typically housed in a metal box mounted on an exterior wall near the unit or directly on the unit itself.
- Open the Disconnect Box: Use caution when opening the disconnect box to access the electrical components. Depending on the design, you may need to unscrew the cover or lift a hinged lid to reveal the switch.
- Switch Off the Power: Once the disconnect box is open, locate the switch or switches inside. In most cases, you will find a handle that can be pulled out or flipped to the “off” position to cut off the power supply to the outdoor unit.
- Verify Power Disconnection: After switching off the power, double-check that the unit’s fan and compressor have stopped running. This visual confirmation ensures that the power has been successfully disconnected.
By diligently following these steps to turn off the power, you create a safe working environment for the subsequent inspection and maintenance tasks. Always exercise caution when handling electrical components and adhere to recommended safety practices throughout the repair process.
With the power supply to the outdoor unit safely deactivated, we can proceed to the next step, which involves cleaning the unit to enhance its performance and efficiency.
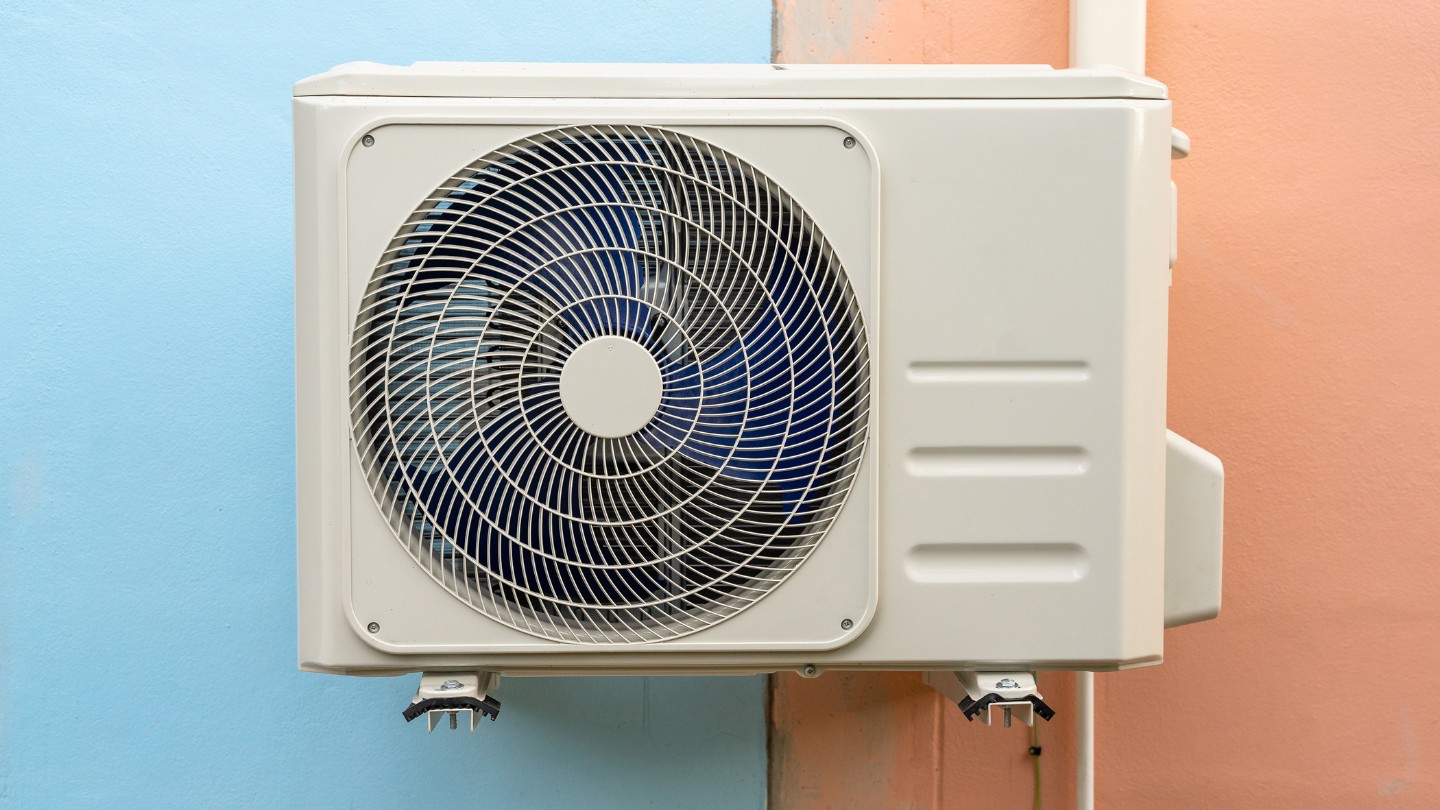
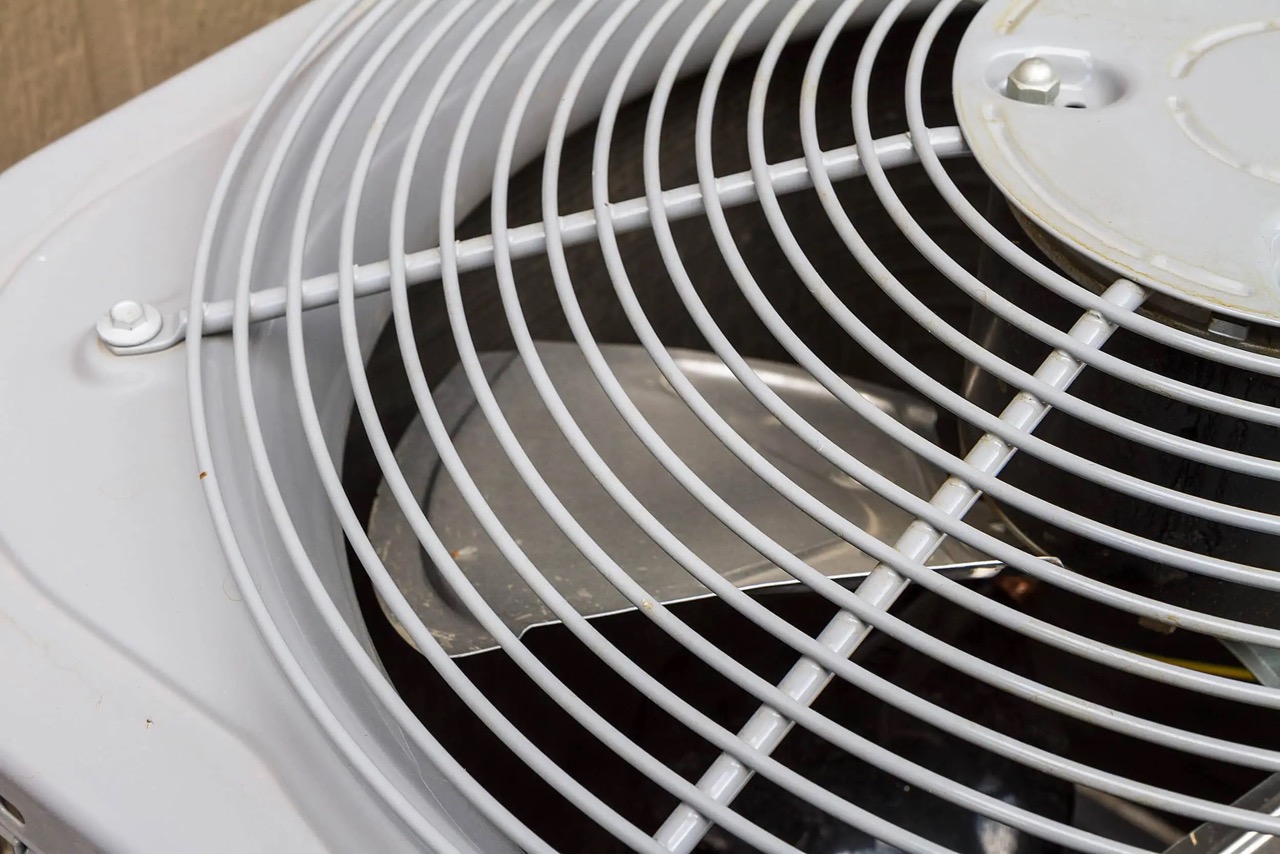
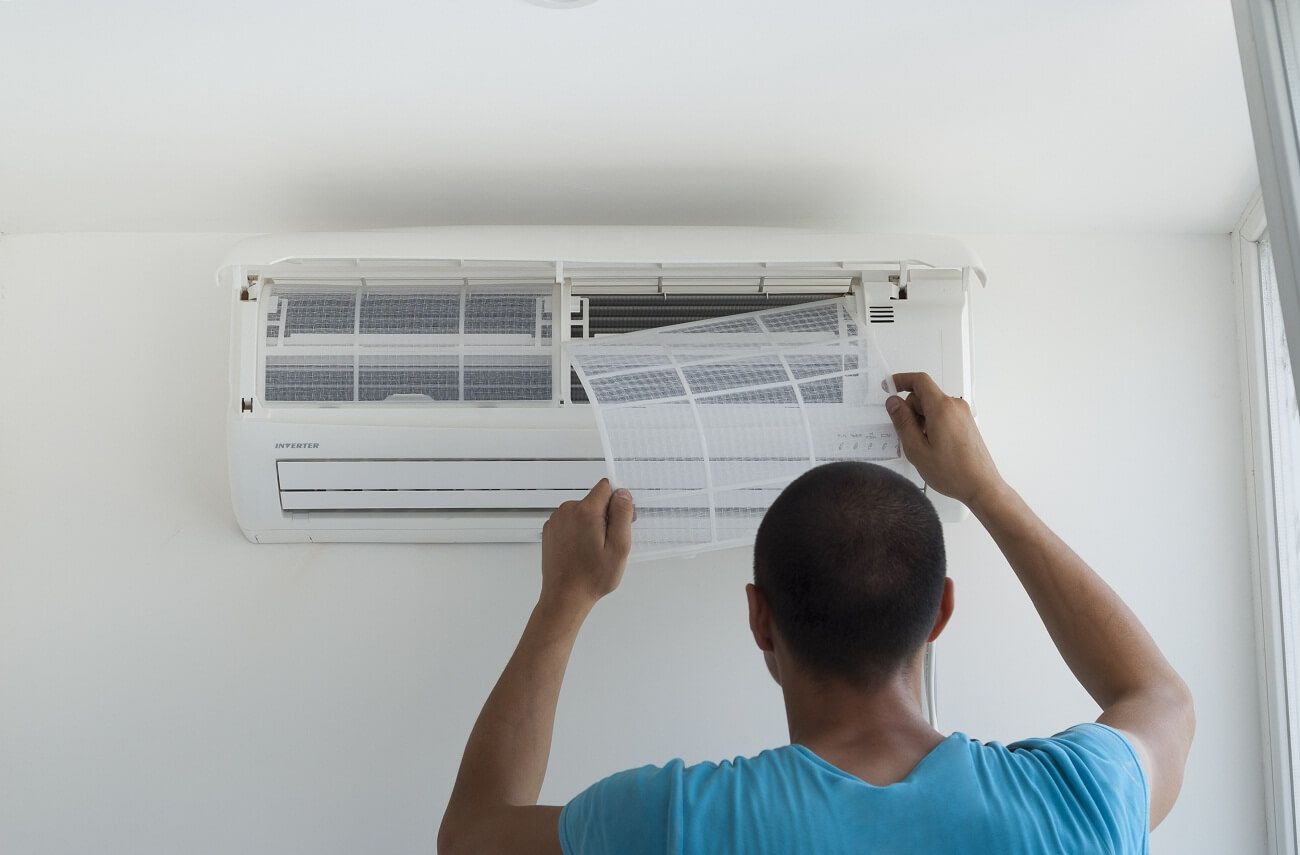
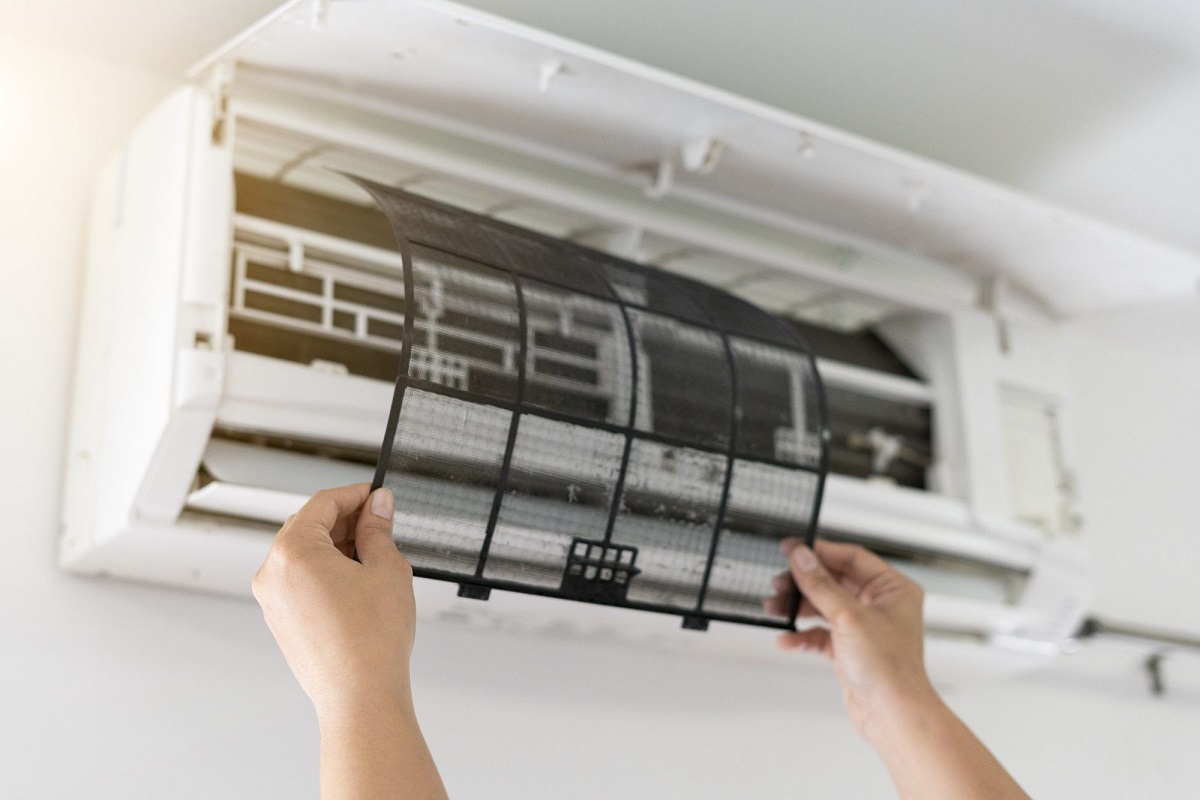
Step 2: Clean the Outdoor Unit
Keeping your AC outdoor unit clean is essential for maintaining optimal performance and efficiency. Over time, dirt, debris, and foliage can accumulate on the unit’s exterior and obstruct airflow, hindering its ability to expel heat effectively. By following these steps to clean the outdoor unit, you can enhance its functionality and prolong its lifespan:
- Remove Debris and Vegetation: Begin by clearing any leaves, grass clippings, twigs, and other debris that have accumulated around the outdoor unit. Use a handheld brush or broom to gently sweep away the debris from the unit’s exterior and the surrounding area.
- Clean the Exterior Surfaces: Wipe down the exterior surfaces of the outdoor unit using a damp cloth or sponge. This helps remove dirt, dust, and grime that may have adhered to the unit, restoring its appearance and promoting efficient heat dissipation.
- Clean the Fins and Coil: Carefully vacuum the aluminum fins on the unit’s condenser coil using a soft-bristle brush attachment to remove any accumulated debris. Be gentle to avoid bending or damaging the fins, as they play a crucial role in facilitating heat transfer.
- Straighten Bent Fins: If you notice any bent fins on the condenser coil, utilize a fin comb to carefully straighten them. This process helps ensure unrestricted airflow through the coil, optimizing the unit’s cooling capacity.
- Trim Vegetation: Trim any overhanging branches, shrubs, or foliage near the outdoor unit to maintain adequate clearance. Vegetation that encroaches upon the unit can impede airflow and contribute to the accumulation of debris, impacting its efficiency.
By diligently cleaning the outdoor unit and maintaining a clear and unobstructed environment around it, you can facilitate efficient heat exchange and airflow. This, in turn, enhances the unit’s cooling performance and reduces the strain on its components, potentially extending its operational lifespan.
With the outdoor unit now cleaned and free from obstructions, we can proceed to the next step, which involves checking for debris and obstructions within the unit’s interior components.
Read more: How To Fix An AC Leak
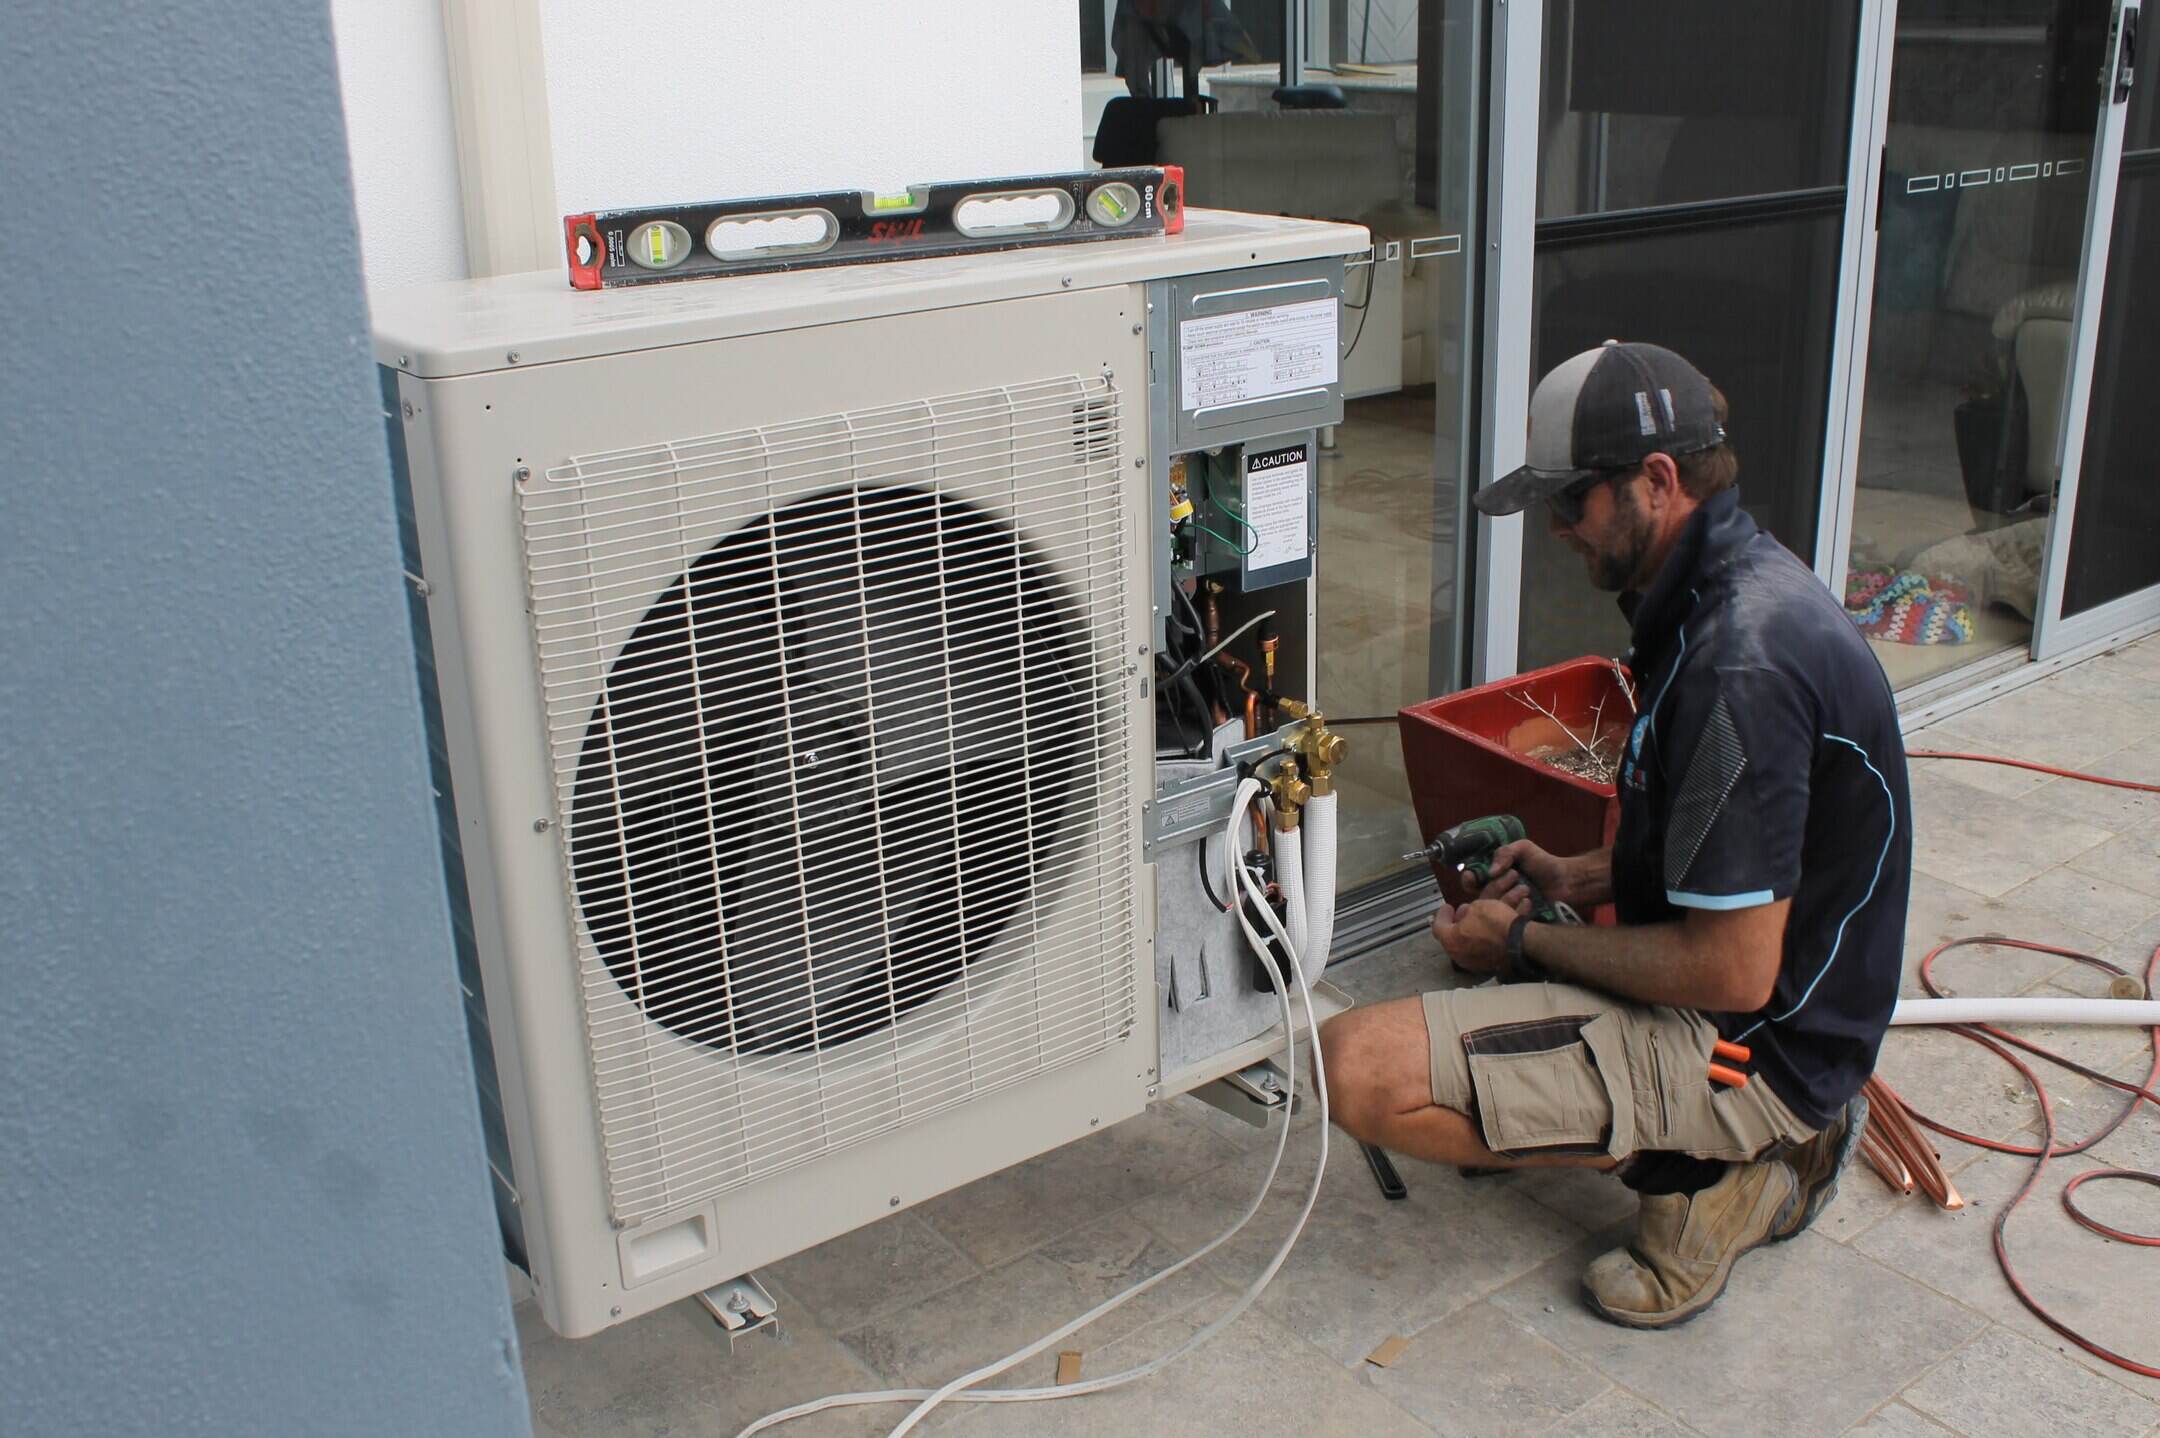
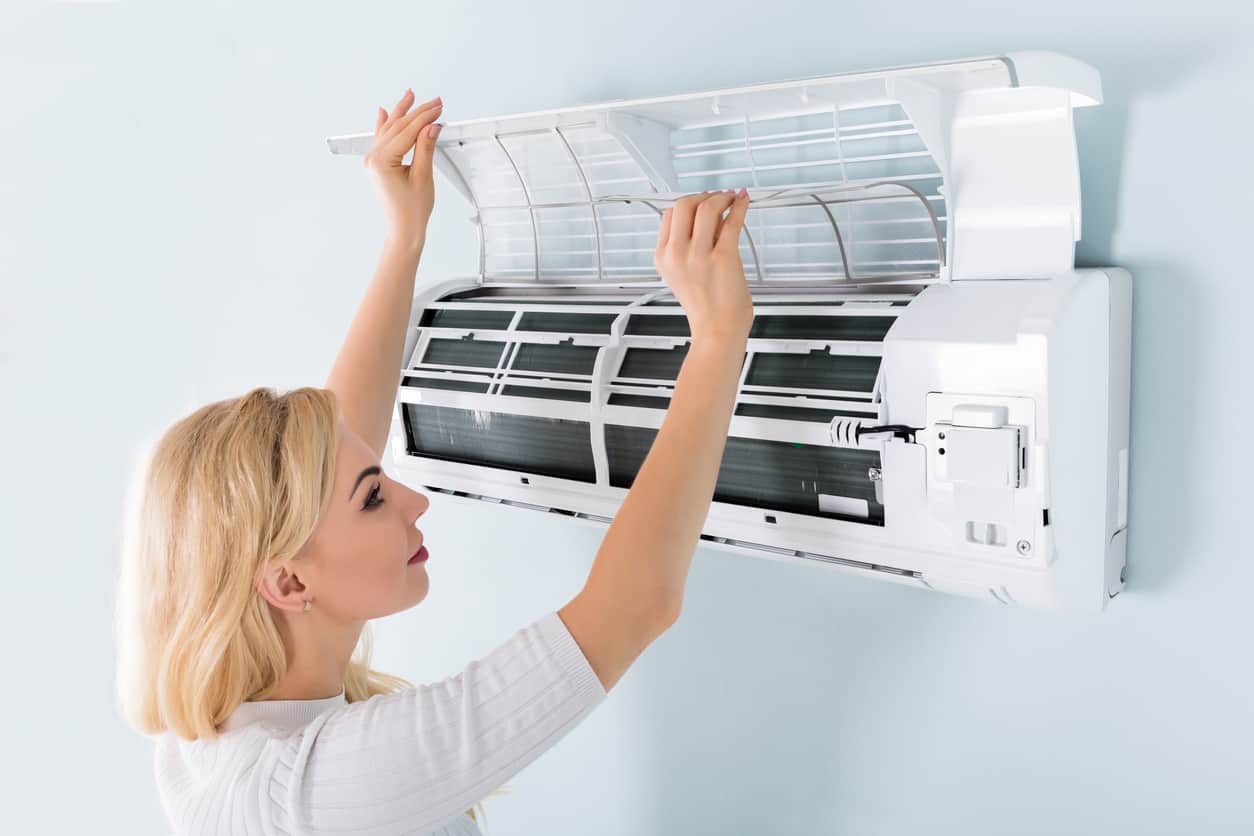
Step 3: Check for Debris and Obstructions
Inspecting the interior components of your AC outdoor unit is crucial for identifying and addressing any debris or obstructions that may impede its functionality. By following these steps, you can systematically assess the unit’s interior and ensure that it remains free from impediments:
- Remove the Access Panel: Locate and remove the access panel or panels that provide entry to the interior of the outdoor unit. Exercise caution and refer to the user manual for guidance on accessing the unit’s internal components.
- Inspect for Debris: Using a flashlight, carefully examine the interior of the unit for any signs of debris, such as leaves, dirt, or small objects that may have entered the unit. Clear any visible debris using a soft brush or vacuum with a brush attachment.
- Check the Condenser Coil: Assess the condition of the condenser coil for any accumulation of dirt, dust, or debris. A dirty condenser coil can impede heat transfer and diminish the unit’s cooling efficiency. Use a specialized coil cleaner and a gentle brush to remove any buildup on the coil’s surface.
- Inspect the Fan Blades: Examine the fan blades for any obstructions or signs of damage. Clear away any debris that may have accumulated on the blades, and ensure that they are free to rotate without interference.
- Check the Drainage System: Verify that the unit’s drainage system, including the condensate drain line, is clear and free from blockages. A clogged drain line can lead to water backup and potential damage to the unit’s interior components.
By meticulously checking for debris and obstructions within the outdoor unit, you can mitigate potential issues that may compromise its performance. Maintaining a clean and unobstructed interior environment is essential for maximizing the unit’s cooling capacity and efficiency.
With the interior inspection completed, we can now proceed to the next step, which involves evaluating the wiring and connections within the outdoor unit.
Regularly clean the outdoor unit to remove dirt, leaves, and debris. Check for any obstructions around the unit and ensure proper airflow. Keep the area around the unit clear for optimal performance.
Step 4: Inspect the Wiring and Connections
Thoroughly examining the wiring and connections within your AC outdoor unit is essential for ensuring the integrity of its electrical system. By following these steps, you can systematically assess the wiring, terminals, and connections to identify any issues that may affect the unit’s performance:
- Turn Off the Power: Prior to inspecting the wiring, ensure that the power supply to the outdoor unit is completely shut off. This precautionary measure minimizes the risk of electrical hazards while working on the unit’s electrical components.
- Remove the Access Panel: Open the access panel to gain access to the unit’s electrical compartment. Exercise caution and refer to the user manual for guidance on safely accessing the wiring and connections.
- Check for Wear or Damage: Examine the wiring, including the insulation and terminal connections, for any signs of wear, fraying, or damage. Damaged wiring can pose safety risks and lead to electrical malfunctions within the unit.
- Tighten Loose Connections: Inspect the terminal connections and ensure that they are secure and free from corrosion. Tighten any loose connections using an appropriate tool, such as a screwdriver or wrench, to maintain reliable electrical contact.
- Verify Proper Wiring: Refer to the unit’s wiring diagram or schematic to verify that the wiring is correctly configured and connected according to the manufacturer’s specifications. Incorrect wiring can lead to operational issues and potential damage to the unit’s electrical components.
- Test the Safety Switches: Test the functionality of any safety switches, such as the high-pressure switch or low-pressure switch, to ensure that they are operating as intended. Faulty safety switches can disrupt the unit’s operation and compromise its safety features.
By meticulously inspecting the wiring and connections, you can identify and address potential electrical issues that may impact the outdoor unit’s performance and safety. Adhering to safety protocols and manufacturer guidelines is essential when working with the unit’s electrical components.
With the wiring and connections thoroughly inspected, we can now proceed to the next step, which involves checking the refrigerant levels within the outdoor unit.
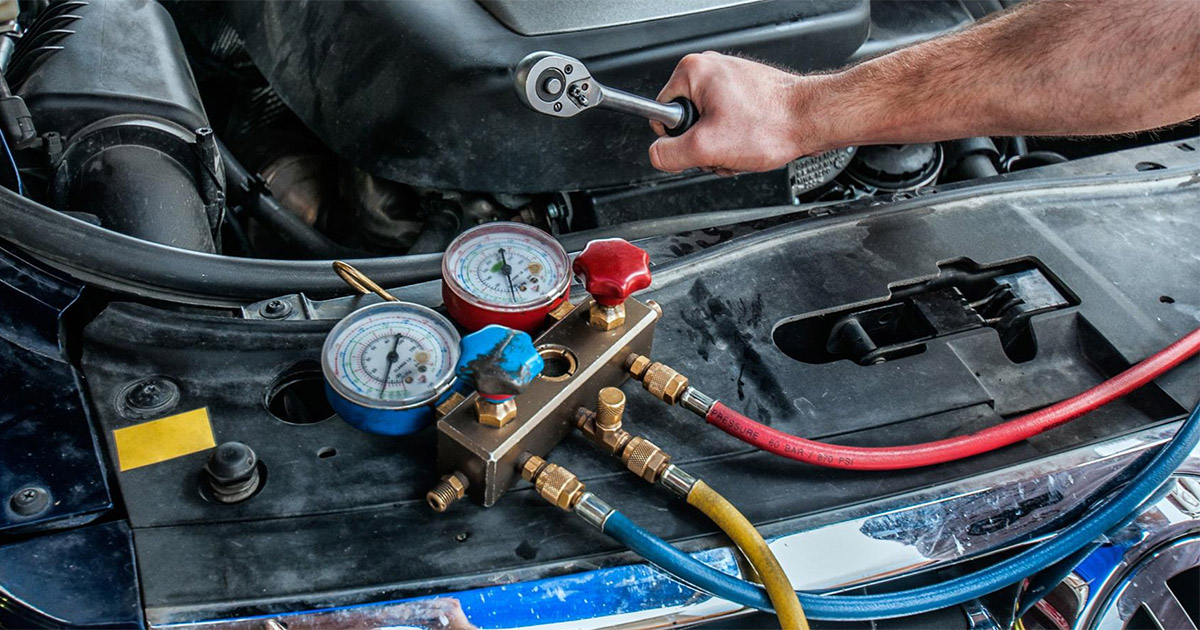
Step 5: Check the Refrigerant Levels
Monitoring the refrigerant levels within your AC outdoor unit is crucial for ensuring optimal cooling performance and energy efficiency. Inadequate refrigerant levels can lead to diminished cooling capacity and potential damage to the compressor. By following these steps, you can systematically assess and address the refrigerant levels within the unit:
- Turn Off the Power: Before proceeding with the refrigerant level check, ensure that the power supply to the outdoor unit is safely deactivated. This precautionary measure minimizes the risk of exposure to electrical components during the inspection process.
- Locate the Service Valves: Identify the service valves on the refrigerant lines connected to the outdoor unit. The service valves allow access to the refrigerant system for monitoring and maintenance purposes.
- Attach Gauges: Connect refrigerant gauges to the service valves to measure the system’s high and low-side pressures. These measurements provide insight into the refrigerant levels and the system’s operating conditions.
- Observe Pressure Readings: Monitor the pressure readings on the gauges and compare them to the manufacturer’s recommended pressure specifications for the specific refrigerant used in your system. Deviations from the optimal pressure ranges may indicate insufficient or excessive refrigerant levels.
- Check for Refrigerant Leaks: Conduct a visual inspection of the refrigerant lines and connections for any signs of leaks or corrosion. Utilize a refrigerant leak detector to pinpoint potential leaks that may compromise the system’s refrigerant charge.
- Consult a Professional: If the pressure readings indicate abnormal refrigerant levels or if leaks are detected, it is advisable to seek the expertise of a certified HVAC technician to diagnose and address the issues effectively.
By systematically checking the refrigerant levels and ensuring the integrity of the refrigerant system, you can maintain the outdoor unit’s cooling efficiency and prevent potential damage to critical components. Adhering to safety guidelines and manufacturer recommendations is essential when working with refrigerant systems.
With the refrigerant levels assessed, we can now proceed to the next step, which involves testing the capacitor within the outdoor unit’s electrical system.
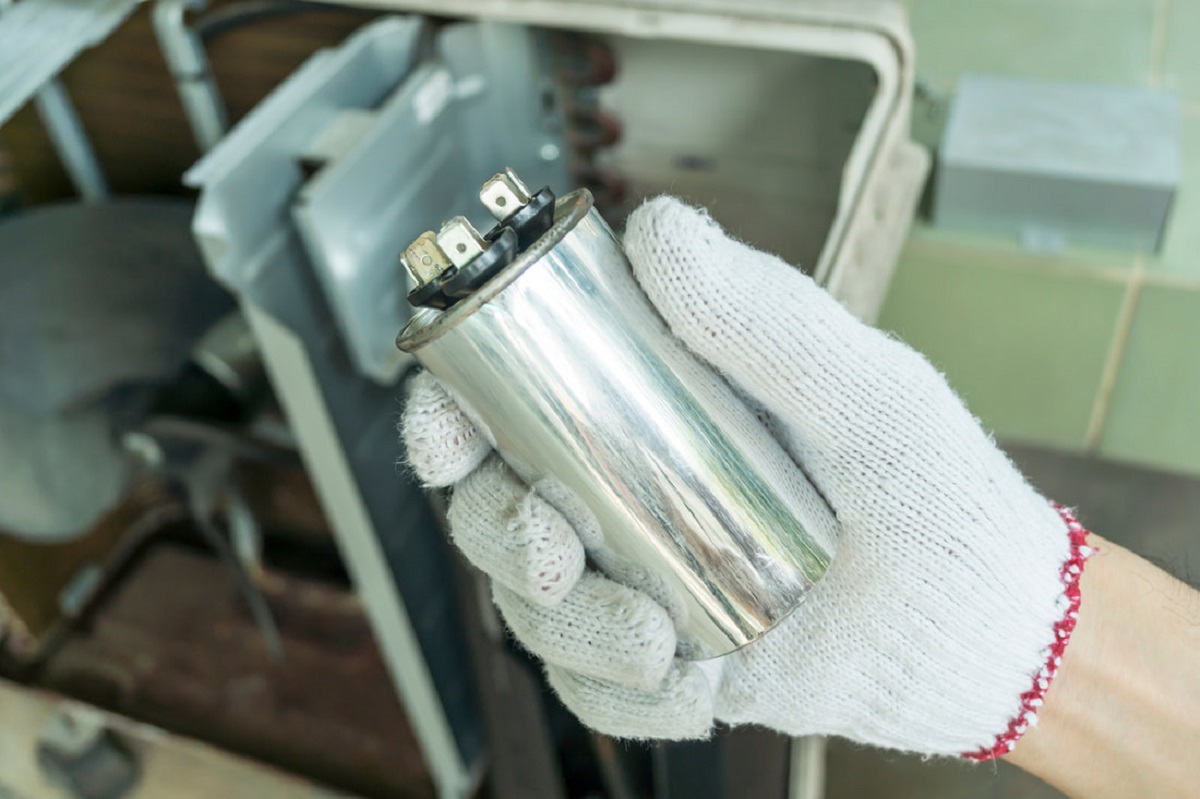
Step 6: Test the Capacitor
The capacitor within your AC outdoor unit plays a pivotal role in facilitating the start-up and operation of the compressor and fan motor. Testing the capacitor is essential for ensuring that it functions optimally, as a faulty capacitor can lead to operational issues and component failure. By following these steps, you can systematically test the capacitor to assess its condition and performance:
- Discharge the Capacitor: Before handling the capacitor, ensure that it is fully discharged to prevent any residual electrical charge. Use an insulated screwdriver to bridge the capacitor terminals and safely discharge any stored energy.
- Identify the Capacitor Terminals: Locate the capacitor within the outdoor unit’s electrical compartment and identify the common, fan, and herm terminals. These terminals correspond to the capacitor’s connections with the compressor and fan motor.
- Use a Multimeter: Set a digital multimeter to the capacitance measurement function and carefully attach the multimeter probes to the capacitor’s terminals, ensuring the correct polarity. Record the capacitance reading displayed on the multimeter.
- Compare with Manufacturer Specifications: Refer to the manufacturer’s specifications or the unit’s technical documentation to verify the required capacitance values for the capacitor. Deviations from the specified capacitance range may indicate a faulty or deteriorating capacitor.
- Inspect for Physical Damage: Visually inspect the capacitor for any signs of physical damage, such as bulging, leaking, or discoloration. These indicators may suggest internal capacitor failure and necessitate replacement.
- Consult a Professional: If the capacitance readings deviate from the specified range or if physical damage is evident, it is advisable to seek the expertise of a qualified HVAC technician to assess and replace the capacitor as needed.
By diligently testing the capacitor and verifying its condition, you can preemptively address potential issues that may disrupt the outdoor unit’s operation. Adhering to safety protocols and handling electrical components with care is essential throughout the testing process.
With the capacitor tested, we can now proceed to the next step, which involves inspecting the fan motor within the outdoor unit.
Read more: How To Fix Frozen AC
Step 7: Inspect the Fan Motor
The fan motor in your AC outdoor unit is responsible for facilitating the airflow necessary for heat dissipation and efficient operation. Conducting a thorough inspection of the fan motor is essential for identifying potential issues that may impede its performance. By following these steps, you can systematically assess the fan motor and ensure its optimal functionality:
- Turn Off the Power: Prior to inspecting the fan motor, ensure that the power supply to the outdoor unit is safely deactivated to prevent any accidental activation of the motor during the inspection process.
- Remove the Fan Cover: Open the fan cover or housing to access the fan motor and blades. Exercise caution and refer to the user manual for guidance on safely removing the cover without causing damage to the motor or other components.
- Visual Inspection: Visually inspect the fan motor for any signs of physical damage, such as worn bearings, loose connections, or excessive dirt accumulation. These indicators may suggest impending motor failure or diminished performance.
- Check for Free Rotation: Gently rotate the fan blades by hand to ensure that the motor spins freely without resistance. Any stiffness or grinding sensations may signify bearing wear or motor misalignment, requiring further attention.
- Lubricate Bearings (If Applicable): If the fan motor features lubrication ports, carefully apply the manufacturer-recommended lubricant to the bearings to maintain smooth operation and reduce friction-induced wear.
- Test Motor Operation: With the power supply restored, observe the fan motor’s operation during a test cycle. Listen for unusual noises, vibrations, or irregularities that may indicate motor malfunctions or imbalances.
- Consult a Professional: If you encounter persistent issues or abnormalities during the inspection, it is advisable to seek the expertise of a qualified HVAC technician to diagnose and address any fan motor-related issues effectively.
By meticulously inspecting the fan motor and ensuring its smooth operation, you can maintain the outdoor unit’s airflow and heat dissipation capabilities, contributing to its overall efficiency and performance. Adhering to safety guidelines and manufacturer recommendations is essential when working with the fan motor and associated components.
With the fan motor inspection completed, we can now proceed to the final step, which involves restarting the outdoor unit to assess its functionality.
Step 8: Restart the Unit
After completing the necessary maintenance and inspection tasks on your AC outdoor unit, it is time to restart the unit to assess its functionality and ensure that the issues have been effectively addressed. By following these steps, you can safely restart the unit and verify its operational status:
- Close Access Panels: Ensure that all access panels, covers, and electrical compartments are securely closed and fastened to prevent any exposure of internal components.
- Restore Power Supply: Turn on the power supply to the outdoor unit at the main electrical panel or by activating the electrical disconnect switch near the unit. Exercise caution when restoring power to the unit.
- Set Thermostat to Cool: Adjust the thermostat in your home to activate the cooling mode and set the desired temperature. This action prompts the outdoor unit to commence its cooling cycle.
- Observe Unit Operation: Monitor the outdoor unit as it restarts and listen for the sound of the compressor and fan motor engaging. Observe the airflow and ensure that the unit is expelling warm air, indicating that the cooling process has commenced.
- Check for Abnormal Noises: Listen for any unusual or persistent noises emanating from the outdoor unit, as these may signify unresolved issues that require further attention.
- Assess Cooling Performance: Verify that the indoor air temperature begins to decrease as the cooling cycle progresses, indicating that the outdoor unit is effectively providing conditioned air to the home.
- Monitor for Operational Stability: Observe the outdoor unit’s operation for an extended period to ensure that it maintains consistent and stable performance without exhibiting irregularities or malfunctions.
By systematically restarting the unit and observing its operation, you can confirm that the maintenance and repair tasks have been successful in addressing any identified issues. This final step allows you to validate the unit’s functionality and ensure that it continues to provide efficient cooling for your home.
With the unit successfully restarted and operational, you have completed the comprehensive process of troubleshooting and maintaining your AC outdoor unit. Regular maintenance and attentive care contribute to the unit’s longevity and sustained performance, ensuring a comfortable indoor environment for you and your family.
Conclusion
Congratulations on successfully completing the comprehensive maintenance and troubleshooting process for your AC outdoor unit. By following the step-by-step guide and diligently addressing potential issues, you have taken proactive measures to ensure the optimal functionality and efficiency of your cooling system. As a result, you can enjoy a comfortable and refreshing indoor environment, especially during the warmest months of the year.
Throughout the maintenance process, you have prioritized safety precautions, adhered to recommended procedures, and meticulously inspected and addressed various components of the outdoor unit. Your dedication to maintaining the unit’s performance reflects a proactive approach to home maintenance and responsible ownership of essential appliances.
By conducting regular inspections, cleaning, and testing of the outdoor unit, you contribute to its longevity and reliability, ultimately reducing the likelihood of unexpected malfunctions and costly repairs. Additionally, your attentiveness to the unit’s condition allows for early detection of potential issues, enabling timely intervention and resolution.
Remember that ongoing maintenance and periodic inspections are key to sustaining the optimal performance of your AC outdoor unit. By incorporating these tasks into your regular home maintenance routine, you can ensure that your cooling system continues to operate efficiently, providing consistent comfort for your household.
Should you encounter complex issues or require professional expertise, do not hesitate to seek the assistance of certified HVAC technicians. Their specialized knowledge and experience can address intricate problems and ensure the long-term functionality of your cooling system.
Thank you for your commitment to maintaining your AC outdoor unit, and may your home remain cool and inviting throughout the seasons. Your proactive approach to home maintenance sets a commendable standard for ensuring comfort and reliability within your living space.
With your outdoor unit now in optimal condition, you can rest assured that your home is equipped with a reliable and efficient cooling system, providing a comfortable refuge from the outdoor elements. Your proactive efforts in maintaining the unit contribute to a conducive indoor environment for relaxation, productivity, and overall well-being.
Frequently Asked Questions about How To Fix Ac Outdoor Unit
Was this page helpful?
At Storables.com, we guarantee accurate and reliable information. Our content, validated by Expert Board Contributors, is crafted following stringent Editorial Policies. We're committed to providing you with well-researched, expert-backed insights for all your informational needs.
0 thoughts on “How To Fix Ac Outdoor Unit”