Home>Furniture & Design>Outdoor Furniture>How To Wire Outdoor Speakers With Volume Control
Outdoor Furniture
How To Wire Outdoor Speakers With Volume Control
Modified: August 28, 2024
Learn how to wire outdoor speakers with volume control for your outdoor furniture. Get expert tips on outdoor furniture, furniture, and design. Discover the best practices for setting up your outdoor sound system.
(Many of the links in this article redirect to a specific reviewed product. Your purchase of these products through affiliate links helps to generate commission for Storables.com, at no extra cost. Learn more)
Introduction
Setting up outdoor speakers with volume control can significantly enhance your outdoor entertainment experience. Whether you're hosting a lively gathering or simply unwinding in your backyard, having well-distributed sound can transform the ambiance. However, the process of wiring outdoor speakers with volume control requires careful planning and execution to ensure optimal performance and longevity.
In this comprehensive guide, we will walk you through the step-by-step process of wiring outdoor speakers with volume control. From selecting the ideal location for the speakers to connecting the wires to the volume control and amplifier, we'll cover everything you need to know to bring your outdoor audio system to life.
By following these instructions and gaining a clear understanding of outdoor speaker wiring, you can seamlessly integrate high-quality sound into your outdoor space. So, gather your tools and let's embark on this journey to elevate your outdoor entertainment experience with the perfect blend of music and nature.
Key Takeaways:
- Setting up outdoor speakers with volume control requires careful planning and precise installation to create a captivating and immersive audio experience in your outdoor space. By strategically placing and mounting the speakers, you can elevate your outdoor entertainment to new heights.
- By embracing the art of outdoor speaker wiring and volume control installation, you can seamlessly integrate high-quality sound into your outdoor space, creating a harmonious blend of music and nature. Your dedication to creating a well-balanced and responsive outdoor audio system enriches your outdoor experiences and fosters a deeper connection with the surrounding environment.
Read more: What Is The Best Outdoor Speaker Wire
Understanding Outdoor Speaker Wiring
Before diving into the practical aspects of wiring outdoor speakers with volume control, it’s essential to grasp the fundamentals of outdoor speaker wiring. Unlike indoor speaker setups, outdoor speaker systems demand extra attention to withstand environmental elements and deliver consistent performance.
When it comes to outdoor speaker wiring, the primary goal is to ensure a secure and weather-resistant connection. This involves using specialized outdoor speaker wire that is designed to withstand exposure to sunlight, moisture, and temperature fluctuations. Additionally, outdoor speaker wire is often constructed with a thicker insulation layer to protect against potential damage from outdoor elements.
Another crucial aspect of outdoor speaker wiring is understanding the impedance and gauge requirements. Most outdoor speakers operate at 8 ohms, so it’s important to select speaker wire with the appropriate gauge to minimize resistance and maintain audio quality over longer distances. Thicker gauge wires, such as 16 or 14 AWG (American Wire Gauge), are commonly recommended for outdoor speaker installations to mitigate power loss and ensure optimal sound reproduction.
Moreover, when planning the wiring layout for outdoor speakers, it’s vital to consider the path of the speaker wire and the potential obstacles it may encounter. Strategically routing the wire to avoid sharp edges, potential interference, and areas prone to water accumulation is essential for long-term reliability.
By understanding these key principles of outdoor speaker wiring, you can make informed decisions when selecting the necessary materials and executing the installation process. With a solid grasp of the fundamentals, you’ll be well-prepared to proceed with confidence as we delve into the practical steps of wiring outdoor speakers with volume control.
Tools and Materials Required
Before embarking on the outdoor speaker wiring and volume control installation, it’s essential to gather the necessary tools and materials to ensure a smooth and efficient process. Here’s a comprehensive list of the items you’ll need:
Tools:
- Wire cutter/stripper: Essential for preparing the speaker wire and ensuring clean, precise cuts.
- Drill and appropriate drill bits: Needed for mounting the speakers and creating pathways for the speaker wire.
- Screwdriver: For securing the speaker mounts and connecting wires to the volume control and amplifier terminals.
- Staple gun or cable clips: Useful for securing the speaker wire along its intended route, keeping it organized and protected.
- Level: Ensures accurate alignment when mounting the speakers for optimal sound dispersion.
- Multimeter: Helpful for testing the continuity and integrity of the speaker wire connections.
- Utility knife: Useful for cutting and stripping the outer insulation of the speaker wire.
Materials:
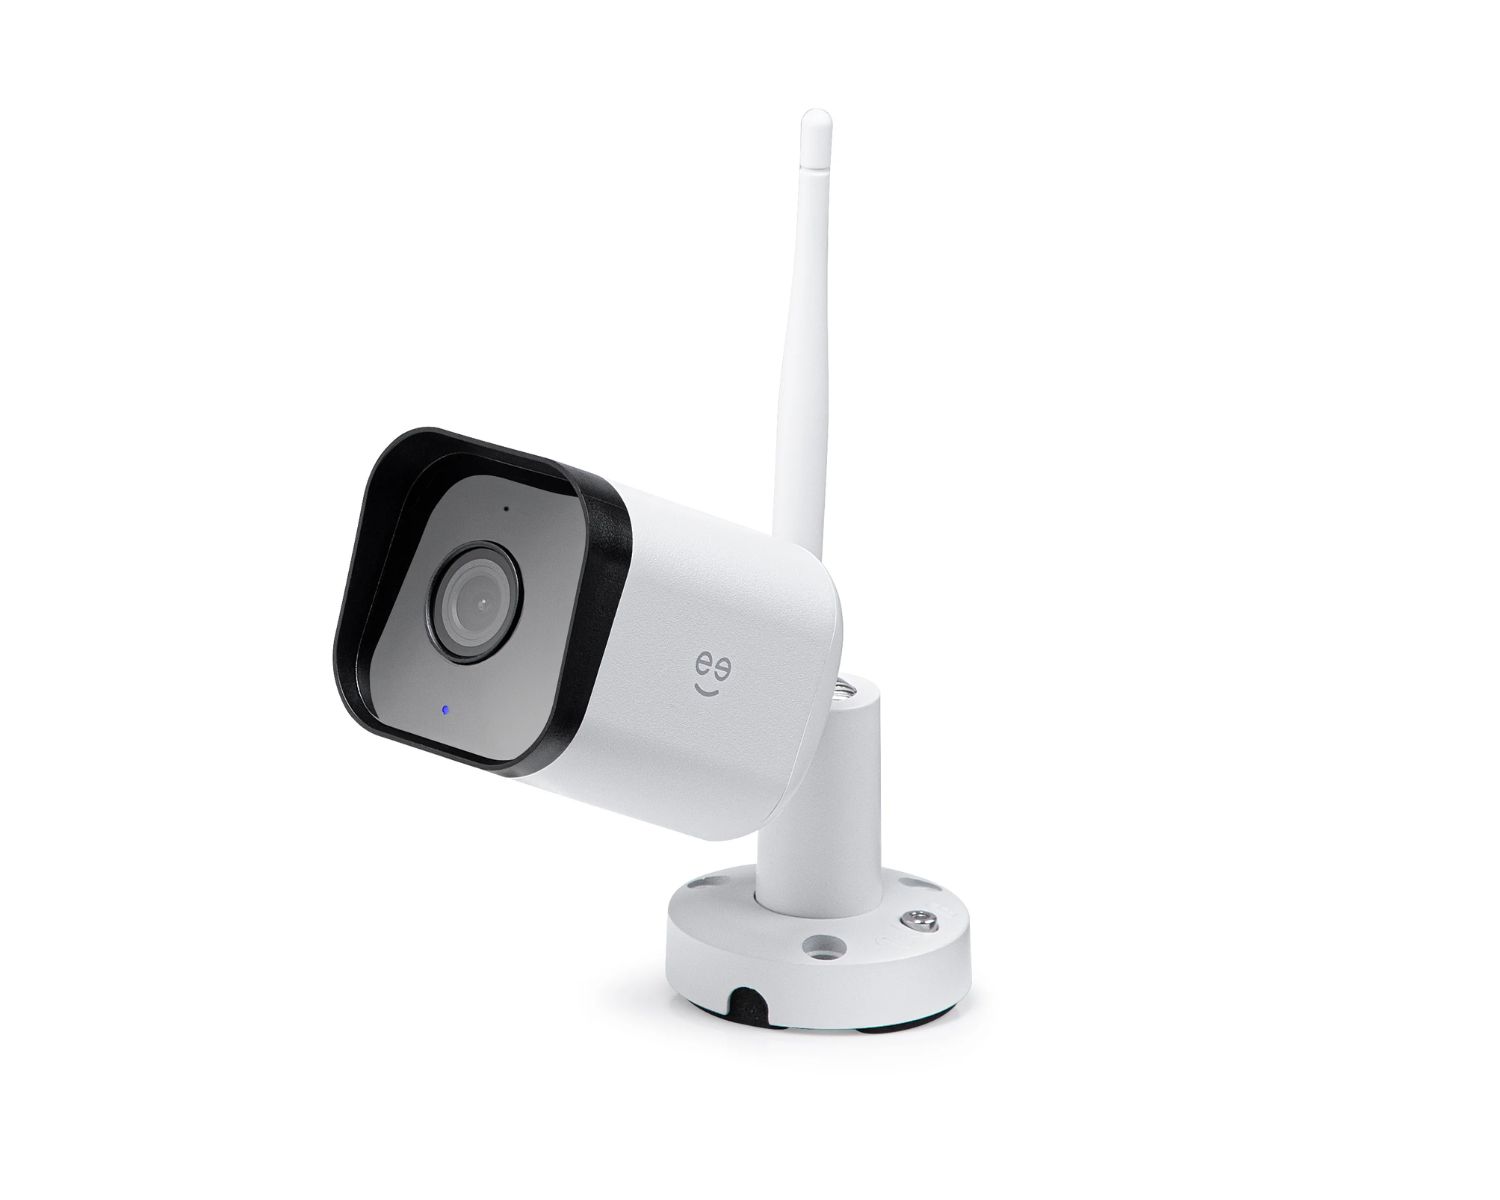
- Outdoor-rated speaker wire: Select a suitable gauge and length based on the distance between the speakers, volume control, and amplifier.
- Outdoor speakers: Choose high-quality, weather-resistant speakers designed for outdoor use, considering factors such as power handling, impedance, and frequency response.
- Volume control: Ensure it is specifically designed for outdoor applications and compatible with the selected speaker wire gauge.
- Amplifier: Select an amplifier that matches the power requirements and impedance of the outdoor speakers.
- Mounting hardware: Depending on the type of outdoor speakers, you may need brackets, screws, or other mounting accessories.
- Weatherproofing materials: Sealant or weatherproof housing to protect the connections and components from moisture and environmental exposure.
- Wire connectors: Suitable connectors for splicing, terminating, and connecting the speaker wire to the volume control and amplifier.
By ensuring you have the right tools and materials on hand, you can streamline the installation process and address any challenges that may arise during the outdoor speaker wiring and volume control setup. With these essentials at your disposal, you’re ready to proceed to the next steps with confidence and precision.
Read more: How To Hide Outdoor Speakers
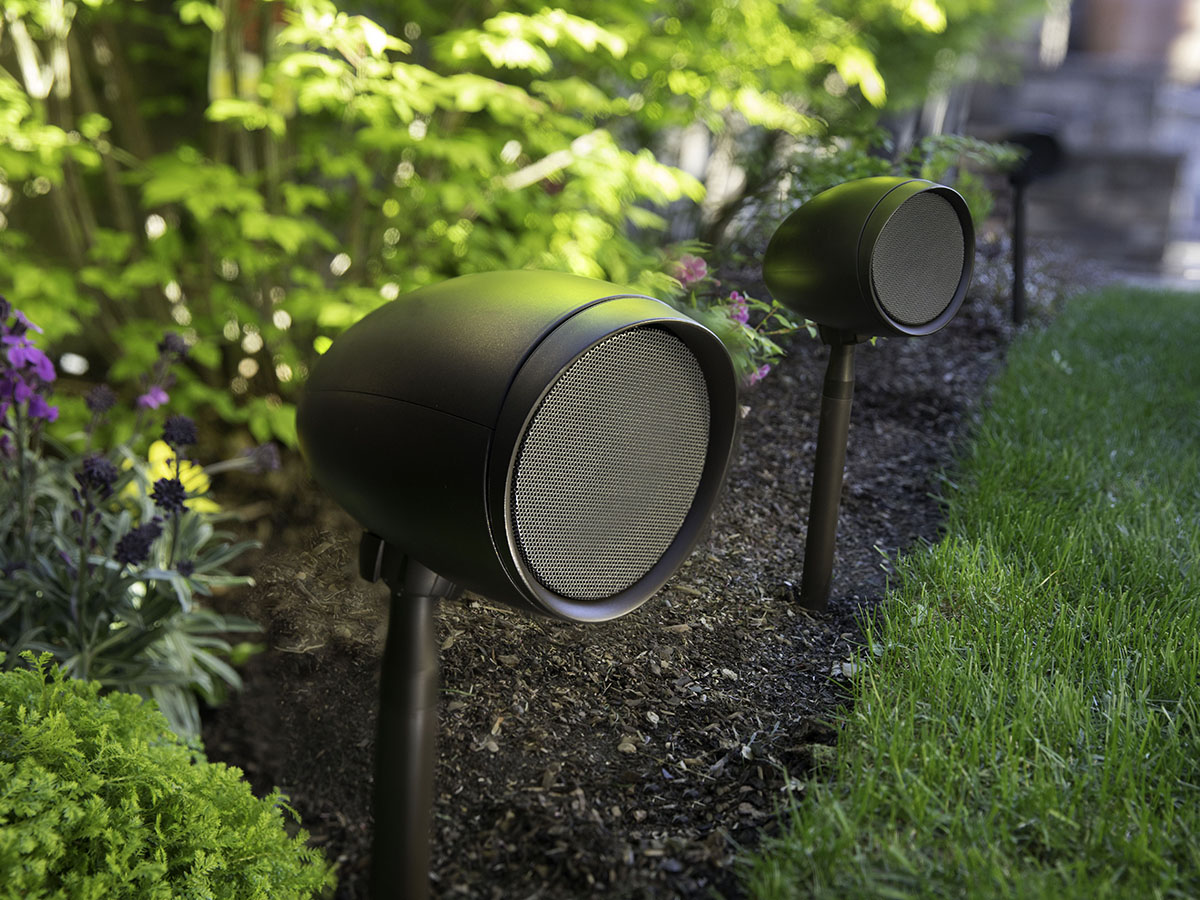
Step 1: Choosing the Right Location for the Speakers
When setting up outdoor speakers with volume control, selecting the optimal locations for speaker placement is crucial for achieving balanced sound coverage and maximizing the listening experience. Here are key considerations to guide you in choosing the right locations:
Assessing the Listening Area:
Begin by evaluating the outdoor space where you intend to install the speakers. Take note of the primary areas where people will gather or spend time, such as seating areas, patio spaces, or poolside lounging areas. Understanding the layout and usage patterns of the outdoor space will help you determine the most strategic placements for the speakers.
Speaker Positioning for Sound Distribution:
For optimal sound dispersion, aim to position the speakers in a manner that covers the entire outdoor area without creating excessive volume imbalances. Consider placing the speakers at elevated positions, such as on walls, eaves, or dedicated speaker mounts, to enhance sound projection and minimize obstructions that could impede the audio quality.
Environmental Considerations:
Take into account the environmental factors that may impact the speakers, such as exposure to direct sunlight, rain, and potential debris. Choose locations that offer some degree of protection from the elements, and opt for weather-resistant speakers designed to withstand outdoor conditions. Additionally, ensure that the selected locations allow for easy access when running the speaker wire and connecting it to the volume control and amplifier.
Read more: How To Power Outdoor Speakers
Spacing and Balance:
Strive to achieve balanced sound coverage by spacing the speakers appropriately and avoiding clustering them too closely together. The goal is to create a cohesive audio environment that envelops the outdoor space without overwhelming specific areas with excessive sound pressure. Consider the power handling and dispersion characteristics of the speakers to determine the ideal spacing for balanced sound distribution.
Integration with Landscape Features:
Integrate the speaker placement with existing landscape features to blend the audio system seamlessly with the outdoor environment. Concealing the speaker wire within landscaping elements or utilizing natural barriers can enhance the aesthetic appeal while minimizing visual clutter.
By carefully considering these factors and selecting strategic locations for the speakers, you can lay the foundation for a well-balanced and immersive outdoor audio setup. With the ideal positions identified, you’re ready to proceed to the next step of mounting the speakers and preparing for the wiring installation.
Step 2: Mounting the Speakers
Once you have identified the optimal locations for your outdoor speakers, the next step is to securely mount them in place. Proper mounting not only ensures stability and longevity but also plays a crucial role in maximizing sound projection and coverage. Here’s a guide to effectively mounting your outdoor speakers:
Speaker Mounting Options:
Depending on the design of your outdoor speakers and the available mounting surfaces, you may have various mounting options to consider. Common methods include using wall brackets, speaker mounts, ground stakes, or integrated mounting hardware provided by the speaker manufacturer. Evaluate the available options to determine the most suitable mounting approach for each speaker location.
Read more: What Are The Best Outdoor Speakers?
Mounting Surface Preparation:
Prior to mounting the speakers, prepare the mounting surfaces to ensure a secure and stable attachment. For wall-mounted speakers, use a stud finder to locate and mark the positions of the wall studs, providing sturdy anchor points for the mounting brackets. If mounting on other surfaces, such as fences or pillars, ensure that they are structurally sound and capable of supporting the weight of the speakers.
Alignment and Orientation:
When positioning the speakers for mounting, pay attention to their orientation and alignment to optimize sound dispersion. Aim to angle the speakers towards the primary listening areas, such as seating arrangements or gathering spaces, to direct the sound effectively. Additionally, use a level to ensure the speakers are mounted evenly and aligned for consistent sound projection.
Secure Mounting Installation:
Follow the manufacturer’s guidelines and recommended hardware to securely mount the speakers in place. Use appropriate screws, anchors, or mounting brackets to fasten the speakers, taking care to avoid over-tightening and causing damage. For ground-mounted speakers, ensure that the stakes or mounting bases provide stable support and resistance to environmental elements.
Weathertight Sealing:
After mounting the speakers, apply a weathertight sealant or protective coating around the mounting points and any entry points for screws or hardware. This additional step helps safeguard the mounting connections from moisture and environmental exposure, prolonging the lifespan of the installation.
By meticulously following these steps and ensuring proper mounting of the outdoor speakers, you can lay the groundwork for a reliable and well-positioned audio system. With the speakers securely in place, you’re ready to proceed to the next stage of running the speaker wire to connect the system components.
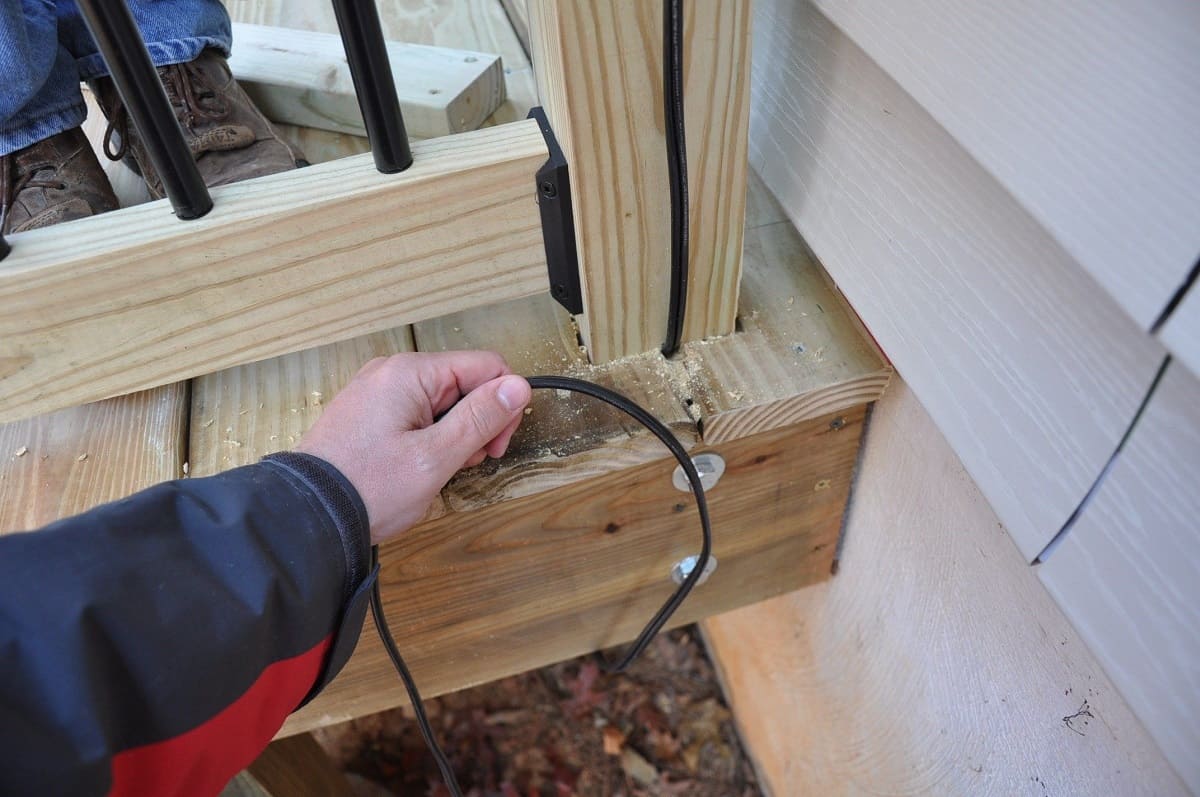
Step 3: Running the Speaker Wire
With the outdoor speakers securely mounted, the next crucial step in the installation process is running the speaker wire to connect the speakers to the volume control and amplifier. Properly routing and securing the speaker wire is essential for maintaining signal integrity and safeguarding against environmental hazards. Here’s a comprehensive guide to effectively run the speaker wire for your outdoor audio system:
Selecting Outdoor-Rated Speaker Wire:
Ensure that you use high-quality, outdoor-rated speaker wire specifically designed to withstand exposure to the elements. Outdoor speaker wire typically features durable insulation and corrosion-resistant conductors, providing long-term reliability and performance in outdoor environments. Select the appropriate gauge based on the distance between the speakers, volume control, and amplifier to minimize signal loss.
Pathway Planning:
Plan the pathway for the speaker wire, considering the most direct and concealed route from the speakers to the location of the volume control and amplifier. Avoid running the wire across high-traffic areas or areas prone to potential damage or interference. If possible, utilize existing structures, such as fences, walls, or landscaping features, to conceal and protect the wire along its path.
Securing the Wire:
Use cable clips, staple guns, or other suitable fastening methods to secure the speaker wire along its designated pathway. Ensure that the wire is taut but not excessively stretched to prevent strain on the connections. When securing the wire, take care to avoid puncturing or damaging the insulation, and position the wire to minimize exposure to direct sunlight and moisture accumulation.
Read more: What Speaker Wire To Use For A Home Theater
Protection and Concealment:
Wherever the speaker wire is exposed, consider utilizing protective conduit or weatherproof housing to shield the wire from environmental elements and potential physical damage. Conceal the wire within landscaping elements, under eaves, or within designated cable channels to maintain a tidy and unobtrusive appearance while safeguarding the wire from the outdoor environment.
Connection Accessibility:
Ensure that the speaker wire is routed to provide convenient access for connecting to the volume control and amplifier. Leave adequate slack at both ends of the wire to facilitate the connection process and accommodate any adjustments or repositioning of the components. Verify that the wire routing allows for a clean and organized connection without excessive tension or strain on the wire terminations.
By meticulously following these guidelines and taking the necessary precautions, you can effectively run the speaker wire for your outdoor audio system, setting the stage for the subsequent steps of connecting the wires to the volume control and amplifier. With the wire in place, you’re ready to proceed with the integration of the volume control into the system.
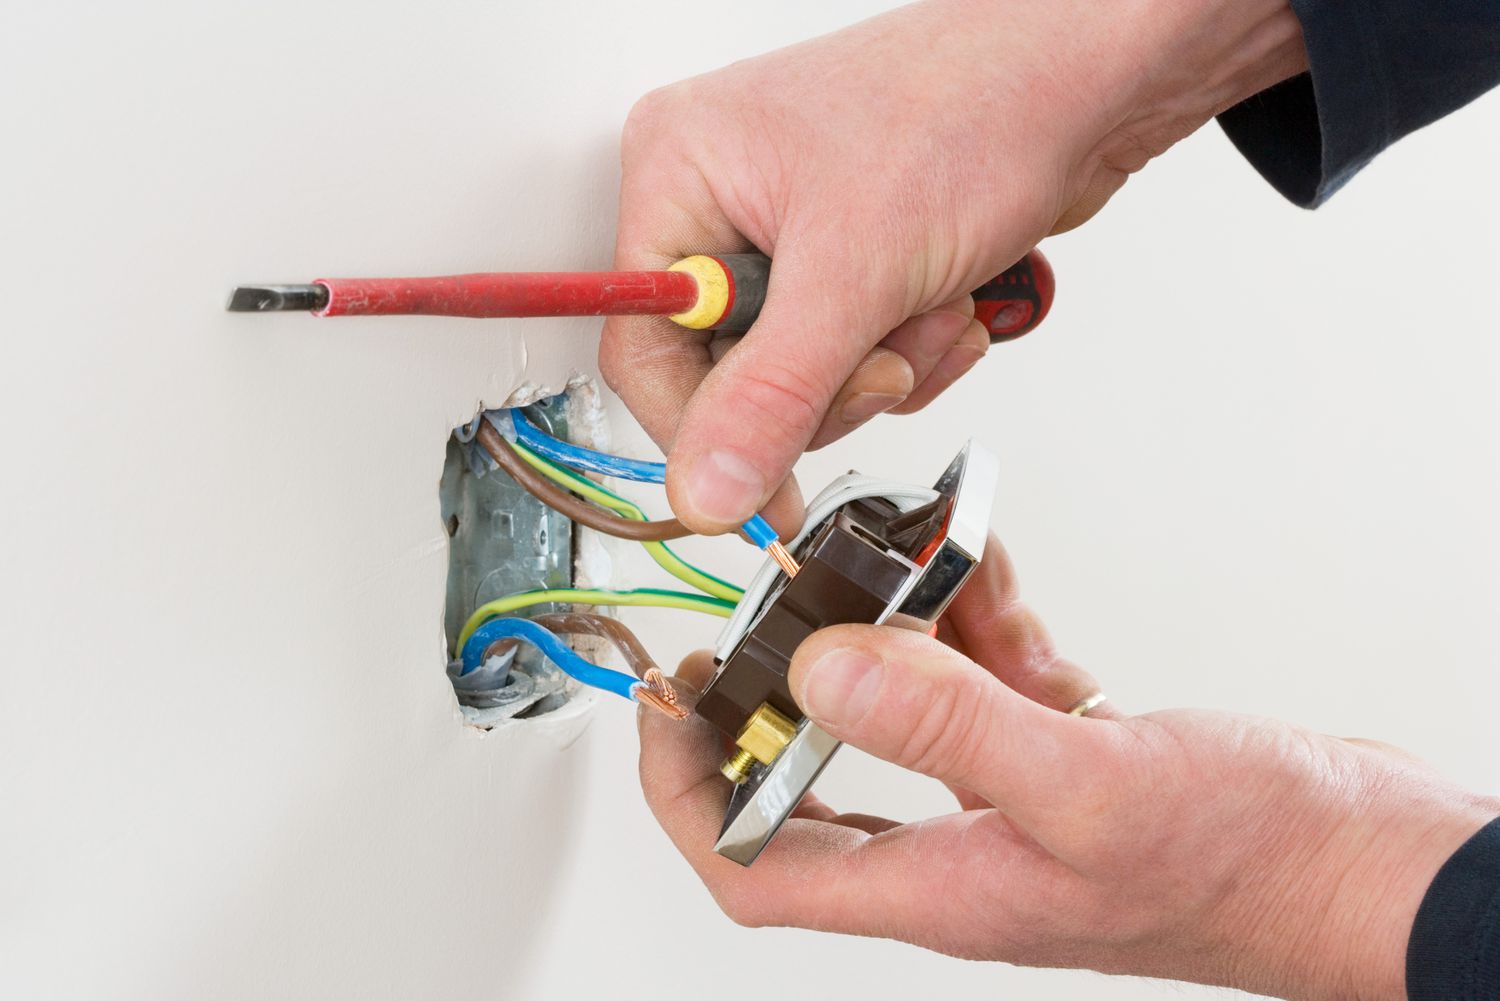
Step 4: Connecting the Wires to the Volume Control
As you progress with the installation of your outdoor audio system, the next critical step is connecting the speaker wires to the volume control unit. The volume control plays a pivotal role in regulating the sound levels and providing convenient access to adjust the audio output in outdoor settings. Here’s a comprehensive guide to effectively connect the speaker wires to the volume control:
Volume Control Placement:
Select a suitable location for mounting the volume control unit, ensuring it is easily accessible and positioned within reach of the primary listening areas. Consider mounting the volume control in a sheltered or weatherproof enclosure to protect it from environmental exposure while maintaining convenient access for adjustments.
Read more: How To Use Nest Outdoor Camera Speaker
Wire Termination Preparation:
Prepare the speaker wire terminations by stripping the insulation from the wire ends to expose the conductors. Use a wire cutter/stripper to carefully remove the appropriate length of insulation, ensuring that the conductors are clean and free from damage. If using multi-conductor speaker wire, separate and strip each conductor according to the volume control’s input terminals.
Terminal Connection Process:
Identify the input terminals on the volume control unit, typically labeled as “L” (Left) and “R” (Right) for the respective channels. Follow the manufacturer’s instructions to determine the appropriate terminals for connecting the speaker wires. Securely insert the stripped wire ends into the designated terminals, ensuring a snug and reliable connection without any exposed conductors or loose strands.
Terminal Fastening and Insulation:
Once the speaker wires are inserted into the volume control terminals, tighten the terminal screws or fasteners to secure the connections. Verify that the conductors are firmly held in place and that the terminal screws are tightened to the manufacturer’s recommended torque specifications. Inspect the connections to ensure there is no stray wire or potential for short circuits, and trim any excess wire protruding from the terminals.
Weatherproofing and Enclosure Integration:
If the volume control unit is installed in an outdoor location exposed to the elements, apply weatherproofing measures to protect the terminal connections and internal components. Utilize weatherproof enclosures or sealant to shield the volume control unit from moisture, dust, and environmental factors, safeguarding the connections and ensuring long-term reliability.
By following these steps and adhering to best practices for connecting the speaker wires to the volume control, you can establish a robust and functional interface for regulating the audio output of your outdoor speakers. With the connections secured, you’re prepared to advance to the subsequent stage of integrating the volume control with the amplifier to complete the system setup.
Read more: How To Keep Birds Off Outdoor Speakers
Step 5: Connecting the Volume Control to the Amplifier
As you near the completion of your outdoor audio system installation, the next crucial step is to connect the volume control to the amplifier. This pivotal connection enables the volume control unit to regulate the audio signal sent to the amplifier, allowing for precise adjustment of the sound levels. Here’s a comprehensive guide to effectively connect the volume control to the amplifier:
Amplifier Selection and Setup:
Ensure that you have selected an amplifier that aligns with the power requirements and impedance specifications of your outdoor speakers. Position the amplifier in a suitable location, considering factors such as ventilation, accessibility, and proximity to power sources. Familiarize yourself with the amplifier’s input and output terminals, as well as its control settings for volume and signal routing.
Volume Control Output Termination:
Identify the output terminals on the volume control unit, typically labeled as “Output” or “Amplifier.” Prepare the output wire terminations by stripping the insulation from the wire ends, ensuring clean and undamaged conductors. If the volume control unit features dedicated output terminals for the amplifier, follow the manufacturer’s instructions to determine the appropriate connections for the output wires.
Amplifier Input Connection:
Locate the input terminals on the amplifier, typically labeled as “Input” or “Line In.” Determine the appropriate input channels for connecting the output wires from the volume control unit. If the amplifier features multiple input options, such as RCA, XLR, or terminal block connections, select the input type that aligns with the output connections from the volume control unit.
Read more: How To Install Bose 251 Outdoor Speakers
Wire Connection and Routing:
Connect the output wires from the volume control unit to the corresponding input terminals on the amplifier, ensuring a secure and reliable connection. Insert the stripped wire ends into the designated input terminals, following the manufacturer’s guidelines for proper wire termination and fastening. Route the wires neatly and avoid excessive tension or strain on the connections to maintain signal integrity.
Signal Routing Verification:
Verify that the signal routing from the volume control to the amplifier is correctly established, with the left and right channel outputs from the volume control unit connected to the corresponding input channels on the amplifier. Double-check the wiring connections for accuracy and secure fastening, ensuring that the signal path is free from potential interruptions or cross-channel interference.
By meticulously following these steps and ensuring precise connections between the volume control and amplifier, you can establish a seamless interface for regulating the audio signal and achieving precise control over the outdoor sound system. With the volume control integrated with the amplifier, you’re poised to proceed to the final stage of testing the system to ensure optimal performance and functionality.
Step 6: Testing the System
As you near the completion of the outdoor speaker wiring and volume control installation, it’s crucial to thoroughly test the system to ensure optimal performance and functionality. Testing the system allows you to identify any potential issues, fine-tune the audio settings, and verify that all components are operating as intended. Here’s a comprehensive guide to effectively test your outdoor audio system:
Power-On and Signal Verification:
Power on the amplifier and ensure that the volume control unit is operational. Verify that the signal path from the volume control to the amplifier is established, and that the input levels on the amplifier are set to an initial low volume position to prevent sudden loud output during testing. Confirm that all connections are secure and that the speaker wires are properly routed without any exposed conductors.
Read more: What Color Thermostat Wire Controls The Heat
Audio Source Selection:
Connect an audio source, such as a smartphone, portable music player, or audio playback device, to the input source of the amplifier. Choose a familiar and varied audio track to test the system’s ability to reproduce different musical elements, including vocals, instrumentation, and dynamic range. Ensure that the audio source is set to an initial low volume level to prevent abrupt loud playback.
Volume Control Adjustment:
Gradually adjust the volume control unit to increase the audio output from the amplifier. Monitor the sound levels and verify that the volume control effectively regulates the sound levels without distortion or irregularities. Listen for balanced sound distribution across the outdoor area and make note of any specific areas where the sound may be uneven or lacking in coverage.
Channel Balance and Stereo Imaging:
Assess the stereo imaging and channel balance by walking around the outdoor space and evaluating the spatial distribution of the sound. Verify that the left and right channel outputs from the speakers are accurately aligned and that the stereo image is cohesive and immersive. Adjust the volume control to fine-tune the channel balance and optimize the stereo imaging for a well-defined listening experience.
Environmental Adaptability:
Observe the system’s performance in response to environmental factors, such as ambient noise, wind conditions, and natural acoustics. Assess the system’s adaptability to outdoor environments and evaluate its ability to deliver clear and intelligible sound even in challenging outdoor conditions. Make note of any adjustments or environmental considerations that may impact the system’s performance.
Read more: How To Wire Outdoor Security Cameras
Component Integrity and Reliability:
Verify that all system components, including the speakers, volume control, and amplifier, are functioning reliably and free from any abnormal behavior or malfunctions. Pay attention to any signs of overheating, signal distortion, or irregular operation, and address any issues promptly to ensure the long-term integrity and reliability of the system.
By meticulously testing the outdoor audio system and addressing any potential issues or adjustments, you can ensure that the installation is successful and that the system is ready to deliver a captivating and immersive listening experience in your outdoor space. With the system thoroughly tested and optimized, you can confidently immerse yourself in the seamless blend of music and nature that your outdoor audio system provides.
Conclusion
Embarking on the journey of wiring outdoor speakers with volume control has not only enhanced your outdoor entertainment experience but also empowered you to create a harmonious blend of music and nature in your outdoor space. Throughout this comprehensive guide, you’ve gained valuable insights into the intricacies of outdoor speaker wiring, the meticulous installation process, and the critical integration of the volume control and amplifier. As you conclude this transformative endeavor, it’s essential to reflect on the key takeaways and the profound impact of your efforts.
Elevated Outdoor Entertainment:
By meticulously selecting the ideal locations for your outdoor speakers and mounting them with precision, you have set the stage for a captivating and immersive audio experience in your outdoor environment. The strategic placement of the speakers ensures balanced sound coverage and seamless integration with the natural landscape, elevating your outdoor entertainment to new heights.
Technical Expertise and Precision:
Throughout the wiring and installation process, you have demonstrated technical expertise and precision in handling the speaker wire, connecting the components, and fine-tuning the system. Your meticulous attention to detail and adherence to best practices have resulted in a robust and reliable outdoor audio setup, capable of delivering exceptional sound quality and adaptability to outdoor conditions.
Read more: How To Cover Outdoor Electrical Wire
Seamless Integration and Testing:
From connecting the wires to the volume control and amplifier to thoroughly testing the system’s performance, you have ensured a seamless integration of the components and verified the system’s adaptability to environmental factors. Your commitment to thorough testing and optimization has culminated in a well-balanced and responsive outdoor audio system, ready to enchant and captivate your outdoor gatherings and moments of relaxation.
Harmonious Blend of Music and Nature:
By embracing the art of outdoor speaker wiring and volume control installation, you have cultivated a harmonious blend of music and nature in your outdoor space. The immersive soundscapes created by your meticulously crafted audio system resonate with the rhythms of nature, enriching your outdoor experiences and fostering a deeper connection with the surrounding environment.
As you conclude this transformative journey, you stand as a maestro of outdoor audio integration, ready to share the enchanting melodies and captivating rhythms with friends, family, and the tranquil beauty of the outdoors. Your dedication to creating a harmonious symphony of music and nature has not only enriched your outdoor space but has also inspired others to embark on their own transformative audio adventures.
Frequently Asked Questions about How To Wire Outdoor Speakers With Volume Control
Was this page helpful?
At Storables.com, we guarantee accurate and reliable information. Our content, validated by Expert Board Contributors, is crafted following stringent Editorial Policies. We're committed to providing you with well-researched, expert-backed insights for all your informational needs.

0 thoughts on “How To Wire Outdoor Speakers With Volume Control”