Home>Furniture & Design>Outdoor Furniture>How To Run Outdoor Electrical Wire
Outdoor Furniture
How To Run Outdoor Electrical Wire
Modified: August 27, 2024
Learn how to safely and effectively run outdoor electrical wire for your outdoor furniture and design projects. Follow our step-by-step guide.
(Many of the links in this article redirect to a specific reviewed product. Your purchase of these products through affiliate links helps to generate commission for Storables.com, at no extra cost. Learn more)
Introduction
Welcome to the world of outdoor electrical wiring! Whether you're setting up lighting for your garden, installing a power outlet on your patio, or adding electrical features to your outdoor space, understanding how to run outdoor electrical wire is essential for a safe and successful project. From ensuring compliance with local building codes to choosing the right wire and implementing proper safety measures, this guide will walk you through the key steps to help you navigate the intricacies of outdoor electrical work.
Undertaking outdoor electrical projects requires a blend of technical knowledge, meticulous planning, and a commitment to safety. By learning the fundamentals of running outdoor electrical wire, you can expand the functionality and aesthetic appeal of your outdoor living areas while maintaining the highest standards of safety and reliability.
In this comprehensive guide, we will delve into the crucial aspects of running outdoor electrical wire, including safety precautions, selecting the appropriate wire for your specific needs, planning the route for the wire, trenching, installing conduit, wiring outdoor fixtures, and testing and troubleshooting to ensure everything is in proper working order.
Whether you're a seasoned DIY enthusiast or a homeowner looking to take on a new project, this guide will equip you with the knowledge and confidence to tackle outdoor electrical wiring with precision and care. So, let's dive in and explore the essential steps and considerations for running outdoor electrical wire, empowering you to transform your outdoor space into a well-lit, functional, and inviting environment.
Key Takeaways:
- Prioritize safety by turning off power, using GFCI outlets, and choosing weatherproof components when running outdoor electrical wire. Adhering to codes and avoiding overloading circuits are crucial for a safe installation.
- Select the right wire by considering gauge, insulation type, weather resistance, and compliance with codes. Careful planning of the wire route and anticipating future expansions are essential for a successful outdoor electrical project.
Read more: How To Run Electrical Wire In A House
Safety Precautions
Before embarking on any outdoor electrical wiring project, prioritizing safety is paramount. Working with electricity demands a high level of caution and adherence to safety protocols to mitigate the risk of accidents and ensure the well-being of yourself and others. Here are essential safety precautions to observe when running outdoor electrical wire:
- Turn Off Power: Always turn off the power at the main breaker before handling any electrical wiring. Confirm that the power is indeed off using a voltage tester to avoid the risk of electrocution.
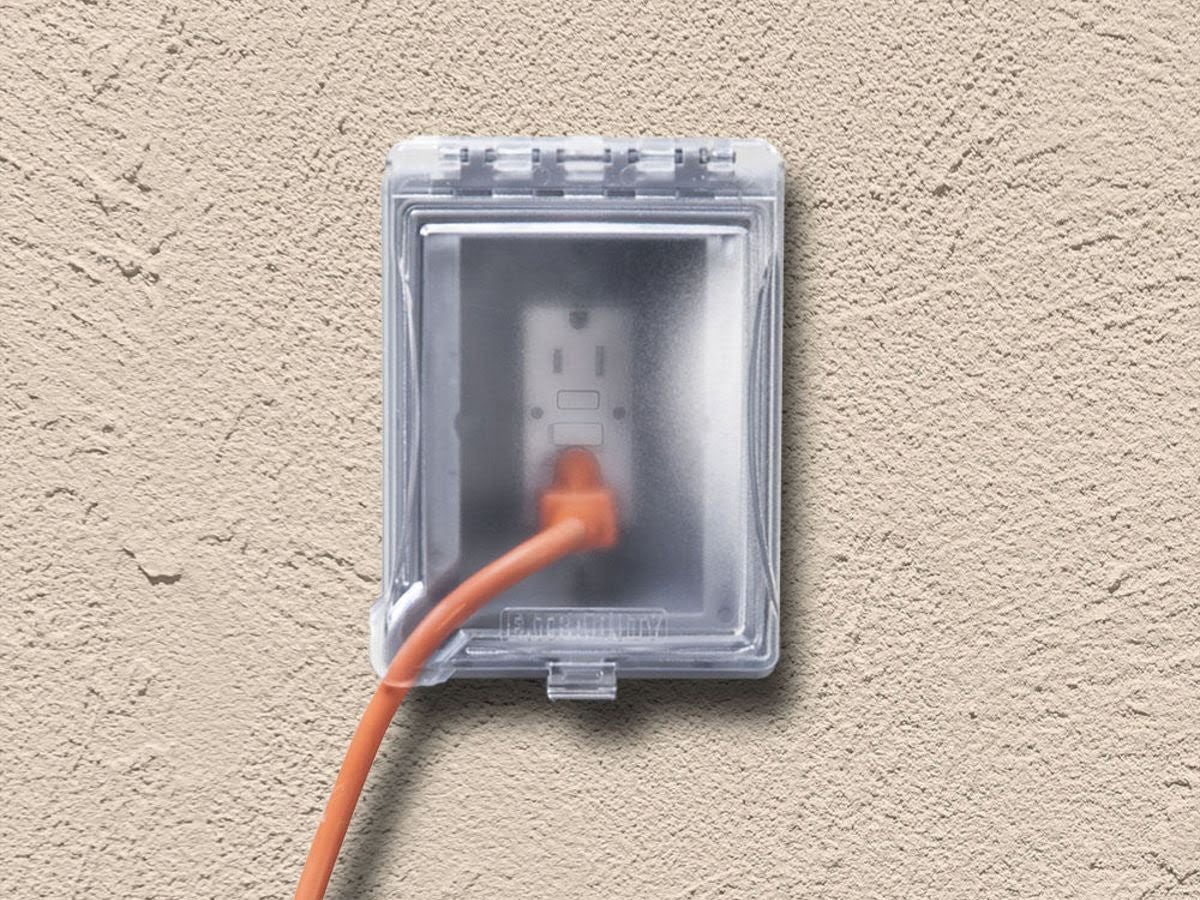
- Use GFCI Outlets: When installing outdoor outlets, utilize Ground Fault Circuit Interrupter (GFCI) outlets to provide protection against electrical shock in wet or damp conditions.
- Weatherproof Components: Ensure that all electrical components, such as outlets, switches, and fixtures, are designed for outdoor use and are adequately weatherproofed to withstand exposure to the elements.
- Protective Gear: Wear appropriate personal protective equipment, including insulated gloves, safety goggles, and non-conductive footwear, to safeguard yourself during the installation process.
- Adhere to Codes: Familiarize yourself with local building codes and regulations pertaining to outdoor electrical work. Complying with these standards is crucial for the safety and legality of your installation.
- Avoid Overloading Circuits: Calculate the electrical load and avoid overloading circuits to prevent overheating and potential fire hazards. Distribute the load evenly across circuits to maintain electrical balance.
- Mind the Environment: Be mindful of the surrounding environment, including the presence of underground utilities, irrigation systems, and landscaping features. Take precautions to avoid damage to existing infrastructure.
- Secure Wiring: Properly secure and protect wiring from physical damage, such as abrasion or puncturing, by using conduit, appropriate fasteners, and burying the wire at the correct depth.
By conscientiously adhering to these safety precautions, you can significantly reduce the inherent risks associated with outdoor electrical wiring projects. Prioritizing safety not only safeguards your well-being but also contributes to the long-term functionality and reliability of your outdoor electrical installations.
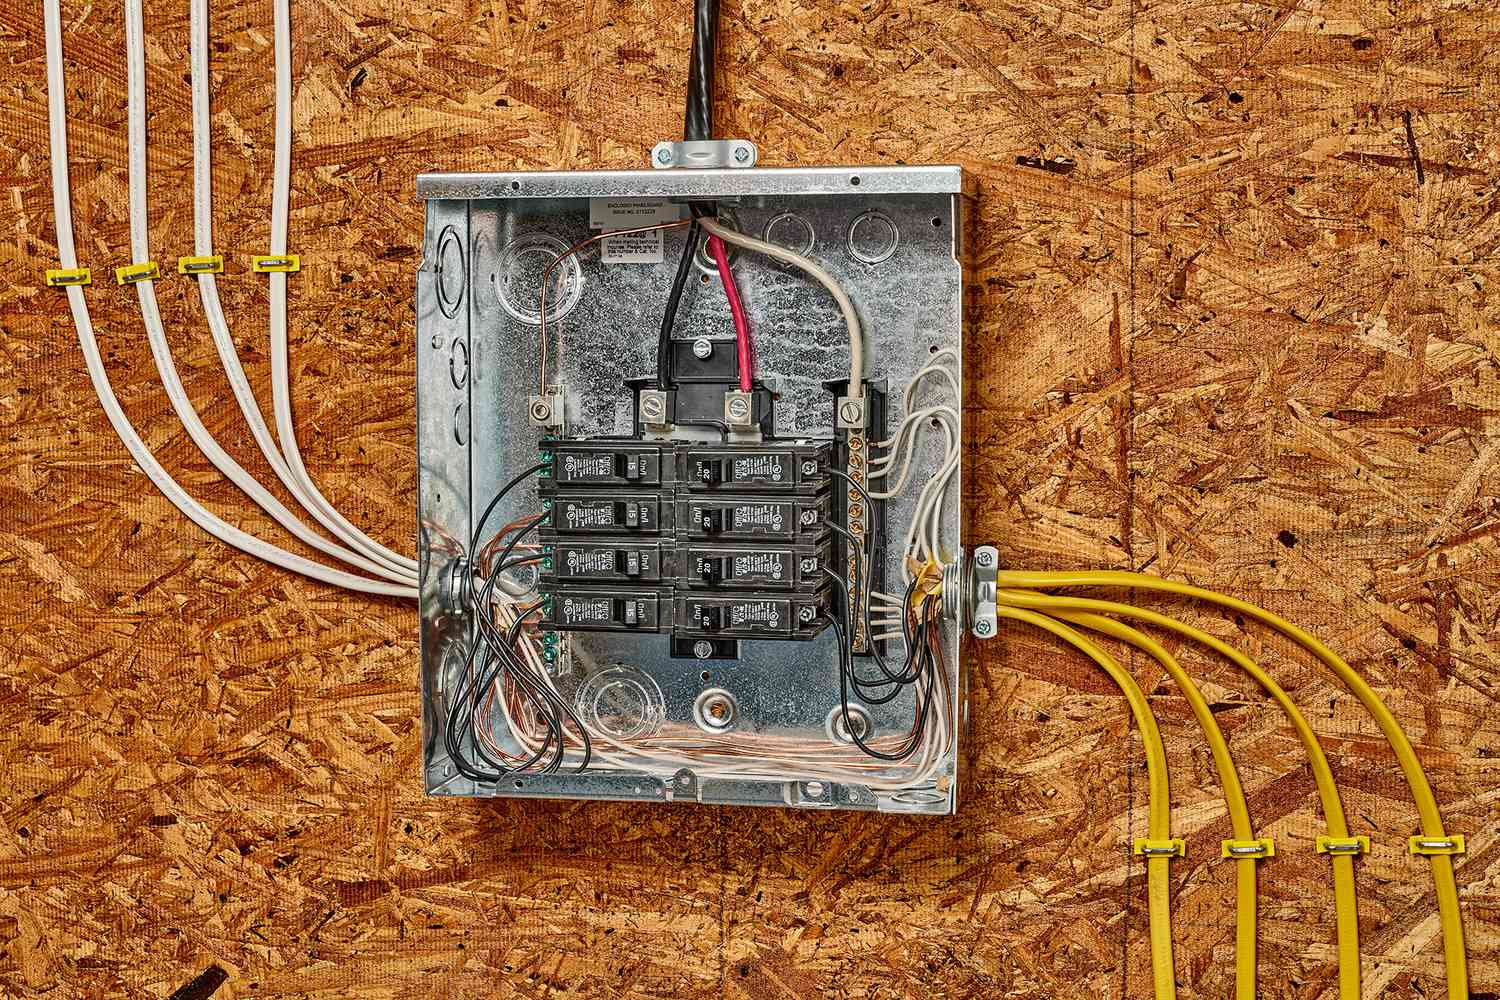
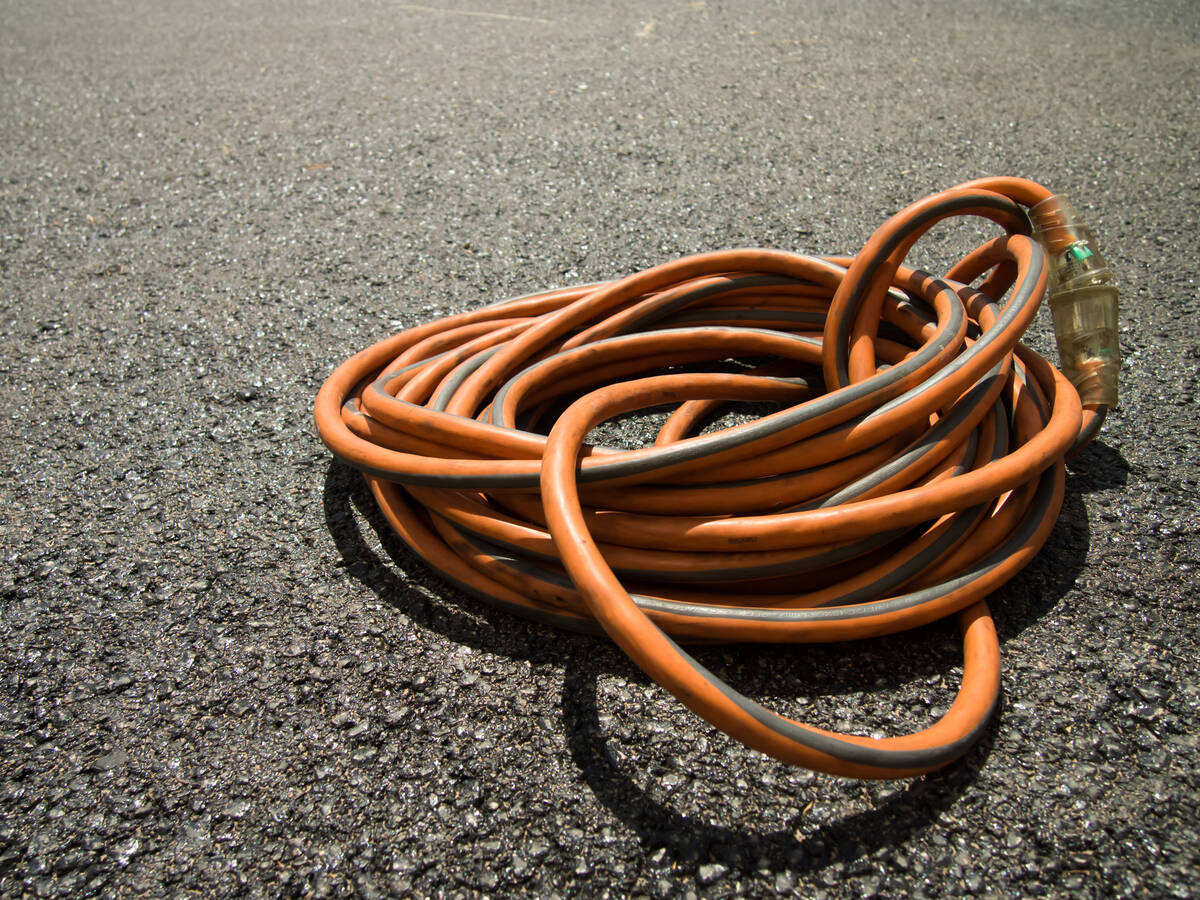
Choosing the Right Wire
When it comes to outdoor electrical wiring, selecting the appropriate wire is crucial for ensuring the efficiency, safety, and longevity of your electrical installations. Factors such as the intended use, environmental conditions, and local building codes play a significant role in determining the right type of wire for your outdoor projects. Here are key considerations to guide you in choosing the right wire:
- Wire Gauge: The wire gauge, or thickness, is a critical factor that influences the amount of current the wire can safely carry. For outdoor applications, such as powering lighting fixtures or outlets, consider using heavier gauge wires to accommodate the potential load and minimize voltage drop over longer distances.
- Insulation Type: Opt for wire with insulation designed for outdoor use, as it provides protection against moisture, UV exposure, and temperature variations. Common outdoor-rated insulation materials include PVC (Polyvinyl Chloride) and THWN-2 (Thermoplastic Heat and Water-resistant Nylon-coated).
- Weather Resistance: Ensure that the chosen wire is specifically designed to withstand outdoor conditions, including exposure to sunlight, rain, and fluctuating temperatures. Weather-resistant wires are constructed to resist degradation and maintain their electrical properties over time.
- Compliance with Codes: Familiarize yourself with local electrical codes and regulations to determine the specific requirements for outdoor wiring. This includes understanding the permissible wire types, burial depths, and conduit specifications mandated by local authorities.
- Consider Voltage Drop: Calculate the voltage drop over the length of the wire to ensure that the chosen wire size can deliver the necessary voltage to the intended outdoor fixtures or outlets. Minimizing voltage drop is crucial for maintaining the efficiency of electrical devices.
- Underground vs. Above Ground: If the wiring will be buried underground, select wire rated for direct burial to withstand soil contact and moisture. For above-ground installations, such as wiring for outdoor lighting, choose wire with appropriate UV protection and weather-resistant insulation.
By carefully evaluating these factors and consulting with local electrical professionals if needed, you can confidently choose the right wire for your outdoor electrical projects. Prioritizing the selection of high-quality, outdoor-rated wire ensures the safety, reliability, and longevity of your outdoor electrical installations, providing peace of mind for years to come.
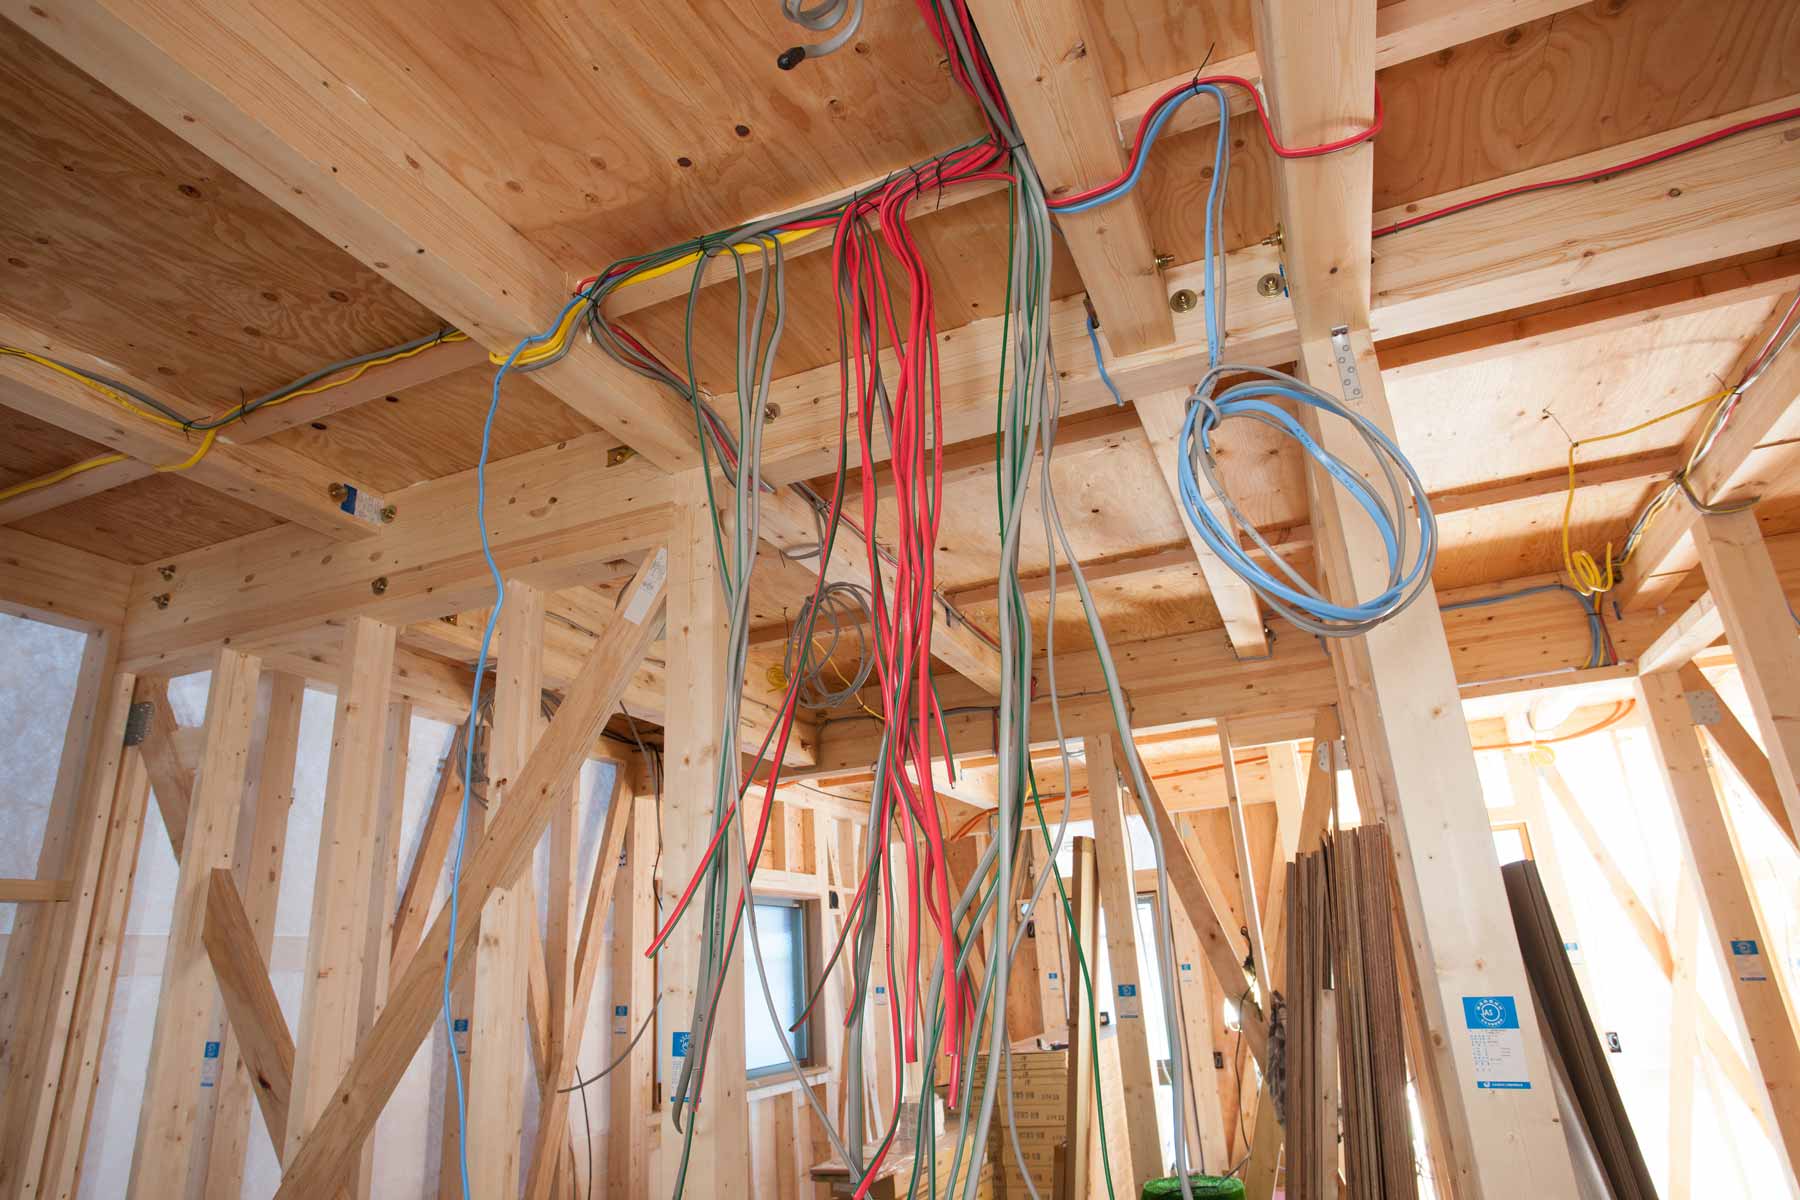
Planning the Route
Effective planning is essential when determining the route for outdoor electrical wire, ensuring that the wiring layout is both functional and compliant with safety standards. Whether you’re installing lighting, powering outdoor appliances, or adding electrical features to your landscape, thoughtful consideration of the wire’s pathway is crucial. Here’s how to plan the route for your outdoor electrical wire:
- Map Out the Layout: Begin by creating a detailed sketch or map of your outdoor space, marking the locations where electrical wiring will be required. This includes identifying areas for lighting, power outlets, or any other electrical fixtures.
- Consider Accessibility: Determine the most accessible and convenient locations for the wiring, ensuring that outdoor outlets and lighting are strategically positioned for practical use while maintaining aesthetic appeal.
- Account for Obstacles: Take into account any existing landscaping features, pathways, and structures that may influence the pathway of the electrical wire. Carefully plan around these obstacles to minimize disruption and ensure a seamless installation.
- Measure Distances: Calculate the distances between the electrical source, such as the main electrical panel, and the intended locations for outdoor fixtures or outlets. This helps in determining the length of wire required and assessing potential voltage drop.
- Account for Burial Depth: If the wiring will be buried underground, be mindful of the required burial depth as per local codes. Different applications, such as low-voltage landscape lighting versus standard electrical wiring, may have specific depth requirements.
- Future Expansion: Anticipate future needs and potential expansions of your outdoor electrical setup. Leave room for additional wiring or outlets to accommodate future enhancements to your outdoor living space.
- Consult with Professionals: If you’re uncertain about the optimal route for the electrical wire or have specific challenges to address, consider consulting with an electrician or a professional experienced in outdoor electrical installations.
By thoughtfully planning the route for your outdoor electrical wire, you can streamline the installation process, minimize disruptions to your outdoor space, and ensure that the wiring layout aligns with both functional and aesthetic considerations. Effective planning sets the stage for a successful and well-executed outdoor electrical project, allowing you to fully enjoy the enhanced functionality and ambiance of your outdoor environment.
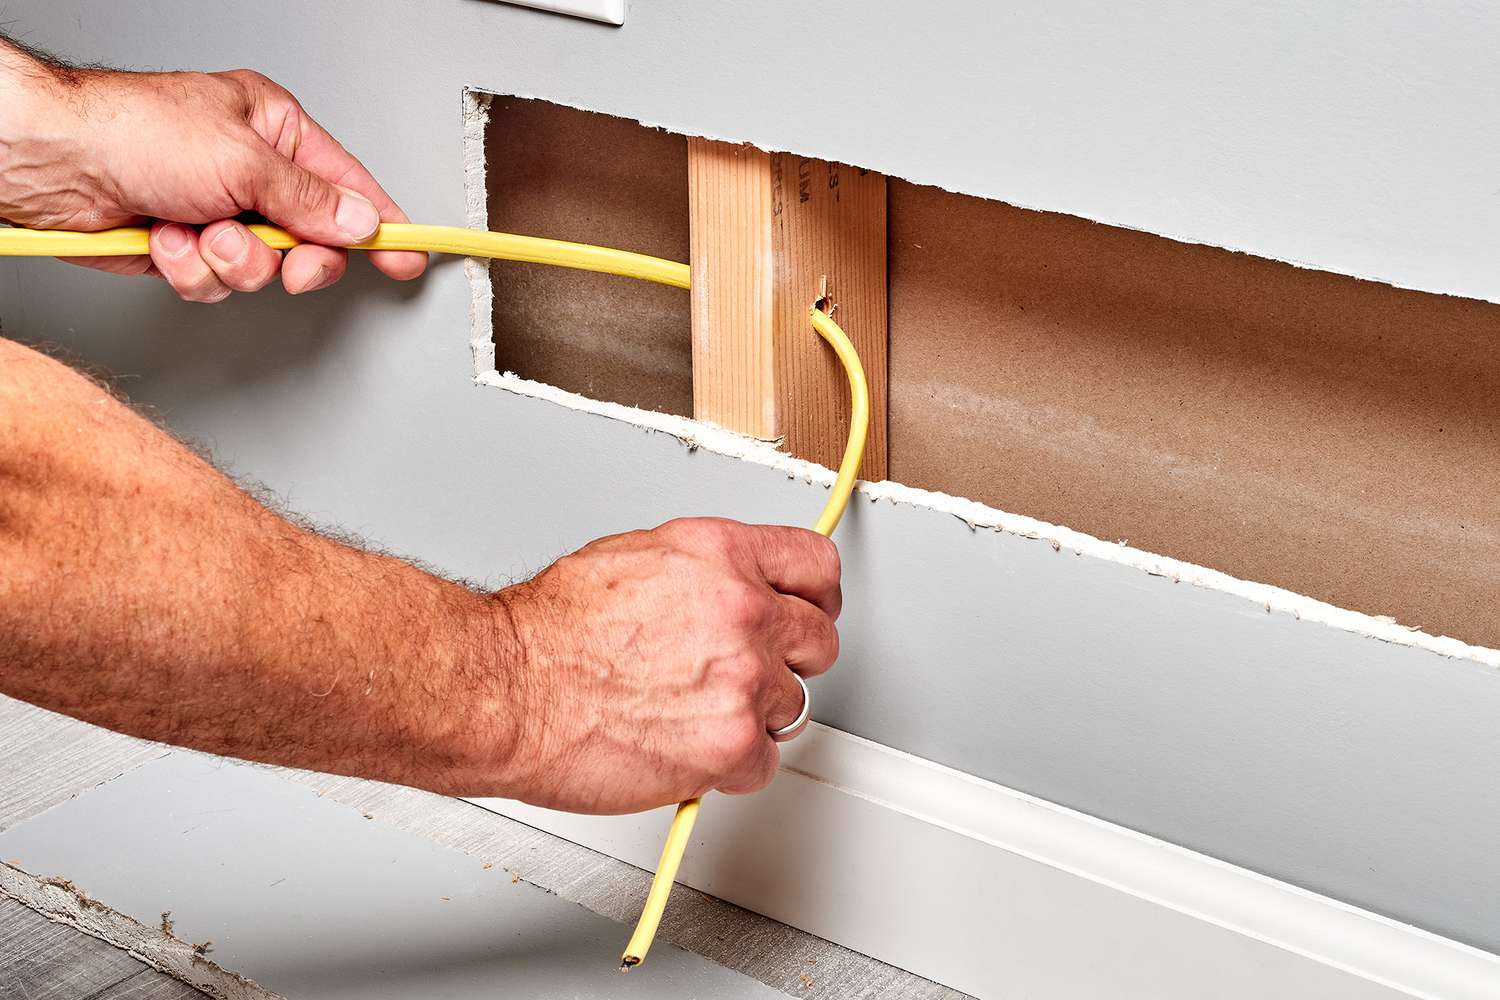
Digging Trenches
When running outdoor electrical wire, digging trenches to accommodate the wiring is a fundamental aspect of the installation process. Whether you’re burying the wire for landscape lighting, powering a detached structure, or extending electrical circuits to outdoor outlets, proper trenching is essential for the safety and longevity of the electrical system. Here’s a guide to effectively digging trenches for outdoor electrical wiring:
- Check Local Regulations: Before digging, familiarize yourself with local regulations regarding trenching, including any permits that may be required and the specified trench depth for electrical wiring in outdoor settings.
- Mark the Trench Path: Using spray paint or flags, mark the pathway where the trench will be dug, following the planned route for the electrical wire. This helps maintain accuracy and ensures that the trench aligns with the intended wiring layout.
- Utilize Safe Digging Practices: Prior to digging, identify and mark the locations of underground utilities using the appropriate utility locating services. This crucial step helps prevent accidental damage to existing utility lines and ensures a safe digging environment.
- Choose the Right Tools: Select the appropriate digging tools based on the soil type and the depth and width of the trench required. Common tools for trenching include trenching shovels, trenching spades, and trenching machines for larger projects.
- Excavate with Care: Begin excavating the trench, maintaining a consistent depth along the planned route. Exercise caution to avoid damaging any existing irrigation systems, landscaping features, or hardscapes in the vicinity of the trench.
- Maintain Proper Depth: Ensure that the trench depth complies with local codes and regulations for outdoor electrical wiring. Different applications, such as low-voltage lighting versus standard electrical wiring, may have specific depth requirements to ensure safety and protection of the wiring.
- Backfilling and Compaction: Once the electrical wire is installed in the trench, carefully backfill the trench with soil, ensuring that the wire is adequately protected and supported. Compact the backfilled soil to prevent settling.
By following these guidelines and exercising diligence during the trenching process, you can establish a secure pathway for the outdoor electrical wire, setting the stage for a safe and reliable electrical installation. Proper trenching not only ensures compliance with regulations but also contributes to the long-term functionality and integrity of your outdoor electrical system.
When running outdoor electrical wire, make sure to use wire rated for outdoor use and bury it at least 18 inches deep to protect it from damage and ensure safety. Always follow local building codes and regulations.
Read more: What Electrical Wire To Run Underground
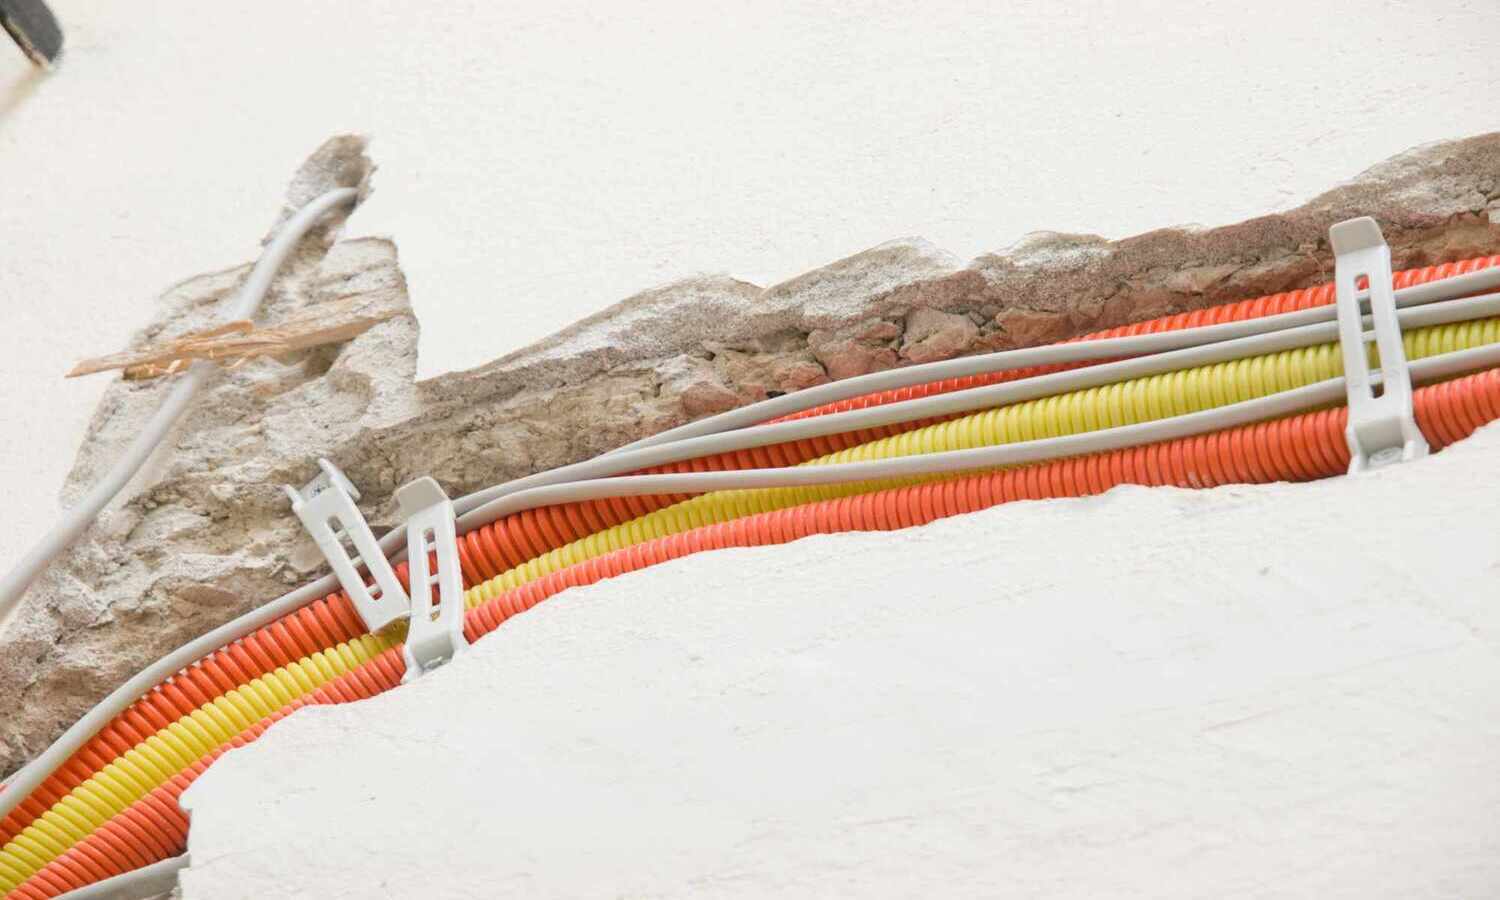
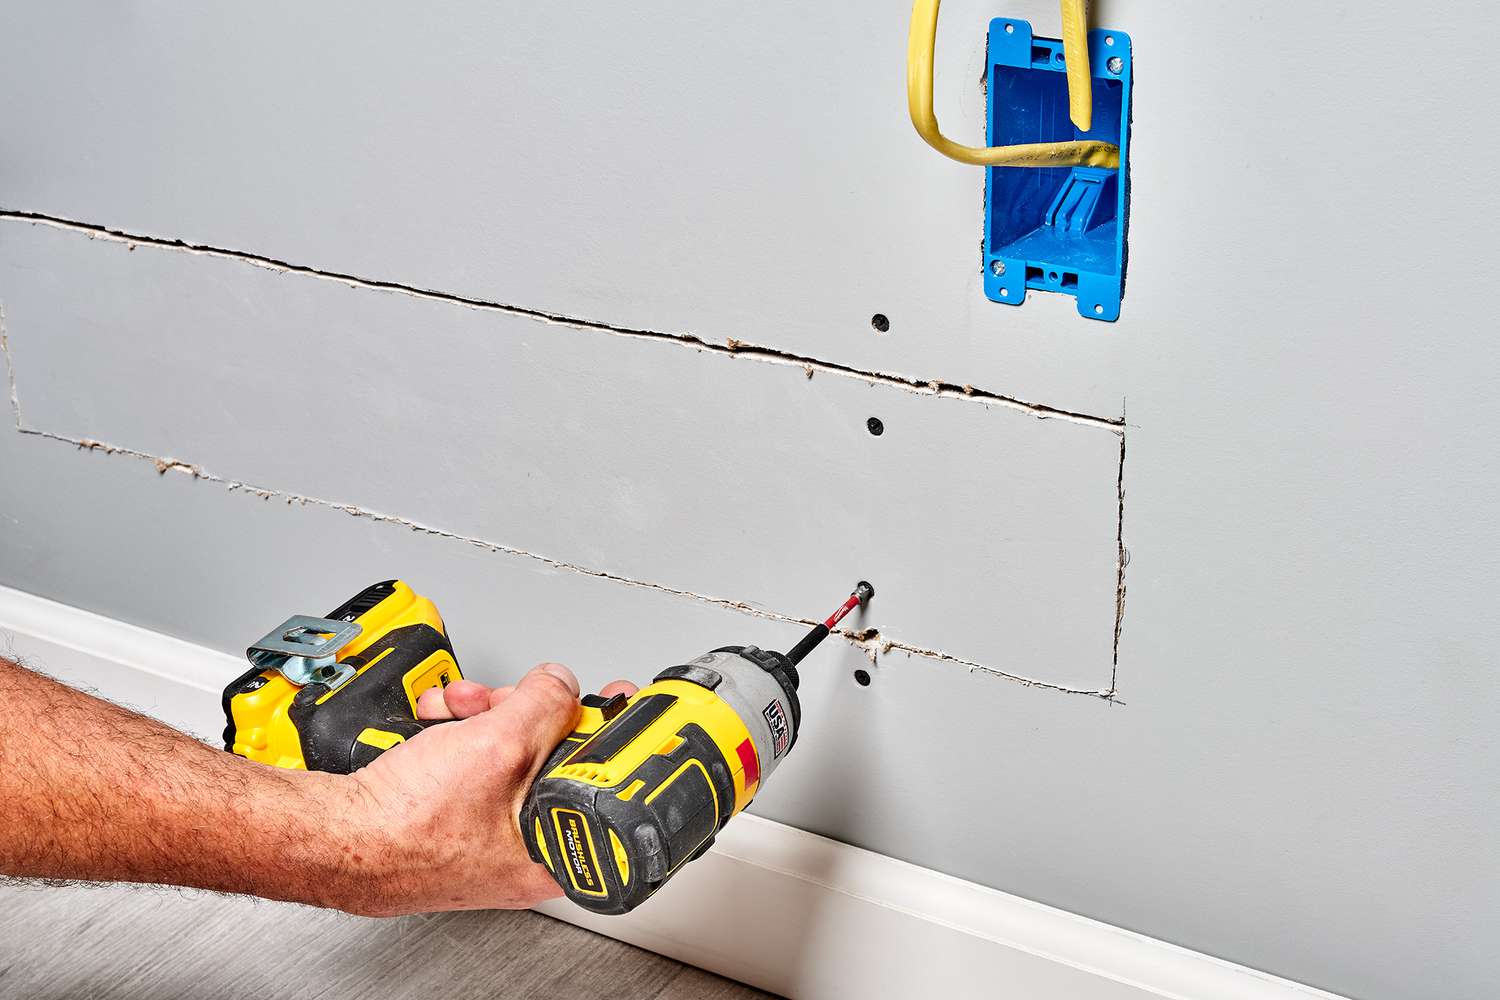
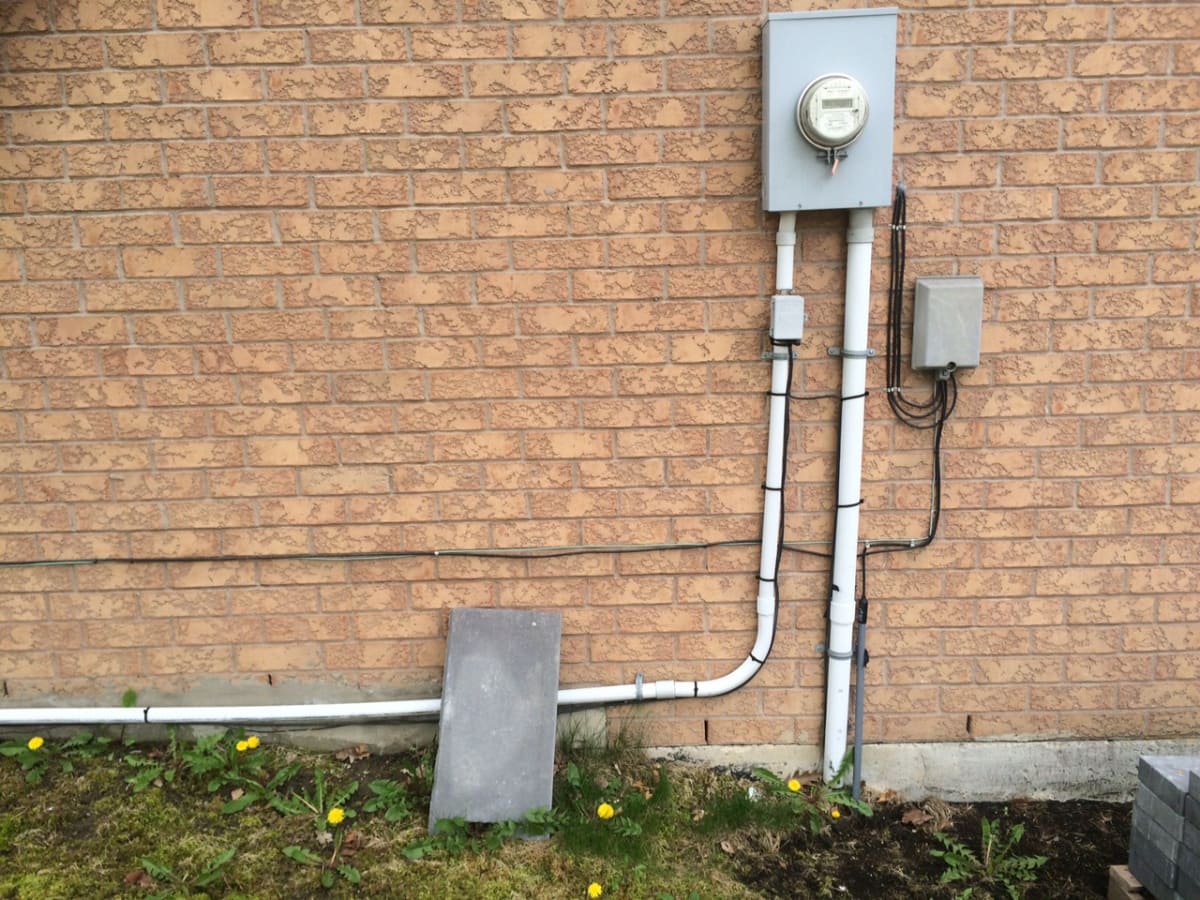
Installing Conduit
When running outdoor electrical wire, installing conduit provides an added layer of protection, safeguarding the wiring from environmental elements, physical damage, and corrosion. Conduit serves as a durable enclosure for the electrical wire, ensuring its safety and longevity in outdoor settings. Whether you’re wiring for outdoor lighting, power outlets, or other electrical features, here’s a comprehensive overview of the process of installing conduit for outdoor electrical wiring:
- Selecting Conduit Type: Choose the appropriate conduit type based on the specific requirements of your outdoor electrical project. Common options include rigid metal conduit (RMC), intermediate metal conduit (IMC), and PVC conduit, each offering unique benefits in terms of durability, corrosion resistance, and ease of installation.
- Planning Conduit Pathway: Determine the pathway for the conduit, aligning it with the planned route for the outdoor electrical wire. Ensure that the conduit layout facilitates easy access for future maintenance and minimizes exposure to potential hazards.
- Mounting and Support: Secure the conduit to the exterior of buildings, structures, or other support elements using appropriate conduit straps, clamps, or hangers. Adequately supporting the conduit prevents excessive movement and minimizes stress on the wiring inside.
- Cutting and Assembling Conduit: Measure and cut the conduit sections to the required lengths, utilizing conduit cutting tools and ensuring precise, clean cuts. Assemble the conduit segments using compatible connectors and fittings, maintaining a secure and watertight enclosure for the electrical wire.
- Implementing Bends and Turns: When navigating corners or changes in direction, use conduit bending techniques or pre-formed conduit elbows to achieve smooth, gradual bends without compromising the integrity of the conduit or the enclosed wiring.
- Sealing and Weatherproofing: Apply appropriate sealing compounds or weatherproof fittings at conduit joints and entry points to prevent moisture ingress and maintain the protective integrity of the conduit system in outdoor environments.
- Grounding the Conduit: If required by local electrical codes, ensure that the conduit system is properly grounded to provide a safe path for fault currents and protect against electrical hazards.
By diligently following these steps and adhering to best practices for conduit installation, you can fortify the outdoor electrical wiring system with a robust layer of protection, safeguarding the wiring from environmental factors and physical damage. Properly installed conduit not only enhances the safety and durability of the electrical installation but also facilitates future maintenance and modifications with ease.
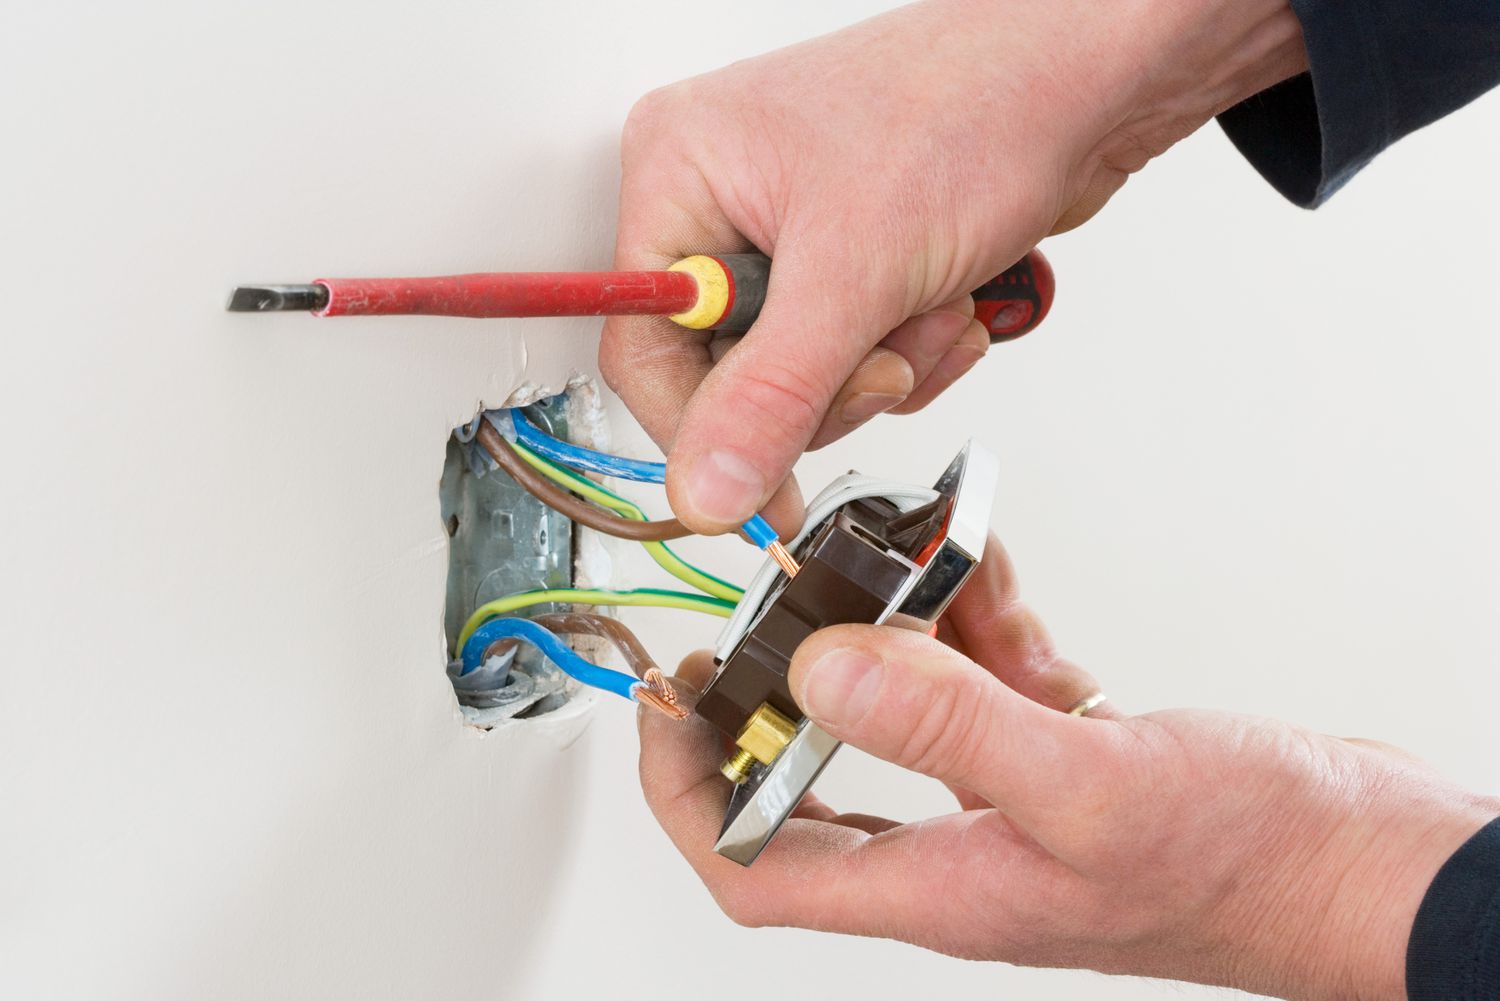
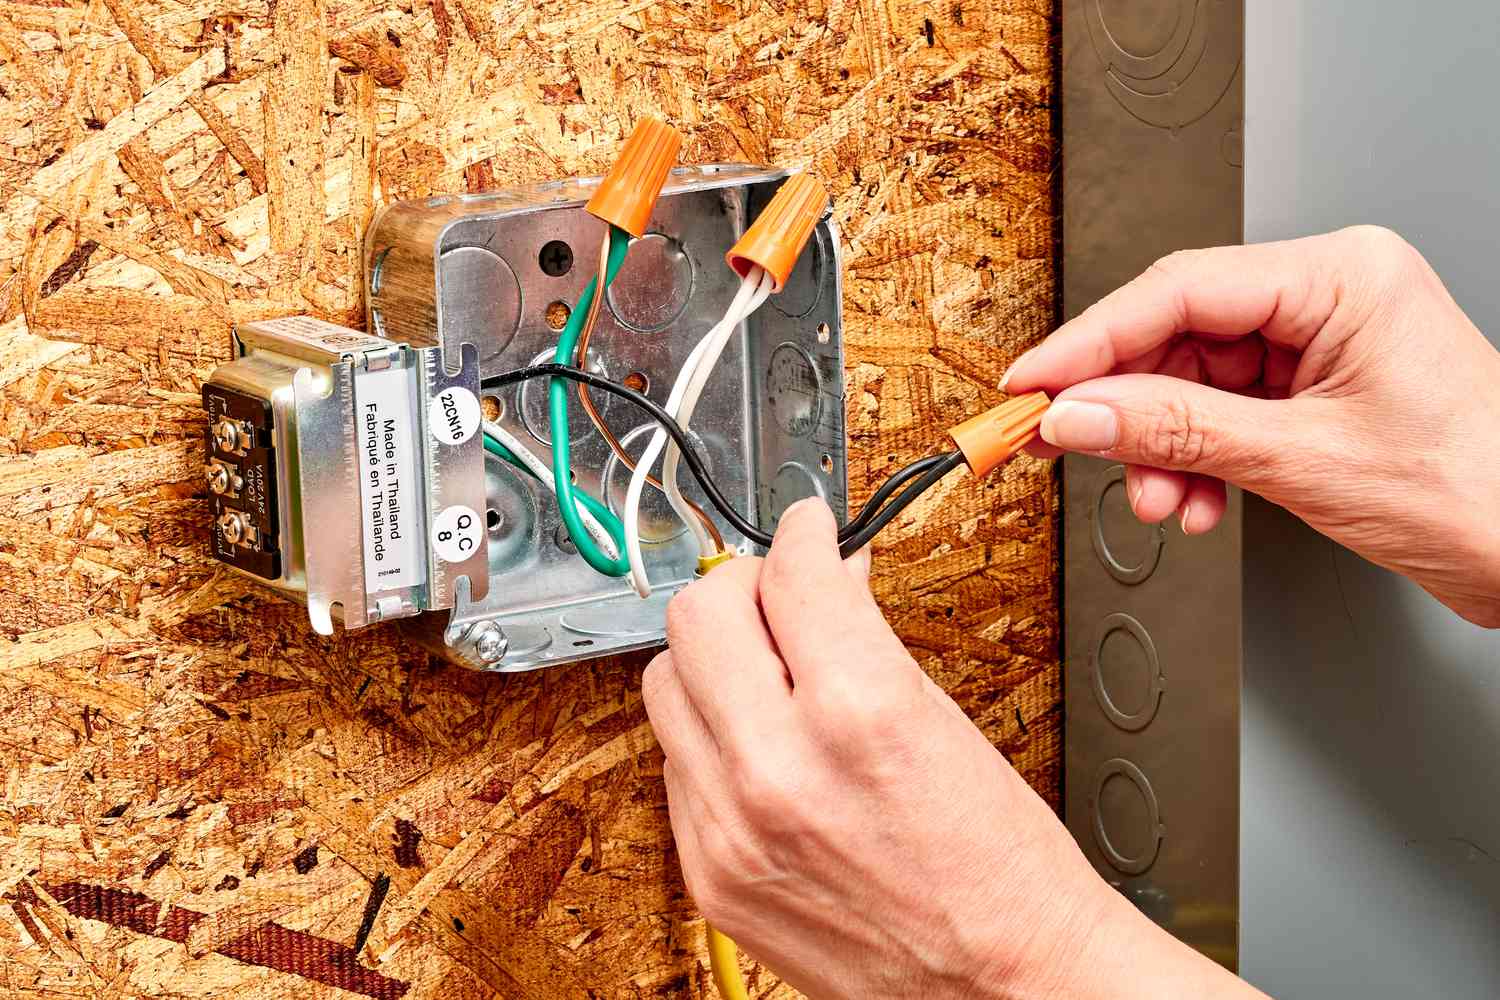
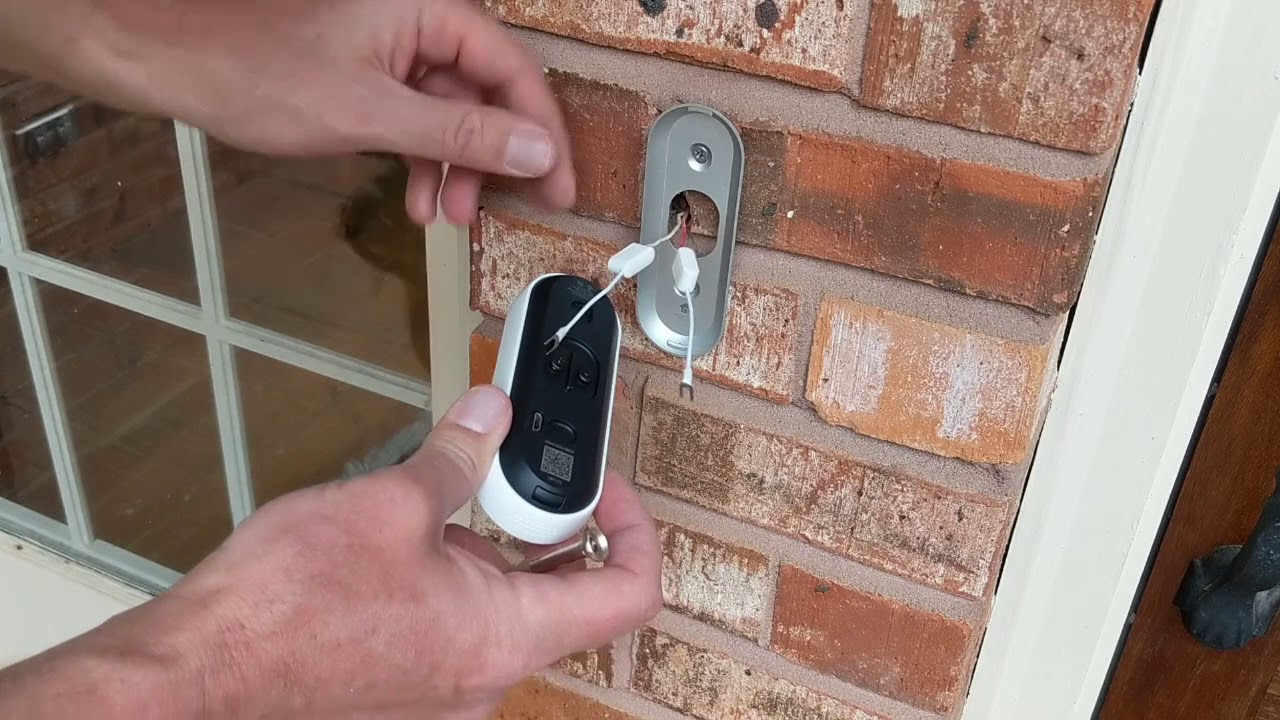
Wiring the Outdoor Fixtures
As you embark on the process of wiring outdoor fixtures, whether it involves illuminating your garden, powering decorative features, or installing functional electrical components, precision and attention to detail are essential for a successful and reliable electrical installation. Wiring outdoor fixtures requires a meticulous approach to ensure the proper connection, protection, and functionality of the electrical system. Here’s a comprehensive guide to effectively wiring outdoor fixtures:
- Fixture Placement: Position the outdoor fixtures according to your design and functional requirements, ensuring that they are strategically located for optimal illumination, aesthetic appeal, or practical use.
- Prepare the Wiring: Cut the electrical wire to the required lengths, leaving ample slack for connections and ensuring that the wire is rated for outdoor use and appropriately insulated for the specific application.
- Make Proper Connections: Follow the manufacturer’s instructions for connecting the wiring to the outdoor fixtures, ensuring secure and watertight connections to prevent moisture ingress and maintain electrical integrity.
- Utilize Junction Boxes: Install junction boxes where necessary to provide a secure and accessible enclosure for wire connections, protecting the connections from exposure to the elements and facilitating future maintenance.
- Secure and Protect Wiring: Use appropriate fastening methods, such as cable straps or clamps, to secure the wiring along its route and protect it from physical damage or strain caused by environmental factors.
- Weatherproofing Connections: Apply weatherproofing techniques, such as using waterproof wire nuts or silicone sealants, to safeguard the electrical connections from moisture and environmental exposure, ensuring long-term reliability.
- Test Fixture Functionality: Once the wiring is complete, test the functionality of the outdoor fixtures to ensure that they operate as intended and provide the desired illumination or electrical functionality.
By meticulously following these steps and exercising care and precision during the wiring process, you can establish a robust and reliable electrical connection for your outdoor fixtures. Properly wired outdoor fixtures not only enhance the functionality and ambiance of your outdoor space but also contribute to the safety and longevity of your electrical installations, allowing you to fully enjoy the benefits of a well-lit and functional outdoor environment.
Testing and Troubleshooting
Upon completing the installation of outdoor electrical wiring and fixtures, thorough testing and troubleshooting are essential to ensure that the system functions reliably and safely. Testing the electrical connections and fixtures helps identify any potential issues or deficiencies, allowing for timely troubleshooting and resolution. Here’s a comprehensive guide to testing and troubleshooting outdoor electrical installations:
- Electrical Testing Tools: Utilize a voltage tester, multimeter, or non-contact voltage detector to verify the presence of power at outdoor outlets, fixtures, and electrical connections. These tools help confirm proper electrical function and identify any faults or irregularities.
- Continuity Checks: Conduct continuity checks on the wiring and connections to ensure that there are no breaks or interruptions in the electrical pathways. This helps verify the integrity of the wiring and confirms that the electrical circuit is complete and functional.
- Ground Fault Circuit Interrupter (GFCI) Testing: If outdoor outlets are equipped with GFCI protection, test the GFCI functionality to ensure that it effectively detects ground faults and provides the necessary protection against electrical hazards in wet or damp conditions.
- Fixture Operation: Test the operation of outdoor lighting fixtures, power outlets, or other electrical components to verify that they function as intended, providing the desired illumination or electrical power without any irregularities.
- Load Testing: If applicable, conduct load testing on the electrical circuit to ensure that it can safely handle the anticipated electrical load without overheating or tripping circuit breakers. Verify that the wiring and components can sustain the expected power demands.
- Visual Inspection: Perform a comprehensive visual inspection of the entire outdoor electrical installation, examining wiring, connections, fixtures, and conduit for any signs of damage, deterioration, or improper installation that may require corrective action.
- Troubleshooting and Remediation: If any issues or irregularities are identified during testing, promptly troubleshoot the root cause of the problem and implement the necessary remedial measures to address wiring faults, fixture malfunctions, or electrical irregularities.
By diligently conducting thorough testing and troubleshooting, you can identify and address any potential issues in the outdoor electrical system, ensuring its safety, functionality, and compliance with electrical standards. Rigorous testing and troubleshooting not only enhance the reliability of the electrical installation but also provide peace of mind, allowing you to enjoy your outdoor space with confidence in the performance of the electrical system.
Conclusion
Embarking on outdoor electrical projects demands a blend of technical expertise, meticulous planning, and a steadfast commitment to safety. From selecting the right wire and meticulously planning the wiring layout to trenching, installing conduit, wiring fixtures, and conducting thorough testing, the process of running outdoor electrical wire encompasses a series of critical steps that collectively contribute to the safety, functionality, and longevity of the electrical system.
By prioritizing safety precautions, adhering to local building codes, and selecting high-quality, outdoor-rated wire, you lay the foundation for a robust and reliable outdoor electrical installation. Thoughtful planning of the wiring route, diligent trenching, and meticulous installation of conduit further fortify the system against environmental elements and physical damage, ensuring its resilience in outdoor settings.
Wiring outdoor fixtures and conducting thorough testing and troubleshooting represent the culmination of the installation process, where precision and attention to detail are paramount in achieving a safe, functional, and well-performing electrical system. Whether it’s illuminating your outdoor landscape, powering functional amenities, or enhancing the ambiance of your outdoor living space, a meticulously executed outdoor electrical installation elevates the functionality and appeal of your outdoor environment.
As you venture into outdoor electrical projects, whether as a seasoned DIY enthusiast or a homeowner seeking to enhance your outdoor space, the knowledge and expertise shared in this guide empower you to navigate the intricacies of outdoor electrical wiring with confidence and precision. By embracing best practices, prioritizing safety, and meticulously executing each step of the process, you can create a well-lit, functional, and inviting outdoor environment while upholding the highest standards of electrical safety and reliability.
With a thorough understanding of how to run outdoor electrical wire and a steadfast commitment to best practices, you are poised to transform your outdoor space into a haven of illumination, functionality, and safety, allowing you to fully enjoy the benefits of a well-designed and meticulously executed outdoor electrical system.
Frequently Asked Questions about How To Run Outdoor Electrical Wire
Was this page helpful?
At Storables.com, we guarantee accurate and reliable information. Our content, validated by Expert Board Contributors, is crafted following stringent Editorial Policies. We're committed to providing you with well-researched, expert-backed insights for all your informational needs.


0 thoughts on “How To Run Outdoor Electrical Wire”