Home>Furniture>Bedroom Furniture>How To Attach A Footboard To A Bed Frame

Bedroom Furniture
How To Attach A Footboard To A Bed Frame
Modified: December 7, 2023
Learn how to easily attach a footboard to your bed frame with our step-by-step guide. Transform your bedroom with this simple DIY project!
(Many of the links in this article redirect to a specific reviewed product. Your purchase of these products through affiliate links helps to generate commission for Storables.com, at no extra cost. Learn more)
Introduction
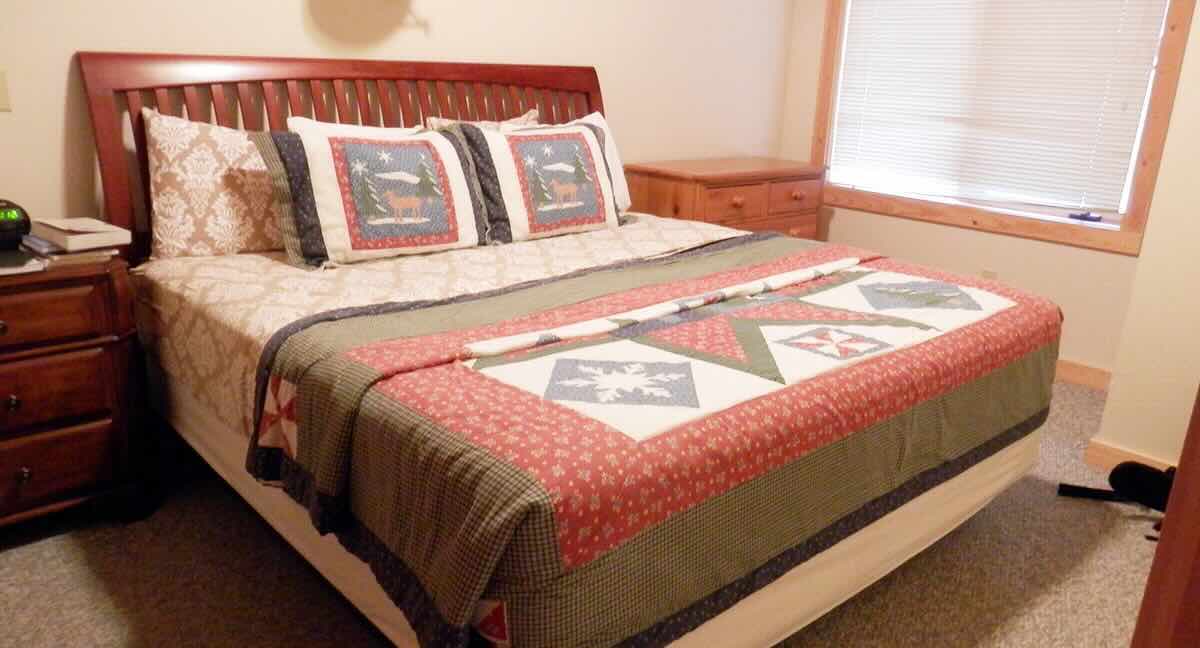
Adding a footboard to your bed frame not only enhances the aesthetics of your bedroom but also provides additional support and stability. Whether you’re looking to replace an old footboard or want to upgrade your current bed frame, attaching a footboard is a relatively simple and straightforward process. With the right tools and materials, you can easily transform your bed into a stylish and functional centerpiece.
In this article, we will guide you through the step-by-step process of attaching a footboard to your bed frame. We will provide you with the necessary tools and materials needed, along with easy-to-follow instructions to ensure a successful installation. So let’s dive in and learn how to attach a footboard to a bed frame.
Key Takeaways:
- Transform your bedroom with a stylish and stable footboard attachment. Follow the step-by-step process and ensure proper preparation, alignment, and secure fastening for a rewarding installation experience.
- Enjoy a beautiful and functional bedroom by attaching a footboard to your bed frame. Take care of your sleeping space with periodic stability checks and maintenance for a safe and visually appealing environment.
Read more: How To Attach A Headboard To A Bed Frame
Tools and Materials Needed
Before you begin attaching a footboard to your bed frame, make sure you have the following tools and materials ready:
- Allen wrench or screwdriver (depending on the type of fasteners used)
- Tape measure
- Drill and drill bits
- Wood screws or bed frame brackets
- Wood glue
- Pencil or marker
- Level
- Hacksaw or circular saw (if trimming is necessary)
- Protective gloves and safety glasses
In addition to these tools, you will also need the following materials:
- Footboard
- Bed frame
- Fasteners (such as bolts, screws, or bed frame brackets)
- Wood trim (if desired)
- Sanding block or sandpaper (if needed)
- Paint or stain (if desired)
Having these tools and materials ready before you start will help ensure a smoother and more efficient installation process. Double-check that everything is readily available and within reach to avoid unnecessary interruptions during the attachment process.
Step 1: Gather Necessary Hardware
Before you can attach the footboard to your bed frame, you need to gather the necessary hardware. The specific hardware required may vary depending on the type of bed frame and footboard you have. Here are some common hardware options:
- Bolts and Nuts: This is a common method used to connect the footboard to the bed frame. You will need bolts, nuts, and washers of appropriate size and length.
- Bed Frame Brackets: Bed frame brackets are metal brackets specially designed for attaching a footboard to a bed frame. They come in various styles and sizes, so make sure to choose the appropriate brackets for your bed frame.
- Wood Screws: If your footboard and bed frame are made of wood, you can use wood screws to securely fasten them together. Make sure to choose screws that are long enough to penetrate both the footboard and the bed frame.
- Fasteners: Depending on the design of your footboard and bed frame, you may need specific fasteners like T-nuts, corner brackets, or joining plates.
Once you have determined the appropriate hardware, gather all the necessary bolts, nuts, washers, bed frame brackets, wood screws, or other fasteners. It’s a good idea to have extras on hand in case some become lost or damaged during installation.
Take the time to organize your hardware and ensure you have all the necessary pieces to avoid any delays or frustrations during the attachment process. Having everything ready will make the installation process much smoother and more efficient.
Step 2: Prepare the Footboard
Before attaching the footboard to the bed frame, it’s important to properly prepare the footboard for installation. Follow these steps to ensure the footboard is ready:
- Measure and Mark: Begin by measuring the width and height of the footboard. Use a tape measure to determine the exact dimensions and make a note of them. This will help you position the footboard correctly on the bed frame later. If needed, mark the desired attachment points on the footboard using a pencil or marker.
- Trim (if necessary): If the footboard is too wide or tall to fit properly on the bed frame, you may need to trim it down to size. Use a hacksaw or circular saw to carefully remove any excess wood. Take measurements and trim gradually to ensure the footboard fits perfectly without compromising its structural integrity.
- Sand and Finish: Once the footboard is properly sized, use a sanding block or sandpaper to smooth out any rough edges or imperfections. This will prevent splinters and create a clean surface for painting or staining. If desired, apply a coat of paint or stain to match the existing bed frame or desired aesthetic.
- Pre-Drill Holes: If you’re using screws to attach the footboard, it’s a good idea to pre-drill pilot holes to prevent the wood from splitting. Use a drill with an appropriate drill bit to create small guide holes where the screws will be inserted. Make sure to align the holes with the marked attachment points on the footboard.
By properly preparing the footboard, you ensure a seamless and hassle-free installation process. Taking the time to measure, trim, sand, and finish the footboard will result in a more aesthetically pleasing and structurally sound end result.
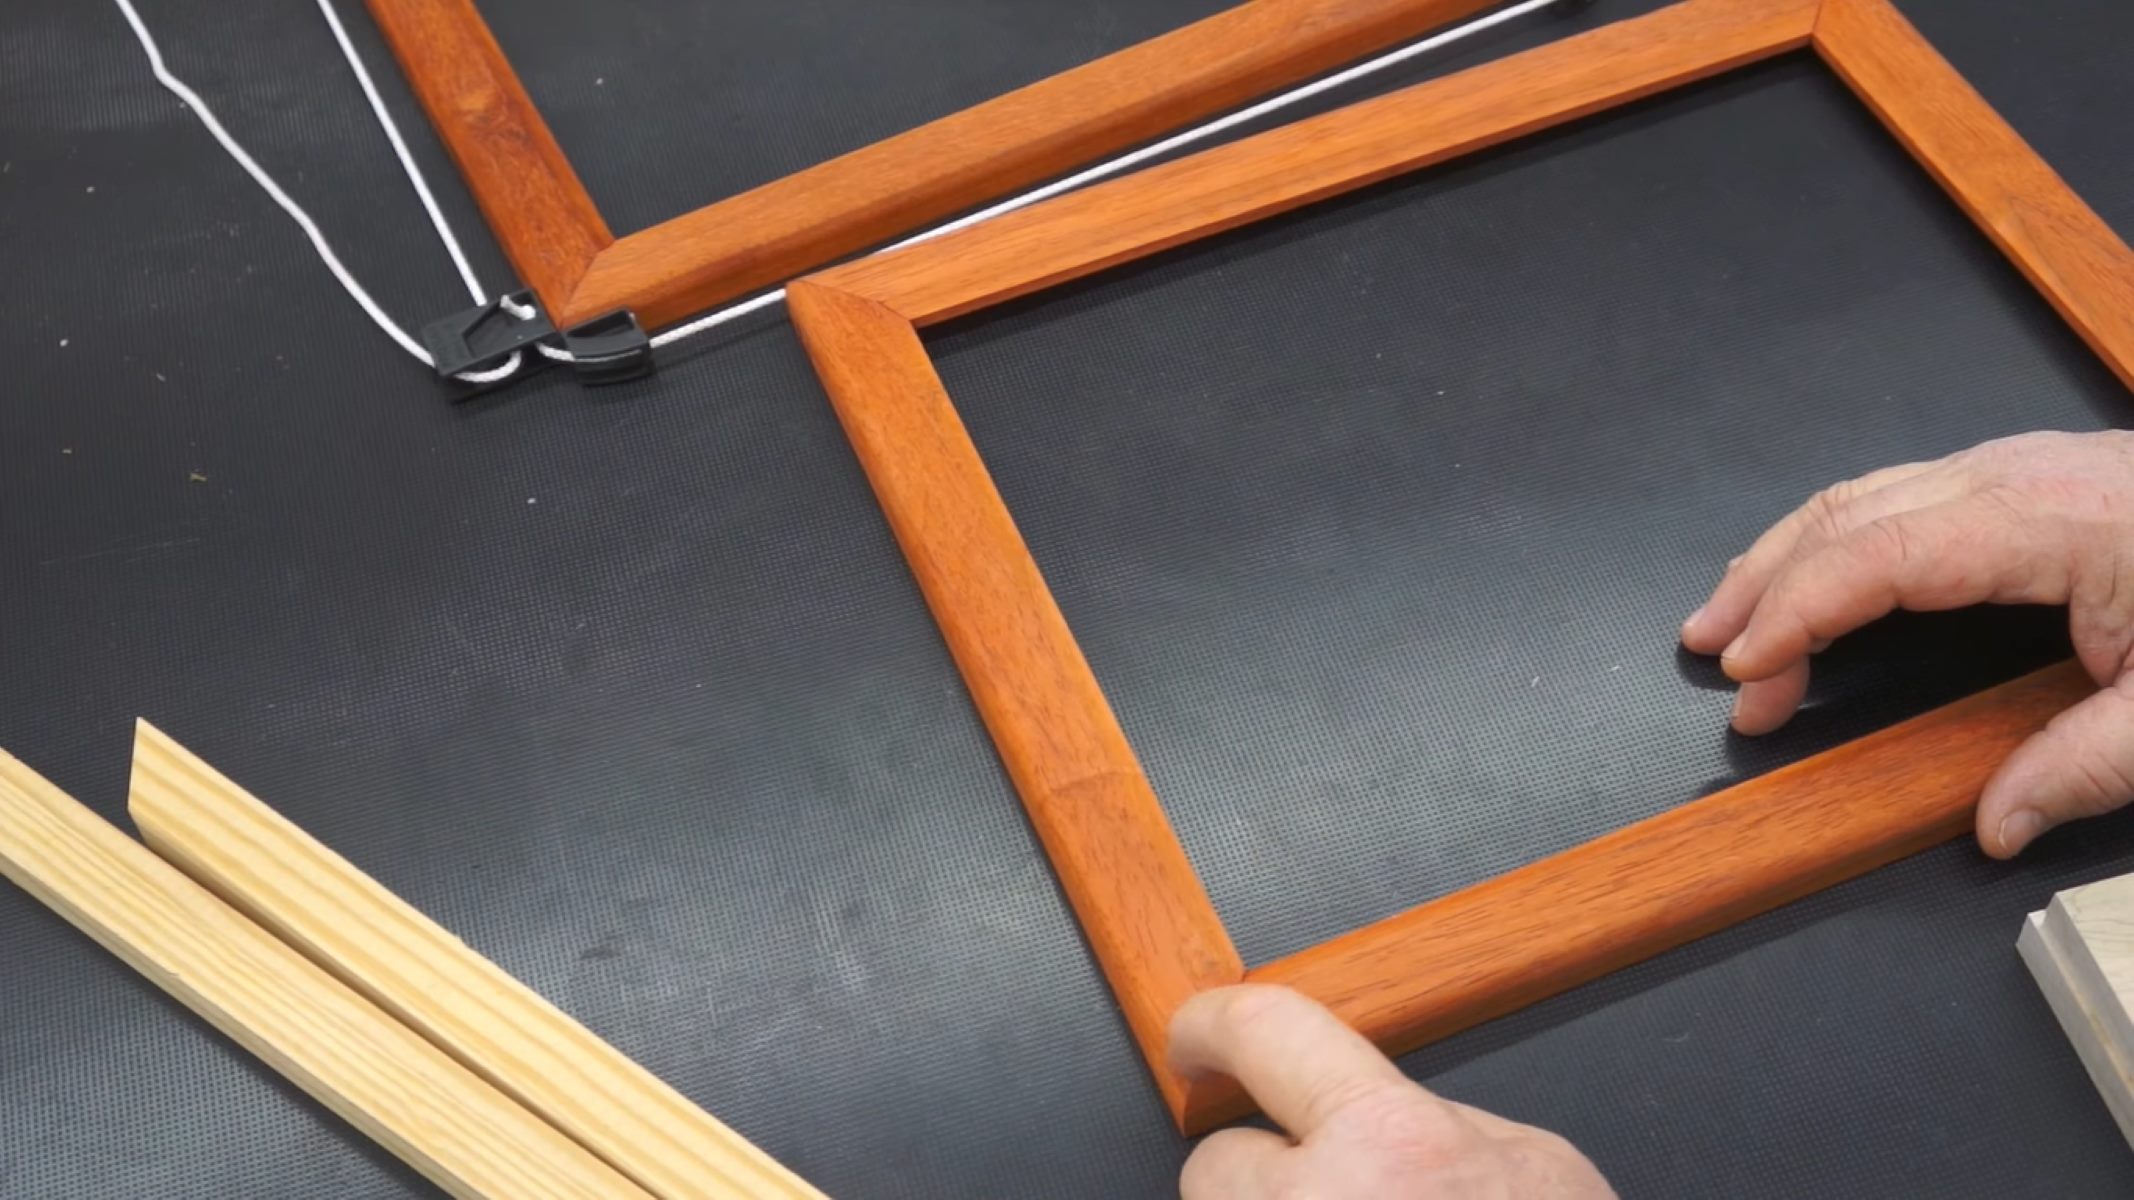
Step 3: Position the Footboard
Now that the footboard is prepared, it’s time to position it correctly on the bed frame. Follow these steps to ensure proper placement:
- Clear the Area: Remove any bedding, mattress, or other items from the bed frame to create a clear workspace. This will allow you to easily access and position the footboard.
- Align the Footboard: Place the footboard at the foot end of the bed frame, aligning it with the appropriate attachment points or markings. Double-check that the footboard is centered and in the desired position.
- Level the Footboard: Use a level to ensure the footboard is perfectly horizontal and not tilted. Adjust the position as needed to achieve a level and balanced appearance. This will contribute to the overall stability of the bed.
- Measure the Gaps: Measure the gaps between the footboard and the bed frame on both sides. Ensure the gaps are consistent and symmetrical to maintain a visually pleasing appearance.
Take the time to carefully position and align the footboard correctly on the bed frame. This will ensure a visually appealing and well-balanced final result. By using a level and measuring the gaps, you can achieve a more precise and professional-looking installation.
When attaching a footboard to a bed frame, make sure to use the appropriate hardware and follow the manufacturer’s instructions carefully to ensure a secure and stable attachment.
Step 4: Attaching the Footboard
Once the footboard is properly positioned, it’s time to attach it to the bed frame. The specific method of attachment will depend on the type of hardware you gathered in Step 1. Follow these general steps for a secure attachment:
- Bolts and Nuts: If you’re using bolts and nuts, insert the bolts through the pre-drilled holes in the footboard and bed frame. Secure them in place by tightening the nuts using an Allen wrench or screwdriver. Make sure to tighten them securely but not overly tight, as this can damage the wood or strip the threads.
- Bed Frame Brackets: If using bed frame brackets, align the brackets with the attachment points on the footboard and bed frame. Secure them in place using the provided screws or bolts. Follow the manufacturer’s instructions for the specific bracket style you have.
- Wood Screws: For a wood-on-wood attachment, position the footboard against the bed frame. Insert the wood screws through the pre-drilled holes in the footboard and into the bed frame. Use a drill to drive the screws in, ensuring they are flush with the wood surface without overtightening.
- Other Fasteners: If using any other types of fasteners, such as T-nuts, corner brackets, or joining plates, follow the manufacturer’s instructions for proper installation. Make sure the fasteners securely connect the footboard to the bed frame, providing stability and support.
During the attachment process, periodically check the alignment and levelness of the footboard. Make any necessary adjustments to ensure it remains centered and properly aligned. Double-check that all hardware is securely tightened to prevent any wobbling or instability.
By following these steps and using the appropriate hardware, you can confidently attach the footboard to the bed frame, creating a sturdy and visually appealing combination.
Step 5: Secure the Footboard
After attaching the footboard to the bed frame, it’s important to take extra measures to ensure its stability and security. Follow these steps to securely fasten the footboard:
- Check for Stability: Gently push and shake the footboard to test its stability. If it feels loose or wobbly, recheck the attachment points and tighten any loose bolts, screws, or brackets.
- Apply Wood Glue: For wood-on-wood attachments, consider applying a small amount of wood glue to the joints between the footboard and the bed frame. This will provide extra strength and stability to the connection. Apply the glue sparingly and wipe away any excess for a neat finish.
- Allow the Glue to Dry: If using wood glue, allow it to dry completely according to the manufacturer’s instructions before putting any weight or pressure on the footboard. This will ensure a strong bond between the two pieces of wood.
- Reinforce with Corner Brackets: To further enhance stability, you can reinforce the corners of the footboard by installing corner brackets. Attach the brackets to the inside corners of the footboard using screws or nails. This will add extra support to the footboard.
By taking these additional steps, you can ensure that the footboard is securely fastened to the bed frame, preventing any movement or instability. Regularly check the footboard for any signs of loosening and tighten any hardware as necessary to maintain its durability over time.
Step 6: Test Stability
Once the footboard is securely attached to the bed frame, it’s important to test its stability before using the bed. Follow these steps to ensure the footboard is properly secured:
- Apply Pressure: Apply gentle pressure to different areas of the footboard to test its stability. Push and lean on the footboard from different angles to simulate normal usage and ensure it can withstand the weight and movement.
- Check for Movement: While applying pressure, check for any movement or wobbling of the footboard. If you notice any significant movement, recheck the attachment points and tighten any hardware that may have come loose.
- Test Weight Distribution: Sit or kneel on the bed near the footboard and shift your weight to test how the footboard holds up under pressure. Pay attention to any squeaks, creaks, or signs of instability. If any issues arise, address them promptly to ensure a secure and stable footboard.
- Inspect Regularly: Periodically inspect the footboard and its attachment points to ensure they remain secure over time. Check for any signs of wear, loose hardware, or shifting. Address any issues as soon as possible to prevent further complications.
By testing the stability of the footboard, you can have peace of mind that it is securely attached to the bed frame and will provide the necessary support. Regularly checking and maintaining the footboard’s stability will ensure its longevity and your safety.
Conclusion
Attaching a footboard to a bed frame is a simple yet rewarding process that can enhance the look and functionality of your bedroom. By following the steps outlined in this article, you can confidently attach a footboard to your bed frame and create a stylish and stable centerpiece.
From gathering the necessary tools and materials to positioning the footboard and securely attaching it to the bed frame, each step is crucial to ensure a successful installation. Taking the time to properly prepare the footboard, align it with the bed frame, and secure it with the appropriate hardware will result in a sturdy and aesthetically pleasing attachment.
Remember to periodically check the stability of the footboard and address any issues promptly. Maintaining the secure attachment of the footboard will provide peace of mind and ensure a safe sleeping environment.
Now that you have completed the process of attaching a footboard to your bed frame, take a moment to appreciate the transformation it has brought to your bedroom. Enjoy the added support, visual appeal, and the comfort it adds to your sleeping space.
By following these steps and taking care of your footboard and bed frame, you can create a beautiful and functional bedroom that you’ll love coming home to each day.
Frequently Asked Questions about How To Attach A Footboard To A Bed Frame
Was this page helpful?
At Storables.com, we guarantee accurate and reliable information. Our content, validated by Expert Board Contributors, is crafted following stringent Editorial Policies. We're committed to providing you with well-researched, expert-backed insights for all your informational needs.


0 thoughts on “How To Attach A Footboard To A Bed Frame”