Home>Furniture>Living Room Furniture>How To Hide Cords Behind TV Stand
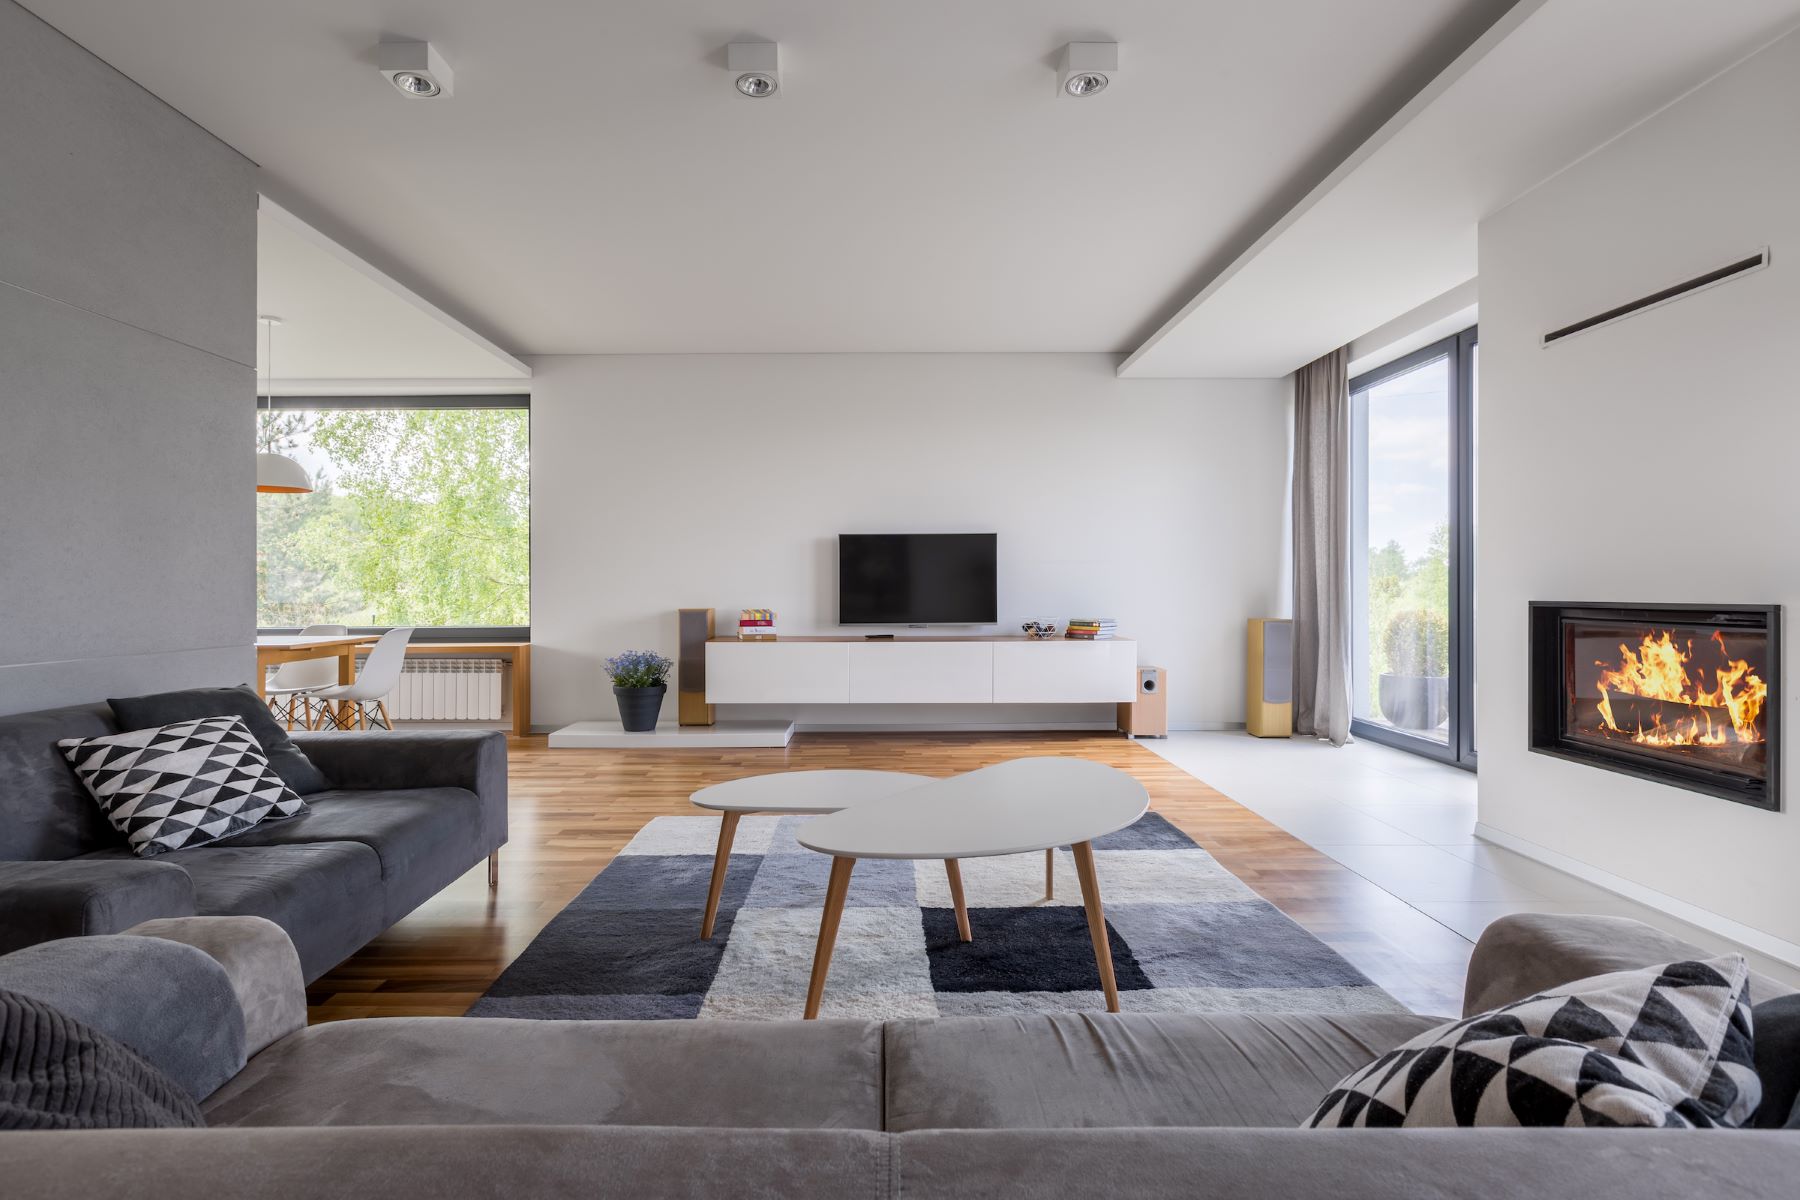

Living Room Furniture
How To Hide Cords Behind TV Stand
Modified: October 20, 2024
Learn how to hide cords behind your TV stand with our living room furniture solutions. Say goodbye to unsightly cable clutter with our easy-to-follow tips and tricks.
(Many of the links in this article redirect to a specific reviewed product. Your purchase of these products through affiliate links helps to generate commission for Storables.com, at no extra cost. Learn more)
Introduction
Having a clutter-free and organized living room is an essential part of creating a peaceful and aesthetically pleasing environment. One common source of frustration in many living rooms is the unsightly tangle of cords and cables that accompany our modern-day technology. If you’ve ever struggled with the mess of cords behind your TV stand, you’re not alone. However, there are solutions that can help you hide those cords and create a clean and streamlined look.
In this article, we will provide you with a step-by-step guide on how to hide cords behind your TV stand. From gathering the necessary materials to perfectly concealing the cords, we’ve got you covered. So let’s dive in and transform your living room into a clutter-free oasis.
Key Takeaways:
- Say goodbye to messy cords behind your TV stand by following our step-by-step guide. Gather materials, plan, create cord channels, and conceal cords for a clutter-free living room.
- Transform your living room into a clutter-free oasis with our guide. Organize, secure, and hide cords behind your TV stand for a clean and streamlined look.
Read more: How To Organize Cables Behind TV
Step 1: Gather necessary materials
The first step in hiding cords behind your TV stand is to gather all the necessary materials. Here’s a list to guide you:
- Tape measure
- Cord covers or sleeves
- Power strip or surge protector
- Cable ties or zip ties
- Sticky adhesive or mounting tape
- Scissors or utility knife
These materials will be essential for organizing, securing, and concealing the cords behind your TV stand.
Step 2: Measure and plan
Before you start hiding the cords, it’s important to measure and plan accordingly. Measure the distance from the power outlet to the desired location of your TV stand to ensure that the cords can reach. Consider the number of cords you need to hide and the available space behind the TV stand. This will help you determine the placement of cord covers or sleeves and the best route for the cords.
Take some time to plan the layout and visualize how you want the cords to be organized and concealed. This will make the process easier and ensure a clean and tidy end result.
Step 3: Prepare the TV stand
Now that you have your measurements and plan in place, it’s time to prepare the TV stand. Start by moving the TV and any other devices that are currently on the stand. This will give you access to the back of the stand and make it easier to work.
Clear away any dust or debris and clean the surface of the TV stand. This will ensure that the adhesive of cord covers or sleeves sticks properly and creates a seamless look.
If your TV stand has any built-in cord management features or holes for cables, take advantage of them. They can make the process of hiding cords much simpler.
Step 4: Create cord channels
To effectively hide cords behind your TV stand, you will need to create cord channels. Cord channels are small grooves or recessed areas that allow you to route the cords neatly and keep them out of sight.
There are multiple options for creating cord channels:
- Adhesive cord channels: These are adhesive strips with built-in channels that you can attach to the back of your TV stand. Simply peel off the backing and stick them in the desired locations. These channels will hold the cords in place and keep them hidden.
- DIY channels: If you’re feeling creative, you can create your own cord channels using PVC pipes, wire raceways, or even decorative molding. Cut the channels to the desired length and attach them to the back of the TV stand using adhesive or screws.
Choose the option that best suits your needs and the design of your TV stand.
Key Takeaways:
- Say goodbye to messy cords behind your TV stand by following our step-by-step guide. Gather materials, plan, create cord channels, and conceal cords for a clutter-free living room.
- Transform your living room into a clutter-free oasis with our guide. Organize, secure, and hide cords behind your TV stand for a clean and streamlined look.
Read more: How To Organize Cables Behind TV
Step 1: Gather necessary materials
Before you begin hiding cords behind your TV stand, it’s important to gather all the necessary materials. Having the right tools and supplies will make the process smoother and ensure a clean and organized end result. Here’s a list of the essential items you’ll need:
- Tape measure: This will help you accurately measure the distance from the power outlet to the TV stand and determine the length of cord covers or sleeves you’ll need.
- Cord covers or sleeves: These are essential for concealing the cords and keeping them organized. Cord covers are typically made of plastic or fabric and come in various lengths and widths. Choose a color that matches your TV stand or wall for a seamless look.
- Power strip or surge protector: Having a power strip or surge protector is crucial for managing multiple cords from your TV, gaming consoles, speakers, and other devices. Opt for one with enough outlets to accommodate all your devices.
- Cable ties or zip ties: These small plastic ties are useful for bundling and securing multiple cords together, preventing them from tangling and creating a cleaner appearance.
- Sticky adhesive or mounting tape: You’ll need this to adhere the cord covers or sleeves to the back of the TV stand. Make sure to choose a strong adhesive that can withstand the weight of the cords.
- Scissors or utility knife: These tools will come in handy for cutting the cord covers or sleeves to the desired length and making precise cuts if needed.
Having these materials ready will save you time and ensure a smoother installation process.
Once you have gathered all the necessary materials, take a moment to familiarize yourself with them. This will help you plan your approach and ensure that you have everything within reach as you begin hiding the cords.
Remember, the specific materials you need may vary depending on the size and design of your TV stand, the number of cords you have, and your personal preferences. Feel free to customize your setup by adding additional items like cable management clips, wire labels, or cable management sleeves if desired.
Now that you have all the materials ready, you’re prepared to move on to the next step of measuring and planning the cord hiding process.
Step 2: Measure and plan
Once you have gathered all the necessary materials, it’s time to measure and plan the hiding of cords behind your TV stand. Taking accurate measurements and carefully planning your route will ensure a clean and organized setup. Here’s how to proceed:
1. Measure the distance: Start by measuring the distance between the power outlet and the location of your TV stand. This will help you determine the length of cord covers or sleeves you’ll need. Make sure to take into account any obstacles or furniture that might be in the way.
2. Assess the number of cords: Take stock of the number of cords you need to hide. This includes the power cord for the TV, HDMI cables, audio cables, and any other cords from devices connected to your TV, such as gaming consoles or soundbars.
3. Plan the cord path: Visualize how you want the cords to be organized and concealed behind the TV stand. Consider the available space and any built-in cord management features of your stand. Determine the most practical route for the cords, keeping in mind any potential cable length limitations.
4. Consider cord management accessories: If you have multiple cords that need to be grouped together, consider using cable ties or zip ties to bundle them neatly. This will help prevent tangling and provide a cleaner appearance. Additionally, think about using cable management clips or adhesive cord organizers to keep the cords in place and avoid them from hanging freely.
5. Think about airflow: Ensure that the cords are not blocking any ventilation points or airflow around your electronic devices. This will help prevent overheating and prolong the lifespan of your equipment.
By carefully measuring and planning the organization and hiding of your cords, you’ll be able to create a streamlined and clutter-free look behind your TV stand. This step is crucial to ensure that you have all the necessary materials and a clear strategy before moving on to the next steps.
Now that you have measured and planned your setup, it’s time to prepare the TV stand for hiding the cords. Proceeding with a clean and prepped surface will set you up for success in achieving a neat and organized result.
Step 3: Prepare the TV stand
Before you can start hiding the cords behind your TV stand, it’s important to prepare the surface to ensure a clean and professional look. Taking the time to clear the area and properly clean the TV stand will help create a smooth and organized setup. Follow these steps to prepare your TV stand:
1. Remove any obstructions: Start by removing any objects or devices that are currently on the TV stand. This includes the TV, gaming consoles, DVD players, or any other electronics. Temporarily relocate them to a safe and convenient area to give yourself full access to the back of the stand.
2. Secure loose cables: Before cleaning, make sure to gather and secure any loose cables or cords that are hanging behind or around the TV stand. Use cable ties or Velcro straps to bundle them neatly together. This will prevent them from getting tangled and make it easier to clean the area.
3. Dust and clean: Use a microfiber cloth or a duster to remove any dust or debris from the TV stand’s surface and surrounding area. Pay attention to the back of the stand where the cords will be hidden. Make sure to clean any vents or openings to ensure proper airflow and prevent overheating.
4. Address wire management features: Some TV stands come with built-in wire management features such as pre-drilled holes or channels for organizing and concealing cords. Check if your stand has these features and make use of them if available. If not, don’t worry, as there are other effective methods to hide the cords.
By preparing the TV stand beforehand, you’ll have a clean and blank canvas to work with as you hide the cords. This step ensures that any dust or clutter is removed, allowing for a seamless and professional-looking installation.
Once you have prepared the TV stand, you’re ready to move on to the next step: creating cord channels. These channels will guide the cords behind the TV stand and keep them neatly organized and hidden.
Step 4: Create cord channels
Creating cord channels is an essential step in effectively hiding cords behind your TV stand. Cord channels help guide the cords and keep them organized, preventing them from becoming tangled or visible. There are various options available for creating these channels, depending on your preferences and the design of your TV stand. Here are two common methods:
1. Adhesive cord channels: Adhesive cord channels are pre-designed strips with built-in channels that you can attach to the back of your TV stand. These channels come in various lengths and widths, allowing you to choose the size that best fits your needs. To create cord channels using adhesive strips, follow these steps:
- Measure the length of each cord and determine where you want the channels to be placed on the back of the TV stand.
- Cut the adhesive cord channels to the appropriate lengths, ensuring that they correspond to the cords’ measurements.
- Remove the backing from the adhesive strip and carefully attach it to the back of the TV stand, aligning it with the desired path for the cords.
- Press down firmly to ensure a secure adhesion, and smooth out any air bubbles or wrinkles for a clean look.
2. DIY cord channels: If you prefer a more customized approach, you can create your own cord channels using common household items such as PVC pipes, wire raceways, or decorative molding. Follow these steps to create DIY cord channels:
- Measure and mark the desired locations for the channels on the back of the TV stand.
- Based on the measurements, cut the PVC pipes, wire raceways, or molding to the appropriate lengths.
- Attach the DIY channels to the TV stand using adhesive or screws, ensuring they are securely in place.
Creating cord channels allows you to route the cords neatly behind the TV stand, preventing them from tangling and keeping them out of sight. Choose the method that best suits your needs and the overall design of your TV stand.
Once you have created the cord channels, you’re ready to proceed to the next steps of organizing and securing the cords behind the TV stand. These steps will help ensure a clean and professional look while keeping the cords neatly organized and hidden.
Read more: How To Hide Plumbing Behind Pedestal Sink
Step 5: Organize and secure cords
Now that you have created cord channels behind your TV stand, it’s time to organize and secure the cords within these channels. This step is crucial for maintaining a clean and clutter-free appearance while also ensuring the cords are kept in place and well-organized. Follow these steps to effectively organize and secure your cords:
1. Group the cords: Start by gathering all the cords that need to be concealed. Group them based on their functions, such as power cords, HDMI cables, audio cables, etc. This will make it easier to manage and prevent tangling.
2. Use cable ties or zip ties: Use cable ties or zip ties to bundle the cords together. Wrap the tie around the grouped cords and pull it tight to secure them. Trim any excess tie length for a neat appearance.
3. Place the cords in the cord channels: Carefully feed the bundled cords into the cord channels you created earlier. Make sure to follow the planned route and keep the cords neatly organized within the channels.
4. Position the power strip or surge protector: If you’re using a power strip or surge protector, position it behind the TV stand within reach of the cords. Plug all the cords into the appropriate outlets of the power strip, ensuring they are securely connected.
5. Arrange cords by length: Adjust the lengths of the cords within the cord channels to ensure a clean appearance. Arrange them from shortest to longest, keeping excess cord length neatly coiled within the channels.
By organizing and securing the cords behind your TV stand, you’ll reduce clutter and create a streamlined look. This step also makes it easier to manage the cords in the future and minimizes the chances of them becoming tangled or visible.
Once you have successfully organized and secured the cords, it’s time to proceed to the next step of concealing the cords using cord covers or sleeves. This final step will add an extra layer of camouflage, making the cords virtually invisible and providing a polished finish to your TV stand setup.
Step 6: Conceal cords using cord covers or sleeves
Now that you have organized and secured the cords behind your TV stand, it’s time to take the extra step of concealing them using cord covers or sleeves. Cord covers or sleeves provide a clean and polished look by hiding the cords and creating a seamless appearance. Follow these steps to effectively conceal the cords:
1. Select the right cord covers or sleeves: Choose cord covers or sleeves that match the color and design of your TV stand or wall for a seamless integration. Measure the length of the cords and ensure that the cord covers or sleeves are long enough to cover them completely.
2. Cut the cord covers or sleeves: Using scissors or a utility knife, cut the cord covers or sleeves to the appropriate length. Make sure to cut them slightly longer than the cords to ensure a snug fit.
3. Insert the cords into the covers or sleeves: Open the cord covers or sleeves and insert the bundled cords into them. Push the cords through the entire length of the covers or sleeves, making sure they are fully concealed.
4. Position the cord covers or sleeves: Place the cord covers or sleeves along the back of the TV stand, following the path of the cord channels or desired route. Ensure that they are properly aligned and cover the entire length of the cords.
5. Secure the cord covers or sleeves: Use adhesive or mounting tape to secure the cord covers or sleeves to the TV stand. Apply the tape to the back of the covers or sleeves and firmly press them against the TV stand surface. Make sure they are securely attached and will not slide or shift over time.
By concealing the cords with cord covers or sleeves, you’ll achieve a neat and professional-looking setup. The cords will be virtually invisible, giving your TV stand a clean and organized appearance. Additionally, cord covers or sleeves help protect the cords from accidental damage and reduce the risk of tripping hazards.
Now that you have successfully concealed the cords, the next step is to neatly arrange them behind the TV stand before finalizing the setup. This will ensure a tidy and cohesive look while maintaining easy access to the necessary cables.
Step 7: Neatly arrange cords behind the TV stand
With the cords concealed using cord covers or sleeves, it’s important to take the time to neatly arrange them behind the TV stand for a clean and organized look. Proper cord management will not only enhance the aesthetics of your setup but also make it easier to access and manage the cords in the future. Follow these steps to neatly arrange the cords:
1. Straighten out the cords: Start by straightening out the cords behind the TV stand. Gently pull them to remove any kinks or twists, ensuring that they lay flat and are not tangled.
2. Keep cords separated: If you have multiple cords running along the same path, make sure to keep them separated and avoid overlapping. This will prevent them from tangling and make it easier to identify and manage individual cords.
3. Use adhesive cord clips: Consider using adhesive cord clips or cable management clips to hold the cords in place. Attach these clips to the back of the TV stand or to the cord covers or sleeves, spacing them out evenly along the route of the cords. These clips will help keep the cords organized and prevent them from slipping or drooping.
4. Arrange cords by purpose: Group the cords based on their purpose or destination. For example, group power cords together, HDMI cables together, and audio cables together. This will make it easier to identify and manage specific cords in the future if needed.
5. Secure excess cord length: If there is excess cord length, coil it neatly and use adhesive or cable ties to secure it in place. This will prevent the cords from hanging loosely and create a tidier appearance.
By taking the time to neatly arrange the cords behind the TV stand, you’ll achieve a clean and organized look. This step will not only enhance the aesthetics of your setup but also make it easier to troubleshoot or add/remove devices in the future.
Now that you have neatly arranged the cords, it’s time to test and finalize your setup to ensure everything is functioning properly and the cords are hidden to your satisfaction.
Step 8: Test and finalize the setup
After completing all the previous steps to hide and arrange the cords behind your TV stand, it’s crucial to test the setup and ensure that everything is in working order. This final step will allow you to make any necessary adjustments and ensure a seamless and functional setup. Follow these steps to test and finalize your cord-hiding project:
1. Reconnect the devices: Start by reconnecting all the devices to their respective cables. Plug the power cords, HDMI cables, audio cables, and any other necessary cords back into their designated ports. Double-check that all connections are secure.
2. Power on the devices: Turn on the TV and any other connected devices to test if they receive power and are functioning properly. Check for any error messages or issues with audio/video signals.
3. Test all functionalities: If you have gaming consoles, speakers, or other devices connected to the TV, test their functionalities to ensure that all signals and audio are working as expected. Make any necessary adjustments to the cord arrangement if there are any issues or if the cords are causing interference.
4. Verify stability and accessibility: Check that the cords behind the TV stand are secure and will not come loose or fall out. Make sure that the cords do not obstruct any vents or airflow, which could cause overheating. Also, ensure that you have easy access to the cords and devices if you need to make changes or troubleshoot in the future.
5. Step back and assess the appearance: Take a moment to step back and visually inspect the finished setup. Check if the cords are properly concealed, if the cord covers or sleeves are securely in place, and if the arrangement looks clean and organized. Make any final adjustments if needed to achieve the desired aesthetic.
By testing and finalizing the setup, you can ensure that everything is properly connected, functioning correctly, and hidden to your satisfaction. This step is crucial for achieving a successful cord-hiding project and creating a clean and well-organized living room space.
Congratulations! You have now successfully hidden and organized the cords behind your TV stand. Enjoy your clutter-free and visually appealing living room setup!
Remember, periodically check the cords and their connections to ensure everything remains secure and in good condition. This will help maintain the functionality and aesthetics of your hidden cord setup.
Read more: How To Hide Electrical Cord On Wall
Conclusion
Hiding cords behind your TV stand is an important step in creating a clean, organized, and visually appealing living room space. By following the step-by-step guide outlined in this article, you can easily transform a messy tangle of cords into a seamless and clutter-free setup.
Starting with gathering the necessary materials, measuring and planning the setup, and preparing the TV stand, you set the foundation for a successful cord-hiding project. Creating cord channels and organizing the cords ensured that they are neatly arranged and secured. Concealing the cords using cord covers or sleeves added an extra layer of camouflage, making them virtually invisible.
By neatly arranging the cords and finalizing the setup, you achieved a clean, streamlined, and functional result. Testing the setup verified that all the devices are working correctly and that the cords are not causing any interference. This guarantees a hassle-free entertainment experience.
Not only does hiding cords behind your TV stand enhance the aesthetics of your living room, but it also helps maintain a safe and organized environment. No more tripping hazards or unsightly cable messes to detract from your space!
Remember, periodically check the cords and their connections to ensure everything remains secure and in good condition. This will help maintain the functionality and aesthetics of your hidden cord setup over time.
Now that you have successfully hidden and organized the cords behind your TV stand, sit back, relax, and enjoy your clutter-free living room space. Say goodbye to unsightly cords and hello to a clean and visually appealing entertainment area!
Frequently Asked Questions about How To Hide Cords Behind TV Stand
Was this page helpful?
At Storables.com, we guarantee accurate and reliable information. Our content, validated by Expert Board Contributors, is crafted following stringent Editorial Policies. We're committed to providing you with well-researched, expert-backed insights for all your informational needs.



0 thoughts on “How To Hide Cords Behind TV Stand”