Home>Furniture>Living Room Furniture>How To Paint A TV Stand
Living Room Furniture
How To Paint A TV Stand
Modified: March 16, 2024
Learn how to paint your living-room furniture with this step-by-step guide. Transform your TV stand into a stylish centerpiece with this easy DIY project.
(Many of the links in this article redirect to a specific reviewed product. Your purchase of these products through affiliate links helps to generate commission for Storables.com, at no extra cost. Learn more)
Introduction
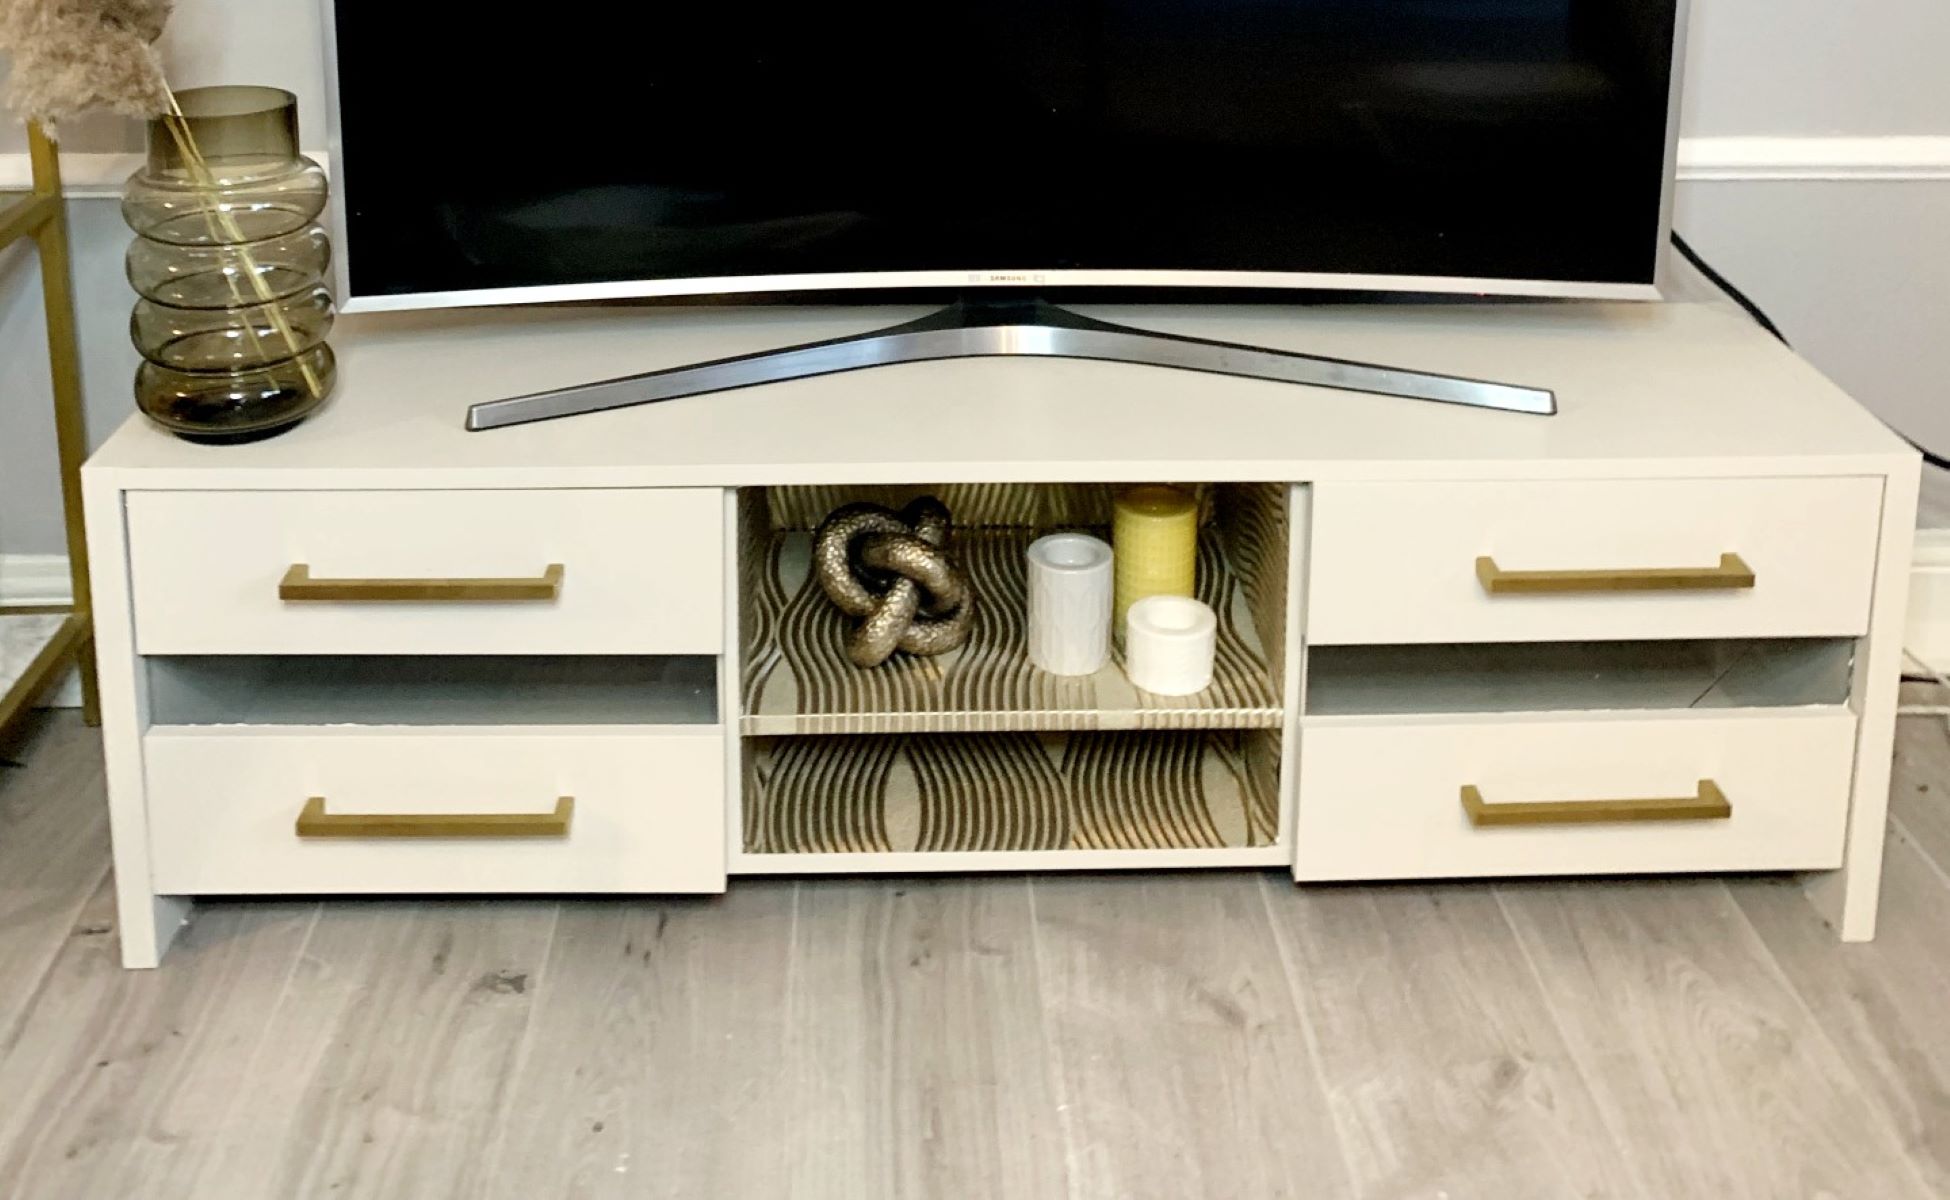
Welcome to this guide on how to paint a TV stand! If you’re looking to give your living room a fresh new look, painting your TV stand can be a cost-effective and fun way to transform your space. Whether you want to update the color or refresh a worn-out finish, with a little bit of time and the right materials, you can easily accomplish this DIY project.
Not only is painting a TV stand a great way to customize your furniture to match your style, but it also gives you the opportunity to breathe new life into an old piece, making it feel brand new again. Plus, by doing it yourself, you can save money and have the satisfaction of completing a creative project.
In this guide, we will walk you through the step-by-step process of painting a TV stand, from preparation to final touches. We will discuss the materials and tools you will need, as well as provide detailed instructions to ensure a smooth painting experience. So, put on your DIY hat and let’s get started!
Key Takeaways:
- Transform your living room by painting your TV stand. It’s a cost-effective way to refresh your space and allows for creative expression and customization.
- Preparation, priming, and patience are key to achieving a professional-looking result. Take pride in your DIY project and enjoy your newly painted TV stand!
Read more: How To Mount A TV On A TV Stand
Materials and Tools Needed
Before you begin the process of painting your TV stand, it’s important to gather all the necessary materials and tools so that you have everything on hand. Here’s a list of what you’ll need:
- TV stand: Make sure it is clean and free from dust or debris.
- Drop cloth or old bedsheet: To protect your working area from paint drips or spills.
- Sandpaper: Choose a medium-grit sandpaper (around 120-150 grit) to roughen the surface of the TV stand for better paint adhesion.
- Primer: Look for a primer suitable for the material of your TV stand, such as wood or metal.
- Paint: Select a high-quality paint that is suitable for your TV stand material (wood, metal, or laminate) and desired finish (matte, satin, or gloss).
- Paintbrushes: Invest in a good quality brush to ensure smooth and even application of paint. A 2-inch angled brush is ideal for most surfaces, while a smaller brush may be needed for detailed areas.
- Paint roller and tray: A roller can be useful for larger surfaces and helps achieve a smooth finish.
- Painter’s tape: Use painter’s tape to protect any areas that you don’t want to paint, such as hardware or edges.
- Screwdriver: You may need it to remove hardware or detach certain parts of the TV stand.
- Cleaning supplies: Have a damp cloth or sponge and mild soap handy for cleaning the TV stand before painting.
- Optional: If you’re working with a metal TV stand, you may need a metal primer and a rust converter if there are any rust spots.
Make sure you have all these materials and tools ready before you begin. This will help streamline the painting process and ensure that you have everything you need to achieve a professional-looking result.
Step 1: Preparation
Before diving into the painting process, it’s crucial to properly prepare your TV stand. Taking the time to prepare the surface will ensure that the paint adheres well and results in a smooth finish. Follow these steps to prepare your TV stand:
- Clear the area: Start by removing any objects or accessories from the TV stand, including electronics, cables, and decorations. This will give you a clear surface to work with and prevent any accidental damage.
- Clean the TV stand: Use a damp cloth or sponge with mild soap to wipe down the entire surface of the TV stand. This will remove any dirt, dust, or grime that could interfere with the paint adhesion. Make sure to dry the TV stand thoroughly before proceeding.
- Protect the surrounding area: Place a drop cloth or an old bedsheet underneath the TV stand to protect the floor or surface from any paint drips or spills.
- Remove hardware: If your TV stand has any hardware, such as drawer pulls or knobs, use a screwdriver to remove them. This will make the painting process easier and ensure that you paint the TV stand more evenly.
- Mask off edges and hardware: If there are any areas or edges you don’t want to paint, use painter’s tape to protect them. Apply the tape carefully, ensuring a clean and straight edge. Take time to tape off any hardware or edges that you want to leave unpainted.
By following these preparation steps, you set a solid foundation for the rest of the painting process. A clean and properly prepped surface will result in a better-looking and longer-lasting finish for your TV stand.
Step 2: Removing Hardware
Once you have prepared your TV stand, it’s time to remove any hardware that could hinder the painting process. By taking this step, you ensure that the paint has a smooth and even surface to adhere to.
- Gather your tools: Before you begin, gather a screwdriver that fits the screws on your TV stand’s hardware. This will allow you to easily unscrew and remove the hardware.
- Identify the hardware: Take a close look at your TV stand and identify any knobs, handles, or other removable hardware components. These could include drawer pulls, cabinet handles, or even decorative accents.
- Unscrew and remove: Using your screwdriver, carefully unscrew the hardware from the TV stand. Pay attention to each screw, making sure not to strip them or damage the surrounding area.
- Keep hardware organized: As you remove the hardware, it’s essential to keep them organized. Place each screw and hardware piece in a small container or bag and label them so that you can easily identify them later when reassembling the TV stand.
By removing the hardware, you ensure that you can paint the TV stand evenly and thoroughly. Painting around hardware often leads to uneven edges and can make the process more challenging. Taking the time to remove the hardware will result in a more professional-looking finished product.
Step 3: Sanding
After removing the hardware from your TV stand, the next step is to sand the surface. Sanding helps to create a roughened texture, allowing the paint to adhere better and ensuring a smooth finish. Follow these steps to effectively sand your TV stand:
- Select the appropriate sandpaper: Choose a medium-grit sandpaper, around 120-150 grit, to remove any existing finish and roughen the surface of the TV stand. If your TV stand has a glossy or smooth finish, you may need to start with a coarser grit sandpaper and gradually move to a finer grit for a smoother result.
- Prepare the sanding area: Place your TV stand on a stable surface, preferably on top of the drop cloth or old bedsheet you’ve set up for protection. This will prevent any mess and make it easier to clean up afterward.
- Sand the TV stand: Using the sandpaper, start sanding the entire surface of the TV stand in the direction of the wood grain or in a circular motion. Apply even pressure and make sure to cover all areas, including corners and edges.
- Check for smoothness: After sanding, run your hand over the surface of the TV stand to ensure it feels smooth and even. If there are any rough spots or imperfections, continue sanding until you achieve a uniform texture.
- Remove sanding dust: Use a clean, dry cloth or a vacuum cleaner to remove the sanding dust from the TV stand. Make sure the surface is completely clean before proceeding to the next step.
Sanding plays a crucial role in achieving a professional-looking paint job. It helps to create a clean and smooth surface that allows the paint to adhere better, resulting in a more durable finish. Take your time with this step to ensure that the TV stand is thoroughly sanded and ready for the next phase of the painting process.
Before painting a TV stand, make sure to sand the surface to remove any existing finish and create a smooth base for the new paint to adhere to. Sanding will also help the paint to go on more evenly and last longer.
Read more: How To Fix A TV Stand
Step 4: Priming
Once you have sanded the surface of your TV stand, it’s time to apply a coat of primer. Primer acts as a base layer that helps the paint adhere better, provides a smooth surface for the paint to go on, and can also help with covering up any imperfections. Follow these steps to effectively prime your TV stand:
- Choose the right primer: Select a primer that is compatible with your TV stand’s material. Choose a wood primer for wooden TV stands, a metal primer for metal TV stands, or a primer suitable for laminate surfaces.
- Prepare your work area: Place your TV stand on top of the drop cloth or old bedsheet to protect the surrounding area from any primer drips or spills.
- Stir the primer: Open the primer can and give it a good stir to ensure that it is well-mixed and ready to apply.
- Apply the primer: Using a brush or a roller, apply a thin and even coat of primer to the entire surface of the TV stand. Start with the flat areas and then move on to the corners and edges. Make sure to cover all areas and pay special attention to any areas that may need extra coverage or have visible imperfections.
- Allow the primer to dry: Follow the manufacturer’s instructions for the recommended drying time. Typically, it takes a few hours for the primer to dry, but it may vary depending on the type of primer used.
- Check and sand, if necessary: Once the primer is dry, inspect the TV stand for any rough spots or imperfections. If needed, lightly sand these areas to create a smooth surface for the final coat of paint.
- Remove dust: Use a clean cloth or vacuum cleaner to remove any dust or debris on the TV stand after sanding.
Applying primer to your TV stand ensures that the paint will adhere better and provides a solid foundation for the final paint coat. It also helps to prevent the original color from bleeding through and allows for better coverage. Taking the time to prime your TV stand will result in a more professional-looking and long-lasting paint finish.
Step 5: Painting
Now that your TV stand is properly prepped and primed, it’s time for the exciting part – painting! Follow these steps to achieve a smooth and even paint finish:
- Choose the right paint: Select a high-quality paint that is suitable for the material of your TV stand and your desired finish. Consider whether you want a matte, satin, or gloss finish and choose the appropriate paint accordingly.
- Prepare your work area: Ensure that your TV stand is still on the drop cloth or old bedsheet to protect the surrounding area from any paint drips or spills.
- Stir the paint: Open the paint can and stir it thoroughly to make sure the color is evenly distributed.
- Start with the brush: Using a high-quality paintbrush, begin by painting the corners and edges of the TV stand. Use smooth and even strokes to ensure an even application. Take your time and be careful not to leave any visible brush marks.
- Move to the roller: Once you have painted the corners and edges, switch to a paint roller for the flat surfaces of the TV stand. Roll the paint onto the surface in overlapping strokes, working in small sections at a time. This will help to achieve a smooth and consistent finish.
- Apply multiple thin coats: Instead of applying one thick coat, it’s better to apply multiple thin coats of paint. This will help prevent drips, ensure better coverage, and result in a more durable finish. Allow each coat to dry before applying the next one, following the drying time recommended by the paint manufacturer.
- Check for any drips or imperfections: As you paint, keep an eye out for any drips, streaks, or missed spots. If you notice any imperfections, gently brush or roll over them while the paint is still wet to fix them.
Painting your TV stand allows you to add your own personal touch and transform it into a beautiful statement piece in your living room. Take your time with this step, ensuring that each coat is applied smoothly and evenly. By following these steps, you’ll achieve a professional-looking painted finish on your TV stand.
Step 6: Applying Second Coat (if necessary)
After the first coat of paint has dried, it’s time to assess whether a second coat is necessary. Applying a second coat can help achieve a more even and vibrant finish, especially if the original color is still visible or if you prefer a bolder look. Follow these steps to determine if and how to apply a second coat:
- Inspect the first coat: Carefully examine the TV stand to check for any areas where the original color is showing through or where the paint coverage is uneven. Pay attention to edges, corners, and any visible imperfections.
- Assess the color and coverage: If you’re happy with the color and coverage after the first coat, you may not need to apply a second coat. However, if the color is not as vibrant as you desire or if the coverage is uneven, it’s recommended to proceed with a second coat.
- Prepare the paint: Stir the paint can thoroughly, just as you did for the first coat. Make sure the paint is well-mixed and ready for application.
- Apply the second coat: If you decide to proceed with a second coat, follow the same painting techniques as before. Use a brush for corners and edges, and a roller for flat surfaces. Ensure that you apply the second coat evenly and smoothly, overlapping with the first coat to create a seamless finish.
- Drying time: Allow the second coat to dry completely according to the paint manufacturer’s instructions. Make sure to give it enough time to fully dry before moving on to the next step.
Applying a second coat of paint can enhance the color and overall appearance of your TV stand, giving it a more polished and professional look. However, if you’re satisfied with the color and coverage after the first coat, you may choose to skip this step. Assess the results and decide what works best for your desired outcome.
Step 7: Drying and Reassembling
After applying the final coat of paint, it’s important to allow your TV stand to dry fully before reassembling it. Follow these steps to ensure proper drying and reassembly:
- Drying time: Check the paint can for the recommended drying time. This can vary depending on factors such as humidity and the type of paint used. Allow the TV stand to dry in a well-ventilated area for the specified time to ensure that the paint cures properly.
- Patience is key: It’s essential to exercise patience during this drying period. Avoid placing objects, touching, or moving the TV stand until it is completely dry. Rushing the process could result in the paint getting damaged or smudged.
- Reattach hardware: Once the paint is dry, it’s time to reattach the hardware you removed in the earlier steps. Retrieve the labelled screws and pieces, and carefully screw them back in place. Ensure that they are secured tightly but not over-tightened, as this could strip the screws or damage the TV stand.
- Inspect the final result: Step back and take a moment to admire your newly painted and reassembled TV stand. Look for any touch-ups that may be needed, such as small areas that may have been missed or brush marks that need to be smoothed out. Address these touch-ups as necessary.
By allowing the TV stand to dry thoroughly and reassembling it with care, you’ll ensure that your hard work in painting it pays off. Take pride in your accomplishment and enjoy the refreshed look of your TV stand in your living room!
Read more: What Size TV Stand For A 70-Inch TV
Conclusion
Congratulations on successfully painting your TV stand! By following the steps outlined in this guide, you have transformed your living room furniture into a stunning piece that reflects your personal style. Not only is painting a TV stand a cost-effective way to refresh your space, but it also allows for creative expression and customization.
Throughout the process, we discussed the importance of preparation, including cleaning the TV stand, removing hardware, and sanding the surface. We also highlighted the significance of applying a primer to ensure better paint adhesion and a smoother finish. The painting phase, whether it’s one coat or multiple coats, allowed you to bring your vision to life and enhance the visual appeal of your TV stand.
Remember, taking your time and paying attention to detail are key to achieving professional-looking results. Be sure to follow the drying times of each coat, allowing the paint to cure fully before reassembling the TV stand and placing it back into your living room.
Now sit back, relax, and enjoy the fruits of your labor. Admire your beautifully painted TV stand that adds a fresh and stylish element to your living space. You can take pride in knowing that you accomplished this DIY project on your own and created something unique and personalized.
Thank you for following this guide on how to paint a TV stand. We hope you found it helpful and inspiring. Happy painting!
Frequently Asked Questions about How To Paint A TV Stand
Was this page helpful?
At Storables.com, we guarantee accurate and reliable information. Our content, validated by Expert Board Contributors, is crafted following stringent Editorial Policies. We're committed to providing you with well-researched, expert-backed insights for all your informational needs.


0 thoughts on “How To Paint A TV Stand”