Home>Furniture>Office Furniture>How To Create Built In Bookshelves
Office Furniture
How To Create Built In Bookshelves
Modified: December 7, 2023
Learn how to create stylish and functional built-in bookshelves for your office space. Find office furniture inspiration and step-by-step instructions to transform your workspace.
(Many of the links in this article redirect to a specific reviewed product. Your purchase of these products through affiliate links helps to generate commission for Storables.com, at no extra cost. Learn more)
Introduction
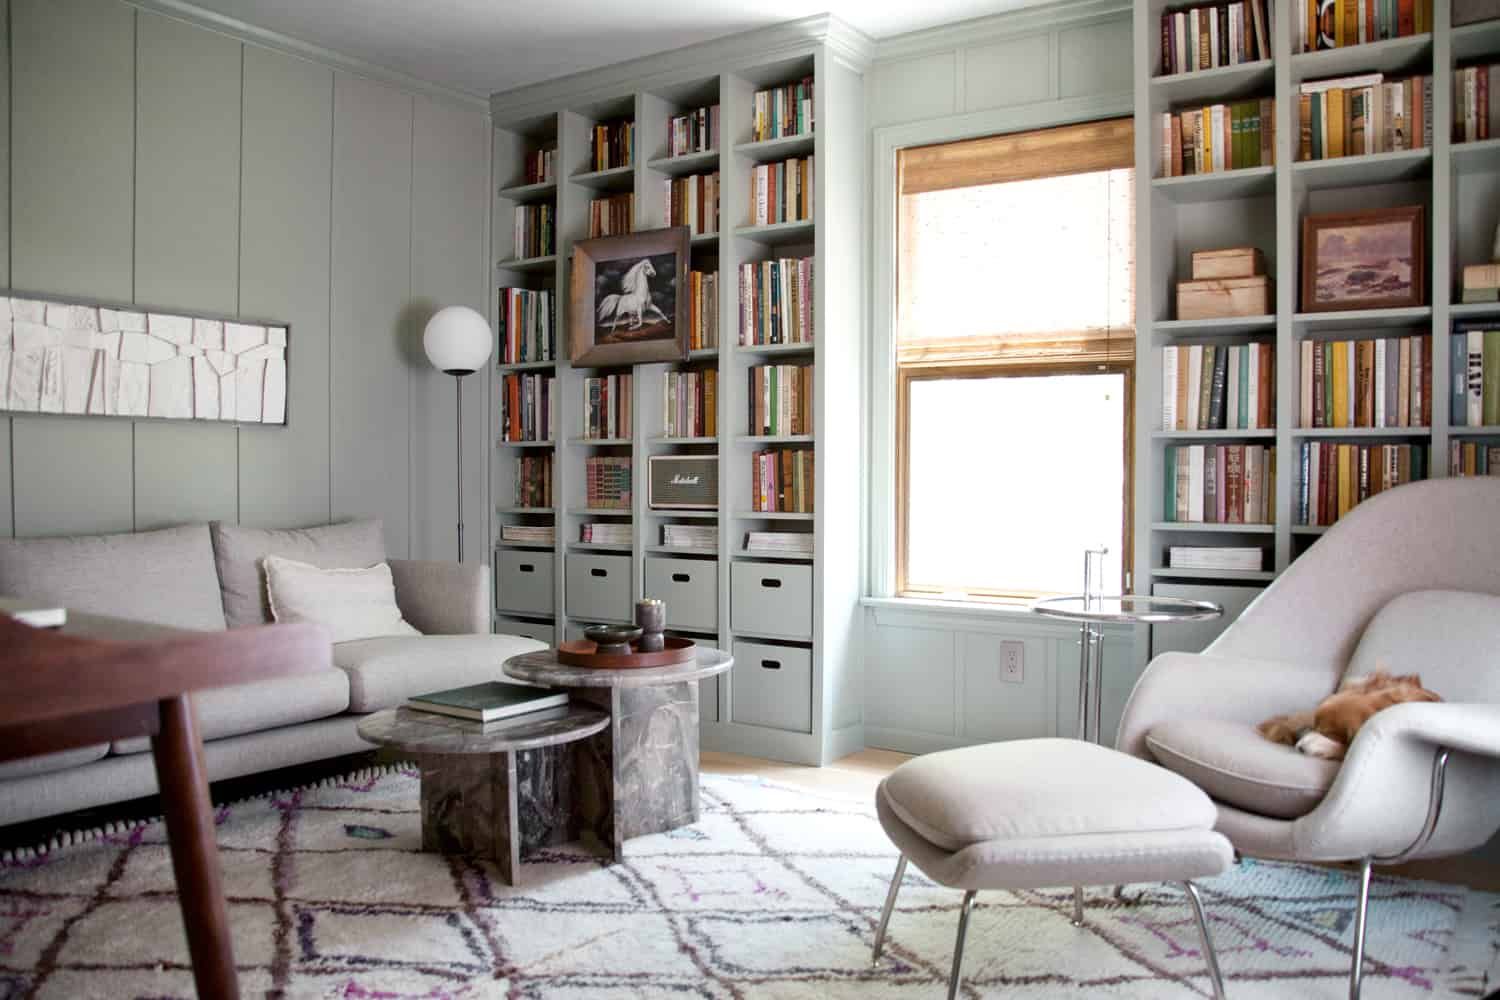
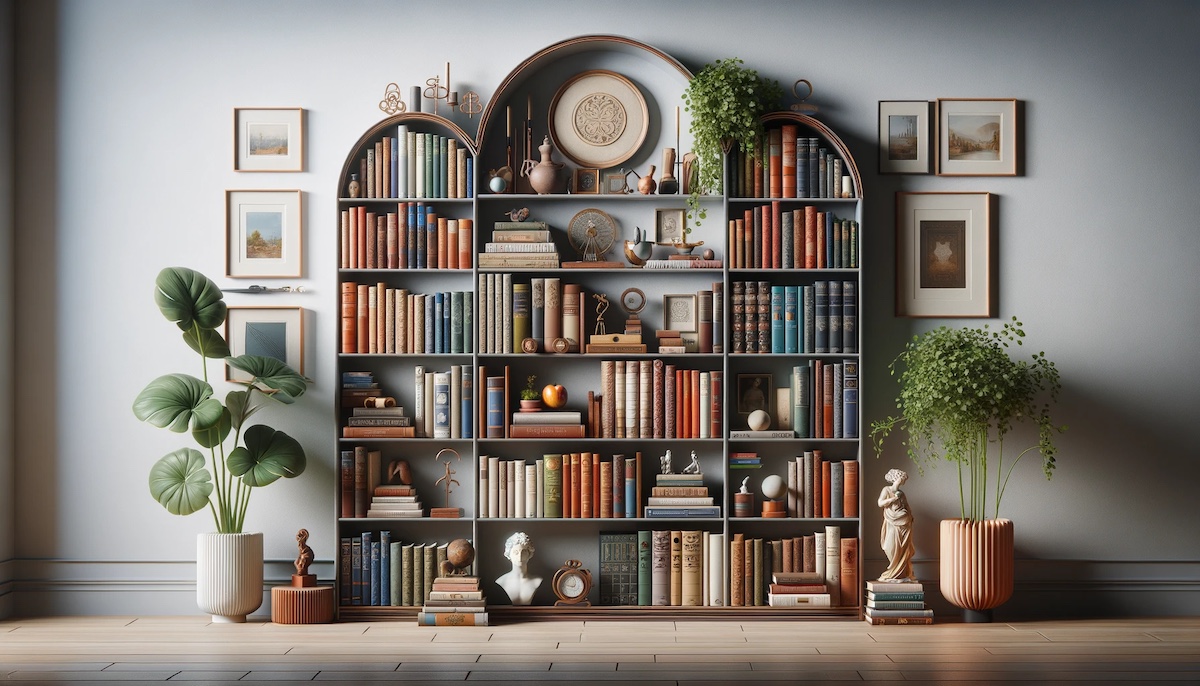
When it comes to creating a functional and stylish home office or library, having built-in bookshelves is a game-changer. Not only do they provide ample storage space for all your books and decorative items, but they also add a touch of sophistication and elegance to any room.
Building your own built-in bookshelves might seem like a daunting task, but with the right planning, materials, and tools, it can be a rewarding DIY project. In this article, we will guide you through the process of creating your own built-in bookshelves, from the initial planning stages to adding the finishing touches.
Whether you are a seasoned DIY enthusiast or a beginner looking to tackle your first major home improvement project, our step-by-step instructions and expert tips will help you achieve professional-looking results. So, gather your tools and let’s get started on this exciting journey to creating beautiful and functional built-in bookshelves!
In the following sections, we will cover all the essential aspects of creating built-in bookshelves, including planning, gathering materials, preparing the wall space, building the frame, installing the shelves, and adding finishing touches. Each step is crucial to ensure the stability and aesthetic appeal of your bookshelves, so be sure to follow along.
Before we dive into the nitty-gritty details, it’s important to note that this guide assumes you have some basic knowledge of woodworking and general DIY skills. If you are a beginner, it is always a good idea to consult with a professional or undertake some introductory woodworking courses to familiarize yourself with the tools and techniques involved.
With that said, let’s roll up our sleeves and embark on this exciting journey of creating your very own built-in bookshelves. By the end of this guide, you’ll have a beautiful and functional space to showcase your book collection and add a touch of sophistication to your home office or library.
Key Takeaways:
- Transform an empty wall into a stylish and functional storage solution with DIY built-in bookshelves. Careful planning, sturdy construction, and finishing touches create a custom piece that adds sophistication to any room.
- Building built-in bookshelves is a rewarding journey that requires attention to detail and creativity. Enjoy the satisfaction of creating a practical and stylish addition to your home while showcasing your beloved book collection.
Planning and Designing Your Built-In Bookshelves
Before you start building your built-in bookshelves, it’s important to spend some time planning and designing the layout to ensure the end result meets your needs and complements your existing room decor. Here are some key steps to consider:
- Assess the available space: Measure the wall where you plan to install the bookshelves and take note of any obstructions such as windows, doors, or electrical outlets. This will help determine the size and configuration of your bookshelves.
- Determine the purpose: Consider how you intend to use the bookshelves. Will they be primarily for storing books, or do you also want to display decorative items? This will help you decide on the number of shelves and their spacing.
- Select the style: Choose a design that complements your existing interior decor. Consider factors such as the material, color, and overall aesthetic. Look for inspiration from magazines, online platforms, or by visiting furniture stores.
- Create a detailed plan: Use graph paper or design software to create a scaled drawing of your bookshelves. Include the dimensions, shelf heights, and any additional features such as cabinets or drawers. This will serve as a blueprint for your project.
- Consider additional features: Think about incorporating special features such as integrated lighting, hidden compartments, or adjustable shelves to enhance the functionality and visual appeal of your bookshelves.
- Estimate the budget: Determine how much you are willing to spend on materials and any professional assistance you may require. Be sure to factor in the cost of tools, hardware, and finishes.
Once you have a clear plan in place, you are ready to move on to the next step: gathering the necessary materials and tools.
Remember, the planning phase is crucial to ensure that your built-in bookshelves turn out exactly how you envision them. Take your time, consider all the details, and make any necessary adjustments before proceeding. This will save you time and frustration later in the process and help you achieve the desired end result.
Gathering the Necessary Materials and Tools
Now that you have a solid plan in place for your built-in bookshelves, it’s time to gather the necessary materials and tools to bring your vision to life. Here’s a list of the essentials:
Materials:
- Wood: Choose a high-quality wood that suits your style and budget, such as plywood or solid wood boards.
- Hardware: Purchase the necessary hardware, including screws, nails, brackets, and hinges.
- Finishes: Decide on the finish you prefer, such as paint, stain, or wood sealant.
- Shelving: Select pre-made or custom-cut shelves that fit the dimensions of your bookshelves.
- Additional features: If you plan to incorporate special features like lighting or hidden compartments, gather the necessary components.
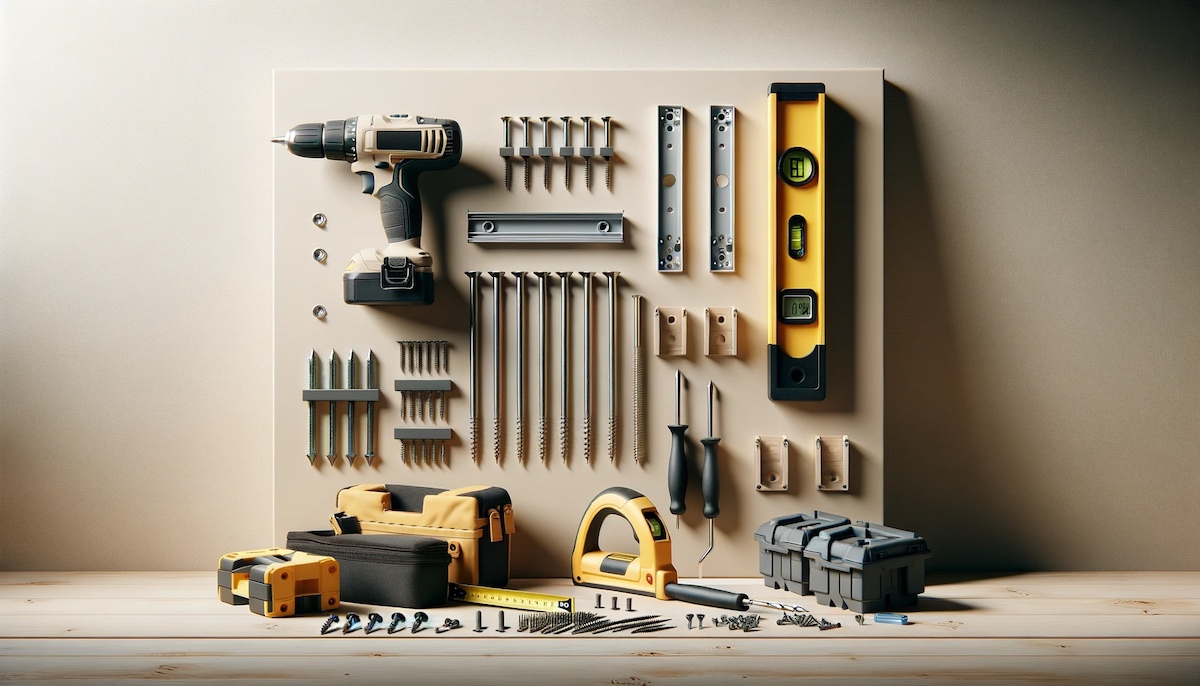
Tools:
- Measuring tape: Essential for accurate measurements.
- Level: Ensures your bookshelves are perfectly straight.
- Miter saw or circular saw: Used for cutting the wood to the desired dimensions.
- Drill: Necessary for creating pilot holes and installing hardware.
- Screwdriver: Used to tighten screws and attach brackets.
- Sanding tools: Helps smooth out rough edges and surfaces.
- Paintbrushes or rollers: Used for applying paint or stain.
While this is a general list of materials and tools needed for building built-in bookshelves, it’s important to refer back to your specific design and plan to ensure you have everything you need. Consider consulting with a professional or visiting a local hardware store for expert advice and to gather all the supplies necessary for your project.
Keep in mind that investing in high-quality materials and tools will result in a better end product. Don’t compromise on the quality of wood, as sturdy and durable materials will ensure the longevity of your bookshelves. Similarly, reliable tools will make the construction process smoother and help achieve more precise results.
Now that you have all the materials and tools ready, it’s time to move on to the next step: preparing the wall space for installation. By properly preparing the wall, you’ll ensure a sturdy foundation for your built-in bookshelves. Let’s dive in!
Preparing the Wall Space for Installation
Before you can begin building your built-in bookshelves, it’s important to properly prepare the wall space where they will be installed. This preparation step will ensure that your bookshelves are stable, secure, and seamlessly integrated into the room. Here’s how to get started:
1. Clear the area:
Remove any furniture, artwork, or decorations from the wall where the bookshelves will be installed. This will provide you with a clear and unobstructed workspace.
2. Remove baseboards:
If your bookshelves will sit flush against the wall, you may need to remove the baseboards to create a flat, even surface. Use a pry bar and a hammer to carefully remove the baseboards, taking care not to damage them if you plan to reuse them later.
3. Locate studs:
Use a stud finder to locate and mark the vertical wooden studs in the wall. These studs will provide the support and stability for your bookshelves. It’s important to attach the bookshelf frame directly to the studs to ensure they can bear the weight of the shelves and books.
4. Calculate shelf height:
Determine the desired height for your bookshelves. Take into consideration the size of your books and any decorative items you plan to display. Measure and mark the positions for each shelf on the wall, ensuring they are evenly spaced and level.
5. Mark the frame outline:
Using a pencil and a level, mark the outline of the bookshelf frame on the wall. This will serve as a guide during the installation process and ensure that the frame is properly aligned.
6. Patch any holes:
If there are any holes, cracks, or imperfections on the wall, patch them up with spackling compound or joint compound. Smooth out the patched areas with sandpaper for a seamless finish.
Once you have completed these steps, you’ll have a well-prepared wall space ready for the installation of your built-in bookshelves. This preparation work will save you time and ensure that the final result is secure and visually appealing.
In the next step, we will guide you through building the bookshelf frame. This is a crucial aspect of the project, as the frame provides the structure and support for your bookshelves. Let’s keep the momentum going as we move forward with the construction process!
Building the Bookshelf Frame
Now that you have prepared the wall space for your built-in bookshelves, it’s time to construct the bookshelf frame. The frame serves as the foundation for the shelves and ensures stability and durability. Follow these steps to build a sturdy and reliable frame:
1. Measure and cut the side panels:
Measure the desired height and width of your bookshelves and cut two pieces of plywood or solid wood boards accordingly. These will serve as the side panels of the bookshelf frame.
2. Create the horizontal support pieces:
Measure the width of the bookshelf frame and cut two pieces of plywood or solid wood to serve as the horizontal support pieces. These pieces will be attached to the side panels to provide stability and divide the frame into sections for each shelf.
3. Attach the support pieces to the side panels:
Using screws and a drill, attach the horizontal support pieces to the side panels. Ensure they are level and square. Use a carpenter’s square to check for accuracy.
4. Add additional vertical supports:
For taller bookshelves or to provide extra support, add vertical support pieces between the horizontal support pieces. These additional supports will increase the strength and stability of the frame.
5. Reinforce the corners:
To further reinforce the frame, use corner braces or L-brackets at the corners. Secure them with screws to strengthen the joints and prevent any wobbling or instability.
6. Double-check the measurements and levelness:
Before proceeding, double-check the measurements, ensuring that the frame matches the dimensions you planned for in the design phase. Use a level to confirm that the frame is perfectly straight and aligns with the marked outline on the wall.
Once you have completed these steps, you will have a solid bookshelf frame ready for installation. It is important to take your time during this phase to ensure accuracy and precision, as a well-built frame will provide a sturdy foundation for your shelves and ensure the longevity of your built-in bookshelves.
Next, we will guide you through the process of installing the shelves, the heart of your bookshelves, where you will display and organize your books and decorative items. So let’s move on to the next step and make progress on creating your dream built-in bookshelves!
Installing the Shelves
Now that you have constructed the bookshelf frame, it’s time to move on to installing the shelves themselves. The shelves are where you will display and organize your books, decorative items, and other belongings. Follow these steps to ensure a successful installation:
1. Measure and cut the shelves:
Measure the width and depth of the sections within the bookshelf frame. Cut your shelves to fit these dimensions, ensuring a snug and precise fit.
Read more: How Tall Should Bookshelves Be
2. Position the first shelf:
Start by installing the bottom shelf. Place it on top of the horizontal support pieces in the desired section of the bookshelf frame. Ensure it is level and flush with the sides of the frame.
3. Secure the shelf:
Using screws, attach the shelf to the horizontal support pieces from underneath. Countersink the screws to ensure they are flush with the shelf surface.
4. Repeat for the remaining shelves:
Continue to install the remaining shelves, working your way up from bottom to top. Ensure each shelf is level and secure it in place using screws.
5. Adjust shelf heights if needed:
If you find that the height of a shelf needs to be adjusted, use a saw or sander to trim it down to fit. Measure carefully and make small adjustments to maintain a seamless appearance.
Read more: How To Keep Dust Off Bookshelves
6. Test stability and adjust as necessary:
Once all the shelves are installed, give the bookshelf a gentle shake to test its stability. If you notice any wobbling or instability, reinforce the shelves with additional screws or brackets.
Take your time during the installation process to ensure that each shelf is properly positioned and securely attached. Proper installation will ensure that your shelves can bear the weight of your books and other items without sagging or breaking. Additionally, double-check the levelness of each shelf to maintain a visually appealing and professional-looking finished product.
With the shelves now installed, you are nearing the completion of your built-in bookshelves. In the next step, we will discuss adding finishing touches, such as paint or stain, to enhance the appearance and protection of your bookshelves. Let’s keep up the momentum and finish strong!
Adding Finishing Touches
With the main construction of your built-in bookshelves complete, it’s time to add the finishing touches that will enhance the visual appeal and durability of your project. The finishing process involves steps such as painting, staining, and adding any additional features you desire. Follow these steps to give your bookshelves a professional and polished look:
1. Sand the surfaces:
Using sandpaper or a sanding block, smooth out any rough edges and surfaces on the bookshelves. This will create a smooth and even finish and prepare the wood for paint or stain.
2. Choose a finish:
Decide whether you want to paint or stain your bookshelves. Paint offers versatility in terms of color options and can be used to match or contrast with your room’s decor. Stain, on the other hand, enhances the natural beauty of the wood and provides a more rustic or traditional look.
3. Apply the finish:
Follow the manufacturer’s instructions to apply the paint or stain to your bookshelves. Use a brush, roller, or sprayer, depending on the type of finish you choose. Apply multiple coats if needed, allowing each coat to dry before applying the next.
4. Seal the finish (optional):
If you choose to use paint, you may want to seal the finish with a clear protective topcoat. This will add durability and make it easier to clean and maintain your bookshelves. Apply the topcoat according to the product instructions.
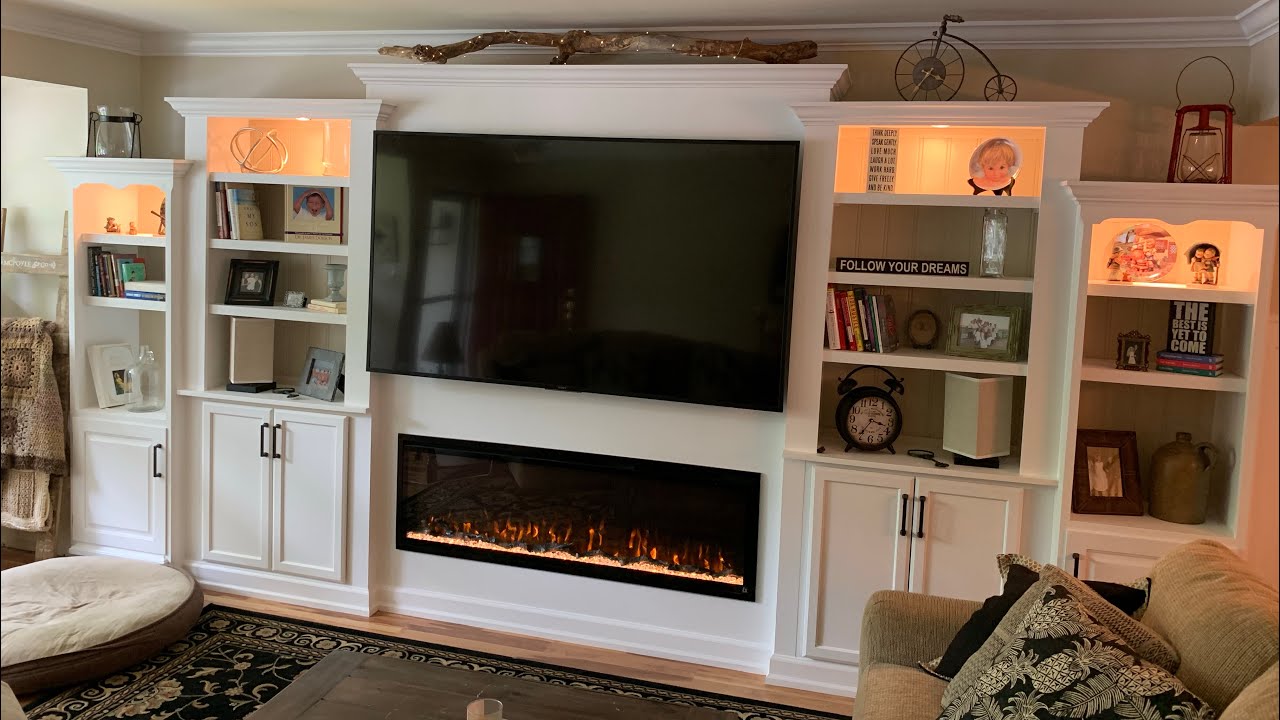
5. Consider additional features:
Now is the time to think about adding any additional features you desire to enhance the functionality or visual appeal of your bookshelves. This could include installing integrated lighting, adding decorative moldings or trim, or incorporating hidden compartments or drawers.
6. Decorate and organize:
Finally, it’s time to decorate your bookshelves and organize your books and decorative items. Arrange your books by genre, color, or any other system that suits your preference. Add decorative accents such as plants, sculptures, or picture frames to personalize the space and make it visually appealing.
Adding the finishing touches is an exciting step that brings your built-in bookshelves to life and transforms them into a focal point of your room. Take your time during this process to ensure a quality finish, paying attention to detail and striving for a cohesive and aesthetically pleasing result.
Congratulations on completing the construction and finishing of your built-in bookshelves! In the next section, we will wrap up the article with a summary and some final thoughts. Let’s move on to the final step of this journey!
Conclusion
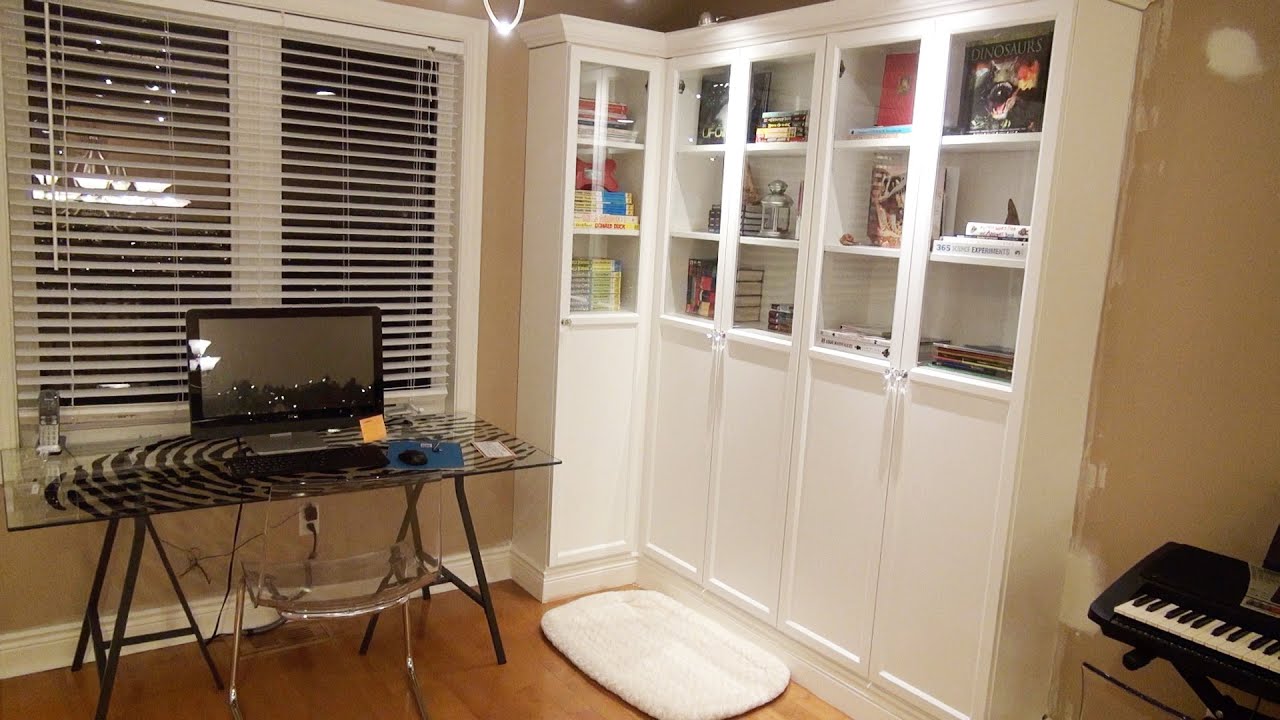
Congratulations on successfully creating your very own built-in bookshelves! Through careful planning, gathering the necessary materials and tools, preparing the wall space, constructing the frame, installing the shelves, and adding the finishing touches, you have transformed an empty wall into a functional and visually appealing storage solution for your books and decorative items.
Building built-in bookshelves is a rewarding DIY project that not only adds style and sophistication to your home office or library but also provides ample storage space for your beloved book collection.
Remember, the key to a successful built-in bookshelf project is careful planning and attention to detail. Take the time to measure and design your bookshelves, ensure proper wall preparation, construct a sturdy frame, and install the shelves securely. Adding finishing touches such as paint or stain will enhance the appearance and protect your bookshelves.
As you organize your books and decorate your bookshelves, take pride in your accomplishment and enjoy the satisfaction of creating a custom piece of furniture that reflects your personal style and meets your specific needs.
Now that you have completed your built-in bookshelves, sit back, relax, and enjoy the beauty and functionality they bring to your space. Curl up with a book, showcase your favorite decorative items, and revel in the sense of accomplishment that comes from turning a simple idea into a tangible and practical addition to your home.
Thank you for joining us on this journey to create built-in bookshelves. We hope this guide has provided you with valuable information and inspiration to tackle this DIY project. Remember, if at any point you feel unsure or overwhelmed, consult with professionals or seek assistance from experienced individuals in the field.
Happy reading and may your built-in bookshelves bring joy and organization to your home for years to come!
Frequently Asked Questions about How To Create Built In Bookshelves
Was this page helpful?
At Storables.com, we guarantee accurate and reliable information. Our content, validated by Expert Board Contributors, is crafted following stringent Editorial Policies. We're committed to providing you with well-researched, expert-backed insights for all your informational needs.


0 thoughts on “How To Create Built In Bookshelves”