Home>Furniture>Office Furniture>How To Make Pallet Bookshelves
Office Furniture
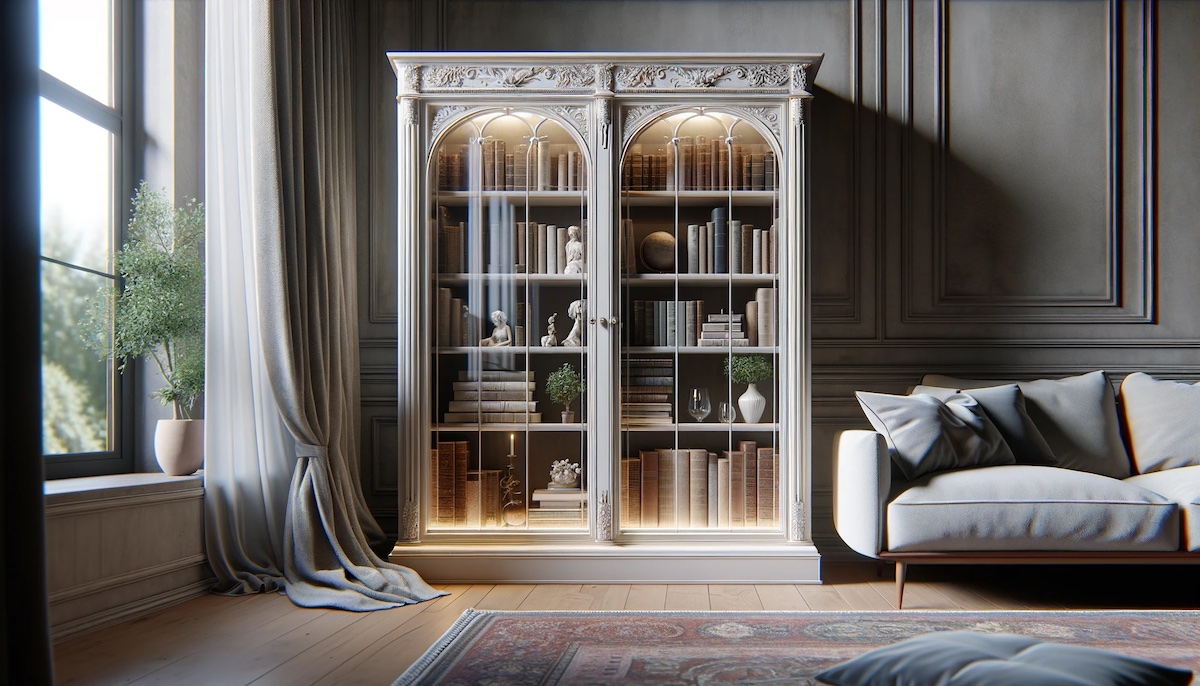
How To Make Pallet Bookshelves
Modified: December 7, 2023
Learn how to make stylish and functional office furniture with our step-by-step guide on building pallet bookshelves. Transform your workspace today!
(Many of the links in this article redirect to a specific reviewed product. Your purchase of these products through affiliate links helps to generate commission for Storables.com, at no extra cost. Learn more)
Introduction
Welcome to the world of DIY furniture! If you’re looking for a creative and budget-friendly way to display your collection of books, pallet bookshelves are the perfect solution. With a bit of imagination and some basic tools, you can transform a simple wooden pallet into a unique and stylish bookshelf that will not only organize your books but also add a rustic charm to your space.
Pallet bookshelves are not only functional but also environmentally friendly. By repurposing pallets, you give new life to materials that might otherwise end up in a landfill. Plus, you have the opportunity to customize your bookshelf to fit your personal style and needs.
In this step-by-step guide, we will take you through the process of creating your own pallet bookshelves. Whether you’re a seasoned DIY enthusiast or new to the world of woodworking, this project is suitable for all skill levels. So, let’s get started!
Key Takeaways:
- Transform a simple wooden pallet into a stylish, functional bookshelf with basic tools and creativity. Embrace sustainability and customize your DIY project to fit your personal style and needs.
- Repurpose materials, save money, and contribute to sustainability by creating a unique pallet bookshelf. Showcase your creativity, love for literature, and passion for DIY projects in a functional and stylish piece of furniture.
Read more: How To Make Furniture With Pallets
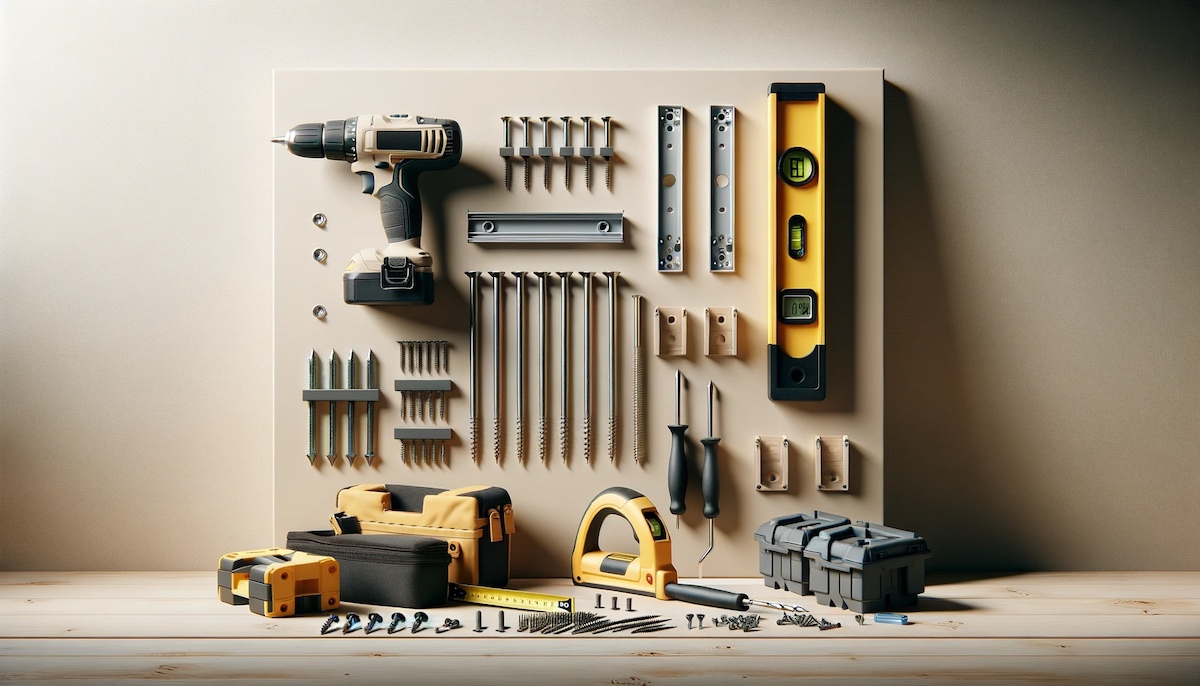
Step 1: Gather the necessary materials
Before you begin your pallet bookshelf project, it’s important to gather all the materials you’ll need. Here’s a list of items you’ll want to have on hand:
- A wooden pallet: Look for one that is sturdy and in good condition. You can often find pallets for free or at a low cost from local businesses.
- Measuring tape: This will be essential for accurately measuring and marking the dimensions of your bookshelves.
- A saw: Depending on the design you choose, you may need a handsaw or a circular saw to cut the pallet into shelf sections.
- Sandpaper or a sander: You’ll want to smooth out any rough edges or splinters on the pallet to ensure a safe and polished finished product.
- Screws or nails: These will be used to attach the shelves to the pallet. Choose ones that are long enough to securely fasten the shelves without penetrating the other side of the pallet.
- A power drill: This will make the process of attaching the shelves much easier and faster.
- Wall mounts: If you plan on mounting your bookshelf on the wall, you’ll need appropriate brackets or mounts.
- Optional: Stain or paint: If you want to add a pop of color or protect the wood, you can choose to stain or paint your bookshelf.
By having all the necessary materials prepared in advance, you’ll be ready to tackle each step of the project without any unnecessary delays. So allow yourself some time to gather everything you need before moving on to the next step.
Step 2: Prepare the pallet
Now that you have all the materials gathered, it’s time to prepare the wooden pallet for your bookshelf project. Follow these steps to ensure the pallet is ready for the next phase:
- Inspect the pallet: Examine the pallet for any damage or loose boards. If there are any broken pieces or loose nails, make the necessary repairs before proceeding.
- Clean the pallet: Remove any dirt, dust, or debris from the pallet. You can use a broom or a brush to sweep it clean, and if needed, wipe it down with a damp cloth.
- Trim the edges: If the pallet has overhanging boards or uneven edges, use a saw to trim them to a neat and uniform shape. This will give your bookshelf a more polished look.
- Remove any protruding nails: Carefully examine the pallet for nails or staples that may be sticking out. Use a hammer or a pry bar to remove them to prevent any injuries while handling the pallet.
Preparing the pallet ensures it is structurally sound and safe to work with. By taking the time to inspect and clean the pallet, you’re setting yourself up for success in the construction of your bookshelf.
Step 3: Measure and mark the desired height for the bookshelves
Now that your pallet is prepared, it’s time to determine the height of your bookshelves. Consider the space where you plan to install the bookshelf and the size of the books you’ll be displaying. Follow these steps to measure and mark the desired height:
- Measure the available space: Use a measuring tape to measure the height of the wall or area where you will be installing the bookshelf. Make sure to account for any baseboards or trim that may affect the measurements.
- Determine shelf height: Decide on the height of each shelf. Consider the size of your books and divide the available space to accommodate them. Aim for a spacing that allows your books to stand upright without being too cramped.
- Mark the pallet: Use a pencil or a marker to mark the desired height on the pallet. Make sure to draw straight lines across all the boards to ensure consistency.
By measuring and marking the desired height for your bookshelves, you’ll have a clear guideline to follow during the next step of cutting the pallet into shelf sections. This step is crucial in creating a well-proportioned and functional bookshelf.
Step 4: Cut the pallet into shelf sections
With the desired height marked on the pallet, it’s time to transform it into individual shelf sections. Follow these steps to cut the pallet:
- Secure the pallet: Place the pallet on a sturdy work surface and ensure it is securely held in place. You can use clamps or weights to prevent it from moving while you cut.
- Measure and mark the sections: Use a measuring tape to measure and mark the width of each shelf section on the pallet. Make sure to leave enough space between each section to accommodate the books.
- Cut the sections: Using a saw (either a handsaw or a circular saw), carefully cut along the marked lines to separate the pallet into individual shelf sections. Take your time and use steady, controlled movements to ensure clean and straight cuts.
- Smooth the edges: After cutting, you may notice rough or jagged edges. Use sandpaper or a sander to smooth out any roughness. This will prevent splinters and create a neat finish.
It’s important to pay attention to safety during the cutting process. Always wear protective goggles and gloves to avoid any accidents. Take your time to ensure accurate cuts and a professional-looking end result.
Read more: How To Make IKEA Bookshelves Look Built In
Step 5: Sand and smooth the edges
After cutting the pallet into shelf sections, it’s time to focus on refining the edges for a polished and professional look. Follow these steps to sand and smooth the edges:
- Gather the necessary supplies: Collect sandpaper with different grits (coarse, medium, and fine) or use a sander if you have one. The different grits will help you achieve a smooth and even finish.
- Sand the edges: Starting with the coarsest grit, use steady and even strokes to sand the cut edges of each shelf section. This will help remove any roughness or splinters. Continue sanding until the edges feel smooth to the touch.
- Progress to finer grits: Once you’ve completed sanding with the coarse grit, move on to the medium grit. Repeat the sanding process, focusing on refining the smoothness of the edges. Finally, use the fine grit to achieve a polished finish.
- Clean the pallet: After sanding, use a clean cloth or a brush to remove any sawdust or debris from the pallet. This will ensure a clean surface for the next steps of the project.
Sanding and smoothing the edges not only enhances the appearance of your bookshelf but also prevents any potential injuries from rough surfaces. Take your time during this step to achieve a professional-looking finish that you’ll be proud to display in your space.
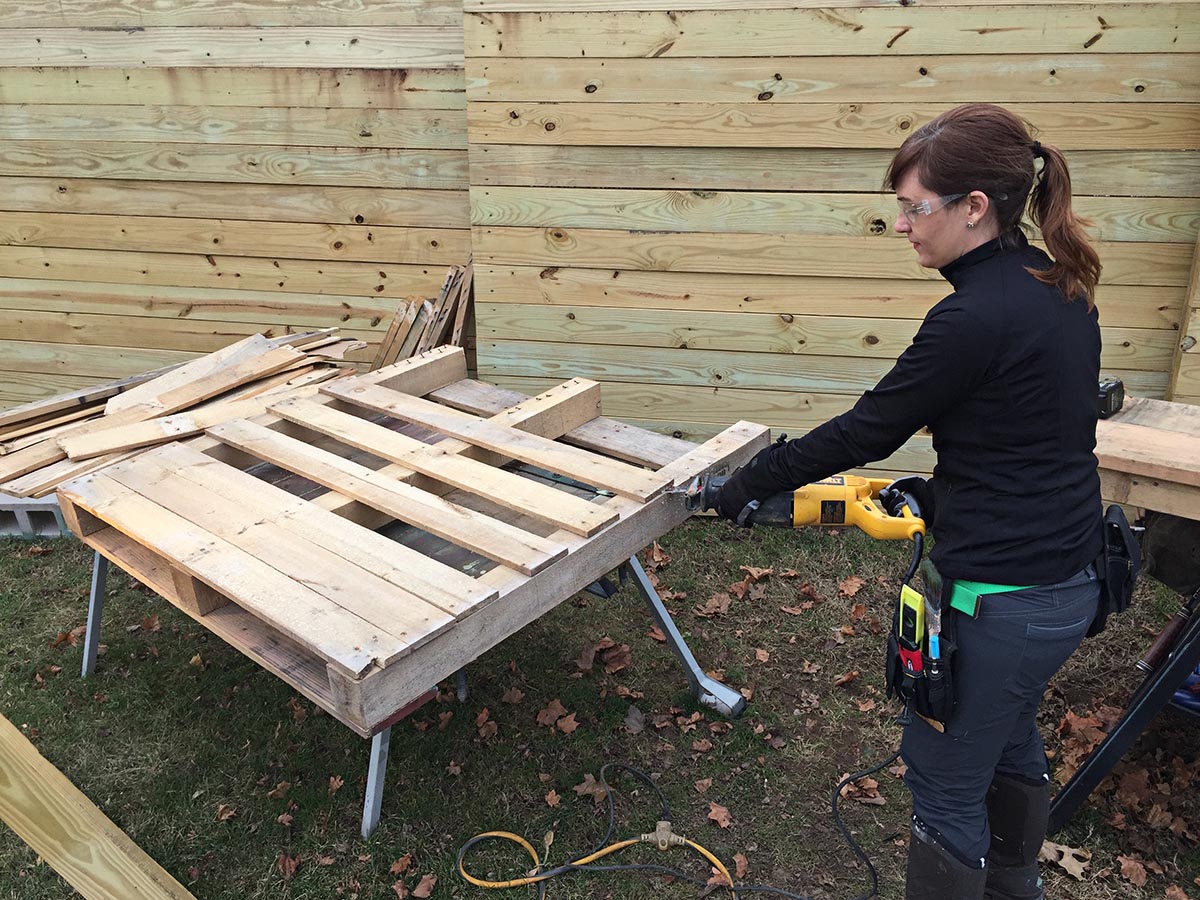
When disassembling a pallet for bookshelves, use a reciprocating saw to carefully cut through the nails holding the boards together, making it easier to remove them without damaging the wood.
Step 6: Attach the shelves to the pallet
Now that you have the individual shelf sections prepared, it’s time to attach them to the pallet. This step will involve securing the shelves in place so that they are sturdy and functional. Follow these steps to attach the shelves:
- Position the shelves: Place each shelf section onto the corresponding markings on the pallet. Make sure they are aligned properly and evenly spaced.
- Secure with screws or nails: Using a power drill, insert screws or nails through the pallet and into each shelf section. Aim for two to three screws or nails per shelf to ensure stability. Make sure to countersink the screws slightly to give a neater appearance.
- Check for stability: After attaching each shelf, give them a gentle shake to ensure they are securely fastened. If you notice any wobbling or instability, add additional screws or nails as needed.
By attaching the shelves to the pallet, you’re creating a solid and functional structure for your bookshelf. It’s important to pay attention to the alignment and stability during this step to ensure a durable finished product.
Step 7: Mount the bookshelf on the wall
Now that your pallet bookshelf is assembled, it’s time to mount it on the wall. This step will involve securely attaching the bookshelf to the wall to ensure stability and safety. Follow these steps to properly mount the bookshelf:
- Locate the wall studs: Use a stud finder or tap the wall to locate the vertical beams behind the drywall. These studs provide the necessary support for mounting heavy objects.
- Position the bookshelf: Hold the bookshelf against the wall in the desired location. Use a level to ensure it is straight and adjust if necessary.
- Mark the mounting points: Once the bookshelf is in position, use a pencil to mark the locations where you will attach the wall mounts or brackets. These marks should align with the studs.
- Attach wall mounts: Depending on the design of your bookshelf, you may need L-brackets or other types of mounts. Use a drill and screws to securely attach the mounts to the marked locations.
- Hang the bookshelf: With the wall mounts in place, carefully lift the bookshelf and align it with the mounts. Slide the bookshelf onto the mounts and ensure it is level and properly positioned.
- Secure the bookshelf: Use screws or nails to securely attach the bookshelf to the wall mounts. Make sure to countersink the fasteners for a clean and neat appearance.
Mounting the bookshelf on the wall not only adds stability but also ensures the safety of your books and prevents any accidents. Take your time during this step to ensure proper alignment and secure attachment to the wall.
Step 8: Optional: Stain or paint the bookshelf
Once you have successfully mounted your bookshelf on the wall, you have the option to further enhance its appearance by applying a stain or paint. This step allows you to customize the bookshelf to match your personal style and complement your existing decor. Here’s how you can proceed:
- Clean and prepare the bookshelf: Before applying any finish, ensure that the bookshelf is clean and free from dust or debris. You can use a damp cloth or a brush to wipe down the surface.
- Choose your finish: Decide whether you want to apply a stain or paint. Stain can bring out the natural beauty of the wood and provide a rustic look, while paint can offer a pop of color and create a more modern appearance. Consider the overall aesthetic you’re aiming for.
- Apply the stain: If you choose to stain the bookshelf, use a brush or a cloth to apply the stain in the direction of the wood grain. Allow the stain to penetrate the wood for the recommended amount of time, and then wipe off any excess with a clean cloth.
- Apply the paint: If you decide to paint the bookshelf, start by applying a primer to create a smooth and even base. Once the primer is dry, use a paintbrush or a roller to apply the paint evenly, covering the entire surface. Allow the paint to dry according to the manufacturer’s instructions, and apply additional coats if necessary.
- Seal the finish: To protect the stain or paint and ensure its durability, consider applying a sealant or clear coat. This will provide an extra layer of protection against scratches and stains.
Staining or painting your bookshelf is an opportunity to add your personal touch and make it truly unique. Take your time during this step to achieve the desired finish, and allow the bookshelf to dry completely before placing books or other decor items on it.
Read more: How To Make Floor To Ceiling Bookshelves
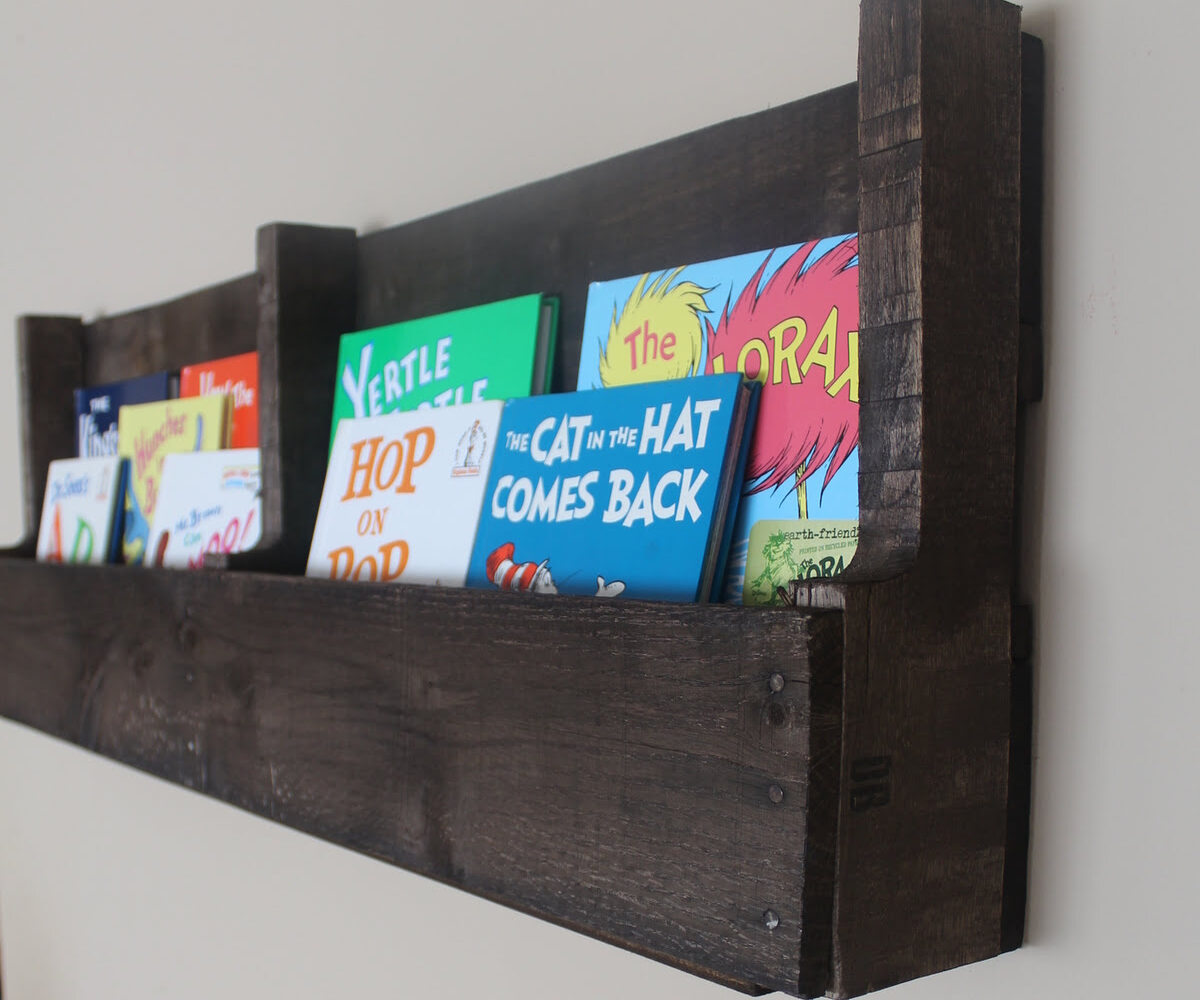
Step 9: Arrange and display your books
With your pallet bookshelf complete and finished to your liking, it’s time to arrange and display your books. This step allows you to showcase your collection and create a visually appealing arrangement. Here’s how you can arrange and display your books:
- Categorize your books: Sort your books into categories such as fiction, non-fiction, or by genre. This will help you organize the placement of the books on the shelves.
- Vary the placement: To create visual interest, alternate the placement of books both vertically and horizontally. Stack some books horizontally to create platforms for displaying smaller decor items or to break up the arrangement.
- Create focal points: Consider placing a few standout books or favorite items in prominent positions to draw attention and create focal points.
- Leave some open space: Allow for some empty space on the shelves to prevent overcrowding. This will give your books and decor room to breathe and allow for future additions to your collection.
- Add personal touches: Integrate personal items such as small plants, decorative objects, or sentimental pieces to infuse your own personality into the display.
Arranging and displaying your books not only adds functionality but also transforms your bookshelf into an aesthetically pleasing focal point in your space. Experiment with different arrangements and have fun curating a display that reflects your style and interests.
Conclusion
Congratulations! You have successfully completed the journey of creating your own pallet bookshelf. Through each step of gathering materials, preparing the pallet, measuring, cutting, sanding, attaching shelves, mounting the bookshelf, and optionally staining or painting, you have transformed a simple wooden pallet into a functional and stylish piece of furniture. Not only does your new bookshelf provide a home for your beloved books, but it also adds a touch of rustic charm to your space.
By repurposing a pallet, you have not only saved money but also contributed to sustainability by giving new life to materials that might have otherwise gone to waste. Your creation is not just a bookshelf; it’s a statement of your creativity and resourcefulness.
Remember, arranging and displaying your books on the shelves adds a personal touch to your space. Organize them in a way that makes sense to you, mix up horizontal and vertical placements, and don’t forget to have fun incorporating personal items and decorative touches.
Now, sit back, relax, and admire your handiwork. Your new pallet bookshelf is ready to be enjoyed and admired by all who enter your space. Not only does it serve as a functional storage solution, but it also showcases your love for literature and your passion for DIY projects.
Thank you for embarking on this DIY journey with us. We hope you found this guide helpful and inspiring. Happy reading and happy DIY-ing!
Frequently Asked Questions about How To Make Pallet Bookshelves
Was this page helpful?
At Storables.com, we guarantee accurate and reliable information. Our content, validated by Expert Board Contributors, is crafted following stringent Editorial Policies. We're committed to providing you with well-researched, expert-backed insights for all your informational needs.


0 thoughts on “How To Make Pallet Bookshelves”