Home>Furniture>Office Furniture>How To Make Floor To Ceiling Bookshelves
Office Furniture
How To Make Floor To Ceiling Bookshelves
Modified: August 17, 2024
Learn how to create stunning floor-to-ceiling bookshelves for your home office with our expert tips and advice. Browse our wide range of office furniture for ultimate storage solutions.
(Many of the links in this article redirect to a specific reviewed product. Your purchase of these products through affiliate links helps to generate commission for Storables.com, at no extra cost. Learn more)
Introduction
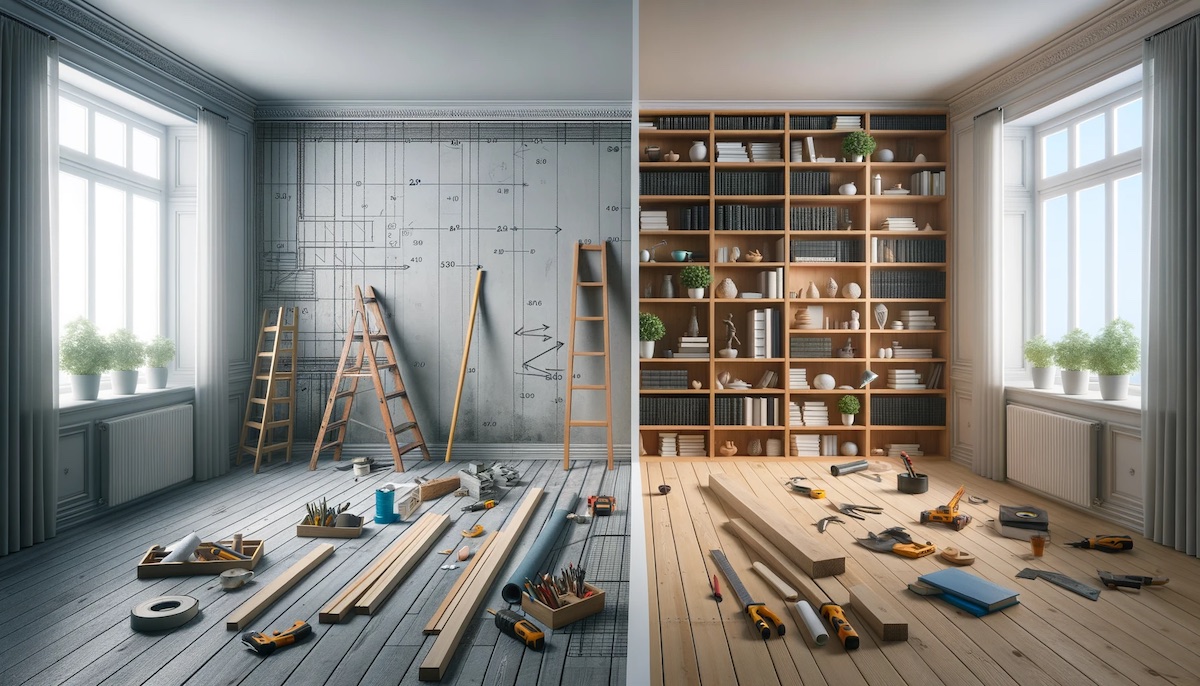
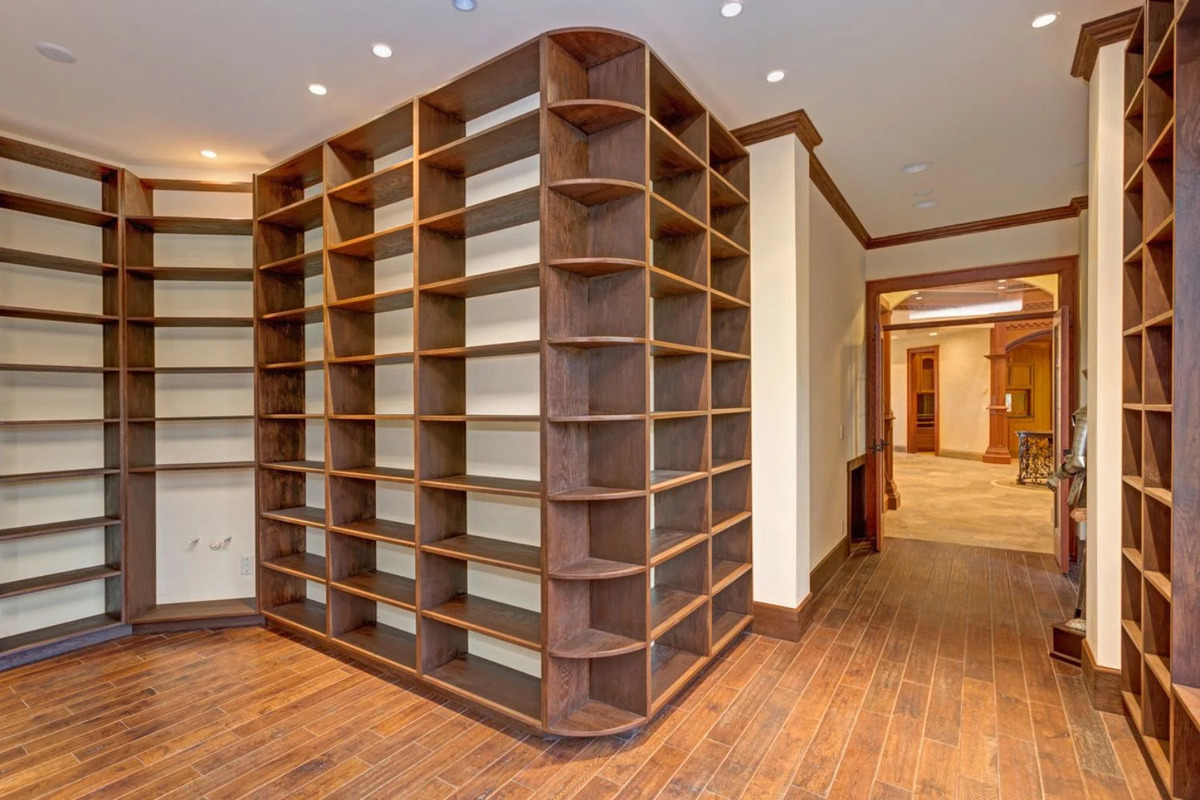
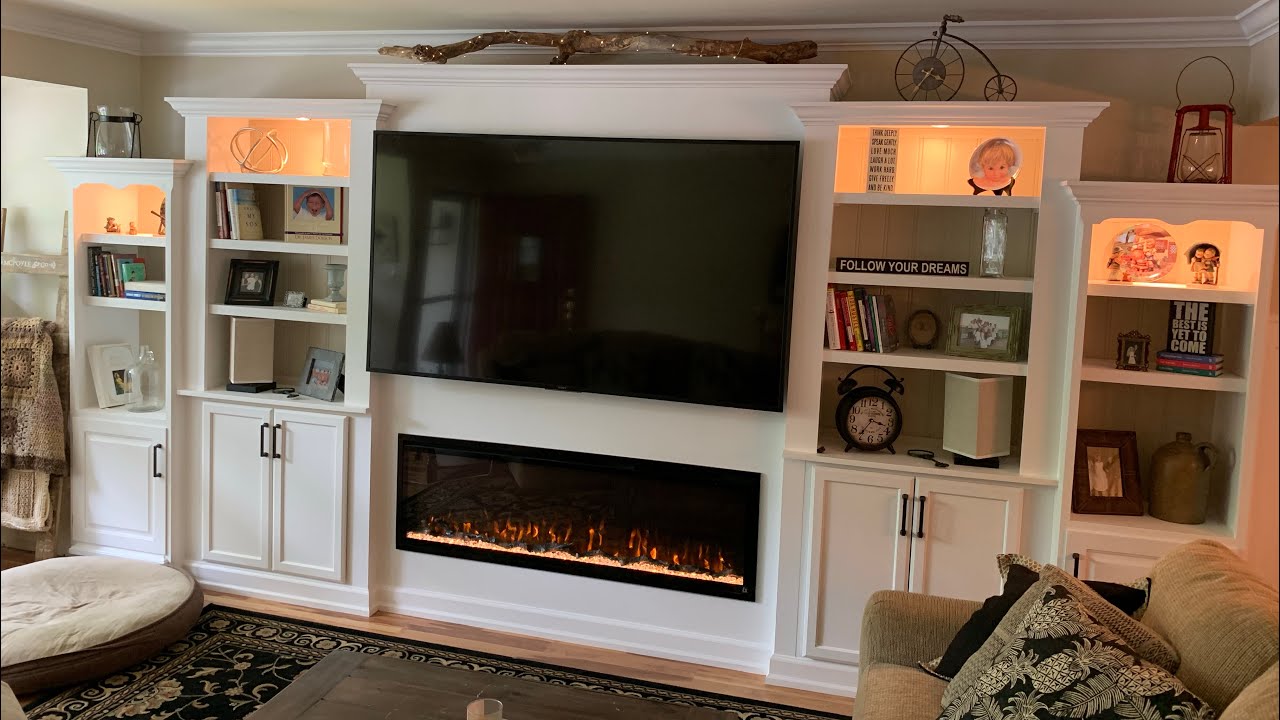
Having a floor-to-ceiling bookshelf is not only a practical storage solution but also a stunning design feature. It adds character to any room and allows you to display your book collection, decor items, and personal mementos in an organized and visually appealing way. Whether you are a bookworm looking for a space to house your extensive collection or simply want to create a unique focal point in your home, learning how to make floor-to-ceiling bookshelves is a worthwhile endeavor.
In this article, we will guide you through the step-by-step process of creating your very own floor-to-ceiling bookshelves. We will discuss the tools and materials you will need, provide helpful tips for measuring and designing the shelves, and walk you through the installation process. By the end, you will have a beautiful and functional bookshelf that reflects your personal style.
Before we dive into the practical details, let’s take a moment to appreciate the benefits of floor-to-ceiling bookshelves. Not only do they provide ample storage space for books, but they also allow you to showcase your favorite belongings. From family photos to decorative items, you can create a personalized and meaningful display that adds warmth and personality to your living space. Furthermore, floor-to-ceiling bookshelves make use of vertical space, maximizing the storage capacity in smaller rooms and minimizing clutter. They can also serve as room dividers, creating separate areas within an open-concept living space without the need for full walls.
Now that we understand the importance and possibilities of floor-to-ceiling bookshelves, let’s gather our tools and begin the journey of creating your very own masterpiece.
Key Takeaways:
- Create a stunning and functional floor-to-ceiling bookshelf by following step-by-step instructions, from gathering tools to adding personalized finishing touches. Enjoy a unique and organized space for your books and cherished items.
- Maximize vertical space and personalize your living area with floor-to-ceiling bookshelves. Showcase your book collection and decor while creating a practical storage solution that adds character to any room.
Read more: How To Make Pallet Bookshelves
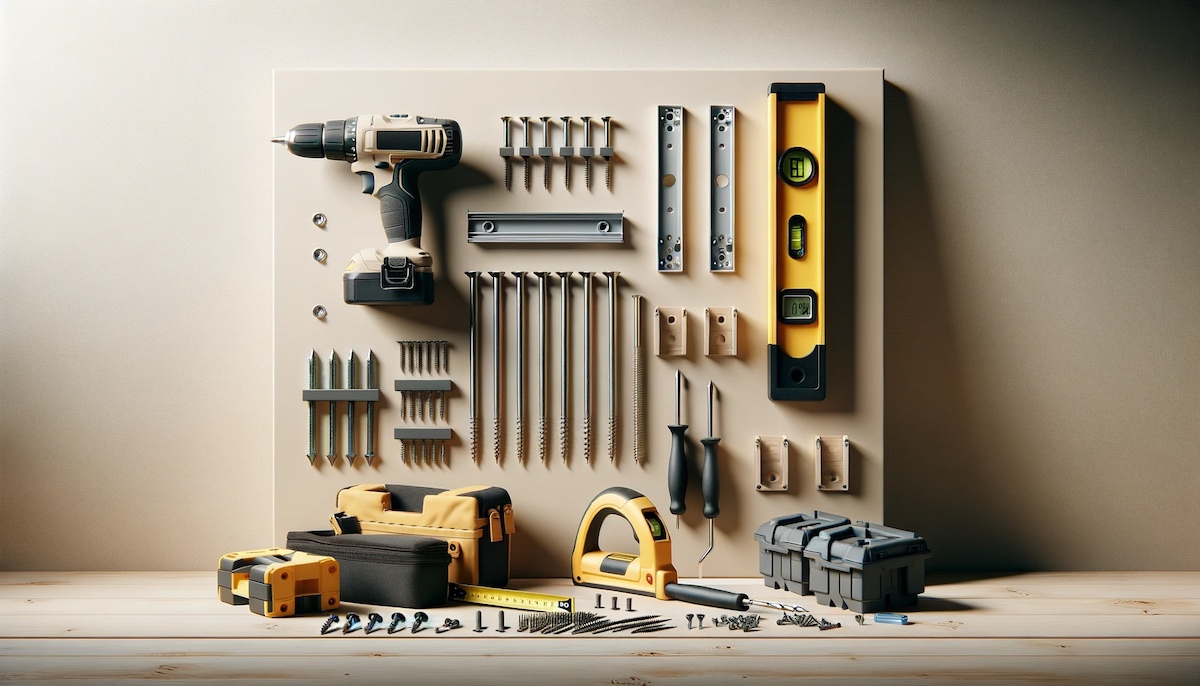
Step 1: Gather the necessary tools
Before you start building your floor-to-ceiling bookshelves, it’s essential to gather all the necessary tools. By having everything you need on hand, you can streamline the construction process and ensure a smooth workflow. Here are the basic tools you will need:
- Measuring tape
- Pencil
- Level
- Power drill
- Screws
- Saw (circular saw or handsaw)
- Clamps
- Screwdriver
- Safety goggles
- Work gloves
The measuring tape and pencil are essential for accurately measuring and marking the wall and shelf placement. Make sure your measuring tape is long enough to span the entire height of your bookshelf. The level is necessary for ensuring your shelves are straight and level, providing a professional and polished look.
A power drill will be your go-to tool for drilling holes and driving screws into the wall and shelves. Make sure you have the appropriate drill bits and screwdriver bits for the job. Additionally, you will need screws of the appropriate length and thickness to securely attach the shelves to the wall and supports.
If you are customizing your shelves or need to make any adjustments, a saw will come in handy. A circular saw is the most efficient tool for cutting large pieces of lumber, while a handsaw can be used for smaller, more precise cuts. Clamps will help secure the wood in place while you make your cuts, ensuring accuracy and safety.
Remember to prioritize safety while working on your project. Wear safety goggles to protect your eyes from any flying debris, and use work gloves to prevent any injuries while handling tools or rough lumber.
Now that you have all the necessary tools, it’s time to move on to the next step: measuring the wall space for your bookshelves.
Step 2: Measure the wall space
Accurate measurements are crucial when building floor-to-ceiling bookshelves. Before you can start cutting and assembling the materials, you need to measure the wall space where the bookshelves will be installed.
Begin by using a measuring tape to measure the height and width of the wall. Measure from the floor to the ceiling to determine the height of your bookshelves. Make sure to account for any baseboards or crown moldings that may affect the measurements.
Next, measure the width of the wall where the bookshelves will be installed. Consider any obstacles such as windows, doors, or electrical outlets that may limit the space available for the bookshelves. It’s important to leave enough clearance on either side of the bookshelves for easy access and to account for any unevenness in the wall.
Once you have the height and width measurements, transfer them to a piece of paper or a digital design tool, such as a home design software or online planner. This will serve as a reference throughout the construction process and help you visualize the final result.
In addition to the overall measurements, consider the desired shelf spacing. Think about the size of your book collection and any other items you plan to display on the shelves. If you have large volumes or decorative items, you may want to have wider spacing between shelves. On the other hand, if you have predominantly small paperbacks, you can have narrower spacing to maximize the storage capacity.
Take note of any special requirements or design preferences you have for your bookshelves during the measurement process. For example, if you want adjustable shelves or integrated lighting, make sure to leave space for these features in your measurements.
Remember, accuracy is key when measuring the wall space for your floor-to-ceiling bookshelves. Take your time and double-check your measurements before moving on to the next step. This will ensure that the final product fits seamlessly into your space and functions as intended.
With the wall space accurately measured, you are now ready to move on to the next step: determining the design and layout of your bookshelves.
Step 3: Determine the design and layout
Now that you have measured the wall space for your floor-to-ceiling bookshelves, it’s time to determine the design and layout of your shelves. This step is crucial as it will influence the overall aesthetics and functionality of your bookshelves.
Begin by considering the style and theme of your room. Do you want your bookshelves to blend seamlessly with the existing decor, or do you prefer a statement piece that stands out? This will help you determine the type of materials and finishes to use for your shelves.
Next, think about the purpose of your bookshelves and the items you plan to display. Are you primarily using them for books, or do you want to incorporate decorative objects and personal mementos as well? This will help determine the number and spacing of the shelves.
Consider whether you want open shelving or if you prefer to have doors or drawers to hide certain belongings. Open shelves offer easy access and a more casual look, while closed storage can create a sleek and streamlined appearance.
When determining the layout of your shelves, think about creating a balance between functional storage and visual interest. You can achieve this by varying the heights of the shelves or incorporating asymmetrical arrangements. Experiment with different configurations to find the one that suits your needs and aesthetic preferences.
Keep in mind any additional features you may want to incorporate into your bookshelves. This can include built-in lighting, adjustable shelves, or even a dedicated space for a TV or sound system. Consider these elements during the design phase to ensure a seamless integration.
If you are uncertain about the design and layout, you can seek inspiration from interior design magazines, online platforms, or consult with a professional. They can provide guidance based on your specific preferences and the dimensions of your space.
Once you have determined the design and layout of your floor-to-ceiling bookshelves, you are ready to move on to the next step: purchasing the materials needed for construction.
Step 4: Purchase the materials
With the design and layout of your floor-to-ceiling bookshelves finalized, it’s time to gather the necessary materials for construction. To ensure a smooth and efficient process, make a detailed list of all the items required before heading to the store or placing an online order.
The materials you will need for your bookshelves depend on the design and dimensions you have decided upon. However, here are some common items you may need:
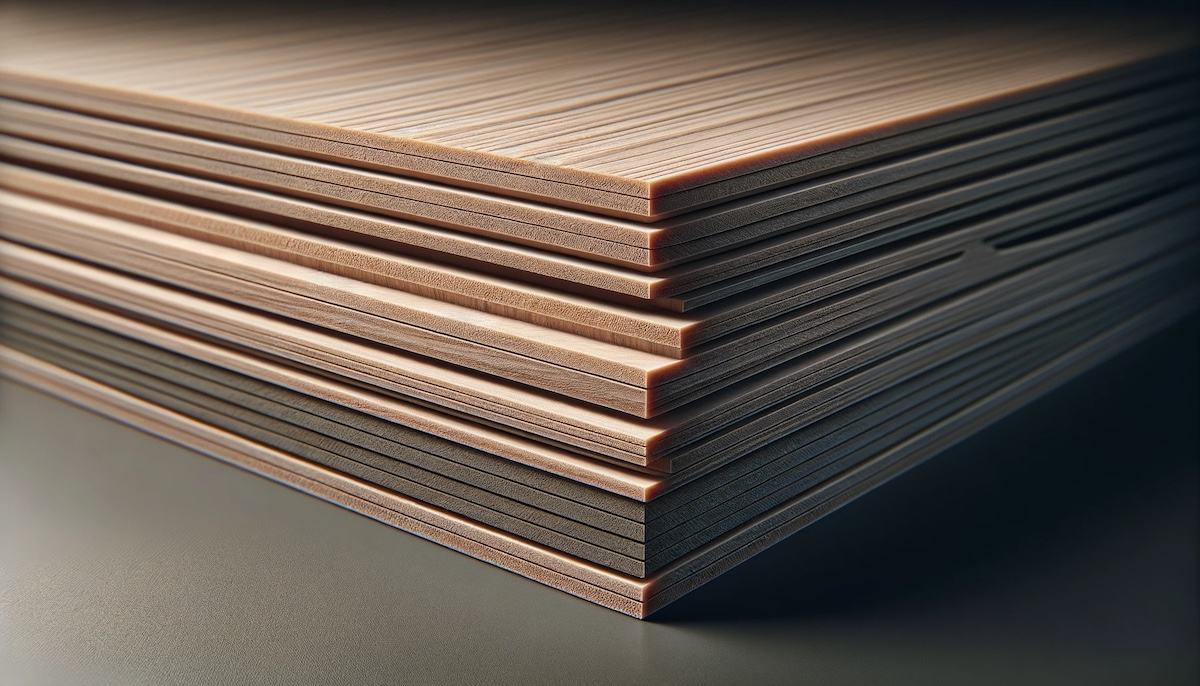
- Wood or melamine boards: Consider the dimensions, thickness, and finish that align with your design and aesthetic preferences. Calculate the total amount of wood needed based on the size and number of shelves.
- Support brackets or metal strips: These are essential for securing the shelves to the wall. Choose sturdy and durable brackets that can support the weight of your books and belongings.
- Screws: Select the appropriate length and thickness of screws based on the thickness of the boards and the type of wall you will be attaching the shelves to.
- Wood glue: This will reinforce the strength and stability of the shelves. Opt for a high-quality wood glue that dries clear and bonds well.
- Paint or stain (optional): If you prefer a specific color or finish for your bookshelves, purchase paint or stain that complements your design scheme. Make sure to choose paint or stain that is suitable for the type of wood you are using.
- Sandpaper: Depending on the condition of the wood and your desired finish, you may need sandpaper to smooth out rough edges or prepare the surface for painting or staining.
- Optional accessories: If you plan to incorporate additional features such as lighting or doors, purchase the necessary hardware and components.
Before making any purchases, it’s a good idea to consult your measurement and design plans to ensure that you are buying the correct quantity of materials. It’s better to have a little extra than to run out mid-construction.
When purchasing the materials, consider visiting a local home improvement store or specialty woodworking store. They will have a wide selection of wood options and hardware, and the staff can provide guidance and answer any questions you may have.
Alternatively, you can also order materials online. Many websites offer a variety of wood, hardware, and accessory options, making it convenient to find exactly what you need.
Once you have all the materials on hand, you are ready to move on to the next step: preparing the wall for installation.
Read more: How To Make IKEA Bookshelves Look Built In
Step 5: Prepare the wall
Before you can start installing your floor-to-ceiling bookshelves, it’s important to properly prepare the wall where they will be attached. This preparation ensures a stable and secure installation. Follow these steps to prepare the wall:
1. Clear the wall: Remove any furniture, artwork, or decorations from the area where the bookshelves will be installed. This will give you a clear and open workspace.
2. Patch and repair: Inspect the wall for any cracks, holes, or damage. Use a wall patching compound and a putty knife to fill in any imperfections. Allow the compound to dry, then sand it smooth to create a level surface.
3. Locate studs: Use a stud finder to locate the wall studs. These are the vertical wooden beams behind the drywall that provide extra support. Mark the stud locations with a pencil or masking tape.
4. Reinforce the wall: Depending on the weight and size of your bookshelves, you may need to reinforce the wall to ensure stability. One option is to add a plywood backing to the wall. Cut a piece of plywood to the height and width of the bookshelf area, then attach it to the wall studs using screws. This will provide a solid and secure base for your bookshelves.
5. Paint or prime the wall (optional): If you plan to paint the wall behind your bookshelves, now is a good time to do so. Apply a coat of paint or primer and allow it to dry before proceeding with the installation.
By preparing the wall beforehand, you ensure a steady and secure foundation for your bookshelves. This will enhance the overall stability and longevity of your installation.
Once the wall is properly prepared, you are ready to move on to the next step: installing the vertical supports for your bookshelves.
When building floor to ceiling bookshelves, make sure to secure the shelves to the wall studs for stability and safety. Use a level to ensure the shelves are straight and evenly spaced.
Step 6: Install the vertical supports
Now that the wall is prepared, it’s time to install the vertical supports for your floor-to-ceiling bookshelves. These supports will provide the structure and stability for the shelves. Follow these steps to install the vertical supports:
1. Measure and mark the positions: Use a measuring tape and pencil to mark the locations on the wall where you want the vertical supports to be installed. Start from the bottom and work your way up, ensuring that the marks are level and evenly spaced according to your design and layout plans.
2. Attach the supports: Use a power drill and screws to attach the supports to the wall. Make sure to drill directly into the wall studs for maximum stability. If your bookshelves will be spanning a long length, consider adding additional supports at regular intervals to provide extra reinforcement.
3. Check for levelness: Use a level to ensure that each support is perfectly vertical. Adjust as necessary by loosening the screws and repositioning the supports. This step is crucial for ensuring that your shelves will be straight and even.
4. Double-check measurements: Measure the distance between each support to ensure that they are evenly spaced. Adjust if needed to maintain consistency throughout the installation.
5. Secure the supports: Once you are satisfied with the position and levelness of the supports, tighten the screws to secure them firmly to the wall. Give each support a gentle shake or tug to ensure they are stable.
6. Repeat the process for additional supports: If your bookshelves have multiple sections, repeat the above steps to install the vertical supports for each section. Ensure that the supports align with one another to ensure a seamless and cohesive look.
By installing the vertical supports, you have laid the foundation for your floor-to-ceiling bookshelves. These supports will provide the necessary structural integrity and support for the shelves. Next, you will move on to installing the horizontal shelves.
Properly installing the vertical supports is crucial for the stability and longevity of your bookshelves. Take your time and ensure that each support is securely attached to the wall before proceeding to the next step.
With the vertical supports in place, you are ready to move on to the next step: installing the horizontal shelves.
Step 7: Install the horizontal shelves
With the vertical supports securely in place, it’s time to install the horizontal shelves for your floor-to-ceiling bookshelves. These shelves will provide the storage space for your books and other belongings. Follow these steps to install the horizontal shelves:
1. Measure and cut the shelves: Measure the width between the vertical supports to determine the length of each shelf. Use a saw to cut the shelves to the appropriate size. Remember to account for any desired overhang or spacing between the shelves.
2. Test fit the shelves: Before attaching the shelves permanently, place each one on the supports to check for proper fit and alignment. Make any necessary adjustments to ensure that the shelves are level and evenly spaced.
3. Attach the shelves: Once you are satisfied with the fit, use a power drill and screws to attach the shelves to the vertical supports. Drive the screws through the side of the shelf and into the support, ensuring a secure connection. Consider using brackets or metal strips for added stability, especially for longer shelves.
4. Check for levelness: Use a level to ensure that each shelf is straight and level. Adjust as necessary by loosening the screws and repositioning the shelf. This step is important to achieve a professional and polished look.
5. Repeat for additional shelves: If your bookshelves have multiple tiers or sections, repeat the above steps to install the horizontal shelves for each section. Ensure that the shelves align with one another and maintain consistent spacing throughout the installation.
6. Test the stability: Once all the shelves are installed, give them a gentle shake to ensure they are secure and stable. Make any necessary adjustments if you notice any wobbling or instability.
7. Optional: Finish the shelves – If desired, you can apply a coat of paint or stain to the shelves to enhance their appearance and protect the wood. Allow the finish to dry according to the manufacturer’s instructions before proceeding.
By installing the horizontal shelves, your floor-to-ceiling bookshelves are taking shape and becoming functional storage units. Ensure each shelf is properly attached, level, and stable to provide a safe and secure space for your books and belongings.
With the horizontal shelves in place, you are now ready to move on to the next step: attaching the bookshelf to the wall.
Step 8: Attach the bookshelf to the wall
With the horizontal shelves securely in place, it’s time to attach your floor-to-ceiling bookshelf to the wall. Attaching the bookshelf to the wall adds an extra level of stability and ensures that it remains safely in place. Follow these steps to attach your bookshelf to the wall:
1. Determine attachment points: Measure the height of your bookshelf and mark the positions on the wall where you want to attach it. Take into account any studs or support beams behind the wall for added stability.
2. Pre-drill holes: Use a power drill with the appropriate drill bit to pre-drill holes into the back of the bookshelf at the marked attachment points. Ensure that the holes are slightly smaller than the screws you will be using.
3. Position the bookshelf: With the help of a friend or family member, carefully lift the bookshelf and align it with the marked attachment points on the wall. Take extra care to ensure that the bookshelf is level and centered in the desired position.
4. Attach the bookshelf to the wall: Using a power drill and screws, securely fasten the bookshelf to the wall by driving the screws through the pre-drilled holes and into the wall. Be sure to drive the screws into the studs or other secure structural supports behind the wall for maximum stability.
5. Test stability: Give the bookshelf a gentle shake to ensure that it is firmly attached and stable. Make any necessary adjustments or tighten the screws if you notice any wobbling or instability.
6. Consider additional support options: Depending on the size and weight of your bookshelf, you may want to consider additional support options for added safety and stability. This can include using brackets, braces, or even attaching the bookshelf to the floor or ceiling for extra reinforcement.
By securely attaching your bookshelf to the wall, you can have peace of mind knowing that it will stay in place and hold the weight of your books and belongings without the risk of tipping or falling over.
With the bookshelf successfully attached to the wall, you are now ready for the final step: adding the finishing touches to your floor-to-ceiling bookshelves.
Read more: How To Make Bookshelves Look Less Cluttered
Step 9: Add finishing touches
Now that your floor-to-ceiling bookshelves are installed and securely attached to the wall, it’s time to add the finishing touches to complete the look and functionality of your masterpiece. These final touches will enhance the overall aesthetics and usability of your bookshelves. Follow these steps to add the finishing touches:
1. Sand and finish the shelves (if applicable): If you haven’t already done so, sand the edges and surfaces of the shelves to create a smooth finish. Apply paint, stain, or a protective sealant to the wood to enhance its appearance and durability. Allow the finish to dry completely before placing any items on the shelves.
2. Arrange your books and belongings: Organize your books and other items on the shelves in a way that makes sense to you aesthetically and functionally. Consider organizing them by genre, author, color, or size. You can add bookends or decorative accessories to further personalize the display.
3. Add lighting: If desired, consider adding lighting to highlight specific areas or objects on your bookshelves. LED strip lights or small surface-mounted spotlights can create a dramatic and inviting effect. Make sure to choose lighting that is suitable for use with wooden shelves.
4. Decorate the space around the bookshelves: Enhance the overall look of the room by decorating the area around the bookshelves. Add artwork, plants, or decorative accents that complement the style and theme of the bookshelves. These additions will create a cohesive and visually appealing display.
5. Personalize the shelves: Add personal touches and meaningful items to the bookshelves. Display family photos, travel souvenirs, or treasured keepsakes to make your bookshelves truly unique and reflective of your personality.
6. Regular maintenance: Keep your bookshelves looking their best by engaging in regular maintenance. Dust the shelves, clean any spills or stains immediately, and periodically check for loose screws or other signs of wear and tear. This will help prolong the lifespan of your bookshelves and keep them in top condition.
By adding these finishing touches, you can transform your floor-to-ceiling bookshelves into a stunning focal point in your room. The personalized arrangement, decor, and lighting will create a space that not only showcases your book collection but also reflects your individual style and taste.
Congratulations! You have successfully completed all the steps to create your own floor-to-ceiling bookshelves. Enjoy the beauty and functionality they bring to your home.
Before we conclude, it’s important to note that the steps provided in this article serve as a general guide. It’s crucial to follow manufacturer instructions and safety guidelines when using power tools and working with wood or other materials.
We hope this article has been helpful in your journey to create floor-to-ceiling bookshelves. Happy reading and organizing!
Conclusion
Congratulations on successfully creating your own floor-to-ceiling bookshelves! You have taken the journey from gathering the necessary tools to adding the finishing touches, resulting in a stunning and functional storage solution for your books and belongings.
Throughout the process, you have learned how to measure the wall space, determine the design and layout, and purchase the materials needed for construction. You have mastered the art of preparing the wall, installing the vertical supports, and attaching the horizontal shelves. Finally, you have added the finishing touches to personalize and enhance the overall look of your bookshelves.
By following the steps outlined in this article, you have created a beautiful and practical addition to your home. Your floor-to-ceiling bookshelves not only provide ample storage space for your favorite reads but also serve as a focal point and display area for cherished items and decor.
Remember to regularly maintain and care for your bookshelves to ensure their longevity and continued functionality. Dusting, cleaning, and periodically checking for any necessary repairs will keep them looking their best for years to come.
We hope this article has been a valuable resource in helping you create your floor-to-ceiling bookshelves. The process may have required time and effort, but the result is truly worth it. You now have a unique and personalized space that showcases your love for books and reflects your personal style.
Enjoy the joy of organizing your collection, discovering new reads, and creating a cozy reading nook within the comfort of your own home. May your floor-to-ceiling bookshelves bring you endless moments of inspiration, relaxation, and the sheer pleasure of immersing yourself in the world of books.
Happy reading!
Hungry for more DIY inspiration after mastering those floor-to-ceiling bookshelves? Discover why crafting projects yourself enriches more than just your living space in our feature on the joys and benefits of DIY projects. Or, if your new shelving has you dreaming of aesthetically pleasing ways to display your collection, don't miss our creative compilation of bookshelf ideas that transform ordinary storage into stunning showcases for books and much more.
Frequently Asked Questions about How To Make Floor To Ceiling Bookshelves
Was this page helpful?
At Storables.com, we guarantee accurate and reliable information. Our content, validated by Expert Board Contributors, is crafted following stringent Editorial Policies. We're committed to providing you with well-researched, expert-backed insights for all your informational needs.


0 thoughts on “How To Make Floor To Ceiling Bookshelves”