Home>Furniture>Outdoor Furniture>How Much To Make A Concrete Patio

Outdoor Furniture
How Much To Make A Concrete Patio
Modified: August 23, 2024
Get an estimate on how much it will cost to create a beautiful outdoor furniture setup with a concrete patio. Boost your outdoor living space and enjoy cozy moments outdoors!
(Many of the links in this article redirect to a specific reviewed product. Your purchase of these products through affiliate links helps to generate commission for Storables.com, at no extra cost. Learn more)
Introduction
Welcome to our comprehensive guide on how much it costs to make a concrete patio. If you’re looking to transform your outdoor space into a more functional and appealing area, a concrete patio is a fantastic option. Not only does it provide a durable and long-lasting surface, but it also adds value to your home.
Creating a concrete patio involves careful planning, site preparation, and the right materials and tools. Many factors come into play when determining the cost of a concrete patio, such as size, design complexity, site conditions, and whether you hire professionals or opt for a DIY approach.
In this article, we will break down the different factors that affect the cost of making a concrete patio, provide a step-by-step guide on how to create one, and offer insights into the pros and cons of hiring professionals versus doing it yourself. By the end, you’ll have all the information you need to make an informed decision and embark on your patio project.
So, if you’re ready to turn your outdoor space into a beautiful and functional area, let’s dive into the world of concrete patios and discover how much it costs to create your dream outdoor retreat.
Key Takeaways:
- Creating a concrete patio involves careful planning, site preparation, and the right materials and tools. Factors like size, design complexity, and access to the site affect the cost.
- Whether hiring professionals or doing it yourself, a concrete patio can transform your outdoor space. Consider factors like expertise, cost savings, and personal satisfaction when making your decision.
Read more: How Much To Remove A Concrete Patio
Factors Affecting Cost
Several factors can influence the cost of making a concrete patio. Understanding these factors will help you estimate the budget required for your project more accurately. Let’s take a closer look at the key factors that affect the cost of creating a concrete patio:
- Size and Shape: The size and shape of your patio will have a significant impact on the cost. Larger patios require more materials and labor, resulting in higher expenses. Additionally, complex shapes with curves or irregular edges may require additional forms and cutting, increasing the overall cost.
- Site Conditions: The condition of the site where the patio will be installed can affect the cost. If the area is already level and doesn’t require much preparation, the cost may be lower. However, if there are significant grading or drainage issues, additional work may be required, adding to the overall cost.
- Access to the Site: The accessibility of the site for delivery trucks and equipment can also impact the cost. If the patio location is difficult to reach or requires special equipment for concrete pouring, it may increase the overall expenses.
- Design Complexity: The complexity of the patio design can influence the cost. Simple, straightforward designs with a plain concrete finish are generally more affordable. However, if you opt for decorative elements like stamping, staining, or engraving, the cost will be higher due to the additional labor and materials involved.
- Thickness and Strength: The thickness and strength of the concrete used for the patio also play a role in the cost. Thicker and stronger concrete will be more expensive but offers better durability and load-bearing capacity.
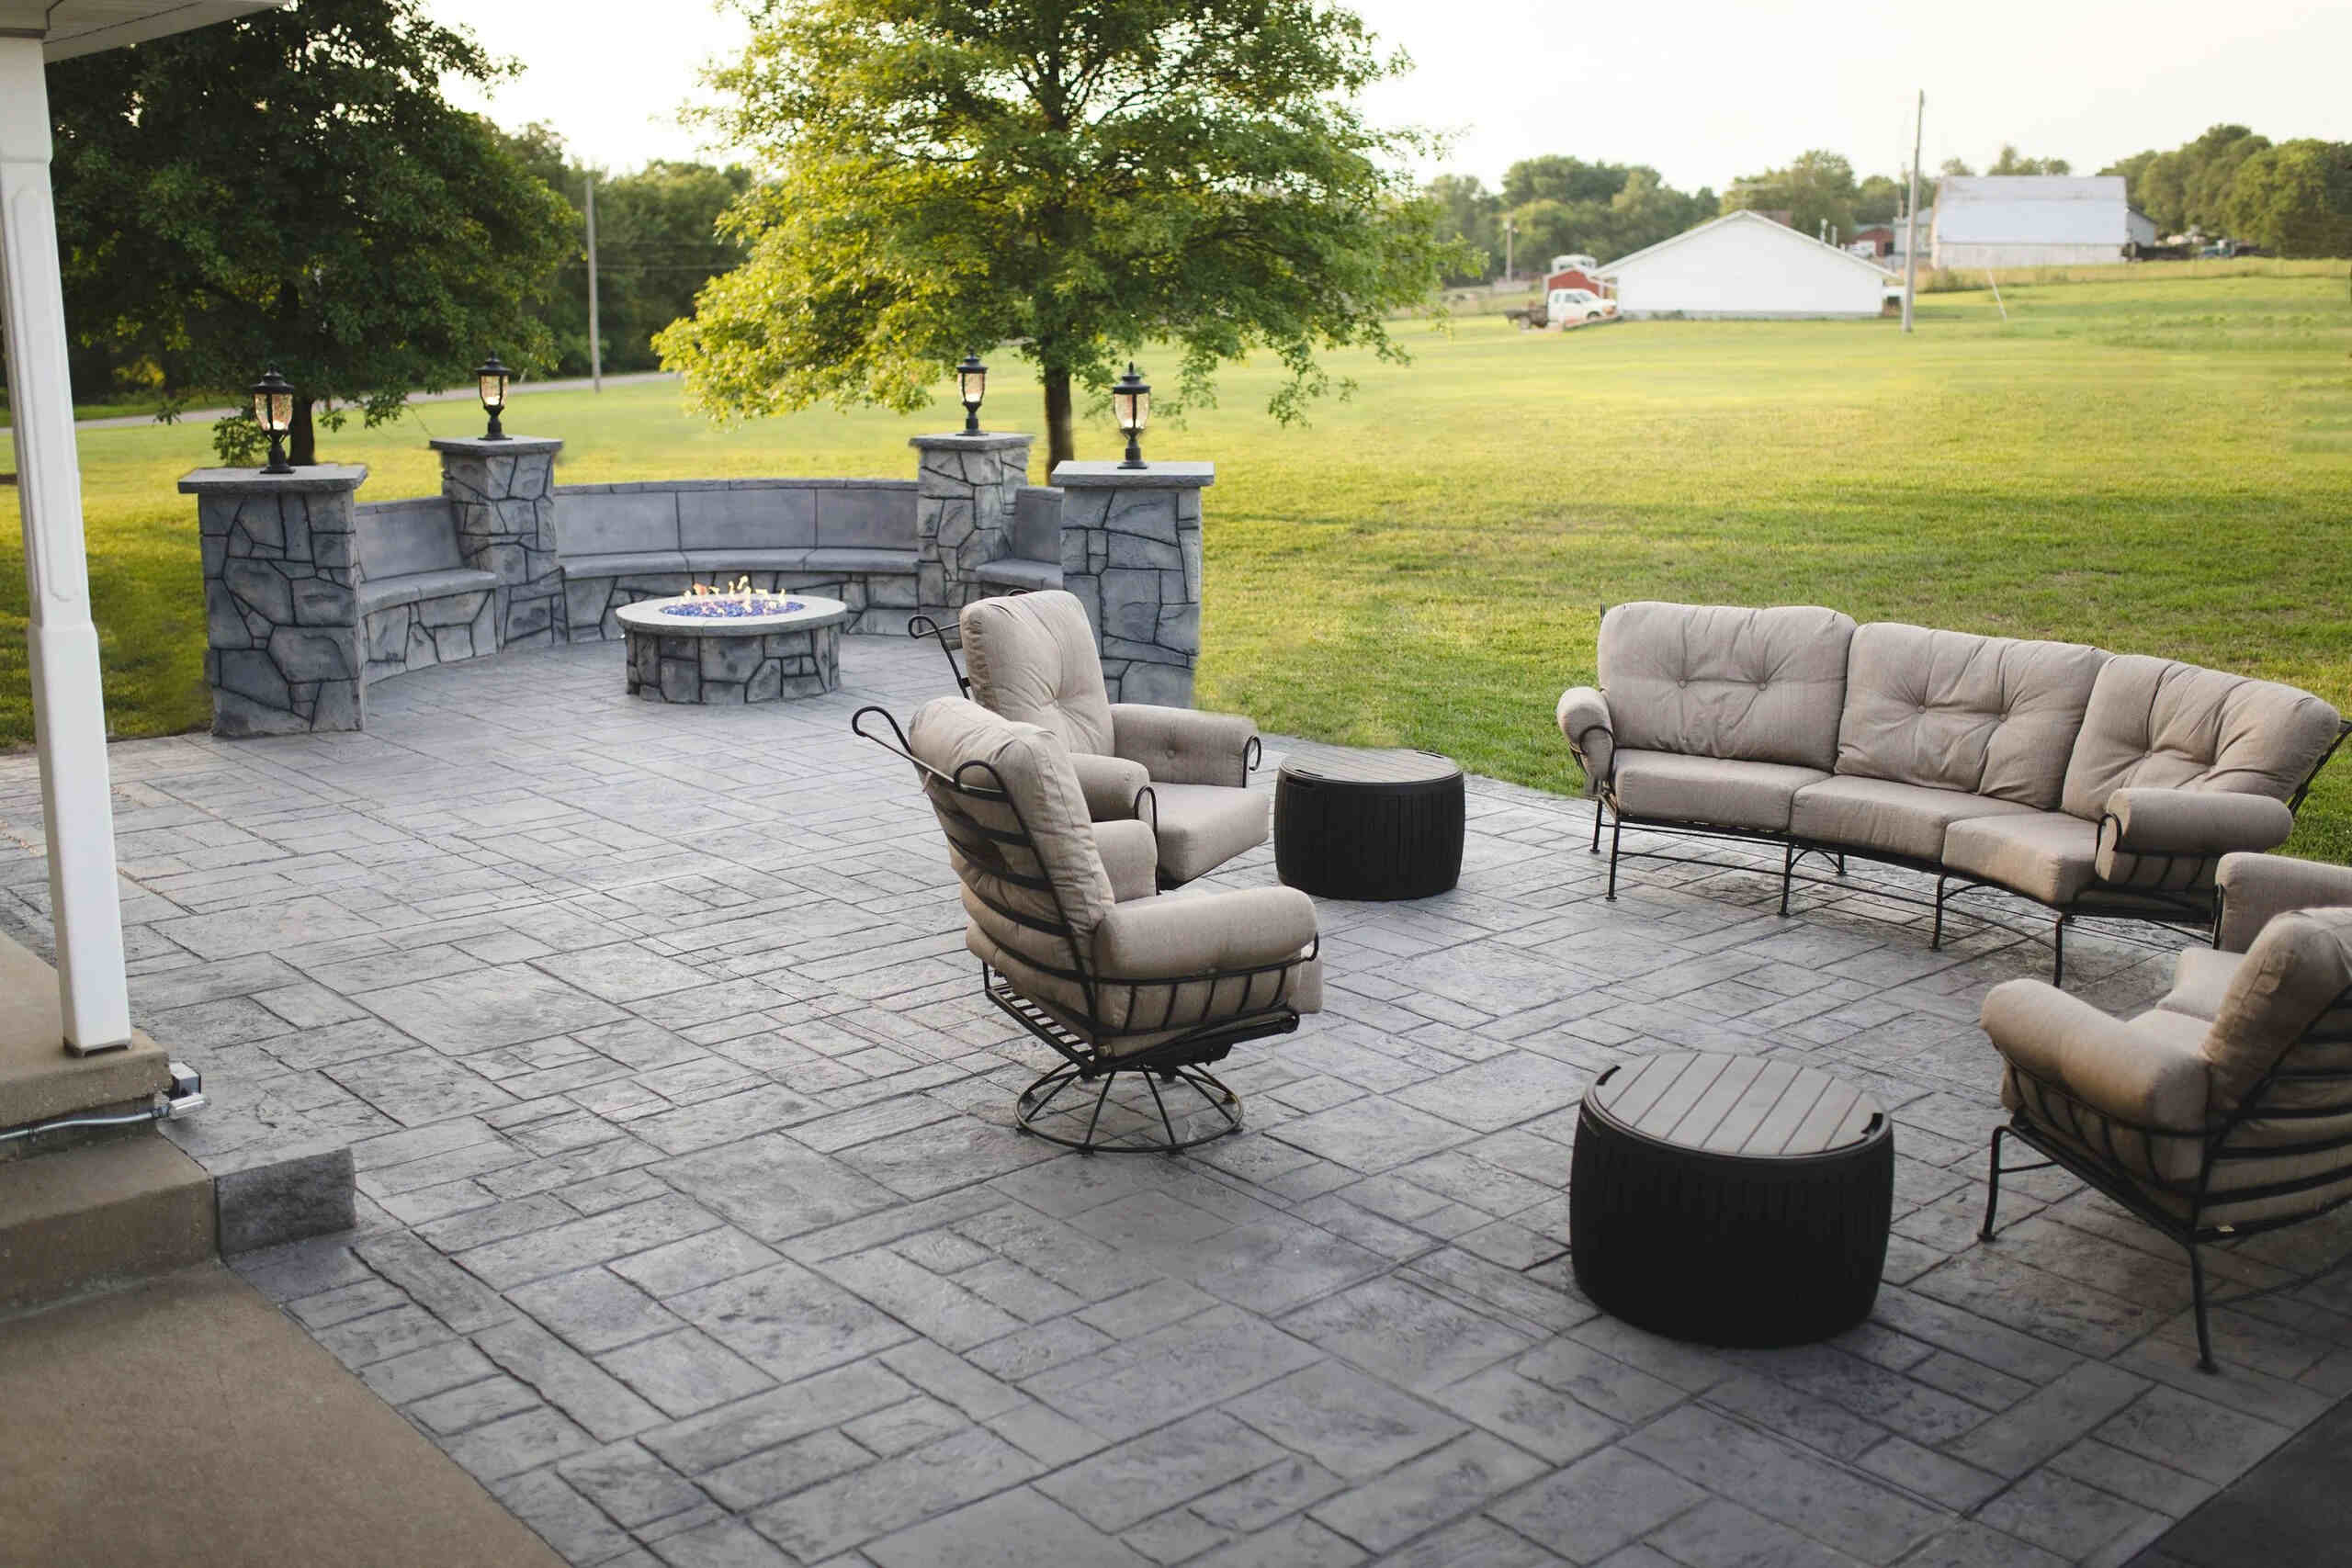
- Additional Features: Including additional features like built-in seating, fire pits, or outdoor kitchens will increase the cost of your patio project. These features require extra materials, labor, and possibly specialized professionals.
It’s important to consider these factors when planning your concrete patio project. By carefully assessing your space, design preferences, and budget, you can make informed decisions and ensure that the final result meets your expectations while staying within your financial means.
Materials Needed
Before starting your concrete patio project, it’s essential to gather all the necessary materials. Here’s a list of the materials you’ll need:
- Concrete: The main material required for creating a concrete patio is, of course, the concrete itself. You’ll need to calculate the quantity of concrete based on the size and thickness of your patio. Consider using ready-mix concrete, as it ensures consistent quality and simplifies the mixing process.
- Rebar or Wire Mesh: Rebar or wire mesh reinforcement helps strengthen the concrete and prevent cracking. The amount and type of reinforcement will depend on the size and expected loads on your patio.
- Forms: Forms are used to contain the concrete and give your patio its shape and edges. These can be made of wood, metal, or plastic. The type of form will depend on your design preferences and budget.
- Gravel or Aggregate: A layer of compacted gravel or aggregate is typically laid as a base for the concrete. It helps with drainage and provides a stable foundation for the patio.
- Concrete Stain or Sealer: If you plan to enhance the appearance of your concrete patio, you may need concrete stain or sealer. Stains can add color and depth, while sealers protect the concrete from moisture and staining.
- Tools: Here are some of the essential tools you’ll need for your concrete patio project:
- Shovel or Excavator for site preparation
- Trowels for concrete placement and finishing
- Broom or brush for texturing or finishing
- Concrete mixer or wheelbarrow for mixing concrete
- Level and measuring tools for accuracy
By ensuring that you have all the necessary materials and tools on hand, you can streamline the construction process and avoid delays and additional expenses. It’s always a good idea to double-check your material list and consult with professionals if needed to ensure you have everything you need for your specific project.
Tools Required
When it comes to creating a concrete patio, having the right tools can make the job much easier and ensure a successful outcome. Here’s a list of tools you’ll need for your concrete patio project:
- Shovel or Excavator: These tools are essential for site preparation, including clearing and leveling the area where your patio will be constructed.
- Tape Measure and Level: Accurate measurements and a level surface are crucial for a well-built concrete patio. Make sure you have a tape measure and a level to ensure that your patio is properly aligned and level.
- Concrete Mixer or Wheelbarrow: Depending on the size of your patio, you’ll need a way to mix the concrete. A concrete mixer is the most efficient option for larger projects, while a wheelbarrow can work well for small to medium-sized patios.
- Trowels: Trowels are used for various tasks when working with concrete. A pointing trowel can help with precise placement and leveling, while a finishing trowel is essential for creating a smooth finish on the surface.
- Broom or Brush: For texturing or finishing the surface of your concrete patio, you’ll need a broom or brush. These tools can create different textures and patterns, adding visual interest to your patio.
- Concrete Forms: Forms are used to create the shape and edges of your patio. Depending on your design, you may need wood, metal, or plastic forms. Make sure you have the necessary forms to achieve the desired look.
- Rebar Cutters and Wire Cutters: If you’re using rebar or wire mesh reinforcement, you’ll need appropriate cutters to trim and shape them to fit your patio dimensions.
- Protective Gear: Working with concrete can be messy and potentially hazardous. Be sure to wear protective gear such as gloves, safety goggles, and a mask to keep yourself safe during the construction process.
- Additional Tools: Depending on the specifics of your project, you may also need other tools such as a concrete saw, power drill, or power washer. Assess your project requirements and consult with professionals if needed to determine if any additional tools are necessary.
Having the right tools for your concrete patio project will greatly contribute to its success. Make sure to gather all the necessary tools before starting your project to ensure a smooth construction process.
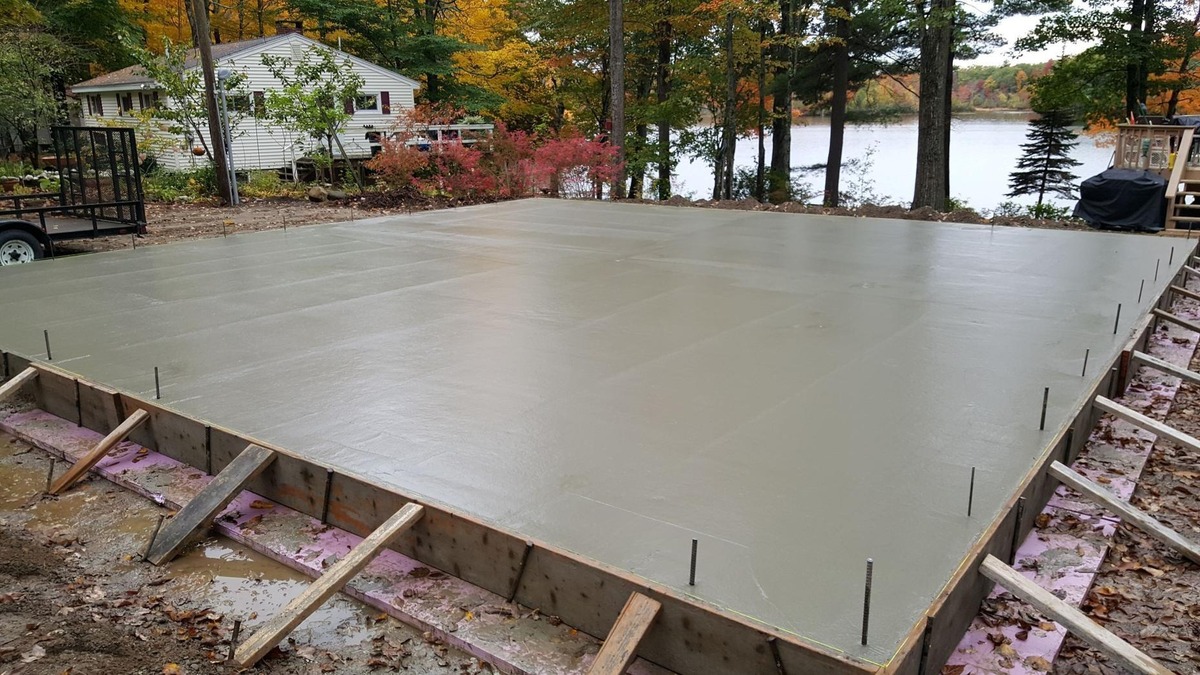
Site Preparation
Proper site preparation is crucial for the success and longevity of your concrete patio. Follow these steps to ensure a solid foundation and a level surface:
- Clear the Area: Start by clearing the area where your patio will be constructed. Remove any vegetation, rocks, or debris that may interfere with the patio’s base.
- Mark the Layout: Use stakes and string to mark the outline of your patio. This will help you visualize the shape and size of the patio and ensure accurate excavation.
- Excavate: Using a shovel or excavator, remove the top layer of soil within the marked area. Make sure to dig to the appropriate depth, considering the thickness of the gravel base and the concrete itself.
- Compact the Soil: Once the area is excavated, compact the soil using a plate compactor or hand tamper. This will create a stable foundation for the patio and help prevent settling or shifting over time.
- Add Gravel Base: Lay a layer of compacted gravel or aggregate over the compacted soil. This will improve drainage and provide a solid base for the concrete. Make sure the gravel is evenly spread and compacted for a level surface.
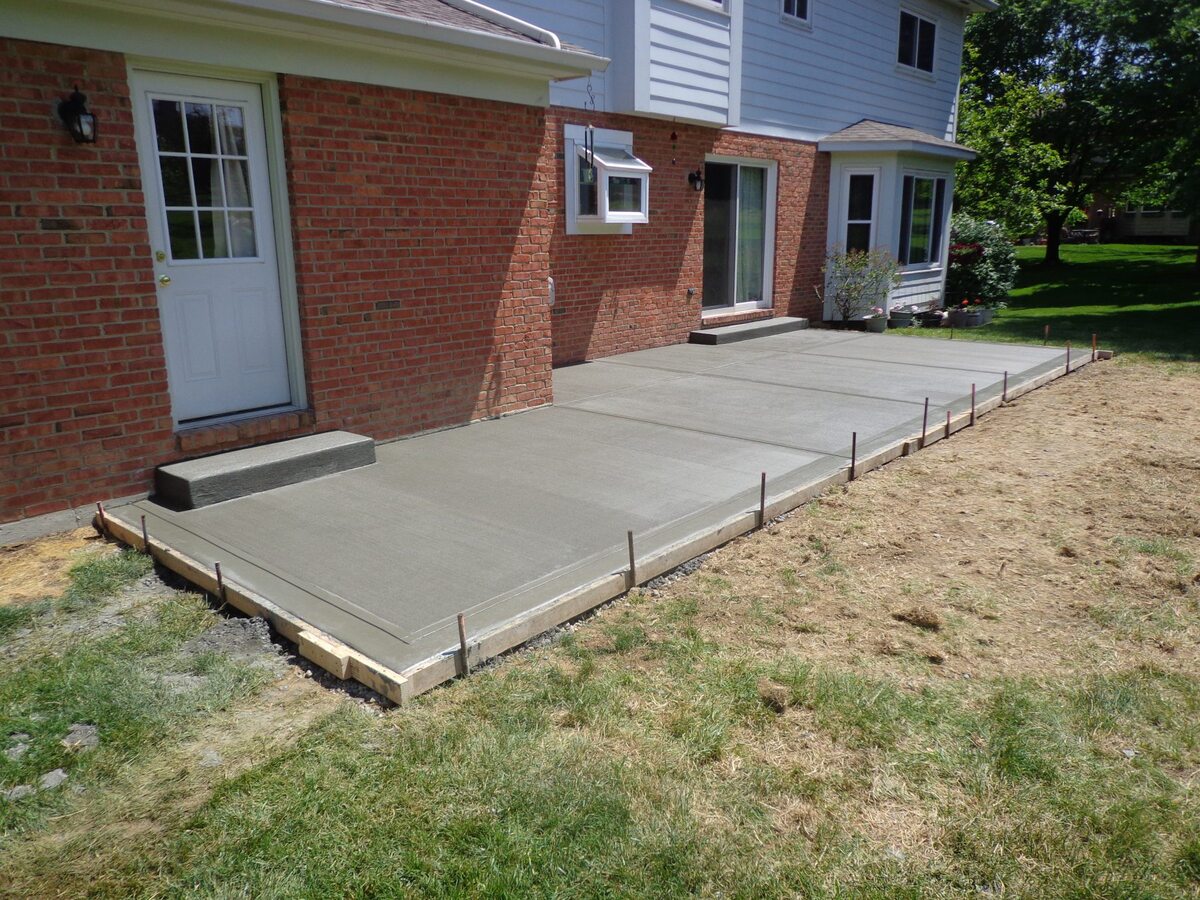
- Install Forms: Install the forms along the edges of your patio, ensuring they are properly aligned and secured. The forms will contain the concrete and determine the shape and edges of your patio.
- Level the Forms: Use a level to ensure that the forms are level and at the desired height. Adjust the forms as necessary to achieve an even surface for your patio.
- Compact Again: Once the forms are in place, compact the gravel base once again. This will help further stabilize the base and ensure a solid foundation for the concrete.
When preparing the site for your concrete patio, it’s critical to take your time and pay attention to detail. A well-prepared site will result in a more durable and visually pleasing patio. If you are unsure about any aspect of the site preparation process, it’s recommended to consult with a professional to ensure proper execution.
Consider the size, materials, and labor costs when budgeting for a concrete patio. Get multiple quotes from contractors and factor in any additional features or decorative elements you want to include.
Read more: How Much For A Stamped Concrete Patio
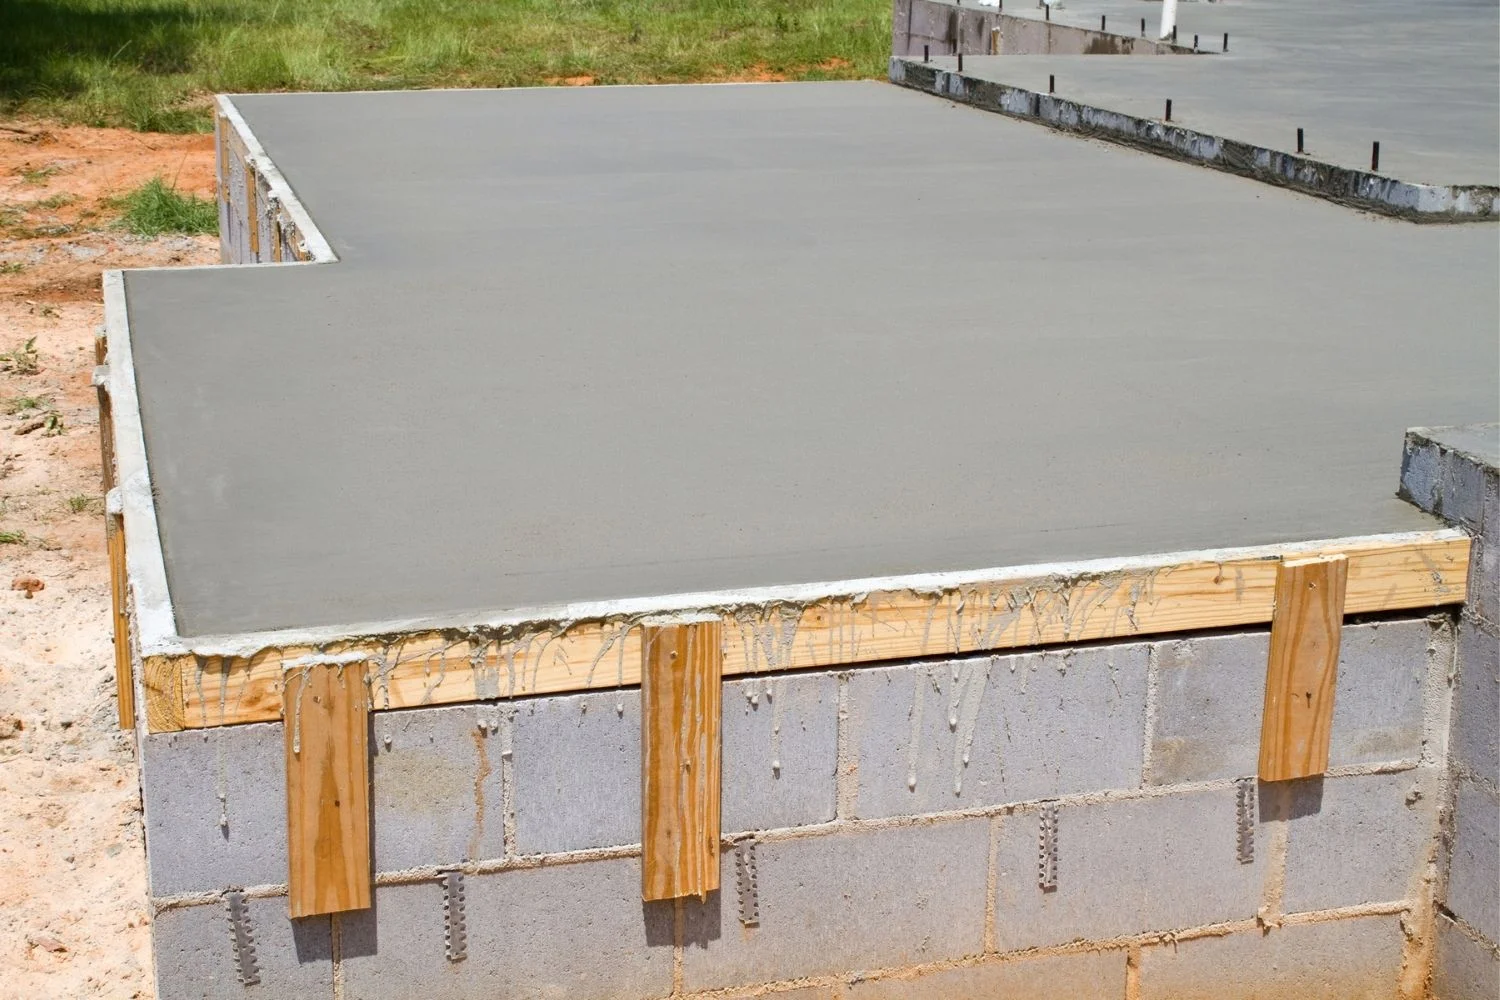
Pouring and Leveling the Concrete
Pouring and leveling the concrete is a critical step in creating a smooth and even surface for your patio. Follow these steps to ensure a successful pour:
- Mix the Concrete: If you’re using ready-mix concrete, follow the instructions provided to mix the concrete. If you’re mixing the concrete yourself, combine the appropriate amounts of cement, sand, and aggregate in a concrete mixer or wheelbarrow. Add water gradually and mix thoroughly until you achieve a workable consistency.
- Pour the Concrete: Pour the mixed concrete into the area between the forms, starting from one end and working your way to the other. Use a shovel or rake to evenly distribute the concrete and fill any gaps. Avoid pouring too much concrete at once to prevent it from drying out before you can work with it.
- Spread and Level: Use a screed board or a long, straight 2×4 to spread and level the concrete. Drag the screed board across the surface, moving it back and forth in a sawing motion to remove excess concrete and fill low spots. Work from one end of the patio to the other, creating a flat and even surface.
- Screed and Float: Once the concrete is spread and relatively level, use a bull float to smooth the surface. This will help remove imperfections and create a uniform texture. Move the bull float in large arcs, overlapping each pass to achieve a consistent finish.
- Edge the Patio: Use an edging tool or a hand trowel to create clean edges along the perimeter of the patio. Run the edging tool along the forms to create a smooth transition from the patio surface to the surrounding ground.
- Float and Trowel: After edging, use a float to further smooth and compact the surface. Then, switch to a steel finishing trowel to create a smooth, polished finish. Work the trowel in circular motions or long, straight lines to achieve the desired texture.
- Cure the Concrete: After finishing the surface, cover the patio with plastic sheeting or use a curing compound to slow down the evaporation of moisture. This helps prevent cracking and ensures the concrete cures properly. Follow the manufacturer’s recommendations for curing time and techniques.
During the pour and leveling process, it’s important to work efficiently but also pay attention to detail. Take your time to achieve a flat and level surface, as any inconsistencies will be visible once the concrete cures. If you’re new to working with concrete, consider seeking advice from professionals or watching tutorial videos to ensure you’re following the best practices.
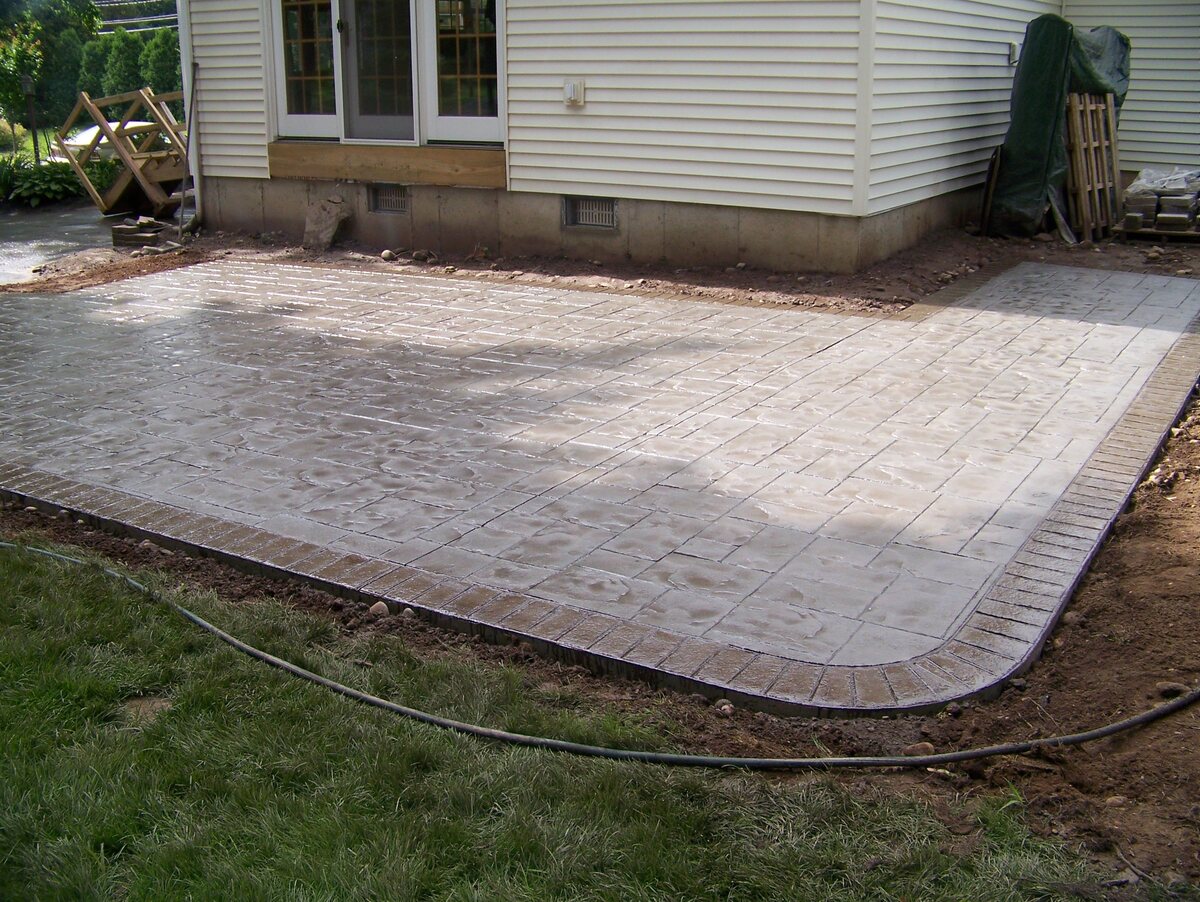
Finishing and Sealing the Patio
Finishing and sealing your concrete patio is essential for both aesthetic appeal and long-term durability. Follow these steps to give your patio a professional and finished look:
- Remove Forms: Once the concrete has cured sufficiently, carefully remove the forms. Use a pry bar or hammer to gently release them from the concrete without damaging the edges or surface.
- Clean the Surface: Thoroughly clean the surface of the patio to remove any dirt, debris, or loose particles. Use a broom or a leaf blower followed by a mild detergent and water solution if necessary. Rinse off the patio and allow it to dry completely.
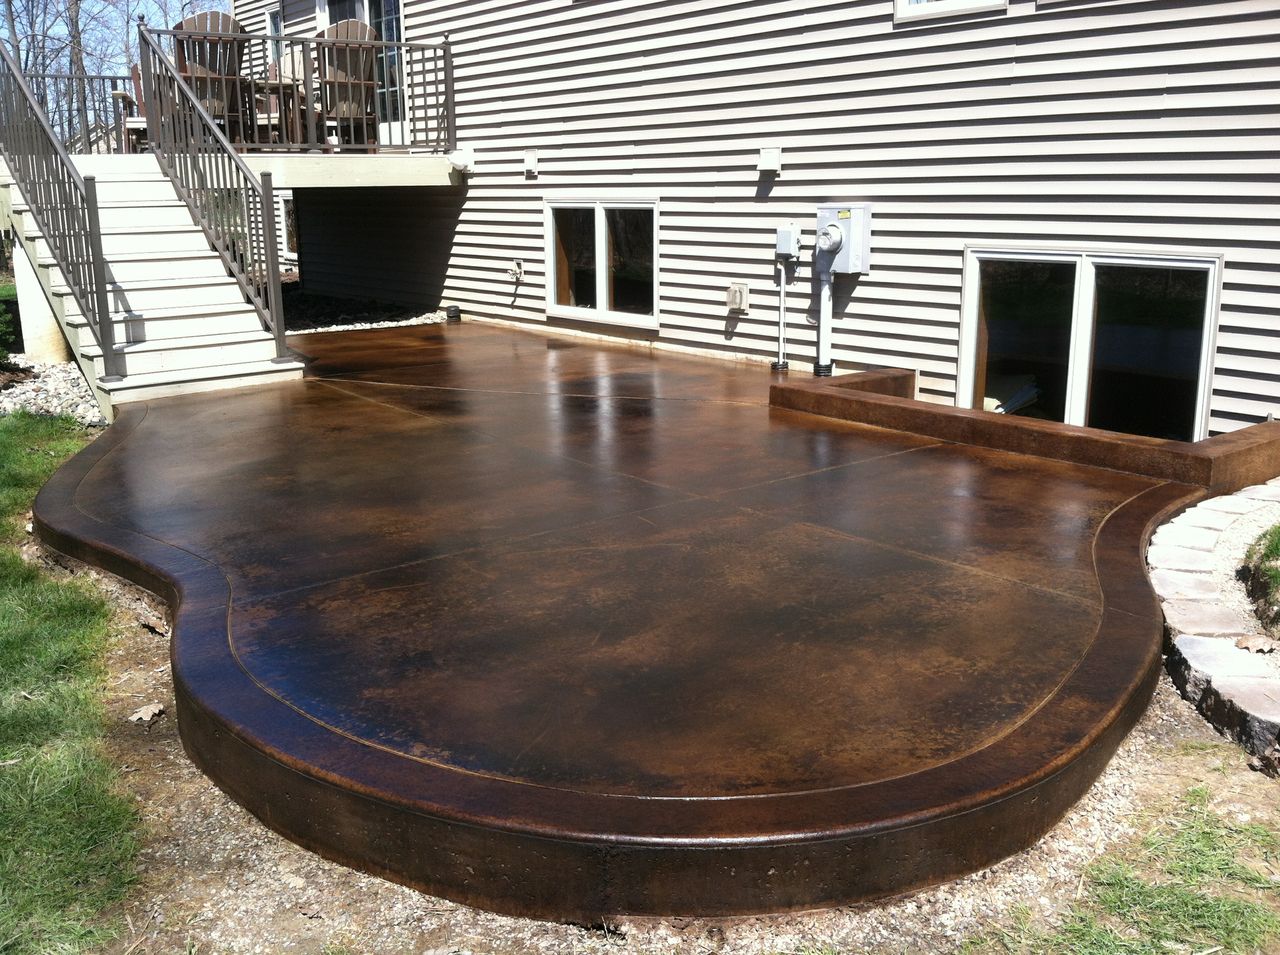
- Apply Stain or Color: If you want to enhance the appearance of your concrete patio, consider applying a concrete stain or color. Follow the manufacturer’s instructions for application, ensuring even coverage and allowing sufficient drying time between coats.
- Seal the Patio: Sealing the patio is crucial to protect it from moisture, stains, and wear. Choose a high-quality concrete sealer suitable for outdoor use. Apply the sealer using a roller or sprayer, ensuring even coverage on the entire surface. Allow the sealer to dry completely.
- Consider Additional Finishing: Depending on your design preferences, you can add further finishing touches to your patio. Options include decorative elements like stamping, engraving, or scoring the concrete surface, or adding texture by broom or brush. These techniques can add personality and visual interest to your patio.
- Regular Maintenance: To keep your concrete patio looking its best, regular maintenance is necessary. Sweep or rinse off any dirt or debris, and clean up spills promptly to avoid staining. Periodically reapply sealer to maintain protection against the elements.
By following these finishing steps, you can enhance the appearance of your concrete patio and protect it from damage over time. With proper maintenance, your patio will withstand the elements and provide years of enjoyment for you and your family.
Cost Breakdown
Calculating the cost of making a concrete patio involves considering various factors, including materials, labor, and additional features. Here’s a breakdown of the typical costs associated with creating a concrete patio:
- Materials: The cost of materials will vary depending on the size of the patio and the quality of the materials chosen. On average, the cost of concrete, reinforcement (rebar or wire mesh), forms, gravel base, and sealer can range from $5 to $10 per square foot.
- Labor: If you decide to hire professionals for your patio project, labor costs must be factored in. The labor cost will depend on the complexity of the design, the size of the patio, and the geographic location. On average, labor costs can range from $5 to $10 per square foot.
- Additional Features: If you choose to include additional features like built-in seating, fire pits, or outdoor kitchens, the cost will increase. The cost of these additional features will vary widely depending on the materials used, the complexity of the design, and whether you hire professionals or do it yourself.
- Site Preparation: Site preparation costs may include the removal of existing structures, grading, and excavation. The cost will depend on the size and condition of the area, as well as any specific site requirements. Site preparation costs can range from $500 to $2,000 or more.
- Permit and Inspection Fees: Depending on your location, you may need to obtain permits for your patio project. Permit costs can vary significantly, so it’s important to check with your local municipality for specific requirements and associated fees.
It’s important to note that these cost estimates are general guidelines, and actual costs may vary depending on your specific project requirements and location. It’s always advisable to consult with professionals and obtain multiple quotes to get a more accurate estimation of costs for your concrete patio.
By considering all these factors and budgeting accordingly, you can ensure that your concrete patio project stays within your financial means while still achieving the desired results.
Hiring a Professional vs DIY
When it comes to creating a concrete patio, you have the option of hiring professionals or taking the DIY route. Let’s examine the pros and cons of each approach:
Hiring a Professional:
- Expertise and Experience: Professional contractors have the knowledge and experience to efficiently plan and execute your patio project. They are well-versed in site preparation, concrete placement, and finishing techniques, ensuring a high-quality result.
- Time and Convenience: Hiring professionals saves you time and effort. They handle all the labor-intensive tasks, including site preparation, concrete pouring, and finishing, allowing you to focus on other priorities.
- Access to Specialized Equipment: Professionals have access to specialized equipment and tools required for concrete work. This ensures a more precise and efficient construction process, resulting in a better overall outcome.
- Guarantees and Warranties: Reputable professionals often provide guarantees or warranties on their work, giving you peace of mind in case any issues arise after the project is completed.
DIY:
- Cost Savings: One of the most significant advantages of the DIY approach is cost savings. By taking on the project yourself, you can eliminate labor costs and potentially save a significant amount of money.
- Creative Control: DIY allows you to have full creative control over the design and execution of your patio. You can tailor the project to your specific vision, incorporating unique features and personal touches.
- Sense of Accomplishment: Completing a DIY project can be incredibly rewarding. Seeing the finished patio that you built with your own hands can offer a sense of accomplishment and pride.
- Learning Experience: Taking on a DIY project provides an opportunity for personal growth and learning. You can develop valuable skills and knowledge that can be applied to future projects.
When deciding between hiring a professional and opting for a DIY approach, consider factors such as your budget, time constraints, skill level, and the complexity of the project. If you have limited experience with concrete work or if the project involves intricate designs or features, it may be better to hire professionals to ensure a successful and high-quality outcome. On the other hand, if you have the necessary skills, time, and dedication to undertake the project yourself, DIY can be a cost-effective and fulfilling option.
Remember, regardless of the approach you choose, proper planning, research, and attention to detail are crucial for a successful concrete patio project.
Read more: How To Make Concrete Patio Furniture
Conclusion
Congratulations! You are now equipped with the knowledge and insights to make informed decisions about creating a concrete patio. Whether you choose to hire professionals or embark on a DIY adventure, creating a patio can transform your outdoor space into a beautiful and functional area.
Throughout this comprehensive guide, we have explored the factors that affect the cost of making a concrete patio, the materials and tools needed, and the step-by-step process of site preparation, pouring, leveling, finishing, and sealing. Understanding these aspects will allow you to plan and execute your patio project with confidence.
When considering the cost, keep in mind that the size, design complexity, materials, and labor all play significant roles. It’s essential to budget appropriately and obtain multiple quotes to ensure an accurate estimate for your specific project.
Remember, there are advantages to both hiring professionals and taking the DIY approach. Hiring professionals guarantees expertise, convenience, and access to specialized equipment, while DIY offers cost savings, creative control, and personal satisfaction. Consider your skill level, time availability, and project complexity to make the best decision for your situation.
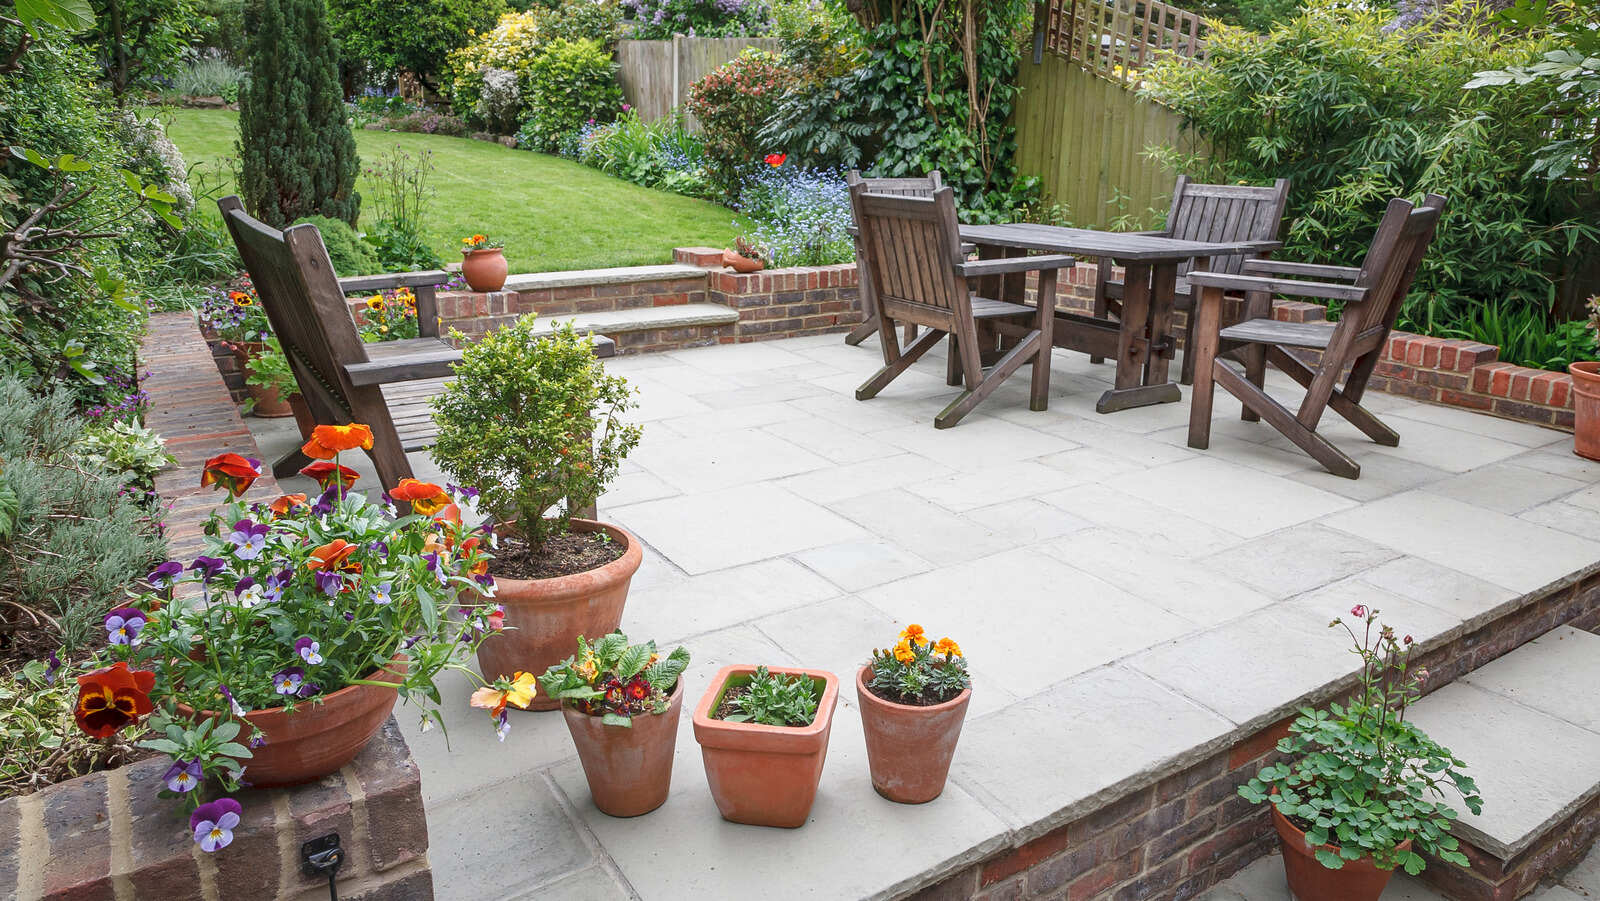
Whether you choose to create a simple, elegant patio or a more elaborate outdoor oasis, a well-designed concrete patio can enhance the beauty and functionality of your outdoor space. With proper maintenance, your new patio will provide years of enjoyment for you, your family, and your guests.
Now that you have the knowledge and confidence, it’s time to get started on your concrete patio project. Plan, gather your materials and tools, and let your creativity guide you as you transform your outdoor space into a lovely retreat. Enjoy the process and the rewarding outcome of your hard work!
Ready to take your outdoor space up a notch? If crafting your own backyard oasis sounds appealing, don't miss our guide on building an easy DIY patio. Perfect for those wanting hands-on involvement, this article offers practical steps for significant upgrades with minimal fuss. Meanwhile, for garden enthusiasts looking to jazz up their green spaces, our compilation of innovative garden fence ideas provides plenty of inspiration. From simple tweaks to major transformations, these suggestions will surely spruce up any garden.
Frequently Asked Questions about How Much To Make A Concrete Patio
Was this page helpful?
At Storables.com, we guarantee accurate and reliable information. Our content, validated by Expert Board Contributors, is crafted following stringent Editorial Policies. We're committed to providing you with well-researched, expert-backed insights for all your informational needs.


0 thoughts on “How Much To Make A Concrete Patio”