Home>Furniture>Outdoor Furniture>How To Pour A Concrete Patio

Outdoor Furniture
How To Pour A Concrete Patio
Modified: March 7, 2024
Learn how to pour a concrete patio for your outdoor furniture needs. Transform your backyard with this step-by-step guide for a durable and stylish outdoor living space.
(Many of the links in this article redirect to a specific reviewed product. Your purchase of these products through affiliate links helps to generate commission for Storables.com, at no extra cost. Learn more)
Introduction: Why Pouring a Concrete Patio is a Popular Choice
Pouring a concrete patio is a popular choice among homeowners who are looking to enhance their outdoor living spaces. Concrete patios offer a wide range of benefits, making them a practical and durable option. In this article, we will explore why pouring a concrete patio is a popular choice and delve into the various advantages that come with it.
One of the main reasons why homeowners choose to pour a concrete patio is its versatility. Concrete can be shaped and formed into various designs, allowing homeowners to create a patio that complements their outdoor aesthetic. Whether you prefer a modern, sleek patio or a more rustic and natural look, concrete can be customized to match your vision.
Another significant advantage of a concrete patio is its durability. Concrete is known for its strength and ability to withstand various weather conditions. Unlike other patio materials such as wood or pavers, concrete is resistant to cracking, fading, and rotting. This longevity ensures that your patio will stand the test of time, requiring minimal maintenance and fewer repairs in the long run.
Additionally, concrete patios offer exceptional functionality. They provide a stable and level surface that is ideal for outdoor entertaining and activities. Whether you plan to host barbecues, set up outdoor furniture, or create an outdoor living room, a concrete patio provides a solid foundation to support your needs. It is also a great space for children to play safely or for pets to roam freely.
One often overlooked benefit of a concrete patio is its cost-effectiveness. Compared to other patio materials, such as natural stone or brick, concrete is generally more budget-friendly. The material itself is less expensive, and the installation process is typically quicker and more straightforward. Concrete patios also require less maintenance and repair over time, reducing ongoing costs.
In terms of customization, concrete patios offer endless possibilities. They can be enhanced with various finishes and colors, allowing you to create a unique and personalized outdoor space. From exposed aggregate and stamped concrete patterns to acid stains and dyes, there are countless design choices to suit your style.
Finally, a concrete patio can increase the overall value of your property. An attractive and well-maintained patio contributes to the curb appeal of your home. If you ever decide to sell, a concrete patio can be a selling point that attracts potential buyers and sets your property apart from others on the market.
Overall, pouring a concrete patio is a popular choice due to its versatility, durability, functionality, cost-effectiveness, customization options, and property value enhancements. Whether you are looking to create a cozy outdoor retreat or an entertainment area for gatherings, a concrete patio provides the perfect foundation for your outdoor living dreams.
Next, we will dive into the planning and preparation process for pouring a concrete patio.
Key Takeaways:
- Pouring a concrete patio offers versatility, durability, and cost-effectiveness. It provides a solid foundation for outdoor activities and can enhance the value of your property, making it a popular choice for homeowners.
- Proper planning, site preparation, and post-pouring maintenance are crucial for a successful concrete patio project. Attention to detail, patience, and regular care will ensure a long-lasting and beautiful outdoor space.
Planning and Preparation
Before you start pouring a concrete patio, proper planning and preparation are essential for a successful project. This stage involves several crucial steps, including choosing the right location, measuring and marking the patio area, gathering the necessary tools and materials, and calculating the amount of concrete needed. Let’s explore each of these steps in detail.
Choosing the Right Location for Your Patio
The first step in planning your concrete patio is selecting the ideal location. Consider factors such as sun exposure, privacy, and accessibility. Choose an area that is spacious enough to accommodate your intended activities and furniture. It’s also crucial to check for any underground utility lines or potential obstructions like tree roots before finalizing the location.
Measuring and Marking the Patio Area
Once you have determined the location, measure and mark the dimensions of the patio area. Use a measuring tape or a laser distance measurer to ensure accurate measurements. Outline the perimeter of the patio using marking paint, stakes, and string. This will serve as a visual guide during the installation process.
Gathering the Necessary Tools and Materials
Before you start pouring concrete, gather all the necessary tools and materials. Here is a list of some common items you will need:
- Concrete mix
- Wheelbarrow or mixing tub
- Concrete mixer (if applicable)
- Shovel or concrete rake
- Concrete float or trowel
- Broom or texture tool
- Measuring tape
- String and stakes
- Marking paint or chalk
- Compactor or tamper (for site preparation)
- Edge forms or boundary markers
- Protective gear (gloves, safety glasses, etc.)
Make sure you have all the necessary tools and materials ready before starting the project to avoid any interruptions or delays.
Read more: How To Pour A Concrete Chimney Cap
Calculating the Amount of Concrete Needed
Properly calculating the amount of concrete needed is crucial to ensure you have enough material for your patio. Measure the length, width, and depth of the planned patio area and use these measurements to determine the volume of concrete required. You can use online concrete calculators or consult with a professional to help you with this calculation.
It is always a good idea to order slightly more concrete than you calculated to account for any unforeseen errors or adjustments that may arise during the pouring process.
By carefully planning and preparing for your concrete patio project, you can ensure a smooth and successful installation process. In the next section, we will discuss the necessary steps for site preparation.
Site Preparation
Site preparation is a critical step in pouring a concrete patio. Properly preparing the site ensures that you have a solid foundation for your patio and helps to prevent potential issues in the future. Below are the essential steps involved in site preparation:
Clearing the Patio Area of Any Obstacles or Debris
Before you can begin, it’s important to clear the patio area of any obstacles or debris. Remove any plants, rocks, or other objects that could hinder the pouring and finishing process. Take the time to thoroughly clean the area to create a clean, blank canvas for your patio.
Leveling the Ground and Ensuring Proper Drainage
Next, ensure that the ground is level and provides proper drainage for your patio. Use a shovel or a compacting machine to level the ground, filling in any low spots and removing any high areas. A level surface will prevent water from pooling and help to keep your patio in good condition over time.
Read more: How To Pour A Concrete Slab For A Shed
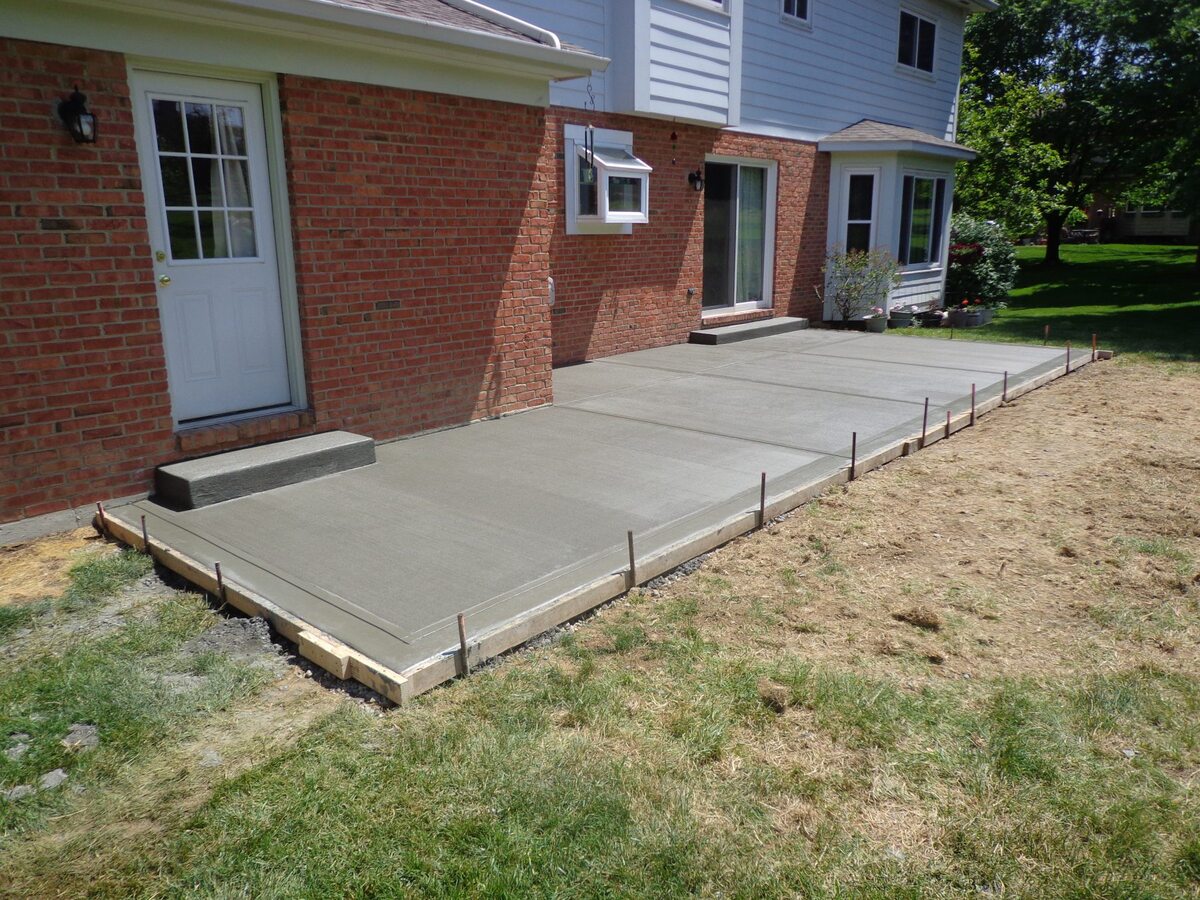
Installing Edge Forms or Boundary Markers
Once the ground is level, install edge forms or boundary markers to define the shape and size of your patio. Edge forms are typically made of wood or plastic and should be set securely in place along the perimeter of the patio area. These forms will help to contain the concrete mixture when it is poured, ensuring clean and crisp edges.
Adding a Layer of Compacted Gravel or Sand
Before pouring the concrete, it’s beneficial to add a layer of compacted gravel or sand to further stabilize the patio area. This layer helps to enhance the drainage and provides a more solid base for the concrete. Spread the gravel or sand evenly across the patio area and use a compactor or tamper to compact it firmly. This layer will also help to prevent any soil settlement or shifting.
By following these site preparation steps, you can ensure that your patio has a sturdy foundation and proper drainage. Taking the time to prepare the site properly will help to ensure the longevity of your concrete patio. In the next section, we will guide you through the process of mixing and pouring the concrete.
Mixing and Pouring the Concrete
Once the site preparation is complete, it’s time to mix and pour the concrete for your patio. This step requires careful attention to detail and proper technique to ensure a smooth and even surface. Let’s explore the steps involved in mixing and pouring the concrete:
Preparing the Concrete Mixture
Start by preparing the concrete mixture according to the manufacturer’s instructions. Depending on your project’s size, you can mix the concrete by hand using a wheelbarrow or use a concrete mixer for larger projects. Follow the recommended water-to-concrete ratio and mix until you achieve a consistency similar to that of oatmeal.
Read more: How To Pour Concrete Countertops In Place
Pouring the Concrete onto the Prepared Area
With the concrete mixture prepared, carefully pour it onto the prepared area within the boundary markers. Start at one end of the patio and work your way towards the other end, moving in consecutive rows. For larger patios, it may be necessary to have additional people assisting with the pouring process to ensure a consistent flow of concrete.
Distributing the Concrete Evenly
Once the concrete is poured onto the patio area, use a shovel or rake to distribute it evenly. Make sure the concrete reaches all corners and edges, filling the area within the boundary markers. Avoid pouring too much concrete in one section, as it can create uneven surfaces. Take your time to distribute the concrete evenly and maintain a consistent thickness throughout the patio area.
Using a Bull Float to Smooth the Surface
After the concrete is evenly distributed, it’s time to smooth the surface. Use a bull float, which is a large, flat tool, to level and smooth the concrete. Hold the bull float at an angle and move it back and forth across the surface, applying even pressure. This process helps to eliminate any lines, ridges, or bumps and creates a uniform and flat surface for your patio.
Continue working from one end of the patio to the other, overlapping each pass slightly to ensure complete coverage. Keep in mind that the bull float will not provide a final smooth finish but is primarily used to level the concrete. Finer finishing details will be addressed in the next section.
By following these steps for mixing and pouring the concrete, you can ensure a well-prepared and evenly distributed surface for your patio. In the next section, we will discuss the finishing and curing process for your newly poured concrete patio.
Finishing and Curing
Once you have poured the concrete for your patio and achieved a smooth surface, it’s time to move on to the finishing and curing stage. This step involves adding texture or desired finishes to the concrete, edging the patio for a clean look, and allowing the concrete to cure and harden properly. Let’s explore these steps in detail:
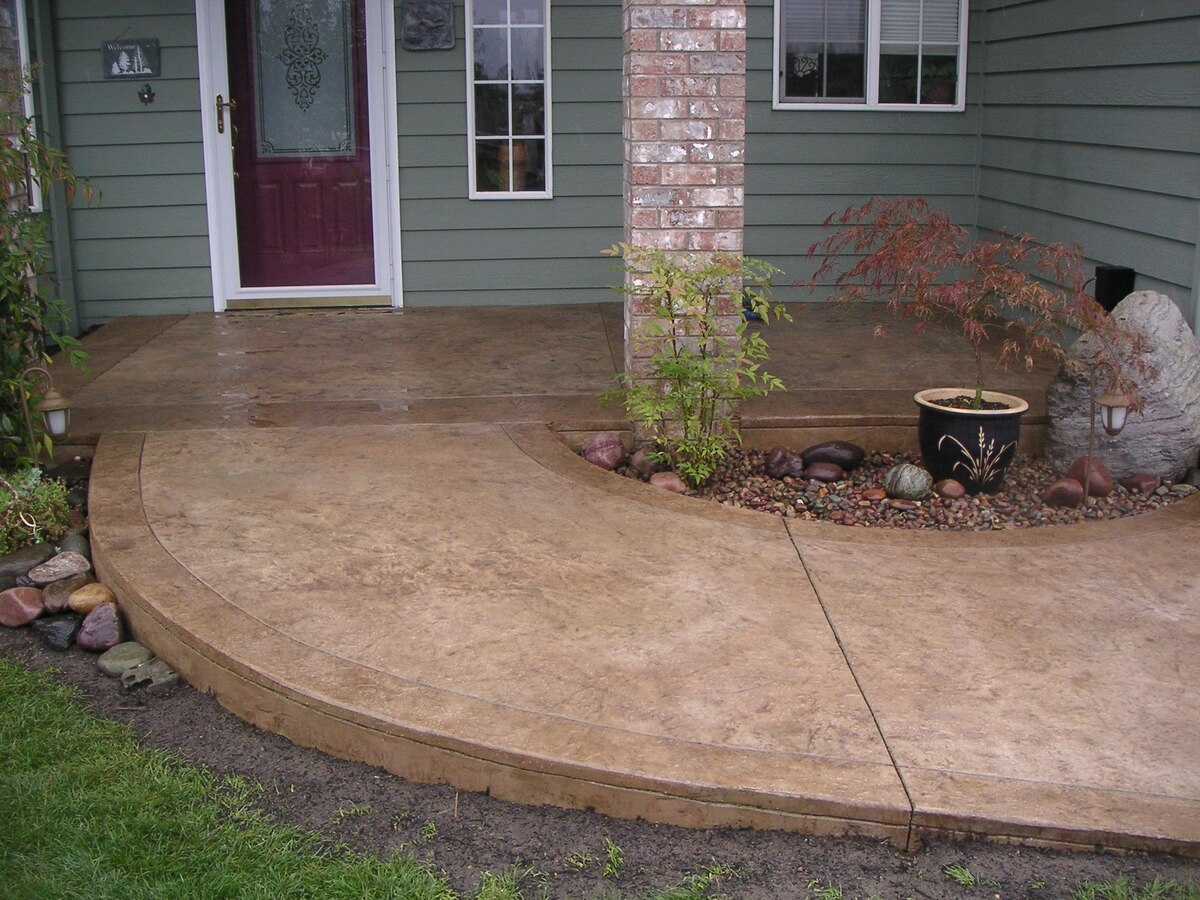
Applying a Broom Finish or Other Desired Texture
If you want to add texture to your concrete patio, one popular option is a broom finish. To achieve this, wait until the concrete has hardened slightly (usually a couple of hours after pouring). Then, use a broom to create texture by gently sweeping it across the surface. The broom strokes can be either straight or in a specific pattern, depending on your preference. This textured finish not only adds visual interest but also provides better traction, especially when the patio is wet.
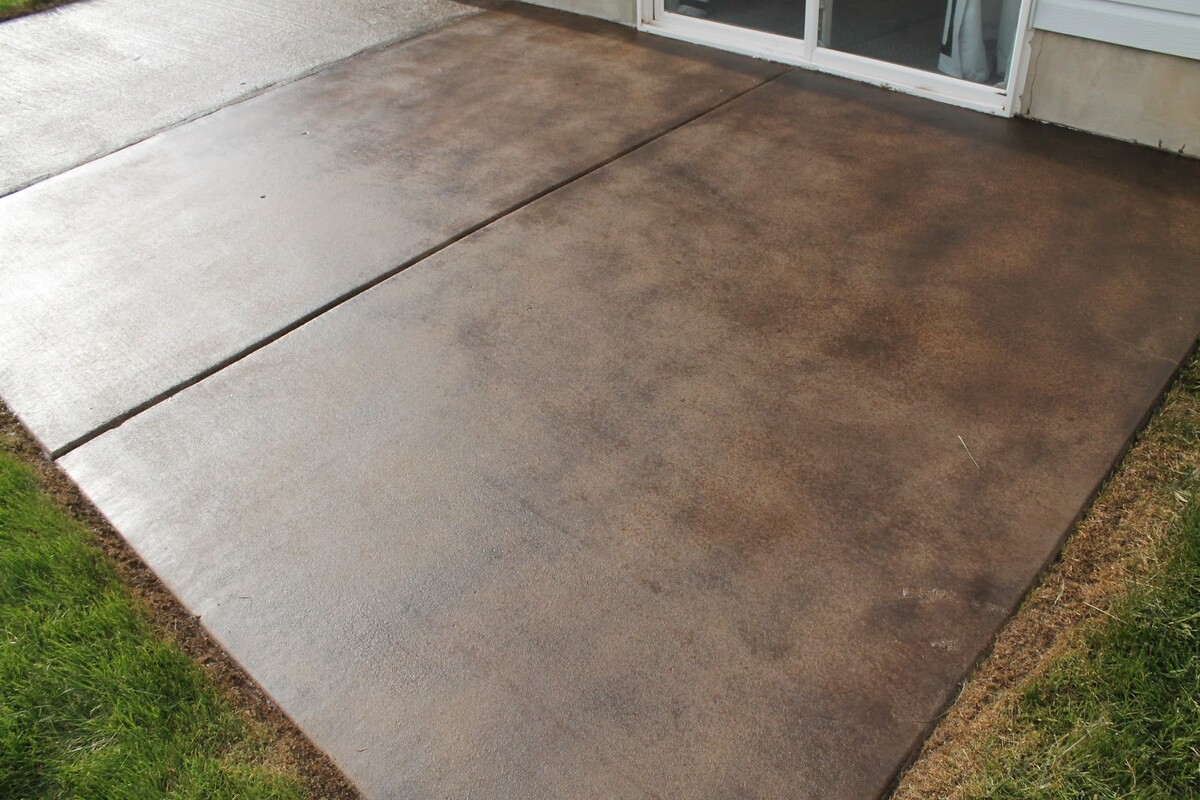
If you prefer a different texture or finish, such as stamping, staining, or exposed aggregate, these options can be applied at this stage as well. Follow the manufacturer’s instructions or consult with a professional to ensure proper application and achieve the desired result.
Edging the Patio for a Clean and Polished Look
To give your patio a clean and polished appearance, it’s important to edge the perimeter. Use an edging tool or a trowel to create a smooth, rounded edge along the boundaries of the patio. This process defines the edges and adds a decorative touch to the overall look of your patio.
Covering the Concrete to Protect it During the Curing Process
After the concrete has been finished, it’s crucial to protect it during the curing process. Cover the patio with plastic sheeting or a curing compound to prevent rapid moisture evaporation. This helps to retain the water necessary for proper hydration of the concrete and ensures that it cures evenly. Leave the covering in place for the duration recommended by the concrete manufacturer or as specified by a professional.
Allowing the Concrete to Cure and Harden for the Recommended Time
Concrete curing time varies depending on factors such as temperature, humidity, and the specific concrete mix used. It’s essential to allow the concrete to cure and harden for the recommended time before subjecting it to heavy use or placing any furniture or accessories on the patio. Typically, curing can take anywhere from a few days to a week or more. During this time, avoid excessive foot traffic or heavy objects on the patio to allow the concrete to achieve maximum strength and durability.
By following these finishing and curing steps, you can ensure that your concrete patio achieves the desired texture, has a clean and polished edge, and cures properly. Patience during the curing process will pay off in the long run, as it helps to ensure the longevity and strength of your newly poured concrete patio.
Next, we will discuss the post-pouring steps and additional considerations to keep in mind for your concrete patio project.
Read more: How To Smooth A Concrete Patio
Post-Pouring Steps
After the concrete has cured and hardened, there are several important post-pouring steps to take to ensure the longevity and maintenance of your newly poured concrete patio. These steps involve removing the edge forms or boundary markers, sealing the concrete, installing accessories or features, and establishing a regular maintenance routine. Let’s explore each of these steps:
Removing the Edge Forms or Boundary Markers
Once the concrete has fully cured, carefully remove the edge forms or boundary markers from your patio. Use a pry bar or hammer to loosen and detach them from the concrete surface. Take your time and be gentle to avoid damaging the edges of the patio. Dispose of the removed forms responsibly.
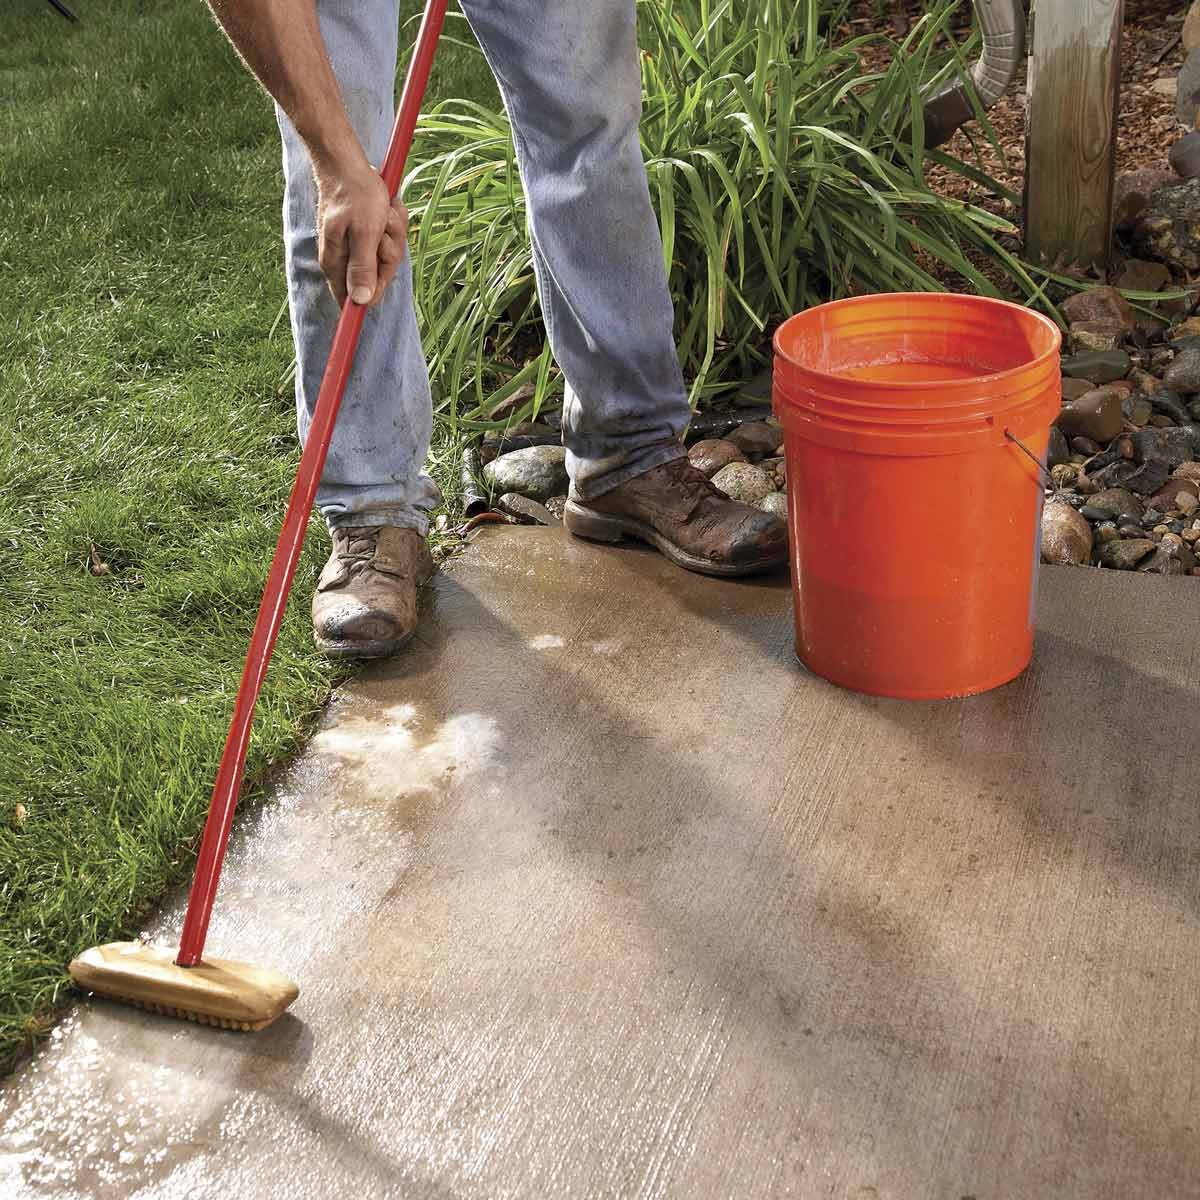
Sealing the Concrete for Added Protection and Longevity
After removing the edge forms, it is highly recommended to seal the concrete to provide added protection and enhance its longevity. Concrete sealer acts as a barrier against stains, moisture, and UV damage. It also helps to reduce dusting and makes the surface easier to clean. Choose a high-quality concrete sealer suitable for outdoor use, and follow the manufacturer’s instructions for application. Apply the sealer evenly across the entire surface of the patio, using a roller or sprayer. Allow the sealer to dry completely before using the patio.
Installing Any Desired Accessories or Features (e.g., Furniture, Outdoor Lighting)
With the concrete patio fully prepared and sealed, you can now proceed to enhance its functionality and aesthetics by installing accessories or features. This could include outdoor furniture, such as tables, chairs, or loungers, to create a comfortable seating area. Consider the layout and design of your patio when placing the furniture, ensuring there is enough space for movement and a cohesive arrangement.
You may also want to install outdoor lighting fixtures to illuminate the patio area during the evenings. Options range from string lights and lanterns to built-in fixtures or even solar-powered lights. Carefully position the lighting to provide adequate visibility and ambiance for your outdoor space.
Read more: How To Stamp A Concrete Patio
Maintaining and Caring for Your Newly Poured Concrete Patio
To keep your concrete patio in optimal condition, regular maintenance is essential. Here are a few tips to help you maintain and care for your patio:
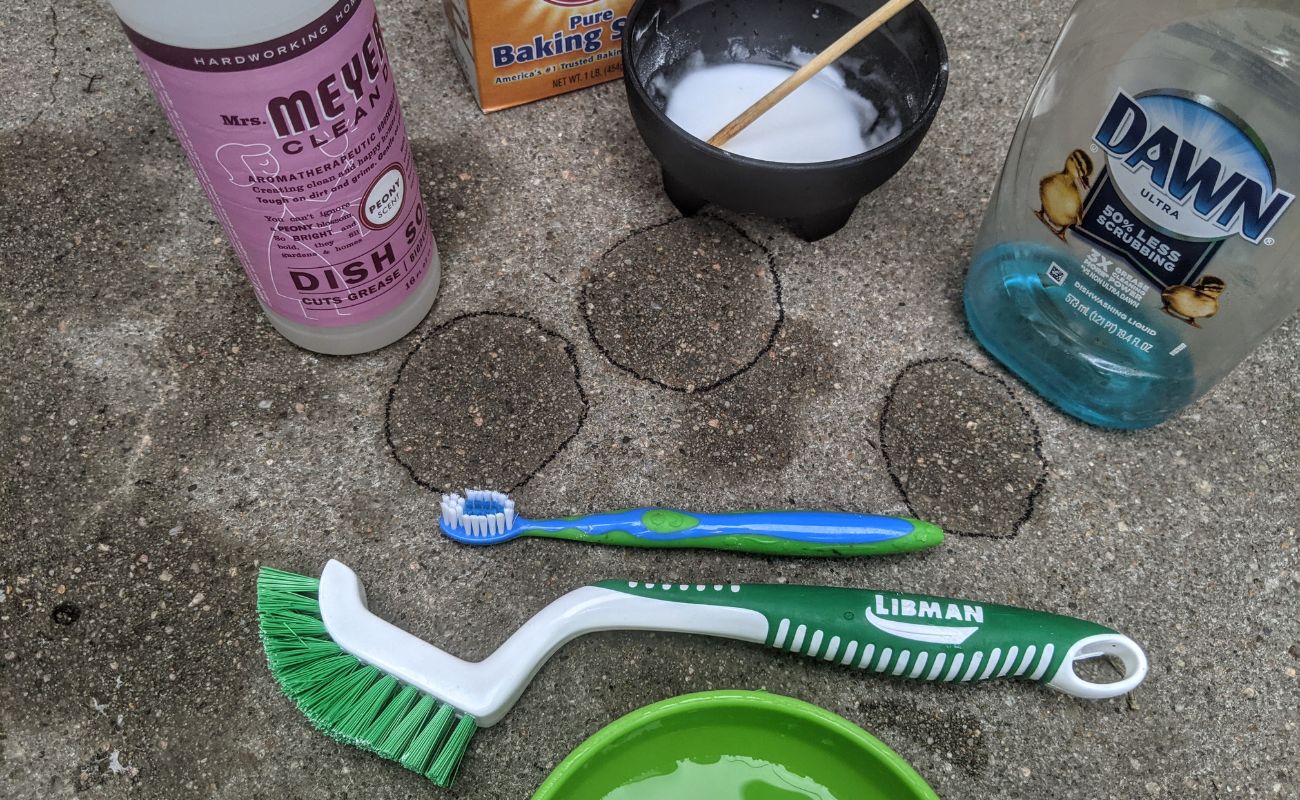
- Sweep or rinse the patio regularly to remove debris and dirt.
- Wash away stains or spills promptly using a mild detergent and water.
- Avoid using harsh chemicals or abrasive cleaners that can damage the surface.
- Consider reapplying a concrete sealer every few years to maintain its protective properties.
- During winter or periods of freezing temperatures, use caution when removing ice or snow to prevent damage to the patio surface.
By following these maintenance practices, you can keep your concrete patio looking its best and enjoy it for many years to come.
Now that you have completed the post-pouring steps and learned how to maintain your concrete patio, you can sit back, relax, and enjoy your beautiful outdoor space.
Remember to regularly inspect your patio for any signs of damage or wear and address any issues promptly to prevent further deterioration.
With proper care and maintenance, your newly poured concrete patio will continue to be a delightful and functional addition to your outdoor living area.
If you have any questions or need further assistance, don’t hesitate to consult with a professional or concrete specialist for guidance.
Happy patio enjoyment!
Conclusion
Pouring a concrete patio is a rewarding project that can enhance the functionality and aesthetics of your outdoor space. By following the proper steps and taking the necessary precautions, you can create a durable and beautiful patio that will stand the test of time. Let’s summarize the key steps involved in pouring a concrete patio and consider some final thoughts and considerations.
Summary of the Steps Involved in Pouring a Concrete Patio
To pour a concrete patio, you need to follow a systematic approach. Here is a summary of the main steps involved:
- Plan and prepare: Choose the right location, measure and mark the patio area, gather tools and materials, and calculate the amount of concrete needed.
- Site preparation: Clear the patio area, level the ground, install edge forms, and add a layer of compacted gravel or sand.
- Mixing and pouring: Prepare the concrete mixture, pour it onto the prepared area, distribute the concrete evenly, and use a bull float to smooth the surface.
- Finishing and curing: Apply a broom finish or desired texture, edge the patio, cover the concrete for curing, and allow it to cure for the recommended time.
- Post-pouring steps: Remove the edge forms, seal the concrete for added protection, install accessories or features, and establish a regular maintenance routine.
By following these steps carefully, you can achieve a successful and long-lasting concrete patio that meets your expectations.
Final Thoughts and Considerations
Before embarking on your concrete patio project, here are some final thoughts and considerations to keep in mind:
- Ensure proper planning and preparation to avoid costly mistakes and ensure a smooth installation process.
- Take weather conditions into account when pouring and curing the concrete, as extreme temperatures or high humidity can affect the outcome.
- Consider consulting with a professional or experienced contractor for guidance and assistance, especially if you are tackling a larger or more intricate patio design.
- Regular maintenance is crucial for preserving the appearance and functionality of your concrete patio. Clean it regularly, address any stains or damage promptly, and reseal it as needed.
- Invest in high-quality materials and tools to ensure the longevity and durability of your patio.
- Lastly, enjoy your new concrete patio! Create memories, entertain guests, and make the most of your outdoor living space.
Remember that pouring a concrete patio requires patience, attention to detail, and careful execution. With proper planning, preparation, and maintenance, your concrete patio will provide a stylish and functional space for you and your loved ones to enjoy for years to come.
If you have any further questions or require assistance, do not hesitate to seek professional advice or consult with a concrete specialist. Happy patio building!
Frequently Asked Questions about How To Pour A Concrete Patio
Was this page helpful?
At Storables.com, we guarantee accurate and reliable information. Our content, validated by Expert Board Contributors, is crafted following stringent Editorial Policies. We're committed to providing you with well-researched, expert-backed insights for all your informational needs.


0 thoughts on “How To Pour A Concrete Patio”