Home>Furniture>Outdoor Furniture>How To Stamp A Concrete Patio
Outdoor Furniture
How To Stamp A Concrete Patio
Modified: March 7, 2024
Learn how to stamp a concrete patio and enhance your outdoor space with beautiful outdoor furniture. Transform your patio into a stylish and inviting retreat today!
(Many of the links in this article redirect to a specific reviewed product. Your purchase of these products through affiliate links helps to generate commission for Storables.com, at no extra cost. Learn more)
Introduction
Creating a beautiful and functional outdoor space begins with a well-designed patio. A stamped concrete patio is an excellent choice for homeowners looking to enhance the aesthetic appeal of their outdoor area. This versatile and durable flooring option allows you to mimic the look of natural stone, brick, or even wood, providing endless design possibilities.
In this article, we will guide you through the process of stamping a concrete patio, from the initial preparation to the final finishing touches. We will discuss the materials and tools you will need, as well as provide step-by-step instructions to ensure a successful project.
Stamped concrete patios not only add visual appeal to your outdoor space but also offer durability and longevity. Unlike traditional paving options, such as natural stone or brick, stamped concrete is more affordable and requires less maintenance.
Whether you are planning to revamp your existing patio or embark on a new project, creating a beautiful stamped concrete surface can transform your outdoor area into a true extension of your home.
So, let’s get started and learn how to stamp a concrete patio!
Key Takeaways:
- Stamp a concrete patio to create a beautiful outdoor space. Follow steps like preparing the area, mixing and pouring concrete, and adding color and finish options for a stunning and personalized patio.
- Maintain your stamped concrete patio by regular cleaning, addressing stains promptly, and resealing as needed. Enjoy your outdoor oasis and make lasting memories with family and friends.
Read more: How Much For A Stamped Concrete Patio
Materials and Tools Needed
Before you begin the process of stamping a concrete patio, it is essential to gather all the necessary materials and tools. Here is a list of the items you will need:
1. Concrete Mix: Choose a high-quality concrete mix designed specifically for stamping applications. Make sure to calculate the amount of concrete needed based on the size of your patio.
2. Stamping Mats: Stamping mats are the key tool for creating the desired texture and pattern on your patio surface. There are various designs available, such as stone, brick, and wood patterns.
3. Release Agent: A release agent is applied to the surface of the concrete to prevent the stamping mats from sticking. It also adds color and enhances the depth of the pattern. Choose a release agent that complements your desired aesthetic.
4. Concrete Coloring: If you want to add color to your stamped concrete patio, choose a high-quality concrete coloring agent. There are different options available, including powdered pigments and liquid dyes.
5. Concrete Sealer: Once the patio is stamped and dried, applying a concrete sealer will protect it from stains, moisture, and UV damage. Choose a sealer specifically designed for outdoor use.
6. Mixing Equipment: Depending on the size of your project, you may need a mixing machine, such as a cement mixer, or you can mix the concrete manually using a mixing trough, shovel, and wheelbarrow.
7. Float and Trowel: A float is used to level and smooth the concrete surface before stamping. A trowel is then used to apply the release agent and work it into the concrete to ensure full coverage.
8. Edging Tools: Edging tools, such as a hand tamper or edging trowel, will help create clean and defined edges for your patio.
9. Safety Gear: Ensure your safety by wearing protective gear, including gloves, safety glasses, a dust mask, and knee pads. This will protect you from any potential hazards during the construction process.
10. Cleaning Supplies: Finally, gather cleaning supplies, such as a broom, hose, and pressure washer, to clean the patio surface before and after stamping.
By having all the necessary materials and tools ready, you can streamline the process and ensure a smooth execution of your stamped concrete patio project. Let’s move on to the next step: preparing the patio area.
Preparing the Patio Area
Before you can begin stamping your concrete patio, it is important to properly prepare the area. This will ensure a solid foundation and prevent any future issues with the patio. Follow these steps to prepare the patio area:
1. Clear the Area: Start by removing any furniture, plants, or debris from the patio area. This will give you a clean and clear space to work with.
2. Mark the Boundaries: Use stakes and string to mark the boundaries of the patio. This will help you visualize the final layout and ensure accurate measurements.
3. Excavate the Area: Use a shovel or excavator to dig up the top layer of soil within the marked boundaries. Dig down to a depth of around 6 to 8 inches, or as specified by local building codes and climate conditions.
4. Create a Slope: To ensure proper drainage, create a slight slope by angling the ground away from your home or any structures. Aim for a slope of around 1/8 inch per foot.
5. Compact the Soil: Use a plate compactor or hand tamper to compact the soil evenly throughout the excavated area. This will provide a stable base for the concrete.
6. Install Edging: Place plastic or metal edging along the perimeter of the patio area to create a border. This will help contain the concrete and provide clean edges for the finished patio.
7. Lay a Gravel Base: Pour a layer of compacted gravel over the excavated area, around 4 to 6 inches thick. This will further enhance drainage and provide additional stability for the concrete.
8. Level the Base: Use a rake or screed board to level the gravel base, ensuring a smooth and even surface.
9. Install Reinforcement: Depending on the size of your patio, you may want to include reinforcement, such as rebar or wire mesh, to increase the strength and durability of the concrete.
10. Compact Again: Once all the preparatory steps are complete, go over the entire patio area with a plate compactor or hand tamper once more to ensure the soil, gravel, and reinforcement materials are firmly in place.
With the patio area properly prepared, you are now ready to move on to the next step: mixing and pouring the concrete.
Mixing and Pouring the Concrete
Once you have prepared the patio area, it’s time to mix and pour the concrete for your stamped patio. Follow these steps to ensure a successful and smooth process:
1. Prepare the Concrete Mix: Follow the instructions on the concrete mix packaging to prepare the right amount of concrete for your project. Use a mixing machine or a mixing trough and shovel to create a smooth and uniform mixture.
2. Start Pouring: Begin pouring the concrete onto the prepared patio area in small sections. Work from one end to the other, making sure to distribute the concrete evenly.
3. Spread the Concrete: Use a shovel or a concrete rake to spread the concrete mix evenly over the entire patio area. Aim for a thickness of around 4 to 6 inches, or as specified by the concrete mix manufacturer.
4. Use a Bull Float: After spreading the concrete, use a bull float to smooth the surface. This tool helps eliminate any high spots and levels the concrete, providing a solid foundation for the stamping process.
5. Consolidate the Concrete: To ensure a dense and sturdy concrete surface, use a concrete vibrator or a wooden float to consolidate the mix. This helps remove any air bubbles and creates a more solid structure.
6. Continue Pouring and Leveling: Repeat the pouring, spreading, and leveling process until the entire patio area is covered with concrete. Make sure to blend each new section smoothly with the previous one to avoid visible seams.
7. Create Expansion Joints: To prevent cracking, create expansion joints by inserting plastic or wooden strips into the wet concrete. These joints allow the concrete to expand and contract without damaging the patio surface.
8. Smooth the Edges: Use an edging tool or a trowel to smooth and round the edges of the concrete. This not only adds a finished look to the patio but also helps prevent chipping and cracking.
9. Let the Concrete Cure: Allow the concrete to cure for the recommended time, typically around 24 to 48 hours. During this period, make sure to protect the surface from foot traffic and adverse weather conditions.
10. Remove any Surface Imperfections: Before proceeding to the stamping process, inspect the concrete surface for any imperfections. If necessary, use a grinder or a rubbing stone to smooth out any rough spots or minor flaws.
With the concrete mixed, poured, and cured, it’s time to move on to the next step: leveling and smoothing the surface.
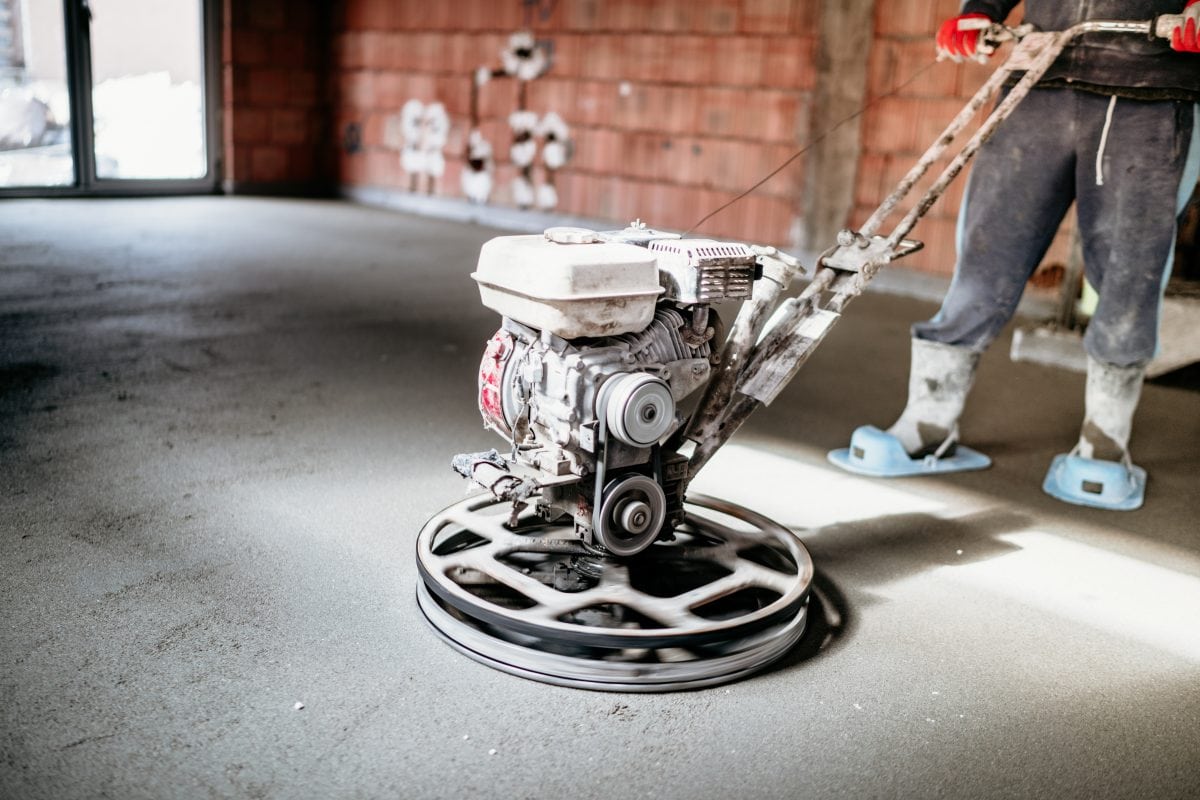
Leveling and Smoothing the Surface
After pouring and curing the concrete for your stamped patio, the next step is to level and smooth the surface. This stage is crucial for ensuring an even and flawless base for the stamping process. Follow these steps to level and smooth the surface:
1. Prepare the Surface: Begin by cleaning the surface of any debris, dirt, or loose materials. Use a broom or a leaf blower to sweep away any unwanted particles.
2. Examine the Surface: Inspect the concrete surface for any High spots or low spots. High spots can be identified by visual irregularities or by tapping the surface and listening for a different sound. Low spots can be filled with a thin layer of concrete mix.
3. Use a Concrete Grinder: For minor irregularities or high spots, a concrete grinder can be used to level the surface. Grind down the high spots until they are flush with the rest of the concrete. Wear protective gear such as goggles, a dust mask, and earplugs when using a grinder.
4. Smooth the Surface with a Trowel: Use a steel finishing trowel to smooth out any remaining rough spots and create a uniform surface. Use circular motions and apply light pressure to achieve a smooth finish.
5. Pay Attention to Edges and Corners: Be sure to carefully smooth out any edges and corners of the patio. Use the trowel to create clean lines and crisp edges for a professional look.
6. Check for Levelness: Use a level to ensure that the patio surface is level. Place the level in different areas and directions to check for any slopes or unevenness.
7. Make Adjustments if Needed: If any areas are not level, use additional concrete mix or a leveling compound to adjust and correct the slope. Smooth out the surface again to blend any adjustments.
8. Allow the Surface to Dry: After leveling and smoothing the surface, allow it to dry fully before moving on to the next step. Follow the recommended drying time provided by the concrete manufacturer.
By taking the time to level and smooth the surface of your patio, you will ensure a uniform and flawless base for the stamping process. This will greatly enhance the overall appearance and durability of your stamped concrete patio.
Now that the surface is leveled and smoothed, it’s time to move on to the exciting part: stamping the concrete!
Before stamping a concrete patio, make sure the surface is clean and level. Use a release agent to prevent the stamp from sticking, and press the stamp evenly to create a consistent pattern.
Read more: How To Clean A Stamped Concrete Patio
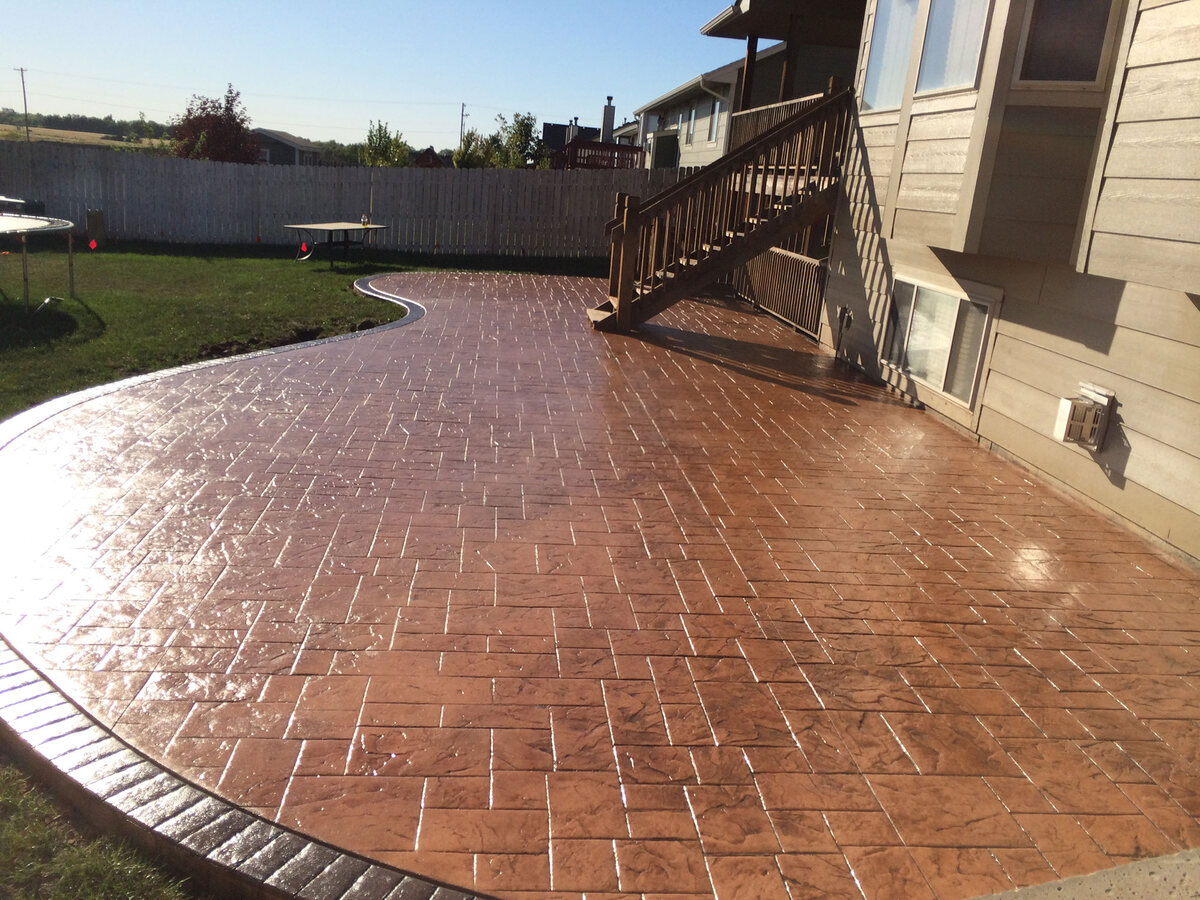
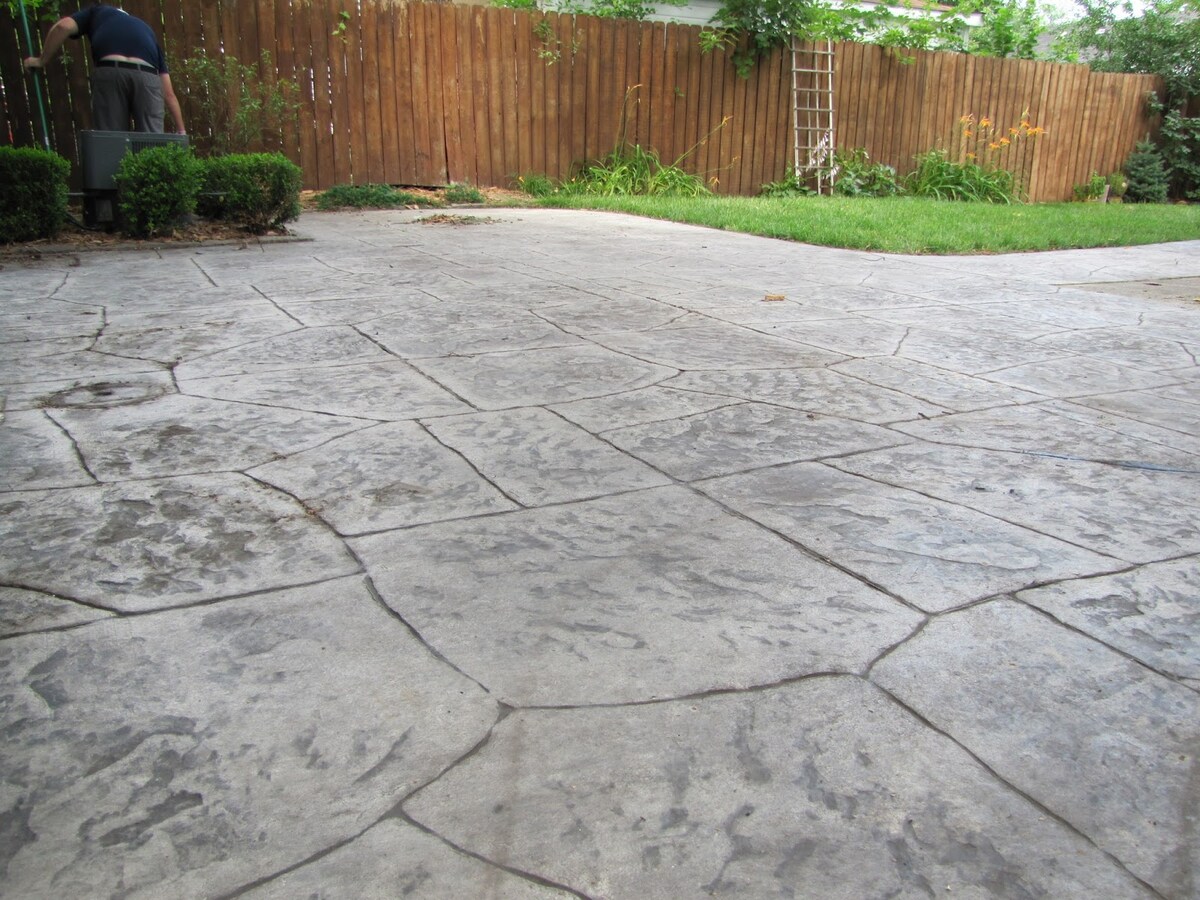
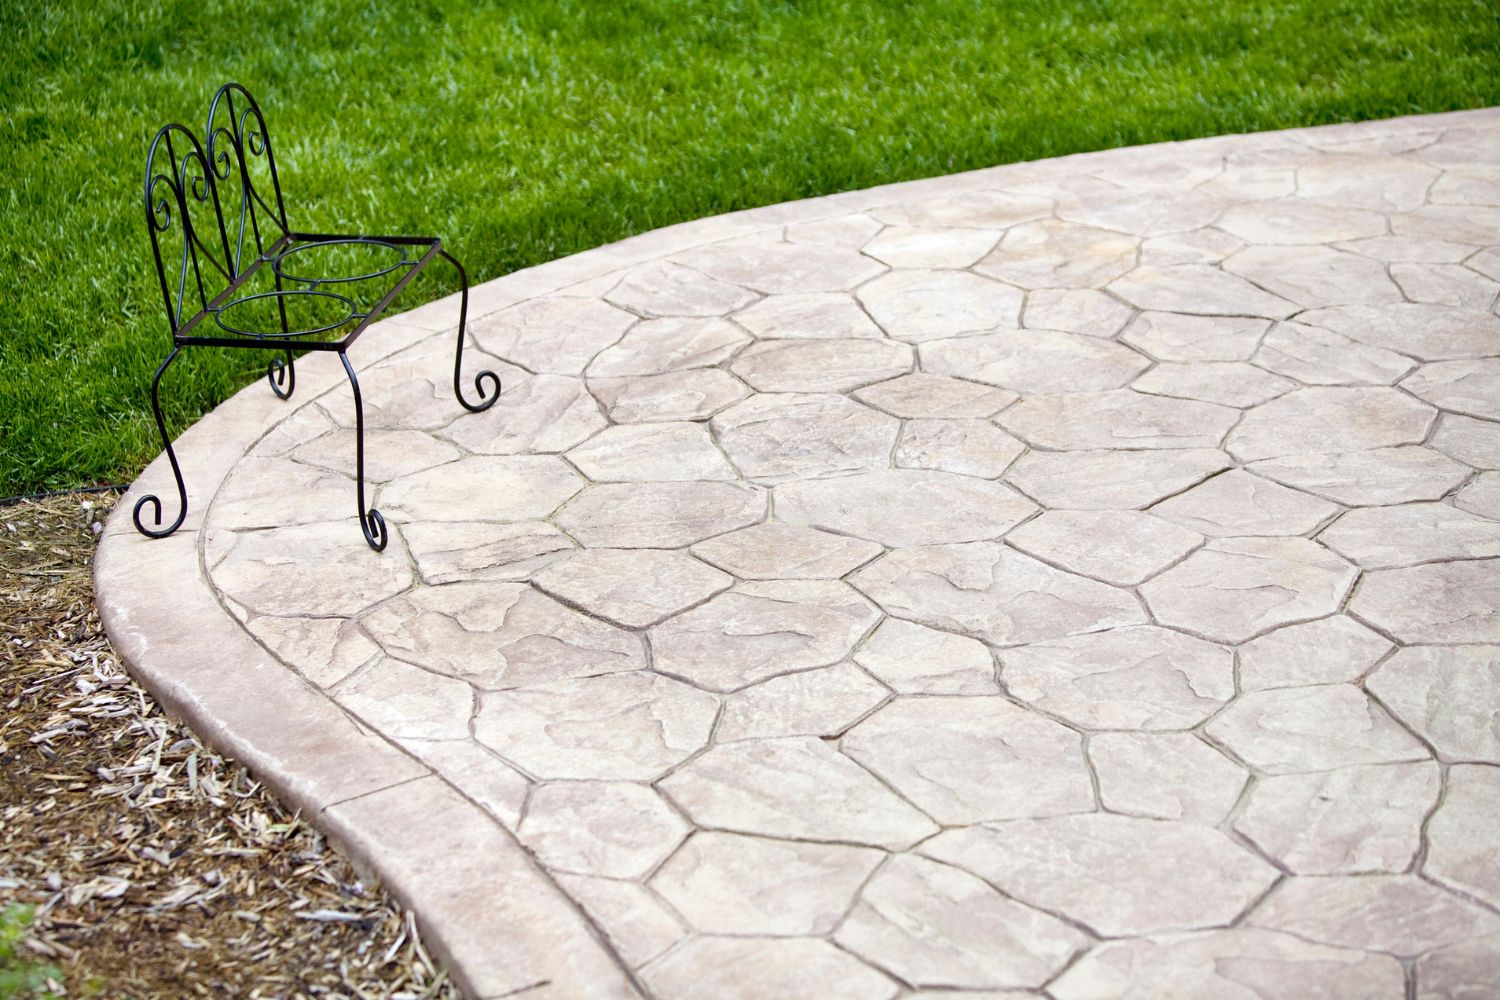
Stamping the Concrete
Stamping the concrete is where you can truly unleash your creativity and bring your desired design to life. This step is what gives your patio its unique, textured appearance. Here are the steps to successfully stamp your concrete patio:
1. Prepare the Stamping Mats: Before you begin, ensure that the stamping mats are clean and free from any debris. Apply a thin layer of release agent to the mats to prevent them from sticking to the concrete.
2. Start in a Corner: Begin stamping in a corner of the patio, working your way outward. This will prevent you from accidentally stepping on freshly stamped areas as you move around.
3. Press the Stamping Mats: Place the stamping mat firmly onto the concrete surface, applying even pressure. Step onto the mat or use a handheld tamper to ensure that the entire surface makes contact with the concrete.
4. Remove the Stamping Mat: Gently lift the stamping mat off the concrete surface, taking care not to disturb the pattern. If the mat sticks to the concrete, use a release agent or a lift-off tool to carefully detach it.
5. Continue Stamping: Move to the adjacent section of the patio and repeat the process, overlapping the previous stamped area slightly to create a seamless pattern. Stamps can be rotated, shifted, or flipped to add variation and realism to the design.
6. Use Hand Tools for Detailing: For areas near edges or corners where the stamping mat cannot reach, use hand tools, such as a chisel or a trowel, to create a consistent pattern and texture.
7. Clean the Stamping Mats: Regularly clean the stamping mats with water and a mild detergent to prevent any built-up concrete from affecting the clarity and details of the pattern.
8. Touch Up and Repair: If any areas of the stamped concrete need touching up or repairing, use a trowel or a small stamping mat to blend the new impressions with the existing pattern.
9. Allow the Stamped Concrete to Dry: Once you have completed stamping the entire patio surface, allow the concrete to dry for the recommended time. This typically ranges from 24 to 48 hours, depending on the weather conditions.
10. Inspect and Clean the Patio: After the stamped concrete has dried, inspect the surface for any imperfections or debris. Clean the patio with a broom, hose, or pressure washer to remove any residual release agent or unwanted materials.
By following these steps, you can achieve a beautifully stamped concrete patio that perfectly resembles the texture and pattern you desire. Now, let’s explore the next step: adding color and finish options to enhance the overall look of your patio.
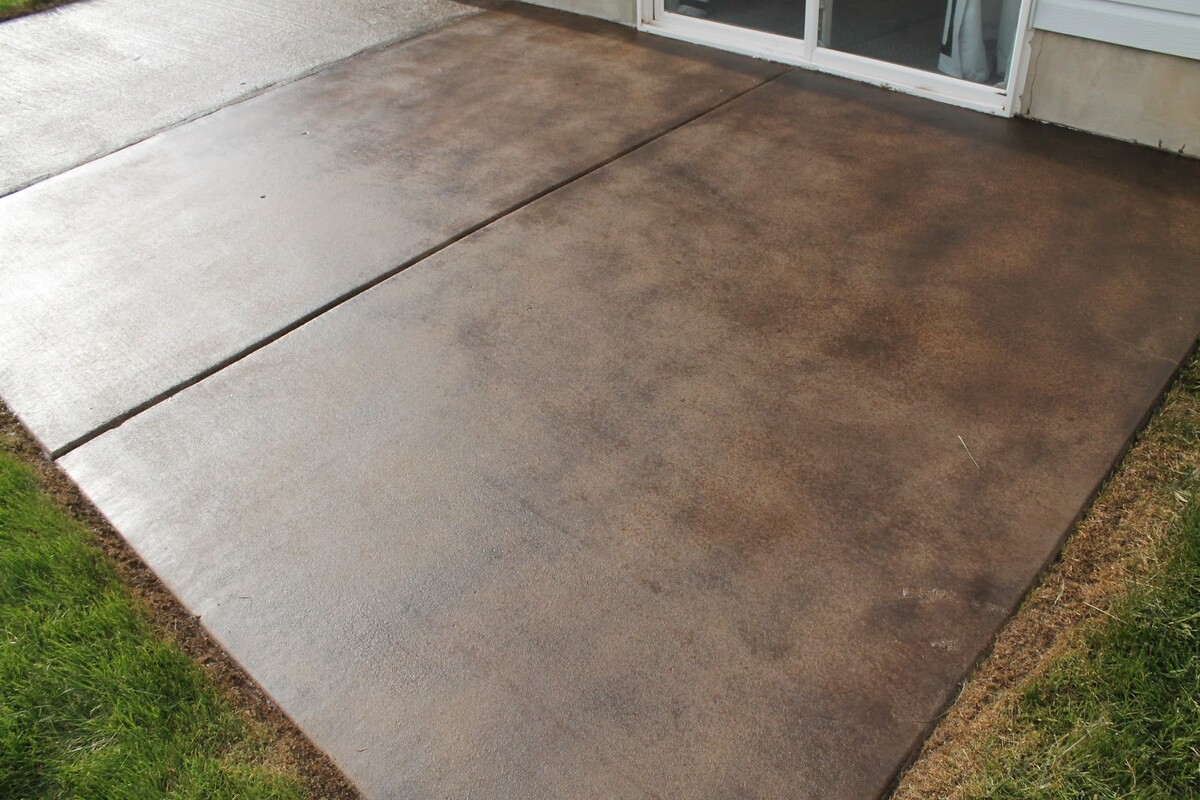
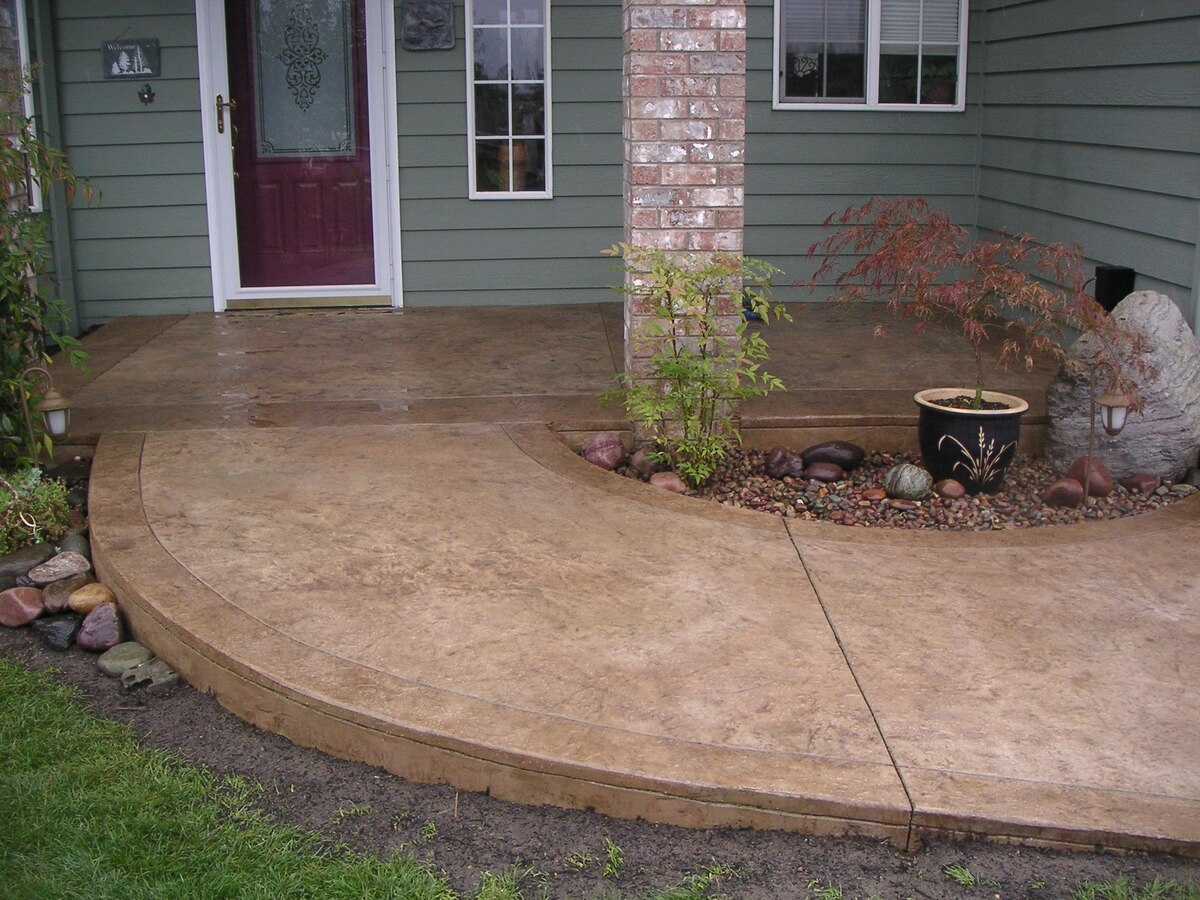
Adding Color and Finish Options
Adding color and finish options to your stamped concrete patio can elevate its appearance and make it even more visually appealing. Here are some popular techniques to consider:
1. Integral Color: Integral color involves adding color directly to the concrete mix before pouring it onto the patio. This allows for a consistent and lasting color throughout the entire patio surface.
2. Stains and Dyes: Stains and dyes can be applied to the cured concrete surface to enhance its color and add depth. Acid-based stains create a mottled and variegated effect, while water-based dyes offer a wider range of color options.
3. Antique Release: An antique release agent is applied to the surface of the stamped concrete during the stamping process. This release agent adds color contrast and highlights the texture of the stamped pattern.
4. Highlighting and Accenting: You can use different color pigments or stains to highlight specific areas or elements of your stamped patio, such as borders, focal points, or intricate patterns.
5. Color Hardener: Color hardener is a dry shake material that is applied to the surface of the wet concrete just before stamping. It adds both color and strength to the patio, creating a vibrant and durable finish.
6. Texture Overlay: A texture overlay is a thin layer of concrete that is applied to an existing patio to add texture and a fresh new look. It can be stamped to mimic various patterns and textures.
7. Sealers and Finishes: Applying a sealer to the stamped concrete patio not only protects it from stains and UV damage but also enhances the color and provides a glossy or matte finish. Choose a sealer specifically designed for exterior use.
8. Exposed Aggregate: Exposed aggregate finish involves removing the top layer of concrete to reveal the decorative aggregate beneath. This creates a unique and textured surface with a natural stone-like appearance.
9. Concrete Stamps and Texturing Tools: Consider using different stamps and texturing tools to create a variety of patterns and textures on your patio. This allows you to customize the look and feel of your outdoor space.
10. Test and Experiment: Before applying any color or finish option to your entire patio, it is advisable to test the products on a small, inconspicuous area. This will allow you to assess the desired effect and make any necessary adjustments before proceeding.
By utilizing these color and finish options, you can transform your stamped concrete patio into a stunning and personalized outdoor retreat. Next, let’s learn about the importance of curing and sealing the patio to ensure its longevity and durability.
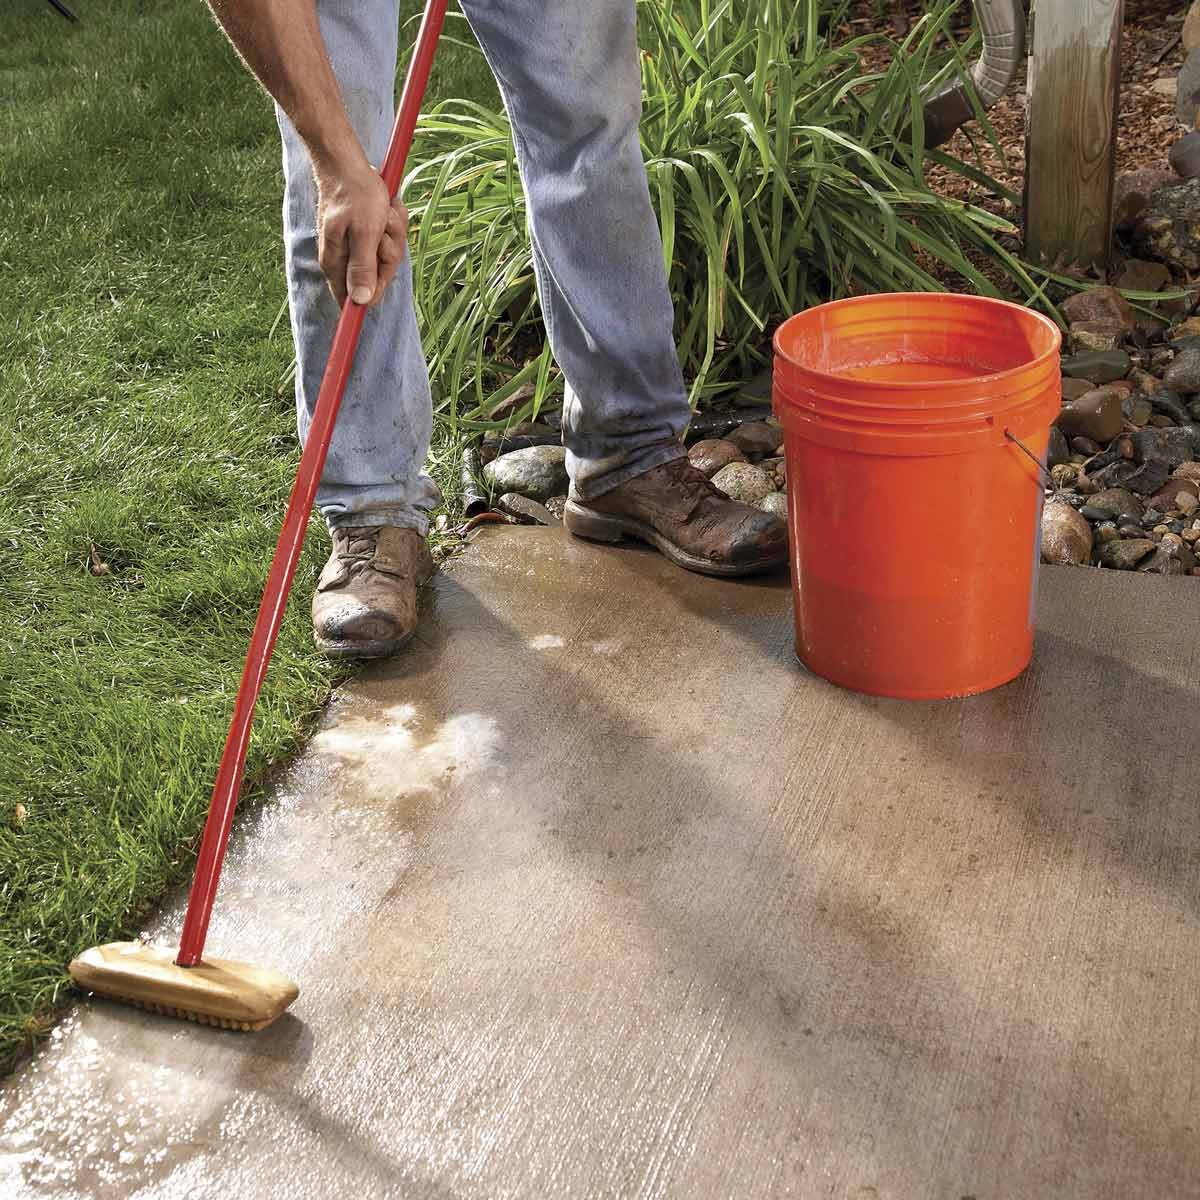
Curing and Sealing the Patio
Curing and sealing your stamped concrete patio is a crucial step to ensure its longevity, durability, and overall appearance. Properly curing and sealing the patio will protect it from stains, moisture, and UV damage, while also enhancing its color and adding a polished finish. Follow these steps to effectively cure and seal your patio:
1. Allow Sufficient Curing Time: After the stamped concrete has been installed and any color or finish options have been applied, it is important to allow the patio to cure for a minimum of 7 to 14 days. This allows the concrete to fully set and gain strength.
2. Keep the Patio Moist: During the curing process, it is essential to keep the concrete moist to prevent cracking. This can be achieved by lightly misting the surface with water and covering it with a plastic sheet or curing blanket.
3. Avoid Heavy Foot Traffic: While the concrete is curing, avoid walking on the patio or placing heavy objects on it. This can disrupt the curing process and may cause damage to the surface.
4. Choose the Right Sealer: Select a high-quality concrete sealer specifically designed for exterior applications. Consider factors such as the desired sheen (glossy or matte), the level of protection, and the environmental conditions in your area.
5. Clean the Patio Thoroughly: Before applying the sealer, ensure that the patio is clean and free from any dirt, debris, or stains. Use a broom, pressure washer, or mild detergent to remove any unwanted materials.
6. Apply the Sealer: Follow the manufacturer’s instructions for applying the sealer. Use a sprayer, roller, or brush to evenly distribute the sealer over the entire surface of the patio. Be sure to work in small sections for better control and coverage.
7. Allow Sufficient Drying Time: After applying the sealer, allow it to dry thoroughly. This typically takes around 24 to 48 hours, depending on the weather conditions. Keep foot traffic and water exposure to a minimum during this time.
8. Consider Additional Coats: Depending on the desired level of protection and sheen, you may choose to apply additional coats of sealer. Follow the manufacturer’s recommendations for multiple coats and allow adequate drying time between each application.
9. Regularly Maintain the Sealed Patio: To extend the lifespan of your stamped concrete patio, regularly maintain the sealed surface. Sweep away debris, clean up spills promptly, and periodically reapply sealer as needed.
10. Seek Professional Help if Necessary: If you are unsure about the process of curing and sealing or if you are dealing with a larger or more complex patio, it is advisable to seek professional assistance. Professional contractors have the expertise and knowledge to ensure a successful and long-lasting finish.
Properly curing and sealing your stamped concrete patio will help maintain its beauty and protect it against damage. By following these steps, you can enjoy a resilient and aesthetically pleasing outdoor space for years to come.
Now that your patio is cured and sealed, let’s explore some important maintenance and repair tips to keep your stamped concrete patio in top condition.
Maintaining and Repairing Stamped Concrete Patios
Maintaining and repairing your stamped concrete patio is essential for its long-term beauty and durability. By following these maintenance and repair tips, you can keep your patio looking pristine for years to come:
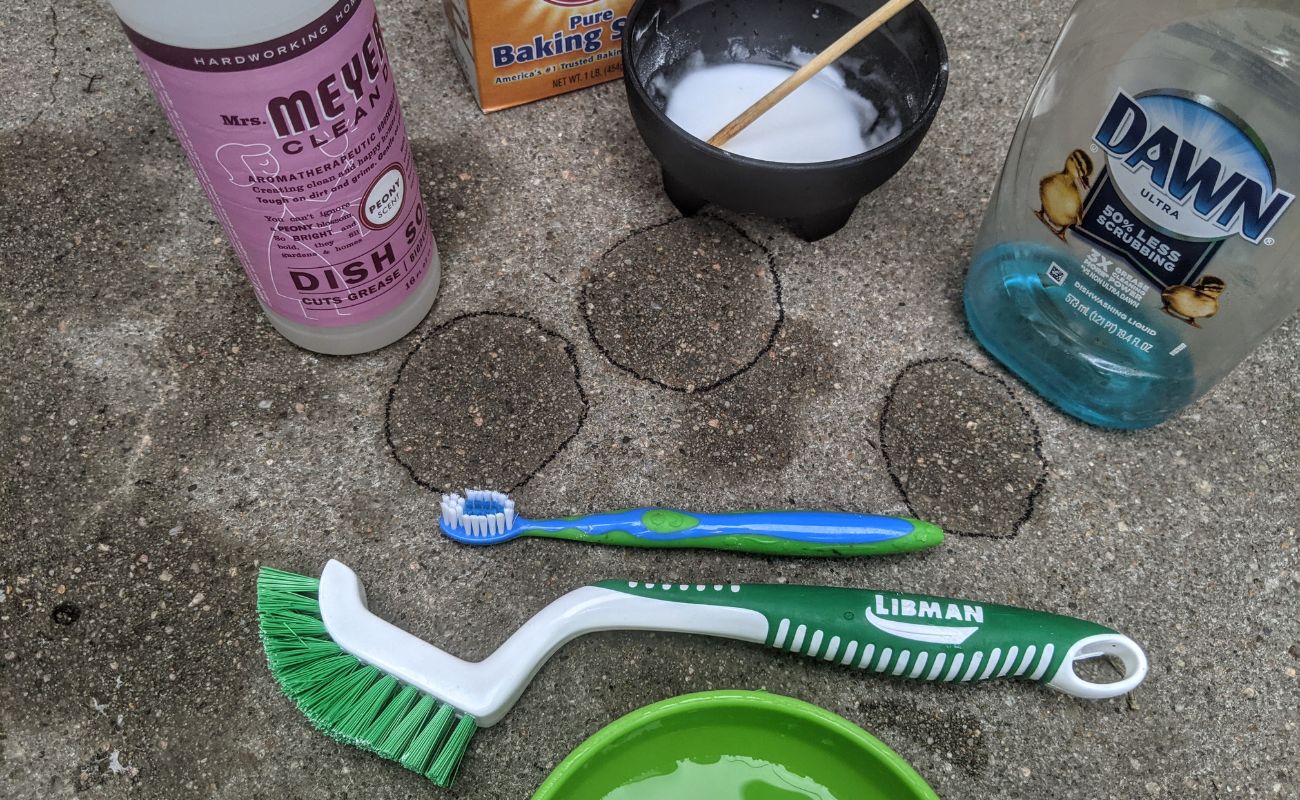
1. Regular Cleaning: Sweep your patio regularly to remove dirt, leaves, and debris. You can also use a hose or pressure washer to wash away stubborn stains or dirt buildup. Avoid using harsh chemicals or abrasive cleaners that can damage the sealer or color of the stamped concrete.
2. Avoid Sharp Objects: To prevent surface damage, avoid dragging sharp or heavy objects across the patio. Use furniture pads or coasters under heavy furniture to protect the concrete surface from scratches and dents.
3. Address Stains Promptly: If you notice any stains on your stamped concrete patio, clean them up as soon as possible. Use a mild detergent and scrub gently with a soft-bristle brush. For stubborn stains, consider using a concrete stain remover or contacting a professional for assistance.
4. Reseal as Needed: Over time, the sealer on your stamped concrete patio may wear off due to foot traffic and weather exposure. It is important to periodically reapply a fresh coat of sealer to maintain the protection and appearance of the patio. Follow the manufacturer’s instructions for the recommended resealing frequency.
5. Address Cracks or Damage: If you notice any cracks or damage on your stamped concrete patio, it is crucial to address them promptly. Small cracks can be filled with a concrete patching compound, while larger cracks may require professional repair. Consult a concrete specialist to assess the extent of the damage and recommend the appropriate repair method.
6. Avoid Using Deicing Chemicals: During winter months, avoid using deicing chemicals on your stamped concrete patio. These chemicals can damage the surface by causing discoloration and deterioration. Instead, use sand or a non-corrosive ice melt product to provide traction on icy surfaces.
7. Protect from Extreme Heat: As with any outdoor surface, stamped concrete can become hot under direct sunlight. To protect your patio and prevent discoloration, consider using shaded areas, outdoor rugs, or umbrellas to provide shade during the hottest parts of the day.
8. Maintain Proper Drainage: Ensure that the drainage system around your patio is functioning properly. Poor drainage can lead to water pooling on the surface, which can cause damage and compromise the integrity of the stamped concrete. Clear any clogged drainage areas or install additional drainage solutions as needed.
9. Consult with Professionals: If you encounter extensive damage or are unsure how to properly maintain or repair your stamped concrete patio, it is always beneficial to consult with professionals. They can provide expert advice and offer solutions tailored to your specific situation.
10. Enjoy Your Outdoor Space: Lastly, remember to enjoy your stamped concrete patio! It is a beautiful addition to your outdoor area that provides a versatile and durable space for relaxation, entertainment, and creating lasting memories.
By following these maintenance and repair tips, you can ensure that your stamped concrete patio remains in excellent condition and maintains its visual appeal for years to come.
As the final step, let’s conclude our guide on stamping a concrete patio.
Read more: How To Stamp And Stain A Concrete Patio
Conclusion
Creating a stunning outdoor space begins with a well-designed and meticulously constructed patio. A stamped concrete patio offers a versatile and durable flooring option that can elevate the aesthetic appeal of your outdoor area. By following the steps outlined in this guide, you can successfully stamp a concrete patio and transform it into a beautiful and functional extension of your home.
From preparing the patio area and mixing the concrete to leveling, smoothing, and stamping the surface, each step contributes to the overall success of your project. Adding color and finish options provides the opportunity to customize the look and feel of your patio, while curing and sealing ensure its longevity and protection against the elements.
However, the work does not end there. Proper maintenance and repair are essential for preserving the beauty and durability of your stamped concrete patio. Regular cleaning, addressing stains promptly, resealing as needed, and addressing any cracks or damage will help your patio withstand the test of time and continue to impress for years to come.
Remember to consult professionals when necessary for guidance and expertise. They can provide valuable insights and solutions to ensure the best results for your stamped concrete patio project.
As you enjoy your newly stamped concrete patio, take the time to create an inviting outdoor oasis where you can relax, entertain, and make lasting memories with family and friends. From cozy furniture arrangements to vibrant landscaping, your stamped concrete patio will serve as the centerpiece of your outdoor space, reflecting your personal style and enhancing the overall beauty of your home.
So, get ready to stamp a concrete patio and transform your outdoor area into a captivating and functional retreat that you can enjoy for years to come!
Frequently Asked Questions about How To Stamp A Concrete Patio
Was this page helpful?
At Storables.com, we guarantee accurate and reliable information. Our content, validated by Expert Board Contributors, is crafted following stringent Editorial Policies. We're committed to providing you with well-researched, expert-backed insights for all your informational needs.


0 thoughts on “How To Stamp A Concrete Patio”