Home>Furniture>Outdoor Furniture>How To Fix A Hammock
Outdoor Furniture
How To Fix A Hammock
Modified: October 20, 2024
Learn how to fix your outdoor furniture, including your hammock, with our step-by-step guide. Keep your relaxation spot comfortable and sturdy for endless hours of lounging.
(Many of the links in this article redirect to a specific reviewed product. Your purchase of these products through affiliate links helps to generate commission for Storables.com, at no extra cost. Learn more)
Introduction
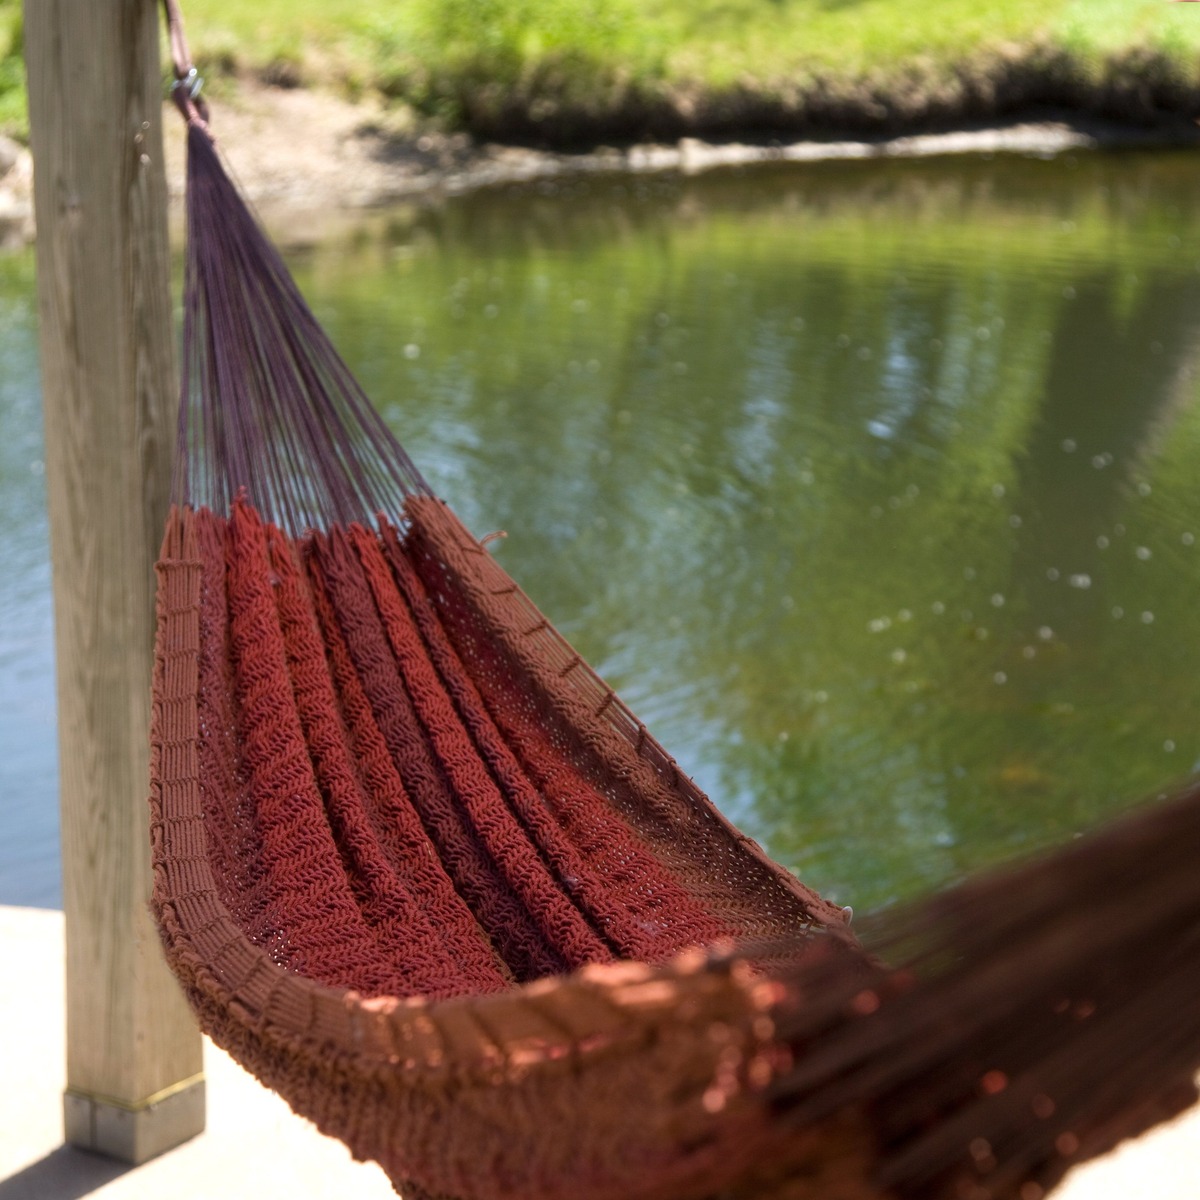
Welcome to our comprehensive guide on how to fix a hammock! There’s nothing quite like lounging in your favorite hammock, whether it’s on a sunny beach, in a picturesque backyard, or even indoors. Hammocks provide a relaxing and comfortable space to unwind, read a book, or simply enjoy the gentle swaying motion. However, over time, hammocks can become worn, torn, or damaged, preventing you from enjoying this peaceful oasis.
But don’t worry! With a little bit of know-how and some simple steps, you can easily fix your hammock and bring it back to life. Whether it’s a small tear, a broken rope, or loose hardware, we’ve got you covered. In this guide, we will walk you through the process of assessing the damage, gathering necessary materials, and making the necessary repairs to get your hammock back in perfect condition. So let’s dive in and get your hammock up and swinging once again!
Before we jump into the specific repair steps, it’s important to note that the techniques described in this guide apply to most types of hammocks. Whether you have a traditional rope hammock, a fabric hammock, or even a hammock chair, the principles remain the same. However, it’s always a good idea to check the manufacturer’s instructions or consult the specific guidelines for your hammock to ensure you are using the appropriate repair methods.
Additionally, it’s worth noting that while some repairs can be easily done by yourself, there may be instances where professional assistance is necessary, especially if the damage is extensive or if your hammock is still under warranty. Use your judgment and, if in doubt, seek professional advice. With that being said, let’s proceed to the first step: assessing the damage.
Key Takeaways:
- Repairing a hammock is a fun and rewarding DIY project that can extend its lifespan. By following simple steps to assess, gather materials, and make repairs, you can enjoy the comfort and tranquility of your hammock for years to come.
- Ensuring proper suspension and tension, along with regular maintenance, is essential for a safe and enjoyable hammock experience. By taking care of your hammock, you can create countless cherished memories and moments of relaxation.
Read more: How To Choose A Hammock
Step 1: Assess the damage
Before you begin repairing your hammock, it’s important to assess the extent of the damage. Take a close look at your hammock and identify any tears, holes, frayed ropes, or broken hardware that may need fixing. This initial assessment will help you determine the scope of the repairs needed and guide you in gathering the necessary materials.
Start by examining the fabric or material of your hammock. Look for any visible tears or holes. If you come across small punctures or tears, don’t worry – they can often be easily repaired. However, if there are large or multiple tears, it may require more intensive repair work or even the replacement of the hammock.
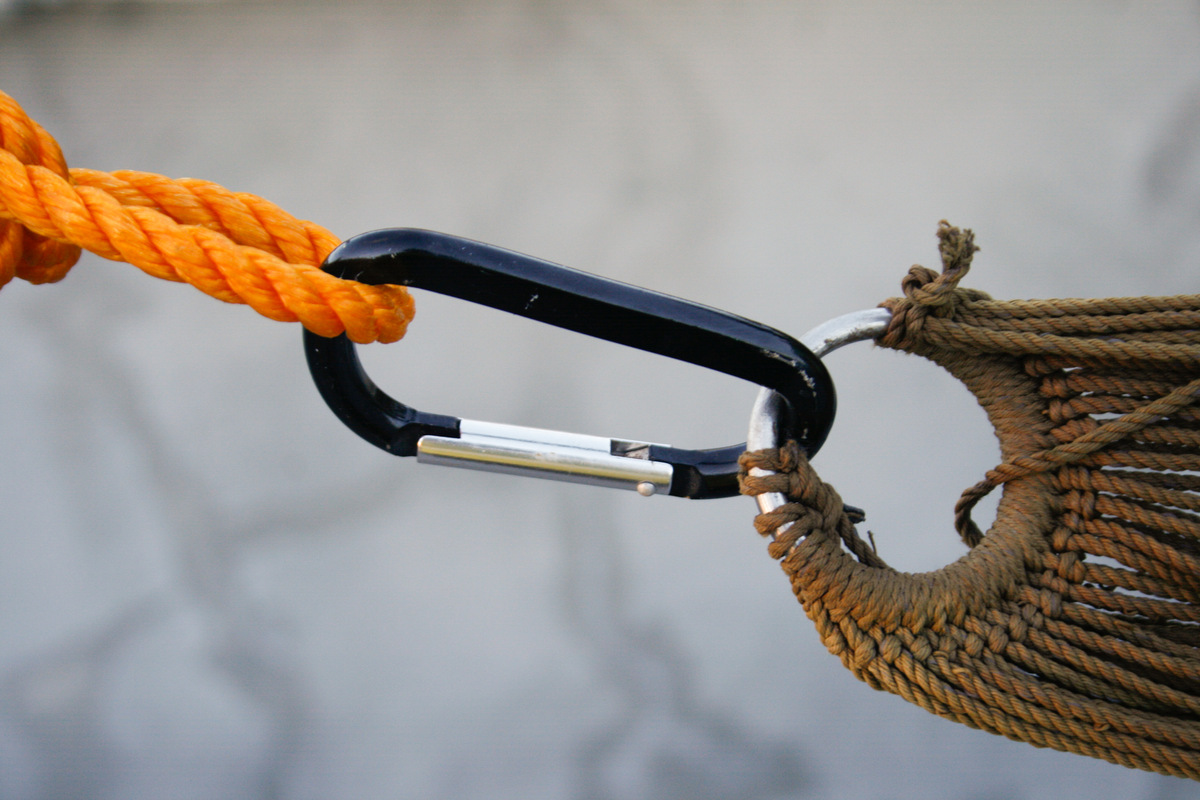
Next, inspect the ropes or chains that suspend your hammock. Check for any frayed or broken sections. A few frayed strands can be easily fixed, but if there are extensive frays or broken ropes, you may need to replace them entirely. Similarly, examine the hardware that connects the ropes or chains to the hammock. Make sure all hooks, carabiners, and eye hooks are in good condition and securely attached. If any of the hardware is damaged or loose, it may need to be replaced.
During the assessment, also pay attention to the overall condition of the hammock. Look for signs of wear and aging, such as faded colors or weakened material. While these may not require immediate repair, it’s good to note them for future reference.
Once you have completed the assessment, make a list of the repairs needed and prioritize them based on their urgency and complexity. This will help you stay organized and ensure that you tackle the most critical repairs first. Now that you have assessed the damage and made a repair plan, it’s time to move on to the next step: gathering the necessary materials.
Step 2: Gather necessary materials
Now that you have assessed the damage and have a clear understanding of what needs to be repaired, it’s time to gather the necessary materials. Having the right tools and supplies on hand will make the repair process much smoother and ensure that you have everything you need to fix your hammock. Here are some common materials you may need:
- Fabric patch or repair kit: If your hammock has small tears or holes in the fabric, you will need a fabric patch or repair kit. These kits typically include adhesive patches or fabric swatches that can be bonded to the damaged area to reinforce and mend it.
- Replacement rope or chain: If your hammock has frayed or broken ropes or chains, you will need to replace them. Measure the length of the existing ropes or chains to determine the appropriate length for the replacement. Nylon ropes or chains are commonly used for hammocks due to their strength and durability.
- Hardware: If any of the hooks, carabiners, or eye hooks are damaged or require replacement, make sure to have the appropriate hardware on hand. Depending on the type of hammock, you may need S-hooks, O-rings, or other connectors.
- Scissors or utility knife: These tools will come in handy for cutting fabric patches, trimming excess rope or chain, or performing other cutting tasks during the repair process.
- Needle and thread or sewing machine: If your hammock requires stitching repairs, you will need a needle and thread or a sewing machine. Ensure that you have a heavy-duty needle and strong thread that is suitable for the fabric of your hammock.
- Measuring tape: This will be useful for measuring the length of replacement ropes or chains, ensuring accuracy during the repair.
- Clean cloth and mild detergent: Before making any repairs, it’s always a good idea to clean your hammock. Use a clean cloth and mild detergent to gently clean the fabric, removing any dirt or stains. Allow it to dry completely before proceeding with the repairs.
Make sure to gather all the necessary materials before you start repairing your hammock. This will save you time and prevent interruptions during the repair process. Once you have all the tools and supplies ready, you can move on to the next step: repairing small tears or holes in the fabric.
Step 3: Repair small tears or holes
Now that you have gathered the necessary materials, it’s time to focus on repairing small tears or holes in the fabric of your hammock. These minor damages can often be fixed easily, allowing you to extend the lifespan of your hammock without having to invest in a new one.
If you have a fabric patch or repair kit on hand, follow the instructions provided to mend the tears or holes. Typically, this involves cleaning the damaged area, applying an adhesive patch or fabric swatch, and ensuring a secure bond. Make sure to cut the patch or swatch to an appropriate size, slightly larger than the damaged area, to ensure proper coverage and reinforcement.
If you don’t have a repair kit, you can still repair small tears or holes using basic sewing techniques. Use a thread and needle that are suitable for the fabric of your hammock. Start by threading the needle and tying a knot at the end of the thread. Then, carefully stitch the edges of the tear or hole together, creating a strong and invisible seam. Make sure to stitch both sides of the fabric for added reinforcement.
If your hammock has a more intricate or delicate fabric, or if you are not confident in your sewing skills, you may consider using fabric glue instead. Apply a small amount of fabric glue along the edges of the tear or hole, ensuring that the fabric is securely bonded. Allow the glue to dry completely before moving or using the hammock.
Once the repairs are complete, inspect the mended area to ensure that the tear or hole is fully sealed and reinforced. Give it a gentle tug to test its strength. If you notice any weak spots or if the repair does not hold up, you may need to revisit the repair process and make adjustments or seek professional assistance.
Repairing small tears or holes in your hammock is an important step to ensure its longevity and usability. Once you have successfully repaired the damaged fabric, you can move on to the next step: fixing broken ropes or chains.
Step 4: Fix broken ropes or chains
If your hammock has broken or frayed ropes or chains, it’s essential to repair or replace them to ensure the structural integrity and safety of your hammock. Without properly functioning suspension, your hammock may not provide the support and stability needed for a comfortable lounging experience.
To fix broken ropes or chains, start by removing the damaged sections. Use scissors or a utility knife to carefully cut away any frayed or broken parts. Take note of the length of the ropes or chains that need to be replaced.
Measure the length of the original ropes or chains and cut the replacement ones accordingly. When choosing replacement ropes or chains, opt for durable materials like nylon or polyester, as they are strong and weather-resistant. Make sure the replacements are of the appropriate thickness for your specific hammock type.
Next, attach the new ropes or chains to the appropriate anchor points on the hammock. This could be eye hooks, S-hooks, carabiners, or other hardware depending on your hammock’s design. Ensure that the attachments are secure and properly aligned.
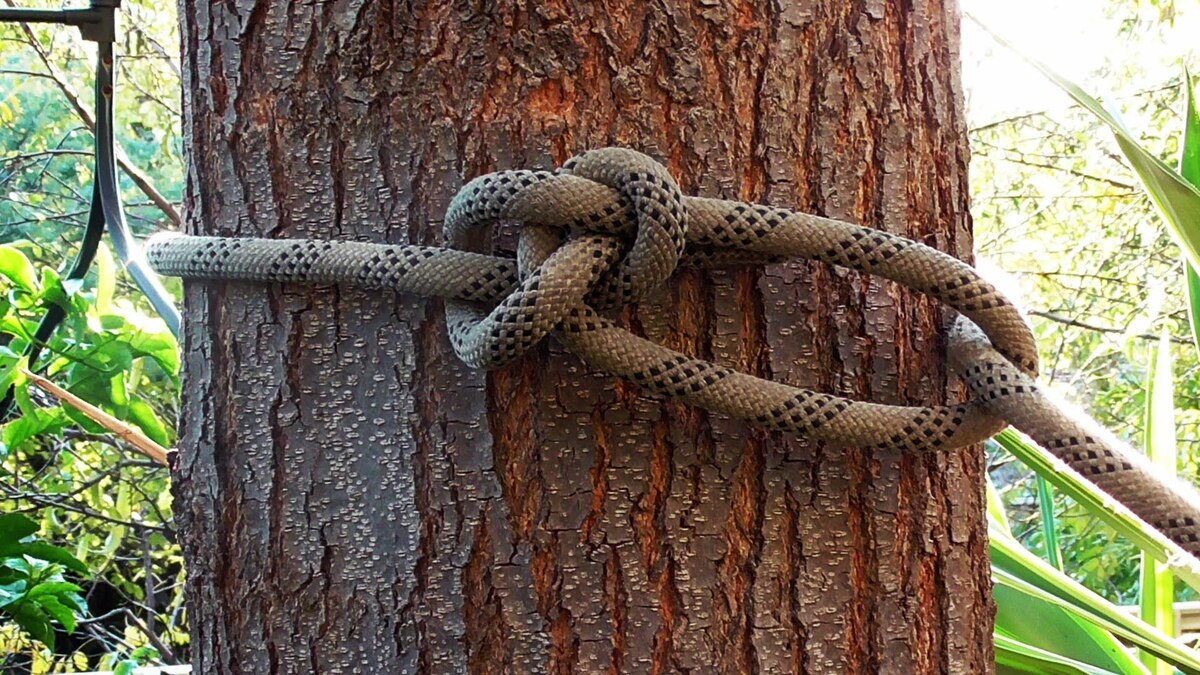
If your hammock has a woven or braided design, you may need to tie knots at the ends of the replacement ropes. The knot should be strong and secure while allowing for proper tension adjustment. Use reliable knot-tying techniques such as an anchor bend or a double fisherman’s knot.
Once the replacement ropes or chains are securely attached, it’s time to test the suspension. Gently sit or lie in the hammock to check if the new ropes or chains hold your weight and provide a comfortable level of support. Adjust the tension as needed by either adjusting the knot or tightening the hardware attachment.
If you’re unsure about the proper tension or suspension of your hammock, refer to the manufacturer’s guidelines or seek professional advice. It’s important to ensure that your hammock is properly set up and can safely support the intended weight capacity.
With the broken ropes or chains fixed, you’re one step closer to enjoying your hammock once again. In the next step, we’ll cover how to reattach or replace any damaged hardware.
Inspect the hammock for any tears or damage. Use a strong thread and needle to mend any small tears. For larger tears, use a patch kit or take it to a professional for repair.
Read more: What Is A Hammock
Step 5: Reattach or replace hardware
Properly functioning hardware is crucial for the stability and safety of your hammock. If you have noticed any damaged or loose hardware during the initial assessment, this step will guide you on how to reattach or replace it.
Start by examining the hooks, carabiners, eye hooks, or any other hardware that connects the suspension ropes or chains to the hammock. Check for any signs of wear, damage, or rust. If you spot any issues, it’s better to replace the hardware to ensure optimal performance and safety.
To reattach or replace hardware, follow these steps:
- If a hook or carabiner needs reattaching, use pliers or a screwdriver (if applicable) to open the attachment point on the hammock. Then, insert the hook or carabiner back into the appropriate hole or loop and securely close it. Make sure it is tightly fastened to prevent any slippage or instability.
- If you need to replace a damaged or worn hook, carabiner, or eye hook, make sure to select the appropriate replacement. Consider the weight capacity and durability requirements of your hammock. Stainless steel or heavy-duty metal hardware is often recommended for its strength and longevity.
- Remove the damaged hardware by loosening or opening it using the appropriate tools. Follow the manufacturer’s instructions or seek professional advice if needed.
- Attach the replacement hardware by inserting it into the designated hole or loop and securely fasten it. Use pliers, a wrench, or other tools to tighten the hardware, ensuring a stable connection between the suspension and the hammock.
Once the hardware is properly reattached or replaced, test the stability by gently sitting or lying in the hammock. Ensure that the hardware securely holds your weight and that there are no signs of wobbling or shifting. If you notice any issues, double-check the attachment and tighten if necessary.
Remember, the hardware is a crucial component of your hammock’s safety and performance. Regularly inspect and maintain it to prevent any accidents or damage.
With the hardware in place, it’s time to move on to the next step: tightening or adjusting the tension of the hammock.
Step 6: Tighten or adjust tension
Once the repairs to the fabric, ropes, and hardware are complete, it’s important to ensure that your hammock is properly tensioned. Correct tensioning not only provides a comfortable and stable lounging experience but also helps prevent unnecessary strain on the hammock and prolongs its lifespan.
To tighten or adjust the tension of your hammock, follow these steps:
- Start by sitting or lying in the hammock and assess the overall sag and comfort. The ideal tension for your hammock should allow you to lie flat and provide a slight, comfortable curve when you’re seated. Adjustments may be necessary to achieve this optimal tension.
- If your hammock has an adjustable suspension system with loops, hooks, or carabiners, you can easily fine-tune the tension. Slide the loops or adjust the attachment points to either tighten or loosen the hammock as needed. Make small adjustments and test the tension each time until you reach the desired level of comfort.
- If your hammock doesn’t have an adjustable suspension system, you can manually adjust the tension by retying the knots. Carefully untie and retie the knots at each end of the hammock, adjusting the length of the ropes or chains to achieve the desired tension. Test the tension by lying in the hammock to ensure it feels secure and supportive.
- Remember that the ideal tension may vary depending on your personal preference and the type of hammock you have. It’s always a good idea to follow the manufacturer’s recommendations for the appropriate tensioning guidelines.
- Ensure that both ends of the hammock are evenly tensioned. A balanced tension will provide a more stable and comfortable experience during use.
Always test the tension of your hammock by gently sitting or lying in it after making adjustments. Take the time to find the perfect tension that suits your comfort and relaxation needs.
With the tension properly adjusted, you’re almost ready to enjoy your hammock once again. The next step will guide you on ensuring the proper suspension of the hammock.
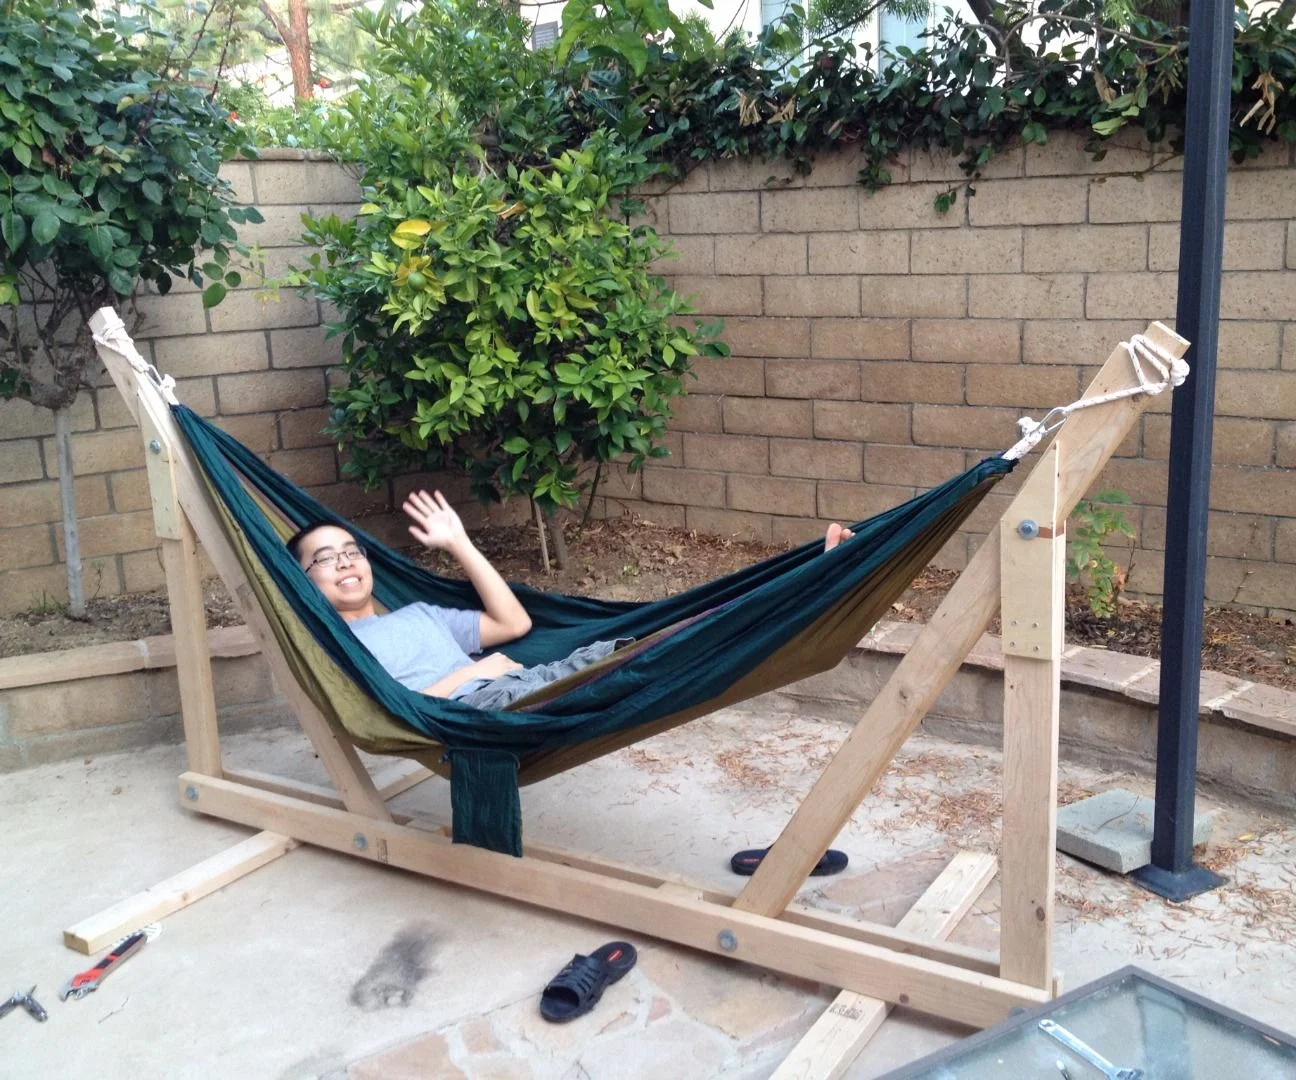
Step 7: Ensure proper suspension
Proper suspension is vital for the safety and functionality of your hammock. It ensures that your hammock is securely anchored and provides a stable and enjoyable lounging experience. In this step, we will guide you on how to ensure the proper suspension of your hammock.
- Start by checking the anchor points where your hammock is attached. Whether you’re using trees, posts, or a hammock stand, ensure that the anchor points are sturdy, stable, and able to support the weight of the hammock and whoever will be using it.
- If you’re using trees as anchor points, be mindful of the trees’ health and well-being. Use wide tree straps or protective pads to minimize any damage to the tree bark and distribute the weight evenly.
- Make sure that the suspension ropes or chains are properly attached to the anchor points. Check for any signs of fraying, weakness, or loose connections. Securely fasten the ropes or chains to ensure they cannot slip or detach during use.
- Tug on the suspension system to test its strength and stability. The hammock should feel secure and be able to support the weight of the intended users without excess sagging or strain on the anchor points.
- Consider using additional support or reinforcement if necessary. Depending on the type of hammock and the desired setup, you may need to use additional straps, ropes, or hardware to ensure proper suspension and stability.
- Ensure that the hammock is hung at an appropriate height. The ideal height will depend on personal preference, but as a general guideline, the hammock should be approximately 18-24 inches off the ground. Adjust the height accordingly to achieve a comfortable and safe lounging position.
- Regularly inspect the suspension system for any signs of wear or damage. Check the ropes, chains, loops, hooks, or carabiners for any rust, fraying, or weakening. Make any necessary repairs or replacements promptly to maintain the safety and integrity of your hammock.
By ensuring proper suspension, you can relax and enjoy your hammock with peace of mind, knowing that it’s securely and safely set up. With the suspension in place, you’re almost ready to test and enjoy the fixed hammock. Let’s move on to the final step: testing and enjoying your hammock once again!
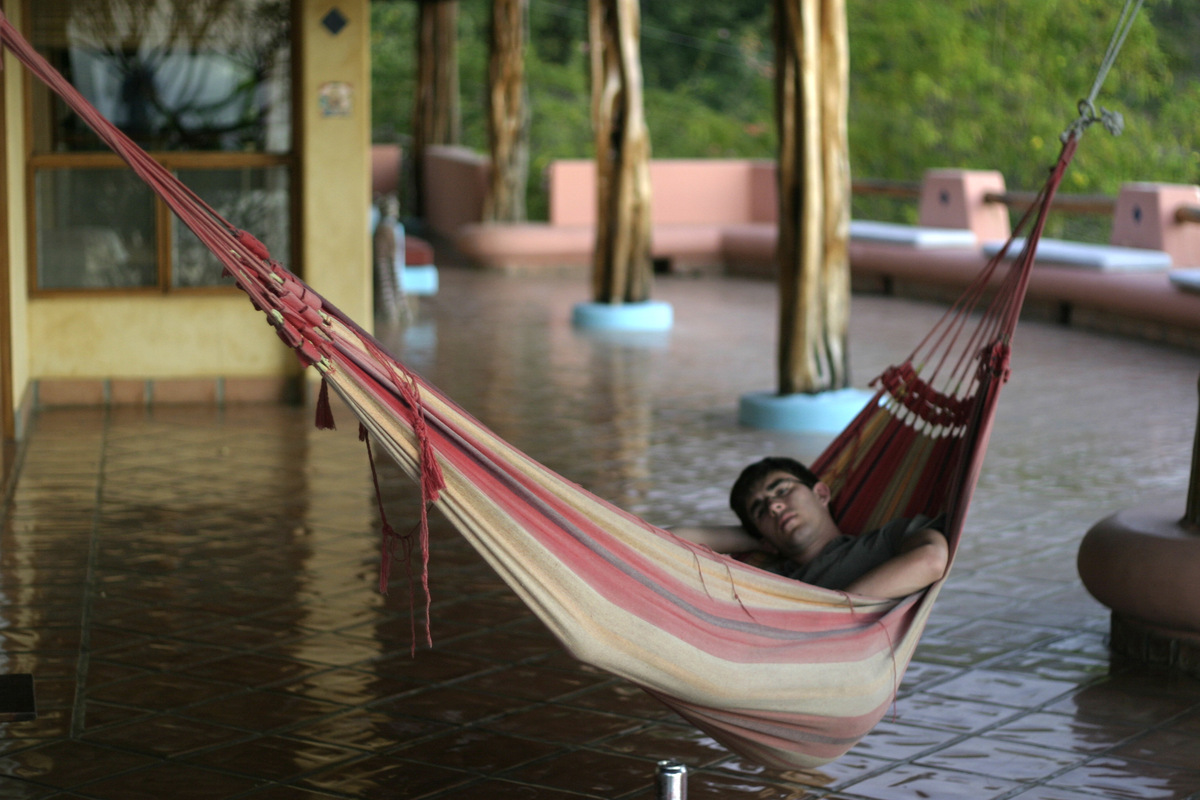
Step 8: Test and enjoy your fixed hammock
Congratulations, you’ve reached the final step of fixing your hammock! Now it’s time to put all your hard work and effort to the test and finally enjoy the serenity and comfort of your newly repaired hammock.
- Start by carefully lowering yourself into the hammock. Take a moment to adjust your body and find the most comfortable position.
- Pay attention to the stability and support of the hammock. Shift your weight and move around slightly to ensure that the repaired areas, suspension, and hardware are holding up well.
- Take a deep breath, close your eyes, and let yourself fully relax. Feel the gentle sway and the soothing embrace of the hammock as you let go of any tension or stress.
- Savor the moment by reading a book, listening to music, or simply enjoying the beauty of your surroundings. Let the hammock become your personal oasis of tranquility.
- If you notice any discomfort or instability during your relaxation time, carefully examine the hammock for any signs of damage or weakness. Address any issues promptly to ensure continued safety and enjoyment.
- Remember to follow proper usage guidelines and weight limits specified by the manufacturer for your specific hammock type.
- Regularly inspect and maintain your hammock to prolong its lifespan. Clean it periodically, check for any signs of wear or tear, and make any necessary repairs or adjustments.
- Share the joy of your fixed hammock with family and friends. Invite them to join you and experience the blissful relaxation that a hammock can provide.
Now that you’ve successfully repaired your hammock and tested its performance, you can look forward to many more peaceful and rejuvenating moments ahead. So sit back, unwind, and let your hammock be your sanctuary of comfort and tranquility.
Thank you for following our comprehensive guide on how to fix a hammock. We hope it has empowered you to take matters into your own hands and revive your beloved hammock. Happy lounging!
Read more: How To Sit In A Hammock
Conclusion
Fixing a hammock is a rewarding experience that allows you to extend its lifespan and continue enjoying its comfort and relaxation. By following the steps outlined in this comprehensive guide, you can confidently assess the damage, gather the necessary materials, and make the required repairs to bring your hammock back to life.
Remember to approach each step with care and attention to detail. Assess the damage to determine the scope of repairs needed, gather the appropriate materials, and make the necessary fixes to the fabric, suspension, and hardware. Take the time to properly tension and suspend the hammock to ensure optimal comfort and safety.
Throughout the repair process, don’t forget to prioritize safety. Regularly inspect your hammock for any signs of wear or damage, and promptly address any issues to prevent accidents or further deterioration.
By investing a little time and effort into repairing your hammock, you can continue to enjoy its soothing embrace and create countless cherished memories in the years to come. Whether it’s lounging in the backyard, camping in the great outdoors, or simply finding moments of relaxation at home, your hammock will be there to provide a cozy sanctuary of tranquility.
So go ahead, gather your materials, assess the damage, and embark on the journey of fixing your hammock. With our comprehensive guide as your companion, you can restore your hammock to its former glory and experience the rejuvenating benefits it offers.
Thank you for joining us on this repair adventure. Remember to take proper care of your hammock, and may it continue to provide you with endless moments of relaxation and bliss.
Frequently Asked Questions about How To Fix A Hammock
Was this page helpful?
At Storables.com, we guarantee accurate and reliable information. Our content, validated by Expert Board Contributors, is crafted following stringent Editorial Policies. We're committed to providing you with well-researched, expert-backed insights for all your informational needs.


0 thoughts on “How To Fix A Hammock”